Replacing the nut on your guitar can dramatically improve playability and tone. This comprehensive guide from guitarplayers.net walks you through the process, ensuring a successful upgrade, whether you’re dealing with a broken nut, a poor-sounding plastic nut, or string slots that are too low. By understanding the purpose, tools, and step-by-step instructions, you will be able to elevate your guitar’s sound and performance, ensuring optimal string action and intonation.
1. Why Should I Replace My Guitar Nut?
Replacing your guitar nut enhances playability, sound quality, and overall instrument health. A quality nut ensures proper string spacing, height, and intonation, leading to a better playing experience.
There are several reasons why you might want to replace the nut on your guitar. These include:
- Broken Nut: A cracked or chipped nut can cause buzzing and tuning instability.
- Poor-Sounding Plastic Nut: Upgrading to bone, Tusq, or brass can improve tone and sustain.
- String Slots Too Low: Low slots cause string buzz and make the guitar difficult to play.
- Material Degradation: Over time, the nut material can wear down, affecting string height and spacing. According to research from the Berklee College of Music, upgrading to a higher-quality nut material can significantly improve the resonance and sustain of the guitar.
- Incorrect String Spacing: If the strings are too close or too far apart, it can affect playability, especially for complex chords or fingerpicking.
- Intonation Issues: An improperly shaped or positioned nut can lead to intonation problems, making it difficult for the guitar to play in tune across the fretboard.
2. What Tools and Materials Do I Need to Replace a Guitar Nut?
Gathering the right tools and materials is essential for a successful nut replacement. This ensures you can perform the task efficiently and without damaging your instrument.
Here’s a list of what you’ll need:
-
Replacement Nut: Choose a pre-slotted nut made of bone, Tusq, or graphite that matches your guitar’s specifications.
-
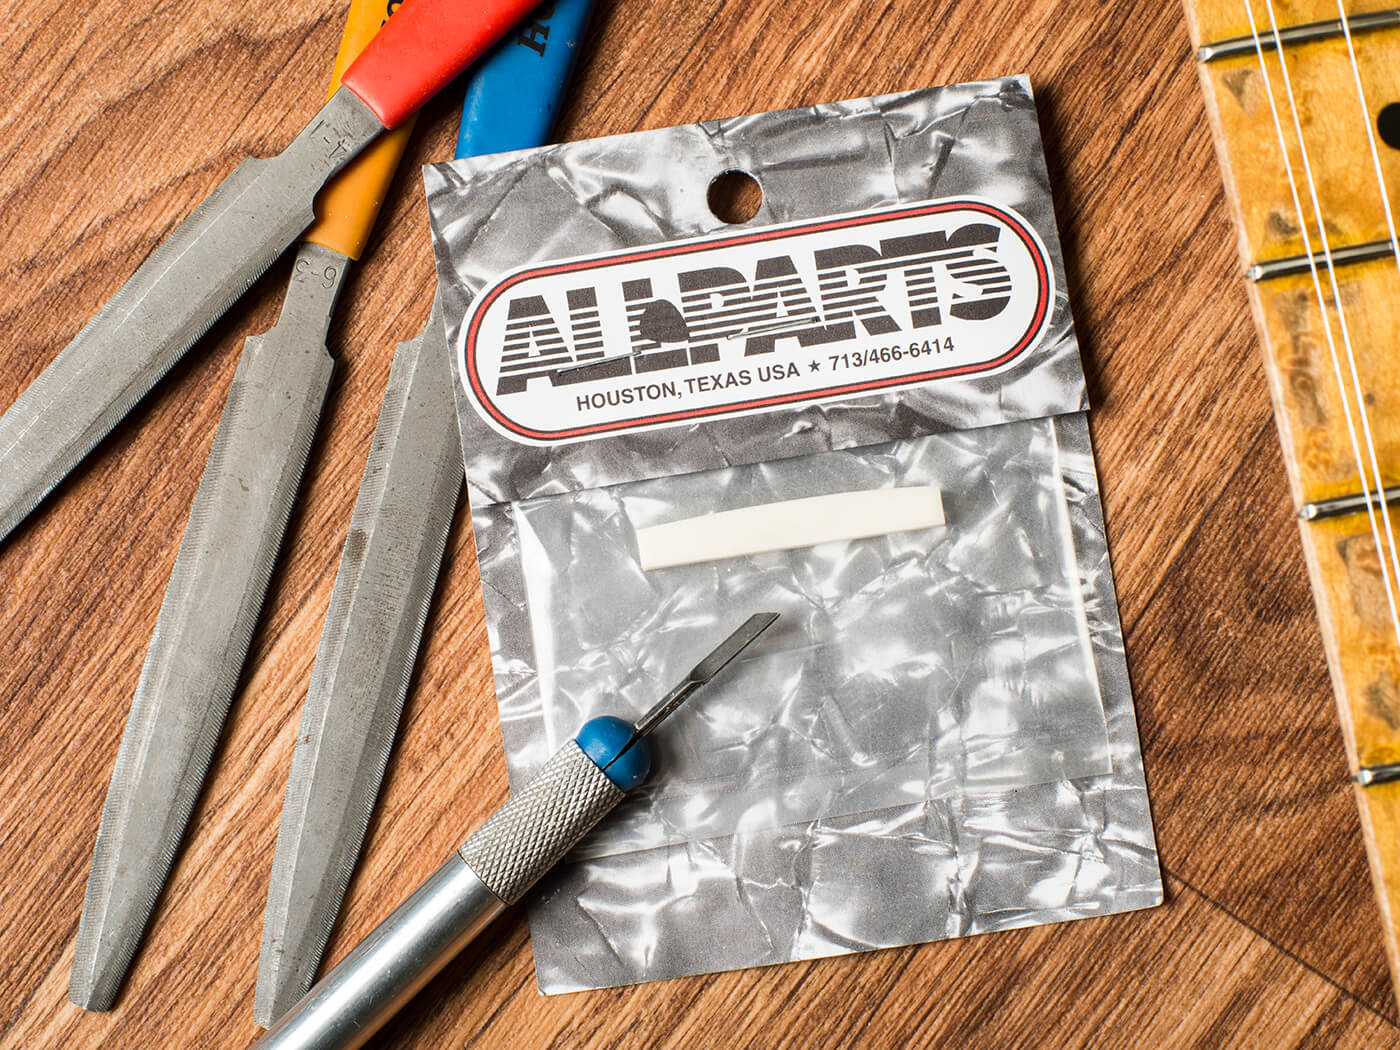
Craft Knife: A craft knife with a fresh blade is used for scoring the finish around the nut.
-
Mallet: Use a mallet to gently tap the old nut out of its slot.
-
Small Block of Wood: This protects the guitar’s finish when tapping out the old nut.
-
Abrasive Paper: Various grits of sandpaper (220, 400, 600, and 800 grit) for shaping and smoothing the new nut.
-
Masking Tape: To protect the fretboard and surrounding areas from scratches.
-
Nut Files: A set of nut files for fine-tuning the string slots. (optional, but highly recommended)
-
Tuning Fork or Electronic Tuner: To check the intonation after the new nut is installed.
-
Ruler or Precision Measuring Tool: For measuring string height and nut dimensions.
-
Super Glue or Wood Glue: To secure the new nut in place.
-
Soft Cloth: For cleaning and polishing the guitar.
-
String Cutter: To remove the old strings.
-
Pencil: For marking adjustments on the new nut.
-
Safety Glasses: Protect your eyes from debris when filing or sanding.
Tool Purpose Craft Knife Scoring finish around the nut Mallet Gently tapping the old nut out Abrasive Paper Shaping and smoothing the new nut Masking Tape Protecting the fretboard Nut Files Fine-tuning the string slots Super Glue Securing the new nut Precision Ruler Measuring the string height and nut dimension
3. How Do I Choose the Right Replacement Nut?
Selecting the correct replacement nut is critical for optimal guitar performance. Consider material, dimensions, and string spacing to ensure a perfect fit and improved sound.
- Material: Bone, Tusq, and graphite are popular choices. Bone offers a balanced tone, Tusq provides consistent quality and enhanced harmonics, and graphite reduces friction, improving tuning stability.
- Dimensions: Measure the length, width, and height of the existing nut to ensure the replacement fits properly.
- String Spacing: Choose a nut with string spacing that matches your guitar’s specifications and playing style. Narrower spacing is suitable for faster playing, while wider spacing is better for fingerpicking.
- Pre-Slotted vs. Unslotted: Pre-slotted nuts are easier to install but may require fine-tuning. Unslotted nuts offer more customization but require specialized tools and skills.
- Nut Radius: Ensure the nut radius matches the radius of your guitar’s fretboard for consistent string height and playability.
- Flat vs. Curved Bottom: Fender-style necks often require nuts with a curved bottom, while others need a flat bottom.
4. How To Remove The Old Guitar Nut?
Removing the old guitar nut requires patience and care to avoid damaging the guitar. Follow these steps to safely remove the old nut.
- Prepare the Area: Use masking tape to protect the fretboard and headstock around the nut.
- Score the Finish: Use a craft knife to carefully score the finish around the edges of the nut. This prevents the finish from chipping when removing the nut.
- Apply Gentle Pressure: Place a small block of wood against one side of the nut and gently tap it with a mallet. Alternate sides to gradually loosen the nut.
- Use a Nut Removal Tool or Screwdriver: If the nut is stubborn, use a specialized nut removal tool or a narrow flathead screwdriver to gently pry it out. Be careful not to damage the nut slot.
- Clean the Nut Slot: Once the nut is removed, clean the nut slot with a small brush or file to remove any glue residue or debris.
- Check the Fit: Test fit the new nut to ensure it sits flush in the slot before proceeding.
 Removing Guitar Nut
5. How Do I Prepare the New Guitar Nut for Installation?
Preparing the new guitar nut involves shaping, sanding, and slotting to ensure a perfect fit and optimal string action. Precision in this step is key to a successful nut replacement.
- Measure and Mark: Measure the nut slot and mark the new nut for trimming. Use a precision ruler to ensure accurate measurements.
- Shape the Nut: Use sandpaper or files to shape the nut to the correct dimensions. Start with a coarser grit (220) and gradually move to finer grits (400, 600, 800) for a smooth finish.
- Adjust the Height: Sand the bottom of the nut to adjust the string height. The strings should clear the first fret by a small margin to avoid buzzing.
- File the String Slots: Use nut files to deepen and shape the string slots. The slots should be wide enough to accommodate the strings without binding. According to Guitar Player Magazine, properly filed string slots are crucial for tuning stability and tone.
- Smooth the Edges: Use fine-grit sandpaper to smooth any sharp edges on the nut. This prevents discomfort while playing.
- Test Fit: Test fit the nut frequently during the shaping process to ensure a snug and flush fit.
6. How To Install The New Guitar Nut?
Installing the new guitar nut involves gluing it in place and making final adjustments for optimal performance. Patience and precision are key to a successful installation.
- Apply Glue: Apply a small amount of super glue or wood glue to the bottom of the nut. Be careful not to use too much glue, as it can be difficult to remove the nut later if needed.
- Position the Nut: Carefully position the nut in the slot, ensuring it is centered and flush with the fretboard.
- Clamp the Nut: Use a small clamp or rubber band to hold the nut in place while the glue dries. Allow at least 30 minutes for the glue to fully cure.
- Remove Excess Glue: Once the glue is dry, use a craft knife or fine-grit sandpaper to remove any excess glue.
- String Up the Guitar: String up the guitar and tune it to pitch. Check the string height and adjust the nut slots as needed.
- Final Adjustments: Make any final adjustments to the nut slots or string height to optimize playability and tone.
- Polish the Nut: Use a soft cloth to polish the nut and remove any fingerprints or smudges.
7. How Do I Adjust String Height at the Nut?
Adjusting string height at the nut is crucial for optimal playability and tone. Proper string height prevents buzzing and ensures comfortable action.
- Measure String Height: Use a precision ruler to measure the string height at the first fret. The strings should clear the fret by a small margin.
- Lower String Height: If the string height is too high, use nut files to deepen the string slots. File gradually and check the string height frequently.
- Raise String Height: If the string height is too low, you may need to shim the nut or replace it with a taller one. Small pieces of paper or veneer can be used as shims.
- Check for Buzzing: After adjusting the string height, check for buzzing by playing each string at various frets. If buzzing occurs, further adjustments may be needed.
- Maintain Consistent Height: Ensure the string height is consistent across all strings for balanced playability.
8. What Are Common Mistakes to Avoid When Replacing a Guitar Nut?
Avoiding common mistakes ensures a successful nut replacement and prevents damage to your guitar. Awareness and caution are essential.
- Using Too Much Glue: Applying excessive glue can make future nut replacements difficult. Use only a small amount of glue to secure the nut.
- Damaging the Fretboard: Be careful not to scratch or dent the fretboard when removing the old nut or shaping the new one. Use masking tape to protect the fretboard.
- Incorrect String Spacing: Ensure the string spacing on the new nut matches your guitar’s specifications. Incorrect spacing can affect playability and intonation.
- Filing Slots Too Deep: Filing the string slots too deep can cause buzzing and make the guitar difficult to play. File gradually and check the string height frequently.
- Ignoring Nut Radius: Ensure the nut radius matches the radius of your guitar’s fretboard. An incorrect radius can affect string height and playability.
- Rushing the Process: Take your time and work carefully. Rushing the process can lead to mistakes and damage to your guitar.
9. How Does Nut Material Affect Guitar Tone?
The material of the guitar nut significantly impacts tone and sustain. Different materials offer unique sonic characteristics that can enhance your instrument’s sound.
- Bone: Bone is a popular choice for its balanced tone, sustain, and durability. It provides a clear and articulate sound that is suitable for various playing styles.
- Tusq: Tusq is a synthetic material that offers consistent quality and enhanced harmonics. It provides a bright and clear tone with improved sustain compared to plastic.
- Graphite: Graphite reduces friction, improving tuning stability and sustain. It offers a smooth and warm tone that is ideal for guitars with tremolo systems.
- Brass: Brass provides a bright and metallic tone with excellent sustain. It is often used on vintage guitars to replicate the sound of original brass nuts.
- Plastic: Plastic is the least expensive option and is commonly found on entry-level guitars. It offers a dull and muted tone with limited sustain.
According to research from Guitar World, upgrading to a higher-quality nut material can significantly improve the overall tone and sustain of your guitar.
| Material | Tone | Sustain | Tuning Stability | Durability |
|---|---|---|---|---|
| Bone | Balanced | Good | Good | Excellent |
| Tusq | Bright | Excellent | Excellent | Good |
| Graphite | Warm | Excellent | Excellent | Good |
| Brass | Metallic | Excellent | Good | Good |
| Plastic | Muted | Poor | Poor | Fair |
10. What are the benefits of professional guitar nut replacement?
Opting for a professional guitar nut replacement guarantees precision, expertise, and optimal results. A skilled technician can address specific issues and ensure the best possible performance.
- Expertise and Precision: Professional technicians have the knowledge and experience to accurately assess and address any issues with your guitar nut.
- Proper Tools and Equipment: Professionals have access to specialized tools and equipment that ensure a precise and clean nut replacement.
- Optimal String Action: A professional can adjust the string height and nut slots to achieve optimal playability and tone.
- Improved Tuning Stability: Properly filed and lubricated nut slots can improve tuning stability and prevent string binding.
- Enhanced Tone and Sustain: Upgrading to a higher-quality nut material can significantly improve the overall tone and sustain of your guitar.
- Warranty and Guarantee: Many professional technicians offer a warranty or guarantee on their work, providing peace of mind.
- Time Savings: A professional can complete the nut replacement quickly and efficiently, saving you time and effort.
- Preventing Damage: Professionals know how to avoid common mistakes and prevent damage to your guitar during the nut replacement process.
For those seeking expert assistance or further learning resources, guitarplayers.net offers comprehensive guides, tutorials, and a vibrant community of guitar enthusiasts. Whether you’re looking to deepen your understanding of guitar maintenance or connect with fellow musicians, guitarplayers.net provides a wealth of information and support.
11. How To Maintain My Guitar Nut?
Proper maintenance extends the life of your guitar nut and ensures optimal performance. Regular cleaning and lubrication are essential for keeping your nut in top condition.
- Clean Regularly: Use a soft cloth to wipe down the nut after each playing session. This removes dirt, sweat, and other debris that can accumulate over time.
- Lubricate the Nut Slots: Apply a small amount of nut lubricant to the string slots every time you change strings. This reduces friction and improves tuning stability.
- Use the Right Products: Use only products that are specifically designed for guitar nuts. Avoid using household cleaners or lubricants, as they can damage the nut material.
- Check for Wear: Inspect the nut regularly for signs of wear, such as cracks, chips, or deep string grooves. If you notice any of these issues, it may be time to replace the nut.
- Avoid String Bending at the Nut: Excessive string bending at the nut can cause premature wear and damage. Use proper technique to minimize stress on the nut.
- Store Your Guitar Properly: Store your guitar in a case or gig bag when not in use. This protects the nut from dust, moisture, and other environmental factors.
12. What are the alternative nut materials besides bone and Tusq?
Exploring alternative nut materials can provide unique tonal and performance characteristics. Consider these options for customizing your guitar’s sound.
- Graphite: Known for its self-lubricating properties, graphite nuts reduce friction, enhancing tuning stability, especially in guitars with tremolo systems.
- Brass: Brass nuts deliver a bright, metallic tone with extended sustain, favored in vintage instruments for their distinctive sound.
- Stainless Steel: Offering exceptional durability and a bright tone, stainless steel nuts are a modern choice for players seeking longevity and clarity.
- Corian: A synthetic material similar to Tusq, Corian provides a balanced tone and consistent performance, making it a reliable alternative.
- Ebony: While less common, ebony nuts offer a warm, mellow tone and a smooth feel, complementing guitars with darker tonal characteristics.
13. How does the guitar’s scale length affect nut placement?
The guitar’s scale length directly influences nut placement, impacting intonation and playability. Accurate nut positioning is essential for a well-tuned instrument.
- Intonation Accuracy: Proper nut placement ensures accurate intonation across the fretboard, allowing the guitar to play in tune in all positions.
- Scale Length Calculation: The nut’s position is determined by the guitar’s scale length, the distance from the nut to the bridge saddle, ensuring correct fret spacing.
- Compensated Nut: Some guitars use a compensated nut, slightly adjusting string length to improve intonation, particularly for the wound strings.
- Professional Setup: A professional guitar setup includes precise nut placement, optimizing intonation and playability for the specific instrument.
- DIY Considerations: When replacing a nut, accurately measure and position the new nut to maintain the guitar’s intended scale length and intonation.
14. Can I replace a guitar nut myself if I’m a beginner?
Replacing a guitar nut can be a manageable DIY project for beginners with the right guidance and tools. Start with thorough preparation and careful execution.
- Start with Research: Familiarize yourself with the process through online tutorials, videos, and guides, such as those available on guitarplayers.net.
- Gather Essential Tools: Ensure you have the necessary tools, including a craft knife, small mallet, abrasive paper, masking tape, and a suitable replacement nut.
- Take Your Time: Work slowly and methodically, following each step carefully to avoid mistakes and potential damage to the guitar.
- Practice on an Inexpensive Guitar: If possible, practice the nut replacement on an older or less valuable guitar before working on your primary instrument.
- Seek Help When Needed: Don’t hesitate to ask for assistance from experienced guitar technicians or online communities if you encounter difficulties.
- Consider a Pre-Slotted Nut: Opt for a pre-slotted nut to simplify the process, minimizing the need for precise filing and slotting.
15. What is the lifespan of a guitar nut, and when should I consider replacing it?
The lifespan of a guitar nut varies depending on material, playing style, and maintenance. Recognizing signs of wear is crucial for timely replacement and optimal performance.
- Material Durability: Bone and synthetic materials like Tusq typically last longer than plastic nuts due to their superior durability.
- Playing Style Impact: Aggressive playing styles with frequent string bending can accelerate wear on the nut slots, reducing its lifespan.
- Signs of Wear: Common indicators of a worn nut include string buzzing, difficulty tuning, visible cracks or chips, and strings sitting too low in the slots.
- Regular Inspections: Periodically inspect the nut for signs of wear and damage, especially during string changes or guitar maintenance.
- Professional Assessment: Consult a guitar technician for a professional assessment if you suspect the nut is worn or contributing to playability issues.
- Performance Decline: Noticeable declines in tone, sustain, or tuning stability can indicate that the nut needs replacement to restore optimal performance.
Replacing the nut on your guitar, whether a DIY project or handled by a professional, can significantly enhance your playing experience. By choosing the right materials, using proper techniques, and maintaining your instrument, you ensure your guitar sounds and plays its best.
Visit guitarplayers.net for more in-depth guides, reviews, and a community of passionate guitar players. Explore our lessons, find your favorite sheet music, read detailed gear reviews, and join our forum to connect with other guitar enthusiasts.
Address: 1140 Boylston Street, Boston, MA 02215, United States
Phone: +1 (617) 747-2261
Website: guitarplayers.net
FAQ: Replacing Your Guitar Nut
-
Why is my guitar buzzing after I changed the strings?
String buzzing after a string change can be due to several factors, including a worn nut. A worn nut can cause the strings to sit too low, resulting in buzzing against the frets. If this is the case, consider replacing the nut to restore proper string height and eliminate buzzing. -
What is the best material for a guitar nut?
The best material for a guitar nut depends on your tonal preferences and playing style. Bone provides a balanced tone, Tusq offers consistent quality and enhanced harmonics, and graphite reduces friction, improving tuning stability. -
How much does it cost to have a guitar nut replaced professionally?
The cost to have a guitar nut replaced professionally typically ranges from $50 to $150, depending on the technician’s experience and the cost of the replacement nut. -
Can I use super glue to install a new guitar nut?
Yes, super glue can be used to install a new guitar nut. However, use only a small amount of glue to secure the nut, as excessive glue can make future replacements difficult. -
How do I know if my guitar nut is too high?
If your guitar nut is too high, the strings will be difficult to press down, especially at the first few frets. This can make the guitar uncomfortable to play and affect intonation. -
What tools do I need to file the string slots on a guitar nut?
To file the string slots on a guitar nut, you will need a set of nut files. These specialized files are designed to create smooth and precise slots that accommodate the strings without binding. -
How do I measure the string height at the nut?
To measure the string height at the nut, use a precision ruler to measure the distance between the bottom of the string and the top of the first fret. The strings should clear the fret by a small margin to avoid buzzing. -
What is the purpose of lubricating the string slots on a guitar nut?
Lubricating the string slots on a guitar nut reduces friction and improves tuning stability. This helps prevent the strings from binding in the slots, which can cause tuning issues. -
How often should I clean my guitar nut?
You should clean your guitar nut after each playing session to remove dirt, sweat, and other debris. Use a soft cloth to wipe down the nut and keep it in top condition. -
Can a worn guitar nut affect intonation?
Yes, a worn guitar nut can affect intonation. If the nut slots are worn or uneven, it can cause the strings to sit at incorrect heights, leading to intonation problems.