Are you a guitar player looking for a unique way to upcycle your old strings? At guitarplayers.net, we’ll guide you through creating stunning guitar string bracelets that are not only eco-friendly but also showcase your passion for music. Discover the art of transforming your used guitar strings into fashionable accessories. Learn about wire wrapping techniques, different bracelet styles, and customization tips to make your jewelry truly stand out, plus find resources for all your guitar needs, from lessons to gear reviews.
1. What Are the Benefits of Making a Guitar String Bracelet?
Creating bracelets from guitar strings offers numerous benefits, blending creativity with sustainability. It’s an excellent way to express your musical identity and reduce waste by repurposing materials. Plus, crafting your own jewelry allows for personalized designs that reflect your unique style.
- Eco-Friendly: Upcycling used guitar strings reduces waste.
- Unique Style: Handmade bracelets showcase individuality.
- Personal Expression: Reflects your passion for music.
- Cost-Effective: Save money by making your own accessories.
- Therapeutic: Crafting can be relaxing and enjoyable.
- Conversation Starter: Unique jewelry attracts attention and sparks conversations.
- Personalized Gifts: Create meaningful gifts for fellow music lovers.
2. What Materials Do I Need to Make a Guitar String Bracelet?
To start crafting your own guitar string bracelet, gather these essential materials. Having the right tools and supplies will ensure a smooth and enjoyable crafting experience. Make sure to choose high-quality materials to create durable and attractive bracelets.
| Material | Description |
|---|---|
| Used Guitar Strings | Cleaned and ready for crafting |
| Wire Cutters | For trimming and cutting the guitar strings |
| Pliers | To bend and shape the strings |
| Jewelry Clasps | For secure closure of the bracelet |
| Beads | Optional, for added decoration |
| Crafting Wire | Thin wire to hold the strings together |
| Ruler | To measure the desired length of the bracelet |
| Work Surface | A clean, flat area to work on |
| Safety Glasses | To protect your eyes from flying string pieces during cutting and bending |
3. How Do I Prepare Guitar Strings for Bracelet Making?
Preparing your guitar strings properly is crucial for a successful bracelet-making process. Proper preparation ensures the strings are safe to handle, easy to work with, and contribute to a cleaner, more professional-looking final product.
- Collect Used Strings: Gather your old guitar strings after changing them.
- Clean the Strings: Use a cloth dampened with isopropyl alcohol to remove dirt and oil.
- Dry the Strings: Let the strings air dry completely before handling.
- Sort the Strings: Separate the strings by gauge and material for different design options.
- Cut the Strings: Use wire cutters to trim off any frayed or damaged ends.
- Straighten the Strings: Gently straighten any kinks or bends for easier manipulation.
- Consider a Patina: If desired, add a patina using liver of sulfur or another metal aging solution for an antique look.
- Rinse and Dry: If you used a patina solution, rinse the strings thoroughly and dry them.
- Apply a Sealant: Consider applying a clear sealant to prevent tarnish and protect the skin from any potential allergic reactions.
- Store Properly: Keep the prepared strings in a dry place until you’re ready to use them.
4. What Are the Basic Techniques for Making a Guitar String Bracelet?
Mastering the basic techniques is essential for creating beautiful and durable guitar string bracelets. These methods will allow you to explore various designs and personalize your creations. Practice each technique to improve your skill and create unique jewelry.
- Simple Braid: Braiding three or more strings together for a classic look.
- Wire Wrapping: Using thin wire to wrap and secure the strings in place.
- Coiling: Wrapping the string around itself to create a spiral design.
- Knotting: Tying knots with the strings for a textured appearance.
- Beading: Adding beads to the strings for decorative accents.
- Clasp Attachment: Securely attaching clasps for easy wearing and removal.
- Crimping: Using crimp beads and pliers to hold the strings and clasps together.
- Memory Wire: Stringing the guitar strings onto memory wire that retains its shape.
- Epoxy Resin: Embedding the strings in epoxy resin for a durable, glossy finish.
- Soldering: Soldering the ends of the strings together for a seamless look (requires experience).
5. How Do I Braid Guitar Strings to Make a Bracelet?
Braiding guitar strings is a straightforward and attractive way to create a bracelet. This technique works well with various gauges and types of strings, allowing for versatile designs. A tightly braided bracelet will be more durable and hold its shape better.
- Gather Strings: Collect three or more guitar strings of similar length.
- Secure the Ends: Tie a knot at one end or use a clamp to hold the strings together.
- Start Braiding: Divide the strings into three sections and begin braiding them together, like braiding hair.
- Maintain Tension: Keep the strings taut as you braid to ensure a tight, uniform braid.
- Incorporate Beads: Add beads by threading them onto one of the strings before braiding, and slide them into the braid as you go.
- Finish the Braid: Once you reach the desired length, secure the other end with a knot or clamp.
- Attach Clasps: Use jewelry clasps and wire to attach a secure closure to both ends of the bracelet.
- Trim Excess: Cut off any excess string length with wire cutters.
- Secure Ends: Use crafting wire to wrap the ends tightly and prevent fraying.
- Wear and Enjoy: Your braided guitar string bracelet is now ready to wear.
6. What Are Some Creative Design Ideas for Guitar String Bracelets?
Explore various design ideas to create unique and personalized guitar string bracelets. These creative concepts will inspire you to experiment with different styles, materials, and techniques, resulting in stunning and original pieces of jewelry.
- Beaded Bracelets: Incorporate colorful beads for added flair.
- Wire-Wrapped Bracelets: Use wire to create intricate designs around the strings.
- Multi-String Bracelets: Combine multiple strings for a chunkier look.
- Leather and String Mix: Weave guitar strings with leather cords for a rustic style.
- Charm Bracelets: Add charms related to music or personal interests.
- Slider Bracelets: Use adjustable slider beads for a customizable fit.
- Cuff Bracelets: Create wide cuff bracelets by arranging multiple strings side by side.
- Braided Leather and String: Braid guitar strings with leather strands.
- Gemstone Accents: Add small gemstones for a touch of elegance.
- Personalized Engravings: Attach small engraved metal tags with initials or meaningful dates.
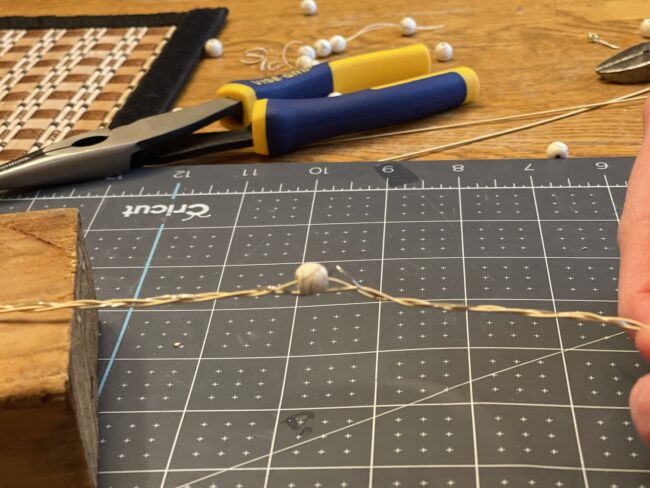
 Guitar string bracelet materials
7. How Can I Add Beads to a Guitar String Bracelet?
Adding beads to your guitar string bracelet can enhance its visual appeal and personalize it to your taste. Choose beads that complement the color and texture of the guitar strings. Experiment with different patterns and arrangements to achieve a unique design.
- Choose Beads: Select beads that fit your design and have holes large enough to accommodate the guitar strings.
- Thread Beads: Slide the beads onto the guitar string before you start braiding, coiling, or wire-wrapping.
- Secure Beads: Use small pieces of wire or bead stoppers to hold the beads in place along the string.
- Space Evenly: Distribute the beads evenly along the bracelet for a balanced look.
- Vary Sizes: Use different sizes and shapes of beads for added visual interest.
- Create Patterns: Arrange the beads in a pattern or sequence for a more structured design.
- Use Focal Beads: Add a larger, more decorative bead as a focal point in the center of the bracelet.
- Combine with Wire: Use wire to wrap around the strings and beads, securing them tightly in place.
- Experiment with Colors: Use beads of different colors to create a vibrant and eye-catching design.
- Mix Materials: Combine beads made of glass, metal, wood, or stone for a diverse texture.
8. What Types of Clasps Work Best for Guitar String Bracelets?
Choosing the right clasp is essential for ensuring your guitar string bracelet is secure and easy to wear. Different types of clasps offer varying levels of security, ease of use, and aesthetic appeal. Select a clasp that complements your bracelet design and meets your personal preferences.
- Lobster Clasps: Secure and easy to use, ideal for most bracelets.
- Toggle Clasps: Decorative and functional, consisting of a bar and a ring.
- Magnetic Clasps: Easy to fasten and unfasten, great for those with dexterity issues.
- Hook and Eye Clasps: Simple and classic, providing a secure closure.
- Barrel Clasps: Two-piece clasps that screw together for a seamless look.
- Sliding Clasps: Adjustable and versatile, allowing for a customized fit.
- Crimp Clasps: Use crimp beads to secure the clasp to the guitar strings.
- Spring Ring Clasps: Small and lightweight, suitable for delicate bracelets.
- S-Hook Clasps: Shaped like an S, hooking onto a loop on the other end.
- Box Clasps: Elegant and secure, featuring a decorative box-like closure.
9. How Do I Properly Size a Guitar String Bracelet?
Properly sizing your guitar string bracelet ensures a comfortable and secure fit. Accurately measuring your wrist and accounting for the thickness of the materials will help you create a bracelet that fits perfectly.
- Measure Your Wrist: Use a flexible measuring tape to measure the circumference of your wrist.
- Add Extra Length: Add 0.5 to 1 inch to the measurement, depending on how loose you want the bracelet to fit.
- Consider String Thickness: Account for the thickness of the guitar strings and any additional materials like beads or wire.
- Test Fit: If possible, create a sample section of the bracelet to test the fit before completing the entire piece.
- Adjust as Needed: Make adjustments to the length as you go, ensuring the bracelet is neither too tight nor too loose.
- Use Adjustable Clasps: Opt for adjustable clasps or sliding closures to allow for a customizable fit.
- Account for Stretch: If using materials that may stretch over time, make the bracelet slightly smaller to compensate.
- Measure Against Existing Bracelet: If you have a bracelet that fits well, measure its length and use that as a guide.
- Use a Bracelet Sizing Chart: Consult a bracelet sizing chart for standard wrist sizes and corresponding bracelet lengths.
- Round Up: If your measurement falls between sizes, round up to the nearest half-inch to ensure a comfortable fit.
10. What Safety Precautions Should I Take When Making Guitar String Bracelets?
When crafting guitar string bracelets, safety should be a top priority. Guitar strings can be sharp and may cause injury if not handled carefully. Following these precautions will ensure a safe and enjoyable crafting experience.
- Wear Safety Glasses: Protect your eyes from flying pieces of string when cutting or bending.
- Use Wire Cutters Carefully: Avoid applying excessive force that could cause the cutters to slip.
- Handle Strings with Care: Be mindful of sharp ends and edges to prevent cuts.
- Work in a Well-Lit Area: Ensure you have adequate lighting to see what you are doing.
- Use a Stable Work Surface: Work on a flat, stable surface to prevent accidents.
- Keep Tools Organized: Store tools properly when not in use to avoid tripping hazards.
- Supervise Children: If crafting with children, provide close supervision and age-appropriate tools.
- Avoid Skin Contact with Chemicals: If using patinas or sealants, wear gloves and follow the manufacturer’s instructions.
- Ventilate the Area: When using chemicals, work in a well-ventilated area to avoid inhaling fumes.
- Dispose of Waste Properly: Discard string scraps and other waste materials in a safe and responsible manner.
11. How Do I Clean and Maintain a Guitar String Bracelet?
Proper cleaning and maintenance will keep your guitar string bracelet looking its best and ensure its longevity. Regular care will prevent tarnish, dirt buildup, and potential damage.
- Wipe Regularly: Use a soft, dry cloth to wipe the bracelet regularly and remove dirt, oil, and fingerprints.
- Use Mild Soap: For more thorough cleaning, use mild soap and warm water.
- Rinse Thoroughly: Rinse the bracelet thoroughly to remove all soap residue.
- Dry Completely: Pat the bracelet dry with a soft cloth and allow it to air dry completely before wearing.
- Avoid Harsh Chemicals: Do not use harsh chemicals, abrasive cleaners, or solvents that could damage the strings or any added embellishments.
- Store Properly: Store the bracelet in a dry, cool place, away from direct sunlight and humidity.
- Use Anti-Tarnish Cloth: Store the bracelet with an anti-tarnish cloth to prevent tarnishing.
- Polish Metal Components: Use a jewelry polishing cloth to polish any metal components, such as clasps or beads.
- Check for Damage: Periodically check the bracelet for any signs of damage, such as loose strings or broken clasps, and repair them promptly.
- Avoid Wearing During Certain Activities: Remove the bracelet before engaging in activities that could expose it to excessive moisture, chemicals, or physical stress, such as swimming, showering, or exercising.
12. Can I Sell Guitar String Bracelets?
Yes, selling guitar string bracelets can be a rewarding way to turn your crafting hobby into a business. With creativity, good craftsmanship, and effective marketing, you can find a market for your unique creations.
- Create High-Quality Bracelets: Ensure your bracelets are well-made and durable.
- Develop a Unique Style: Stand out by offering unique designs and customization options.
- Price Competitively: Research the market to price your bracelets appropriately.
- Sell Online: Use platforms like Etsy, Shopify, or your own website to reach a wider audience.
- Sell at Craft Fairs: Participate in local craft fairs and markets to showcase your products.
- Collaborate with Local Music Stores: Partner with music stores to sell your bracelets to musicians.
- Use Social Media Marketing: Promote your bracelets on social media platforms like Instagram and Facebook.
- Offer Custom Orders: Provide personalized options to attract customers seeking unique jewelry.
- Package Attractively: Present your bracelets in attractive packaging to enhance their appeal.
- Provide Excellent Customer Service: Build a loyal customer base by offering exceptional customer service.
13. What Are the Best Online Resources for Learning More About Guitar String Jewelry?
Numerous online resources can help you expand your knowledge and skills in guitar string jewelry making. These platforms offer tutorials, inspiration, and communities where you can connect with fellow crafters.
- YouTube: Search for tutorials on braiding, wire wrapping, and other techniques.
- Etsy: Explore examples of guitar string jewelry for inspiration.
- Pinterest: Find ideas and tutorials for various bracelet designs.
- Instructables: Discover step-by-step guides on crafting with guitar strings.
- Craftsy: Take online classes on jewelry making and related skills.
- Jewelry Making Forums: Join online forums to ask questions and share ideas with other jewelry makers.
- Blogs: Follow jewelry making blogs for tips, tutorials, and inspiration.
- Online Craft Stores: Browse online craft stores like Fire Mountain Gems for supplies and ideas.
- Social Media Groups: Join Facebook groups and other social media groups dedicated to jewelry making.
- Guitarplayers.net: Visit guitarplayers.net for resources, lessons, and a community of guitar enthusiasts who may be interested in your creations. Address: 1140 Boylston Street, Boston, MA 02215, United States. Phone: +1 (617) 747-2261.
14. How Can I Personalize a Guitar String Bracelet?
Personalizing your guitar string bracelet makes it a unique reflection of your style and interests. There are numerous ways to customize your creations, from adding meaningful charms to incorporating personal mementos.
- Add Charms: Attach charms related to music, hobbies, or personal interests.
- Incorporate Beads: Use beads in your favorite colors or with special meanings.
- Engrave a Clasp: Engrave the clasp with a name, date, or meaningful message.
- Use Different String Gauges: Combine different gauges of guitar strings for varying textures.
- Add Leather Accents: Weave leather cords or strips into the bracelet design.
- Incorporate Gemstones: Add small gemstones that represent your birthstone or favorite colors.
- Use Different Wire Colors: Experiment with different colors of crafting wire for added visual interest.
- Include Musical Notations: Incorporate small metal charms or beads with musical notations.
- Add Initials: Attach small metal tags with your initials or the initials of a loved one.
- Use Patina: Add a patina to the metal components for an antique or weathered look.
15. What Are Some Tips for Working with Stiff Guitar Strings?
Working with guitar strings can be challenging due to their stiffness and tendency to uncoil. However, with the right techniques and tools, you can manage these challenges and create beautiful bracelets.
- Use Pliers: Use pliers to bend and shape the strings into desired forms.
- Anneal the Strings: Heat the strings with a torch to make them more pliable (use caution and proper safety equipment).
- Work in Sections: Work on small sections of the bracelet at a time, securing each section before moving on.
- Use Clamps: Use clamps to hold the strings in place while you work on them.
- Pre-Shape the Strings: Pre-shape the strings before incorporating them into the bracelet.
- Soak in Warm Water: Soak the strings in warm water to make them slightly more flexible.
- Use a Jig: Use a jig or template to help shape the strings consistently.
- Wear Gloves: Wear gloves to protect your hands from cuts and scrapes.
- Apply Lubricant: Apply a small amount of lubricant, such as WD-40, to the strings to reduce friction.
- Practice Patience: Work slowly and deliberately, taking breaks as needed to avoid frustration.
16. How Do I Attach a Clasp to a Guitar String Bracelet Using Crimp Beads?
Using crimp beads is a secure and effective way to attach a clasp to your guitar string bracelet. This method ensures that the clasp stays firmly in place, providing a reliable closure for your bracelet.
- Thread Crimp Bead: Thread a crimp bead onto the end of the guitar string.
- Add Clasp: Thread the string through the loop of the clasp.
- Thread Back Through Crimp Bead: Bring the string back through the crimp bead, creating a small loop.
- Position Crimp Bead: Position the crimp bead close to the clasp loop.
- Crimp the Bead: Use crimping pliers to crimp the bead tightly, securing the string in place.
- Trim Excess String: Trim any excess string with wire cutters, leaving a small tail.
- Hide the Tail: Tuck the tail back into the crimp bead or under the nearest bead for a clean finish.
- Check Security: Gently tug on the clasp to ensure it is securely attached.
- Repeat on Other Side: Repeat the process on the other end of the bracelet to attach the other half of the clasp.
- Test the Closure: Test the closure to ensure it is easy to fasten and unfasten.
17. What Are Some Alternatives to Using Clasps on Guitar String Bracelets?
If you prefer not to use traditional clasps, several alternatives offer unique and stylish ways to secure your guitar string bracelets. These options can enhance the design and functionality of your jewelry.
- Sliding Knot Closure: Use an adjustable sliding knot to create a closure that can be tightened or loosened.
- Memory Wire: Use memory wire that retains its shape, creating a bracelet that simply wraps around the wrist.
- Elastic Cord: String the guitar strings onto elastic cord for a stretchy bracelet that slips over the hand.
- Button and Loop: Create a loop on one end of the bracelet and attach a decorative button on the other end.
- Magnetic Closure: Use a strong magnetic closure that snaps together easily.
- Wrap Bracelet: Design the bracelet to wrap around the wrist multiple times, eliminating the need for a clasp.
- Tie Closure: Leave extra length on the strings and tie them together to create a closure.
- Braided Closure: Braid the ends of the strings together to create a decorative and functional closure.
- Beaded Loop: Create a loop with beads and thread the end of the bracelet through the loop to secure it.
- Cuff Style: Design a cuff-style bracelet that is slightly open and can be slipped onto the wrist.
18. How Do I Prevent Guitar String Bracelets from Tarnishing?
Preventing tarnish is essential to keep your guitar string bracelets looking their best. Various methods and products can help protect the metal components from oxidation and maintain their shine.
- Clean Regularly: Clean the bracelet regularly with a soft, dry cloth to remove dirt, oil, and fingerprints.
- Store Properly: Store the bracelet in a dry, cool place, away from direct sunlight and humidity.
- Use Anti-Tarnish Cloth: Store the bracelet with an anti-tarnish cloth to absorb moisture and prevent tarnishing.
- Apply a Protective Coating: Apply a thin layer of clear nail polish or jewelry sealant to the metal components.
- Avoid Harsh Chemicals: Avoid exposing the bracelet to harsh chemicals, such as chlorine, bleach, and household cleaners.
- Use Tarnish-Resistant Metals: Choose guitar strings and clasps made from tarnish-resistant metals, such as stainless steel or sterling silver.
- Store in an Airtight Container: Store the bracelet in an airtight container or zip-lock bag to protect it from air and moisture.
- Use Silica Gel Packets: Place silica gel packets in the storage container to absorb moisture.
- Polish Regularly: Polish the metal components regularly with a jewelry polishing cloth to remove tarnish.
- Avoid Wearing During Certain Activities: Remove the bracelet before engaging in activities that could expose it to excessive moisture or chemicals, such as swimming, showering, or exercising.
19. What Are Some Eco-Friendly Practices for Making Guitar String Bracelets?
Embracing eco-friendly practices in your guitar string bracelet making not only reduces your environmental impact but also adds value to your creations. Sustainable crafting is both responsible and rewarding.
- Use Recycled Strings: Use strings that have been recycled by other musicians.
- Source Sustainable Materials: Choose beads and clasps made from sustainable or recycled materials.
- Minimize Waste: Cut strings carefully to minimize waste and use scraps for smaller projects.
- Use Eco-Friendly Cleaners: Use eco-friendly cleaners to clean the strings and materials.
- Create Sustainable Packaging: Use recycled or biodegradable packaging materials for your bracelets.
- Promote Upcycling: Highlight the upcycled nature of your bracelets in your marketing efforts.
- Partner with Local Music Stores: Collaborate with local music stores to collect used strings.
- Use Non-Toxic Finishes: Use non-toxic finishes and sealants to protect the bracelets.
- Reduce Energy Consumption: Use natural lighting and minimize energy consumption during the crafting process.
- Donate Proceeds: Donate a portion of your proceeds to environmental organizations.
20. How Can I Find Inspiration for My Guitar String Bracelet Designs?
Finding inspiration is key to creating unique and captivating guitar string bracelet designs. Explore various sources and let your creativity flow to develop your signature style.
- Explore Nature: Draw inspiration from natural elements such as colors, textures, and shapes.
- Browse Online Platforms: Look at Pinterest, Etsy, and Instagram for jewelry design ideas.
- Visit Craft Fairs: Attend craft fairs and markets to see what other artisans are creating.
- Read Jewelry Magazines: Read jewelry-making magazines for design trends and techniques.
- Visit Museums: Visit museums and art galleries to see different styles and artistic expressions.
- Listen to Music: Let music inspire your designs, reflecting the rhythm, melody, and emotion in your creations.
- Experiment with Colors: Play with different color combinations to create visually appealing bracelets.
- Incorporate Cultural Elements: Draw inspiration from different cultures and traditions.
- Look at Fashion Trends: Stay updated with current fashion trends to create bracelets that are stylish and relevant.
- Reflect on Personal Experiences: Let your personal experiences and memories inspire your designs.
21. What Are Some Advanced Techniques for Guitar String Bracelet Making?
For those looking to elevate their guitar string bracelet making skills, several advanced techniques can add complexity, beauty, and sophistication to your designs.
- Micro-Macrame: Use micro-macrame techniques to create intricate knotted designs with the strings.
- Wire Weaving: Weave fine wires around the guitar strings to create complex patterns.
- Resin Casting: Embed guitar strings in resin to create unique and durable bracelets.
- Metal Clay: Use metal clay to create custom clasps and embellishments.
- Enameling: Add enamel to the metal components for a pop of color and visual interest.
- Filigree: Create delicate filigree patterns with fine wire and solder them onto the bracelet.
- Stone Setting: Set small gemstones into custom-made bezels on the bracelet.
- Hydraulic Press Forming: Use a hydraulic press to form the guitar strings into specific shapes.
- Keum-Boo: Apply thin sheets of gold to the surface of the bracelet using the ancient Korean technique of Keum-Boo.
- Powder Coating: Apply a powder coating to the metal components for a durable and colorful finish.
22. How Do I Create a Guitar String Bracelet with a Slider Closure?
A slider closure is a versatile and adjustable option for guitar string bracelets, allowing the wearer to customize the fit. This type of closure is both functional and stylish, making it a popular choice.
- Prepare the Strings: Cut the guitar strings to the desired length for the bracelet.
- Create the Main Bracelet: Braid, coil, or wire-wrap the strings to form the main part of the bracelet.
- Add Slider Beads: Thread the ends of the strings through two slider beads, leaving a small loop at each end.
- Create the Sliding Mechanism: Take a separate piece of string and thread it through both loops created by the slider beads.
- Tie Knots: Tie knots at the ends of the separate string to secure the sliding mechanism.
- Adjust the Fit: Adjust the slider beads to tighten or loosen the bracelet as needed.
- Trim Excess: Trim any excess string length with wire cutters.
- Secure Ends: Use crafting wire to wrap the ends tightly and prevent fraying.
- Test the Closure: Test the closure to ensure it is easy to adjust and stays securely in place.
- Add Embellishments: Add beads or charms to the bracelet for extra decoration.
23. What Are Some Popular Styles of Guitar String Bracelets?
Guitar string bracelets come in various styles, each offering a unique look and feel. Exploring different styles can help you find the perfect design to match your personal taste and preferences.
- Braided Bracelets: Classic and versatile, featuring braided guitar strings.
- Wire-Wrapped Bracelets: Intricate and detailed, with wire-wrapped designs.
- Beaded Bracelets: Colorful and eye-catching, incorporating various beads.
- Cuff Bracelets: Bold and stylish, with a wide cuff design.
- Wrap Bracelets: Trendy and adjustable, wrapping around the wrist multiple times.
- Charm Bracelets: Personalized and sentimental, with added charms.
- Slider Bracelets: Adjustable and comfortable, with a slider closure.
- Leather and String Bracelets: Rustic and edgy, combining leather and guitar strings.
- Bohemian Bracelets: Eclectic and free-spirited, with a mix of beads and charms.
- Minimalist Bracelets: Simple and understated, with a clean and modern design.
 Braided guitar string bracelet
24. How Do I Incorporate Semi-Precious Stones into a Guitar String Bracelet?
Incorporating semi-precious stones into your guitar string bracelets adds a touch of elegance and sophistication. These stones can enhance the visual appeal and create unique, meaningful pieces of jewelry.
- Choose Stones: Select semi-precious stones that complement the color and style of the guitar strings.
- Drill Holes (If Necessary): If the stones do not have pre-drilled holes, use a specialized drill to create small holes for threading.
- Thread Stones: Thread the stones onto the guitar strings before you start braiding, coiling, or wire-wrapping.
- Secure Stones: Use small pieces of wire or bead stoppers to hold the stones in place along the string.
- Space Evenly: Distribute the stones evenly along the bracelet for a balanced look.
- Create Focal Points: Use larger or more decorative stones as focal points in the design.
- Combine with Wire: Use wire to wrap around the strings and stones, securing them tightly in place.
- Use Bezels: Create custom-made bezels with wire or metal clay to set the stones securely on the bracelet.
- Experiment with Colors: Use stones of different colors to create a vibrant and eye-catching design.
- Mix Shapes and Sizes: Combine stones of different shapes and sizes for added texture and visual interest.
25. What Are the Best Types of Guitar Strings to Use for Bracelets?
The type of guitar strings you use can significantly impact the look and feel of your bracelets. Different materials, gauges, and winding types offer various aesthetic and functional qualities.
- Electric Guitar Strings: Typically made of nickel-plated steel, offering a bright and shiny appearance.
- Acoustic Guitar Strings: Often made of bronze or phosphor bronze, providing a warm and earthy tone.
- Nylon Strings: Used for classical guitars, offering a soft and flexible texture.
- Bass Guitar Strings: Thicker and heavier, creating bold and chunky bracelets.
- Coated Strings: Feature a protective coating that prevents tarnish and extends the lifespan of the strings.
- Unwound Strings: Smooth and simple, ideal for minimalist designs.
- Wound Strings: Textured and intricate, adding visual interest to the bracelet.
- Colored Strings: Available in various colors, allowing for vibrant and personalized designs.
- Flatwound Strings: Smooth and comfortable to wear, often used for jazz guitars.
- Roundwound Strings: Bright and articulate, providing a textured feel.
26. How Can I Sell Guitar String Bracelets at Craft Fairs?
Selling your guitar string bracelets at craft fairs can be a rewarding way to showcase your creations and connect with potential customers. Effective preparation and presentation are key to success.
- Prepare Your Inventory: Create a variety of bracelets in different styles and sizes.
- Price Your Items: Research the market to price your bracelets competitively.
- Create an Attractive Display: Use display stands, jewelry busts, and other props to showcase your bracelets.
- Provide Clear Signage: Use clear and professional signage to display prices, materials, and your brand name.
- Accept Multiple Payment Methods: Accept cash, credit cards, and mobile payments to accommodate all customers.
- Offer Packaging: Provide attractive packaging for your bracelets, such as small boxes or pouches.
- Promote Your Brand: Use business cards, flyers, and social media to promote your brand.
- Engage with Customers: Be friendly, approachable, and knowledgeable about your products.
- Offer Custom Orders: Offer custom orders to attract customers seeking personalized jewelry.
- Comply with Regulations: Ensure you comply with all local regulations and obtain any necessary permits.
27. What Tools Are Essential for Creating Intricate Wire-Wrapped Guitar String Bracelets?
Creating intricate wire-wrapped guitar string bracelets requires specific tools that allow for precise and detailed work. Investing in high-quality tools will enhance your craftsmanship and make the process more enjoyable.
- Round Nose Pliers: For creating loops and curves in the wire.
- Chain Nose Pliers: For gripping and manipulating the wire.
- Flat Nose Pliers: For flattening and straightening the wire.
- Wire Cutters: For trimming and cutting the wire.
- Crimping Pliers: For crimping beads and securing closures.
- Jewelry Hammer: For flattening and texturing the wire.
- Anvil: For providing a solid surface for hammering.
- Ruler or Measuring Tape: For measuring the wire and bracelet length.
- Magnifying Glass: For seeing fine details.
- Bench Block: For providing a stable surface for wire work.
28. How Do I Create a Two-Strand Braided Guitar String Bracelet?
Creating a two-strand braided guitar string bracelet is a simple yet stylish way to showcase the unique texture of guitar strings. This technique is easy to master and results in a comfortable and durable bracelet.
- Prepare the Strings: Cut two guitar strings to the desired length for the bracelet.
- Secure One End: Secure one end of the strings with a clamp or tie a knot.
- Start Braiding: Twist the two strings around each other, creating a spiral effect.
- Maintain Tension: Keep the strings taut as you braid to ensure a tight, uniform braid.
- Continue Braiding: Continue braiding until you reach the desired length.
- Secure the Other End: Secure the other end with a clamp or tie a knot.
- Attach Clasps: Use jewelry clasps and wire to attach a secure closure to both ends of the bracelet.
- Trim Excess: Cut off any excess string length with wire cutters.
- Secure Ends: Use crafting wire to wrap the ends tightly and prevent fraying.
- Wear and Enjoy: Your two-strand braided guitar string bracelet is now ready to wear.
29. How Can I Make a Guitar String Bracelet Using the Coil Method?
The coil method is a unique way to create a guitar string bracelet with a spiral design. This technique involves wrapping the string around itself to form a coil, resulting in a textured and eye-catching piece of jewelry.
- Prepare the String: Cut a guitar string to the desired length for the bracelet.
- Create a Loop: Create a small loop at one end of the string using round nose pliers.
- Start Coiling: Begin wrapping the string tightly around the loop, creating a coil.
- Maintain Tension: Keep the string taut as you coil to ensure a uniform spiral.
- Continue Coiling: Continue coiling until you reach the desired length.
- Secure the End: Secure the end of the string by tucking it into the coil or using wire to wrap it in place.
- Attach Clasps: Use jewelry