
Changing your guitar strings is a fundamental skill every guitarist needs to learn. Fresh strings can breathe new life into your instrument, improving tone and playability. Whether you’re a beginner or seasoned player, knowing how to properly restring your guitar is essential for maintaining its sound and performance. This guide will walk you through each step of the process, ensuring you can confidently change your guitar strings like a pro.
Step 1: Gather Your Tools
Before you start, having the right tools at hand will make the process smoother and more efficient. Here’s what you’ll need:
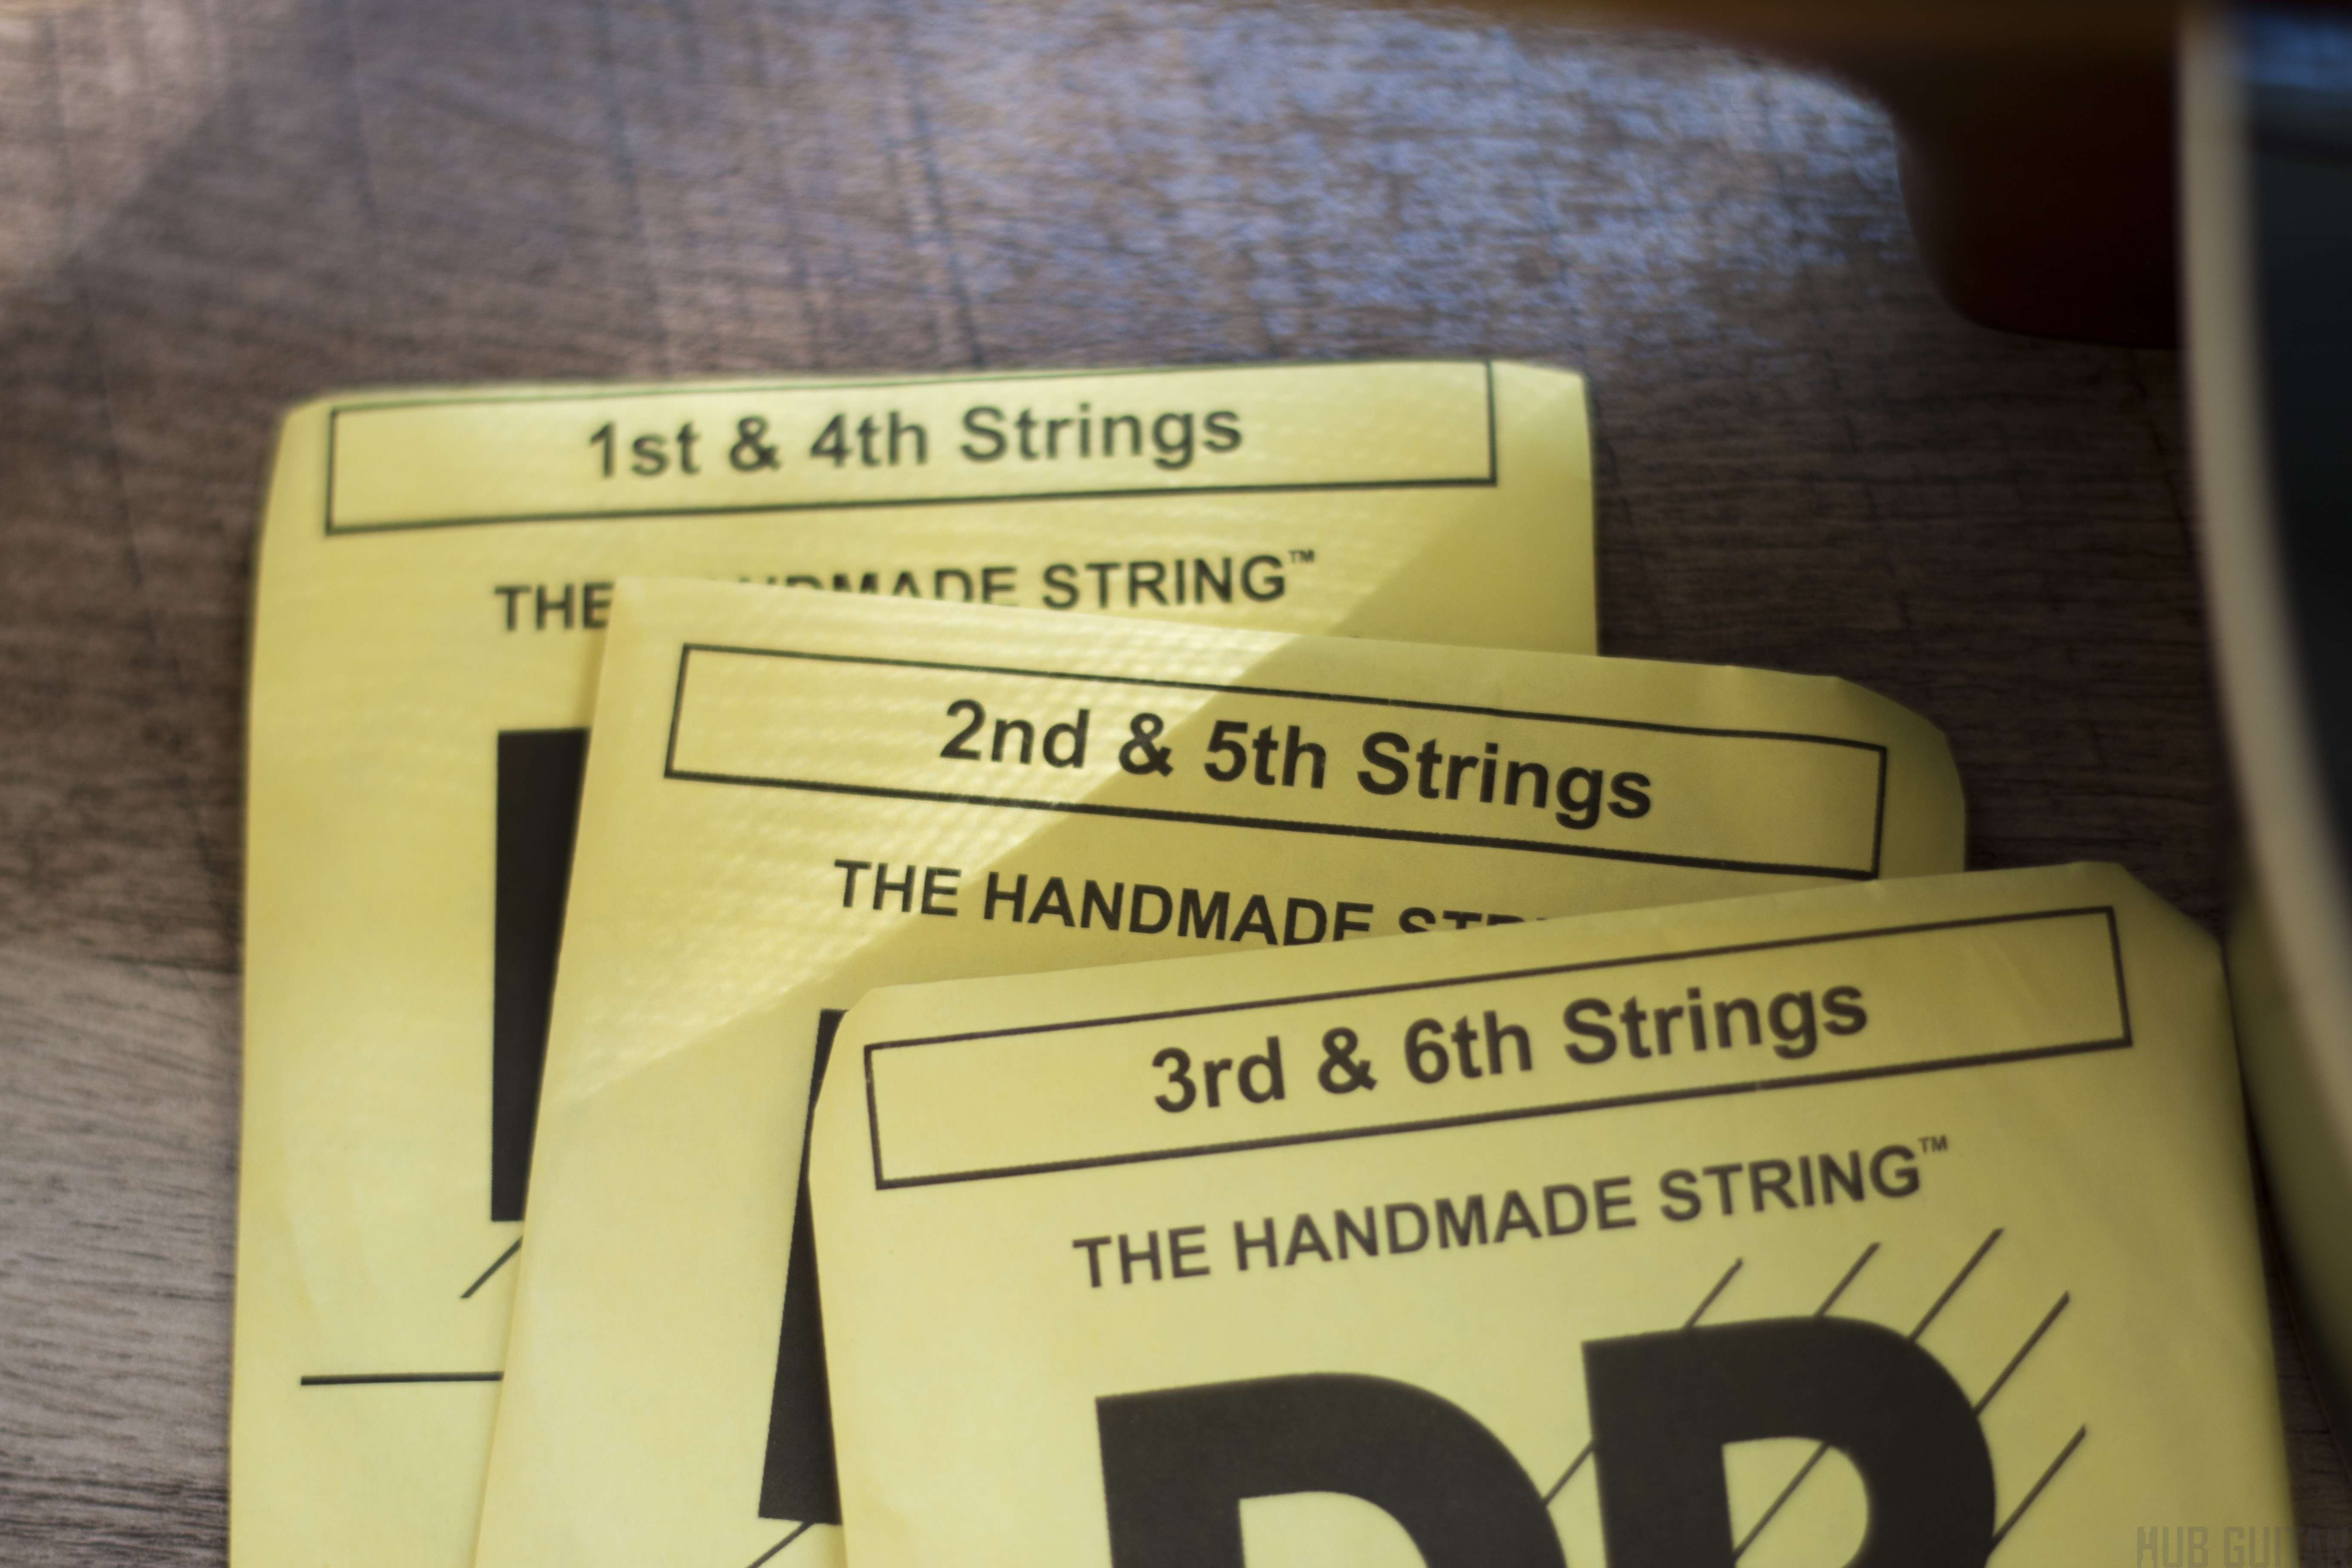
- New Guitar Strings: Choose the right type and gauge for your guitar (acoustic, electric, or nylon) and playing style.
- String Winder: This tool speeds up the process of winding and unwinding tuning pegs.
- Wire Cutters: For trimming excess string ends.
- Tuning Peg Wrench (Optional): Some string winders include this, making peg turning easier.
- Fretboard Cleaner and Lemon Oil (Optional): For cleaning and conditioning your fretboard while the strings are off.
- Bridge Pin Puller (For Acoustic Guitars with Bridge Pins – Optional but Recommended): Makes removing bridge pins much easier and prevents damage.
Alt text: Essential tools for changing guitar strings, including new strings, string winder, and wire cutters.
Step 2: Remove the Old Strings
The first step is to remove the old strings. It’s a common myth that removing all strings at once can damage your guitar neck due to truss rod adjustments. However, for a standard string change and fretboard cleaning, removing all strings simultaneously is perfectly acceptable and often more convenient.
To remove the strings, start by loosening them at the tuning pegs.
- Loosen the Tuning Pegs: Locate the tuning peg on the headstock corresponding to the string you want to remove. Typically, turning the tuning peg counter-clockwise will loosen the string, reducing its pitch. Use a string winder to speed up this process. Continue loosening until the string is slack and easily handled.
Alt text: Loosening a guitar string by turning the tuning peg counter-clockwise to reduce string tension.
-
Remove from Tuning Peg: Once loose, you can usually unwind the string end from the tuning peg by hand. If it’s stuck, pliers can help.
-
Remove from Bridge: The bridge attachment method varies by guitar type:
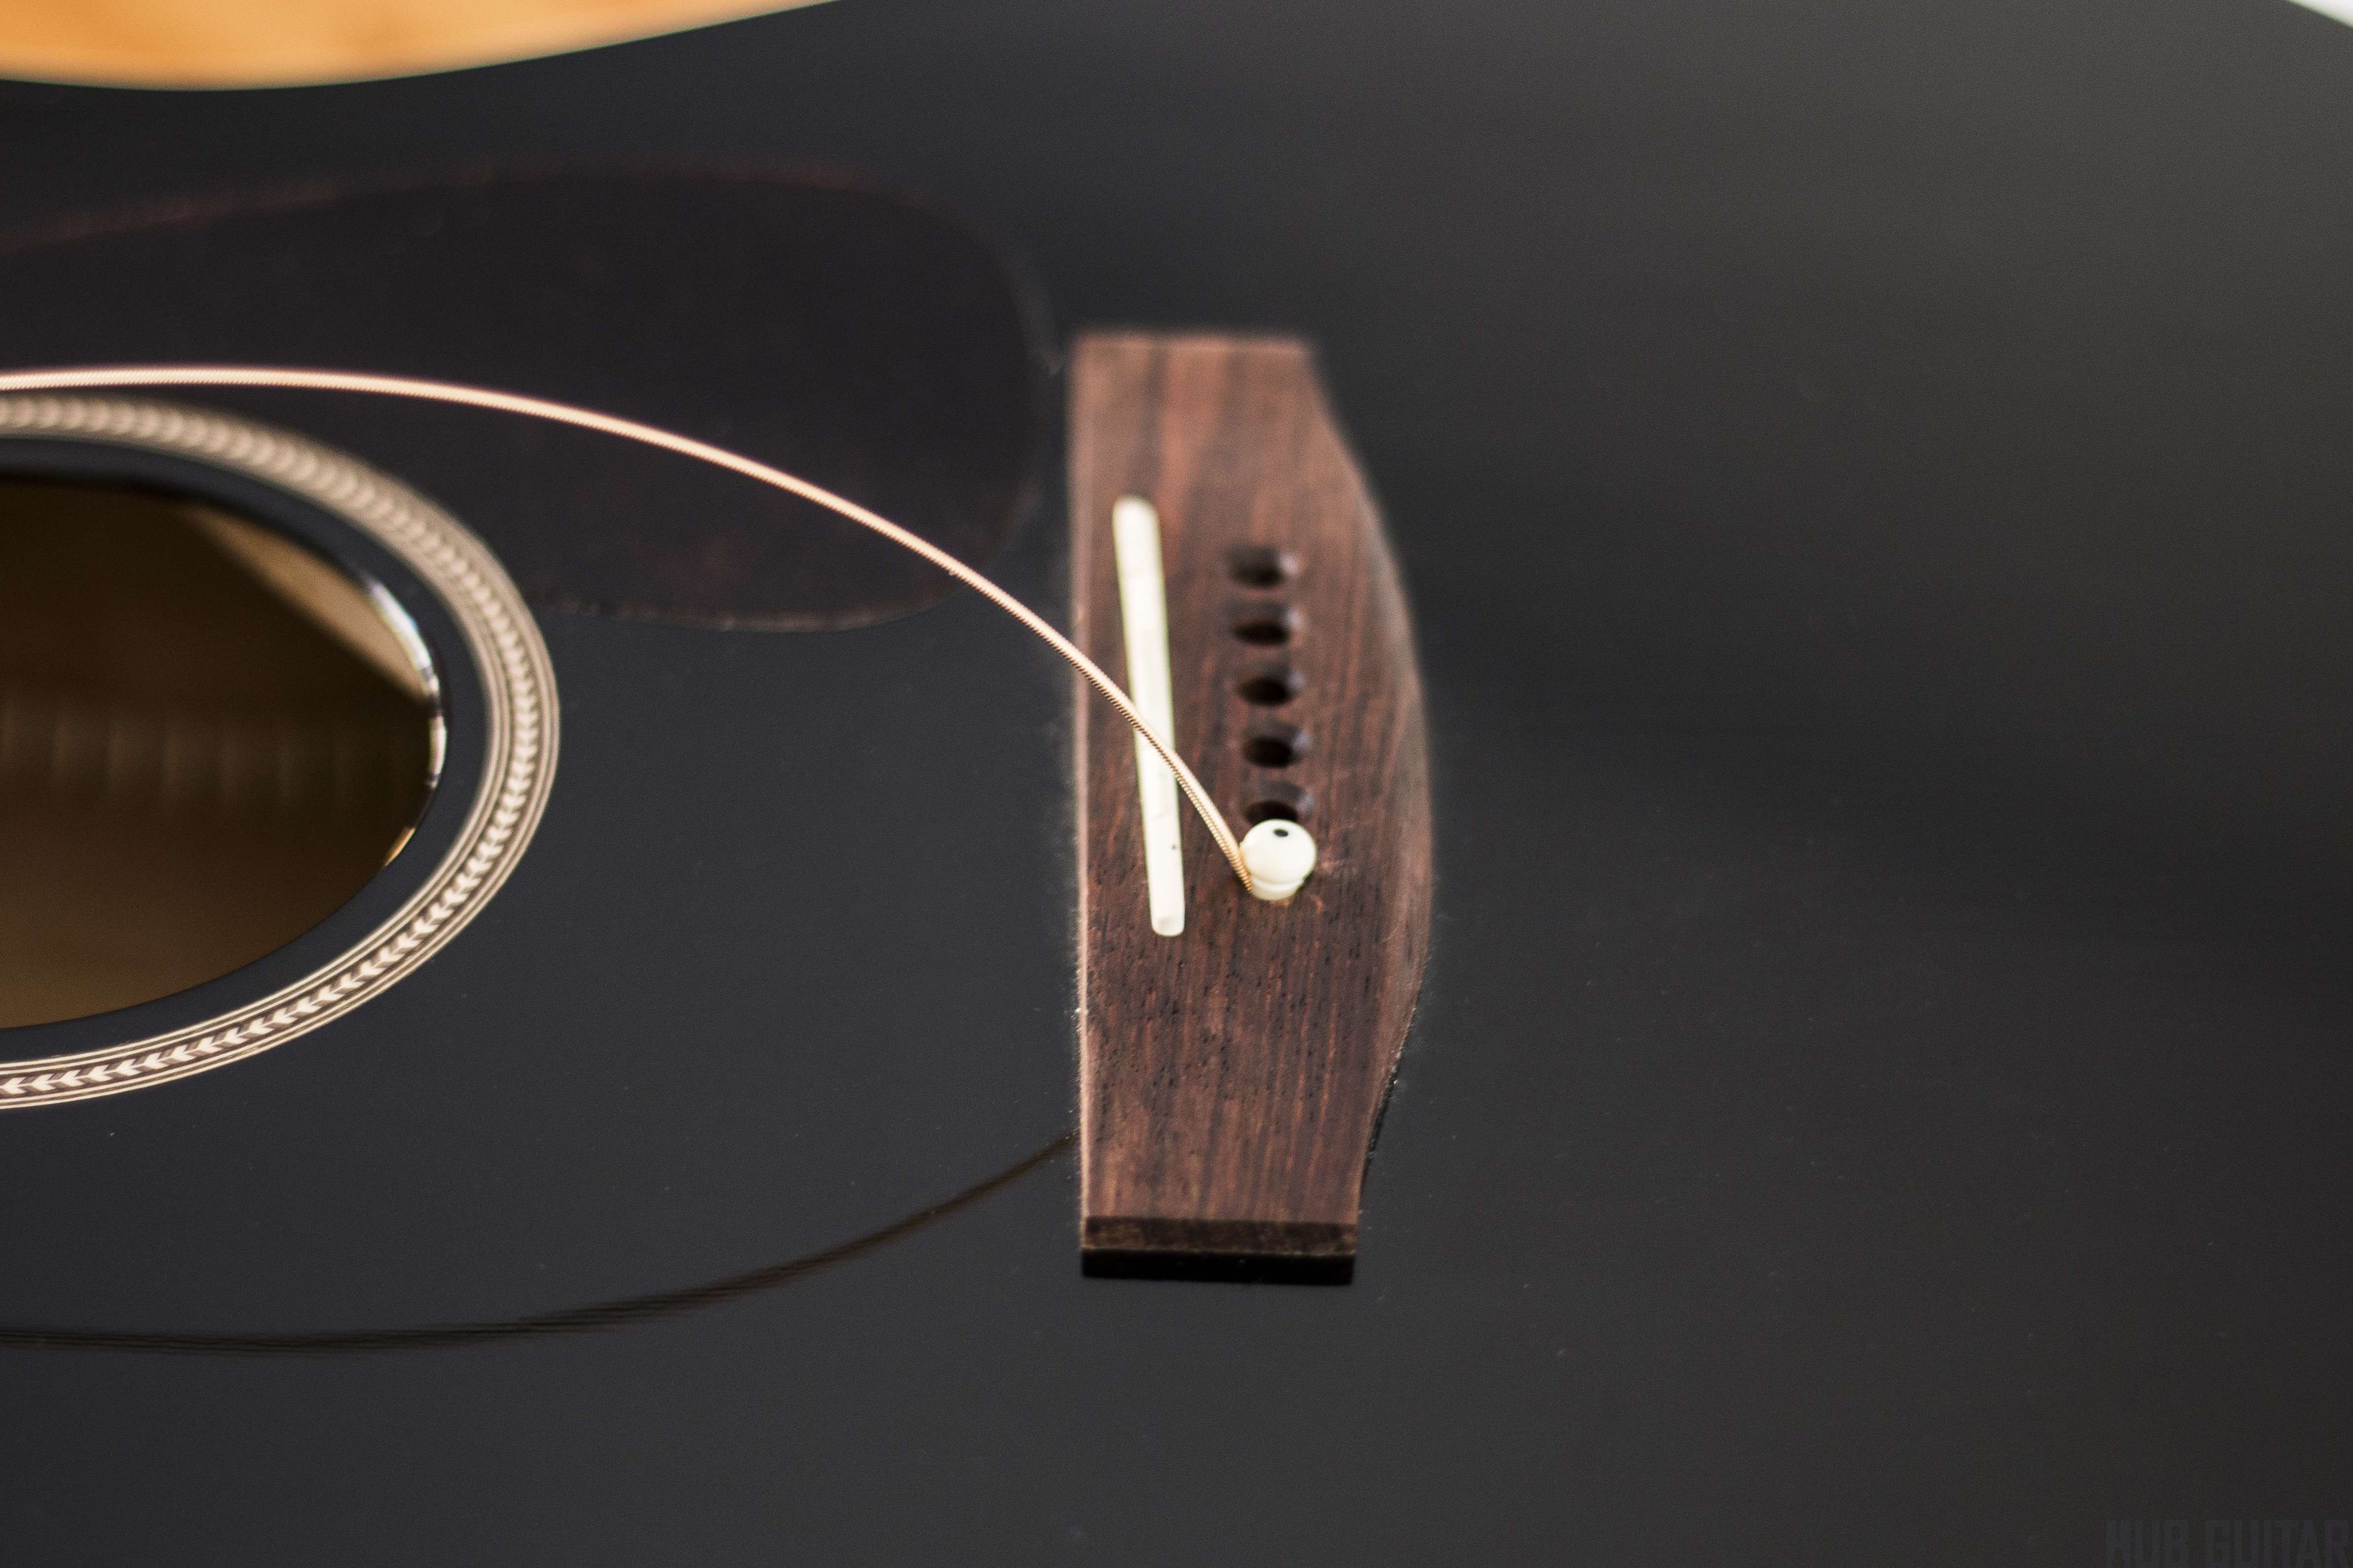
- Steel-String Acoustic Guitars: These guitars use bridge pins to secure ball-end strings. Use a bridge pin puller or carefully use pliers to gently lift and remove the bridge pins. Once the pin is out, the string’s ball end can be removed.

Alt text: Removing a bridge pin from an acoustic guitar to release the ball end of the string.- Nylon-String Acoustic Guitars: Nylon strings are typically tied at the bridge. Once the string is loose at the headstock, you can usually untie the knot at the bridge by gently pulling the string.
Alt text: Removing a nylon guitar string from the bridge after loosening it at the headstock.- Electric Guitars: Electric guitars have various bridge types. Some, like those on a Les Paul (hard-tail), have strings that feed through the back of the bridge. Others, like on a Stratocaster, go through the body from the back. Simply push the string through the hole in the opposite direction it was installed to remove it.
Repeat this process for all strings until all old strings are removed.
Step 3: (Optional) Clean and Condition Your Fretboard
With the strings off, this is the perfect opportunity to clean and condition your fretboard. Over time, dirt, oil, and grime can build up, affecting playability and the fretboard’s condition.
-
Clean the Fretboard: Use a soft cloth and a specialized fretboard cleaner. For tougher grime, you can use 0000 grade steel wool very gently, moving along the grain of the wood. Be careful not to scratch the wood. After using steel wool, ensure you remove all tiny fragments with a cloth.

Alt text: Cleaning a guitar fretboard with a cloth to remove dirt and grime before restringing. -
Condition the Fretboard (Oiling): For rosewood, ebony, or other unfinished wood fretboards, apply a small amount of lemon oil or fretboard conditioner to a clean cloth and gently rub it into the wood. This helps to moisturize the wood, preventing it from drying out and cracking. Use lemon oil sparingly, and wipe off any excess after a few minutes. Maple fretboards are usually finished and do not require oiling; cleaning is typically sufficient.
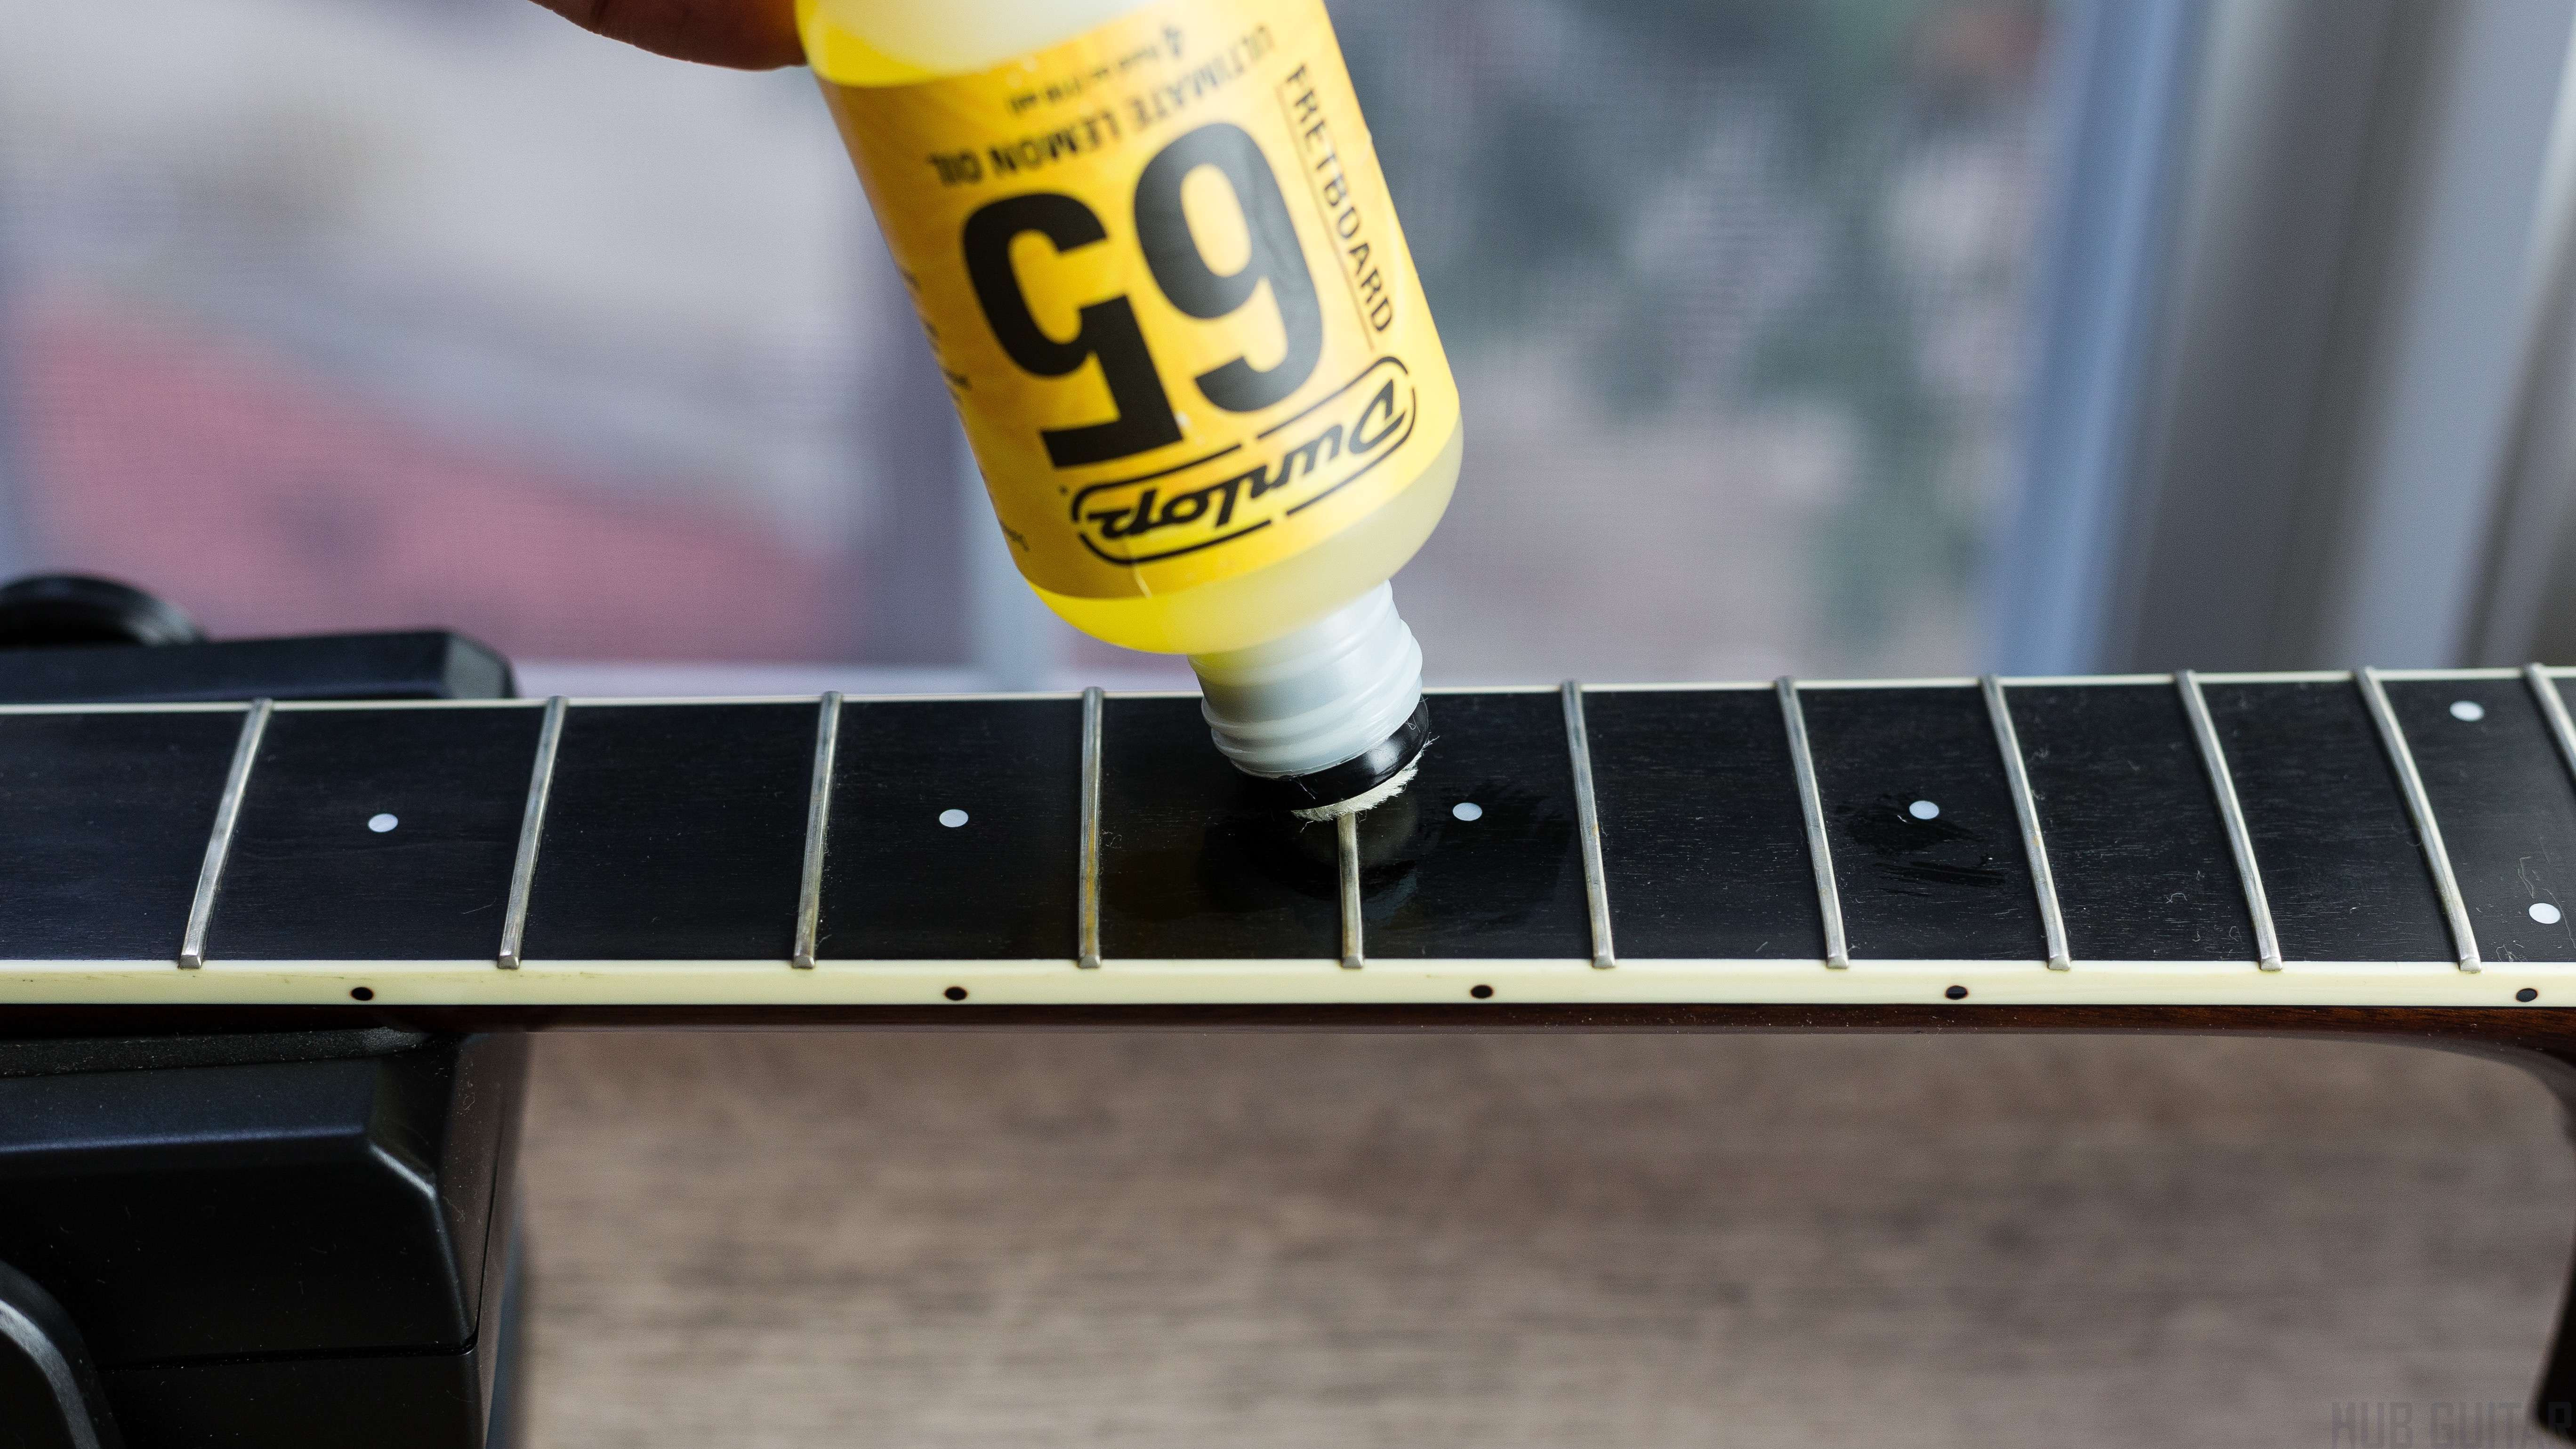
Alt text: Applying lemon oil to a guitar fretboard to condition the wood and enhance its appearance.
Step 4: Install the New Strings
Now it’s time to put on your new strings. Start with the lowest string (usually the low E string) and work your way up.
-
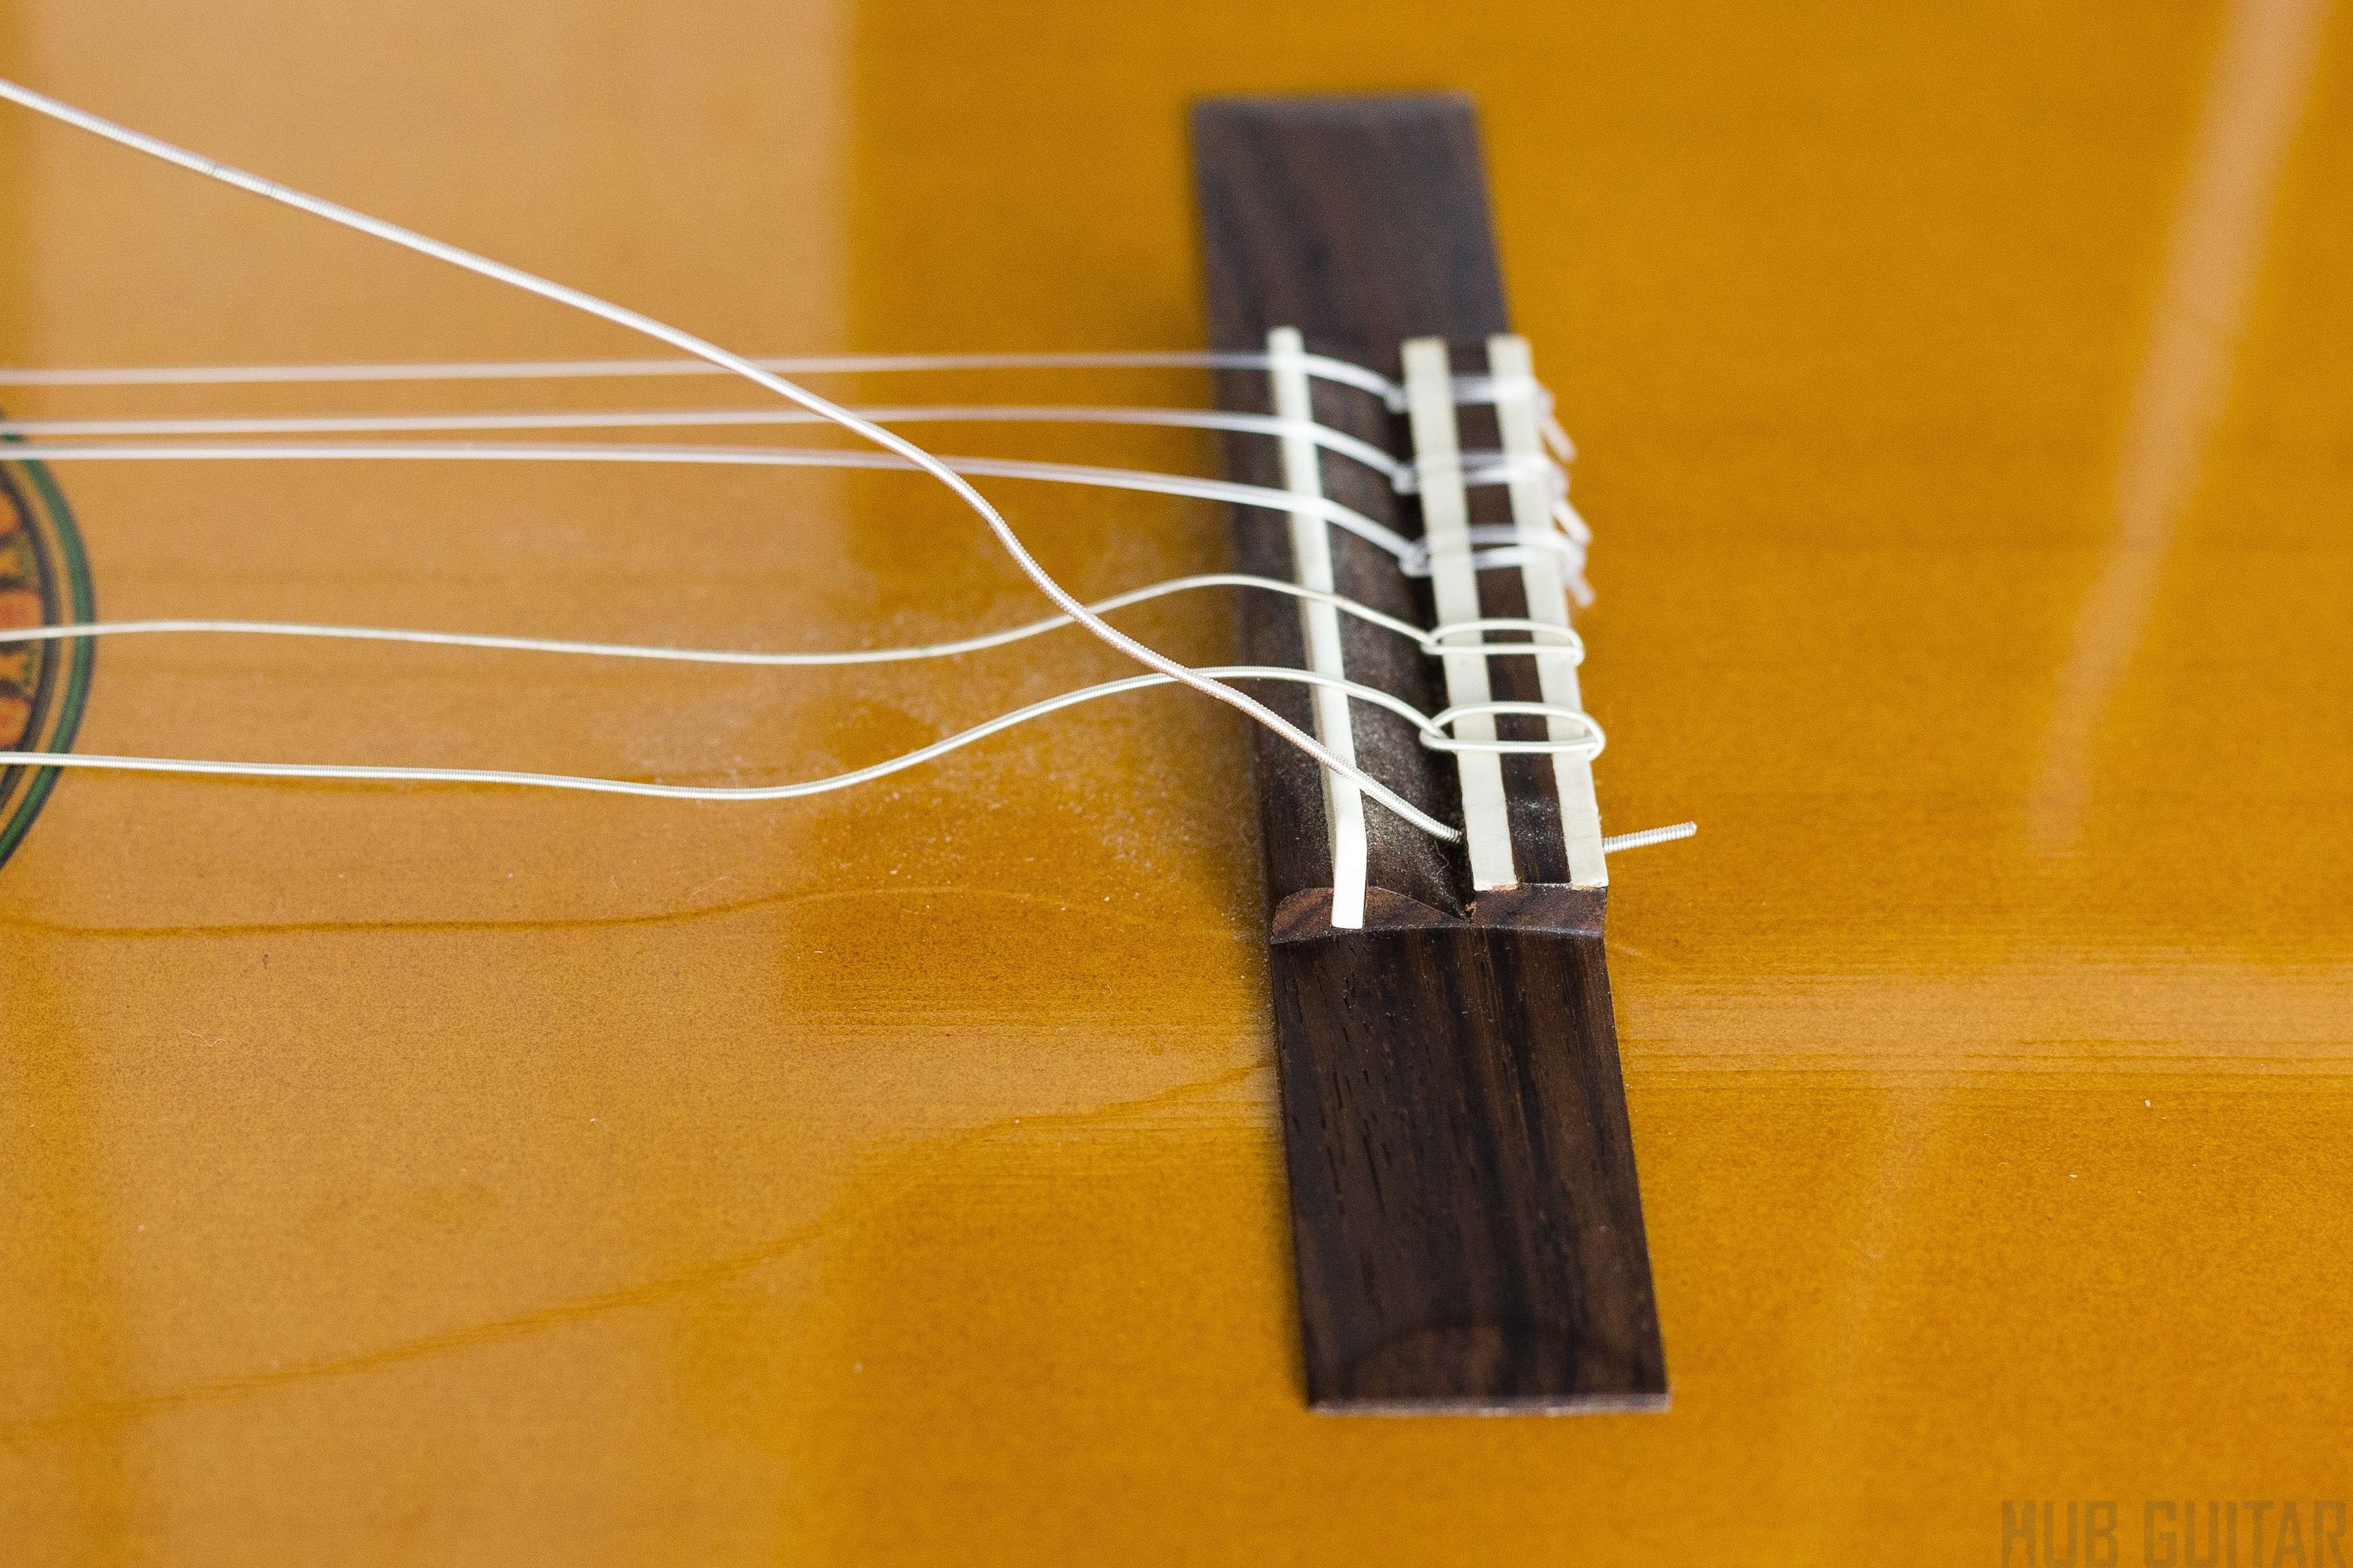
Bridge Attachment: Secure the new string at the bridge first.
- Steel-String Acoustic Guitars: Insert the ball end of the string into the bridge hole. Ensure the bridge pin is oriented correctly, with the groove facing towards the guitar neck to accommodate the string. Push the pin firmly into place to secure the string. You should feel it “lock” in.
Alt text: Securing a new guitar string on an acoustic guitar bridge using a bridge pin with the groove facing the neck.-
Nylon-String Acoustic Guitars: For ball-end nylon strings, simply insert the ball end into the bridge hole and pull it snug. For traditional nylon strings that require tying, feed the string through the bridge hole and tie a secure knot. (Refer to online tutorials for specific nylon string knot-tying techniques if needed).
-
Electric Guitars: Feed the string through the bridge according to your guitar’s design (through the back of the bridge or body). Pull the string through until the ball end is seated against the bridge.
-
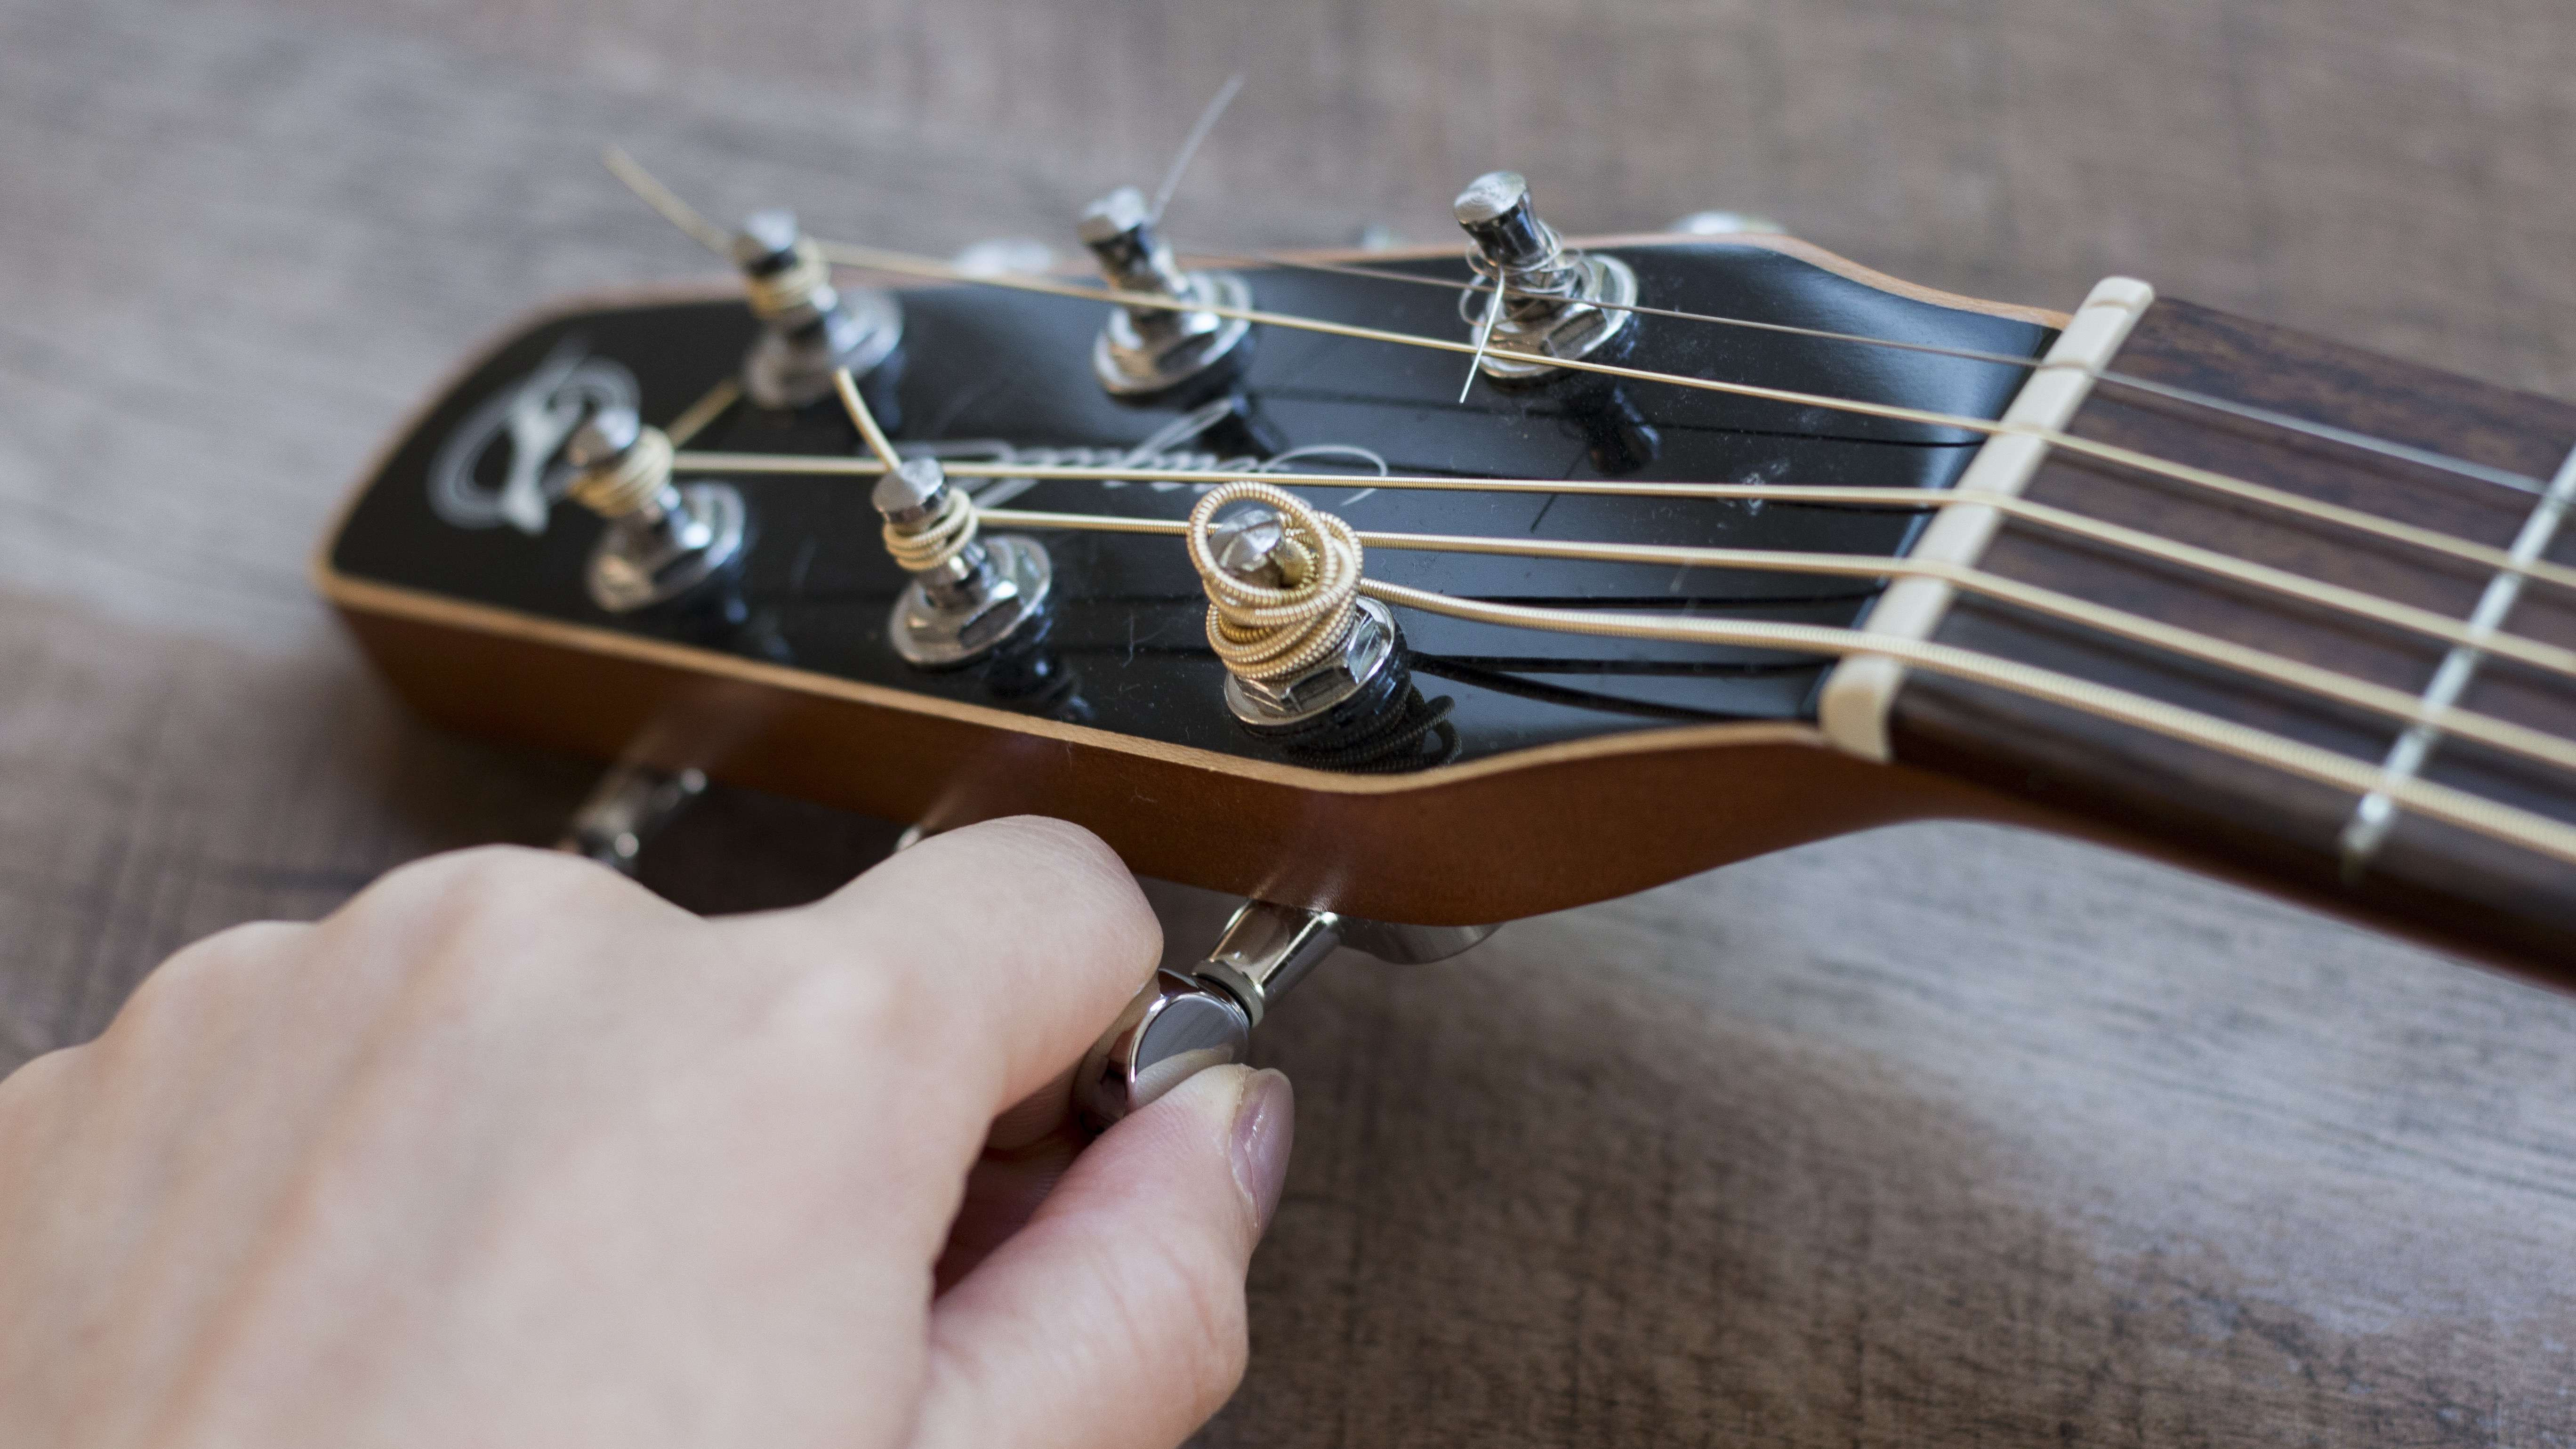
Headstock and Tuning Peg Attachment:
- Guide String to Headstock: Bring the other end of the string up to the headstock and guide it into the correct nut slot.
- Insert into Tuning Peg: Turn the tuning peg so the hole for the string is aligned with the nut. Insert the string end into the hole of the tuning peg. Pull the string through, leaving some slack for winding around the peg – about 2-3 inches is usually sufficient.
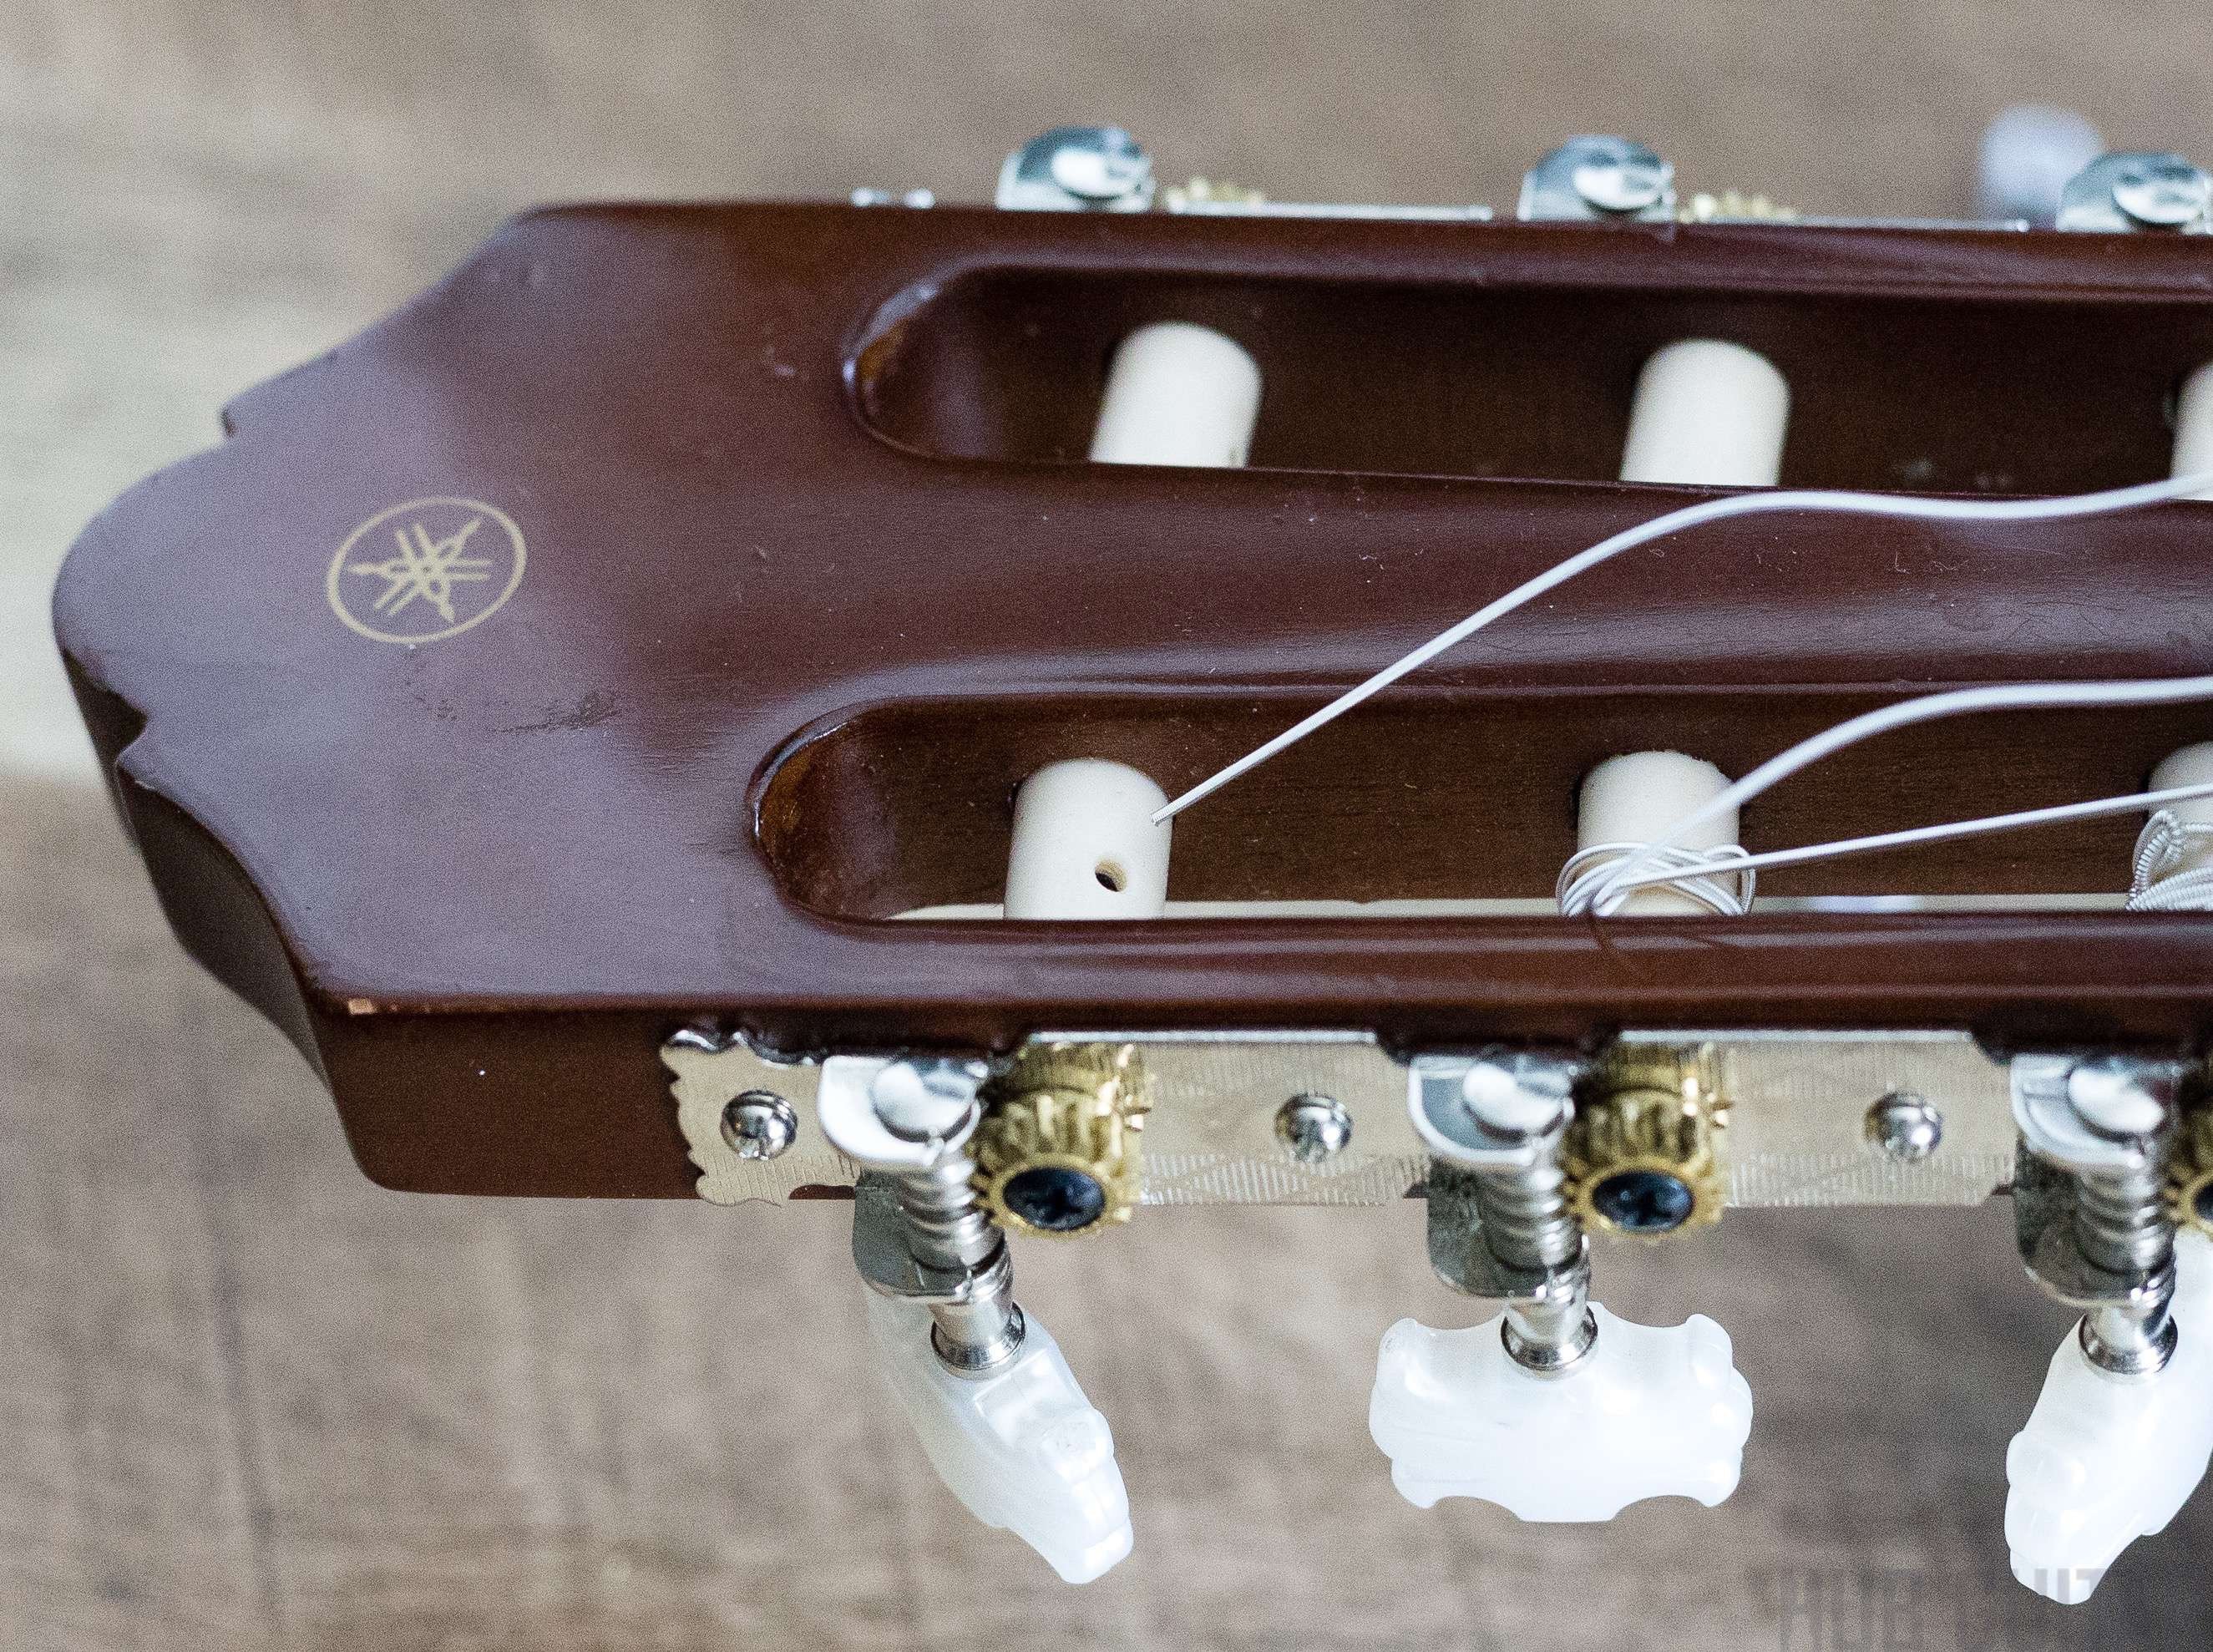
Alt text: Inserting the end of a nylon guitar string into the tuning peg on the headstock.
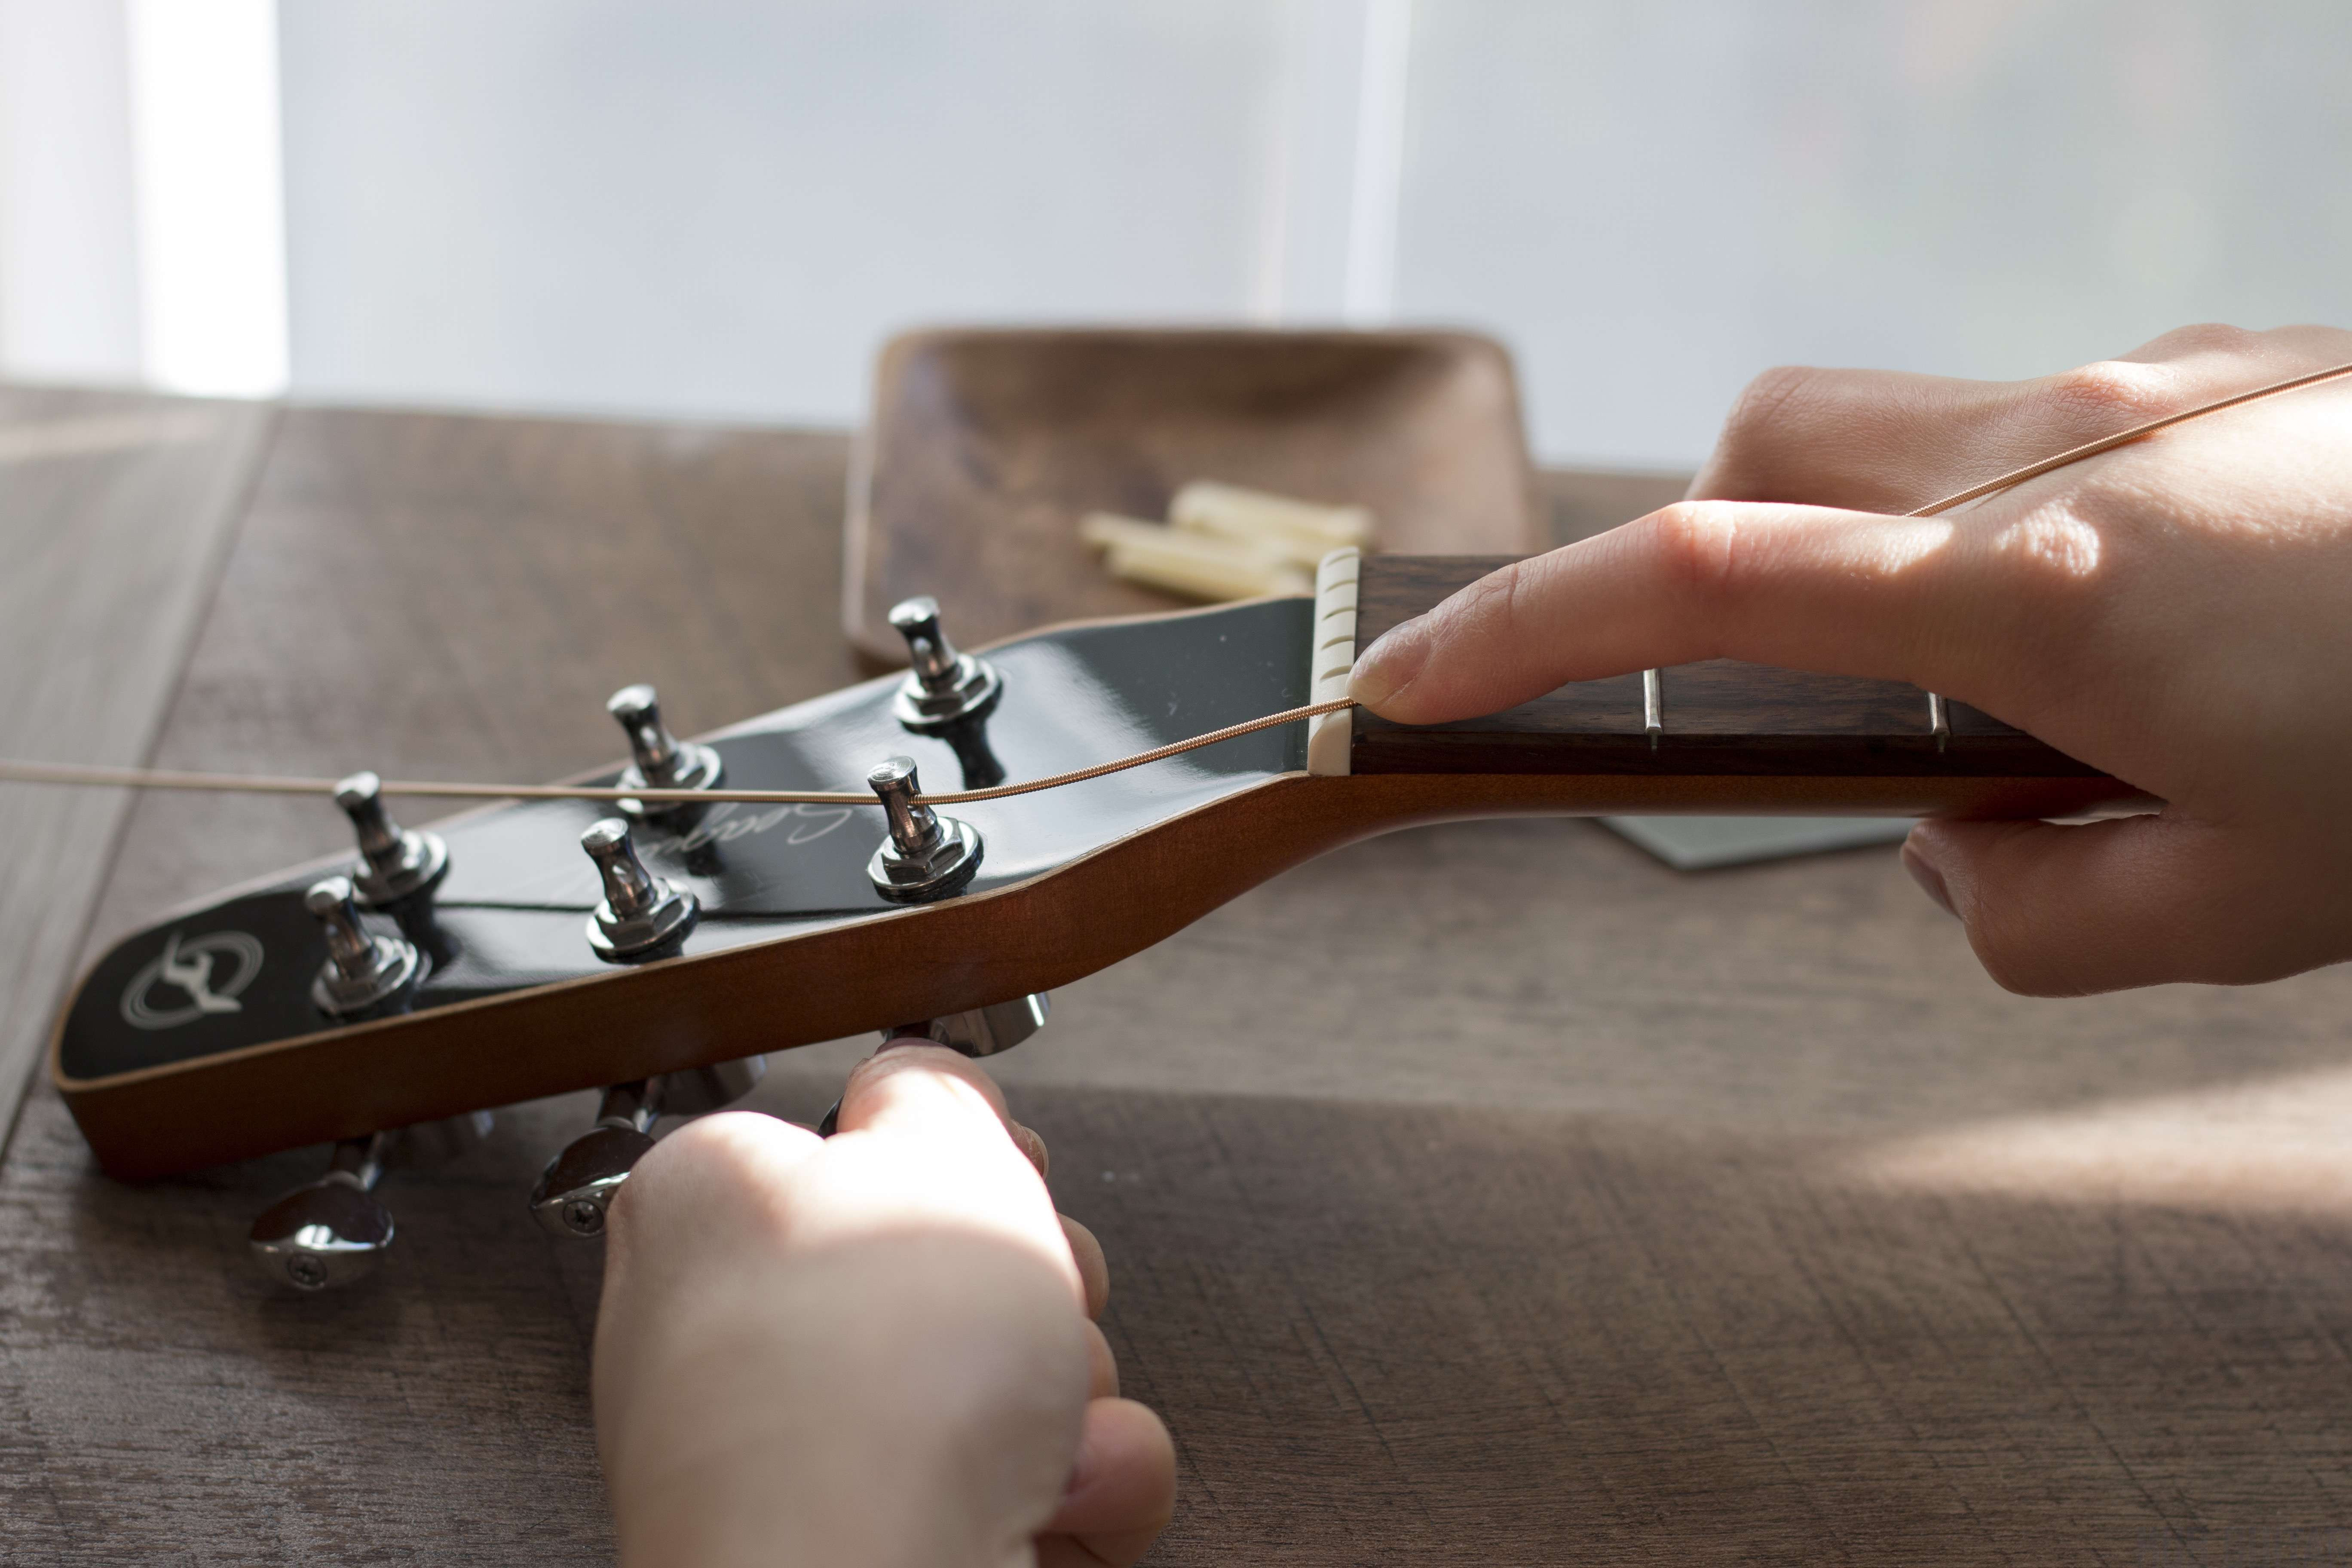
Step 5: Winding the Strings
Proper winding technique is crucial for tuning stability.
-
Start Winding: Begin winding the tuning peg to tighten the string. For the lower strings (E, A, D), wind counter-clockwise. For the higher strings (G, B, e), wind clockwise (this may vary depending on headstock orientation – observe which direction tightens the string). Use a string winder to make this faster.
Alt text: Starting to wind a new guitar string around the tuning peg using a string winder. -
String Winding Pattern: For optimal tuning stability, aim for a neat winding pattern. For the first revolution, ensure the string end is guided underneath the incoming string. For subsequent winds, guide the string above the previous windings. This helps to lock the string in place and creates a downward pressure on the nut, improving sustain and tuning stability.
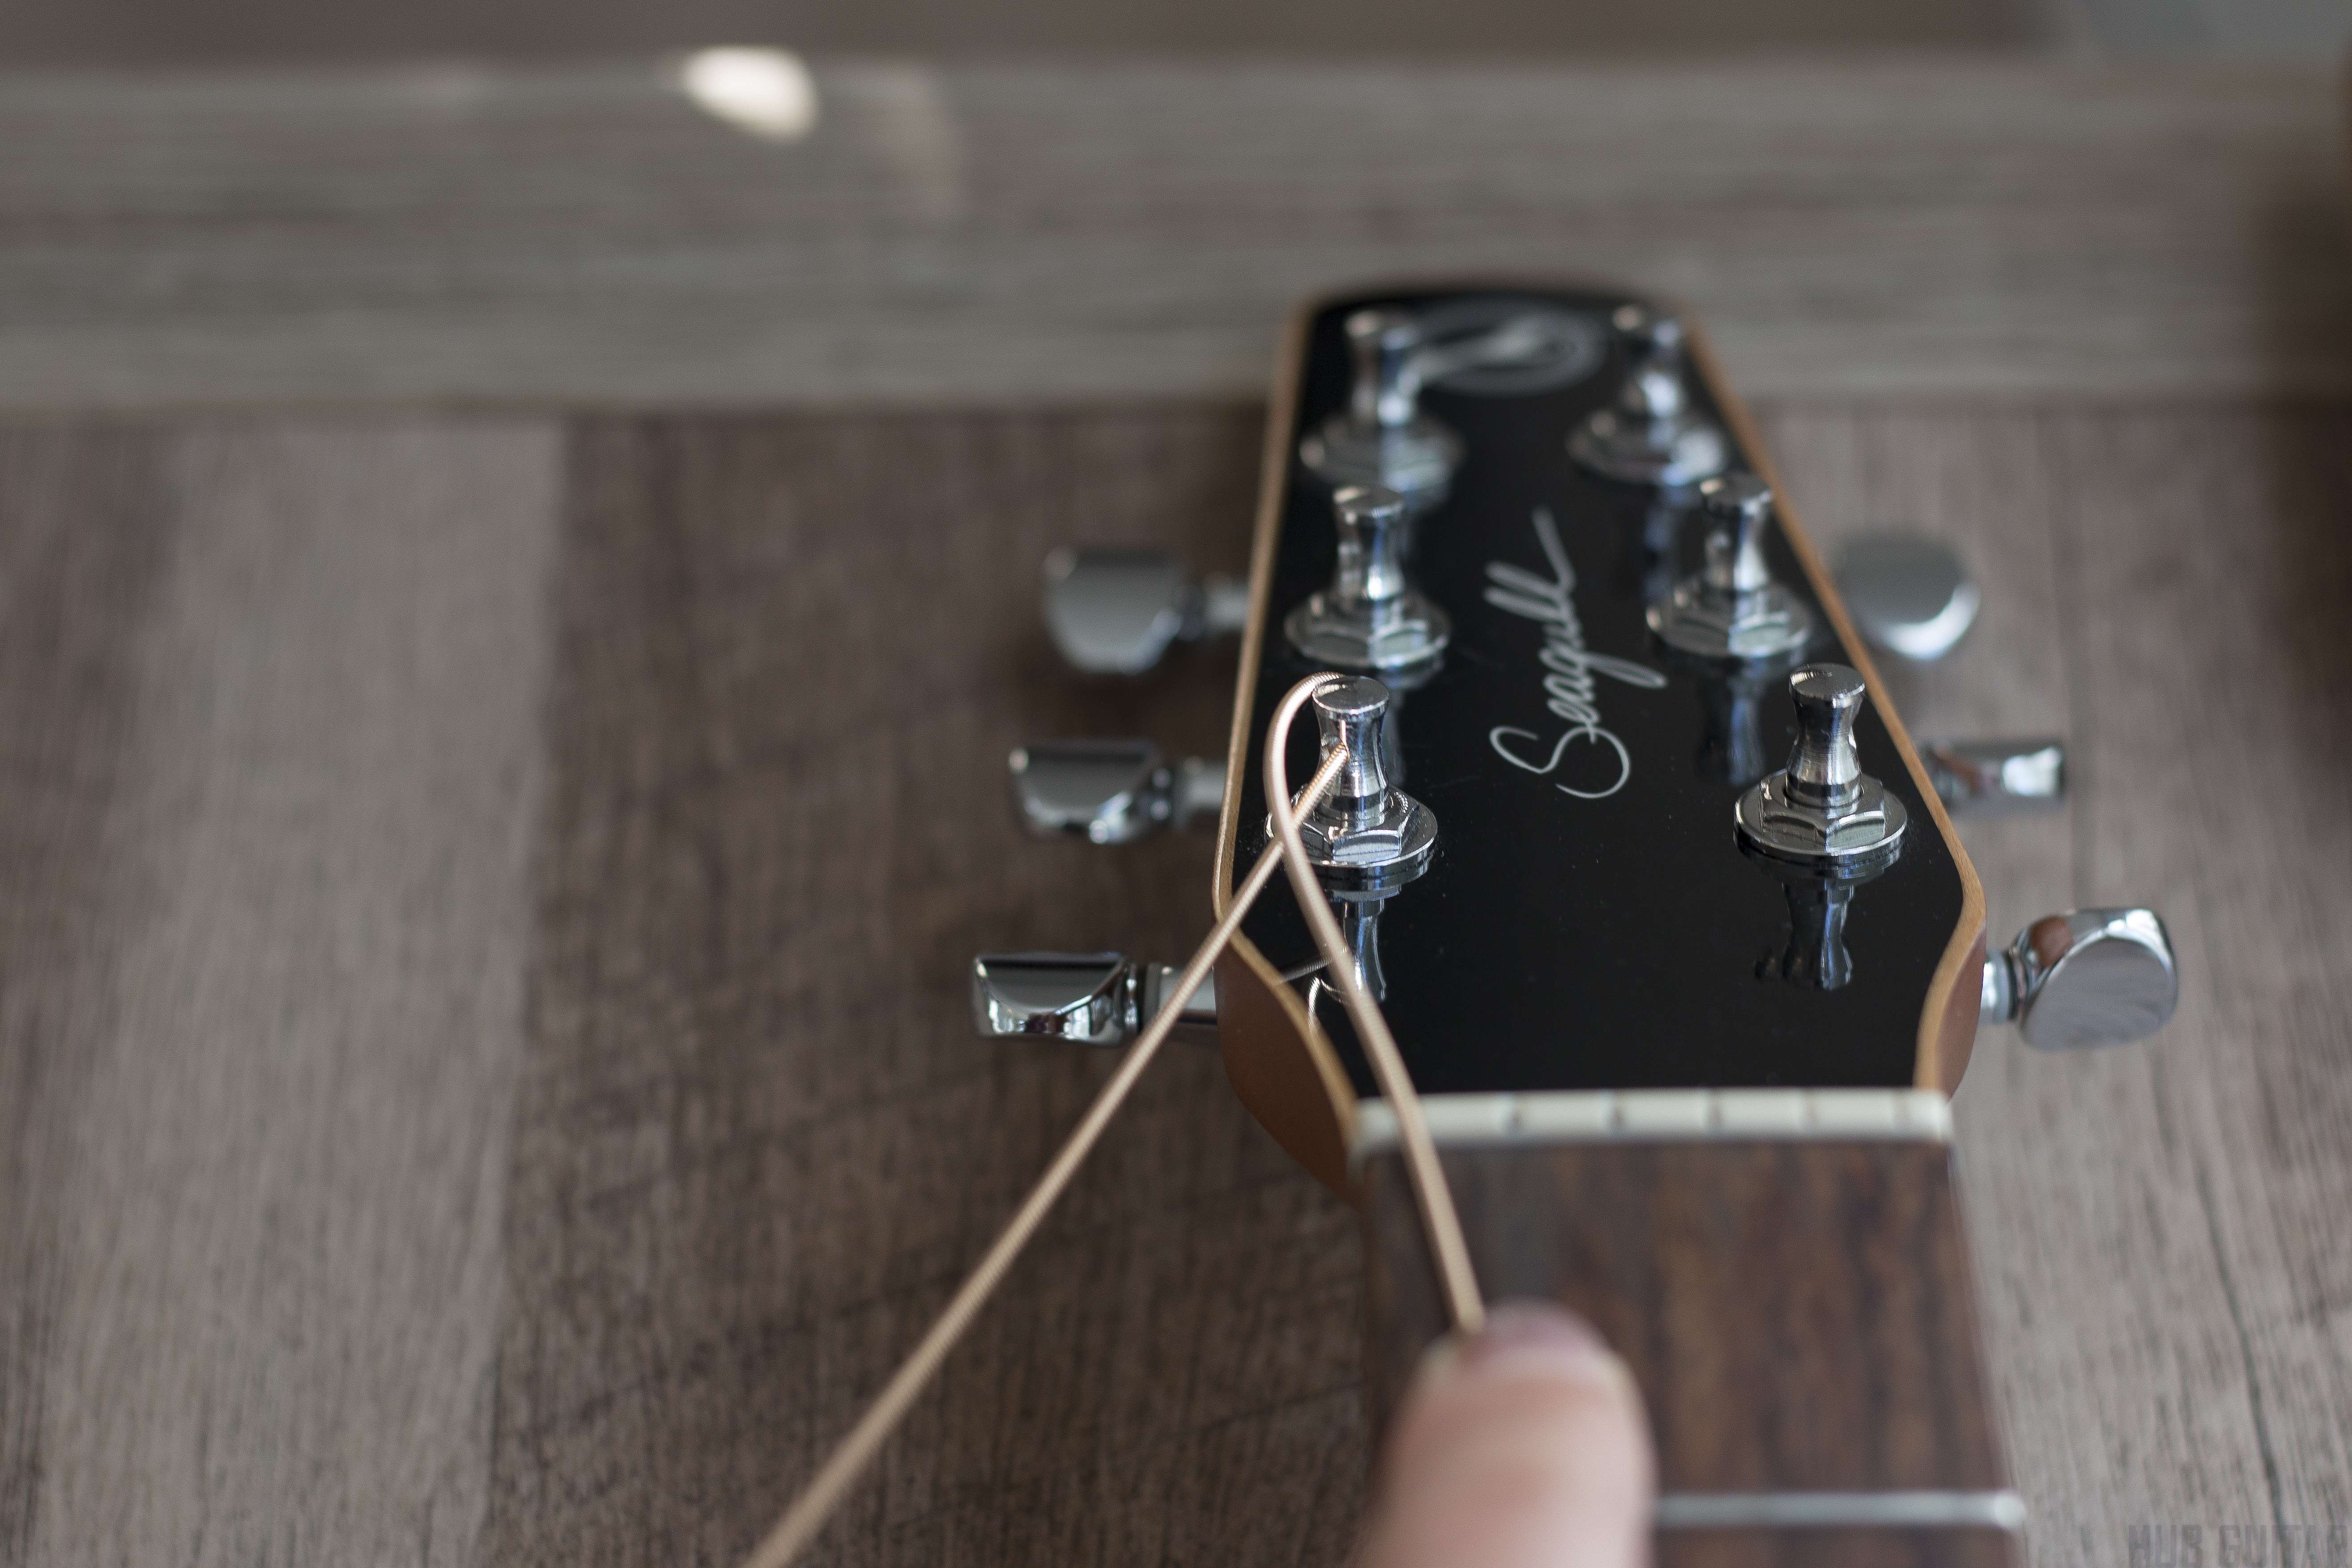
Alt text: Guiding the first revolution of a guitar string winding underneath the string end for secure fastening.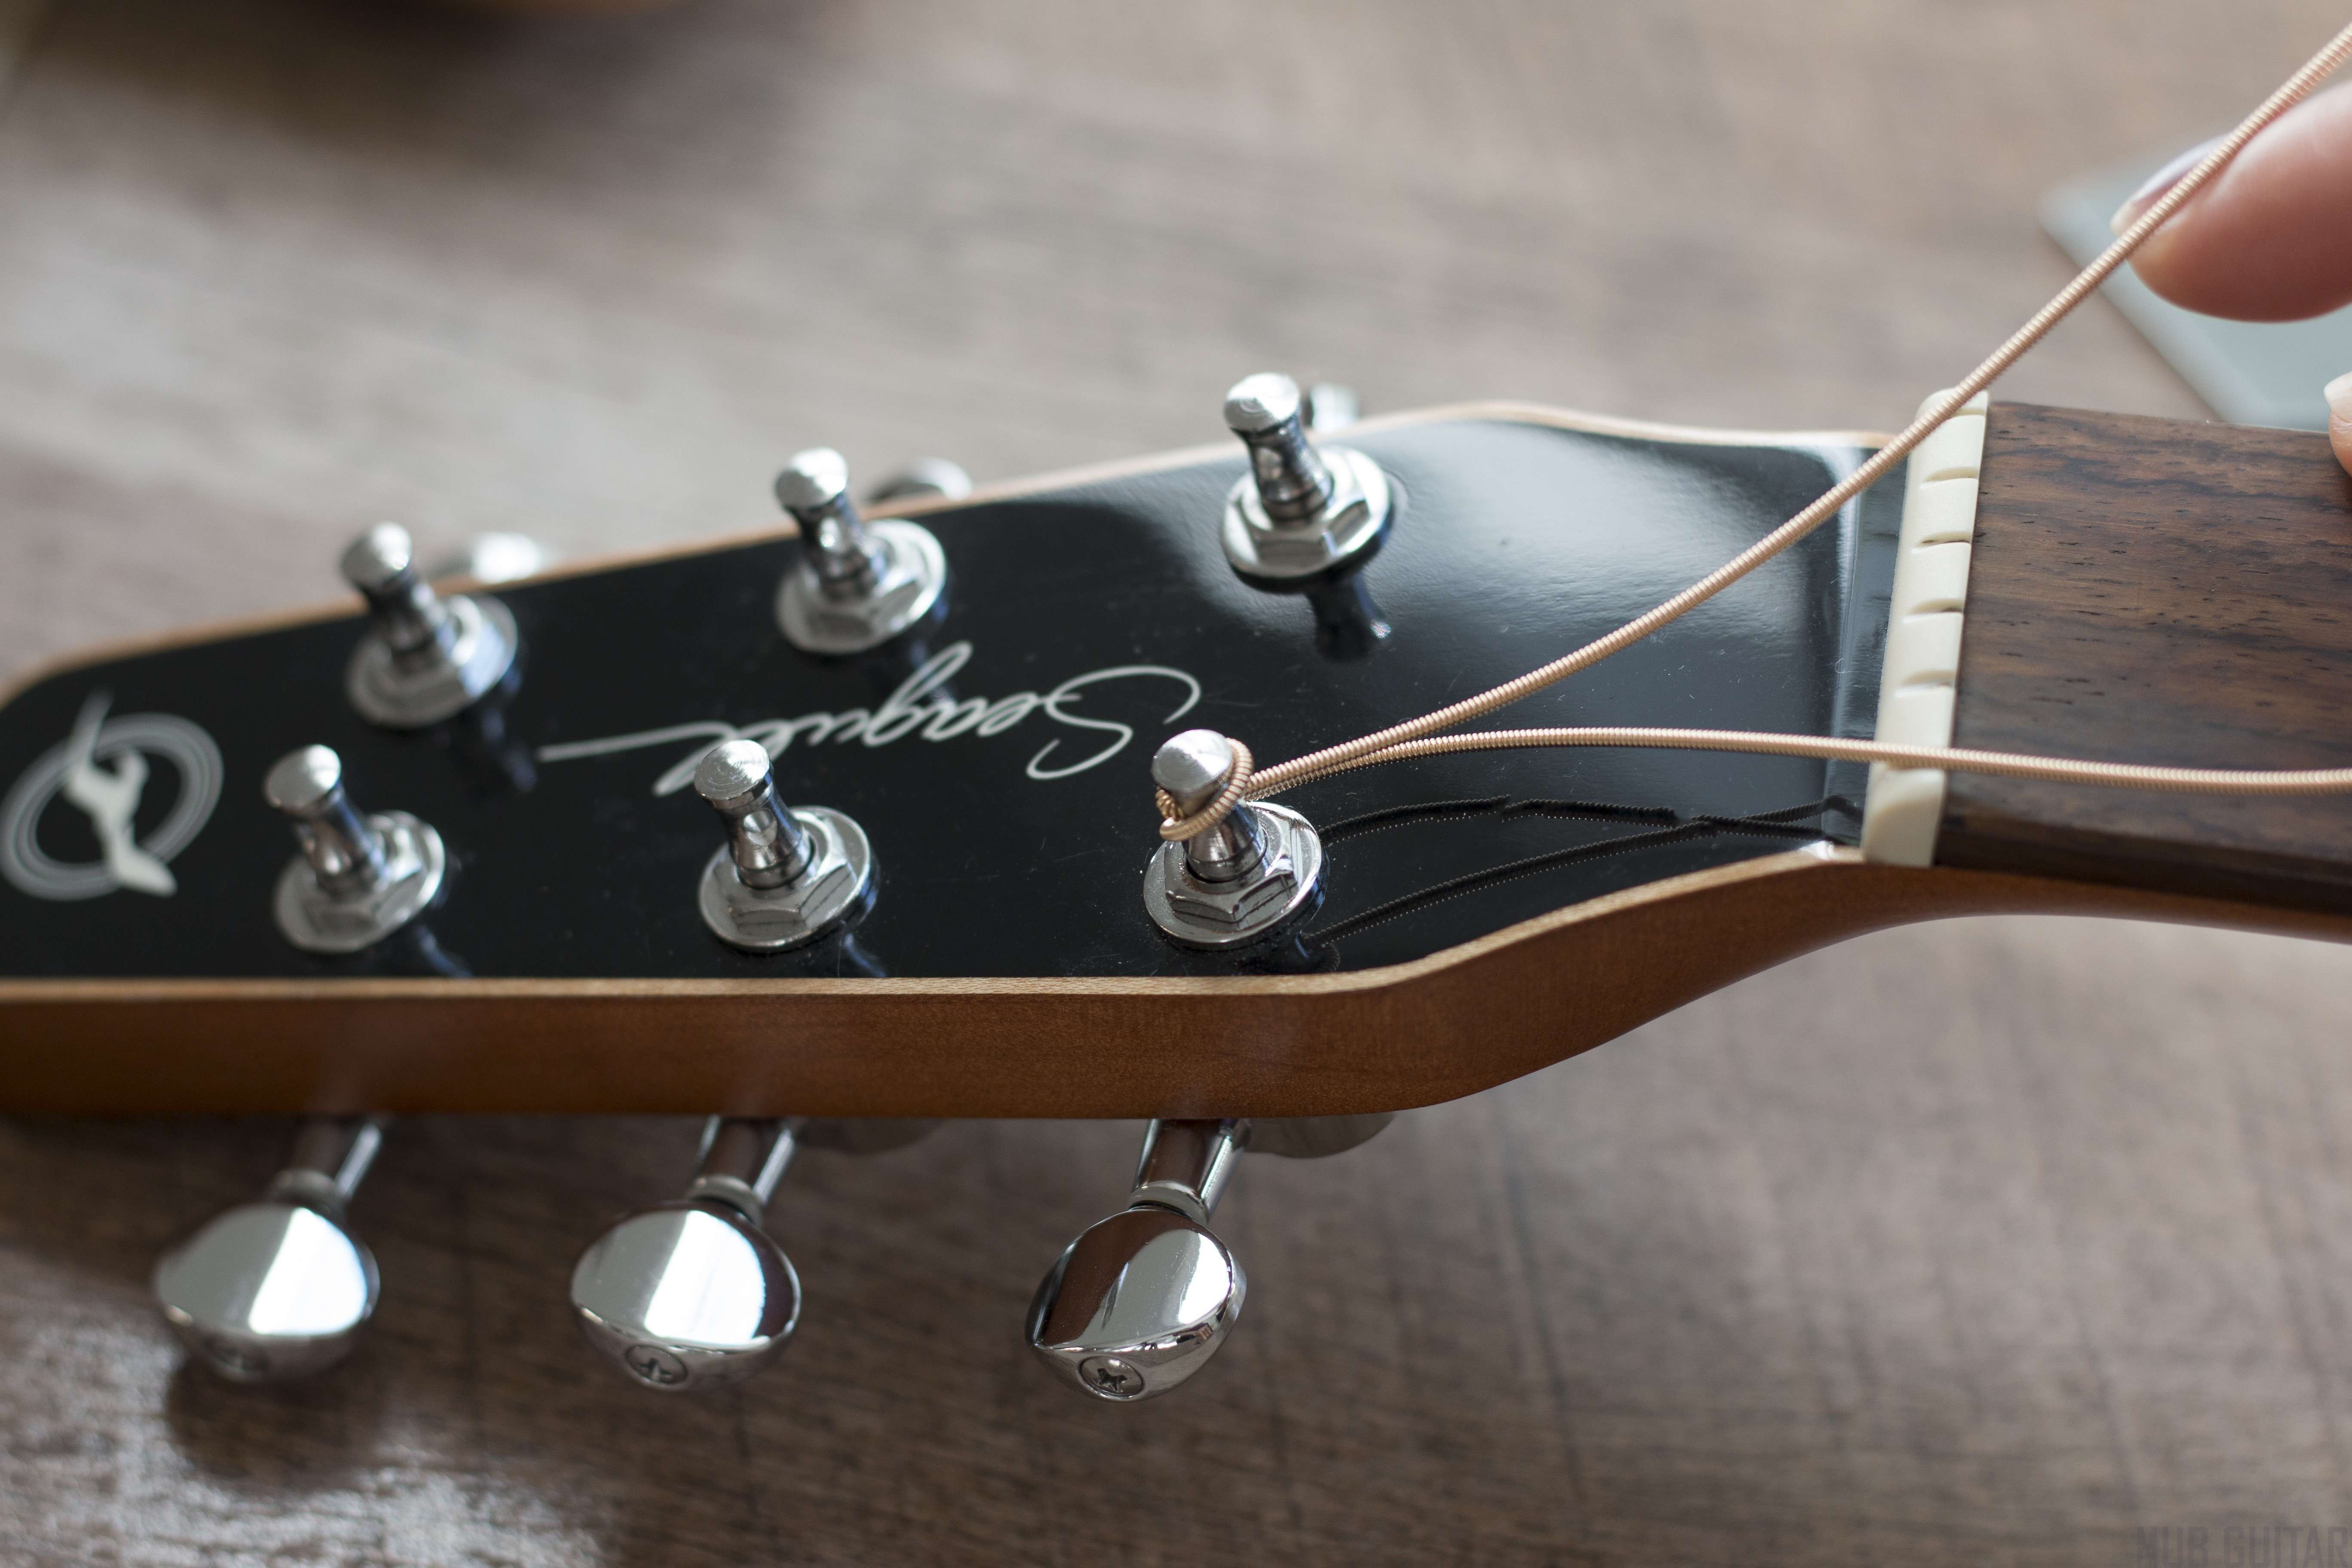
Alt text: Winding subsequent revolutions of a guitar string above the string end for a neat and stable winding. -
Tune to Pitch: As you wind, use a tuner to bring the string up to pitch. Tune each string roughly to pitch before moving to the next string.
-
Repeat for All Strings: Repeat steps 4 and 5 for all six strings.
Step 6: Stretch and Tune Again
New strings need to be stretched before they will hold their tune reliably.
- Stretch the Strings: Gently stretch each string by pulling it away from the fretboard in the middle of the string’s length. Don’t pull too hard, just enough to increase tension. You will hear the pitch drop.
- Retune: Retune each string to the correct pitch.
- Repeat: Repeat the stretching and retuning process several times until the strings hold their pitch and require minimal retuning. This process helps to settle the strings and improves tuning stability.
Step 7: Trim Excess String Ends
Once the strings are stretched and holding tune, use wire cutters to trim the excess string ends at the headstock. Cut them close to the tuning pegs, leaving a small, safe amount to avoid sharp ends.
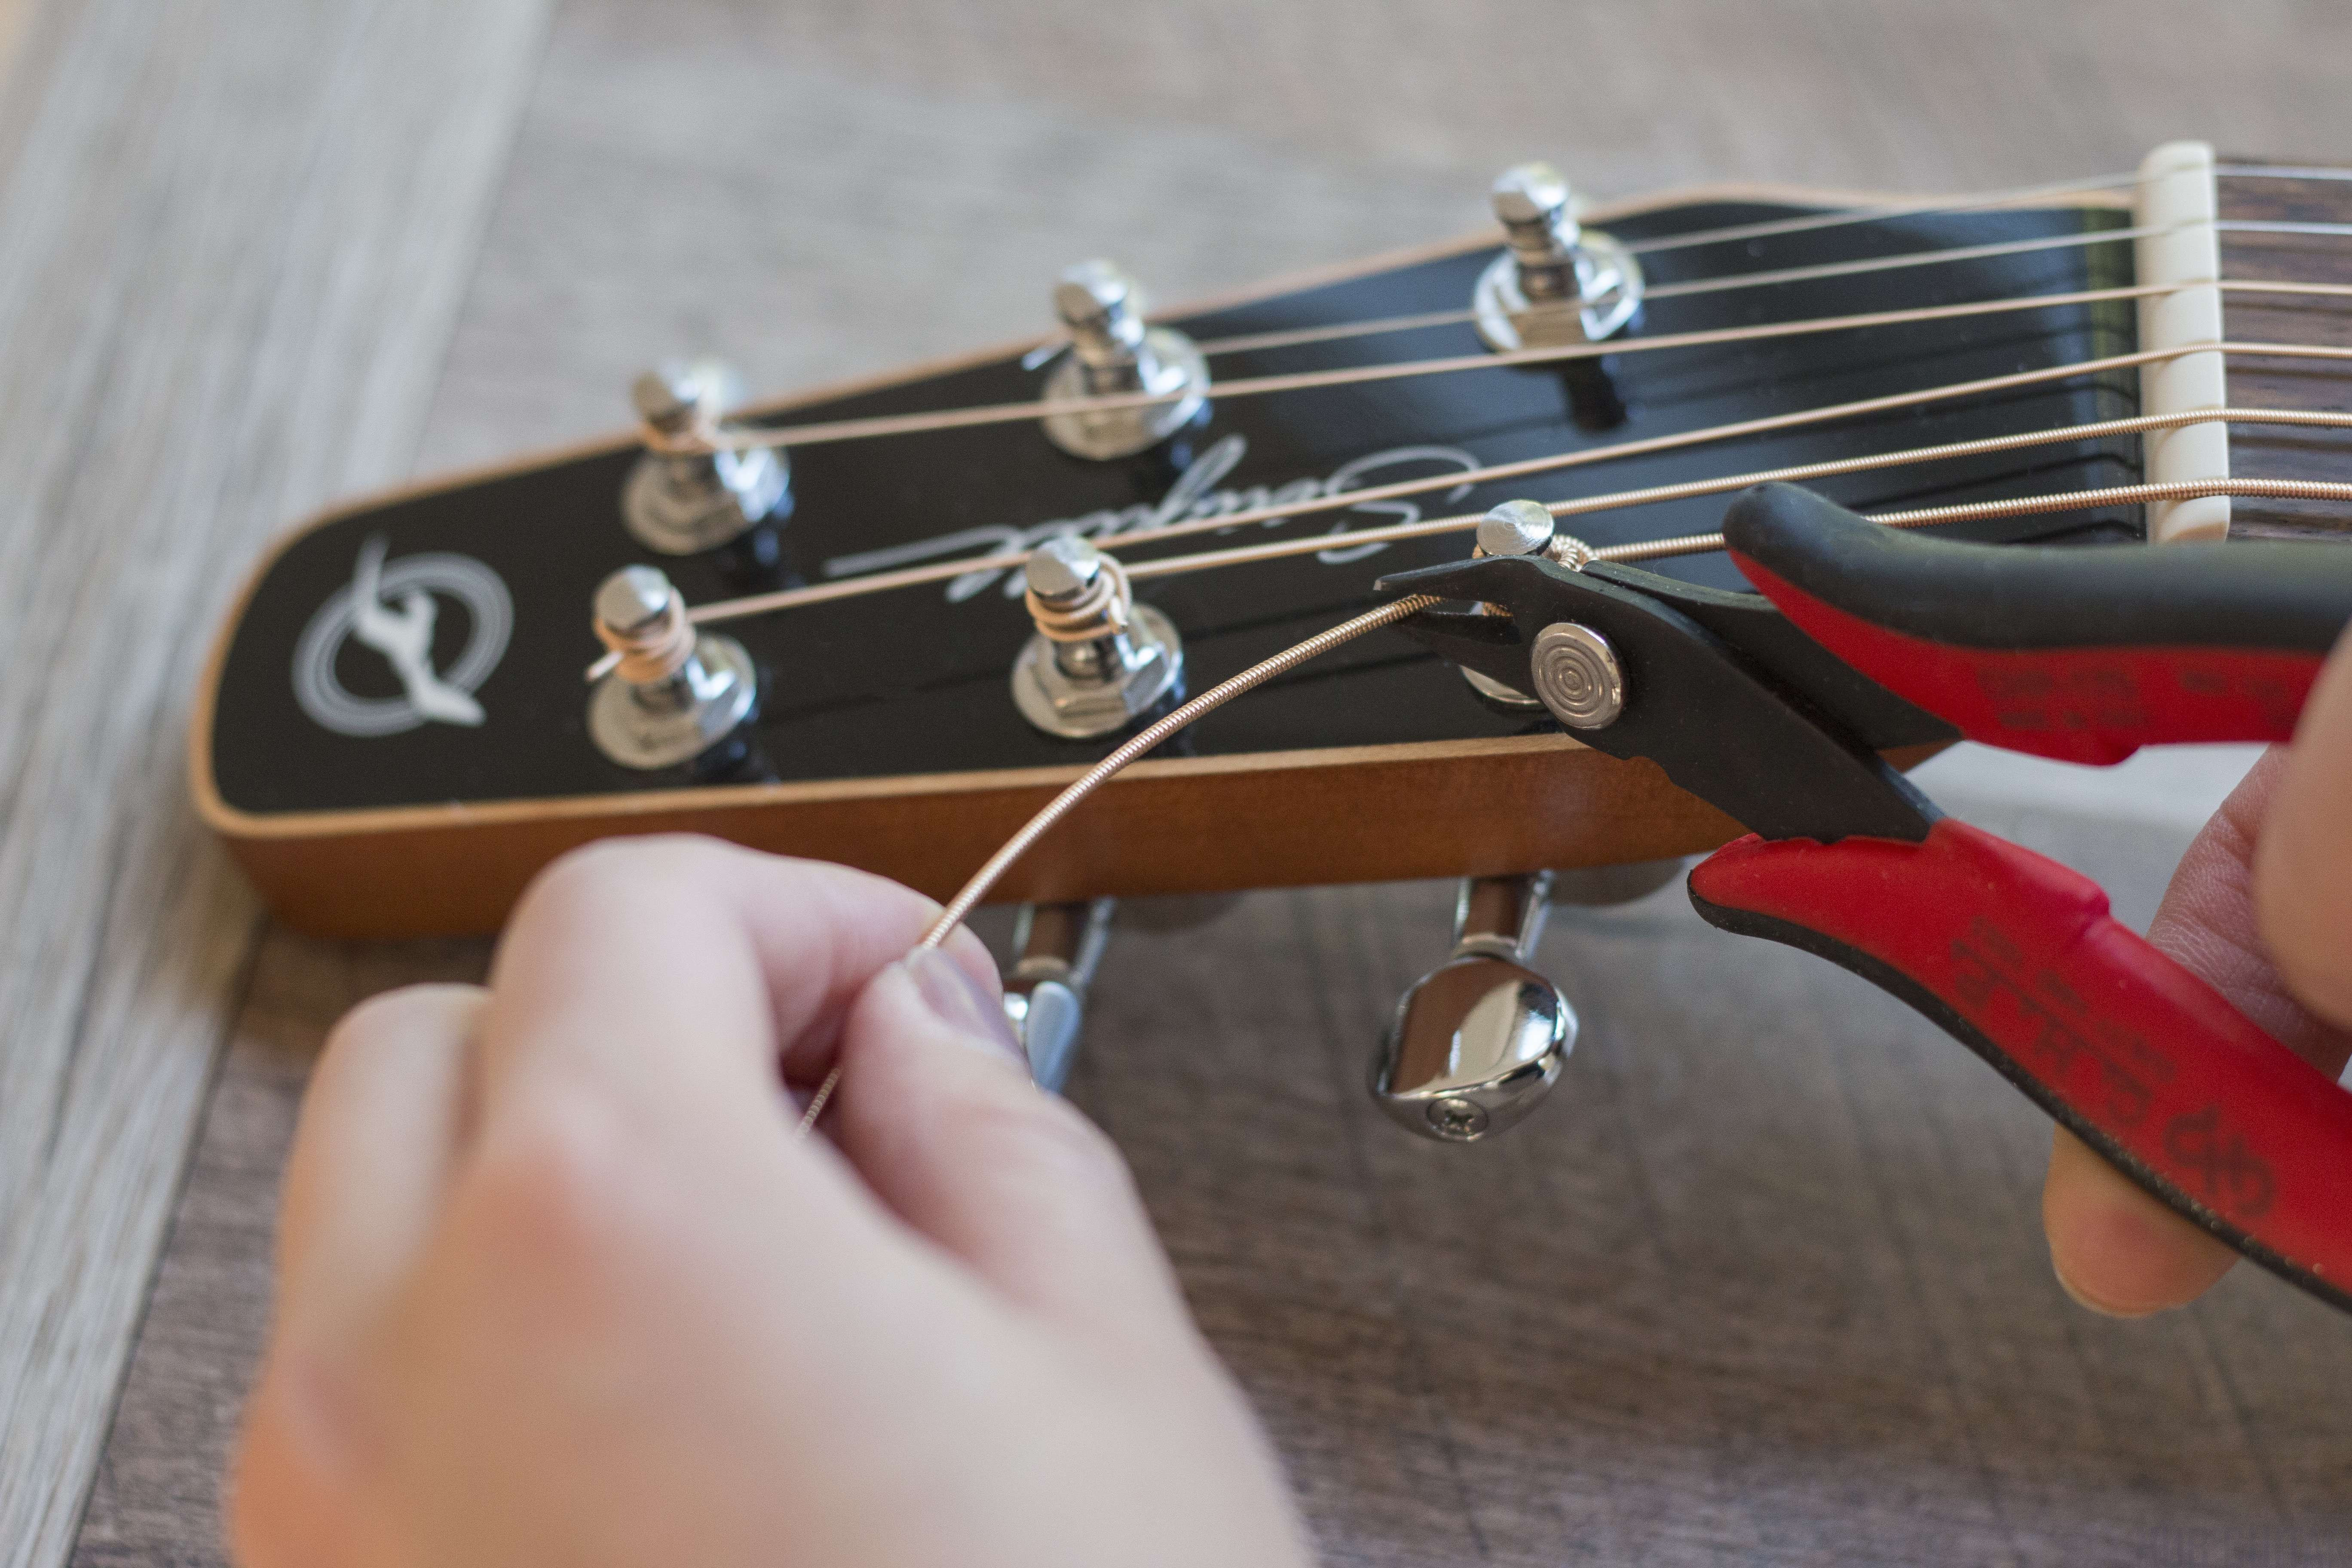
Alt text: Trimming excess guitar string ends at the headstock using wire cutters after restringing.
Step 8: Final Tuning
Do a final tuning check. Your guitar is now restrung and ready to play! You may need to fine-tune again after playing for a short while as the new strings continue to settle.
Changing guitar strings might seem daunting at first, but with practice, it becomes a quick and easy routine. Regular string changes are vital for maintaining your guitar’s sound and ensuring you always play with optimal tone and clarity. Enjoy the fresh sound of your newly strung guitar!