
Many guitar enthusiasts admire the iconic paint designs from the 1950s era, particularly the sunburst finishes that graced legendary guitars of the time. This guide delves into the process of recreating that sought-after 1950’s era guitar paint design, offering a detailed, step-by-step approach to achieving an authentic sunburst finish at home. We’ll explore techniques for veneering, grain filling, and spraying, all while focusing on methods and materials that echo the classic aesthetics of the 1950s.
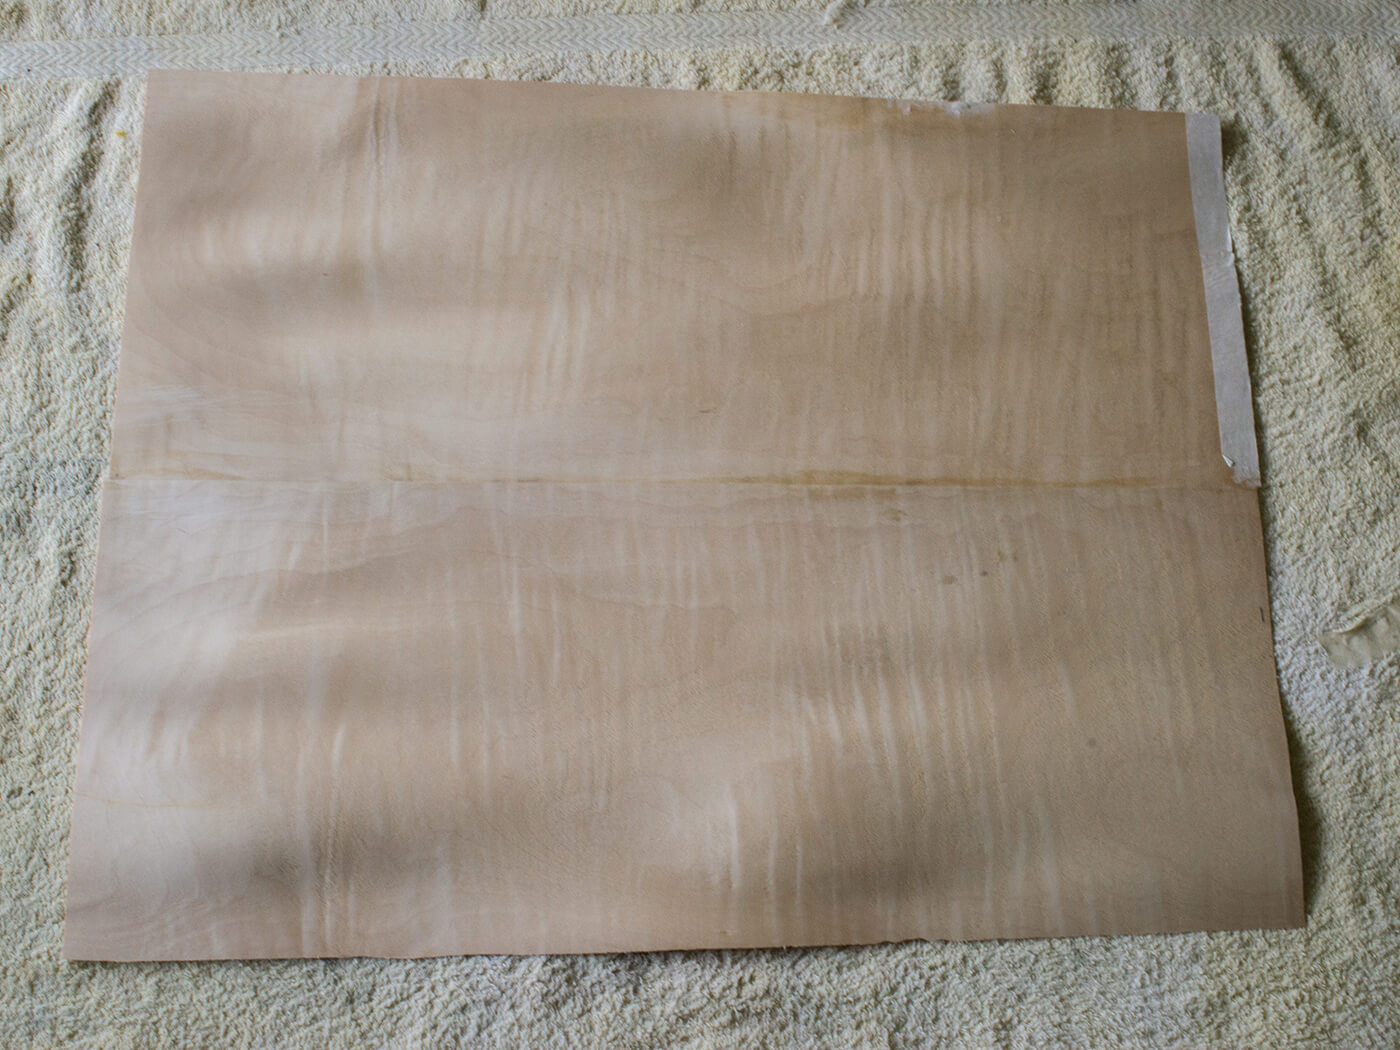 Bookmatched curly maple veneer sheets prepared for joining, a crucial step in achieving a 1950's era guitar paint design.
Strip Down
We’re joining this guitar refinishing journey mid-process, assuming the initial stages are complete. Essentially, the original finish has been removed using a stripper like Nitromors. Following this, the body binding is carefully detached, and the fretboard is separated from the neck to allow for veneer application to the back of the fretboard and to increase the neck’s depth. For those interested in a more in-depth look at these preliminary steps, you can refer to previous projects on Guitar.com, such as the Goldtop and Gretsch Anniversary conversions.
Veneering a curved surface using a vacuum press, a technique learned during a Gretsch restoration, is key here. Subsequently, a vacuum storage bag method was employed for concealing inlays and filled post holes in a Goldtop conversion. However, replicating a Burst-style top, characteristic of the 1950’s era guitar paint design, necessitates bookmatched veneer rather than single pieces used in those prior projects.
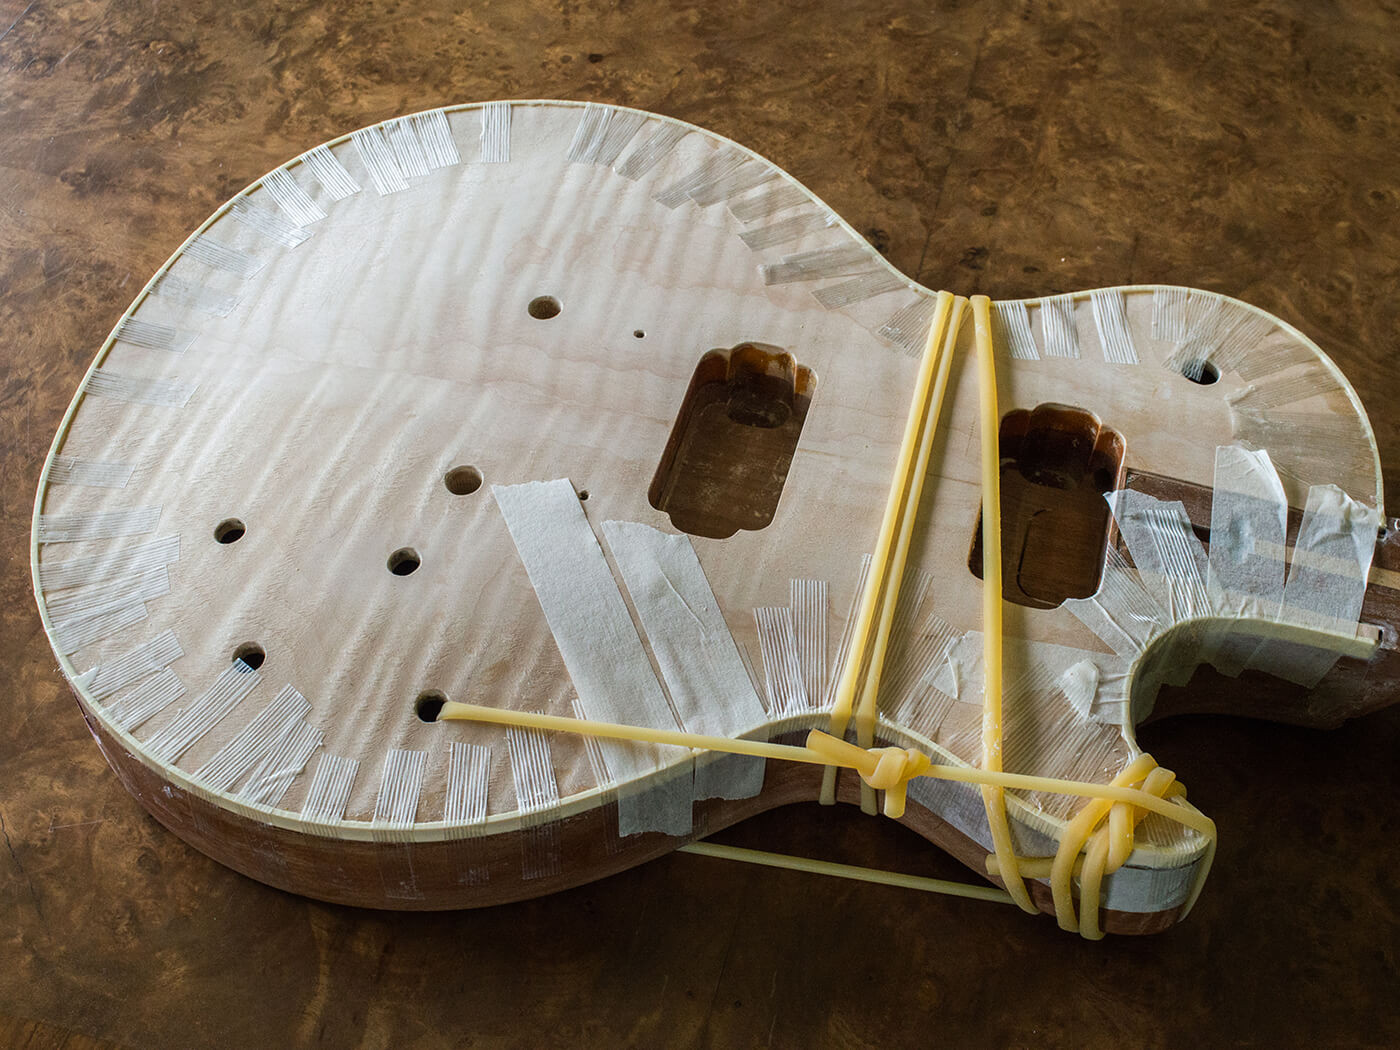
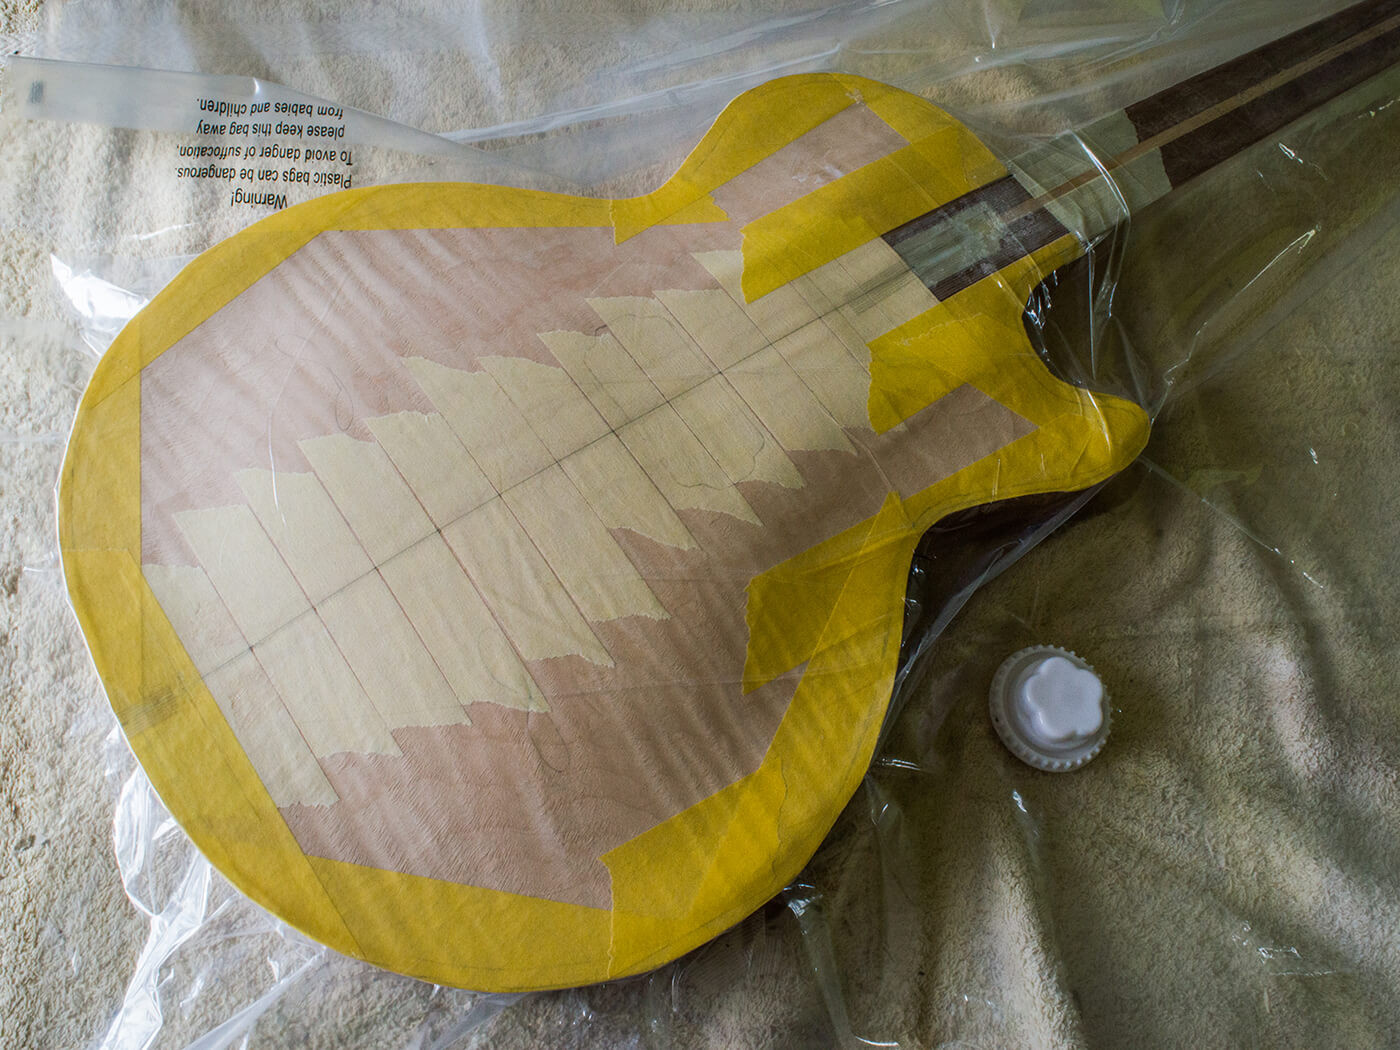 Guitar body in a vacuum press with yellow and pale masking tape, demonstrating the veneering process for a 1950's era guitar paint design project.
While some might attempt to pre-cut veneer to match the body’s curvature, joining the veneer pieces beforehand seems a more robust approach. The hypothesis is that a well-executed glue joint can surpass the strength of wood fibers themselves. For this project, figured maple veneer sourced from eBay is used, proving to be a surprisingly reliable resource for guitar building materials. Despite the veneer’s thin profile (approximately 0.4mm), the joining process mirrors that of acoustic guitar back plates.
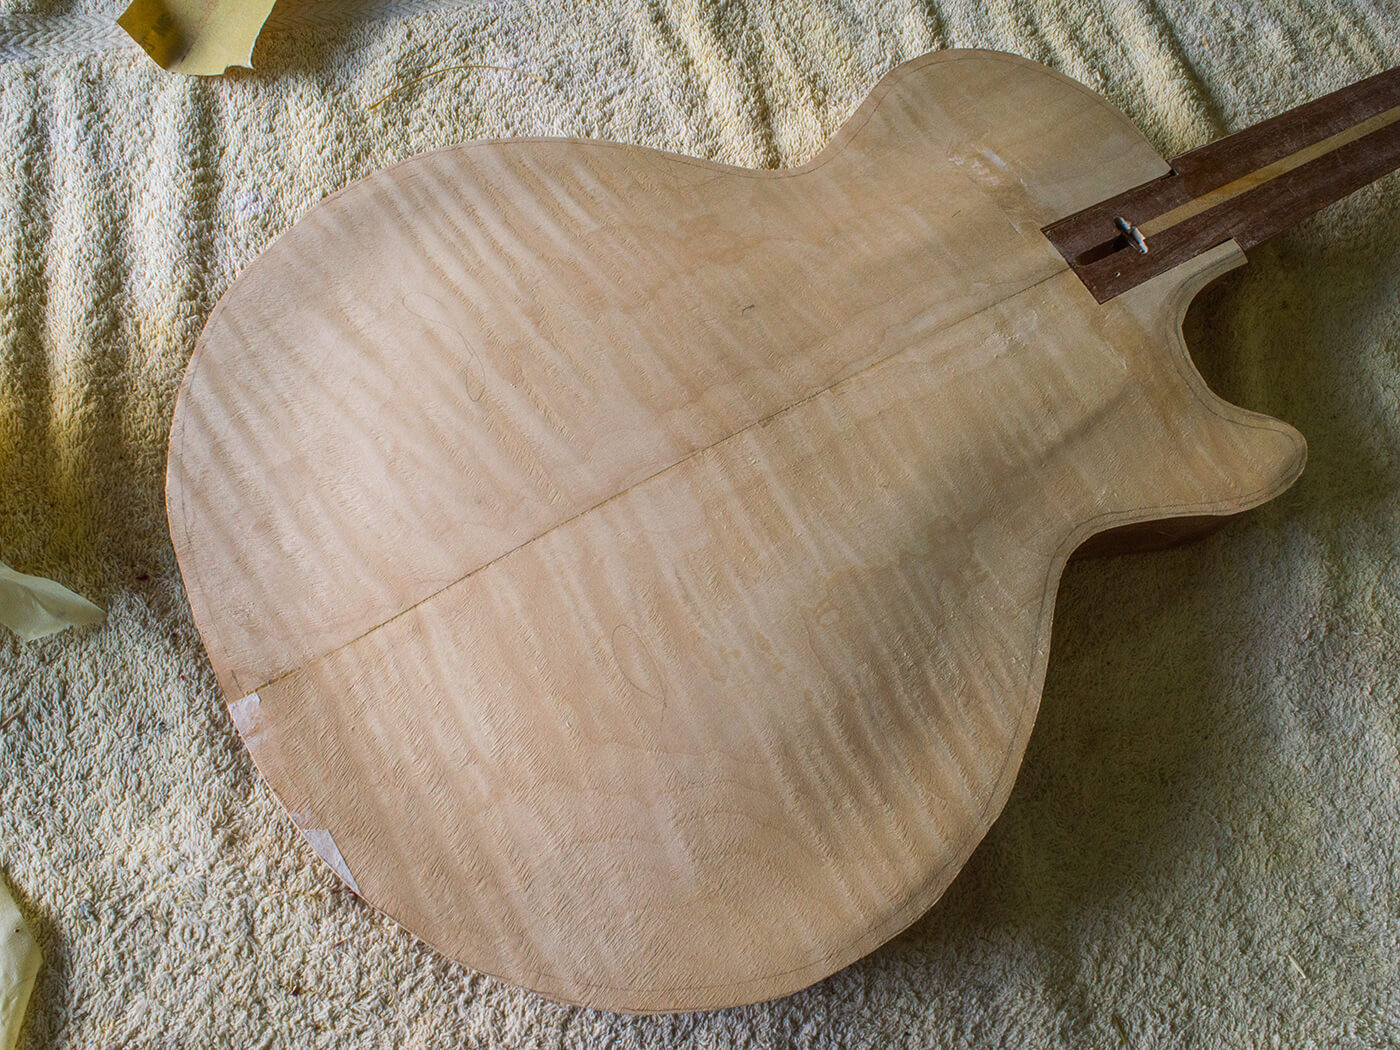 Veneer successfully applied to the guitar body, showcasing the initial stage of recreating a 1950's era guitar paint design.
The veneer pieces are carefully aligned and clamped to a shooting board. A plane, fitted with 320 grit sandpaper instead of a blade, is used to true the edges. Masking tape strips are employed to join the veneer sheets, utilizing their elasticity to pull the pieces together for a tight seam, as conventional clamps are unsuitable for this delicate task.
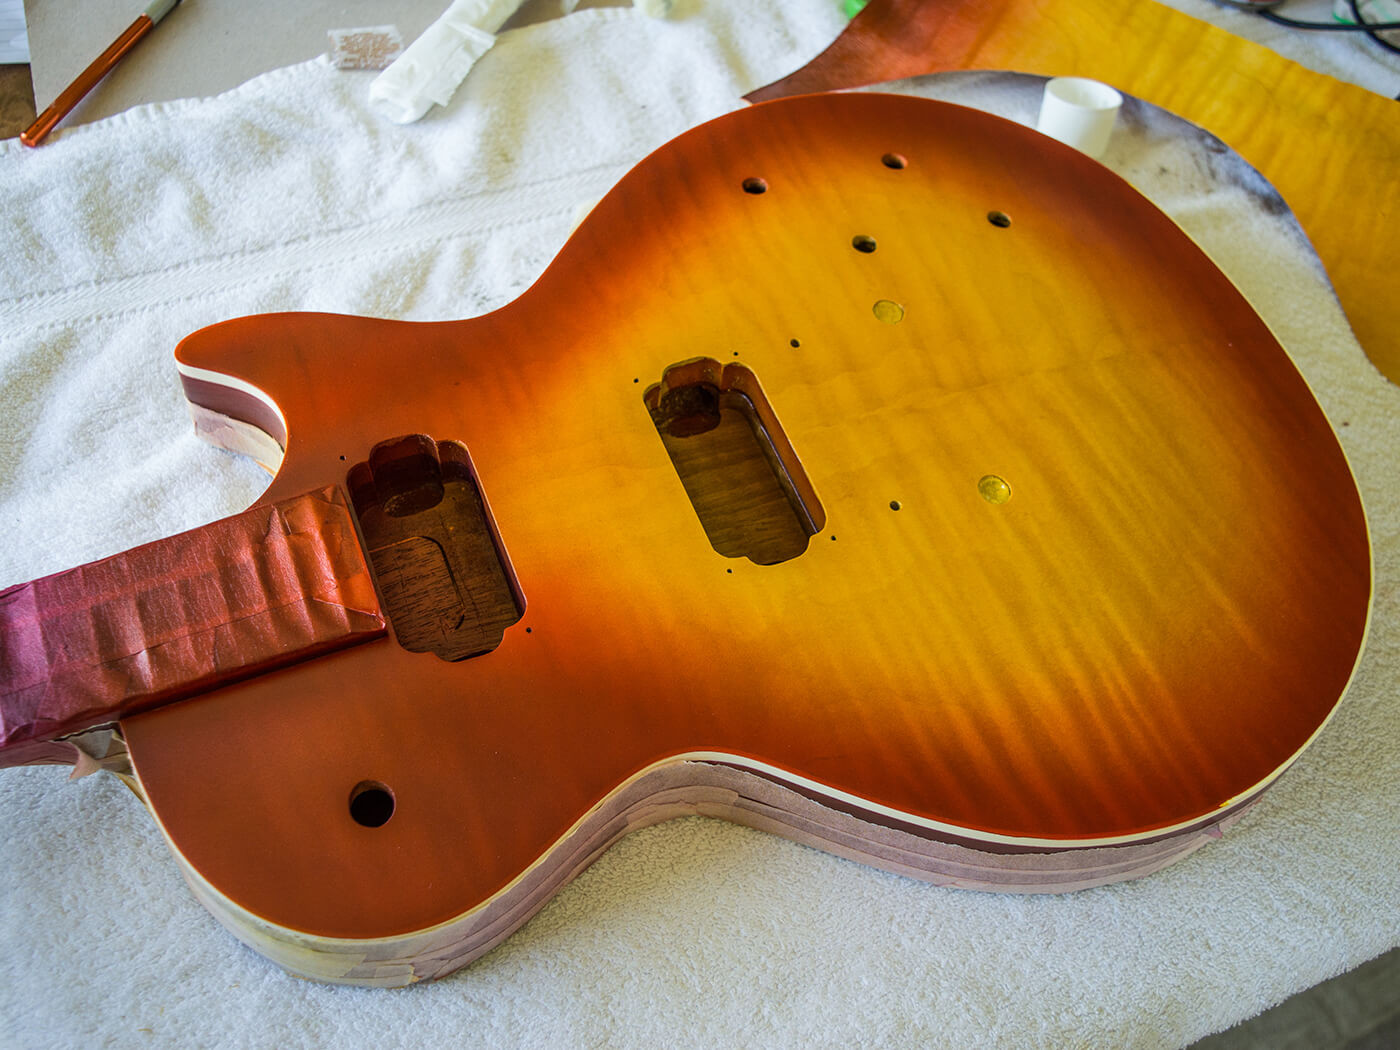
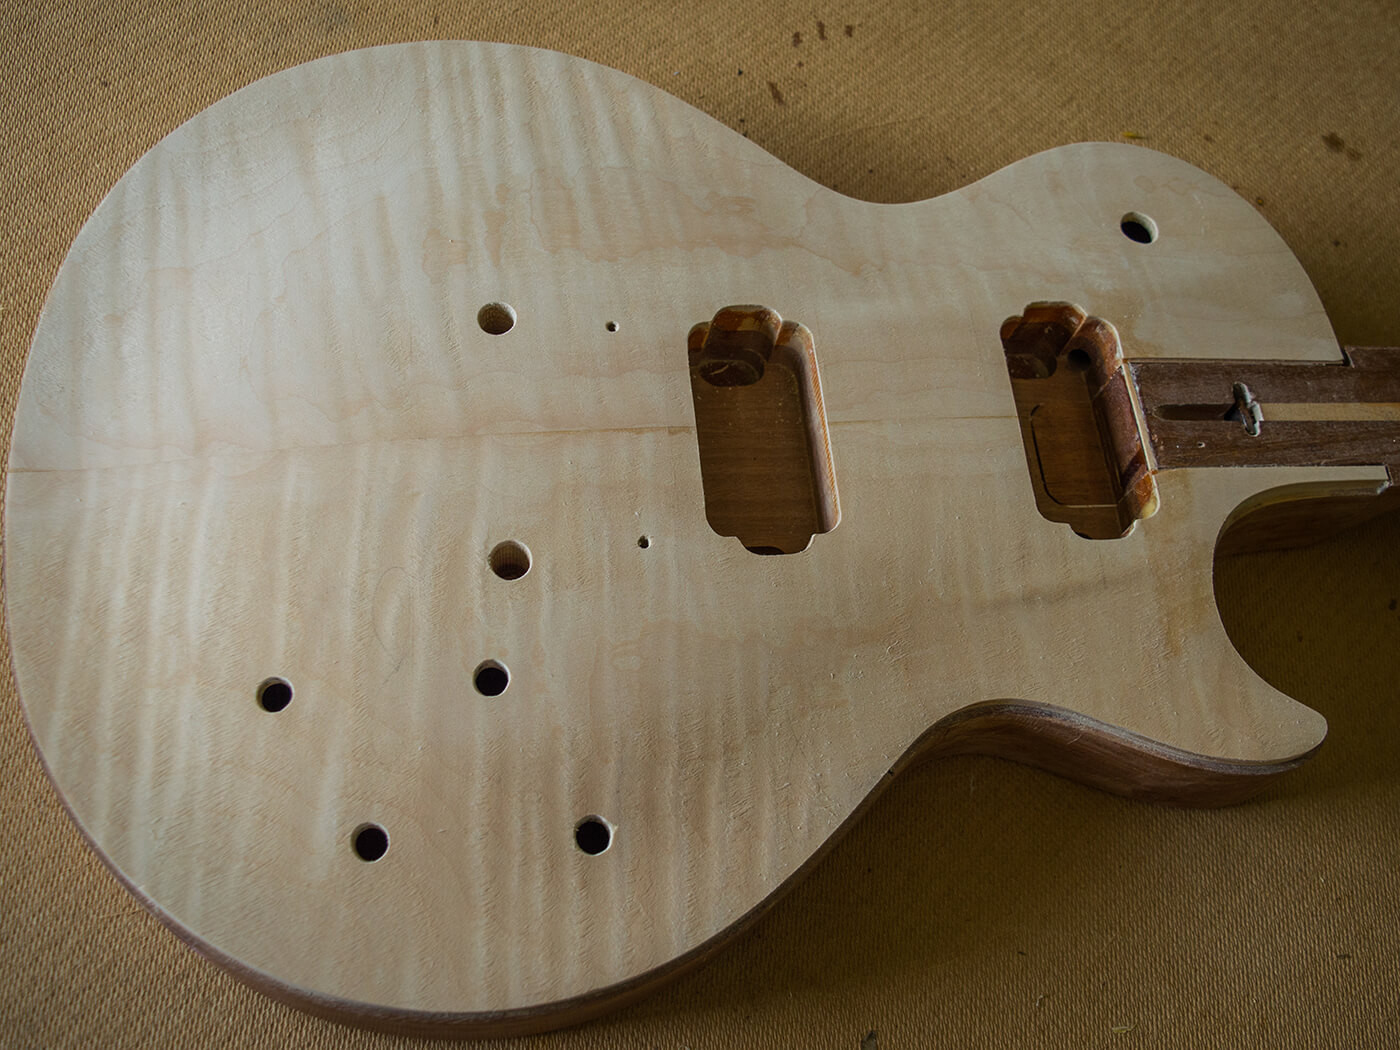 Veneered guitar body with trimmed edges and re-established holes, prepared for binding and sanding in the 1950's era guitar paint design process.
Titebond Original glue is applied to the opened veneer joint, a delicate operation given the wood’s thinness. The veneer sheets are then laid onto a flat surface protected with plastic packing tape to prevent sticking. As the pieces are pressed flat, the masking tape ensures a tight joint. After inspection for alignment and sanding any minor imperfections, the veneered top is ready for the next stage.
 Guitar body with binding being applied, a step towards achieving the authentic look of a 1950's era guitar paint design.
Drawing on lessons learned from the Goldtop project, minimal overhang is ensured, and masking tape reinforces the edges to prevent cracking. Cascamite glue is applied with a roller for bonding the veneer in a vacuum press for 24 hours, proving more reliable than Cold Press Veneer glue.
Back Together
The veneer edges are cleaned with a chisel, and any binding channel residue is removed before applying new binding. Sourcing off-white binding of the correct thickness for Grecos of this era can be challenging, but Eurospruce provides a suitable option that bends easily when heated. New fretboard binding is necessary due to the increased neck depth, and side dots are crafted from a tortoiseshell pickguard before the fretboard is re-glued to the neck. This is done once the top veneer has been sanded flush with the mahogany neck extension.
After sanding the body and neck, the ground wire and tailpiece bushings are reinstalled. A new nylon nut is created, and the guitar is reassembled to verify functionality before the finish is applied. Neck profiling is refined with the guitar strung, using templates derived from various 1950s Les Pauls, ensuring an authentic feel to match the 1950’s era guitar paint design.
Seeing Red
Gibson utilized red grain filler for 1950s Bursts, a key element in their iconic 1950’s era guitar paint design. Dartfords Thixotropic cherry red grain filler is chosen for this project. Despite grain filling being typically messy, this product is noted for its ease of application and cleanup. After drying overnight, it sands smoothly.
Applying the filler to bare wood stains the mahogany, necessitating masking off the neck, binding, and body front. After sanding and cleaning with a tack cloth, the masking is removed, filler-raised areas are leveled, and fresh masking is applied. Two mist coats of clear lacquer are followed by heavy coats of sanding sealer, leveled with 320 grit paper to create a smooth base for color coats.
 Guitar body back after red grain filling, highlighting the contrast against the clean binding in preparation for a 1950's era guitar paint design.
Manchester Guitar Tech’s aniline cherry lacquer is used for three coats on the neck and body. While pleased with the color, a slight darkening of the red grain filler with black might be considered for future projects to more closely emulate some variations within the 1950’s era guitar paint design spectrum. Tests on scrap mahogany suggest the color will deepen with tinted clear coats. Masking is removed, and any overspray is sanded off.
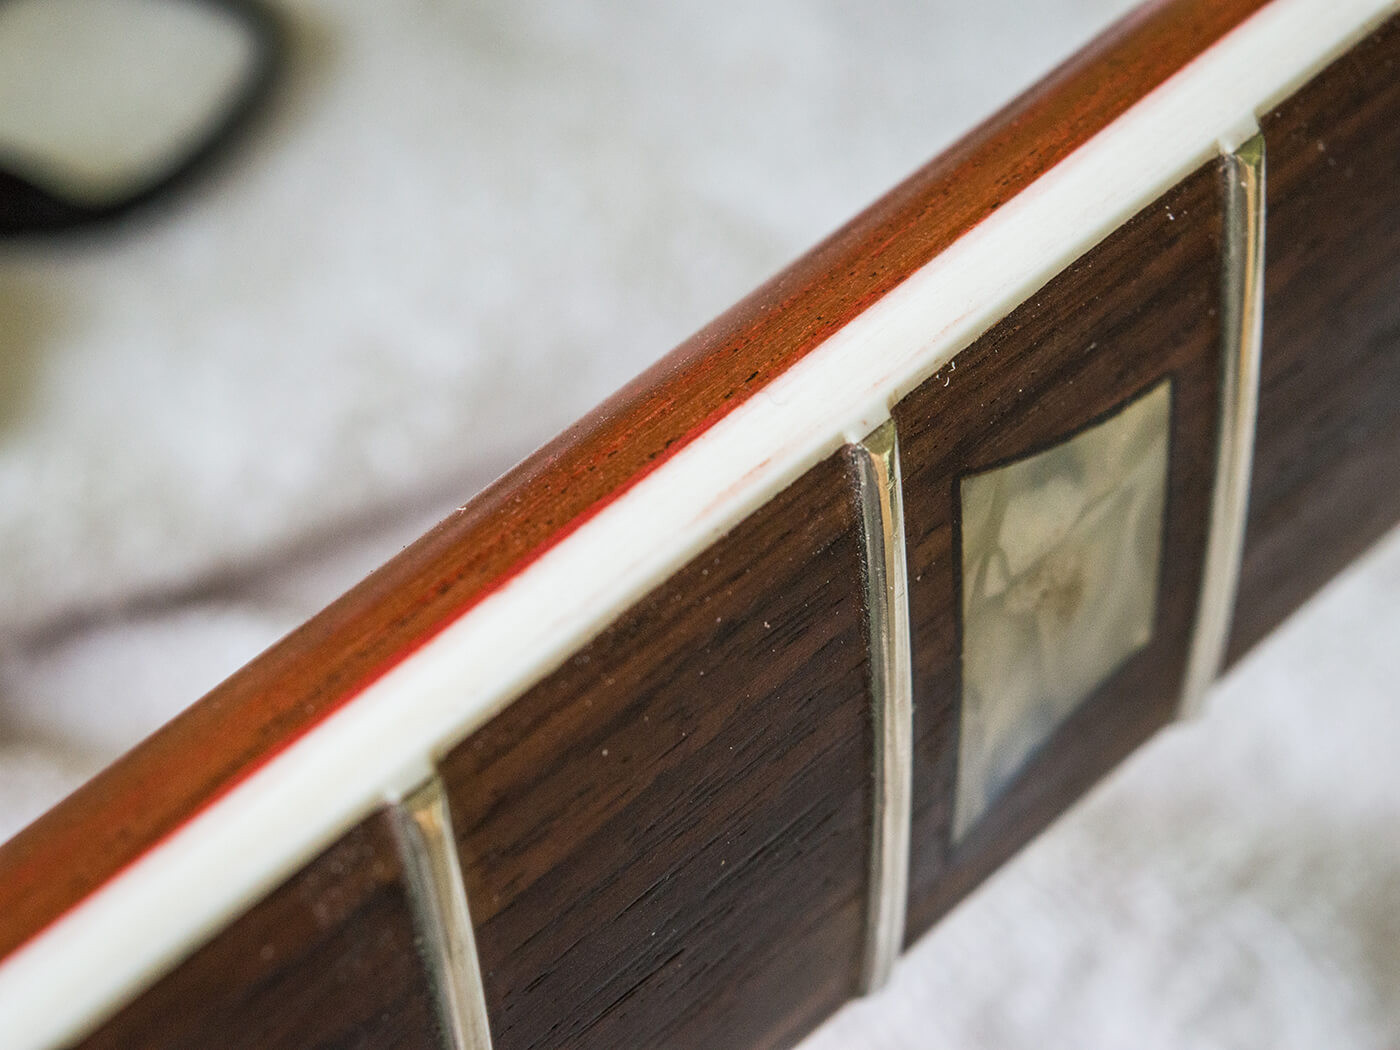 Close-up of guitar binding after spraying, showing the clean edge contrasting with the red overspray, a detail in achieving a crisp 1950's era guitar paint design.
Beginning to Burst
Aniline dye’s fading characteristic is central to replicating a vintage sunburst finish, a hallmark of the 1950’s era guitar paint design. All non-maple body parts are masked. Spraying begins with sealer coats, sanded for a perfectly flat surface.
Gibson reportedly used aniline yellow, but commercially available aniline yellow lacquer aerosols are scarce. Therefore, mixing a custom blend is necessary. The challenge lies in spraying self-tinted lacquer without professional spray equipment.
Fortunately, affordable solutions exist: a modeling airbrush with propellant, and a Preval sprayer. The Preval sprayer, an aerosol unit attaching to a lacquer-filled vessel, allows using tinned or bottled lacquer with replaceable aerosol canisters. Sunburst colors will be applied using these tools, while clear gloss coats will use Manchester Guitar Tech’s clear gloss aerosols.
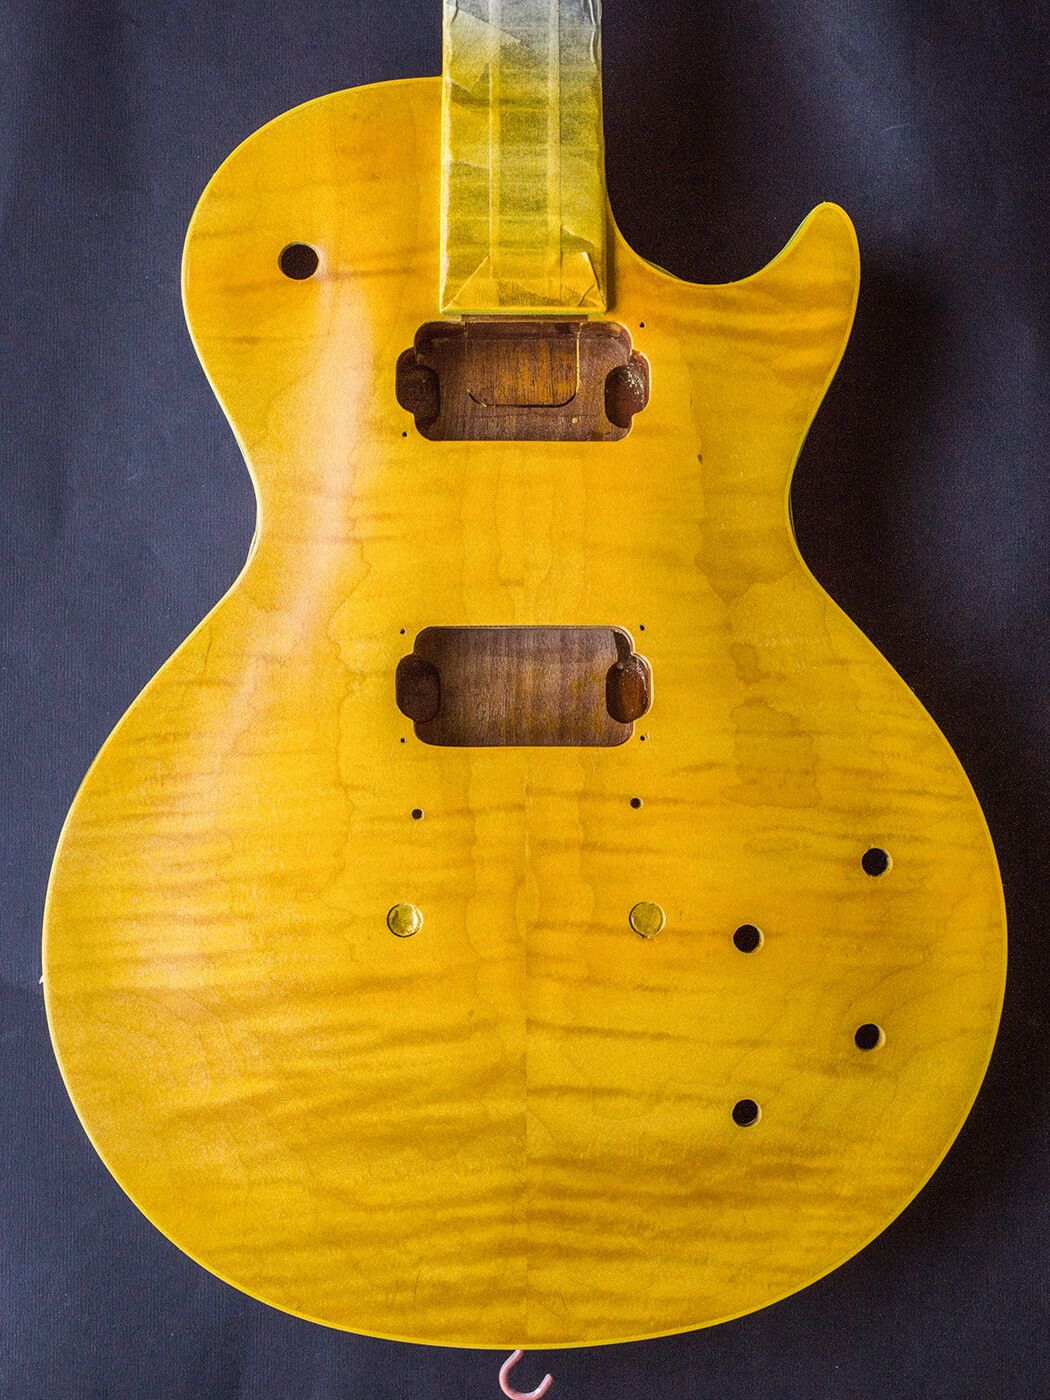 Guitar body after two coats of aniline yellow, the first color layer in creating a vibrant 1950's era guitar paint design sunburst.
Dyeing to Know
Alcohol-soluble yellow aniline dye powder from touchstonetonewoods.co.uk is dissolved in isopropyl alcohol with a touch of acetone to aid the process. The dissolved dye is filtered through a 190-micron paint strainer as it’s added to clear lacquer. The alcohol/acetone volume is accounted for in the thinner mix, reducing the required cellulose thinner. A lacquer to thinner/solvent ratio of approximately 60:40 is recommended.
Test pieces sprayed with aniline yellow yield results closer to vintage Gibson yellow than off-the-shelf amber tints. The yellow enhances the wood grain with a golden hue. Masking off non-maple parts, the Preval sprayer is used to apply a couple of coats of yellow to the top, anticipating a toning down effect from fading and darkened top coats, crucial for an authentic 1950’s era guitar paint design.
 Guitar edges shaded with a greenish-grey tone, an intermediate step in achieving the nuanced color transitions of a 1950's era guitar paint design.
In the Shade
A shading coat is applied before the red, mixing blue, medium brown, and black into cellulose thinners, resulting in a RAF blue/grey shade. This is mixed 50:50 with gloss cellulose for airbrush application. This greenish-grey shadow around the edges immediately mellows the aniline yellow, contributing to the nuanced look of a 1950’s era guitar paint design.
For the aniline red burst, pre-mixed aniline red from Eurospruce is chosen after testing revealed the cherry red used on the mahogany to be too dark and aerosol spitting potentially problematic. The Eurospruce red appears closer to the desired shade when sprayed over yellow and blue/black shaded maple veneer.
 Completed sunburst finish on the guitar body, demonstrating the smooth color transition characteristic of a 1950's era guitar paint design.
The airbrush’s superior atomization is ideal for achieving a smooth transition from yellow to red, essential for a high-quality sunburst finish. Color depth and shade can shift as lacquer dries and under varying lighting. Gradual application is advised. Tinted lacquer can be stored airtight for future use, allowing for a step-by-step approach to spraying the burst, especially beneficial for beginners aiming for a precise 1950’s era guitar paint design.
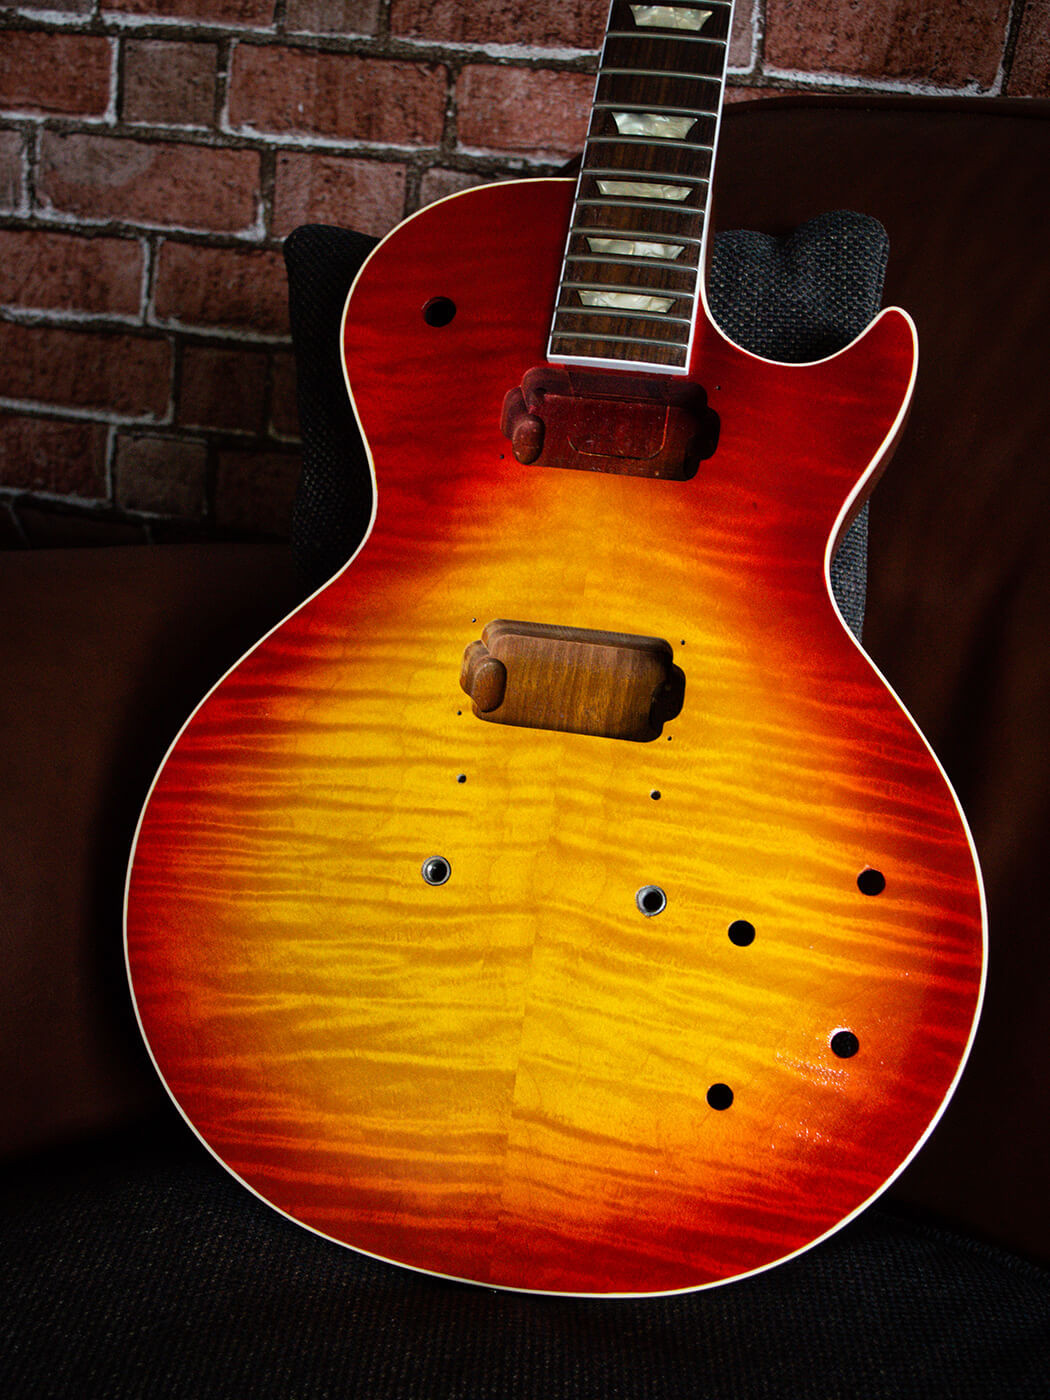 Finished guitar body with a sunburst paint design, ready for final clear coats and assembly, embodying the aesthetic of the 1950s era.
Mixing custom colors provides control over achieving the desired look, albeit requiring practice. While technically satisfied with this sunburst, the intention is to allow natural fading and aging processes to further transform it into the preferred vintage finish. Binding scraping and heavy clear gloss coats conclude this stage. The final project installment will explore aniline dye fading and fine-tuning the look with a special tinted lacquer before relic’ing and reassembly, ultimately completing this journey to recreate a classic 1950’s era guitar paint design.
For more DIY workshops and guides, click here.