
For any guitarist, understanding the anatomy of their instrument is crucial. Among the many components that contribute to a guitar’s playability and sound, the truss rod stands out as a seemingly simple yet incredibly vital element. Whether you’re strumming chords on an acoustic or shredding riffs on an electric, the truss rod plays a silent but essential role in maintaining your guitar’s neck and overall performance. If you’re diving into the world of guitars, grasping the function and purpose of the Truss Rod Guitar system is a fundamental step towards becoming a knowledgeable player.
What Exactly is a Truss Rod?
At its core, a truss rod is a slender metal rod that resides within the neck of your guitar. It stretches from the nut, located at the headstock end where the strings begin, all the way down to the heel, where the neck is joined to the guitar’s body. This rod is strategically placed just beneath the fretboard, acting as an internal support structure. Access to the truss rod is typically found via a small opening situated on the headstock, often concealed by a decorative cover made of wood or plastic and secured with screws. However, it’s worth noting that some guitars, particularly older nylon-string models and certain acoustic designs, feature a truss rod access point through the soundhole itself.
To visualize the truss rod’s placement within the guitar neck, consider these cross-sectional images of a Taylor guitar neck, revealing the truss rod nestled inside.
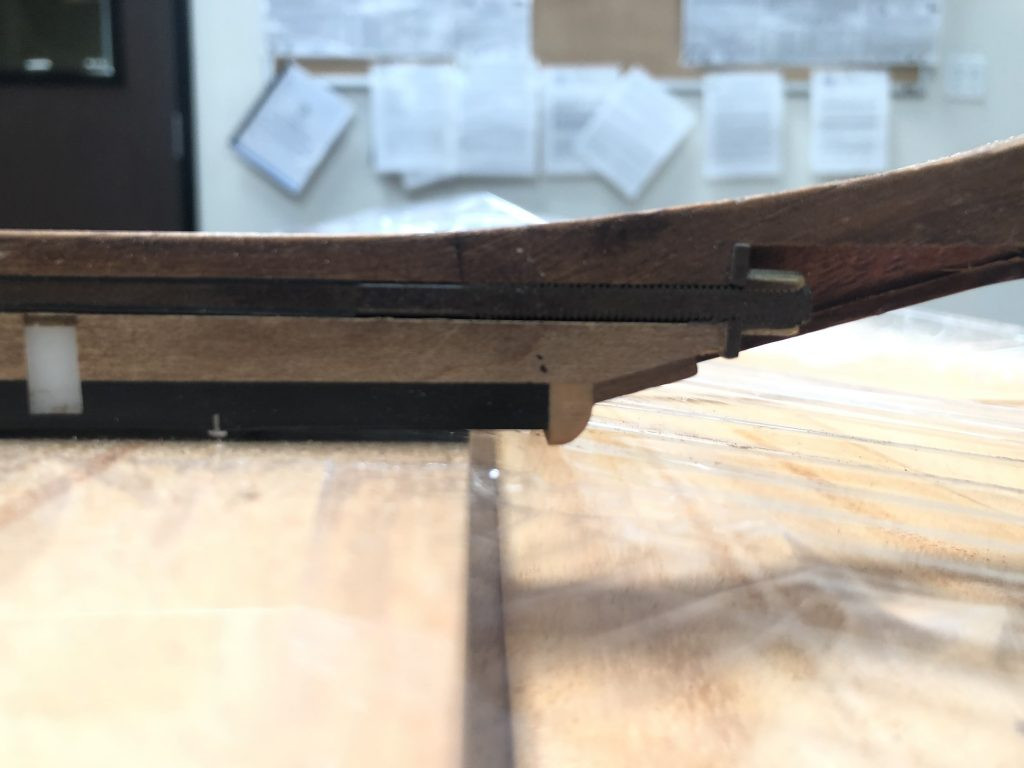 Truss rod access point at the headstock of a Taylor guitar
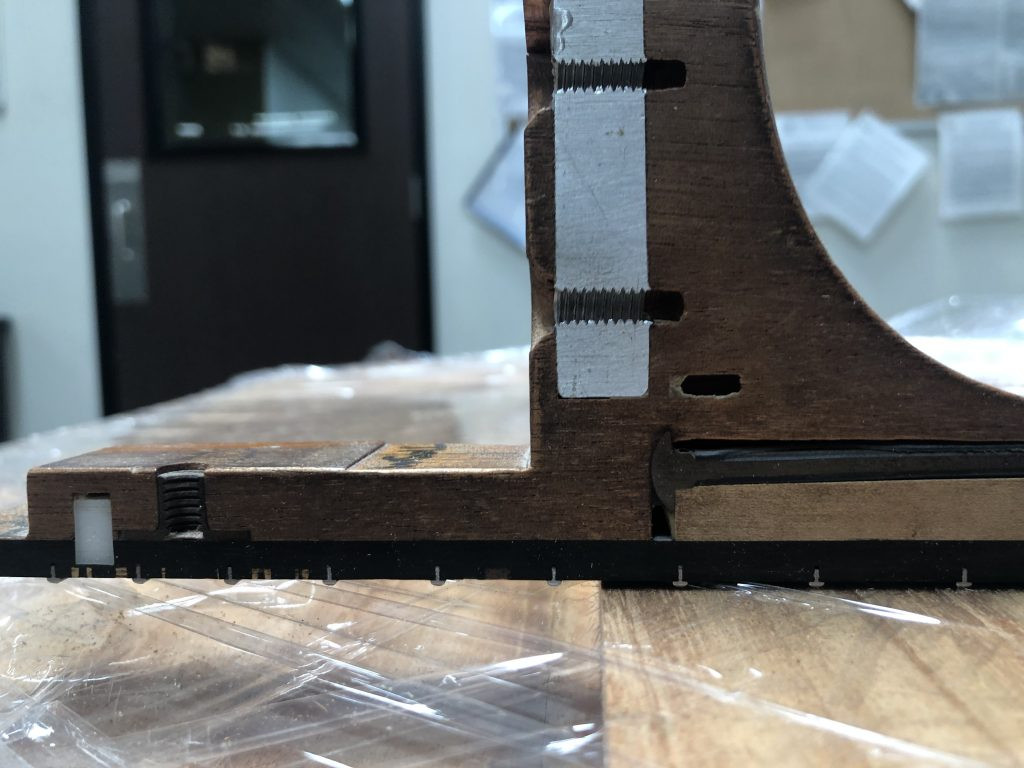 Truss rod placement at the heel of a Taylor guitar neck
The Vital Role of the Truss Rod in Guitars
The fundamental purpose of the truss rod, in both electric and acoustic steel-string guitars, is to counteract the immense tension exerted by the strings. The combined pull of guitar strings can be surprisingly significant; even light gauge acoustic strings can exert up to 180 pounds of force, constantly pulling upwards on the neck and bridge of the instrument. Without the truss rod, this relentless tension would cause the guitar neck to bow and bend over time, drastically impacting playability and potentially causing damage. The truss rod acts as a counter-force, stabilizing the neck and ensuring it remains straight and functional under string pressure.
Beyond just preventing damage, the truss rod plays a critical role in adjusting the neck relief of your guitar. Neck relief refers to the slight degree of bow or curvature intentionally built into a guitar neck. This relief is essential for comfortable playing, as it provides space for the strings to vibrate freely without buzzing against the frets. Adjusting the truss rod allows guitarists to fine-tune this neck relief to match their individual playing style and preferences. The ideal amount of relief is subjective and depends heavily on a player’s technique and attack – there’s no single “perfect” setting that suits everyone.
It’s a common misconception that the truss rod is primarily for adjusting the action of a guitar. While adjusting the truss rod can influence action, it’s not its primary function, and it’s not a complete solution for action adjustments. Action refers to the distance between the strings and the fretboard, which directly impacts how easy or difficult it is to press down the strings. While truss rod adjustments can be a step in setting the action, achieving optimal action often requires a more comprehensive setup, potentially involving adjustments to the neck angle or the bridge saddle. Attempting to solely use the truss rod to compensate for significant action issues, such as a neck angle problem causing excessively high strings, can lead to over-adjustment and new problems like fret buzz.
Adjusting Your Guitar’s Truss Rod: A Step-by-Step Guide
For minor adjustments to your guitar’s neck relief, tweaking the truss rod at home is often a straightforward process. It’s important to distinguish between minor adjustments and a full guitar setup, as major issues may require professional attention. Glen Wolff, Customer Service Manager at Taylor Guitars, offers reassuring advice on home truss rod adjustments:
There are a lot of myths and scary stories about adjusting the truss rod. People are told, “Don’t touch it, you could snap it,” or “Just adjust the saddle, it’s safer than messing with the truss rod.” Some of this comes from stories of older guitars that someone may have had issues with. But here’s what you really need to know. Modern guitars have working, stable truss rods. The truss rod is in the neck so that the neck can be adjusted. It’s meant to be used to add or reduce the relief in the neck, to compensate for the string tension pulling on it. There’s no risk in making a truss rod adjustment to your Taylor. Follow our instructions and watch the video demo on our website and you’ll be better off for knowing how to do it.
The adjustment process itself is relatively simple. Begin by sighting down the guitar neck from the headstock towards the body. This perspective allows you to visually assess the neck’s straightness and identify any bowing. If you observe a downward bow, meaning the neck curves away from the strings in the middle, this indicates excessive relief, and you’ll need to tighten the truss rod. To do this, use the appropriate truss rod wrench (often included with the guitar or readily available) and turn it clockwise in small increments, such as a quarter or half turn. Conversely, if the neck bows upwards, curving towards the strings, it signifies insufficient relief. In this case, you’ll need to loosen the truss rod by turning it counter-clockwise, again in small increments. Remember the common mnemonic: “righty-tighty, lefty-loosey.”
After each small adjustment, re-sight the neck to check your progress. It’s crucial to make gradual adjustments and avoid forcing the truss rod.
When to Seek Professional Help
While minor truss rod adjustments are often manageable at home, there are situations where seeking professional assistance from a qualified guitar technician or luthier is advisable. If you find that truss rod adjustments alone are not resolving your guitar’s playability issues, or if you’re uncomfortable performing the adjustments yourself, it’s best to consult an expert. Complex problems like significant neck bowing, persistent fret buzz even after adjustment, or issues with overall guitar action that extend beyond simple truss rod tweaks often require specialized knowledge and tools. A skilled luthier can diagnose the root cause of the problem, perform more advanced adjustments, and ensure your guitar is set up for optimal performance. For Taylor guitar owners, contacting their customer service line can also be a helpful resource for guidance and referrals to authorized service centers.
Conclusion
The truss rod, though hidden within your guitar’s neck, is an indispensable component that directly impacts playability and tone. Understanding its function and how to perform basic adjustments empowers guitarists to maintain their instruments and optimize their playing experience. While professional setups are sometimes necessary, learning to adjust your truss rod guitar yourself can be a rewarding skill that keeps your guitar playing and sounding its best.