Wiring a guitar pedal board can be tricky, but guitarplayers.net is here to help you achieve a tidy and efficient setup. This guide offers a step-by-step approach to organizing your pedals and cables, ensuring optimal performance and a clean look for your pedalboard. Learn how to achieve a professional-grade wiring setup that enhances your guitar playing experience.
1. What Are The Essential Tools And Materials Needed To Wire A Guitar Pedal Board?
To wire a guitar pedal board effectively, you need several key tools and materials. These include:
- Pedalboard: The foundation for organizing your pedals.
- Power Supply: To provide consistent power to all your pedals. According to research from Truetone, in September 2023, a reliable power supply reduces noise and ensures optimal pedal performance.
- Patch Cables: Short cables to connect your pedals together.
- Pedal Couplers: Alternatives to patch cables for connecting pedals that are close together.
- Velcro: To secure pedals to the board.
- Cable Ties or Zip Ties: To bundle and manage cables.
- Wire Cutters/Strippers: For modifying cables if necessary.
- Screwdriver Set: For mounting power supplies or pedals.
- Multimeter: For testing connections and troubleshooting (optional).
- ізоляційна стрічка (Electrical Tape): For insulating and securing connections.
Having these materials on hand will make the wiring process smoother and more efficient.
2. How Do You Plan The Layout Of Your Guitar Pedal Board?
Planning the layout of your guitar pedal board is crucial for optimizing signal flow and ease of use. Start by placing your most frequently used pedals in easily accessible locations.
- Signal Chain: Consider the order of your pedals based on their function. Overdrive and distortion pedals typically go early in the chain, while modulation and delay effects come later.
- Pedal Size: Arrange larger pedals first to ensure they fit comfortably on the board.
- Power Requirements: Group pedals with similar power requirements together to simplify power distribution.
- Cable Length: Minimize cable runs to reduce signal loss and noise. According to an article in Guitar Player Magazine in May 2024, shorter cable lengths preserve signal integrity.
Taking the time to plan your layout ensures a clean, efficient, and user-friendly pedalboard.
3. What Is The Best Way To Secure Pedals To The Pedal Board?
Securing pedals to your pedal board is essential for preventing them from moving during transport or performance. The most common method involves using Velcro.
- Industrial-Strength Velcro: This provides a strong, reliable hold.
- Application: Cut the Velcro to fit the bottom of each pedal and the corresponding area on the pedalboard.
- Cleaning: Ensure both surfaces are clean before applying the Velcro for optimal adhesion.
- Alternative Methods: Consider using dual-lock fasteners for an even stronger hold, especially for heavier pedals.
Properly securing your pedals ensures they stay in place, maintaining your carefully planned layout.
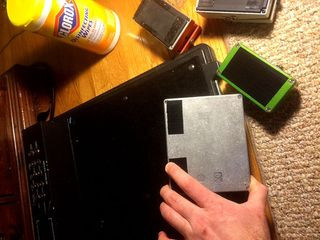 Velcro strips attached to the back of guitar effect pedals for secure mounting on a pedalboard
4. How Do You Optimize Cable Management On A Guitar Pedal Board?
Effective cable management is key to a tidy and functional pedal board. Here are some strategies:
- Short Patch Cables: Use the shortest patch cables possible to minimize excess cable length.
- Cable Ties: Bundle cables together using cable ties or zip ties to keep them organized and out of the way.
- Cable Routing: Plan the path of your cables to avoid crossing over pedals or creating a tangled mess.
- Under-Board Routing: If your pedalboard allows, route cables underneath the board to keep the top surface clean.
- Cable Sleeves: Use cable sleeves or tubing to group and protect multiple cables.
Proper cable management not only improves the appearance of your pedalboard but also reduces the risk of accidental disconnections and signal interference.
5. How Do You Choose The Right Power Supply For Your Guitar Pedals?
Selecting the right power supply is critical for ensuring your pedals operate correctly and without unwanted noise.
- Voltage and Current: Check the voltage and current requirements of each pedal and choose a power supply that meets those needs. Most pedals require 9V DC, but some may need 12V or 18V.
- Isolated Outputs: Opt for a power supply with isolated outputs to prevent ground loops and reduce noise. According to research from Voodoo Lab, in February 2022, isolated outputs are essential for a clean signal.
- Number of Outputs: Ensure the power supply has enough outputs to power all your pedals simultaneously.
- Power Capacity: Calculate the total current draw of your pedals and choose a power supply with sufficient capacity.
- Brand Reputation: Consider reputable brands known for their reliability and performance.
Choosing the correct power supply guarantees consistent power and optimal performance for your entire pedalboard setup.
6. What Are Some Common Mistakes To Avoid When Wiring A Guitar Pedal Board?
Several common mistakes can lead to problems when wiring a guitar pedal board. Avoiding these pitfalls can save you time and frustration:
- Using Low-Quality Cables: Inferior cables can degrade your signal and introduce noise.
- Overcrowding: Cramming too many pedals onto a small board can make cable management difficult.
- Ignoring Power Requirements: Failing to provide adequate power can cause pedals to malfunction or produce unwanted noise.
- Poor Cable Management: Neglecting to organize cables can lead to a tangled mess and accidental disconnections.
- Not Testing: Failing to test your setup after wiring can result in обнаруживши problems during a performance.
By avoiding these common mistakes, you can ensure a reliable and efficient pedalboard setup.
7. How Can You Troubleshoot Common Issues With A Wired Guitar Pedal Board?
Troubleshooting is a necessary part of maintaining a guitar pedal board. Here are some common issues and how to address them:
- No Sound: Check all connections, including power, input, and output cables.
- Excessive Noise: Ensure your power supply has isolated outputs and that your cables are of good quality.
- Weak Signal: Verify that all pedals are functioning correctly and that your cable lengths are minimized.
- Popping Sounds: These can be caused by DC offset; try using a buffered pedal early in the chain.
- Ground Loops: Use a ground lift adapter or an isolated power supply to eliminate ground loops.
Regularly checking and maintaining your pedalboard can prevent many of these issues.
8. How Do You Optimize Signal Flow On A Guitar Pedal Board?
Optimizing signal flow is crucial for achieving the best possible sound from your pedal board. Here are some tips:
- Buffer Placement: Place a buffer pedal early in the chain to prevent signal loss, especially with long cable runs. According to research from Dunlop Manufacturing, in January 2023, buffers maintain signal integrity.
- True Bypass vs. Buffered Pedals: Understand the difference between true bypass and buffered pedals and use them strategically. True bypass pedals preserve the signal when disengaged, while buffered pedals can strengthen the signal.
- Experiment with Pedal Order: Try different pedal orders to find the configuration that works best for your sound.
- Minimize Cable Length: Use the shortest cables possible to reduce signal degradation.
- Use a Signal Splitter: If you’re using multiple amplifiers, a signal splitter can help maintain signal integrity.
Experimentation and careful planning can greatly improve the signal flow and overall sound quality of your pedalboard.
9. What Are The Benefits Of Using A Looper Pedal On Your Guitar Pedal Board?
A looper pedal can be a valuable addition to your guitar pedal board, offering numerous benefits for practice, songwriting, and performance.
- Practice Tool: Loopers allow you to record and play back riffs or chord progressions, enabling you to practice soloing or experiment with different sounds.
- Songwriting: Use a looper to build layers of sound and create complex arrangements.
- Live Performance: Loopers can add depth and texture to your live performances, allowing you to create backing tracks on the fly.
- Experimentation: Loopers encourage experimentation and creativity, helping you discover new musical ideas.
Integrating a looper pedal into your setup can significantly enhance your musical capabilities.
10. How Do You Maintain And Care For Your Wired Guitar Pedal Board?
Proper maintenance and care are essential for keeping your wired guitar pedal board in top condition.
- Regular Cleaning: Clean your pedalboard regularly to remove dust and dirt, which can affect the performance of your pedals.
- Check Cables: Inspect cables for wear and tear and replace them as needed.
- Tighten Connections: Periodically tighten all connections to ensure they are secure.
- Protect from the Elements: Store your pedalboard in a dry, safe place to protect it from moisture and extreme temperatures.
- Test Regularly: Test your setup regularly to identify and address any potential issues.
By following these maintenance tips, you can prolong the life of your pedalboard and ensure it continues to perform reliably.
11. What Are The Advantages Of Using Pedal Board Power Conditioners?
Pedal board power conditioners provide several benefits that can improve the performance and reliability of your pedal setup.
- Clean Power: They filter out noise and interference from the power supply, resulting in a cleaner signal.
- Voltage Regulation: Power conditioners regulate voltage to ensure consistent power delivery to your pedals.
- Surge Protection: They protect your pedals from power surges and spikes, preventing damage.
- Noise Reduction: By isolating and filtering power, they reduce unwanted noise and hum.
- Improved Tone: Cleaner power can lead to improved clarity and definition in your tone.
Investing in a power conditioner can be a worthwhile upgrade for any serious guitarist.
12. How Do You Incorporate MIDI Controllers Into Your Guitar Pedal Board Setup?
Incorporating MIDI controllers into your guitar pedal board setup can greatly expand your control over your effects and sound.
- MIDI-Enabled Pedals: Use pedals that support MIDI control to remotely adjust parameters and switch presets.
- MIDI Foot Controller: A MIDI foot controller allows you to send MIDI messages to your pedals, enabling you to control multiple effects with a single stomp.
- Connectivity: Connect your MIDI controller to your pedals using MIDI cables.
- Programming: Program your MIDI controller to send the appropriate messages to your pedals.
- Integration: Integrate MIDI control into your live performances to seamlessly switch between different sounds and effects.
Using MIDI controllers can significantly enhance the versatility and flexibility of your pedalboard.
13. What Role Do Patch Bays Play In Advanced Pedal Board Setups?
Patch bays can play a crucial role in advanced pedal board setups by providing a centralized hub for all your connections.
- Centralized Connections: Patch bays allow you to easily connect and disconnect pedals without having to reach behind the board.
- Signal Routing: They enable you to quickly change the order of your pedals in the signal chain.
- Versatility: Patch bays provide flexibility for experimenting with different pedal combinations and signal routings.
- Organization: They help keep your pedalboard tidy and organized by consolidating all connections in one place.
- Efficiency: Patch bays streamline the setup and teardown process, saving you time and effort.
For complex pedal board setups, a patch bay can be an invaluable tool.
14. How Can You Optimize The Use Of Expression Pedals With Your Pedal Board?
Expression pedals can add a new level of control and expressiveness to your guitar playing.
- Compatible Pedals: Use expression pedals with effects that support expression control, such as wah, volume, or modulation pedals.
- Placement: Place the expression pedal in a convenient location on your pedalboard where you can easily access it with your foot.
- Connectivity: Connect the expression pedal to your effects using an expression cable.
- Calibration: Calibrate the expression pedal to ensure it is working correctly with your effects.
- Experimentation: Experiment with different expression pedal settings to find the sounds that work best for you.
Integrating expression pedals into your setup can greatly enhance your creativity and control over your sound.
15. What Are The Best Practices For Grounding Your Guitar Pedal Board?
Proper grounding is essential for minimizing noise and hum in your guitar pedal board setup.
- Isolated Power Supply: Use a power supply with isolated outputs to prevent ground loops.
- Ground Lift Adapters: Use ground lift adapters to break ground loops if they occur.
- Star Grounding: Implement a star grounding scheme, where all ground connections converge at a single point.
- Shielded Cables: Use shielded cables to minimize interference.
- Proper Wiring: Ensure that all your pedals and cables are properly wired and grounded.
Following these best practices can help you achieve a clean and quiet pedalboard setup.
16. How Do You Integrate Wireless Systems With Your Guitar Pedal Board?
Integrating wireless systems with your guitar pedal board can provide freedom of movement and eliminate cable clutter.
- Placement: Place the wireless receiver on your pedalboard in a location where it has a clear line of sight to your transmitter.
- Power: Ensure the receiver is powered correctly.
- Connectivity: Connect the output of the receiver to the input of your first pedal.
- Frequency Selection: Choose a frequency that is free from interference.
- Testing: Test the wireless system thoroughly before using it in a live performance.
Using a wireless system can enhance your mobility and stage presence.
17. What Are Some Creative Ways To Use Splitters On A Guitar Pedal Board?
Splitters can be used in various creative ways on a guitar pedal board to achieve unique sounds and effects.
- Parallel Processing: Use a splitter to send your signal to multiple effects chains simultaneously, creating layered textures.
- Stereo Effects: Use a splitter to create stereo effects by sending different signals to the left and right channels.
- Wet/Dry Rig: Use a splitter to create a wet/dry rig, where one signal path contains your dry signal and the other contains your processed signal.
- A/B Switching: Use a splitter to switch between different amplifiers or effects chains.
- Boosting: Use a splitter to boost your signal by sending it to multiple amplifiers simultaneously.
Experimenting with splitters can open up new sonic possibilities for your guitar playing.
18. How Do You Incorporate Rack Effects Into A Pedal Board Setup?
Integrating rack effects into a pedal board setup can combine the convenience of pedals with the power of rack-mounted units.
- Effects Loop: Use an effects loop on your amplifier to integrate rack effects into your signal chain.
- Routing: Route your signal from your pedalboard to the input of the rack effect, and then back to the effects return on your amplifier.
- Power: Ensure the rack effect is powered correctly.
- Control: Use a MIDI controller to control the parameters of the rack effect.
- Integration: Integrate the rack effect seamlessly into your pedalboard setup for enhanced sound options.
Using rack effects can expand the sonic palette of your pedalboard.
19. What Are The Best Practices For Using Power Conditioners With Vintage Pedals On A Guitar Pedal Board?
When using power conditioners with vintage pedals on a guitar pedal board, it’s important to follow best practices to ensure the safety and optimal performance of your valuable gear. Vintage pedals often have unique power requirements and sensitivities, so careful consideration is necessary.
- Check Voltage Requirements: Before plugging any vintage pedal into a power conditioner, verify its voltage requirements. Many vintage pedals operate on different voltages than modern pedals, such as 18V or even AC voltage. Using the wrong voltage can damage or destroy the pedal.
- Use Isolated Outputs: Always use a power conditioner with isolated outputs when powering vintage pedals. This prevents ground loops and reduces the risk of noise or interference that can affect the pedal’s performance.
- Avoid Daisy-Chaining: Never daisy-chain vintage pedals with other pedals. Each vintage pedal should have its own isolated output from the power conditioner to ensure consistent and clean power.
- Use the Correct Polarity: Ensure that the polarity of the power supplied by the power conditioner matches the polarity required by the vintage pedal. Reverse polarity can cause damage to the pedal.
- Monitor for Overheating: Keep an eye on the temperature of your vintage pedals, especially if they are running for extended periods. Overheating can damage the components and affect the pedal’s lifespan.
20. How Can You Use Audio Interfaces With Guitar Pedal Boards For Recording And Live Performance?
Integrating audio interfaces with guitar pedal boards offers versatile options for recording and live performance, combining the flexibility of pedals with the digital capabilities of interfaces.
- Recording Setups: Connect your pedalboard output to the input of the audio interface for recording directly into a DAW (Digital Audio Workstation).
- Live Performance Integration: Use the audio interface as an output to a PA system, leveraging your pedalboard as a live effects processor.
- Re-amping Techniques: Utilize the interface’s outputs to re-amp tracks through your pedalboard, adding textures and effects to pre-recorded signals.
- Software Integration: Combine your physical pedalboard with virtual effects and amp simulations within your DAW for a hybrid setup.
- Signal Splitting: Use the audio interface to split signals, sending one path through your pedalboard and another directly to the DAW for clean and processed track blending.
21. How Do You Organize A Pedal Board For Different Musical Genres?
Organizing a pedal board for different musical genres requires tailoring your setup to the specific sonic demands of each genre.
- Rock/Blues: Focus on overdrive, distortion, and wah pedals. Place your drive pedals early in the chain, followed by modulation and time-based effects.
- Metal: Prioritize high-gain distortions, noise gates, and EQ pedals. Ensure your noise gate is placed before or after your distortion pedals to eliminate unwanted noise.
- Ambient/Shoegaze: Emphasize reverb, delay, and modulation effects like chorus and flanger. Experiment with placing these effects in different orders to create unique textures.
- Funk: Highlight wah, phaser, and compressor pedals. Place your compressor early in the chain to even out your signal and enhance the percussive elements of your playing.
- Country: Use compressor, overdrive, and tremolo pedals. Opt for transparent overdrive pedals that add warmth without excessive distortion.
22. How Do You Set Up A “Wet/Dry/Wet” Guitar Rig Using A Pedal Board?
Setting up a “Wet/Dry/Wet” guitar rig with a pedal board involves creating a setup where your dry guitar signal is amplified through one cabinet, while your wet (effected) signals are sent to two separate cabinets for a wide, immersive sound.
- Signal Splitting: Use a splitter pedal or an audio interface to divide your guitar signal into three paths: one dry and two wet.
- Dry Signal Path: Send the dry signal directly to one amplifier and speaker cabinet. This provides the core tone without any effects.
- Wet Signal Paths: Send the two wet signals through your pedal board, focusing on modulation, delay, and reverb effects.
- Amplifiers and Cabinets: Connect each wet signal path to its own amplifier and speaker cabinet.
- Placement: Position the dry cabinet in the center and the two wet cabinets on either side to create a stereo soundscape.
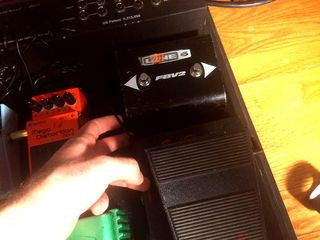 Diagram illustrating a "Wet/Dry/Wet" guitar rig setup with a pedalboard, amplifiers, and speaker cabinets
23. What Are The Best Ways To Label Cables And Pedals On A Guitar Pedal Board?
Labeling cables and pedals on your guitar pedal board is essential for quick identification and troubleshooting, especially in live performance situations.
- Label Makers: Use a label maker to create clear, durable labels for each cable and pedal.
- Color-Coding: Use different colored labels or colored electrical tape to differentiate between types of cables or signal paths.
- Heat Shrink Tubing: Apply heat shrink tubing around the ends of cables and label them with a permanent marker.
- Cable Tags: Attach small cable tags to each cable with a brief description of its function (e.g., “Input,” “Output,” “Power”).
- Pedal Labels: Place labels on or near each pedal indicating its name and function.
24. How Do You Integrate A Volume Pedal Into Your Guitar Pedal Board For Different Effects?
Integrating a volume pedal into your guitar pedal board allows for dynamic control over your signal, creating swells, fades, and unique effects.
- Placement: Experiment with placing the volume pedal at different points in your signal chain to achieve various effects.
- Before Gain Pedals: Placing the volume pedal before your gain pedals allows you to control the amount of signal hitting the distortion or overdrive, affecting the intensity of the effect.
- After Gain Pedals: Placing the volume pedal after your gain pedals controls the overall output volume without changing the character of the distortion.
- After Time-Based Effects: Placing the volume pedal after time-based effects like reverb and delay allows you to create ambient swells and fade out the trails.
- Expression Control: Use the volume pedal as an expression pedal for other effects that support expression control.
25. How Can You Use A/B Boxes To Expand The Functionality Of Your Guitar Pedal Board?
A/B boxes are versatile tools that can significantly expand the functionality of your guitar pedal board by allowing you to switch between different signal paths, amplifiers, or effects chains.
- Amplifier Switching: Use an A/B box to switch between two different amplifiers, each with its own unique sound and settings.
- Effects Loop Selection: Use an A/B box to choose between different effects loops on your amplifier, each containing a different set of effects.
- Parallel Effects Chains: Use an A/B box to create parallel effects chains, where your signal is split and sent through two different sets of effects before being combined.
- True Bypass Switching: Use an A/B box to create a true bypass loop for certain effects, allowing you to completely remove them from your signal path when they are not in use.
- Kill Switch: Use an A/B box as a kill switch to quickly mute your signal during a performance.
26. How Do You Choose The Right Pedal Board Size For Your Needs?
Choosing the right pedal board size is crucial for balancing portability, functionality, and organization.
- Assess Your Current Pedal Collection: Start by laying out all the pedals you currently own and use regularly. This provides a visual representation of the space you need.
- Consider Future Expansion: Think about whether you plan to add more pedals in the future. It’s often wise to choose a pedal board that offers some extra space for potential additions.
- Measure Your Pedals: Take note of the dimensions of your largest pedals, as these will dictate the minimum size requirements for your board.
- Think About Ergonomics: Ensure the board is wide and deep enough to comfortably access and stomp on your pedals without accidentally hitting others.
- Evaluate Portability: Consider how you will be transporting your pedal board. Larger boards can be cumbersome and heavy, while smaller boards may sacrifice functionality.
27. What Are The Key Considerations For Pedal Board Placement On Stage?
Proper pedal board placement on stage is vital for ensuring easy access, minimizing cable clutter, and maintaining a professional appearance during performances.
- Accessibility: Position the pedal board where it is easily accessible and within comfortable reach while playing.
- Cable Management: Place the pedal board near your amplifier to minimize cable runs and reduce the risk of tripping over cables.
- Visibility: Ensure the pedal board is visible enough so you can easily see and access your pedals in varying lighting conditions.
- Stability: Place the pedal board on a stable, level surface to prevent it from wobbling or sliding during the performance.
- Power Source: Position the pedal board near a reliable power source to avoid the need for long extension cords.
28. How Do You Handle Powering Unusual Or High-Current Pedals On A Pedal Board?
Handling power for unusual or high-current pedals on a pedal board requires careful planning and the right equipment to ensure consistent and reliable performance.
- Identify Power Requirements: Check the voltage (V) and current (mA) requirements of each pedal. This information is usually printed on the pedal or in the manual.
- Use An Appropriate Power Supply: Invest in a power supply that can deliver the required voltage and current for each pedal.
- Isolated Outputs: Opt for a power supply with isolated outputs to prevent noise and ground loops.
- High-Current Outputs: Some power supplies have specific outputs designed to handle high-current pedals.
- Voltage Converters: If you have pedals with unusual voltage requirements, use voltage converters to step up or step down the voltage as needed.
29. What Are The Latest Innovations In Guitar Pedal Board Technology?
The world of guitar pedal board technology is constantly evolving, with new innovations emerging to enhance performance, flexibility, and convenience.
- Digital Pedal Boards: These boards allow you to load and switch between different pedal configurations with the touch of a button.
- Wireless Pedal Boards: These boards eliminate the need for cables, providing a clean and clutter-free setup.
- MIDI Integration: Many modern pedal boards offer MIDI integration, allowing you to control multiple effects and parameters simultaneously.
- Smart Power Supplies: These power supplies monitor the current draw of each pedal and adjust the voltage accordingly.
- Compact and Lightweight Designs: Manufacturers are increasingly focusing on creating pedal boards that are both compact and lightweight, making them easier to transport.
You can explore a wealth of resources, engage in discussions, and find the perfect gear to enhance your musical journey. Visit guitarplayers.net, located at 1140 Boylston Street, Boston, MA 02215, United States, or call us at +1 (617) 747-2261.
30. How Do You Build A Custom Pedal Board From Scratch?
Building a custom pedal board from scratch allows you to create a setup that perfectly fits your needs and preferences.
- Design Your Layout: Start by planning the layout of your pedals. Consider the signal chain, the size of your pedals, and the available space.
- Choose Your Materials: Select the materials for your pedal board. Common choices include plywood, hardwood, or aluminum.
- Cut the Base: Cut the base of the pedal board to the desired size and shape.
- Add a Frame: Add a frame around the base to provide stability and protection.
- Apply Velcro: Apply Velcro to the top of the pedal board and the bottom of your pedals.
 An organized guitar pedalboard with neatly arranged pedals and cables
FAQ: Wiring A Guitar Pedal Board
1. What is the first step in wiring a guitar pedal board?
The first step is planning your pedal layout to optimize signal flow and accessibility. This includes considering the order of your pedals based on their function and size.
2. Why is cable management important for a guitar pedal board?
Effective cable management is crucial for a tidy and functional pedalboard, reducing the risk of accidental disconnections and signal interference.
3. What type of power supply should I use for my guitar pedals?
Opt for a power supply with isolated outputs to prevent ground loops and reduce noise. Check the voltage and current requirements of each pedal to ensure compatibility.
4. How do I secure my pedals to the pedal board?
Use industrial-strength Velcro to secure your pedals to the board, ensuring they stay in place during transport and performance.
5. What are some common mistakes to avoid when wiring a guitar pedal board?
Avoid using low-quality cables, overcrowding the board, ignoring power requirements, and neglecting cable management to ensure a reliable setup.
6. How can I troubleshoot noise issues on my guitar pedal board?
Ensure your power supply has isolated outputs, use good-quality cables, and check for ground loops. A ground lift adapter may also help eliminate noise.
7. What is the benefit of using a buffer pedal on my pedal board?
A buffer pedal, placed early in the chain, prevents signal loss, especially with long cable runs, maintaining signal integrity.
8. Can a looper pedal enhance my guitar playing?
Yes, a looper pedal can be a valuable tool for practice, songwriting, and live performance, allowing you to create layers of sound and experiment with new ideas.
9. How do I maintain my wired guitar pedal board to keep it in top condition?
Regularly clean your pedalboard, check cables for wear and tear, tighten connections, and protect it from the elements to prolong its life and ensure reliable performance.
10. Why should I consider a pedalboard power conditioner?
Pedalboard power conditioners provide clean power, voltage regulation, and surge protection, improving the performance and reliability of your pedal setup.