For any aspiring guitarist, mastering the art of tuning is non-negotiable. Whether you’re strumming basic chords in your bedroom or aiming to nail iconic guitar solos, a guitar that’s in tune is the bedrock of all musical endeavors. Learning how to tune your acoustic guitar early on is a crucial step, allowing you to quickly immerse yourself in playing your favorite songs and progressing on your musical journey.
Fortunately, tuning an acoustic guitar is a straightforward skill that beginners can grasp within their first few days of playing. This comprehensive guide is designed to walk you through the process of tuning your acoustic guitar effectively. By the end of this guide, you’ll be well-equipped to keep your guitar sounding its best and focus on what truly matters – playing music.
Understanding the Mechanics of Guitar Tuning
Before diving into the practical steps of tuning, it’s beneficial to understand the underlying mechanics. Guitar strings are held taut between two points on the instrument to create musical notes. On a steel-string acoustic guitar, one end of the string is secured at the bridge using a bridge pin, while the other end wraps around tuning posts located on the headstock. Nylon-string guitars, on the other hand, typically have strings tied directly to the bridge and then wound around tuning machines at the headstock.
Regardless of the string type, tuning pegs are the key to adjusting string tension. Tension is directly linked to pitch: increasing tension by tightening a string raises the pitch (making it sharper), while decreasing tension by loosening the string lowers the pitch (making it flatter). This pitch change occurs because sound is essentially a pressure wave traveling through the air. A tighter string vibrates more rapidly, producing more frequent waves and thus a higher pitch or frequency.
Conversely, reducing tension results in a slower vibration and a lower pitch. String thickness, or gauge, also plays a role. Thicker strings vibrate slower than thinner strings at the same tension, which is why guitar strings come in varying thicknesses. The thicker the string, the lower the natural pitch.
 Close-up of a guitar headstock showing tuning pegs and strings
Alt text: Detailed view of acoustic guitar headstock illustrating tuning pegs and string winding, essential components for acoustic guitar tuning.
Acoustic Guitar Standard Tuning: The Foundation
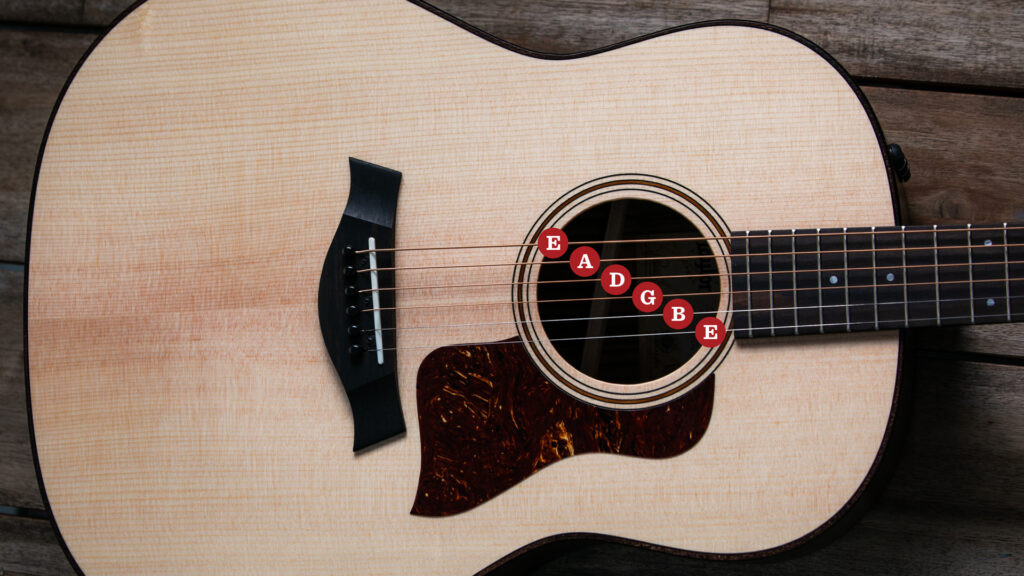
Standard tuning is the most prevalent tuning for acoustic guitars and is the go-to for most popular music genres. In standard tuning, the strings, from thickest to thinnest, are tuned to the notes E-A-D-G-B-E. Many players use mnemonic phrases to memorize this sequence. Here are a few popular examples to help you remember, or feel free to create your own:
- Eddie Ate Dynamite, Good Bye Eddie
- Elephants And Donkeys Grow Big Ears
- Eat Apples Daily Get Better Eating
Guitar strings are also numbered, starting with the thickest, lowest-pitched string (E) as the 6th string and going down to the thinnest, highest-pitched string (E) as the 1st string. When tuning, remember that turning the tuning peg away from you generally tightens the string, raising the pitch. Conversely, turning the peg towards you loosens the string, lowering the pitch.
A crucial technique for accurate tuning is to always tune up to pitch. Even if a string is too sharp (high-pitched), first loosen it below the correct pitch until it’s flat, and then tune upwards to the desired note. Tuning up to pitch helps to stabilize the tuning, as the gears within the tuning pegs are less prone to slipping and causing the string to go out of tune after being tightened.
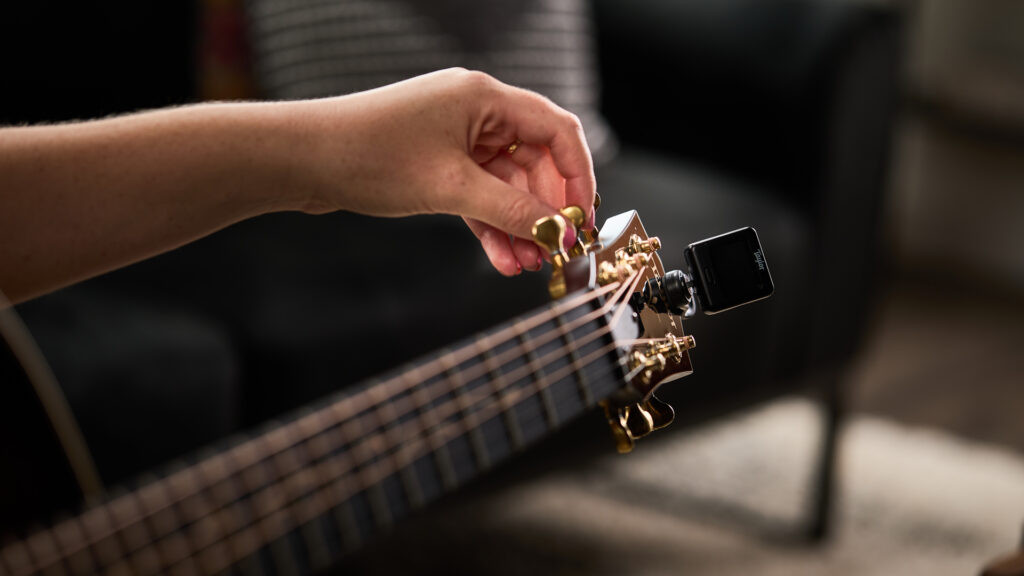
 Hands tuning an acoustic guitar using tuning pegs on the headstock
Alt text: Hands adjusting tuning pegs on an acoustic guitar headstock, demonstrating the physical process of tuning a guitar to achieve correct string pitch.
Effective Methods for Tuning Your Guitar
Once you grasp the basic principles of tuning, several methods are available. There’s no single “correct” approach, so experimenting with different techniques is recommended to find what suits you best and allows you to tune your acoustic guitar most efficiently.
Utilizing a Guitar Tuner or Tuner App
For beginners, a chromatic tuner is an invaluable tool. These devices “listen” to the note you play and use a display screen to guide you to the correct pitch. For instance, if you pluck the B string and it’s flat, the tuner will indicate this on the display, usually with a marker to the left of the center. You then tighten the tuning peg until the marker aligns with the center, indicating the correct pitch.
Chromatic tuners are available in various formats:
-
Pedal Tuners: These stompbox-style tuners are widely used by guitarists at all levels. You connect your guitar to the pedal with a standard guitar cable, and the tuner display illuminates. Popular models like the Korg Pitchblack or the BOSS TU-3 are staples on many pedalboards. Note that pedal tuners require a guitar with a pickup to function as they don’t have a built-in microphone.
-
Tuner Apps: For convenient tuning anywhere, tuner apps are excellent. Apps such as Guitar Tuna or Fender Guitar Tuner use your smartphone’s microphone to detect sound and guide you through the tuning process. They are incredibly user-friendly and accurate, making them perfect for quick tuning adjustments.
A helpful tip for chromatic tuners: ensure it is set to A440Hz unless a specific song requires a different tuning standard. A440Hz is the standard frequency for the note A above middle C and is the universal standard in music. Most tuners default to this setting.
Tuning with a Piano or Keyboard
If you have access to a piano or keyboard, you can use it as a reference to tune your guitar by matching pitches. This method is particularly useful if you plan to play alongside a piano, ensuring both instruments are perfectly in tune with each other. Tuning to a piano involves some basic music theory knowledge but is a rewarding practice that also develops your ear for recognizing pitch. You can find the corresponding piano keys for each guitar string (E, A, D, G, B, E) and tune each string to match the piano note.
Tuning by Ear: Developing Your Aural Skills
In situations where you don’t have a tuner or piano, you can tune your guitar to itself by ear. While this method might not achieve perfect concert pitch without an initial reference, it ensures your guitar is internally in tune, which is often sufficient for practice or informal jam sessions. Two common techniques for tuning by ear include:
-
Fifth Fret Method: The note at the fifth fret of any string (except the G string) should be the same as the open string immediately below it. For example, fretting the 5th fret of the 6th string (E) produces an A note, which you can then match to your open 5th string (A). Continue this pattern down the strings. For the interval between the G and B strings, you’ll use the 4th fret of the G string to match the open B string.
-
Harmonics Method: Guitar harmonics are bell-like tones produced by lightly touching a string above certain frets (typically the 5th, 7th, and 12th frets) and plucking the string. Similar to the fifth fret method, harmonics can be used to tune strings to each other. A fifth fret harmonic on one string will produce the same pitch as a seventh fret harmonic on the string below it. Play both harmonics simultaneously; if they are out of tune, you’ll hear a wavering or “beating” sound. Adjust the tuning until this “wobbling” disappears, and the harmonics ring clearly together. Again, the exception is tuning the B string to the G string, where the standard fifth fret/open string method is more straightforward.
 Close-up demonstrating how to play a harmonic on an acoustic guitar
Alt text: Fingertip lightly touching an acoustic guitar string above a fret to create a harmonic, illustrating a technique for tuning guitar strings by ear.
Tips for Maintaining Your Guitar’s Tuning
Once your guitar is perfectly tuned, keeping it that way is crucial. Here are some helpful tips to maintain your tuning stability:
-
Stretch New Strings: Whenever you put on new strings, take a few minutes to gently stretch them. Using your fingers, carefully pull each string away from the fretboard a few times and then retune. Repeat this process two or three times per string. This pre-stretching minimizes string slippage and prevents them from going out of tune quickly as you play.
-
Invest in Quality Strings: High-quality strings significantly improve tuning stability. Reputable brands like Elixir, D’Addario, and Ernie Ball are known for their consistent quality and longevity. For example, Taylor guitars are factory-equipped with Elixir NANOWEB strings.
-
Tune Regularly: Frequent tuning, whether before playing, during practice sessions, or before performances, is essential. Regular tuning helps you develop an ear for pitch and allows you to recognize when your guitar is drifting out of tune. The more you tune, the better you’ll become at hearing and correcting intonation issues.
Stay Tuned and Play On
While tuning might initially seem like a tedious chore, it quickly becomes a fundamental habit for any guitarist. Whether you’re playing with a band, performing at an open mic night, or jamming with friends, being in tune is essential for sounding your best.
Ultimately, a well-crafted and properly set-up guitar is easier to tune and, more importantly, stays in tune longer. This commitment to quality craftsmanship is why companies like Taylor Guitars prioritize precision in guitar construction, allowing you to focus more on your playing and less on constant tuning adjustments.
Eager for more tips and tricks for beginners? Explore resources on how to hold a guitar pick effectively, learn about different acoustic guitar body shapes, and much more on the guitarplayers.net blog.