Are you ready to transform your six-string guitar from a source of unpleasant noise into a musical instrument capable of producing sweet melodies? Tuning your guitar is the very first step towards creating beautiful music, and it’s a straightforward process that anyone can master.
Think of your guitar as a precision instrument, much like a finely tuned sports car. You wouldn’t take a high-performance car for a drive without ensuring the engine is running smoothly, right? The same principle applies to your guitar. To achieve harmonious chords and accurate riffs, each string must be correctly tuned.
Let’s be honest: there’s almost nothing more discouraging than playing on an out-of-tune guitar. It’s akin to trying to sing with a sore throat – the result simply isn’t pleasant. So, let’s get your guitar perfectly tuned and ready to sound its best.
A Brief Look at Guitar History
The guitar’s origins can be traced back approximately 5,000 years to primitive instruments resembling banjos or ancient Egyptian tanburs. Over centuries, the guitar underwent significant evolution, transitioning from lute-like forms to the vihuela, a flat-backed lute, and eventually to the classical Spanish guitar with gut or nylon strings, which emerged in 1859. The number of strings gradually increased from four to five and then to six, culminating in the modern standard string order: EADGBE.
As musicians demanded louder and more versatile guitars, modifications were made to the instrument’s body and bracing system to accommodate the increased tension of steel strings. Further innovations included pickups, amplifiers, and effects pedals, leading to the distinct development paths of acoustic and electric guitars.
While acoustic guitarists pursued one direction, their electric counterparts ventured into another, fostering new musical subgenres and driving the evolution of guitar technology as we recognize it today.
Acoustic vs. Electric Guitar Tuning: What’s the Difference?
Let’s address the question of whether there’s a difference between tuning an acoustic and an electric guitar. While the instruments share visual similarities, the fundamental principles of tuning are the same for both. The goal remains consistent: to adjust each string to its correct pitch.
Whether your preference is the resonant strumming of an acoustic 6-string or the powerful riffs of an electric guitar, mastering the art of tuning is essential to ensure your instrument sounds its best.
Understanding Standard Tuning
Standard tuning, the most common tuning for a six-string guitar, arranges the strings to specific pitches. From the thickest string to the thinnest, these notes are E, A, D, G, B, and E. This sequence is often remembered with the mnemonic “Every Adult Dog Growls Bites Eats,” or “Eddie Ate Dynamite, Good Bye Eddie.”
What is Standard Tuning?
In standard tuning, each string is tuned to a specific note. When looking at your guitar in playing position, the thickest string at the top is the 6th string (Low E), and the thinnest string at the bottom is the 1st string (High E). The sequence and corresponding notes are:
- 6th String: E (lowest pitch)
- 5th String: A
- 4th String: D
- 3rd String: G
- 2nd String: B
- 1st String: E (highest pitch)
 A diagram showing the standard tuning notes for a six-string guitar, EADGBE, from thickest to thinnest string.
Why Standard Tuning?
The arrangement of standard tuning, particularly the major third interval between the G and B strings (a deviation from the consistent perfect fourths between other consecutive strings), evolved for practical musical reasons. This tuning pattern makes playing chords and scales across the fretboard more ergonomic, reducing hand strain and cramping. It also resolves certain harmonic complexities that would arise if all strings were tuned in perfect fourths. This tuning has proven to be incredibly effective and practical over time, making learning and playing the guitar more accessible.
How to Tune Your Guitar: Step-by-Step
Tuning your guitar might seem daunting at first, but with practice, it becomes second nature. Here’s a breakdown of two primary methods: using an electronic tuner and tuning by ear.
Using an Electronic Tuner
Electronic tuners are invaluable tools for accurate and quick tuning. They come in various forms, including clip-on tuners, pedal tuners, and smartphone apps. Most tuners detect the pitch of the string you play and indicate whether it’s sharp (too high) or flat (too low) relative to the target note.
Steps to Tune with an Electronic Tuner:
-
Power on your tuner: Activate your electronic tuner and select “chromatic” mode if available. Chromatic mode will detect any note you play. Some tuners also have guitar-specific modes.
-
Play the 6th string (Low E): Strum the thickest string (bottom string when holding the guitar to play) and observe the tuner display.
-
Adjust tuning peg: If the tuner indicates the note is flat (too low), turn the tuning peg for the 6th string clockwise to tighten the string and raise the pitch. If it’s sharp (too high), turn the peg counter-clockwise to loosen the string and lower the pitch.
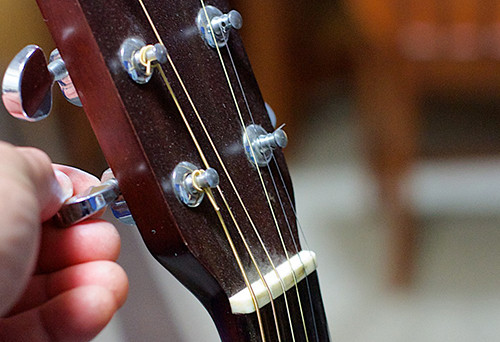
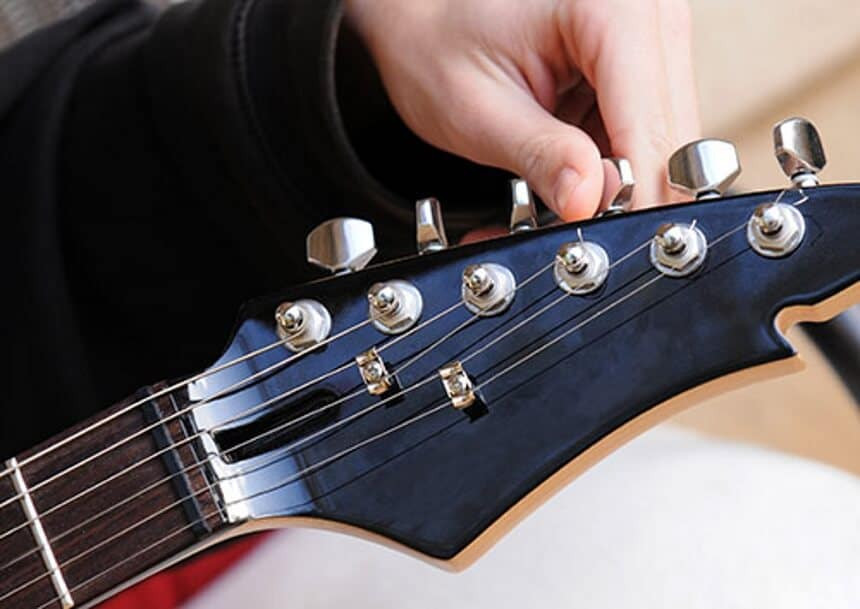 Close-up of tuning pegs on a guitar headstock, with a hand adjusting a peg, and a clip-on tuner attached to the headstock displaying the note being tuned.
 -
Tune to E: Continue adjusting the tuning peg until the tuner indicates you’ve reached the note “E” and the display is stable and in tune (often indicated by a green light or centered needle).
-
Repeat for other strings: Follow the same process for the remaining strings in order: 5th string (A), 4th string (D), 3rd string (G), 2nd string (B), and 1st string (High E). Remember the mnemonic “Every Adult Dog Growls Bites Eats” to keep the string order in mind.
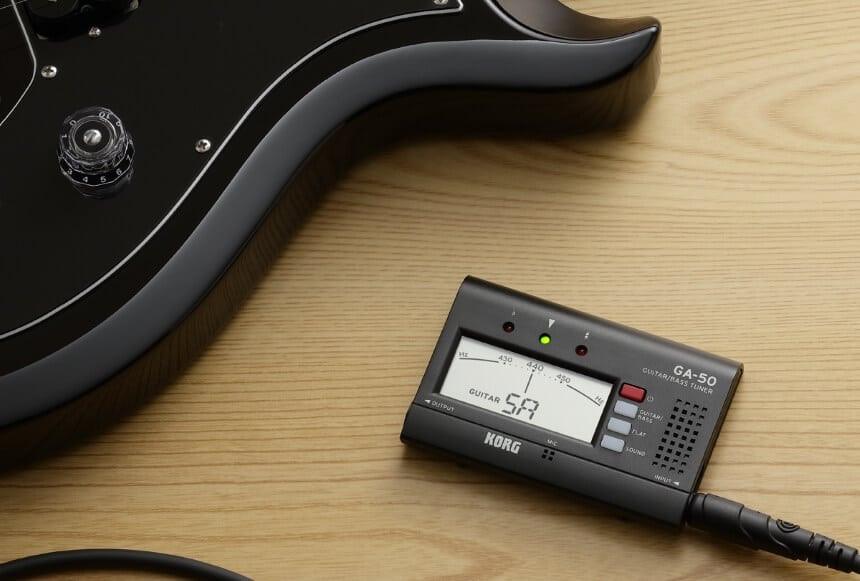 An electronic tuner displaying the note "A" and indicating that the string is slightly flat, needing adjustment to reach perfect pitch.
Tips for using an electronic tuner:
- For electric guitars: You can plug directly into a tuner using a jack cable for a more accurate reading, especially in noisy environments. Alternatively, use the tuner’s built-in microphone. If using a microphone, ensure your guitar is amplified if playing an electric guitar at low volume.
- Turn off effects: When tuning an electric guitar, disable any effects pedals or amp effects that might interfere with the tuner’s ability to detect the pure pitch of the string.
- Automatic string detection: Some advanced tuners automatically detect which string you are playing, simplifying the process. If your tuner doesn’t have this feature, you’ll need to manually select the target note for each string if it has a specific guitar tuning mode.
Tuning by Ear (Relative Tuning – Fifth Fret Method)
Tuning by ear, also known as relative tuning, involves tuning one string to a reference pitch (often the 6th string – Low E) and then tuning the remaining strings in relation to each other. The “fifth fret method” is a common and effective technique for relative tuning.
Steps for Tuning by Ear (Fifth Fret Method):
-
Tune the 6th string (Low E) to a reference: Use a tuning fork, pitch pipe, online tuning sample, or a well-tuned instrument to tune your 6th string to a low E. If you are unsure of the pitch, you can use an electronic tuner initially for just the 6th string.
-
Fret the 6th string at the 5th fret: Press down the 6th string just behind the 5th fret. The note produced should be an A.
-
Tune the 5th string (A) to match: Play the 5th string open (without fretting) and compare its pitch to the A note you are holding on the 6th string (5th fret). Adjust the tuning peg of the 5th string until its open pitch matches the pitch of the 6th string at the 5th fret.
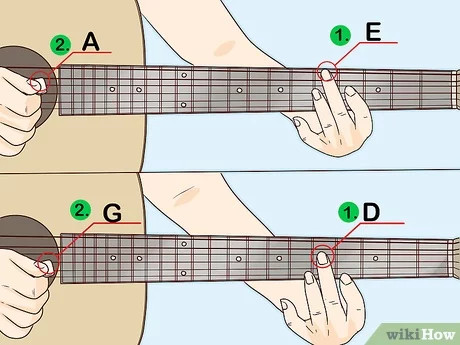 Diagram showing the fifth fret method for tuning a guitar, indicating which frets and strings to compare to tune each string relative to the previous one.
 -
Repeat for the 4th string (D): Fret the 5th string at the 5th fret (this is a D note). Tune the open 4th string to match this pitch.
-
Repeat for the 3rd string (G): Fret the 4th string at the 5th fret (this is a G note). Tune the open 3rd string to match this pitch.
-
Adjust for the 2nd string (B): This is the exception. Fret the 3rd string at the 4th fret (this is a B note). Tune the open 2nd string to match this pitch. Note the 4th fret is used here, not the 5th.
-
Tune the 1st string (High E): Fret the 2nd string at the 5th fret (this is a High E note). Tune the open 1st string to match this pitch.
-
Double-check: After tuning all strings, strum a chord (like a G chord) to listen if the guitar sounds in tune overall. Make fine adjustments as needed by ear.
Tips for tuning by ear:
- Start with a good reference: Ensure your initial 6th string is as close to correct pitch as possible.
- Listen carefully: Pay close attention to the relationship between the pitches you are comparing. You are aiming for the open string to resonate and create a similar tone to the fretted note.
- Practice makes perfect: Tuning by ear takes practice to develop your ear’s ability to discern pitch differences. Regular practice will improve your tuning accuracy over time.
Acoustic Guitar Tuning: Specific Considerations
While the fundamental tuning methods apply to both acoustic and electric guitars, here are a few points specific to acoustic guitars:
Notes to Tune Acoustic Guitar
As with all six-string guitars in standard tuning, the notes for tuning an acoustic guitar are E-A-D-G-B-E, from the 6th (thickest) to the 1st (thinnest) string. Ensuring each string is accurately tuned to these notes is crucial for a well-sounding acoustic guitar.
Acoustic Guitar Tuning Nuances
- Tune from flat to sharp: When tuning an acoustic guitar, it’s generally recommended to tune up to the correct pitch. If you overshoot and tune a string too sharp, it’s better to lower the pitch below the target note and then tune up to it again. This helps improve tuning stability.
- Fresh strings: New strings hold their tune much better than older strings. If you are struggling to keep your acoustic guitar in tune, especially after stretching new strings, consider changing to a fresh set.
- Develop your ear: Tuning an acoustic guitar often relies more on your ear, especially when playing unplugged. Practicing tuning by ear on your acoustic guitar will enhance your overall musical ear and tuning skills.
Electric Guitar Tuning: Specific Considerations
Tuning an electric guitar shares the same core principles as acoustic guitars, but there are some specific aspects to consider:
Using Tuning Pegs Effectively
The tuning pegs on the headstock of your electric guitar are crucial for adjusting string tension and pitch. Understanding how to use them precisely is key to accurate tuning.
- Small adjustments: Tuning pegs are designed for fine adjustments. Make small, gradual turns when tuning.
- Listen while adjusting: Continuously pluck the string while turning the tuning peg to hear the pitch change in real-time and monitor your tuner (if using one).
- Peg direction: Turning the peg clockwise typically tightens the string and raises the pitch (making it sharper). Counter-clockwise loosens the string and lowers the pitch (making it flatter). However, the exact direction can depend on the specific guitar and tuning peg design.
Tuning an Electric Guitar with a Tuner: Best Practices
Electronic tuners are particularly useful for electric guitars, especially when playing with amplification or in band settings.
- Direct input: For the most accurate tuning with an electric guitar, use a jack cable to connect your guitar directly to your tuner if your tuner has an input jack. This eliminates ambient noise and provides a cleaner signal.
- Microphone option: If direct input isn’t possible, or you are using a tuner app with your phone’s microphone, ensure you are in a relatively quiet environment. Amplify your electric guitar slightly so the tuner can clearly pick up the string’s pitch.
- Disable effects: As mentioned earlier, turn off any effects pedals or amp effects that could distort the pure tone and confuse the tuner. A clean guitar signal is best for accurate tuning.
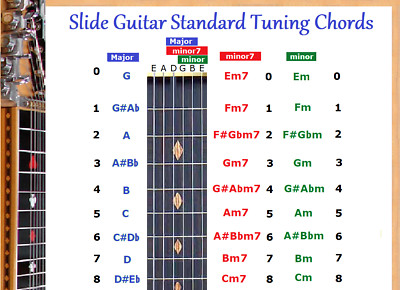
Alternate Guitar Tunings
While standard tuning is the foundation, exploring alternate tunings can unlock new sonic landscapes and creative possibilities on the guitar. Here are a few popular alternate tunings:
- Drop D Tuning: Lower the 6th string (Low E) down to D. This creates a heavier, deeper sound, commonly used in rock and metal.
- Double Drop D Tuning: Tune both the 6th and 1st strings down to D. This creates a drone-like quality.
- DADGAD Tuning: Tune the 6th string to D, 2nd string to A, and 1st string to D. Popular in fingerstyle guitar and Celtic music, offering a spacious and open sound.
- Open G Tuning: Tune to D-G-D-G-B-D. Frequently used in blues and rock (think Rolling Stones). Strumming all strings creates a G major chord.
- Open D Tuning: Tune to D-A-D-F#-A-D. Another open tuning common in blues and slide guitar, creating a D major chord when strummed openly.
- Open E Tuning: Tune to E-B-E-G#-B-E. Well-suited for slide guitar and producing a bright, resonant sound.
 A visual representation of various alternate guitar tunings, showing how each string is tuned differently from standard EADGBE tuning.
Experimenting with alternate tunings can inspire new riffs, chord voicings, and song ideas. Many famous guitarists, including Jimmy Page, Keith Richards, and others, have utilized alternate tunings to create their signature sounds.
Denny’s Tuning Wisdom
Denny Zager, of the legendary duo “Zager & Evans,” offers some insightful advice regarding guitar tuning, particularly for new guitars:
“New guitar woods are still settling, which can cause them to go out of tune more frequently initially. The good news is that as the wood settles and cures, your guitar will become more stable and stay in tune for longer periods. This is why many of our customers report that Zager guitars hold their tuning exceptionally well after a break-in period.
Thinner gauge strings, while offering excellent playability, can sometimes bend slightly out of tune, especially for players with a very discerning ear. For this reason, we often recommend using the next gauge up in string thickness. This can provide even greater tuning stability and a richer, deeper tone. “
Denny’s advice highlights that guitar tuning is not just a one-time task but can be influenced by the instrument itself and string choice.
FAQs
What is The Basic Tuning For The Guitar?
The basic or standard tuning for a six-string guitar is E-A-D-G-B-E, referring to the notes from the thickest (6th) string to the thinnest (1st) string.
How are The Strings Numbered On a 6-String Guitar?
On a 6-string guitar, the strings are numbered from thinnest to thickest. The 1st string is the thinnest (high E), and the string numbers increase sequentially up to the 6th string, which is the thickest (low E). Strings 3rd through 6th are typically wound with metal, while the 1st and 2nd strings are plain steel (unwound). In playing position, the 6th string is often considered the “top” string.
Conclusion
Tuning your six-string guitar is a foundational skill for any guitarist. Whether you choose to use an electronic tuner for precision or develop your ear for relative tuning, consistent practice and attention to detail will ensure your guitar sounds its best. Mastering tuning opens the door to enjoyable practice sessions, confident performances, and a deeper connection with your instrument. So, grab your tuner, or train your ear, and keep your guitar in tune – your music will thank you for it!