
In 2020, as lockdowns swept across the globe, the demand for guitars surged, leaving companies scrambling to fulfill online orders. Many guitars purchased online are shipped directly from warehouses, often untouched since leaving the factory. This means that your brand-new guitar, despite your investment, might arrive in less-than-ideal playing condition. It could be tired, affected by temperature and humidity changes during shipping, and simply not set up for peak performance.
This article will guide you through the essential steps to set up your new guitar, ensuring it’s ready to deliver years of playing enjoyment and musical creativity. Whether you’re a beginner or an experienced player, understanding how to set up your guitar is a valuable skill.
 Close up of a person's hands working on the neck of an electric guitar, emphasizing the process of setting up a guitar for optimal playability.
Many guitarists, especially those starting out, often begin with instruments like a Squier Stratocaster. To demonstrate this setup process, we’ll be using a brand-new Squier Classic Vibe 60s Stratocaster in Lake Placid Blue. This guitar, fresh out of the box, serves as a perfect example for illustrating the setup steps.
It’s crucial to understand that there’s no single “perfect” guitar setup. Setup is a matter of personal preference. Some guitarists prefer a high action, while others prefer a lower, faster action. However, universally, no one enjoys playing a guitar with tarnished frets or a poorly adjusted neck. Let’s dive into the steps to get your guitar playing its best.
 Overhead shot of guitar setup tools and a guitar neck, illustrating the necessary equipment for learning how to set up a guitar.
Before you begin setting up your guitar, gather the following essential tools and supplies:
- New Guitar Strings: Choose a set of your preferred gauge. For this guide, we’re using Ernie Ball Regular Slinky strings (.010 to .046).
- Fine Grade Steel Wool (.0000 grade): For polishing frets. Easily obtainable online or at hardware stores.
- Wire Cutters: For cutting strings.
- Low-Tack Masking Tape: To protect the fretboard during polishing.
- Small Jar or Container: To hold small parts like screws.
- Guitar Fretboard Oil: To condition the fretboard. We recommend MusicNomad F-One Oil.
- Guitar Polish: For cleaning and polishing the guitar body. MusicNomad The One Polish is a good option.
- Soft, Lint-Free Cloths: For polishing and cleaning.
- Kitchen Roll or Paper Towels: For wiping excess oil.
- Allen Keys: The set that came with your guitar (contact the retailer if missing).
- String Winder: To speed up string changes.
- Small Adjustable Wrench or Spanner: MusicNomad Wrench is a handy tool, but a small adjustable spanner will work.
- Flathead Screwdriver: For adjusting bridge saddles and potentially truss rod (depending on model).
- Protective Mat or Towel: To protect your guitar’s finish.
- Neck Support: A proper neck support is ideal (like MusicNomad’s support), but a folded towel can work in a pinch.
 Close-up of guitar setup tools laid out on a workbench, highlighting the essential items needed for a comprehensive guitar setup.
Step 1: Removing the Old Strings
Begin by laying your guitar flat on a stable surface with neck support. Loosen the strings using the tuning pegs until they are slack enough to handle. Most guitars like this Squier Strat come equipped with light gauge strings, often 0.009-.042. The factory strings are primarily intended for initial setup and quality control, not for optimal playing experience.
Replacing these factory strings with a quality set will immediately improve your guitar’s tone and playability. It’s a crucial first step in learning how to set up your guitar properly.
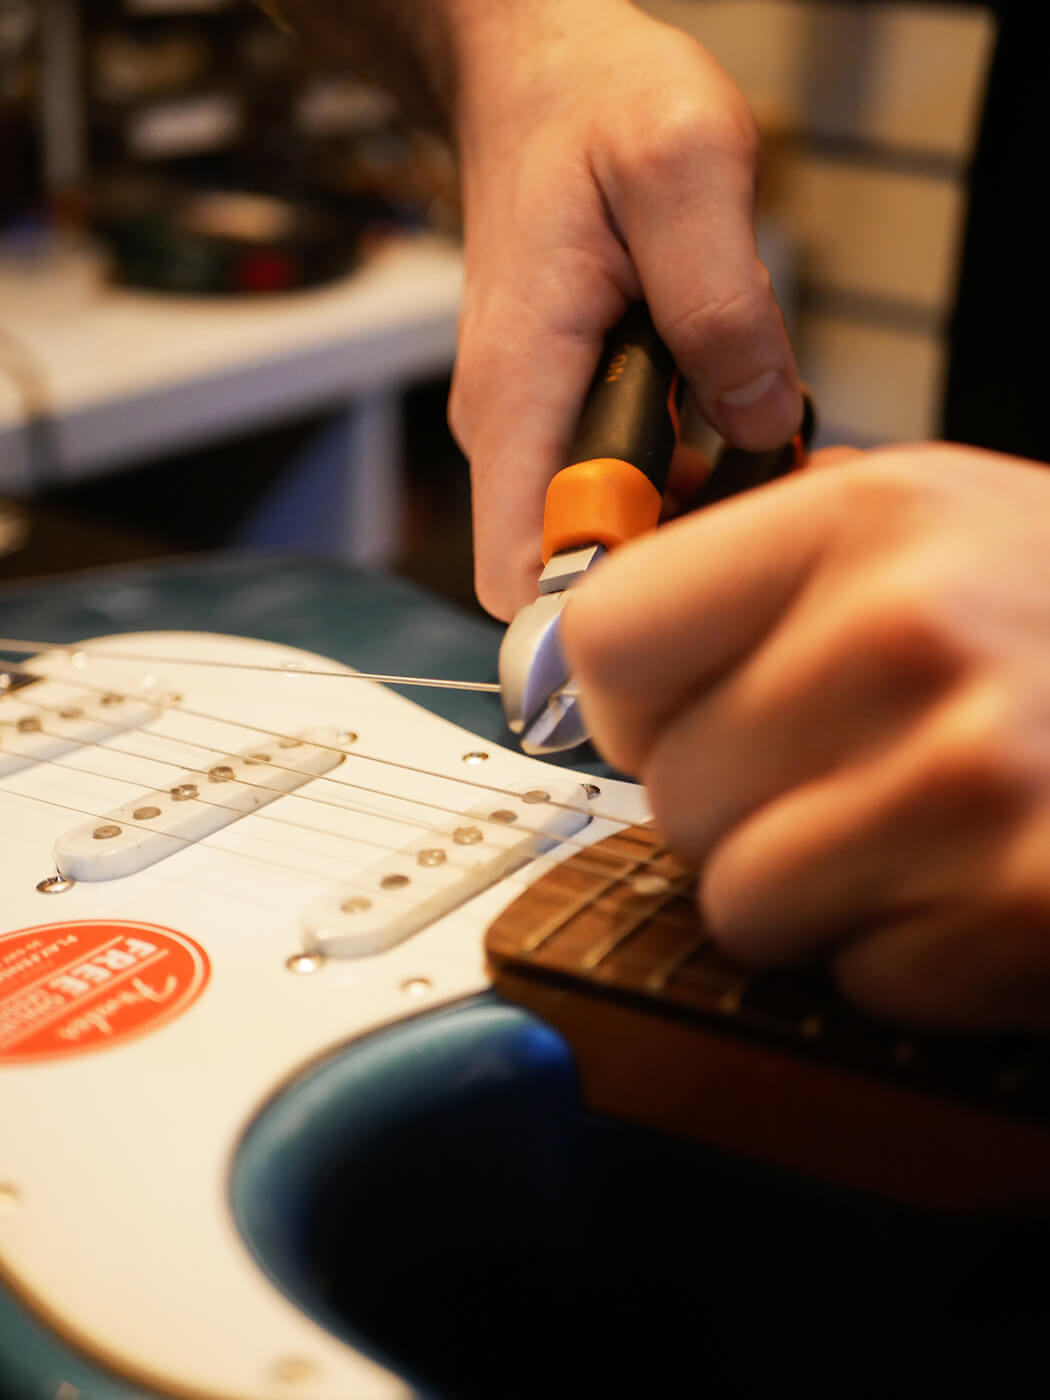
 Hands using wire cutters to cut guitar strings during the removal process, demonstrating the first step in how to set up a guitar.
Once the strings are loose, use wire cutters to cut them in the middle. This makes them easier to remove and dispose of safely. Next, carefully remove the backplate on the rear of the guitar body, along with its screws, and place them in your small jar or container to avoid losing them. We’ll revisit this area after restringing the guitar.
Occasionally, you might encounter a string that doesn’t easily come out of the bridge. This is often due to the ball end of the string being slightly swollen and stuck in the bridge block. A simple solution is to use the thickest string (low E) and insert it into the string hole from the front to push the stuck ball end out. If the E string is too flexible, use the thinnest Allen key from your guitar’s toolkit for a bit more rigidity.
 Close-up of removing guitar strings from the bridge, showing a detail in the process of how to set up a guitar, specifically string removal.
Step 2: Removing the Pickguard Plastic Film
With the strings removed, it’s time to address the protective plastic film on the pickguard. This thin, often clear plastic is applied at the factory to prevent scratches during shipping and assembly. It’s essential to remove it now, as leaving it on can cause problems down the line. Many new guitar owners are unaware of this film and leave it on for extended periods.
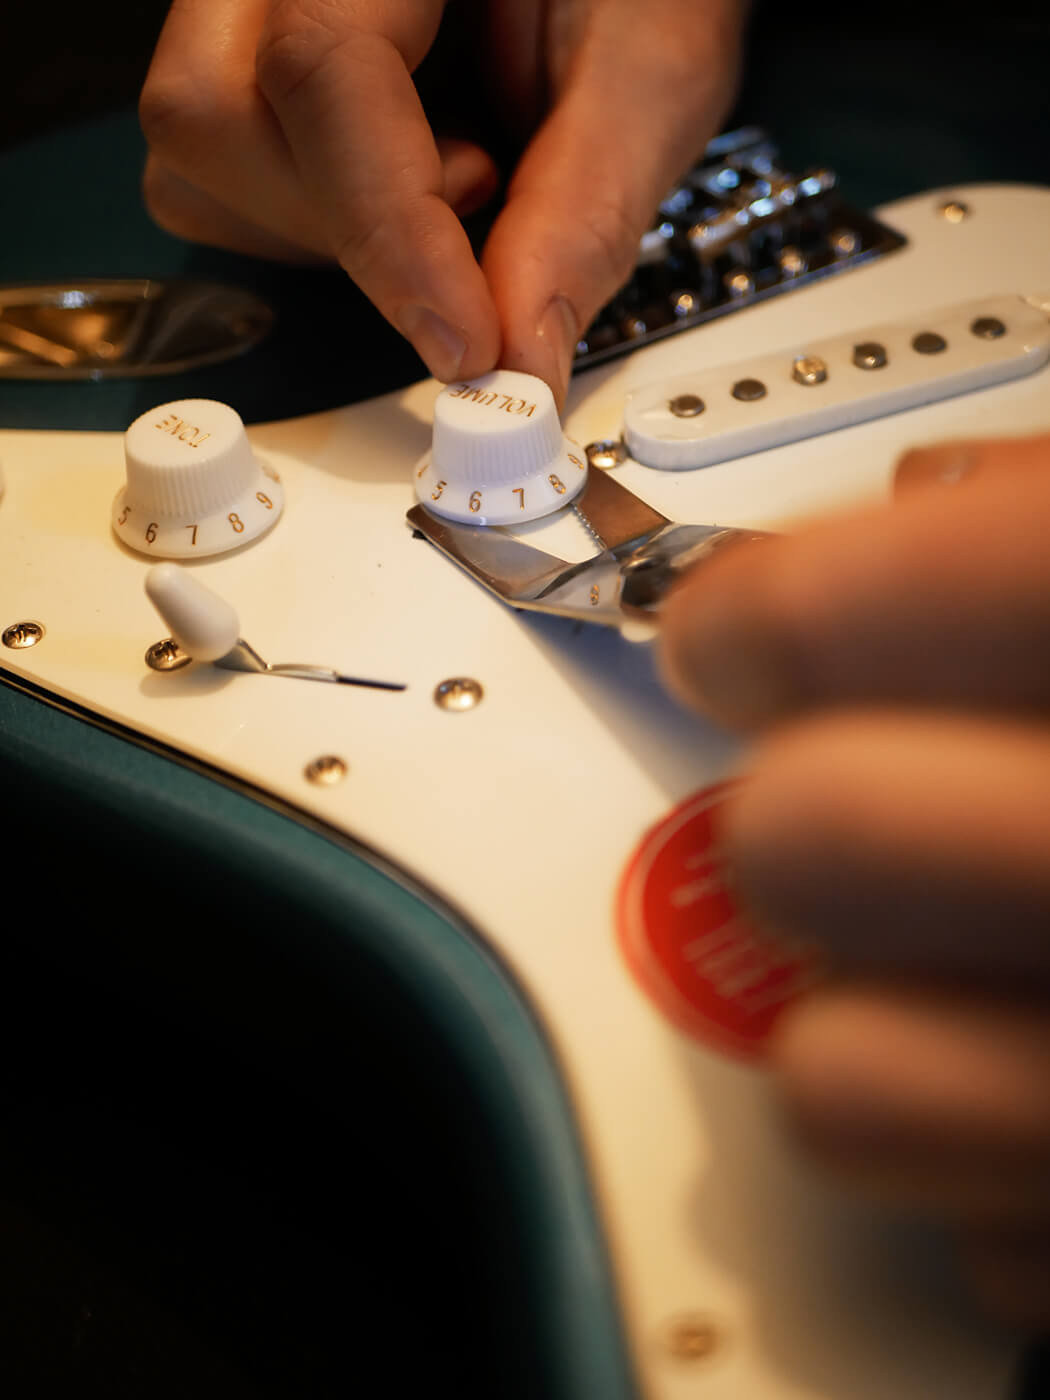
While the plastic is designed to peel off easily, removing the control knobs on a Stratocaster-style guitar can make the process cleaner and easier. While you can peel the plastic around the knobs, doing so often leaves small pieces of plastic trapped underneath, which can attract dust and grime over time and potentially interfere with the controls. Taking a few minutes to remove the knobs prevents future issues.
 Hands using a wrench to gently remove a control knob from a guitar, illustrating the step of preparing the pickguard for cleaning during a guitar setup.
To remove the knobs, use a gentle prying motion with even pressure. A specialized tool like the MusicNomad Wrench can be helpful, but you can also use your fingers carefully. After removing the knobs, use your wrench or a small spanner to slightly loosen the nut on each control pot. Crucially, do not fully remove the nuts. Loosening them just enough allows you to lift the pickguard slightly to remove the plastic film. Completely removing the nuts can cause the potentiometers to fall inside the guitar body, creating unnecessary complications.
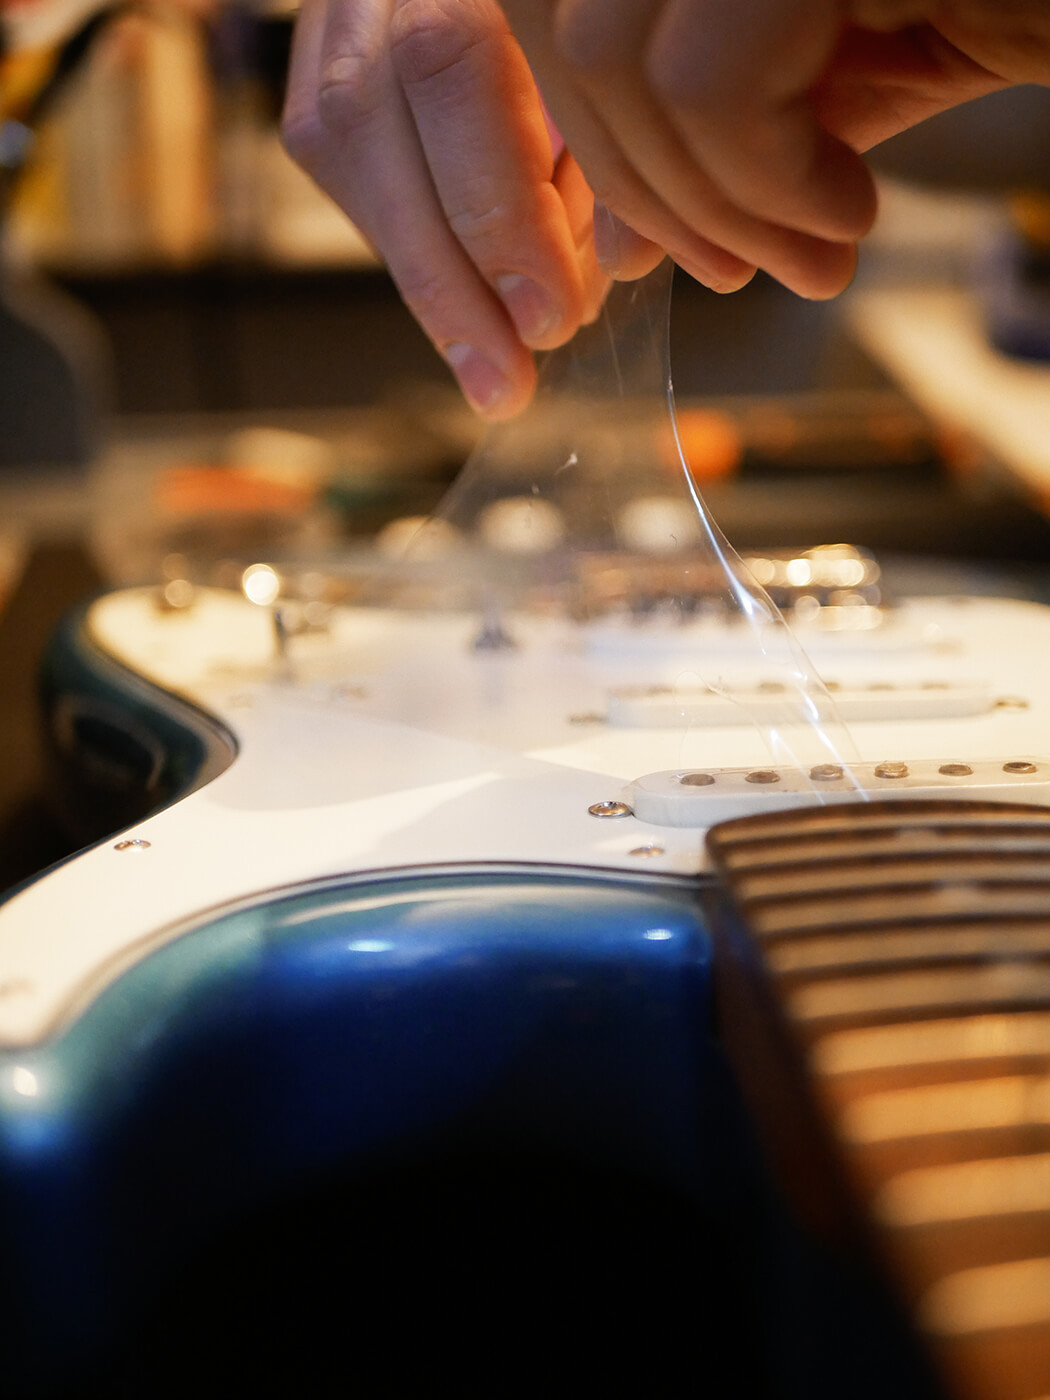
Once the nuts are loosened, find a corner of the plastic film and slowly peel it away. Ideally, you want to remove it in one piece for maximum satisfaction!
After removing the plastic and enjoying the pristine surface, carefully tighten the control pot nuts back down (finger-tight is usually sufficient) and push the knobs back onto the control posts. Ensure the knobs are pushed on firmly and aligned correctly, typically with the “10” marking pointing towards the neck when the control is at its maximum setting.
 Close-up of a clean guitar pickguard after removing the plastic film, highlighting the result of careful preparation during the guitar setup process.
Step 3: Conditioning the Fretboard and Polishing Frets
Guitars shipped online often spend considerable time in cardboard boxes, sometimes for a year or more, often with silica gel packets to control humidity. This environment can lead to the fretboard drying out, especially if it’s made of rosewood or pau ferro. The frets themselves can also tarnish during this time. Both the fretboard and frets will benefit from some attention during your guitar setup.
If your guitar has a maple fretboard, it generally requires less conditioning and may only need a polish. However, rosewood or pau ferro fretboards, like the one pictured, are more porous and prone to drying. You might notice the grain is raised or the wood feels rough. To smooth the fretboard, gently rub each fret with fine-grade steel wool. This will smooth down any lifted grain and make the fretboard feel silky smooth.
 Hands gently rubbing steel wool along the guitar frets, demonstrating the fret polishing step in how to set up a guitar for smooth playability.
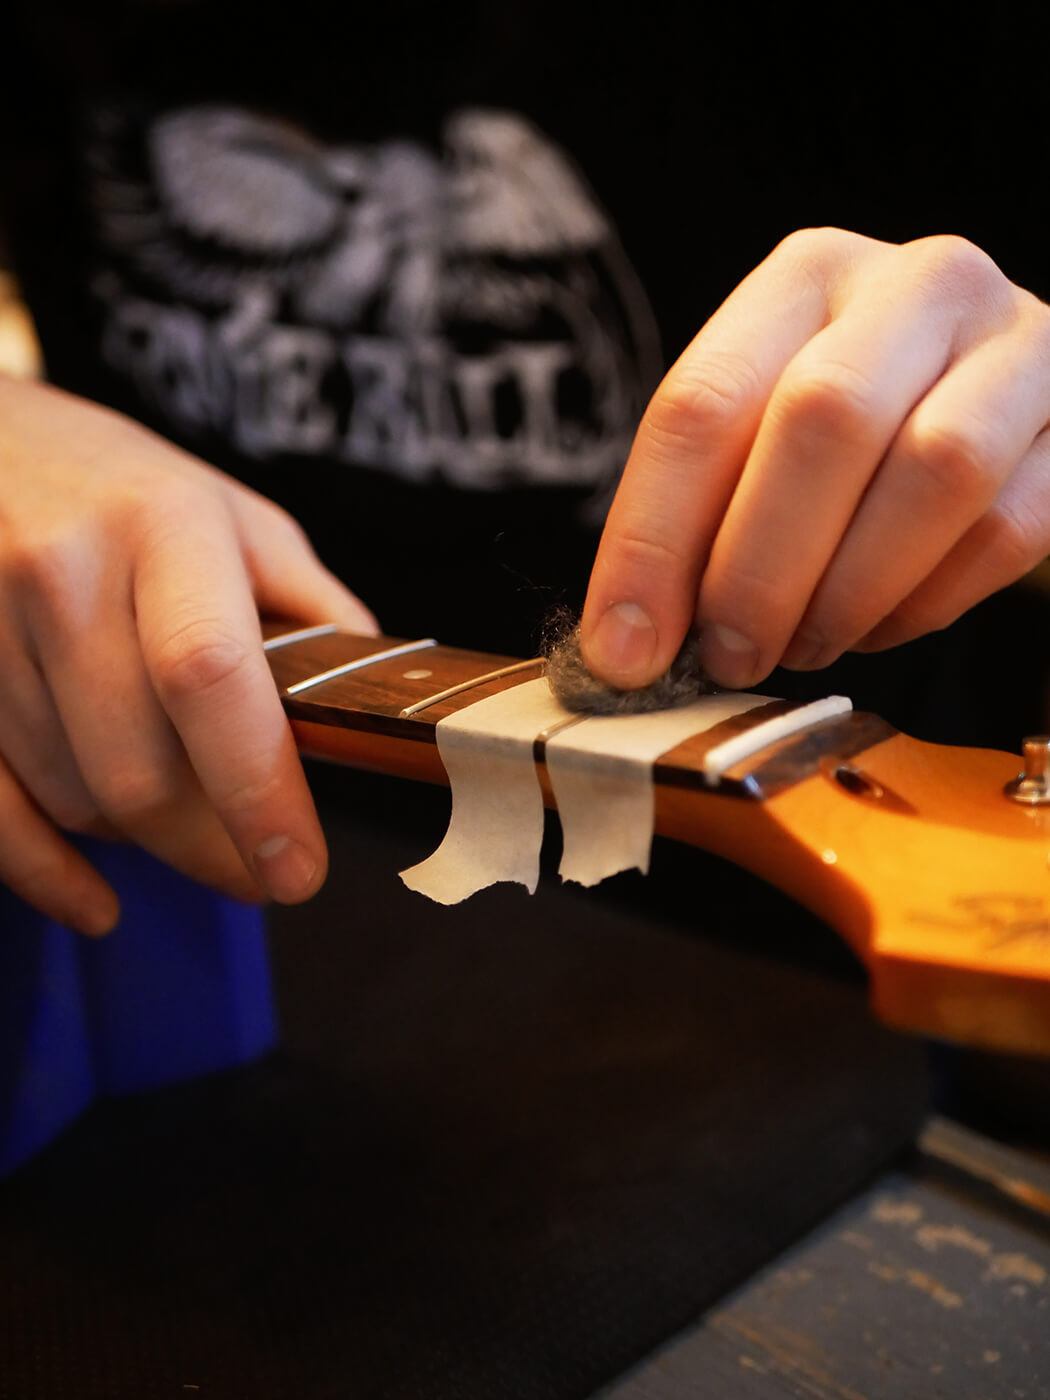
Next, use low-tack masking tape to carefully mask off the fretboard wood on either side of each fret, leaving only the metal fret wires exposed. This protects the wood from the steel wool. Polish each fret wire by rubbing side-to-side with a small piece of steel wool. Repeat this for every fret along the neck. When you reach the highest frets near the body, place a piece of tape over the neck pickup to prevent steel wool fibers from sticking to the pickup magnets. After polishing all the frets, brush away any steel wool dust and remove the masking tape.
Once the fretboard is clean of debris, apply a small drop of guitar fretboard oil, about the size of a small coin, to each fret between the strings (if they were still on) or directly onto the wood. Gently rub the oil into the fretboard until it appears glossy and conditioned. Allow the oil to soak into the wood for a few minutes.
 Applying fretboard oil to a guitar fretboard, showcasing the conditioning step in learning how to set up a guitar and maintain its wood.
You might notice some areas of the fretboard absorb the oil more quickly than others. These drier spots are particularly thirsty and may require a second, smaller application of oil. Simply add a tiny amount more oil to those areas and repeat the rubbing process.
Use a piece of kitchen roll or paper towel to wipe off any excess oil that remains on the surface of the fretboard after a few minutes. As you wipe down the fretboard, you might see more oil seeping out of the wood – this is normal. Wipe again with a fresh piece of paper towel to remove any remaining surface oil.
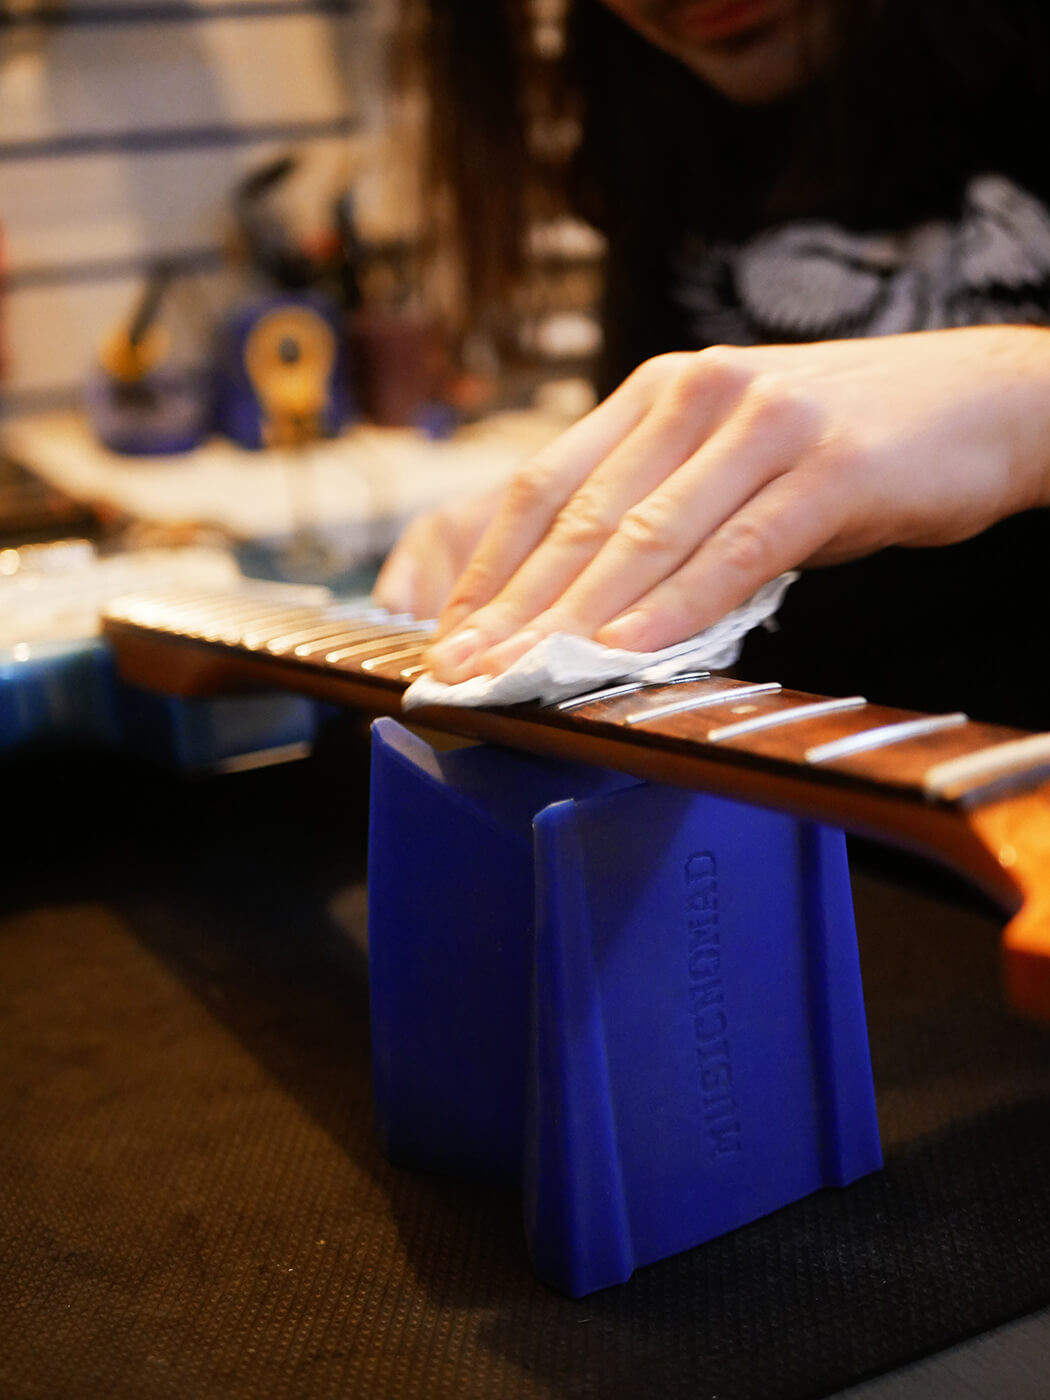
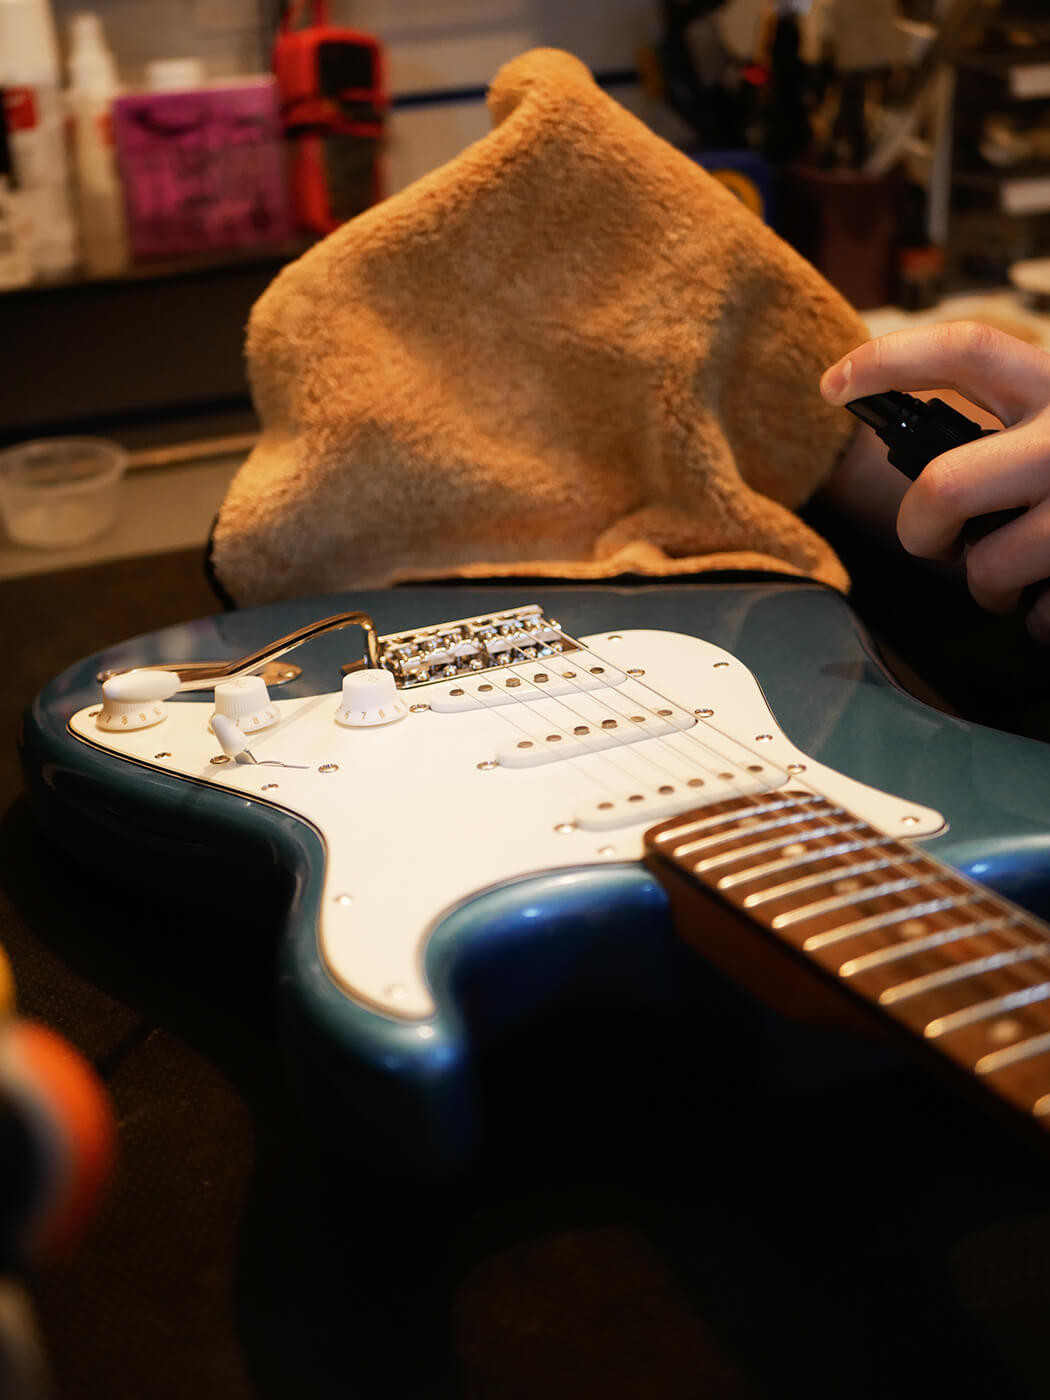
Congratulations! You’ve completed a significant step in personalizing your guitar. Next, take a moment to clean and polish the entire guitar body using a soft, lint-free cloth and guitar polish. Buff the guitar until it shines, removing any dust or fingerprints.
 Polishing the guitar body with guitar polish, illustrating the final cleaning step before restringing in the process of how to set up a guitar.
Step 4: Adjusting Tremolo Springs for Stability
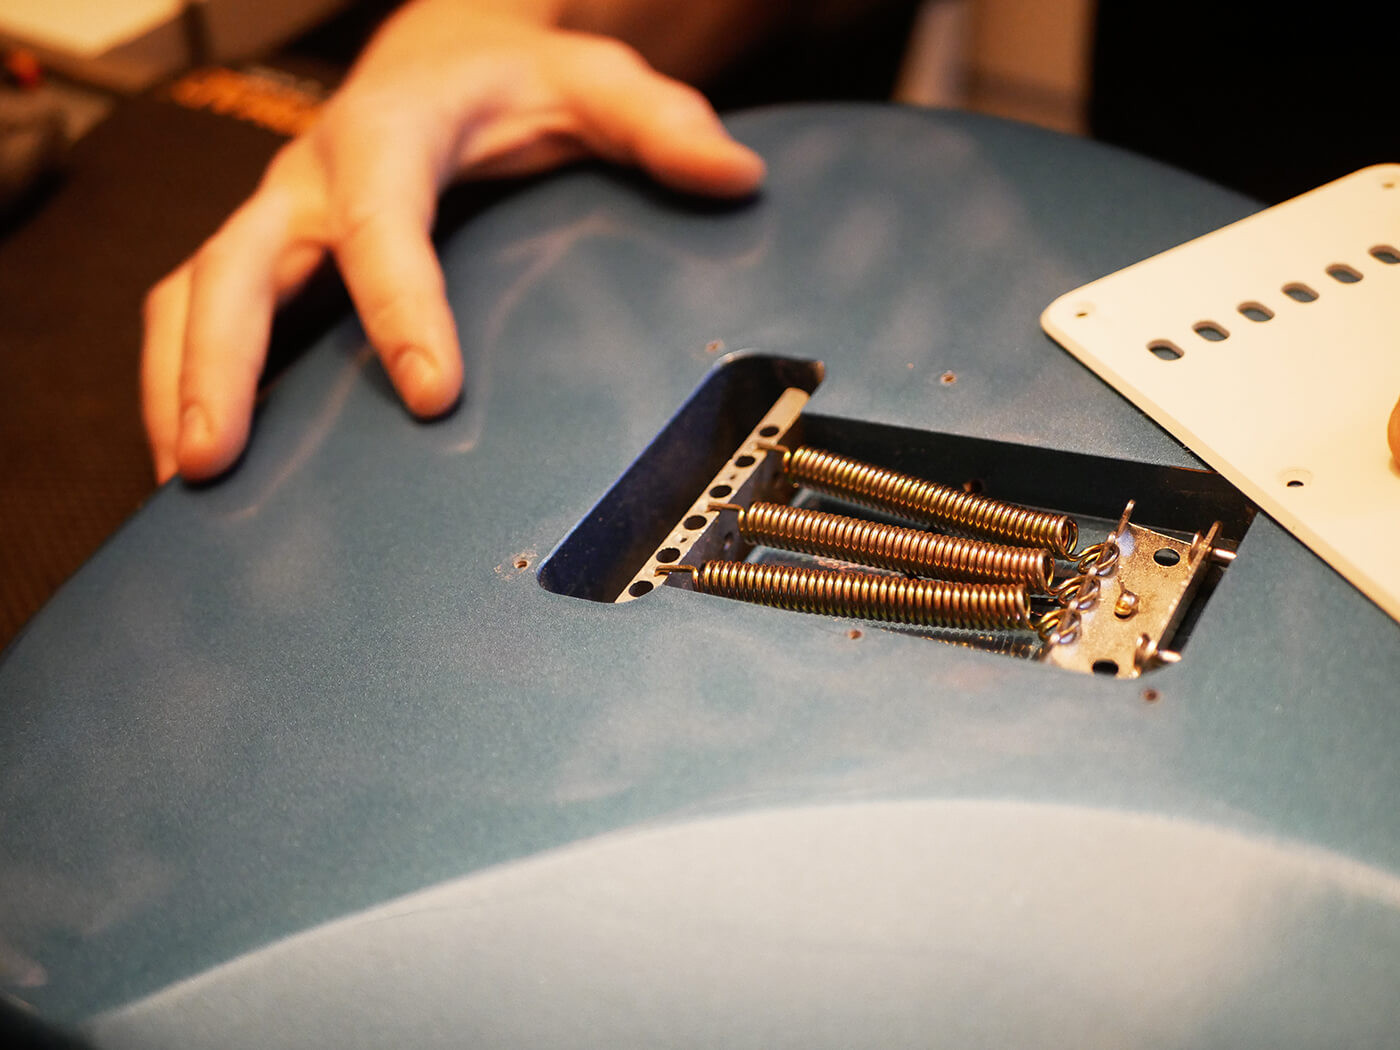
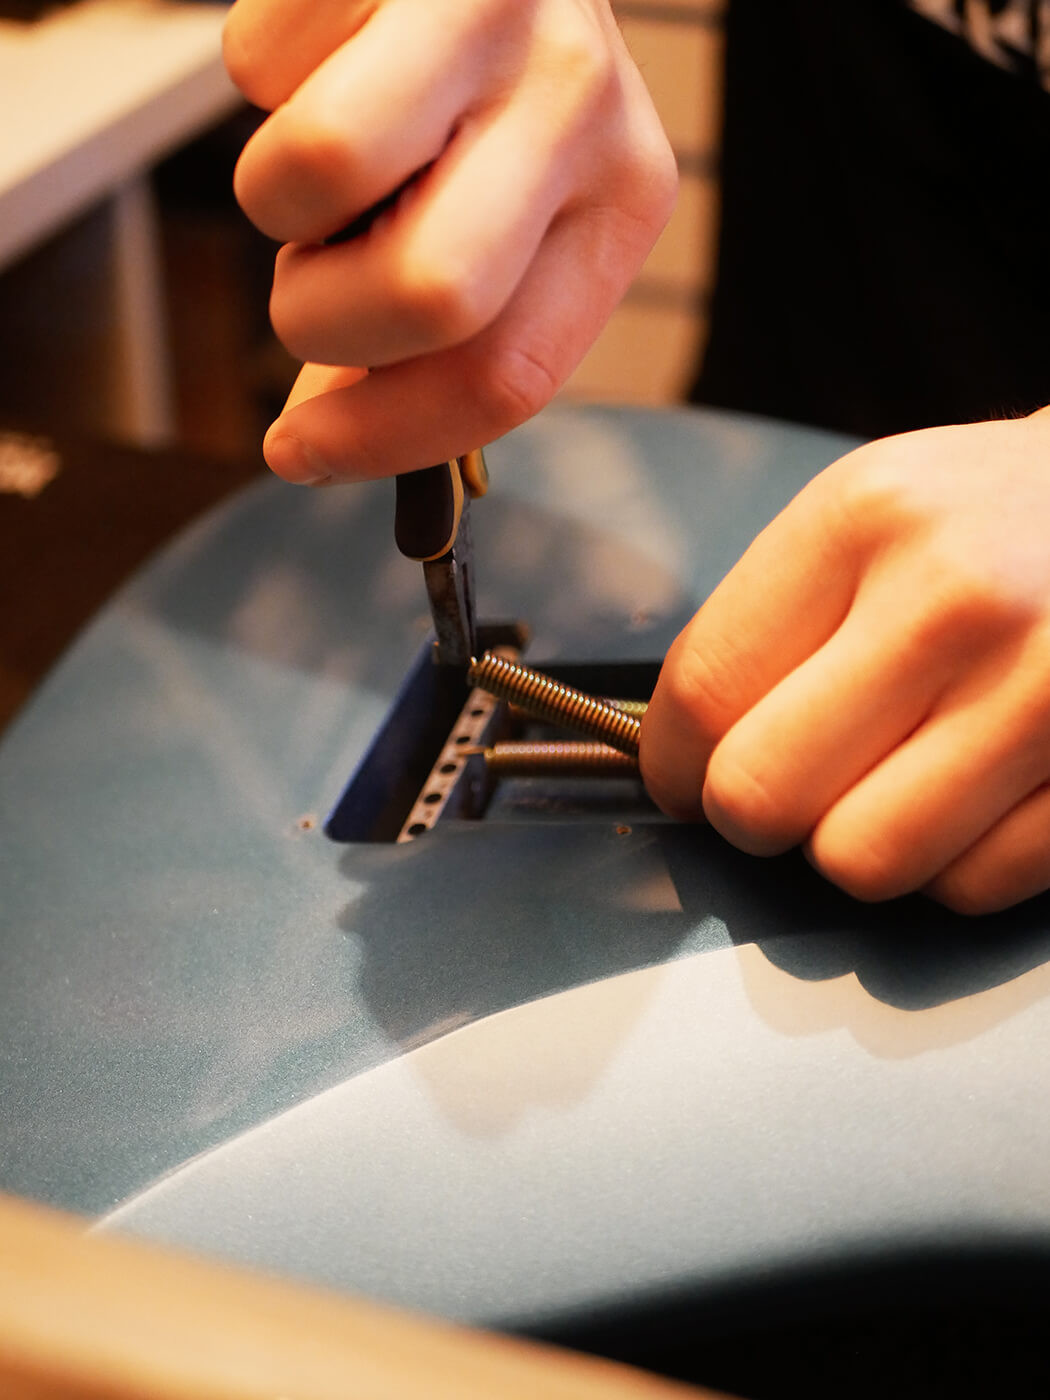
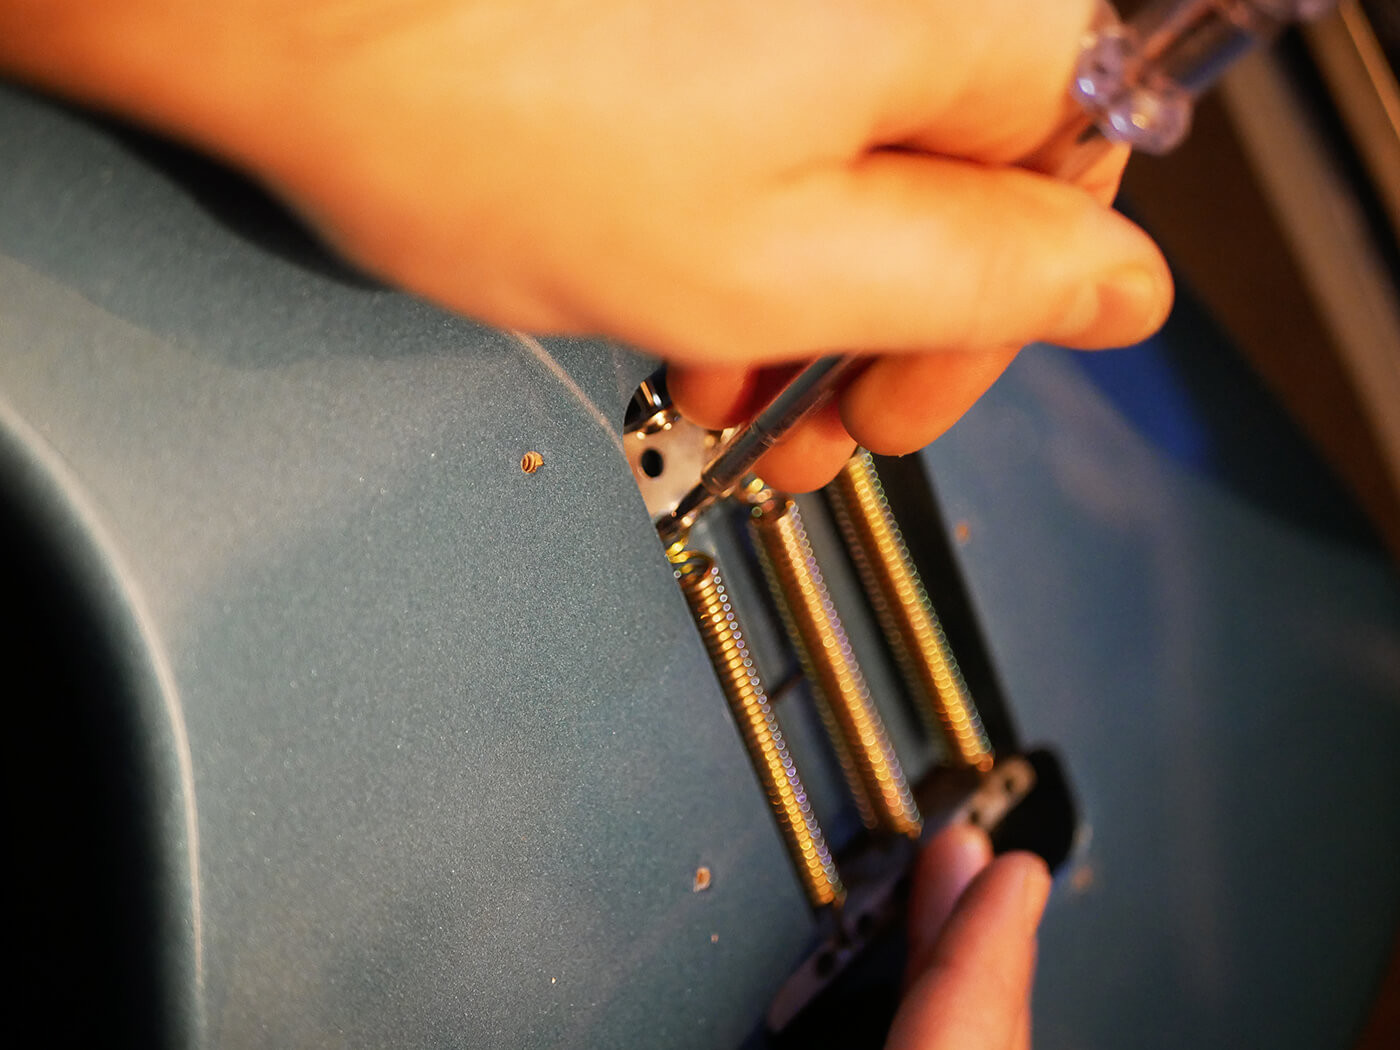
Flip your Stratocaster over to access the tremolo spring cavity on the back of the body. From the factory, the tremolo springs are often arranged in a triangular pattern. While this configuration works, many guitarists find that a straight, parallel arrangement of springs provides more stable tuning, especially when using the tremolo arm.
To change the spring configuration, slightly loosen the two large screws that secure the tremolo claw (the metal piece the springs attach to). Remove the two outer springs that are angled and reposition them so that all springs are running straight and parallel.
This can sometimes require a bit of force and dexterity. Using a flathead screwdriver to help lever the springs into place can be helpful. Once all the springs are straight, you are ready to restring the guitar.
 Adjusting tremolo springs on the back of a guitar, demonstrating a key step in how to set up a guitar for improved tuning stability.
Step 5: Restringing Your Guitar
Now it’s time to put on fresh strings. Working from the thickest string (low E) to the thinnest (high E), thread each new string through the back of the guitar body, through the tremolo block, and over the bridge saddles, ensuring each string is in its correct position.
Pull the low E string through the bridge and up to its corresponding tuning peg on the headstock. Measure approximately three inches beyond the tuning peg and cut off the excess string with your wire cutters. Repeat this process for each string. Cutting the strings to the correct length before winding makes the process neater and prevents excess string wraps around the tuning posts.
 Restringing a guitar by threading strings through the bridge, showing the process of putting on new strings in how to set up a guitar.
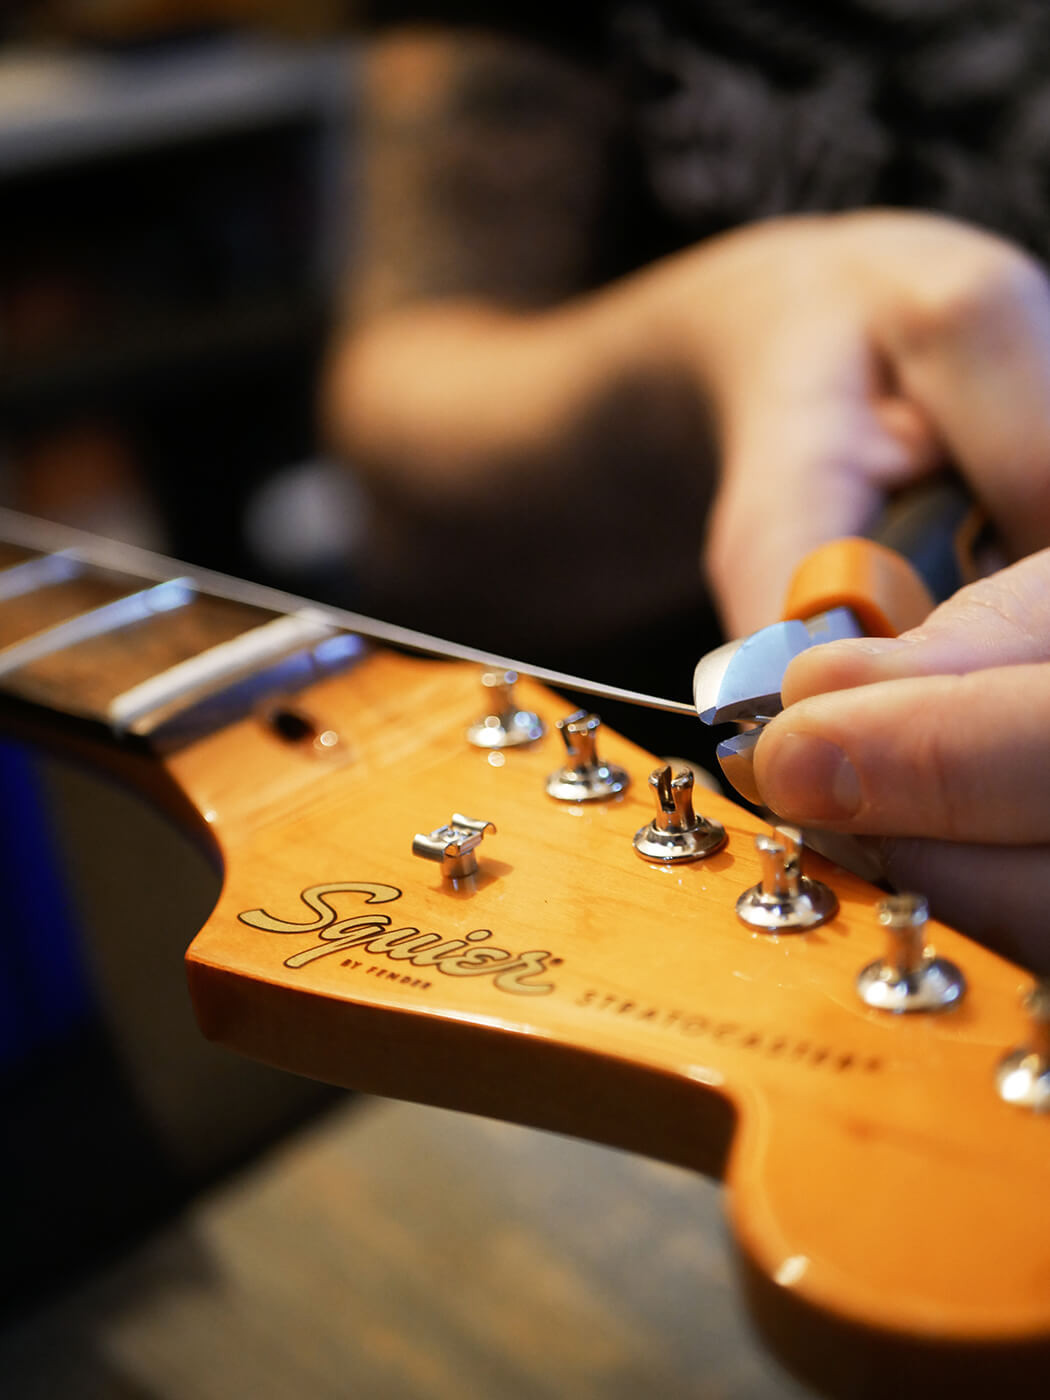
Insert the cut end of the low E string into the hole in the tuning post. Hold the string in place and begin winding the tuning peg. It’s important to wind the string neatly and ensure it travels straight across the nut towards the bridge, not at an angle. For standard tuning pegs (like on a Stratocaster), wind each string clockwise around the post. Make sure each new wrap of the string doesn’t overlap the previous one for a clean and stable string winding. Take your time, especially if you’re new to restringing guitars. Using a string winder can make this process much faster and easier.
Once all the strings are installed and roughly tuned to pitch, gently stretch each string by pulling it away from the fretboard with your thumb and index finger. This pre-stretching helps the strings settle in quickly and improves tuning stability. Your guitar should now be ready to tune up to pitch and hold its tuning more consistently.
 Tuning guitar strings on the headstock, illustrating the final stage of restringing a guitar as part of learning how to set up a guitar.
Step 6: Neck Relief and Truss Rod Adjustment
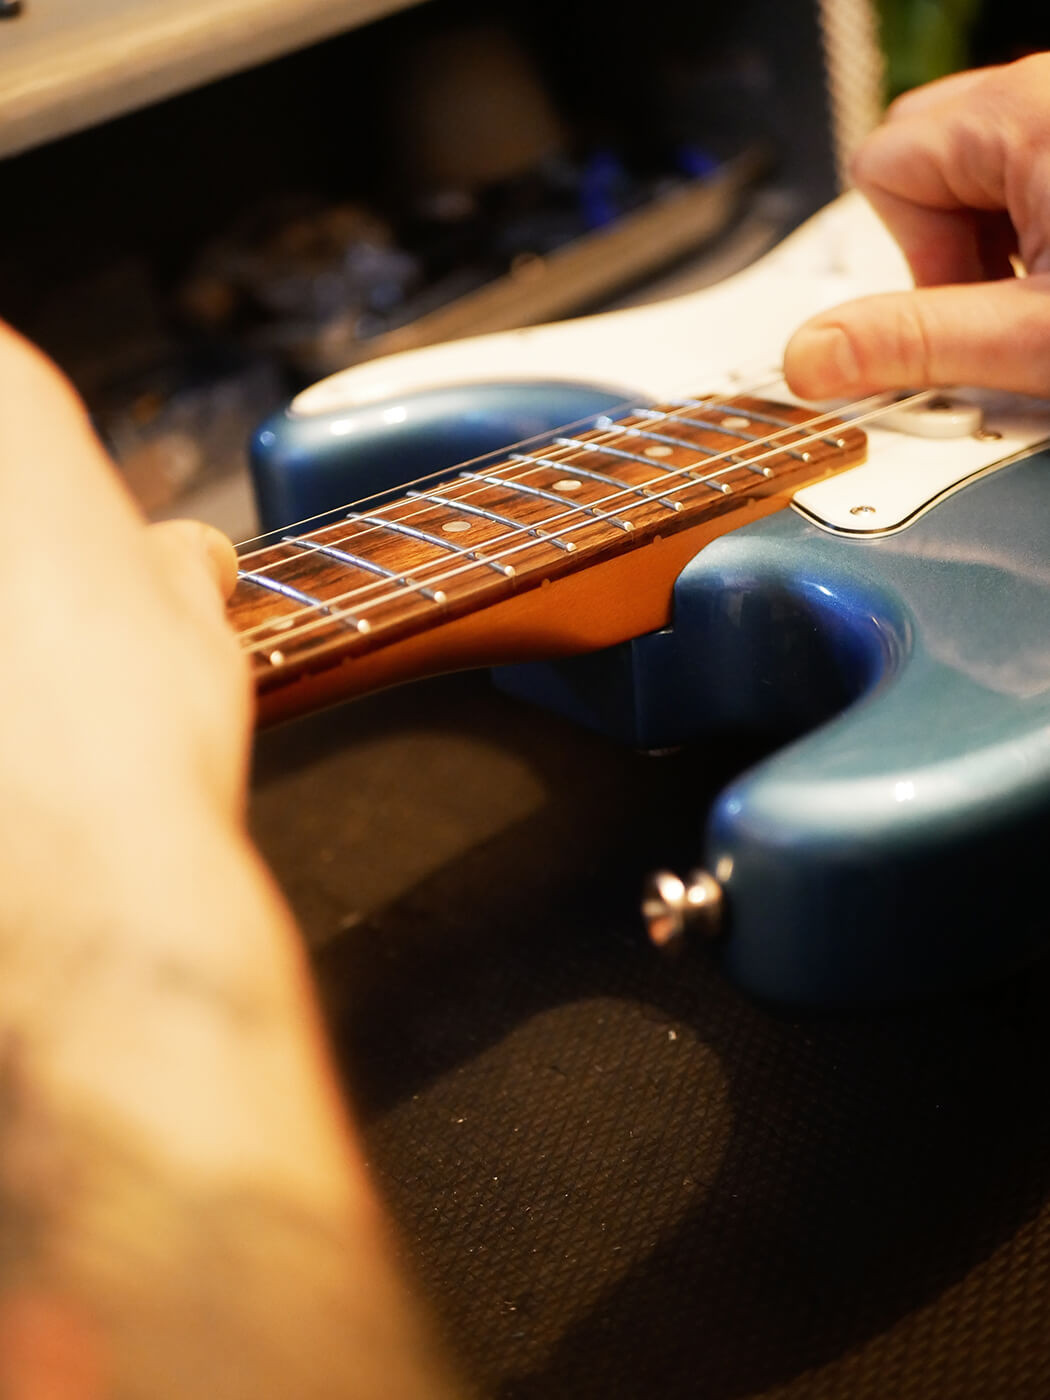
Allow your guitar about 10 minutes to acclimate to the new strings and the setup work you’ve done. Then, check the neck relief – the amount of bow or straightness in the neck. If you notice the string action is high, especially in the middle of the fretboard, it’s likely due to either excessive neck relief (the neck is bowing too much forward) or the bridge saddles being set too high.
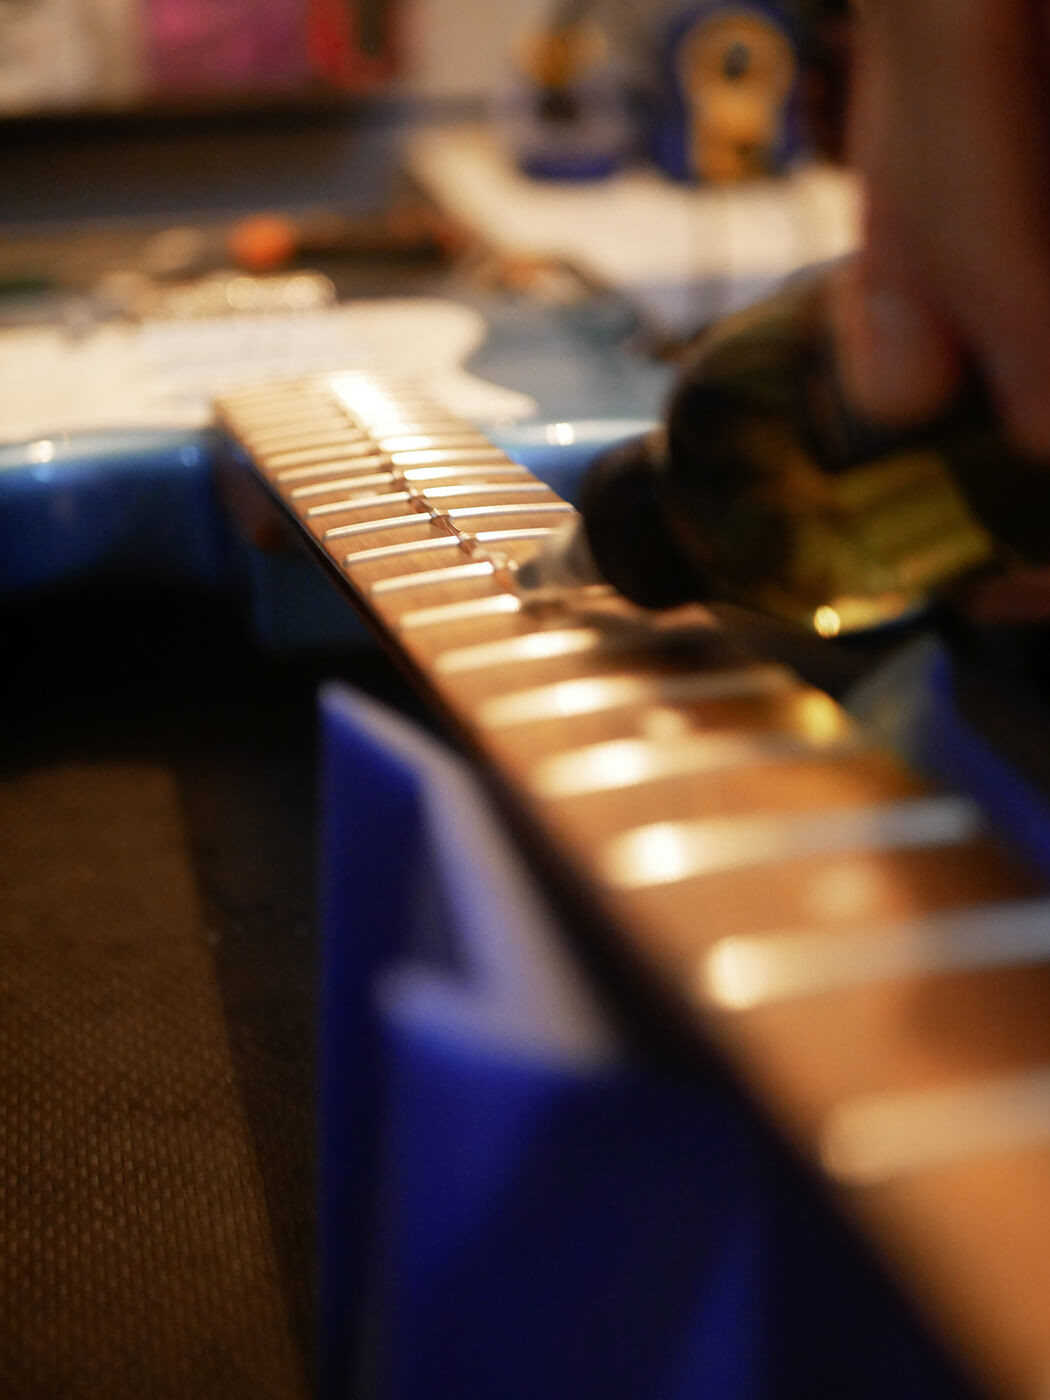
To quickly assess the neck relief, hold the guitar as if you were aiming it like a rifle and sight down the edge of the fretboard from the headstock towards the body. Focus your eye on the edge of the fretboard. If you see a noticeable curve or bow, the truss rod likely needs adjustment. If the neck appears relatively straight, the high action might be due to the bridge saddles.
 Sighting down the guitar neck to check for relief, demonstrating how to assess neck straightness in the process of how to set up a guitar.
To adjust the truss rod, you’ll need the correct size Allen key that came with your guitar. It’s good practice to slightly loosen the strings, particularly those closest to the truss rod adjustment point (usually in the headstock or near the body), before making any truss rod adjustments. Loosening all the strings is even safer.
Truss rod adjustments should be done incrementally and with caution. Overtightening the truss rod can seriously damage your guitar, potentially leading to expensive repairs or even rendering it unplayable. If you feel significant resistance when turning the truss rod, stop immediately. There might be another issue with the guitar, and it’s best to consult a professional guitar technician or return the guitar to the retailer.
 Adjusting the truss rod using an Allen key in the headstock of a guitar, showing the crucial neck relief adjustment step in how to set up a guitar.
In most cases, only a small truss rod adjustment is needed. Typically, turning the truss rod clockwise (to the right) tightens it and reduces neck relief (straightens the neck), while turning counter-clockwise (to the left) loosens it and increases neck relief (allows more bow). Remember “righty-tighty, lefty-loosey.” Make small adjustments, perhaps an eighth or a quarter of a turn at a time. After each adjustment, retune the guitar and sight down the neck again to check the relief. Repeat this process until the neck is almost straight, with just a very slight amount of relief. A flatter neck is generally preferred by most players for easier and faster playing action.
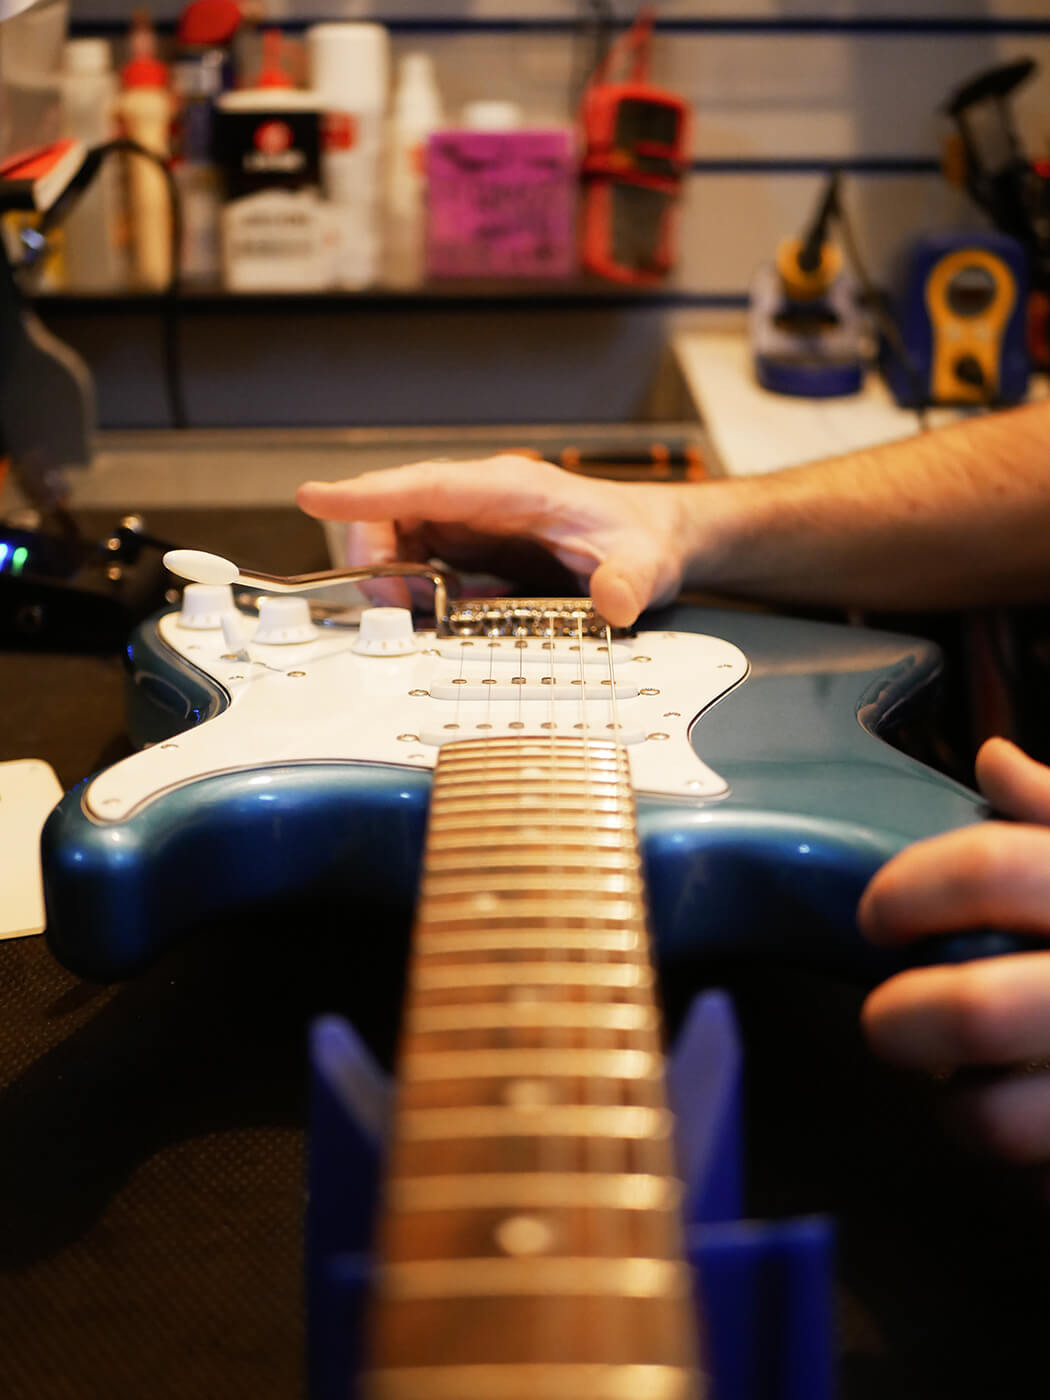
Once you’ve adjusted the truss rod and the neck relief is close to where you want it, tune the guitar back up to pitch and check the string action again. If the action is still too high, or if it’s now too low and causing string buzz, you’ll need to adjust the bridge saddles. Use the small Allen keys (often smaller than the truss rod key) to raise or lower the individual string saddles at the bridge until you achieve your preferred string height and comfortable playability across the neck.
 Adjusting bridge saddles on a guitar, showing the string height adjustment step in learning how to set up a guitar for optimal action.
Step 7: Intonation Adjustment for Accurate Tuning
Intonation is the final critical adjustment for ensuring your guitar plays in tune across the entire fretboard, from the nut to the bridge. Correct intonation means that a note fretted at the 12th fret is the same note, but one octave higher, as the open string.
A good way to check intonation is to play notes across the fretboard and listen for any that sound out of tune or “off.” Notes that don’t ring clearly or sound slightly sharp or flat, especially higher up the neck, might indicate intonation problems. These are usually corrected by adjusting the bridge saddles. If intonation issues persist even after adjustment, it could indicate a problem with fret placement from the factory, in which case you should contact the retailer.
To adjust intonation, plug your guitar into a tuner. Play the harmonic at the 12th fret of a string (lightly touch the string directly over the 12th fret and pluck). Then, fret the same string gently at the 12th fret and compare the tuner reading for both notes. Ideally, they should be the same.
If the fretted note at the 12th fret is sharp compared to the 12th fret harmonic, you need to lengthen the string by moving the bridge saddle away from the neck. If the fretted note is flat, you need to shorten the string by moving the saddle towards the neck. Most bridges have small screws that allow you to move each saddle forward or backward for intonation adjustment. Make small adjustments and re-check the intonation until the fretted 12th fret note matches the 12th fret harmonic for all strings. Factory setups often get the intonation reasonably close, so you might only need minor tweaks.
 Adjusting intonation at the guitar bridge, demonstrating the final tuning accuracy step in how to set up a guitar.
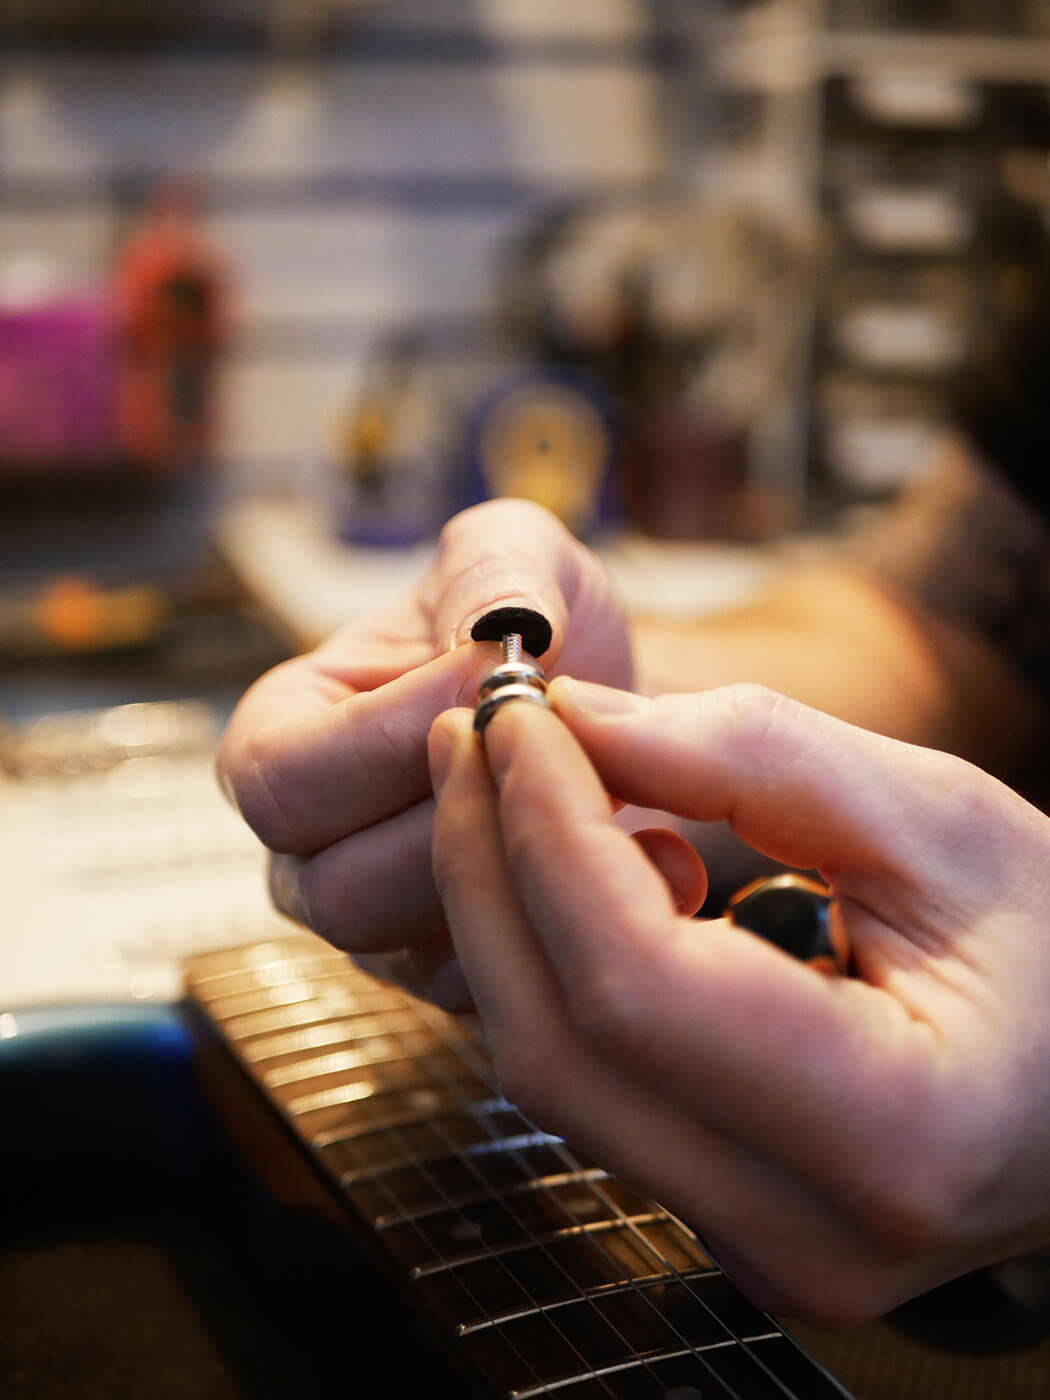
Step 8: Removing Strap Button Washers (Optional)
Finally, a small detail that can sometimes be overlooked: felt washers under the strap buttons. These are often placed at the factory to protect the guitar’s finish while the strap buttons are being installed. However, over time, these felt washers can compress and potentially cause damage to the screw threads if they are not removed. If the felt gets compressed and the screw is tightened further, it can put excessive pressure on the screw and potentially lead to screw breakage when you try to remove the strap button later.
If your guitar has felt washers under the strap buttons, we recommend removing them. Carefully unscrew the strap buttons, remove the felt washers, and then re-attach the strap buttons without the washers. Be careful not to overtighten the strap buttons when reinstalling them.
Give your guitar a final polish and test it out thoroughly. Play up and down the fretboard, check the tuning in all positions, and ensure it plays comfortably and sounds great to you. Remember, there’s no single “perfect” setup, but with these steps and a little patience, you can get your guitar playing its absolute best and maximize your enjoyment of your instrument, whether it’s brand new or a trusted second-hand companion.
If you encounter any notes that still don’t play comfortably or if you are unsure about any of these steps, don’t hesitate to repeat the process, focusing on minor adjustments. If you are still unsure or uncomfortable, it’s always a good idea to seek advice from a local guitar repair shop or experienced technician.
This comprehensive guide provides you with the essential knowledge to confidently set up your guitar. By following these steps, you can unlock the full potential of your instrument and enjoy a significantly improved playing experience.
