Repainting an electric guitar is a fantastic way to personalize your instrument and give it a fresh, new look. At guitarplayers.net, we’ll guide you through the entire process, from stripping the old finish to applying the final coats of lacquer, ensuring your guitar looks and sounds its best. Refinishing your guitar not only enhances its appearance but can also protect the wood and improve its overall playability.
1. Understanding The Need For Repainting Your Electric Guitar
Is repainting your electric guitar really necessary? Yes, repainting an electric guitar can revitalize its appearance, protect the wood, and even enhance its tone. Over time, a guitar’s finish can become worn, chipped, or faded due to playing, environmental factors, or simply aging. A new finish can protect the wood from moisture and temperature changes, which can affect the guitar’s resonance and sustain. According to research from Guitar World, a well-applied finish can contribute to a guitar’s overall sound quality by allowing the wood to vibrate freely.
1.1. Reasons to Repaint Your Electric Guitar
Why should you consider repainting your electric guitar? Here are several compelling reasons:
- Aesthetic Appeal: A fresh coat of paint can transform a dull or damaged guitar into a visually stunning instrument.
- Personalization: Repainting allows you to customize your guitar’s color and finish to match your unique style.
- Protection: A new finish shields the wood from moisture, scratches, and other environmental factors.
- Restoration: Repainting can restore a vintage guitar to its former glory, preserving its value and playability.
- Repair: Repainting can cover up blemishes, scratches, or other damage, making your guitar look new again.
1.2. Assessing Your Guitar’s Current Finish
How do you determine if your guitar needs a new paint job? Examine the finish for signs of wear and tear, such as:
- Cracks and Chips: Small cracks or chips in the finish can expose the wood to moisture, leading to warping or other damage.
- Fading: Over time, the color of the finish may fade due to exposure to sunlight or other environmental factors.
- Scratches: Deep scratches can be unsightly and may require a full repaint to correct.
- Peeling: If the finish is peeling off in large flakes, it’s definitely time for a repaint.
- Hazing: A hazy or cloudy finish can indicate that the lacquer is deteriorating.
2. Preparing Your Electric Guitar For Repainting
How do you properly prepare your electric guitar for a new finish? Proper preparation is essential for achieving a professional-looking result. This involves disassembling the guitar, stripping the old finish, and sanding the wood smooth.
2.1. Gathering The Necessary Tools And Materials
What tools and materials will you need to repaint your electric guitar? Here’s a comprehensive list:
| Tool/Material | Description |
|---|---|
| Screwdrivers | For removing hardware like knobs, pickups, and tuning pegs. |
| Wrenches | For loosening nuts and bolts on the bridge and other components. |
| Painter’s Tape | To protect areas you don’t want to paint, such as the neck pocket. |
| Drop Cloths | To protect your work area from paint spills and splatters. |
| Chemical Stripper | For removing the old finish from the guitar body. |
| Scrapers | To help remove the softened finish after applying the chemical stripper. |
| Sandpaper | Various grits (120, 220, 320, 400) for smoothing the wood surface. |
| Sanding Block | For even sanding and to avoid creating uneven surfaces. |
| Tack Cloth | To remove dust and debris before applying the new finish. |
| Primer | To provide a smooth base for the paint and improve adhesion. |
| Guitar Paint | Choose lacquer, acrylic, or polyurethane based on your desired finish and durability. |
| Clear Coat | To protect the paint and add a glossy or matte sheen. |
| Spray Gun or Aerosol Cans | For applying the primer, paint, and clear coat. |
| Buffing Compound | For polishing the final finish to a high shine. |
| Buffing Pads | For use with a buffer to achieve a smooth, glossy finish. |
| Safety Glasses | To protect your eyes from debris and chemicals. |
| Respirator | To protect your lungs from harmful fumes. |
| Gloves | To protect your hands from chemicals and paint. |
2.2. Disassembling The Guitar
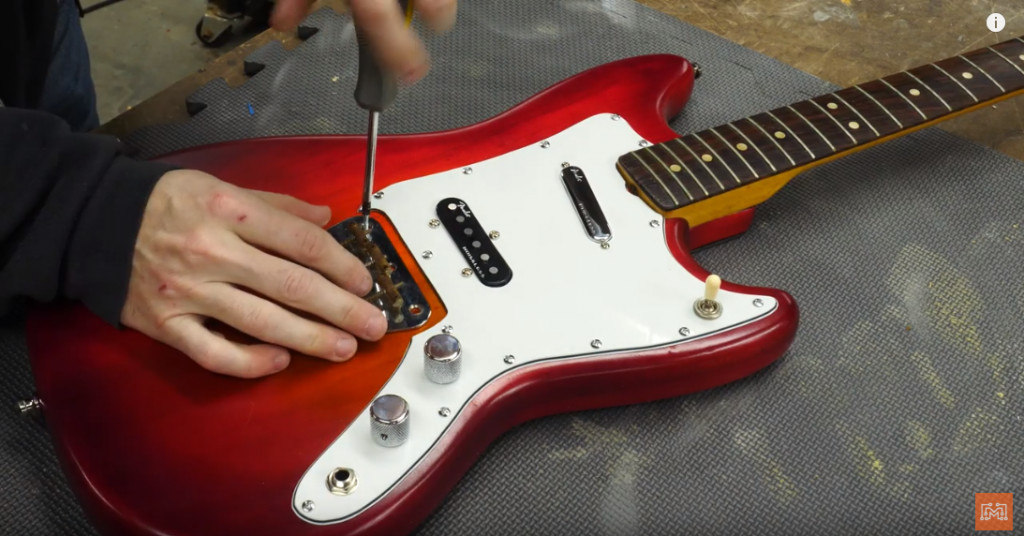
How do you safely disassemble your electric guitar? Follow these steps:
- Remove the Strings: Loosen and remove the strings from the tuning pegs and bridge.
- Remove the Hardware: Unscrew and remove the tuning pegs, bridge, tailpiece, strap buttons, and any other hardware.
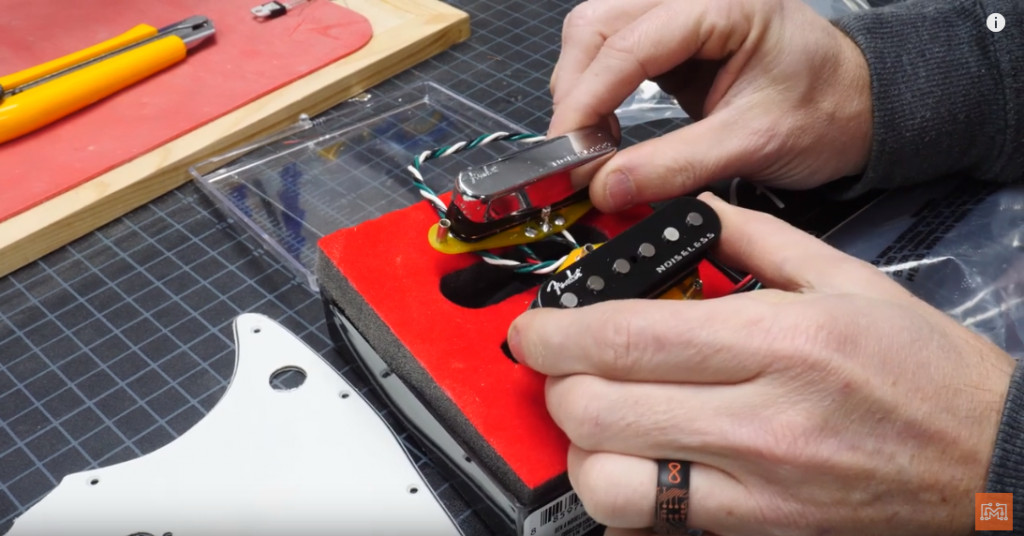
- Remove the Pickups: Disconnect the wires from the potentiometers and switches, then unscrew and remove the pickups.
- Remove the Electronics: Carefully remove the potentiometers, switches, and output jack from the guitar body.
- Remove the Neck: Unscrew the neck bolts and carefully remove the neck from the body.
It’s a great idea to take photos or make notes during disassembly to help you remember how everything goes back together.
2.3. Stripping The Old Finish
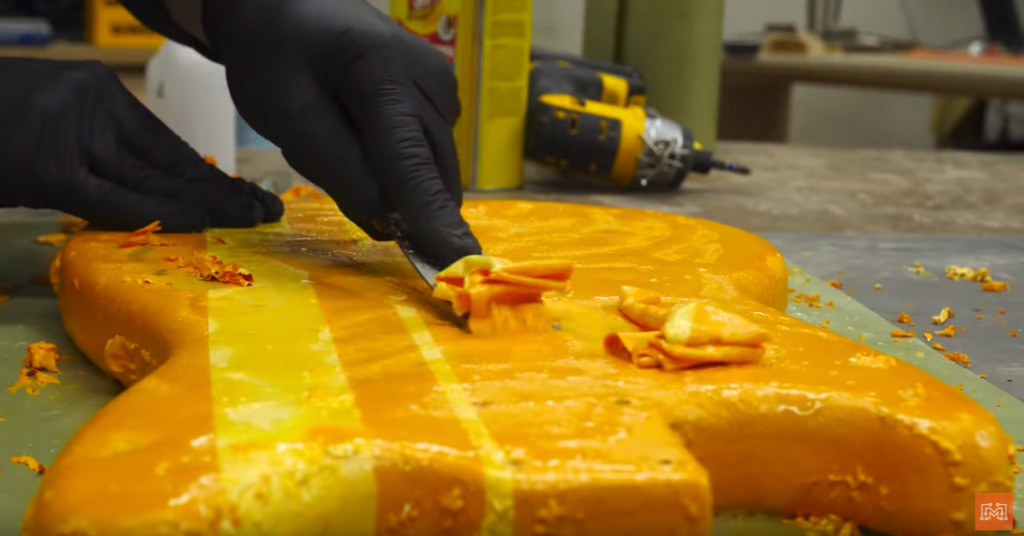
What’s the best way to remove the old finish from your guitar? There are two primary methods: chemical stripping and sanding.
- Chemical Stripping: Apply a chemical stripper to the guitar’s surface, following the manufacturer’s instructions. Allow the stripper to soften the finish, then use a scraper to remove it. Be sure to wear gloves and a respirator when working with chemical strippers.
- Sanding: Use sandpaper to sand away the old finish. Start with a coarse grit (120) and gradually move to finer grits (220, 320, 400) as you smooth the surface. Be careful not to sand too aggressively, as this can damage the wood.
Chemical stripping is generally faster and easier, but sanding allows for more control and precision.
2.4. Sanding The Body Smooth
How do you achieve a perfectly smooth surface for painting? Sanding is the key.
- Start with Coarse Grit: Begin with 120-grit sandpaper to remove any remaining finish and smooth out imperfections.
- Move to Medium Grit: Switch to 220-grit sandpaper to further refine the surface.
- Finish with Fine Grit: Use 320 or 400-grit sandpaper to achieve a silky-smooth surface.
- Sand with the Grain: Always sand in the direction of the wood grain to avoid creating scratches.
- Use a Sanding Block: Wrap the sandpaper around a sanding block to ensure even pressure and avoid creating uneven surfaces.
After sanding, wipe down the guitar body with a tack cloth to remove any dust or debris.
3. Choosing The Right Paint And Finish For Your Electric Guitar
What type of paint and finish should you use for your electric guitar? The choice of paint and finish can greatly affect the appearance, durability, and tone of your guitar.
3.1. Types Of Guitar Finishes
What are the different types of guitar finishes available? Here are some of the most common options:
- Lacquer: A traditional finish known for its glossy appearance and ability to age gracefully. Lacquer is relatively thin, allowing the wood to vibrate freely.
- Polyurethane: A durable and flexible finish that provides excellent protection against scratches and moisture. Polyurethane is often used on modern guitars due to its resilience.
- Acrylic: A water-based finish that is easy to apply and environmentally friendly. Acrylic finishes are less durable than lacquer or polyurethane but are a good option for beginners.
- Oil-Based: Finishes that penetrate the wood offering a natural look and feel. They offer minimal protection compared to the other finishes.
3.2. Selecting The Right Color And Sheen
How do you choose the perfect color and sheen for your guitar? Consider your personal preferences, the style of the guitar, and the desired aesthetic.
- Color: Choose a color that reflects your personality and complements the guitar’s design. Popular options include classic colors like black, white, and sunburst, as well as more vibrant colors like red, blue, and green.
- Sheen: Decide whether you want a glossy, satin, or matte finish. Glossy finishes are shiny and reflective, while satin and matte finishes have a more subdued appearance.
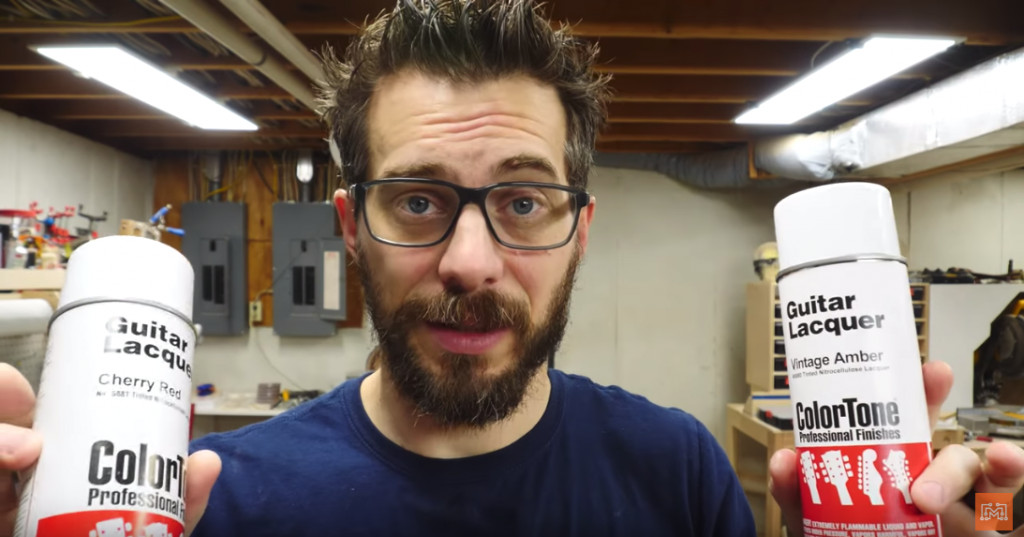
3.3. Understanding ColorTone Lacquers
What makes ColorTone lacquers a popular choice for guitar finishes? ColorTone lacquers are specifically formulated for musical instruments, providing excellent color, clarity, and durability. They are available in a wide range of colors and sheens, making them a versatile option for any guitar project.
According to Stewart-MacDonald, a leading supplier of guitar parts and tools, ColorTone lacquers are prized for their ease of application and ability to produce a professional-looking finish.
4. Priming Your Electric Guitar
Why is priming an essential step in repainting your electric guitar? Primer creates a smooth, uniform surface for the paint to adhere to, improving the finish’s durability and appearance.
4.1. Applying The First Coat Of Primer
How do you properly apply the first coat of primer? Follow these steps:
- Prepare the Surface: Make sure the guitar body is clean, dry, and free of any dust or debris.
- Mix the Primer: Stir the primer thoroughly to ensure a consistent consistency.
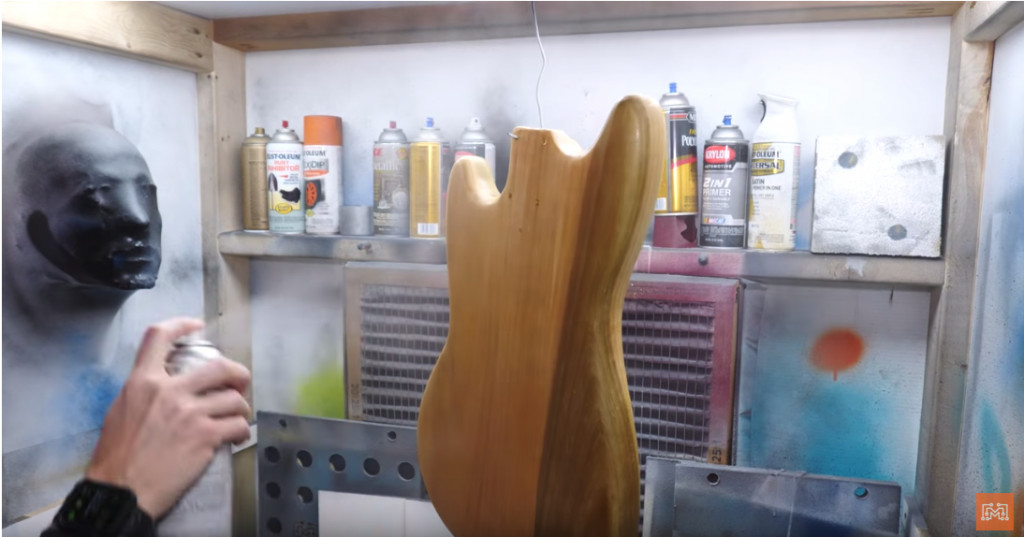
- Apply a Thin Coat: Use a spray gun or aerosol can to apply a thin, even coat of primer to the guitar body.
- Avoid Runs and Drips: Keep the spray gun or can moving to prevent the primer from running or dripping.
- Let it Dry: Allow the primer to dry completely according to the manufacturer’s instructions.
4.2. Sanding The Primer
How do you prepare the primed surface for painting? Sanding the primer smooths out any imperfections and creates a better surface for the paint to adhere to.
- Use Fine-Grit Sandpaper: Use 320 or 400-grit sandpaper to lightly sand the primer.
- Sand Evenly: Sand the entire surface evenly to avoid creating low spots.
- Remove Dust: Wipe down the guitar body with a tack cloth to remove any dust or debris.
4.3. Applying Additional Coats Of Primer (If Needed)
When should you apply additional coats of primer? If the first coat of primer doesn’t completely cover the wood grain or if there are still imperfections in the surface, apply additional coats of primer, sanding between each coat.
5. Applying The Base Coat Of Paint To Your Electric Guitar
How do you apply the base coat of paint to your electric guitar? Applying the base coat is a crucial step in achieving a vibrant, even finish.
5.1. Mixing The Paint
How do you properly mix guitar paint? Stir the paint thoroughly to ensure a consistent consistency. If using a two-part paint, mix the components according to the manufacturer’s instructions.
5.2. Spraying The Base Coat
What’s the best technique for spraying the base coat? Use a spray gun or aerosol can to apply thin, even coats of paint to the guitar body.
- Maintain Consistent Distance: Hold the spray gun or can about 10-12 inches from the guitar body.
- Overlap Each Pass: Overlap each pass by about 50% to ensure even coverage.
- Avoid Runs and Drips: Keep the spray gun or can moving to prevent the paint from running or dripping.
5.3. Allowing The Base Coat To Dry
How long should you let the base coat dry? Allow the base coat to dry completely according to the manufacturer’s instructions, typically 24-48 hours.
6. Applying Custom Finishes And Colors To Your Electric Guitar
How can you create custom finishes and colors on your electric guitar? Custom finishes and colors can add a unique touch to your instrument, allowing you to express your creativity and personality.
6.1. Sunburst Finishes
What is a sunburst finish and how is it achieved? A sunburst finish involves blending multiple colors together, typically with a lighter color in the center fading to darker colors at the edges.
- Apply the Base Color: Start by spraying the entire guitar body with a light base color, such as vintage amber or cream.
- Mask the Center: Use a cardboard template or masking tape to cover the center of the guitar body.
- Apply the Edge Color: Spray the edges of the guitar body with a darker color, such as cherry red or tobacco brown.
- Blend the Colors: Carefully blend the colors together by feathering the edge color towards the center of the guitar body.
6.2. Metallic Finishes
How do you apply a metallic finish to your electric guitar? Metallic finishes add a sparkling, eye-catching effect to your instrument.
- Use Metallic Paint: Choose a metallic paint specifically designed for guitars.
- Apply Thin Coats: Apply thin, even coats of metallic paint to the guitar body.
- Avoid Runs: Metallic paints are prone to running, so be extra careful to avoid applying too much paint in one area.
6.3. Custom Graphics And Designs
How can you add custom graphics and designs to your electric guitar? Custom graphics and designs can range from simple stripes and patterns to elaborate murals and illustrations.
- Create a Template: Use stencils, tape, or freehand drawing to create your desired design on the guitar body.
- Apply the Paint: Carefully apply the paint to the design, using a brush, spray gun, or airbrush.
- Seal the Design: Once the paint is dry, seal the design with a clear coat to protect it from damage.
7. Applying The Clear Coat To Your Electric Guitar
Why is a clear coat necessary for repainting your electric guitar? Clear coat protects the paint from scratches, fading, and other damage, while also adding a glossy or matte sheen to the finish.
7.1. Applying Multiple Coats Of Clear Coat
How many coats of clear coat should you apply? Apply at least three coats of clear coat to ensure adequate protection.
- Apply Thin Coats: Apply thin, even coats of clear coat to the guitar body.
- Allow Each Coat to Dry: Allow each coat to dry completely before applying the next coat, typically 24-48 hours.
7.2. Wet Sanding The Clear Coat
What is wet sanding and why is it important? Wet sanding involves sanding the clear coat with water and fine-grit sandpaper to create a perfectly smooth surface.
- Use Fine-Grit Sandpaper: Use 600, 800, or 1000-grit sandpaper for wet sanding.
- Soak the Sandpaper: Soak the sandpaper in water for several minutes before sanding.
- Sand with Water: Keep the surface wet while sanding to prevent the sandpaper from clogging.
- Sand Evenly: Sand the entire surface evenly to avoid creating low spots.
7.3. Buffing The Clear Coat
How do you buff the clear coat to a high shine? Buffing the clear coat with a buffing compound and a polishing pad creates a glossy, mirror-like finish.
- Apply Buffing Compound: Apply a small amount of buffing compound to the polishing pad.
- Buff the Surface: Use a buffer to buff the surface in a circular motion.
- Apply Pressure: Apply gentle pressure to the buffer while buffing.
8. Reassembling Your Electric Guitar
How do you properly reassemble your electric guitar after repainting? Reassembling the guitar requires care and attention to detail to ensure that all components are properly installed and functioning correctly.
8.1. Reinstalling The Hardware And Electronics
How do you reinstall the hardware and electronics? Follow these steps:
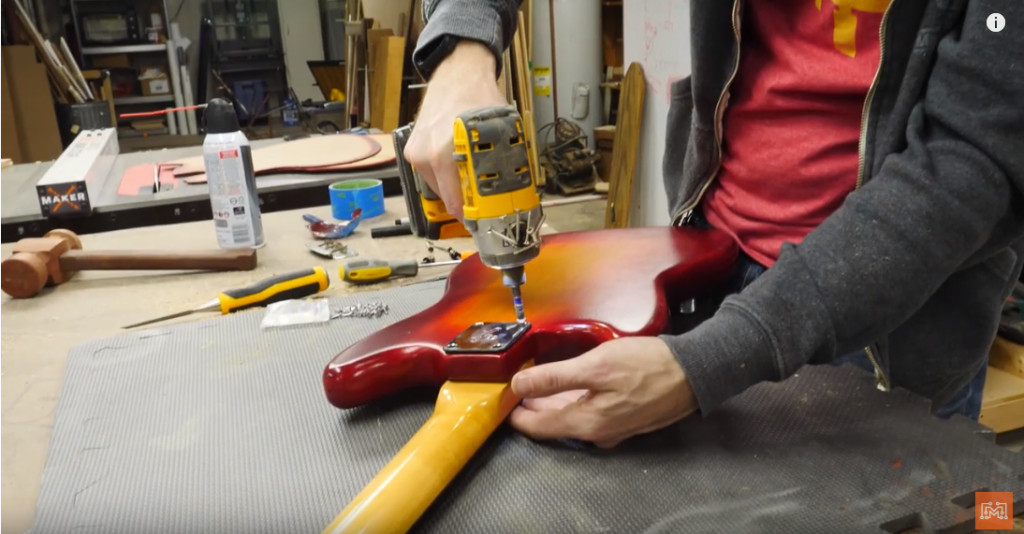
- Reinstall the Neck: Attach the neck to the body using the neck bolts.
- Reinstall the Pickups: Reconnect the pickup wires to the potentiometers and switches, then screw the pickups into the body.
- Reinstall the Electronics: Reinstall the potentiometers, switches, and output jack into the guitar body.
- Reinstall the Hardware: Reattach the tuning pegs, bridge, tailpiece, strap buttons, and any other hardware.
8.2. Setting Up The Guitar
What is involved in setting up your guitar after reassembly? Setting up the guitar involves adjusting the action, intonation, and other parameters to ensure optimal playability.
- Adjust the Action: Adjust the height of the strings at the bridge to achieve a comfortable action.
- Adjust the Intonation: Adjust the length of the strings at the bridge to ensure that the guitar plays in tune across the fretboard.
- Adjust the Pickup Height: Adjust the height of the pickups to achieve the desired tone.
8.3. Stringing The Guitar
How do you properly string your electric guitar? Follow these steps:
- Attach the Strings: Insert the strings through the bridge and thread them through the tuning pegs.
- Wind the Strings: Wind the strings around the tuning pegs, making sure to wind them neatly and evenly.
- Stretch the Strings: Stretch the strings by pulling them away from the fretboard.
- Tune the Guitar: Tune the guitar to the desired pitch using a tuner.

9. Maintaining Your Newly Repainted Electric Guitar
How do you care for your newly repainted electric guitar? Proper maintenance will help to preserve the finish and keep your guitar looking its best for years to come.
9.1. Cleaning The Guitar
How often should you clean your guitar? Clean your guitar regularly with a soft cloth to remove dust, fingerprints, and other debris.
- Use a Guitar Polish: Use a guitar polish specifically designed for your guitar’s finish.
- Apply the Polish: Apply a small amount of polish to a soft cloth.
- Wipe the Guitar: Wipe the guitar down with the cloth, using a circular motion.
- Buff the Guitar: Buff the guitar with a clean, dry cloth to remove any polish residue.
9.2. Storing The Guitar Properly
How should you store your guitar when you’re not playing it? Store your guitar in a case or gig bag to protect it from dust, moisture, and other environmental factors.
- Avoid Extreme Temperatures: Avoid storing your guitar in direct sunlight or in areas with extreme temperatures or humidity.
- Loosen the Strings: If you’re not going to be playing your guitar for an extended period of time, loosen the strings to relieve tension on the neck.
9.3. Avoiding Common Mistakes
What are some common mistakes to avoid when repainting an electric guitar? Here are a few tips to help you avoid common pitfalls:
- Don’t Rush the Process: Take your time and be patient. Rushing through the process can lead to mistakes and a poor-quality finish.
- Don’t Skip the Prep Work: Proper preparation is essential for achieving a professional-looking result.
- Don’t Apply Too Much Paint: Applying too much paint can lead to runs, drips, and other imperfections.
- Don’t Neglect Safety Precautions: Always wear safety glasses, a respirator, and gloves when working with chemicals and paints.
10. Finding Inspiration And Resources At Guitarplayers.Net
Are you looking for more inspiration and resources for your guitar projects? Guitarplayers.net is your go-to source for all things guitar-related.
10.1. Exploring Guitar Lessons And Tutorials
Looking to improve your playing skills? Guitarplayers.net offers a wide range of guitar lessons and tutorials for players of all levels, from beginners to advanced.
10.2. Reading Guitar Reviews And Comparisons
Trying to decide which guitar or gear to buy? Guitarplayers.net features in-depth reviews and comparisons of guitars, amps, pedals, and other equipment.
10.3. Joining The Guitarplayers.Net Community
Want to connect with other guitar enthusiasts? Join the Guitarplayers.net community forum to share your experiences, ask questions, and get feedback on your playing.
At guitarplayers.net, we understand the challenges guitar players face, which is why we offer a wealth of free and paid resources to help you succeed. Whether you’re looking for lessons, reviews, or a community of fellow musicians, we’ve got you covered. Dive into our vast library of guitar tabs and sheet music, explore diverse musical genres, and connect with other guitar players to share your experiences and learn from their expertise. Our goal is to make your musical journey as smooth and enjoyable as possible.
Ready to take your guitar to the next level? Visit guitarplayers.net today to explore our lessons, discover new gear, and join our thriving community of guitar enthusiasts. Let guitarplayers.net be your guide as you explore the world of guitar playing!
Address: 1140 Boylston Street, Boston, MA 02215, United States. Phone: +1 (617) 747-2261. Website: guitarplayers.net.
FAQ: How to Repaint an Electric Guitar
1. Can I repaint my electric guitar myself?
Yes, you can definitely repaint your electric guitar yourself. With the right tools, materials, and a bit of patience, you can achieve a professional-looking finish. However, it’s essential to follow the proper steps and take necessary precautions to ensure the best results.
2. What kind of paint is best for repainting an electric guitar?
The best type of paint for repainting an electric guitar is typically lacquer, acrylic, or polyurethane-based paint. Lacquer is a traditional choice, known for its glossy appearance, while acrylic is water-based and environmentally friendly. Polyurethane is durable and flexible, providing excellent protection against scratches and moisture.
3. How much does it cost to repaint an electric guitar?
The cost to repaint an electric guitar can vary depending on whether you do it yourself or hire a professional. DIY repainting can cost anywhere from $50 to $200, depending on the materials used. Professional repainting can range from $300 to $1000 or more, depending on the complexity of the finish and the expertise of the technician.
4. Do I need to sand my guitar before repainting it?
Yes, sanding your guitar is crucial before repainting it. Sanding helps to remove the old finish, smooth out imperfections, and create a better surface for the new paint to adhere to. Start with a coarse grit sandpaper and gradually move to finer grits for a smooth finish.
5. How do I remove the old finish from my electric guitar?
You can remove the old finish from your electric guitar using either chemical stripping or sanding. Chemical stripping involves applying a chemical stripper to soften the finish, while sanding involves using sandpaper to gradually remove the finish. Choose the method that best suits your skill level and comfort.
6. What is the purpose of using a primer before painting my electric guitar?
Primer creates a smooth, uniform surface for the paint to adhere to, improving the finish’s durability and appearance. It also helps to seal the wood and prevent the paint from being absorbed unevenly.
7. How many coats of paint should I apply when repainting my electric guitar?
Apply thin, even coats of paint to the guitar body, allowing each coat to dry completely before applying the next coat. The number of coats will depend on the type of paint and the desired color intensity.
8. What is clear coat, and why is it important when repainting my electric guitar?
Clear coat is a transparent layer of finish applied over the paint to protect it from scratches, fading, and other damage. It also adds a glossy or matte sheen to the finish, enhancing the overall appearance of the guitar.
9. How do I maintain my newly repainted electric guitar?
Maintain your newly repainted electric guitar by cleaning it regularly with a soft cloth and guitar polish. Store it in a case or gig bag to protect it from dust, moisture, and extreme temperatures. Avoid exposing it to direct sunlight or harsh chemicals, which can damage the finish.
10. Where can I find more resources and inspiration for my guitar projects?
You can find more resources and inspiration for your guitar projects at guitarplayers.net. Explore our lessons, reviews, and community forum to connect with other guitar enthusiasts and learn new skills.
Repainting an electric guitar can be a rewarding project for any guitar enthusiast looking to personalize their instrument and give it a fresh, new look. Whether you’re aiming to restore a vintage guitar, create a custom finish, or simply repair a damaged instrument, the process involves careful preparation, the right materials, and a bit of patience. With the comprehensive guide provided here, along with the wealth of resources available at guitarplayers.net, you can confidently embark on your guitar repainting journey and achieve professional-looking results. Remember to take your time, follow the steps carefully, and enjoy the process of transforming your electric guitar into a unique work of art.