Learning guitar chords is fundamental for any aspiring guitarist. Chord charts are your roadmap to mastering these essential building blocks of music. They might look confusing at first, but understanding how to read guitar chord charts is simpler than you think. This guide will break down each component, ensuring you can confidently learn new chords and expand your musical horizons.
What is a Guitar Chord Chart?
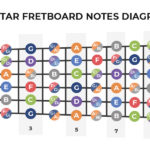
Imagine a guitar chord chart as a visual shortcut for learning guitar chords. Instead of lengthy written instructions, it uses a diagram to show you exactly where to place your fingers on the fretboard to play a specific chord. Think of it like a simplified map of a section of your guitar neck. This diagram is presented as a grid: vertical lines represent your guitar’s six strings, and horizontal lines symbolize the frets. The thick black line at the top of the chart is the guitar’s nut, acting as your starting reference point to identify the correct frets.
Decoding the Anatomy of a Chord Chart
While chord charts are visual aids for finger placement, understanding their components is key to truly reading them effectively. Each line and symbol on a chord chart provides crucial information about how to form a chord.
Vertical & Horizontal Lines
The grid of a chord chart is formed by vertical and horizontal lines, each representing a different part of your guitar.
-
Vertical Lines: These six lines, running from top to bottom, represent the six strings of your guitar. Reading from left to right, they correspond to the strings from thickest to thinnest:
- 6th String: Low E
- 5th String: A
- 4th String: D
- 3rd String: G
- 2nd String: B
- 1st String: High E
-
Horizontal Lines: These lines indicate the frets on your guitar’s fretboard. The space between two horizontal lines represents a single fret. The top horizontal line, often thicker, represents the guitar’s nut (fret zero). Frets are numbered downwards from the nut (1st fret, 2nd fret, and so on), although fret numbers are not always explicitly shown on basic chord charts.
Dots and Numbers
Within the grid, you’ll notice dots placed at the intersections of vertical and horizontal lines. These dots, sometimes containing numbers, are crucial for finger placement.
-
Dots: A dot indicates that you need to press down on that string at the corresponding fret. The position of the dot tells you which string and fret to use.
-
Numbers: When a number appears inside a dot, it specifies which finger of your fretting hand you should use. The numbers correspond to your fingers as follows:
- 1: Index finger
- 2: Middle finger
- 3: Ring finger
- 4: Pinky finger
X’s and O’s
Above the chord chart grid, you might see “X”s and “O”s. These symbols tell you which strings to play and which to mute when strumming the chord.
- X: An “X” above a string indicates that you should not play that string. You should mute or avoid strumming it with your picking hand.
- O: An “O” above a string means you should play that string in the open position. This means you strum the string without pressing down on any fret.
Putting It All Together: Reading a Chord Chart Example
Let’s look at a practical example using the Asus2 chord chart as depicted in the image above.
- Nut Reference: The thick black line at the top is the nut. This chart starts at the open position/nut.
- X on the 6th String: The “X” above the thickest string (6th string, Low E) tells you to mute this string. Don’t play it when strumming.
- O on the 5th String: The “O” above the 5th string (A string) indicates you play this string open (without fretting).
- Dot with “1” on the 4th String, 2nd Fret: This dot tells you to press down the 4th string (D string) at the 2nd fret using your index finger (finger 1).
- Dot with “2” on the 2nd String, 2nd Fret: This dot indicates pressing down the 2nd string (B string) at the 2nd fret with your middle finger (finger 2).
- O on the 1st and 3rd Strings: The “O”s above the 3rd (G) and 1st (high E) strings mean you play these strings open.
Therefore, to play Asus2, you would mute the low E string, play the A, G, and high E strings open, and fret the D and B strings at the 2nd fret with your index and middle fingers respectively.
Why Learn to Read Chord Charts?
Learning to read guitar chord charts is an invaluable skill for several reasons:
- Efficiency: Chord charts are a quick and efficient way to learn new chords. You can visually grasp finger placements almost instantly.
- Chord Vocabulary Expansion: With the ability to read chord charts, you can easily access and learn a vast library of chords, moving beyond basic shapes.
- Song Learning: Most guitar tabs and songbooks use chord charts. Knowing how to read them allows you to learn songs more easily and play along with your favorite music.
- Guitaristic Communication: Chord charts are a universal language among guitarists. You can communicate chord shapes and voicings with other players regardless of language barriers.
Take Your Chord Skills Further with Fender Play
Now that you understand how to decipher chord charts, you’re ready to put this knowledge into practice! Fender Play offers a comprehensive and engaging way to learn guitar, including an extensive chord library filled with chord charts for every level. You can learn songs you love and utilize the Chord Challenge mode to test your chord transition skills. Fender Play provides structured lessons and resources to help you master chords and much more, making your guitar journey fun and rewarding.
Conclusion
Mastering how to read guitar chord charts is a foundational step in your guitar playing journey. It unlocks a world of musical possibilities, allowing you to learn countless chords and songs. By understanding the anatomy of a chord chart – the lines, dots, numbers, and symbols – you’ll be well-equipped to expand your guitar skills and enjoy making music. So, grab your guitar, explore chord charts, and start strumming!