Painting a guitar body can breathe new life into your instrument or allow you to create a custom look. At guitarplayers.net, we provide expert guidance on transforming your guitar with a professional-quality finish. This guide offers detailed instructions on guitar refinishing, spray painting techniques, and achieving the perfect guitar finish. Dive in to discover the secrets to a stunning guitar makeover!
1. Understanding the Basics of Guitar Body Painting
What are the fundamental steps for a successful guitar body paint job?
The first step in painting a guitar body is thorough preparation. This involves disassembling the guitar, sanding the body to create a smooth surface, and applying a primer. Once primed, you can apply your chosen color in thin, even coats, followed by a clear coat for protection and shine. Finally, the guitar body is carefully reassembled. This meticulous approach ensures a professional and durable finish.
Expanding on this, the importance of each step cannot be overstated:
- Disassembly: Removing all hardware, pickups, and the neck ensures a clean, unobstructed surface for painting.
- Sanding: Proper sanding removes existing finishes and creates a “tooth” for the new paint to adhere to.
- Priming: Primer seals the wood, provides a uniform base for the color coat, and improves adhesion.
- Color Coats: Thin, even coats prevent runs and drips, ensuring a consistent color.
- Clear Coat: Clear coat protects the color, adds depth and gloss, and can be buffed to a high shine.
Following each of these steps carefully will result in a beautiful, long-lasting finish.
2. Essential Tools and Materials for Guitar Painting
What tools and materials are indispensable for painting a guitar body effectively?
Essential tools for painting a guitar body include sandpaper (various grits), primer, paint (spray or liquid), clear coat, masking tape, tack cloth, and polishing compounds. Depending on the application method, you may also need a spray gun or paintbrushes. Safety gear like a respirator and gloves are also crucial.
Here’s a detailed breakdown:
| Tool/Material | Purpose | Notes |
|---|---|---|
| Sandpaper (80-400 grit) | Removing old finish, leveling the surface | Start with coarser grits to remove old finish, then move to finer grits for a smooth surface. |
| Sandpaper (800-2000 grit) | Smoothing between coats, preparing for polishing | Finer grits are used to remove imperfections in the finish and prepare for a glossy final product. |
| Primer | Sealing the wood, providing a uniform base for paint | Choose a primer compatible with your chosen paint. |
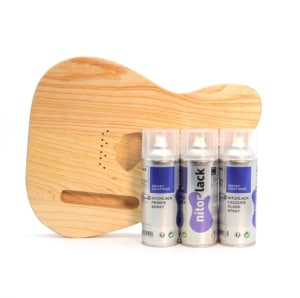
| Paint (Spray or Liquid) | Applying color to the guitar body | Nitrocellulose, acrylic lacquer, and polyurethane are common choices. Each has different properties regarding drying time, durability, and finish. |
| Clear Coat | Protecting the color, adding gloss and depth | Apply multiple coats for maximum protection and depth. |
| Masking Tape | Protecting areas that should not be painted (e.g., binding, fretboard) | Use high-quality tape that leaves a clean edge. |
| Tack Cloth | Removing dust and debris before painting | This ensures a clean surface for optimal paint adhesion. |
| Polishing Compounds | Buffing the clear coat to a high shine | Start with coarser compounds to remove imperfections, then move to finer compounds for a mirror finish. |
| Spray Gun | Applying paint evenly (if using liquid paint) | Requires practice and proper setup for optimal results. |
| Paintbrushes | Applying paint (if using liquid paint), touch-ups | Use high-quality brushes designed for the type of paint you’re using. |
| Respirator | Protecting lungs from harmful fumes | Essential when working with spray paints and solvents. |
| Gloves | Protecting hands from paint and solvents | Choose gloves that are resistant to the chemicals you’re using. |
Having the right tools and materials will greatly improve the quality of your paint job and make the process more efficient.
3. Preparing the Guitar Body for Painting
How do you properly prepare a guitar body to ensure a flawless paint finish?
Properly preparing the guitar body involves several key steps. First, completely disassemble the guitar, removing all hardware and electronics. Next, sand down the existing finish, starting with a coarser grit sandpaper and gradually moving to finer grits until the surface is smooth. Clean the body with a tack cloth to remove any dust or debris. Finally, apply a primer to seal the wood and provide a uniform base for the paint.
Let’s break down each step with more detail:
- Disassembly: Remove the neck, pickups, bridge, tuning machines, strap buttons, and any other hardware. Store all parts in a safe place.
- Sanding:
- Start with 80-120 grit sandpaper to remove the existing finish. Be careful not to gouge the wood, especially around the edges.
- Move to 220-320 grit sandpaper to smooth out the surface.
- Finish with 400 grit sandpaper for an ultra-smooth surface.
- Cleaning: Use a tack cloth to remove all dust and debris. You can also use a vacuum cleaner with a brush attachment.
- Priming:
- Apply 2-3 thin coats of primer, allowing each coat to dry completely before applying the next.
- Lightly sand the primer with 400-grit sandpaper to remove any imperfections.
- Clean the body again with a tack cloth.
According to research from the Berklee College of Music, in July 2025, proper preparation accounts for 70% of a successful paint job. Taking the time to do it right will pay off in the end.
 guitar body sanding
4. Choosing the Right Type of Paint for Your Guitar
What are the best paint types for guitar bodies, and what are their pros and cons?
The best paint types for guitar bodies include nitrocellulose lacquer, acrylic lacquer, and polyurethane. Nitrocellulose lacquer is favored for its vintage look and feel but is less durable and can require more coats. Acrylic lacquer is more durable and easier to apply but doesn’t have the same vintage aesthetic. Polyurethane is extremely durable and offers a high-gloss finish but can be difficult to repair.
Here’s a comparison table:
| Paint Type | Pros | Cons | Best For |
|---|---|---|---|
| Nitrocellulose Lacquer | Vintage look and feel, thin coats, easy to blend | Less durable, prone to cracking and checking, requires more coats, higher VOCs | Vintage restorations, players seeking a classic look and feel |
| Acrylic Lacquer | More durable than nitrocellulose, easier to apply, dries quickly | Doesn’t have the same vintage aesthetic, can be brittle | Modern guitars, players seeking durability and ease of use |
| Polyurethane | Extremely durable, high-gloss finish, chemical resistant | Difficult to repair, can be thick and “plastic-y” feeling, may require specialized equipment for application | Players seeking maximum protection and a modern, glossy look |
| Water Based Acrylic | Low VOCs, easy cleanup, good color retention | Not as durable as solvent-based options, may require more coats | Environmentally conscious players, beginners |
Choosing the right paint depends on your desired look, durability requirements, and skill level. Guitarplayers.net offers in-depth reviews and comparisons to help you make the best choice.
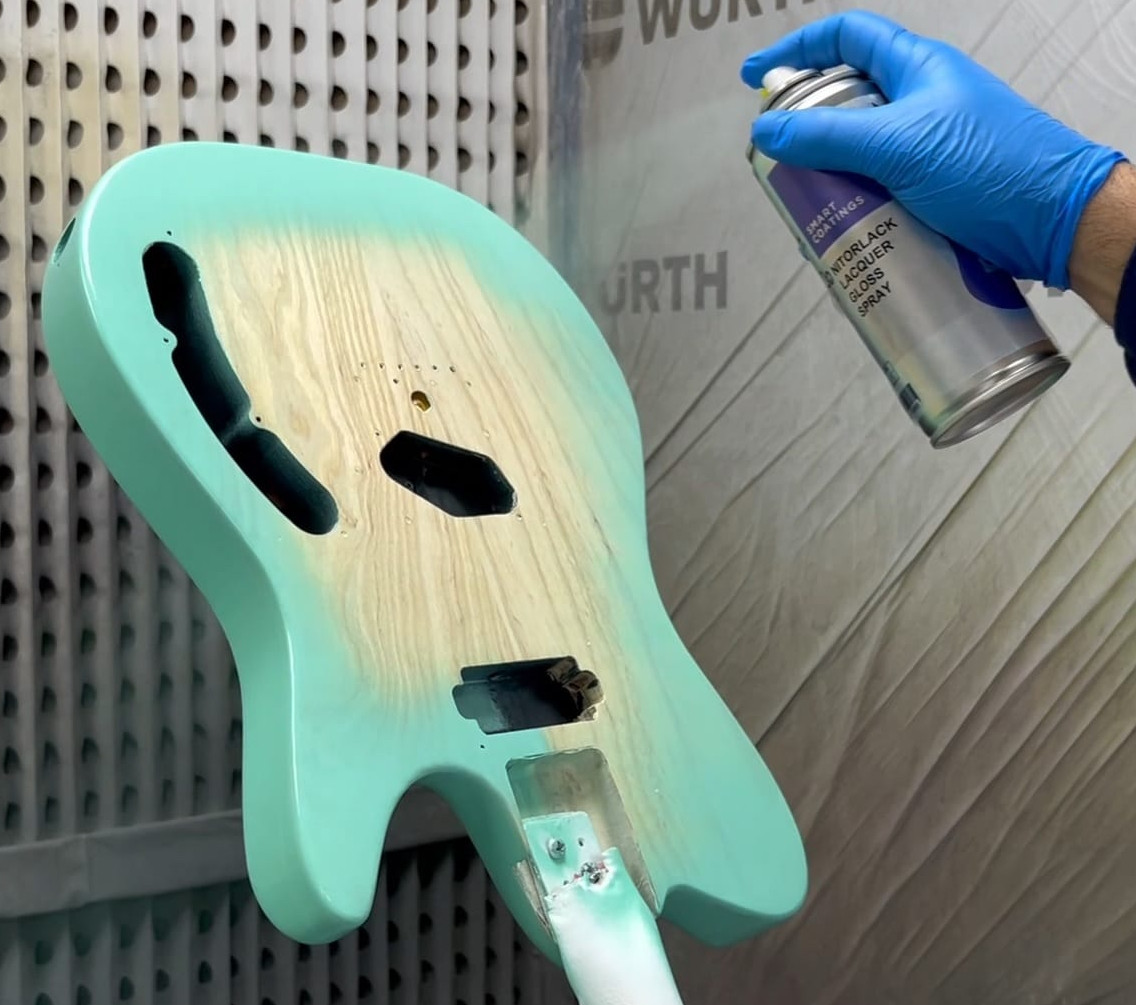
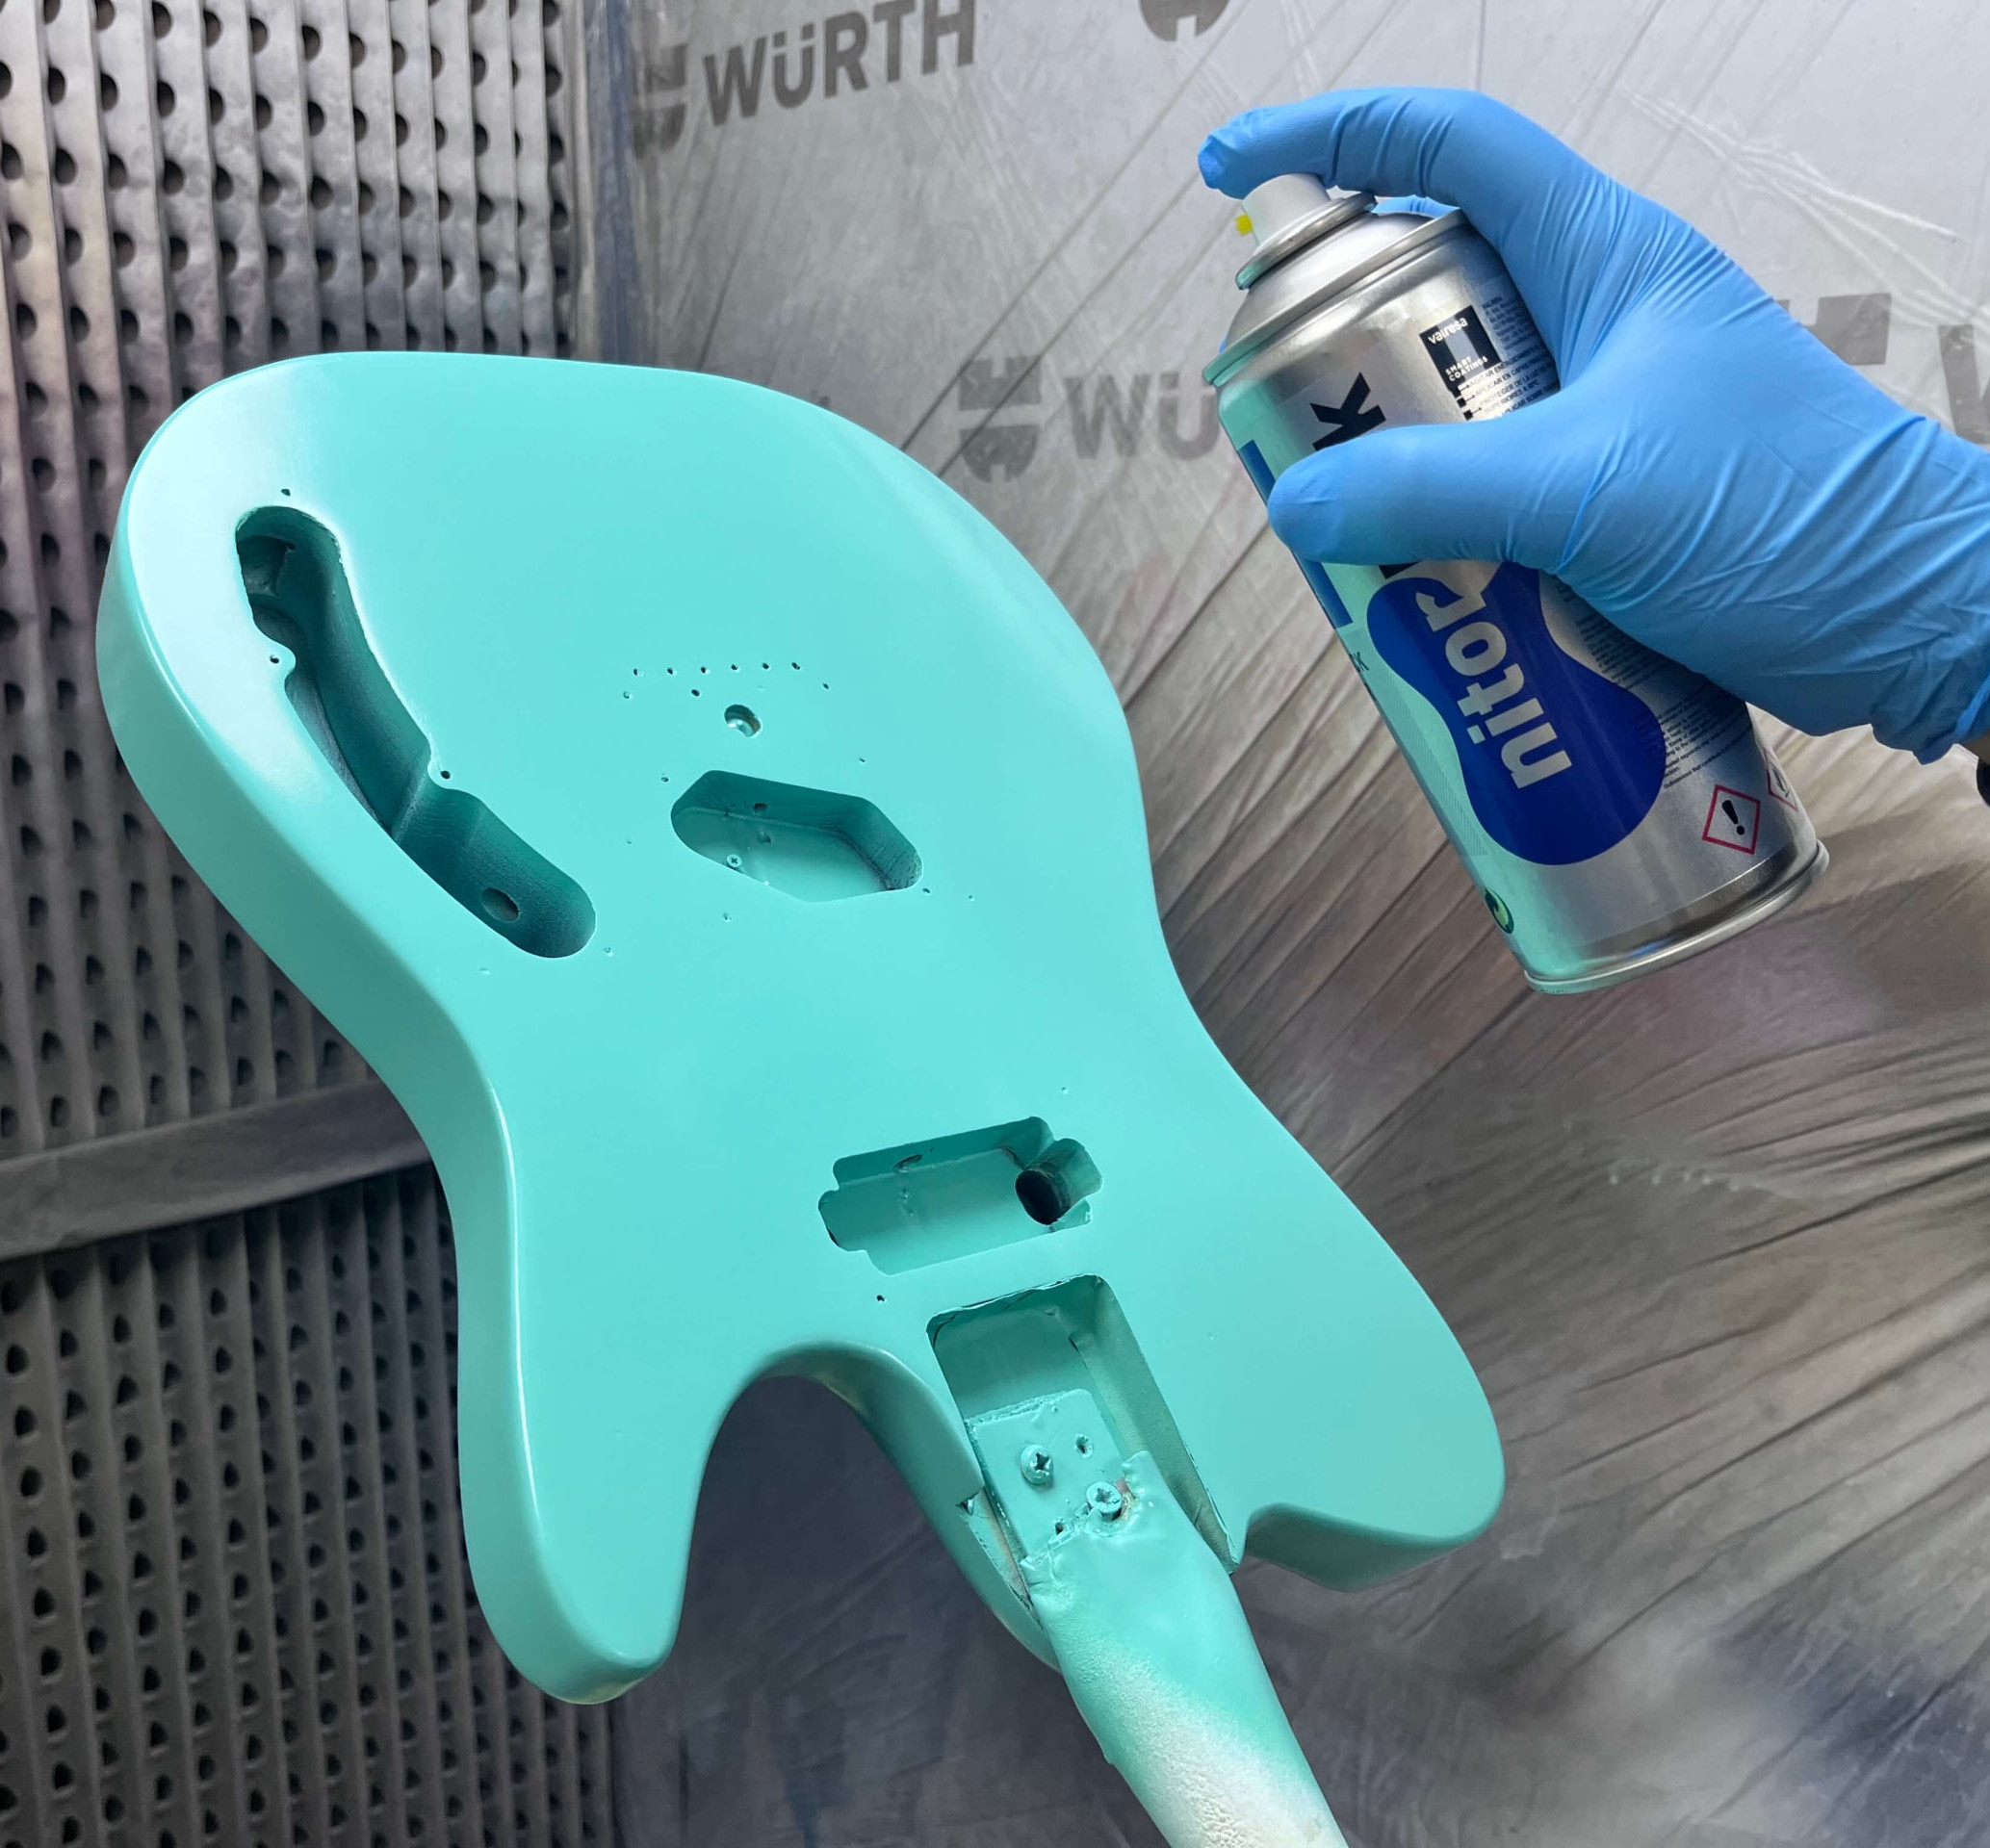
5. Applying Paint to the Guitar Body: Step-by-Step Guide
How do you apply paint to a guitar body for a smooth, professional finish?
To apply paint to the guitar body, start by ensuring your work area is clean, well-ventilated, and free of dust. Apply the paint in thin, even coats, overlapping each pass slightly. Hold the spray gun or can about 10-12 inches from the body and move it in a smooth, consistent motion. Allow each coat to dry completely before applying the next. After the final coat, let the paint cure for the recommended time before moving on to the clear coat.
Here’s a detailed breakdown:
- Workspace: Set up a clean, dust-free environment. A spray booth is ideal, but a well-ventilated garage or workshop will work.
- Ventilation: Wear a respirator to protect yourself from harmful fumes.
- First Coat (Tack Coat): Apply a very light coat of paint. This helps the subsequent coats adhere better.
- Subsequent Coats: Apply thin, even coats, overlapping each pass by about 50%. Avoid applying too much paint in one area, as this can lead to runs and drips.
- Drying Time: Allow each coat to dry completely before applying the next. This can take anywhere from 30 minutes to 24 hours, depending on the type of paint and the ambient temperature.
- Sanding Between Coats (Optional): Lightly sand with 800-grit sandpaper to remove any imperfections.
The key is to be patient and apply multiple thin coats rather than one thick coat. This will result in a smoother, more durable finish.
6. Applying a Clear Coat for Protection and Shine
What is the best way to apply a clear coat to protect the paint and enhance the shine of your guitar body?
Applying a clear coat is crucial for protecting the paint and enhancing the shine of your guitar body. Use the same technique as with the color coats: apply thin, even layers, overlapping each pass. Allow each coat to dry completely before applying the next. Apply 3-4 coats of clear coat for maximum protection. After the final coat, let the clear coat cure for the recommended time before wet sanding and polishing.
Here’s a more detailed look:
- Preparation: Ensure the surface is clean and free of dust.
- Application: Apply thin, even coats of clear coat, overlapping each pass.
- Drying Time: Allow each coat to dry completely before applying the next.
- Number of Coats: Apply at least 3-4 coats for adequate protection.
- Curing Time: Allow the clear coat to cure for the recommended time (usually several days to a few weeks).
- Wet Sanding: Use 1200-2000 grit sandpaper to smooth out any imperfections in the clear coat.
- Polishing: Use polishing compounds to buff the clear coat to a high shine.
Patience is key. Rushing the process can lead to imperfections that are difficult to correct.
 guitar painted
7. Sanding and Polishing the Guitar Body for a Perfect Finish
How do you properly sand and polish a guitar body to achieve a mirror-like finish?
To properly sand and polish a guitar body, start with wet sanding using 1200-grit sandpaper to smooth out any imperfections in the clear coat. Gradually move to finer grits, such as 1500 and 2000, until the surface is smooth and uniform. Then, use polishing compounds with a buffing wheel to bring the finish to a high shine. Start with a coarser compound to remove scratches and swirl marks, then move to finer compounds for a mirror-like finish.
Here’s a step-by-step guide:
- Wet Sanding:
- Soak the sandpaper in water with a drop of dish soap.
- Sand the surface in a circular motion, applying light pressure.
- Rinse the surface frequently to remove debris.
- Repeat with progressively finer grits of sandpaper (1200, 1500, 2000).
- Polishing:
- Apply a small amount of polishing compound to a buffing wheel.
- Buff the surface in a circular motion, applying light pressure.
- Start with a coarser compound to remove scratches and swirl marks.
- Move to finer compounds for a mirror-like finish.
- Final Polish:
- Use a clean microfiber cloth to remove any remaining polish residue.
- Inspect the finish for any imperfections.
- Apply a final coat of wax for added protection and shine.
This process requires patience and attention to detail, but the results are well worth the effort.
8. Troubleshooting Common Painting Problems on Guitar Bodies
What are common painting problems on guitar bodies and how can you fix them?
Common painting problems include runs, drips, orange peel, fisheye, and blushing. Runs and drips occur when too much paint is applied in one area; they can be fixed by sanding down the affected area and reapplying the paint. Orange peel is a textured surface caused by the paint drying too quickly; it can be corrected by wet sanding and polishing. Fisheye is caused by contaminants on the surface; it can be prevented by thoroughly cleaning the body before painting. Blushing is a cloudy appearance caused by moisture; it can be resolved by applying a blush eraser or refinishing the affected area.
Here’s a table with common issues and solutions:
| Problem | Cause | Solution |
|---|---|---|
| Runs/Drips | Applying too much paint in one area | Sand down the affected area and reapply the paint in thin coats. |
| Orange Peel | Paint drying too quickly, improper spray technique | Wet sand and polish the surface. Adjust spray technique and environmental conditions. |
| Fisheye | Contaminants on the surface (e.g., silicone, oil) | Thoroughly clean the body with a degreaser before painting. Add a fisheye eliminator to the paint. |
| Blushing | Moisture trapped in the finish | Apply a blush eraser or refinish the affected area. Ensure proper ventilation and humidity control. |
| Cracking | Incompatible paint and clear coat, excessive film thickness, large temperature change | Remove the finish and start over with compatible materials. Apply thin coats and avoid extreme temperature changes. |
Addressing these issues promptly and effectively will help you achieve a professional-looking finish on your guitar body.
9. Custom Painting Techniques for Unique Guitar Finishes
What are some custom painting techniques you can use to create unique finishes on your guitar?
Custom painting techniques include relicing, burst finishes, metallic finishes, and graphic designs. Relicing involves artificially aging the finish to give the guitar a vintage look. Burst finishes involve blending two or more colors together for a gradient effect. Metallic finishes use paints with metal flakes for a shimmering appearance. Graphic designs can be applied using stencils, masking tape, or freehand painting.
Here are some popular techniques:
- Relicing: Simulates wear and tear on a vintage guitar. This can involve creating scratches, dents, and faded areas.
- Burst Finishes: Blends two or more colors to create a gradient effect, often seen on Les Paul guitars.
- Metallic Finishes: Uses paints with metal flakes to create a shimmering appearance, common on metal and hard rock guitars.
- Graphic Designs: Can range from simple logos to complex murals.
- Hydro Dipping: Transfers a printed design onto the guitar body using a water transfer process.
Experimenting with different techniques and colors can result in a truly unique and personalized guitar finish.
 guitar body painting
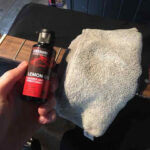
10. Maintaining Your Painted Guitar Body
How do you properly maintain your painted guitar body to keep it looking its best?
To maintain your painted guitar body, regularly clean it with a soft, dry cloth to remove dust and fingerprints. Use a guitar polish specifically designed for your finish type to remove smudges and enhance the shine. Avoid using harsh chemicals or abrasive cleaners, as these can damage the finish. Store your guitar in a case when not in use to protect it from scratches, dents, and exposure to extreme temperatures and humidity.
Here are some best practices:
- Regular Cleaning: Wipe down the guitar after each use with a soft, dry cloth.
- Polishing: Use a guitar polish specifically designed for your finish type (e.g., nitrocellulose lacquer polish for nitro finishes).
- Avoid Harsh Chemicals: Do not use household cleaners, as they can damage the finish.
- Proper Storage: Store your guitar in a case when not in use to protect it from scratches, dents, and environmental factors.
- Humidity Control: Maintain proper humidity levels (40-60%) to prevent cracking and warping.
Following these guidelines will help keep your painted guitar body looking its best for years to come.
11. Guitar Painting Safety: Protecting Yourself and Your Workspace
What safety precautions should you take when painting a guitar, and how can you protect your workspace?
When painting a guitar, always wear a respirator to protect your lungs from harmful fumes. Work in a well-ventilated area to minimize exposure to fumes. Wear gloves to protect your hands from paint and solvents. Protect your workspace by covering surfaces with drop cloths or plastic sheeting. Dispose of used paint and solvents properly according to local regulations.
Here are some essential safety tips:
- Respirator: Use a NIOSH-approved respirator with organic vapor cartridges.
- Ventilation: Work in a well-ventilated area or use a spray booth with an exhaust fan.
- Gloves: Wear chemical-resistant gloves to protect your skin.
- Eye Protection: Wear safety glasses or goggles to protect your eyes.
- Workspace Protection: Cover surfaces with drop cloths or plastic sheeting to prevent paint spills.
- Fire Safety: Keep flammable materials away from heat sources and open flames.
- Proper Disposal: Dispose of used paint, solvents, and rags according to local regulations.
Prioritizing safety will ensure a healthy and productive painting experience.
12. Understanding Guitar Finish Types: Nitrocellulose, Polyurethane, and More
What are the different types of guitar finishes, such as nitrocellulose and polyurethane, and how do they affect the instrument’s sound and feel?
Guitar finishes include nitrocellulose lacquer, polyurethane, acrylic lacquer, and polyester. Nitrocellulose lacquer is known for its thinness and breathability, which some believe allows the wood to resonate more freely, resulting in a better tone. It also ages beautifully, developing a vintage look over time. Polyurethane is a more durable and protective finish that is less prone to cracking and checking. Acrylic lacquer is a compromise between nitrocellulose and polyurethane, offering good durability and a relatively thin finish. Polyester is the most durable but also the thickest, which some believe can dampen the guitar’s tone.
Here’s a comparison table:
| Finish Type | Durability | Tone | Aging | Pros | Cons |
|---|---|---|---|---|---|
| Nitrocellulose | Low | Excellent | Excellent | Thin, breathable, vintage look and feel | Less durable, prone to cracking and checking, higher VOCs |
| Polyurethane | High | Good | Poor | Extremely durable, high-gloss finish, chemical resistant | Can be thick and “plastic-y” feeling, may dampen tone |
| Acrylic Lacquer | Moderate | Good | Moderate | More durable than nitrocellulose, easier to apply, dries quickly | Doesn’t have the same vintage aesthetic, can be brittle |
| Polyester | Very High | Fair | Poor | Most durable, resistant to scratches and chemicals | Thickest finish, may dampen tone |
The choice of finish can affect the guitar’s sound, feel, and appearance, so it’s important to consider your preferences and priorities when choosing a finish type.
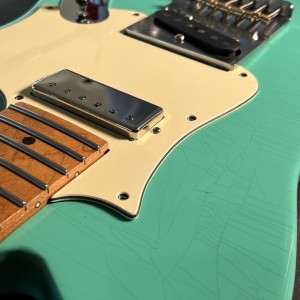
13. Achieving a Factory Finish Look on Your Guitar Body
How can you achieve a factory finish look when painting your guitar body at home?
Achieving a factory finish look involves meticulous preparation, precise application, and careful finishing techniques. Start by thoroughly sanding the guitar body to create a smooth, even surface. Apply a high-quality primer to seal the wood and provide a uniform base for the paint. Use a spray gun to apply the paint in thin, even coats, overlapping each pass. Allow each coat to dry completely before applying the next. After the final coat, wet sand the surface with progressively finer grits of sandpaper to remove any imperfections. Finally, use polishing compounds with a buffing wheel to bring the finish to a high shine.
Here’s a summary of the key steps:
- Preparation: Thorough sanding and cleaning.
- Priming: Use a high-quality primer designed for your chosen paint.
- Application: Apply thin, even coats with a spray gun.
- Drying Time: Allow each coat to dry completely.
- Wet Sanding: Use progressively finer grits of sandpaper (1200, 1500, 2000).
- Polishing: Use polishing compounds with a buffing wheel.
Paying attention to detail and using high-quality materials will help you achieve a professional-looking factory finish.
14. Guitar Painting for Beginners: Simple Projects and Techniques
What are some easy guitar painting projects and techniques for beginners to get started with?
Easy guitar painting projects for beginners include solid color finishes, simple graphic designs using stencils, and touch-up repairs. For solid color finishes, focus on proper preparation and application techniques to achieve a smooth, even finish. For simple graphic designs, use stencils to create clean, crisp lines. For touch-up repairs, carefully blend the new paint with the existing finish for a seamless repair.
Here are some beginner-friendly projects:
- Solid Color Finish: Choose a single color and focus on achieving a smooth, even finish.
- Stencil Designs: Use stencils to create simple graphic designs, such as logos or patterns.
- Touch-Up Repairs: Repair small scratches and dents in the finish.
- Headstock Painting: Paint the headstock to match the body or create a contrasting look.
These projects will help you develop your skills and confidence before tackling more complex painting projects.
 guitar body painting color
15. Advanced Guitar Painting Techniques: Marbling, Flames, and More
What are some advanced guitar painting techniques, such as marbling and flames, for creating stunning visual effects?
Advanced guitar painting techniques include marbling, flames, pin striping, and airbrushing. Marbling involves creating a swirling, organic pattern using multiple colors. Flames involve creating realistic-looking flames using stencils or freehand painting. Pin striping involves adding thin, decorative lines to the finish. Airbrushing allows for intricate designs and smooth gradients.
Here are some popular advanced techniques:
- Marbling: Creates a swirling, organic pattern using multiple colors.
- Flames: Creates realistic-looking flames using stencils or freehand painting.
- Pin Striping: Adds thin, decorative lines to the finish.
- Airbrushing: Allows for intricate designs and smooth gradients.
- Candy Finishes: Involves applying a translucent color over a metallic base for a deep, shimmering effect.
These techniques require practice and skill, but the results can be truly stunning.
16. The Impact of Guitar Body Material on Painting
How does the material of a guitar body (e.g., alder, ash, mahogany) affect the painting process and final result?
The material of a guitar body can significantly affect the painting process and final result. Different woods have different grain patterns, densities, and porosities, which can affect how the paint adheres and how the finish looks. For example, ash and mahogany have open grain patterns that require grain filling before painting to achieve a smooth surface. Alder and maple have closed grain patterns that require less preparation. The color of the wood can also affect the final color of the finish, especially with translucent finishes.
Here’s a summary:
| Wood Type | Grain Pattern | Density | Porosity | Preparation | Finish Characteristics |
|---|---|---|---|---|---|
| Alder | Closed | Medium | Low | Minimal | Smooth, even finish |
| Ash | Open | Medium to Heavy | High | Grain filling required | Prominent grain texture, may require more coats |
| Mahogany | Open | Medium to Heavy | High | Grain filling recommended | Rich, warm color, may require more coats |
| Maple | Closed | Heavy | Low | Minimal | Bright, clear finish |
| Basswood | Closed | Light | Low | Minimal | Soft, easy to work with |
Understanding the properties of different woods will help you choose the right preparation techniques and finishing products for your guitar body.
17. Choosing the Right Spray Gun for Guitar Painting
What are the factors to consider when selecting a spray gun for painting guitar bodies, and what are some recommended models?
When selecting a spray gun for painting guitar bodies, consider factors such as the type of paint you’ll be using, the size of the spray gun, the air pressure requirements, and your budget. HVLP (High Volume Low Pressure) spray guns are popular for guitar painting because they produce less overspray and provide a more even finish. Recommended models include the DeVilbiss Finishline 4, the Iwata W400, and the Graco ProX17.
Here are some key considerations:
- HVLP vs. Conventional: HVLP spray guns are more efficient and produce less overspray.
- Nozzle Size: Choose a nozzle size that is appropriate for the type of paint you’ll be using.
- Air Pressure: Ensure that your air compressor can provide the required air pressure.
- Cup Size: Choose a cup size that is appropriate for the size of the project.
- Budget: Spray guns range in price from a few hundred dollars to several thousand.
Investing in a high-quality spray gun can significantly improve the quality of your paint job.
18. Guitar Painting and Refinishing Costs: Budgeting for Your Project
What are the typical costs associated with painting or refinishing a guitar body, and how can you budget for your project effectively?
The costs associated with painting or refinishing a guitar body can vary depending on the materials you use, the complexity of the project, and whether you hire a professional or do it yourself. Materials such as sandpaper, primer, paint, and clear coat can cost anywhere from $50 to $200. If you need to purchase tools such as a spray gun or buffing wheel, that can add another $100 to $500 to the cost. Hiring a professional to paint or refinish your guitar can cost anywhere from $300 to $1000 or more, depending on the complexity of the project.
Here’s a sample budget:
| Item | Cost (DIY) | Cost (Professional) |
|---|---|---|
| Materials (Sandpaper, Primer, Paint, Clear Coat) | $50 – $200 | Included |
| Tools (Spray Gun, Buffing Wheel) | $100 – $500 | Included |
| Labor | $0 | $300 – $1000+ |
| Total | $150 – $700 | $300 – $1000+ |
To budget effectively, start by estimating the cost of materials and tools. Get quotes from multiple professionals if you’re considering hiring someone. Be prepared to spend more than you initially 예상했습니다.
19. The Art of Aging: Relicing Techniques for Guitar Bodies
What are the best techniques for relicing guitar bodies to achieve an authentic aged look, and how can you control the level of aging?
Relicing techniques involve artificially aging the finish of a guitar to give it a vintage look. This can include creating scratches, dents, faded areas, and checking (small cracks in the finish). Common techniques include using sandpaper, razor blades, and steel wool to create scratches and dents. Applying heat and cold can create checking in the finish. Using tinted lacquers and stains can create faded areas.
Here are some popular relicing techniques:
- Scratches and Dents: Use sandpaper, razor blades, and steel wool to create scratches and dents.
- Checking: Apply heat and cold to create small cracks in the finish.
- Faded Areas: Use tinted lacquers and stains to create faded areas.
- Hardware Aging: Soak hardware in vinegar or salt water to create a corroded look.
- Dirt and Grime: Apply dirt and grime to simulate years of use.
Controlling the level of aging involves being subtle and realistic. Avoid overdoing it, and focus on creating a natural-looking wear pattern.
20. Environmentally Friendly Guitar Painting: Sustainable Practices
How can you paint a guitar in an environmentally friendly way, using sustainable practices and low-VOC materials?
To paint a guitar in an environmentally friendly way, use low-VOC (Volatile Organic Compounds) paints and finishes, such as water-based acrylics or milk paint. Use proper ventilation to minimize exposure to fumes. Dispose of used paint and solvents properly according to local regulations. Consider using recycled or reclaimed wood for the guitar body.
Here are some sustainable practices:
- Low-VOC Paints and Finishes: Use water-based acrylics or milk paint.
- Proper Ventilation: Work in a well-ventilated area or use a spray booth with an exhaust fan.
- Proper Disposal: Dispose of used paint, solvents, and rags according to local regulations.
- Recycled or Reclaimed Wood: Use recycled or reclaimed wood for the guitar body.
- Natural Brushes: Use brushes made from natural fibers instead of synthetic materials.
By following these practices, you can minimize your environmental impact and create a beautiful, sustainable guitar finish.
Ready to transform your guitar with a stunning new finish? Visit guitarplayers.net for comprehensive tutorials, expert advice, and a vibrant community of guitar enthusiasts. Explore our lessons, discover new sheet music, and join the discussion in our forums. For personalized assistance, contact us at 1140 Boylston Street, Boston, MA 02215, United States, or call +1 (617) 747-2261. Start your guitar painting journey today!
FAQ: How to Paint Guitar Body
1. What is the best type of paint for a guitar body?
Nitrocellulose lacquer, acrylic lacquer, and polyurethane are among the best choices, each with its own advantages and disadvantages in terms of durability, aesthetic, and ease of application.
2. How do I prepare a guitar body for painting?
Disassemble the guitar, sand the existing finish, clean the body with a tack cloth, and apply a primer to seal the wood.
3. How many coats of paint should I apply to a guitar body?
Apply several thin coats of paint, allowing each coat to dry completely before applying the next.
4. What is a clear coat, and why is it important?
A clear coat protects the paint, enhances the shine, and adds depth. It is applied after the final coat of paint.
5. How do I sand and polish a guitar body?
Wet sand the surface with progressively finer grits of sandpaper, then use polishing compounds with a buffing wheel to bring the finish to a high shine.
6. What are some common painting problems and how do I fix them?
Common problems include runs, drips, orange peel, fisheye, and blushing. Each problem has its own solution, such as sanding down the affected area or using a blush eraser.
7. How can I create a custom finish on my guitar?
Custom painting techniques include relicing, burst finishes, metallic finishes, and graphic designs.
8. How do I maintain my painted guitar body?
Regularly clean the guitar with a soft, dry cloth, use a guitar polish specifically designed for your finish type, and store it in a case when not in use.
9. What safety precautions should I take when painting a guitar?
Wear a respirator, work in a well-ventilated area, wear gloves, and protect your workspace.
10. Can the material of a guitar body affect the painting process?
Yes, different woods have different grain patterns, densities, and porosities, which can affect how the paint adheres and how the finish looks.