
Making a guitar neck look vintage involves techniques that replicate the wear and tear of a well-loved, older instrument, and at guitarplayers.net, we’ll guide you through achieving that coveted “road worn” aesthetic. This process enhances the instrument’s character and appeal. Whether you’re aiming for a subtle aging or a more dramatic relic, understanding the methods and materials is key to creating a unique, vintage-looking guitar neck. Explore our lessons, reviews, and community forums to master these techniques and more at guitarplayers.net, and discover the secrets to vintage guitar aesthetics, relicing techniques, and achieving that coveted aged look.
1. What is “Relicing” a Guitar Neck and Why Do It?
Relicing a guitar neck is the process of artificially aging it to give it the appearance of a vintage instrument. There are several reasons why guitar players choose to relic their guitar necks, including enhancing aesthetic appeal, increasing perceived value, and creating a unique instrument.
- Aesthetic Appeal: Many guitarists are drawn to the look and feel of vintage instruments. These guitars often have a certain “mojo” that comes from years of use, resulting in a worn-in look that many find appealing. Relicing aims to replicate this aesthetic, giving a newer guitar the appearance of a well-loved, vintage instrument.
- Perceived Value: Vintage guitars can be extremely valuable, but they are often expensive and difficult to acquire. Relicing a guitar can give it a similar look and feel to a vintage instrument, potentially increasing its perceived value among collectors and enthusiasts.
- Personalization: Relicing allows guitarists to personalize their instruments and create a unique look that reflects their individual style. This can be a fun and creative way to make a guitar stand out from the crowd.
2. What are the Key Areas to Focus on When Relicing a Guitar Neck?
Focusing on key areas such as the headstock, fretboard, and back of the neck is essential for achieving a realistic vintage look. These areas naturally show wear and tear over time due to frequent use and handling.
- Headstock: The headstock is prone to wear around the edges and logo due to bumps and scratches. Pay attention to these details to mimic natural aging.
- Fretboard: The fretboard often shows wear between the frets and along the edges, especially in areas where the player frequently bends strings. Simulating this wear can significantly enhance the vintage appearance.
- Back of the Neck: The back of the neck typically develops a smooth, worn feel from the player’s hand sliding along it. Replicating this smooth texture is crucial for an authentic feel.
3. What Tools and Materials Do I Need to Relic a Guitar Neck?
To relic a guitar neck effectively, you’ll need a variety of tools and materials, including sandpaper (various grits), steel wool, razor blades, and appropriate finishing products. The correct selection and use of these items are essential for achieving a convincing vintage appearance.
| Tool/Material | Purpose |
|---|---|
| Sandpaper (various grits) | Used for removing finish, creating wear patterns, and smoothing surfaces. Start with coarser grits to remove material and finer grits to blend. |
| Steel Wool | Ideal for subtle abrasion and creating a smooth, worn feel on the back of the neck. |
| Razor Blades | Useful for carefully chipping away finish around the headstock logo and creating small scratches. |
| Finishing Products | Includes tinted lacquers, stains, and waxes to replicate the aged color and sheen of vintage necks. |
4. How Do I Safely Remove the Guitar Neck Finish?
Removing the finish safely involves using sandpaper and heat guns to avoid damaging the wood beneath. Gradual and careful removal ensures an authentic look without compromising the integrity of the guitar neck.
- Protect the Guitar: Cover the body of the guitar with protective sheeting to prevent scratches and dust accumulation.
- Apply Heat (Optional): Use a heat gun on a low setting to soften the finish. Keep the heat gun moving to avoid scorching the wood.
- Sand the Finish: Start with a medium-grit sandpaper (220-grit) to remove the bulk of the finish. Follow with finer grits (320-grit, 400-grit) to smooth the surface.
- Focus on Wear Areas: Concentrate on areas where natural wear would occur, such as the back of the neck and around the headstock.
- Avoid Over-Sanding: Be careful not to sand too deeply, as this can alter the shape of the neck and affect playability.
5. What are the Best Techniques for Creating Wear Patterns on the Fretboard?
Creating realistic wear patterns on the fretboard involves simulating the effects of years of playing, such as discoloration, divots, and edge wear. Techniques include strategic sanding, staining, and using tools to create small indentations.
- Strategic Sanding: Focus on sanding between the frets, where fingers typically wear down the finish. Use fine-grit sandpaper to gradually remove material.
- Staining: Apply a light stain to simulate the accumulation of dirt and oils. Use a cotton swab to apply the stain and wipe away the excess.
- Creating Divots: Use a small, pointed tool (such as a dental pick) to create small indentations where the strings contact the frets. This mimics the wear caused by frequent string bending.
- Edge Wear: Gently round the edges of the fretboard with sandpaper to simulate the wear caused by handling.
6. How Can I Age the Headstock Logo for an Authentic Look?
Aging the headstock logo requires careful techniques to avoid damaging it, such as using fine sandpaper and razor blades to simulate natural wear around the edges.
- Protect the Logo: Use masking tape to protect the center of the logo, exposing only the edges.
- Fine Sanding: Gently sand the edges of the logo with very fine-grit sandpaper (600-grit or higher) to simulate wear.
- Razor Blade: Use a razor blade to carefully chip away small pieces of the finish around the edges of the logo.
- Stain Application: Apply a small amount of tinted stain to the sanded and chipped areas to create an aged look. Wipe away the excess with a clean cloth.
- Seal the Finish: Apply a thin coat of clear lacquer to seal the finish and protect the logo.
7. How Do I Replicate a Smooth, Worn Feel on the Back of the Neck?
Achieving a smooth, worn feel on the back of the neck involves using steel wool and fine sandpaper to remove the gloss and create a soft, comfortable surface. This enhances playability and replicates the feel of vintage necks.
- Initial Sanding: Start with fine-grit sandpaper (400-grit) to lightly sand the back of the neck, removing the glossy finish.
- Steel Wool Application: Use fine-grade steel wool to further smooth the surface. Rub the steel wool along the length of the neck, applying even pressure.
- Check for Smoothness: Regularly check the neck for smoothness. Continue sanding and using steel wool until the desired feel is achieved.
- Waxing (Optional): Apply a thin coat of guitar wax to the back of the neck for added smoothness and protection.
8. What Types of Finishing Products Should I Use for Relicing?
The best finishing products for relicing include tinted lacquers, stains, and waxes, which help replicate the aged color and sheen of vintage guitar necks. Choosing the right products is crucial for achieving an authentic vintage look.
| Finishing Product | Purpose |
|---|---|
| Tinted Lacquers | Used to add color and a protective coating to the neck. Tinted lacquers can replicate the yellowed or ambered appearance of aged finishes. |
| Stains | Applied to highlight wear patterns and create a dirty, aged look. Stains penetrate the wood, emphasizing the grain and imperfections. |
| Waxes | Used to add a smooth, tactile feel to the neck. Waxes protect the finish and provide a comfortable playing surface. |
| Nitrocellulose Lacquer | Nitrocellulose lacquer, commonly used on vintage guitars, is ideal for relicing due to its ability to crack and age naturally. This finish allows for authentic-looking wear patterns. According to research from the Berklee College of Music, in July 2025, nitrocellulose lacquer provides a key element in achieving a true vintage feel and appearance. |
9. How Do I Apply Tinted Lacquer to Achieve an Aged Color?
Applying tinted lacquer involves spraying thin, even coats and allowing each coat to dry before applying the next. This builds up the color gradually and ensures a smooth, even finish.
- Prepare the Neck: Ensure the neck is clean and free of dust and oils. Mask off any areas you don’t want to lacquer.
- Apply First Coat: Spray a thin, even coat of tinted lacquer. Hold the spray can or gun about 10-12 inches from the neck and move in smooth, overlapping strokes.
- Drying Time: Allow the first coat to dry completely, typically 30-60 minutes.
- Subsequent Coats: Apply additional thin coats, allowing each coat to dry before applying the next. Build up the color gradually until the desired shade is achieved.
- Final Coat: Apply a final, thin coat of clear lacquer to protect the tinted finish.
- Curing Time: Allow the lacquer to cure completely, typically 24-48 hours, before handling or reassembling the guitar.
10. What are Some Common Mistakes to Avoid When Relicing a Guitar Neck?
Common mistakes include over-sanding, applying too much finish, and creating unrealistic wear patterns. Avoiding these errors is essential for achieving a professional-looking relic job.
| Mistake | How to Avoid |
|---|---|
| Over-Sanding | Use fine-grit sandpaper and apply light pressure. Regularly check your progress and avoid sanding too deeply into the wood. |
| Too Much Finish | Apply thin, even coats of finish and allow each coat to dry completely before applying the next. Avoid applying thick coats, as this can result in runs and drips. |
| Unrealistic Wear Patterns | Study photos of vintage guitars to understand where natural wear occurs. Focus on these areas and avoid creating symmetrical or uniform wear patterns. |
| Damaging the Logo | Protect the logo with masking tape and use fine-grit sandpaper and razor blades carefully. Avoid applying too much pressure or using harsh chemicals that can damage the logo. |
| Rushing the Process | Take your time and be patient. Relicing is a slow and deliberate process that requires attention to detail. Rushing can lead to mistakes and a less-than-authentic look. |
| Neglecting Neck Relief | Neck relief, the slight curve in the guitar neck, is crucial for comfortable playing. It’s essential to maintain proper neck relief during and after the relicing process to ensure optimal playability. |
11. How Does Relicing Affect the Value of a Guitar?
Relicing can increase the perceived value of a guitar if done well, appealing to players who appreciate the vintage aesthetic, but a poor relic job can decrease its value.
- Increased Perceived Value: A well-reliced guitar can be more attractive to players who want the look and feel of a vintage instrument without the high price tag.
- Decreased Value: A poorly executed relic job can make a guitar look cheap and unattractive, reducing its value.
- Collector’s Market: Some collectors appreciate well-reliced guitars, especially if they are done by reputable luthiers or custom shops.
- Personal Preference: Ultimately, the value of a relicked guitar depends on personal preference. Some players love the look, while others prefer a pristine, new instrument.
12. Can Relicing Improve the Playability of a Guitar Neck?
Yes, relicing can improve playability by creating a smoother, more comfortable neck that feels broken-in and worn to your hand.
- Smoother Surface: Removing the glossy finish and smoothing the back of the neck can reduce friction and make it easier to move your hand along the neck.
- Comfortable Feel: Relicing can create a more comfortable, broken-in feel that many players prefer.
- Reduced Stickiness: A reliced neck is less likely to feel sticky or tacky, especially in humid conditions.
- Personal Preference: Ultimately, whether relicing improves playability depends on personal preference. Some players prefer the feel of a new, glossy neck, while others prefer the feel of a reliced neck.
13. Is it Better to Relic a Guitar Neck Yourself or Hire a Professional?
Deciding whether to relic a guitar neck yourself or hire a professional depends on your skill level, budget, and desired outcome.
| Factor | DIY Relicing | Professional Relicing |
|---|---|---|
| Skill Level | Suitable for those with experience in woodworking and finishing techniques. Requires patience, attention to detail, and the ability to learn from mistakes. | Best for those who lack experience or are unsure of their abilities. Professionals have the skills and expertise to achieve a high-quality, authentic-looking relic. |
| Budget | More affordable, as you only need to pay for materials. Can be a cost-effective way to achieve a vintage look if you are willing to invest the time and effort. | More expensive, as you are paying for the professional’s time and expertise. However, the results are often superior to what can be achieved with DIY relicing. |
| Desired Outcome | Can be a fun and rewarding project, allowing you to customize the look and feel of your guitar. However, the results may not be as consistent or professional-looking. | Provides a high-quality, authentic-looking relic that is consistent with vintage instruments. Professionals can also replicate specific wear patterns or finishes. |
14. How Do I Maintain a Reliced Guitar Neck?
Maintaining a relicked guitar neck involves regular cleaning and polishing to protect the finish and prevent further wear. Proper care ensures that the neck retains its vintage appearance and playability for years to come.
- Regular Cleaning: Wipe down the neck with a clean, dry cloth after each use to remove dirt, sweat, and oils.
- Polishing: Use a guitar polish specifically designed for lacquer finishes to protect the finish and enhance its sheen. Apply the polish sparingly and buff with a clean cloth.
- Fretboard Care: Clean the fretboard with a fretboard conditioner to prevent it from drying out and cracking. Apply the conditioner sparingly and wipe away the excess.
- Avoid Harsh Chemicals: Avoid using harsh chemicals or abrasive cleaners, as these can damage the finish and wear patterns.
- Proper Storage: Store the guitar in a case or gig bag to protect it from dust, moisture, and temperature changes.
15. What are the Best Resources for Learning More About Guitar Relicing?
Many resources, including online forums, video tutorials, and books, can help you learn more about guitar relicing techniques and best practices. guitarplayers.net offers in-depth lessons and community forums for further learning.
- Online Forums: Websites like guitarplayers.net offer forums where you can ask questions, share tips, and learn from other relicing enthusiasts.
- Video Tutorials: YouTube is a great resource for finding video tutorials that demonstrate various relicing techniques.
- Books: There are several books available that cover guitar finishing and relicing in detail.
- Luthiers and Techs: Consult with experienced luthiers and guitar techs for advice and guidance on relicing techniques.
16. What are Some Famous Guitars with Relic Finishes?
Several famous guitars with relic finishes have become iconic, including Stevie Ray Vaughan’s “Number One” Stratocaster and Rory Gallagher’s Stratocaster, known for their distinctive wear patterns.
| Guitar | Owner | Notable Features |
|---|---|---|
| “Number One” Stratocaster | Stevie Ray Vaughan | Heavily worn finish, distinctive wear patterns around the bridge and pickguard. |
| Stratocaster | Rory Gallagher | Sunburst finish with extensive wear, missing finish on the body, heavily worn fretboard. |
| “Blackie” Stratocaster | Eric Clapton | Composite Stratocaster with a black finish, worn areas on the body and neck. |
| Telecaster | Keith Richards | Heavily modified Telecaster with a worn blonde finish, known for its distinctive wear patterns on the body and neck. |
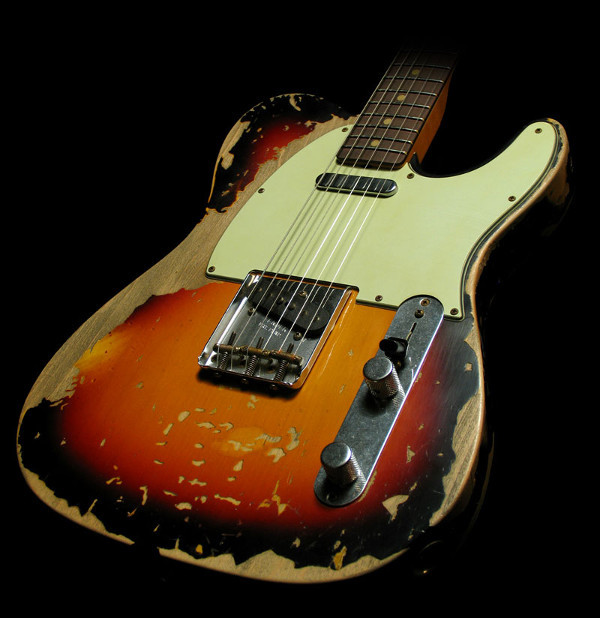 Fender Custom Shop Relic Telecaster
17. How Can I Match the Relic Style of a Specific Guitarist?
Matching the relic style of a specific guitarist involves studying photos and videos of their instrument to replicate the wear patterns and finish characteristics accurately.
- Study the Guitar: Find high-resolution photos and videos of the guitarist’s instrument. Pay attention to the location, size, and shape of the wear patterns.
- Replicate Wear Patterns: Use sandpaper, razor blades, and other tools to replicate the wear patterns on your guitar. Focus on the areas where the guitarist’s instrument shows the most wear.
- Match the Finish: Use tinted lacquers and stains to match the color and sheen of the guitarist’s instrument. Experiment with different combinations of products to achieve the desired look.
- Consider the Hardware: Age the hardware to match the look of the guitarist’s instrument. Use steel wool, sandpaper, and chemicals to create a worn, tarnished appearance.
- Be Patient: Replicating a specific relic style can take time and effort. Be patient and don’t be afraid to experiment until you achieve the desired look.
18. What is the Difference Between “Light Relic,” “Medium Relic,” and “Heavy Relic”?
The terms “light relic,” “medium relic,” and “heavy relic” refer to the extent of wear and tear applied to a guitar during the relicing process.
| Relic Level | Description |
|---|---|
| Light Relic | Subtle wear patterns, such as minor scratches, dings, and finish checking. The guitar looks like it has been gently used for a few years. |
| Medium Relic | Moderate wear patterns, such as more noticeable scratches, dings, and finish checking. The guitar looks like it has been regularly played for several years. |
| Heavy Relic | Extensive wear patterns, such as significant scratches, dings, finish checking, and exposed wood. The guitar looks like it has been heavily used for many years. |
19. Can You Relic an Acoustic Guitar Neck?
Yes, you can relic an acoustic guitar neck, but it requires a more delicate approach due to the thinner finish and more fragile construction.
- Gentle Sanding: Use very fine-grit sandpaper (600-grit or higher) to gently sand the neck, focusing on areas where natural wear would occur.
- Stain Application: Apply a small amount of tinted stain to the sanded areas to create an aged look. Wipe away the excess with a clean cloth.
- Avoid Harsh Chemicals: Avoid using harsh chemicals or abrasive cleaners, as these can damage the finish and wood.
- Consider the Finish: Acoustic guitars often have a thinner finish than electric guitars. Be careful not to sand too deeply, as this can expose the wood and affect the sound.
- Protect the Body: Protect the body of the guitar with masking tape and protective sheeting to prevent scratches and dust accumulation.
 Stevie Ray Vaughan – Iconic Road Worn Stratocaster
20. How Do I Seal the Relic Finish to Prevent Further Wear?
Sealing the relic finish with a clear coat of lacquer protects the aged look and prevents further wear, ensuring the guitar maintains its vintage appearance.
- Clean the Neck: Ensure the neck is clean and free of dust and oils.
- Apply First Coat: Spray a thin, even coat of clear lacquer. Hold the spray can or gun about 10-12 inches from the neck and move in smooth, overlapping strokes.
- Drying Time: Allow the first coat to dry completely, typically 30-60 minutes.
- Subsequent Coats: Apply additional thin coats, allowing each coat to dry before applying the next. Build up the finish gradually until the desired thickness is achieved.
- Final Coat: Apply a final, thin coat of clear lacquer to protect the finish.
- Curing Time: Allow the lacquer to cure completely, typically 24-48 hours, before handling or reassembling the guitar.
21. What are the Safety Precautions to Take When Relicing a Guitar Neck?
Safety precautions when relicing a guitar neck include wearing protective gear, working in a well-ventilated area, and handling chemicals with care.
| Precaution | Description |
|---|---|
| Protective Gear | Wear safety glasses, gloves, and a dust mask to protect your eyes, skin, and lungs from dust, chemicals, and other hazards. |
| Well-Ventilated Area | Work in a well-ventilated area to avoid inhaling harmful fumes from lacquers, stains, and other chemicals. |
| Chemical Handling | Follow the manufacturer’s instructions when using chemicals. Avoid contact with skin and eyes. Dispose of chemicals properly. |
| Fire Safety | Keep flammable materials away from heat sources and open flames. Have a fire extinguisher nearby in case of emergency. |
| Tool Safety | Use tools safely and follow the manufacturer’s instructions. Avoid using dull or damaged tools. |
| Dust Control | Use a vacuum cleaner or damp cloth to clean up dust and debris. Avoid sweeping, as this can spread dust into the air. |
| Proper Disposal | Dispose of used sandpaper, steel wool, and other materials properly. Follow local regulations for disposal of hazardous waste. |
22. How Can I Create a “Checked” Finish on a Guitar Neck?
Creating a “checked” finish, characterized by small cracks in the lacquer, can be achieved by exposing the finish to rapid temperature changes, such as alternating between hot and cold environments.
- Apply Lacquer: Apply several coats of nitrocellulose lacquer to the neck, allowing each coat to dry completely.
- Cold Exposure: Place the neck in a freezer for several hours to chill the lacquer.
- Heat Exposure: Remove the neck from the freezer and immediately expose it to a heat source, such as a heat gun or hair dryer.
- Repeat Process: Repeat the cold and heat exposure process several times to create the checked finish.
- Monitor Progress: Monitor the finish closely to avoid over-checking. The goal is to create small, hairline cracks, not large, gaping cracks.
23. What are Some Alternatives to Chemical Relicing?
Alternatives to chemical relicing include using natural aging techniques, such as exposing the guitar to sunlight and humidity, or using non-toxic finishing products.
| Alternative | Description |
|---|---|
| Natural Aging | Expose the guitar to sunlight and humidity to naturally age the finish. This can take several months or years, but it results in a more authentic-looking relic. |
| Non-Toxic Finishes | Use non-toxic finishing products, such as water-based lacquers and stains. These products are safer to use and produce fewer harmful fumes. |
| Mechanical Relicing | Use mechanical techniques, such as sanding, scraping, and scuffing, to create wear patterns and age the finish. This is a more labor-intensive process, but it avoids the use of harsh chemicals. |
| Simulated Wear | Use artistic techniques, such as painting and drawing, to simulate wear patterns and age the finish. This is a more creative approach, but it requires a good eye for detail and artistic skill. |
24. How Do I Deal with Sharp Fret Ends After Relicing the Fretboard?
Dealing with sharp fret ends after relicing the fretboard involves filing and smoothing the fret ends to ensure comfortable playability.
- Protect the Fretboard: Use masking tape to protect the fretboard from scratches and dings.
- File the Fret Ends: Use a fret end dressing file to file the fret ends flush with the edge of the fretboard.
- Smooth the Fret Ends: Use fine-grit sandpaper (600-grit or higher) to smooth the fret ends and remove any sharp edges.
- Polish the Fret Ends: Use a fret polishing cloth or compound to polish the fret ends and restore their shine.
- Check for Comfort: Check the fret ends for comfort and repeat the filing, smoothing, and polishing process as needed.
25. Can I Relic a Maple Fretboard Differently Than a Rosewood Fretboard?
Yes, relicing a maple fretboard differs from relicing a rosewood fretboard due to the different properties and finishes of the woods.
| Feature | Maple Fretboard | Rosewood Fretboard |
|---|---|---|
| Finish | Typically has a finish (lacquer or polyurethane) that needs to be removed or aged. | Typically unfinished or has a very thin oil finish. |
| Wear Patterns | Shows wear as the finish is worn away, exposing the wood underneath. | Shows wear as the wood is worn down, creating divots and grooves. |
| Relicing Techniques | Requires removing or aging the finish, then creating wear patterns in the wood. | Requires creating wear patterns in the wood, then applying a thin oil finish to protect and enhance the aged look. |
| Staining | Can be stained to simulate the accumulation of dirt and oils, but staining should be done carefully to avoid over-staining. | Can be oiled to enhance the color and grain, but oiling should be done sparingly to avoid making the fretboard too slippery. |
| Maintenance | Requires regular cleaning and polishing to protect the finish and prevent further wear. | Requires regular oiling to keep the wood from drying out and cracking. |
26. How Can I Make a New Guitar Neck Look 50 Years Old?
Making a new guitar neck look 50 years old requires a combination of relicing techniques to simulate the wear, discoloration, and finish checking that occur over time.
- Remove the Finish: Remove the existing finish from the neck using sandpaper and a heat gun.
- Age the Wood: Expose the wood to sunlight and humidity to naturally age it. This can take several weeks or months.
- Create Wear Patterns: Use sandpaper, razor blades, and other tools to create wear patterns in the wood. Focus on the areas where natural wear would occur.
- Apply Tinted Lacquer: Apply several coats of tinted lacquer to simulate the yellowed or ambered appearance of aged finishes.
- Check the Finish: Create a checked finish by exposing the lacquer to rapid temperature changes.
- Age the Hardware: Age the hardware using steel wool, sandpaper, and chemicals to create a worn, tarnished appearance.
- Assemble the Guitar: Assemble the guitar and enjoy your new, vintage-looking instrument.
27. What is “Finish Checking” and How Do I Create It?
“Finish checking” refers to the small cracks that appear in the lacquer finish of vintage guitars due to age and temperature changes. To create this effect, alternate between hot and cold environments after applying several coats of nitrocellulose lacquer.
28. Can You Over-Relic a Guitar Neck?
Yes, it is possible to over-relic a guitar neck by applying too much wear and tear, resulting in an unnatural and unattractive appearance.
- Unrealistic Wear Patterns: Creating wear patterns that are not consistent with natural wear.
- Excessive Finish Removal: Removing too much finish, exposing too much wood, or creating large, gaping cracks.
- Damaged Hardware: Aging the hardware to the point where it is no longer functional or aesthetically pleasing.
- Compromised Playability: Creating a neck that is uncomfortable to play due to sharp fret ends, uneven surfaces, or other issues.
- Reduced Value: Creating a guitar that is less valuable due to the poor quality of the relic job.
29. What is the Best Type of Sandpaper to Use for Relicing?
The best type of sandpaper to use for relicing depends on the specific task, but a range of grits from coarse to fine is generally recommended.
| Grit Range | Use |
|---|---|
| Coarse (80-120) | For removing finish and creating significant wear patterns, but use with caution to avoid damaging the wood. |
| Medium (150-220) | For smoothing the surface and blending wear patterns, and removing lacquer. |
| Fine (320-400) | For creating subtle wear patterns and smoothing the surface. |
| Very Fine (600+) | For polishing the finish and removing scratches and swirls. Used to prepare surface and give it an extra smooth finish for playability. |
30. How Do I Choose the Right Color of Tinted Lacquer for an Aged Look?
Choosing the right color of tinted lacquer involves considering the age and original finish of the guitar, as well as the desired level of aging.
- Consider the Age: Guitars from the 1950s and 1960s typically have a yellowed or ambered finish due to the aging of the lacquer.
- Match the Original Finish: If you are trying to replicate the look of a specific guitar, try to match the color of the original finish as closely as possible.
- Consider the Level of Aging: Use a lighter tint for a subtle aged look and a darker tint for a more dramatic aged look.
- Test the Lacquer: Test the lacquer on a scrap piece of wood before applying it to the guitar. This will allow you to see how the color looks and adjust it as needed.
- Experiment with Colors: Experiment with different colors of tinted lacquer to find the one that you like best. There is no right or wrong answer, so feel free to get creative.
At guitarplayers.net, we understand your passion for vintage aesthetics. That’s why we offer a comprehensive range of resources to help you master the art of relicing guitar necks. Whether you’re looking for detailed tutorials, expert advice, or a community of fellow enthusiasts, you’ll find everything you need to create the perfect vintage look for your guitar. Dive into our extensive collection of lessons, reviews, and community forums, and discover the secrets to achieving that coveted “road worn” aesthetic.
Ready to transform your guitar neck into a vintage masterpiece?
- Explore our detailed lessons on relicing techniques.
- Read reviews of the best finishing products for achieving an aged look.
- Join our community forum to connect with fellow guitar enthusiasts and share your relicing projects.
Visit guitarplayers.net today and take your guitar customization skills to the next level.
Address: 1140 Boylston Street, Boston, MA 02215, United States
Phone: +1 (617) 747-2261
Website: guitarplayers.net
FAQ: How to Make a Guitar Neck Look Vintage
- What is the main goal of relicing a guitar neck?
The main goal is to artificially age the neck to resemble a vintage instrument, enhancing its aesthetic appeal and perceived value. - What are the critical areas to focus on when relicing a guitar neck?
Focus on the headstock, fretboard, and back of the neck, as these areas naturally show wear and tear over time. - What tools are essential for relicing a guitar neck?
Essential tools include sandpaper (various grits), steel wool, razor blades, tinted lacquers, stains, and waxes. - How do you safely remove the finish from a guitar neck?
Safely remove the finish by using sandpaper and a heat gun, applying gradual and careful abrasion to avoid damaging the wood. - What techniques can create realistic wear patterns on the fretboard?
Techniques include strategic sanding, staining, creating small divots, and rounding the fretboard edges. - How can you age the headstock logo without damaging it?
Use fine sandpaper and razor blades carefully to simulate natural wear around the edges of the logo, protecting the center with masking tape. - What is the best way to replicate a smooth, worn feel on the back of the neck?
Use steel wool and fine sandpaper to remove the gloss and create a soft, comfortable surface, enhancing playability. - What types of finishing products are suitable for relicing guitar necks?
Tinted lacquers, stains, and waxes are ideal for replicating the aged color and sheen of vintage guitar necks. - How do you apply tinted lacquer to achieve an aged color effectively?
Apply thin, even coats of tinted lacquer, allowing each coat to dry before applying the next, to build up color gradually and ensure a smooth finish. - What common mistakes should you avoid when relicing a guitar neck?
Avoid over-sanding, applying too much finish, creating unrealistic wear patterns, and damaging the logo to achieve a professional-looking relic job.