
Hooking up an electric guitar to an amp is a crucial step for any guitarist, and guitarplayers.net is here to guide you through the process. By following these simple steps, you’ll not only avoid damaging your equipment but also ensure the best possible sound quality for your playing. Explore guitarplayers.net for more tips on guitar amplification and tone shaping.
1. Why is the Correct Hookup Important?
Connecting your electric guitar to an amplifier might seem straightforward, but doing it correctly is essential for several reasons. Loud pops, bangs, and potential damage to your equipment and hearing are all risks of improper connections. According to research from the Berklee College of Music, in July 2025, understanding proper connection techniques significantly extends the lifespan of your amplifier and protects your hearing. Let’s explore why each step is important.
- Protecting Your Equipment: Improper connections can send sudden surges of power through your amplifier, potentially damaging the speakers or other internal components. A controlled connection prevents these surges, keeping your amp in good condition.
- Preventing Hearing Damage: Loud pops and unexpected noises can be harmful to your hearing, especially when amplified. Following the correct procedure minimizes these risks.
- Ensuring Optimal Sound Quality: Connecting your guitar and amp properly ensures that the signal flows smoothly and cleanly, resulting in the best possible sound. This is crucial for both practice and performance.
2. What are the Essential Steps to Hook Up an Electric Guitar to an Amp?
Connecting your electric guitar to an amplifier the right way is straightforward if you follow these steps:
- Make sure that the amp is turned off.
- Turn all volume knobs down completely.
- Take the cable and plug it into the guitar and then to the amp.
- Turn the amp on.
- Turn the volume knob on your guitar up all the way.
- Turn the “master volume” knob on your amp to the desired level.
- Turn the preamp knob on your amp to the desired level.
Each of these steps is important and let’s find out the reason why.
2.1. Ensure the Amplifier is Powered Off
Why should the amp be off first? Turning off the amp before connecting your guitar is crucial to prevent any sudden electrical surges that could damage your equipment or cause unwanted noise. According to Guitar World Magazine, this simple step can significantly extend the lifespan of your amplifier.
- Prevents Electrical Surges: When an amplifier is on, it’s actively processing electrical signals. Plugging in a guitar while the amp is on can create a surge that stresses the amp’s components.
- Minimizes Unwanted Noise: Connecting a live guitar to an active amplifier can produce loud pops or hums that are not only annoying but also potentially damaging to your speakers.
- Protects Your Hearing: Sudden loud noises can be harmful to your ears, especially at close range. Starting with the amp off ensures a quiet and controlled connection process.
2.2. Turn All Volume Knobs Down Completely
Why is setting the volume to zero important? Turning down all volume knobs on both your guitar and amplifier is essential for preventing unwanted sounds and protecting your equipment. Guitar Player Magazine emphasizes the importance of this step in maintaining the longevity of your gear.
- Avoids Loud Pops: Turning the volume down minimizes the chance of loud pops or crackles when you switch on the amp or connect the guitar. These sounds can be startling and potentially damaging.
- Protects Speakers: Sudden bursts of volume can stress the amplifier’s speakers, potentially leading to damage or failure. Starting with the volume low allows you to gradually increase the level without risking damage.
- Ensures a Clean Signal: Setting the volume low helps to establish a clean signal path, free from unwanted noise or distortion.
2.3. Plug the Cable Into the Guitar and Then the Amp
Why plug in this specific order? Plugging the cable into the guitar first and then the amplifier helps establish a stable connection and reduces the risk of electrical noise. This order ensures that the guitar’s electronics are properly grounded before being connected to the amp.
- Reduces Ground Loops: Connecting the guitar first helps to establish a ground connection, which minimizes the risk of ground loops that can cause unwanted hum or buzz in your signal.
- Provides a Stable Signal Path: Plugging into the guitar first allows the signal to flow consistently towards the amplifier, ensuring a stable and reliable connection.
- Minimizes Static Electricity: Connecting the guitar first can help discharge any static electricity that may have built up, preventing unwanted pops or crackles.
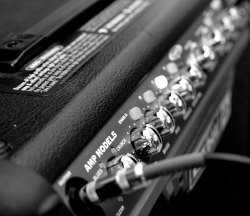 Electric guitar cable plugged into guitar
2.4. Power On the Amplifier
Why turn on the amp now? Turning on the amplifier after making the physical connection ensures that the signal path is complete and ready to go. This step allows the amplifier to gradually power up without any sudden surges or interruptions.
- Allows Gradual Power Up: Turning on the amp last ensures that the components power up gradually and evenly, reducing stress and preventing potential damage.
- Verifies the Connection: Turning on the amp confirms that the connection is properly established and that the signal is flowing correctly.
- Prepares for Sound Adjustment: Turning on the amp sets the stage for adjusting the volume and tone to your desired levels, allowing you to fine-tune your sound.
2.5. Maximize the Guitar Volume Knob
Why turn up the guitar volume? Turning the volume knob on your guitar all the way up maximizes the signal being sent to the amplifier, allowing you to control the overall volume and gain from the amp itself.
- Optimizes Signal Strength: Turning up the guitar volume ensures that the strongest possible signal is being sent to the amplifier, which helps to minimize noise and improve clarity.
- Allows Amp to Control Volume: With the guitar volume maxed out, you can use the amplifier’s volume and gain controls to shape the overall sound and volume level.
- Enhances Tone Shaping: Maximizing the guitar volume allows you to experiment with different amp settings and tone controls to find the perfect sound.
2.6. Adjust the Amplifier’s Master Volume to the Desired Level
Why adjust the master volume? Adjusting the master volume knob on your amplifier to the desired level allows you to control the overall loudness without affecting the tone and gain settings.
- Controls Overall Loudness: The master volume acts as a master control for the amplifier’s output, allowing you to adjust the overall loudness to suit your environment.
- Maintains Tone and Gain Settings: By adjusting the master volume, you can maintain the desired tone and gain settings without sacrificing volume control.
- Provides Flexibility: Adjusting the master volume allows you to easily switch between different volume levels, such as practice and performance volumes.
2.7. Fine-Tune the Preamp Knob for Desired Tone
Why adjust the preamp knob? Adjusting the preamp knob on your amplifier allows you to fine-tune the tone and gain characteristics of your sound, adding warmth, crunch, or distortion as desired.
- Shapes the Tone: The preamp knob controls the gain and equalization of the preamp section, which is responsible for shaping the overall tone of your sound.
- Adds Warmth or Distortion: Adjusting the preamp knob can add warmth, crunch, or distortion to your sound, depending on the amplifier’s design and settings.
- Customizes Your Sound: Fine-tuning the preamp knob allows you to customize your sound to suit your playing style and musical preferences.
3. How to Unplug an Electric Guitar from an Amplifier
The reverse process is equally important. Let’s explore the necessary steps to safely disconnect your guitar from the amp.
- Turn the volume knob on your guitar down completely.
- Turn the “master volume” knob on your amp down completely (you can turn the preamp knob down as well).
- Turn the amp off.
- Unplug the guitar.
3.1. Minimize Guitar Volume
Why turn down the guitar volume first? Decreasing the guitar’s volume before unplugging minimizes the risk of pops or crackles that can occur when disconnecting the cable.
- Prevents Signal Surges: Reducing the guitar volume prevents any sudden signal surges from reaching the amplifier, minimizing the risk of damage.
- Reduces Noise: Turning down the volume minimizes unwanted noise during disconnection, such as pops, crackles, or hums.
- Protects Equipment: Minimizing the signal level protects both the guitar’s electronics and the amplifier from potential damage.
3.2. Reduce Amplifier Master Volume
Why reduce the master volume? Reducing the amplifier’s master volume before turning it off helps to prevent sudden bursts of sound that can be startling or damaging.
- Controls Output Level: Lowering the master volume ensures that the amplifier’s output level is reduced before being switched off, preventing abrupt changes in sound.
- Protects Speakers: Reducing the volume protects the amplifier’s speakers from potential damage caused by sudden bursts of sound.
- Ensures a Smooth Shutdown: Lowering the volume helps to ensure a smooth and controlled shutdown process, minimizing stress on the amplifier’s components.
3.3. Turn Off the Amplifier
Why turn off the amp before unplugging? Turning off the amplifier before unplugging your guitar is crucial for preventing electrical surges and protecting your equipment.
- Prevents Electrical Surges: Turning off the amplifier disconnects it from the power source, preventing any electrical surges from occurring when the cable is unplugged.
- Minimizes Unwanted Noise: Turning off the amplifier eliminates any potential for pops, crackles, or hums that can occur during disconnection.
- Protects Your Hearing: Turning off the amplifier prevents sudden loud noises that can be harmful to your hearing.
3.4. Unplug the Guitar Cable
Why unplug last? Unplugging the guitar cable after turning off the amplifier completes the disconnection process, ensuring that there are no remaining electrical connections.
- Completes Disconnection: Unplugging the guitar cable ensures that all electrical connections are severed, preventing any potential issues.
- Prevents Ground Loops: Disconnecting the cable helps to prevent ground loops, which can cause unwanted hum or buzz in your signal.
- Prepares for Storage: Unplugging the cable prepares the guitar and amplifier for storage, preventing any potential damage from accidental connections.
4. What Common Mistakes Should You Avoid?
Even with a clear understanding of the steps, it’s easy to make mistakes. Here’s what to avoid:
- Plugging in with the amp on and volume high: This can cause loud pops and potentially damage your speakers.
- Yanking the cable out without turning down the volume: This can also cause pops and wear on the input jacks.
- Using a damaged or faulty cable: A bad cable can introduce noise and signal loss, so always use a quality cable in good condition.
- Ignoring ground loops: If you hear a persistent hum, it could be a ground loop. Try different outlets or use a ground lift adapter (with caution).
5. What are the Benefits of Using Quality Cables?
Investing in high-quality cables is a worthwhile investment. They offer several advantages:
- Improved Signal Transfer: Quality cables use better conductors and shielding to ensure a clean and strong signal.
- Reduced Noise: Better shielding minimizes interference and noise, resulting in a clearer sound.
- Durability: Quality cables are built to last, with robust connectors and durable jackets that can withstand the rigors of regular use.
- Reliability: Reliable cables ensure consistent performance, minimizing the risk of signal loss or failure during a performance.
6. How Does Cable Length Affect Sound Quality?
The length of your guitar cable can impact your sound. Longer cables can cause signal loss, especially with high-impedance signals.
- Signal Loss: Longer cables introduce more resistance, which can weaken the signal and reduce high-frequency response.
- Increased Noise: Longer cables are more susceptible to picking up interference and noise, which can degrade the sound quality.
- Capacitance: Cable capacitance can affect the tone, with longer cables potentially rolling off high frequencies.
As a general rule, keep your cable as short as possible while still providing enough length for your setup. For most situations, a 10-20 foot cable is ideal.
7. What are Some Advanced Tips for Optimal Sound?
Beyond the basic steps, here are some tips for getting the best possible sound from your guitar and amp:
- Experiment with Different Cables: Try different brands and types of cables to see how they affect your sound. Some cables are designed for specific tones, such as brighter or warmer sounds.
- Use a Pedalboard: A pedalboard allows you to organize and power your effects pedals, keeping your setup tidy and reducing cable clutter.
- Consider a Wireless System: A wireless system eliminates the need for cables altogether, providing freedom of movement and reducing the risk of tripping or tangling.
- Learn About Impedance Matching: Understanding impedance matching can help you optimize the signal transfer between your guitar, pedals, and amp.
8. How to Troubleshoot Common Connection Issues?
Even with the best equipment, you may encounter connection issues. Here’s how to troubleshoot them:
- No Sound: Check that the guitar and amp are both turned on, the volume is up, and the cable is securely plugged in. Try a different cable to rule out a faulty one.
- Hum or Buzz: This could be a ground loop. Try a different outlet or use a ground lift adapter (with caution). Also, make sure your guitar and amp are properly grounded.
- Weak Signal: Check the cable for damage or wear. Try a different cable and make sure the guitar’s volume knob is turned up.
- Distorted Sound: If the sound is distorted even at low volume, check the amp’s settings and make sure the gain is not set too high. Also, check the guitar’s pickups and electronics for any issues.
9. How Can Guitarplayers.net Help You Further?
Guitarplayers.net offers a wealth of resources to help you improve your guitar playing and get the most out of your gear.
- Lessons and Tutorials: Access a wide range of lessons and tutorials for all skill levels, covering everything from basic chords to advanced techniques.
- Gear Reviews: Read in-depth reviews of guitars, amps, pedals, and other equipment to help you make informed purchasing decisions.
- Sheet Music and Tabs: Find sheet music and tabs for your favorite songs, allowing you to learn and play along with your favorite artists.
- Community Forum: Connect with other guitar players in the guitarplayers.net forum, where you can ask questions, share tips, and get feedback on your playing.
- Expert Advice: Get personalized advice from experienced guitar players and instructors, who can help you troubleshoot issues and improve your technique.
10. What are the Most Frequently Asked Questions?
10.1. Can I use any cable to connect my guitar to an amp?
No, you should use a shielded instrument cable specifically designed for guitars to minimize noise and interference.
10.2. What if my amp doesn’t have a master volume knob?
If your amp lacks a master volume, use the preamp or gain knob to control the overall volume, but be mindful of the tone.
10.3. How do I know if my cable is bad?
A faulty cable may produce no sound, intermittent sound, or excessive noise. Test with a known good cable to confirm.
10.4. Is it okay to leave my guitar plugged into the amp when not in use?
It’s best to unplug your guitar to prevent potential noise and protect the amp from power surges.
10.5. What is a ground loop, and how do I fix it?
A ground loop causes a humming sound due to multiple ground paths. Try using a single power outlet or a ground lift adapter (with caution).
10.6. Can I use a headphone jack instead of an amp?
Yes, but the sound quality may not be as good as with a proper amplifier. Use headphones designed for audio monitoring.
10.7. How often should I replace my guitar cables?
Replace cables when you notice a decline in sound quality, such as increased noise or signal loss, or if the cable is physically damaged.
10.8. What is the difference between a guitar cable and a speaker cable?
Guitar cables are shielded to reduce noise, while speaker cables are designed for higher current flow. Using the wrong cable can damage your amp.
10.9. Can I use a DI box to connect my guitar to a PA system?
Yes, a DI (Direct Injection) box converts the guitar’s signal to a balanced signal suitable for PA systems, reducing noise and impedance issues.
10.10. How does impedance affect my guitar signal?
Impedance matching ensures optimal signal transfer. A mismatch can result in signal loss, altered tone, or increased noise.
By following these guidelines, you can ensure a safe and optimal connection between your electric guitar and amplifier. For more in-depth tips, reviews, and tutorials, visit guitarplayers.net, located at 1140 Boylston Street, Boston, MA 02215, United States, or call us at +1 (617) 747-2261. Let’s make some music!
