
Hey there, guitar enthusiasts! At guitarplayers.net, we understand the desire to display your beloved guitars, but drilling into walls isn’t always an option. That’s why we’re diving into the world of damage-free guitar mounting, offering you simple, stylish, and secure solutions. Explore alternatives to traditional hangers, discover innovative mounting techniques, and learn how to protect your walls while showcasing your musical treasures.
1. Why Avoid Drilling? The Downsides Of Traditional Guitar Mounting
1.1 Why is drilling into walls a problem for guitar hangers?
Drilling into walls can be a problem primarily due to potential damage and restrictions. Many rental agreements strictly forbid drilling, leading to fines or loss of your security deposit. Even if you own the property, drilling creates permanent holes that require filling and repainting when you decide to move the guitar or redecorate. The process can be time-consuming and messy, adding unnecessary hassle.
Furthermore, the structural integrity of the wall is a concern. Not all walls are suitable for supporting the weight of a guitar, especially heavier models like Les Pauls. Finding a stud can be challenging, and relying on drywall alone might lead to the guitar falling and getting damaged, causing both financial and emotional distress.
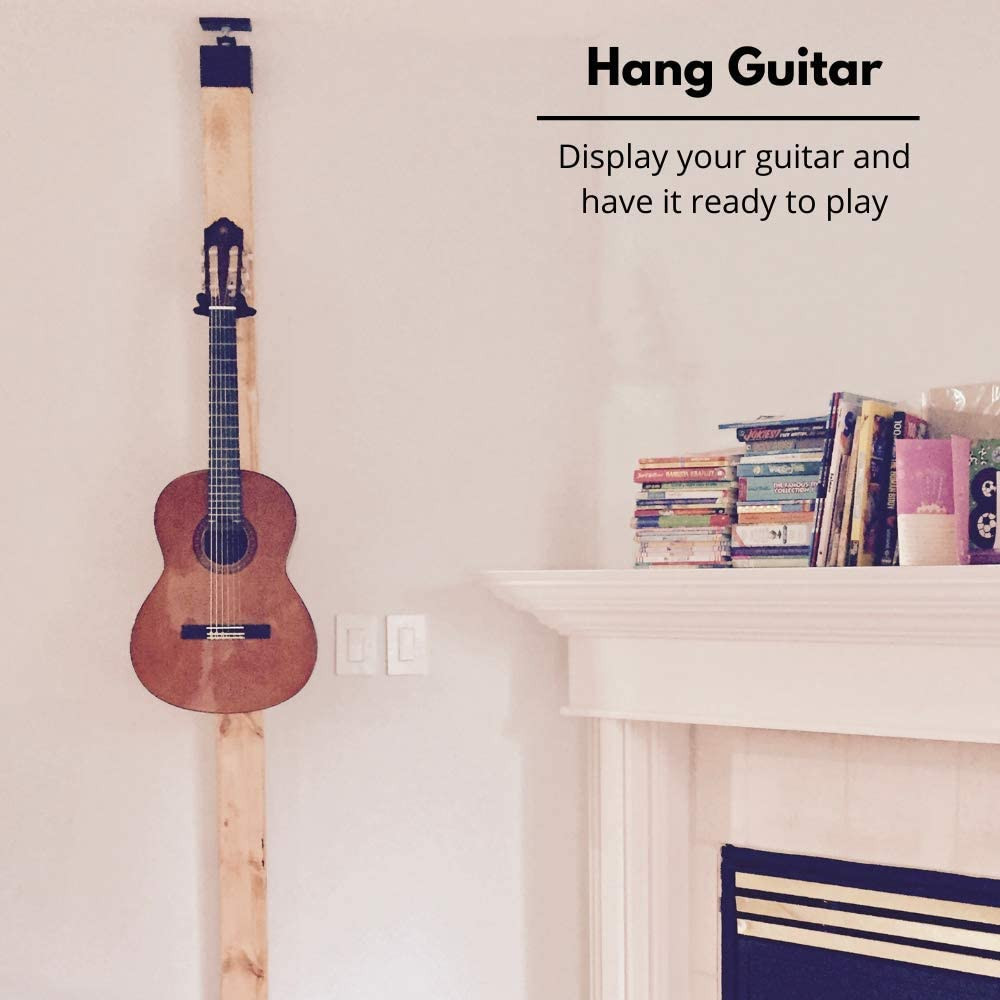 Guitar hanging on a wall with a traditional hanger
1.2 What are the restrictions on drilling in rented spaces?
Rental agreements usually have strict rules about what tenants can and cannot do to the property. Drilling holes typically falls under prohibited activities, as it’s considered property damage beyond normal wear and tear. Landlords often require the property to be returned in its original condition, and any alterations, including holes from drilling, need to be repaired.
Violating these rules can result in financial penalties, such as deductions from the security deposit, or even legal issues. It’s crucial to review your lease agreement carefully to understand the specific restrictions and avoid potential conflicts with your landlord. If you’re unsure, it’s always best to ask for clarification before making any modifications to the walls.
1.3 How does drilling affect wall integrity?
Drilling into walls can compromise their structural integrity if not done correctly. Walls are constructed with studs (wooden or metal frames) that provide support, and simply drilling into the drywall between studs can weaken the wall. Drywall alone isn’t designed to hold heavy objects, and over time, the weight can cause the drywall to crumble or crack around the hole.
Additionally, drilling can damage hidden pipes or electrical wires within the wall, leading to costly repairs and potential safety hazards. Therefore, it’s essential to know what’s behind the wall before drilling. Using a stud finder can help locate studs and avoid damaging essential infrastructure. If you’re uncertain, it’s always safer to consult a professional to ensure the job is done correctly and safely.
2. Innovative No-Drill Guitar Hanger Solutions
2.1 What are the best no-drill options for hanging a guitar?
For those looking to avoid drilling, there are several excellent no-drill options for hanging a guitar. These solutions provide secure and damage-free ways to display your instrument. Here are a few top choices:
| Option | Description | Advantages | Disadvantages |
|---|---|---|---|
| Adhesive Hooks | Strong, removable hooks designed for holding weight. | Easy to install, no tools required, removable without damage. | May not be suitable for heavier guitars, can fail if not applied correctly. |
| Freestanding Guitar Stands | Stands that hold the guitar without needing to be mounted on a wall. | Portable, versatile, no installation required. | Takes up floor space, can be knocked over. |
| Over-the-Door Hangers | Hangers that hook over the top of a door. | Simple to install, utilizes unused space, no wall damage. | Can only be used on doors, may not be aesthetically pleasing. |
| Labrico 2×4 Brackets | Brackets that create a vertical post using a 2×4, against which you hang the guitar. | Very sturdy, holds multiple guitars, no wall damage. | Requires assembly, may not blend seamlessly with decor. |
2.2 How do adhesive hooks work and when are they appropriate?
Adhesive hooks are a popular no-drill solution for hanging lightweight items. These hooks use a strong adhesive backing to stick to the wall, providing a secure hold without the need for screws or nails. Brands like 3M Command offer hooks specifically designed for heavier items, making them suitable for hanging guitars.
To use adhesive hooks effectively, start by cleaning the wall surface with rubbing alcohol to remove any dirt or grease. Then, peel off the backing and firmly press the hook against the wall for the recommended time (usually 30 seconds to a minute). Allow the adhesive to cure for the specified duration (often an hour or more) before hanging the guitar.
Adhesive hooks are appropriate for:
- Lightweight guitars: Electric guitars like Strats or similar that weigh under 8 pounds.
- Smooth surfaces: Walls with smooth, clean surfaces that allow the adhesive to bond properly.
- Temporary solutions: Renters or those who frequently rearrange their spaces.
However, avoid using adhesive hooks on textured walls, wallpaper, or surfaces that are prone to peeling, as they may not provide a reliable hold and could damage the surface when removed. Also, regularly check the hook’s stability to ensure it remains firmly attached to the wall.
2.3 What are freestanding guitar stands and their benefits?
Freestanding guitar stands are a convenient and versatile way to store and display your guitar without the need for wall mounting. These stands come in various designs, including A-frame stands, tripod stands, and multi-guitar racks. They work by providing a stable base that holds the guitar upright, preventing it from falling over.
The benefits of using freestanding guitar stands include:
- Portability: Easy to move around, making them ideal for gigs, rehearsals, or rearranging your space.
- No installation required: No drilling or adhesives needed, so they won’t damage your walls.
- Versatility: Suitable for all types of guitars, from acoustic to electric to bass.
- Accessibility: Keeps your guitar within easy reach, encouraging more frequent playing.
However, freestanding guitar stands do take up floor space and can be knocked over if not placed carefully. Consider a corner or a less trafficked area to minimize the risk of accidents. Also, ensure the stand is sturdy and well-balanced to prevent your guitar from tipping.
2.4 How do over-the-door guitar hangers work and what are their limitations?
Over-the-door guitar hangers are a simple and space-saving solution for hanging your guitar without drilling. These hangers consist of a padded hook that fits over the top of a door and a cradle that holds the guitar. They utilize the unused space behind a door, making them ideal for small rooms or apartments.
To install, simply slide the hook over the top of the door, ensuring it fits snugly. The padded hook protects the door from scratches and provides a secure grip. Then, place the guitar in the cradle, making sure it’s balanced and stable.
The limitations of over-the-door guitar hangers include:
- Door compatibility: Only works on standard-sized doors that are not too thick or thin.
- Weight restrictions: Not suitable for heavy guitars, as the door may not be able to support the weight.
- Aesthetics: May not be the most visually appealing option, as the guitar is hanging on the back of a door.
- Door usage: The door’s functionality may be affected, as opening and closing it could cause the guitar to swing.
If you choose this option, ensure the door is sturdy and can handle the weight of the guitar. Also, consider the door’s location and usage to minimize any inconvenience or potential damage.
2.5 What are Labrico 2×4 brackets and how do they work?
Labrico 2×4 brackets offer a sturdy and versatile no-drill solution for hanging guitars. These brackets allow you to create a vertical post using a standard 2×4 piece of lumber, which is then secured between the floor and ceiling. The brackets feature non-slip pads on both ends to prevent damage to the surfaces.
To install Labrico brackets:
- Measure the height: Measure the distance between the floor and ceiling to determine the length of the 2×4 you’ll need.
- Cut the 2×4: Cut the 2×4 to the measured length.
- Attach the brackets: Attach the Labrico brackets to both ends of the 2×4.
- Position the post: Place the 2×4 post in the desired location, ensuring it’s vertical.
- Adjust the tension: Use the thumbwheel on the ceiling side of the bracket to adjust the height and ensure a tight fit.
Once the post is in place, you can attach standard guitar wall hangers to the 2×4, as you would with a stud in the wall. Labrico brackets can hold a significant amount of weight, making them suitable for multiple guitars or heavier instruments.
The advantages of Labrico brackets include:
- Sturdiness: Provides a secure and stable mounting solution.
- No wall damage: Doesn’t require drilling or adhesives.
- Versatility: Can be used to create an entire wall display of guitars.
- Weight capacity: Able to hold multiple guitars or heavier instruments.
However, Labrico brackets do require some assembly and may not blend seamlessly with all decor styles. Also, the 2×4 post will be visible, so consider painting or staining it to match your room’s aesthetics.
3. Step-by-Step Guide: Hanging a Guitar Without Drilling
3.1 How to prepare the wall surface for adhesive solutions?
Preparing the wall surface properly is crucial for ensuring adhesive solutions work effectively and prevent damage. Here’s a step-by-step guide:
- Clean the surface: Use a clean, damp cloth to wipe the wall surface and remove any dust, dirt, or debris. For stubborn residue, use a mild detergent and water solution.
- Degrease the area: Apply rubbing alcohol to a clean cloth and wipe the area where the adhesive will be applied. This removes any grease or oil that could interfere with the adhesive bond.
- Dry thoroughly: Allow the wall surface to air dry completely before proceeding.
- Test the adhesive: Before applying the adhesive hook or strip, test it in an inconspicuous area to ensure it doesn’t damage the paint or wallpaper.
- Apply the adhesive: Follow the manufacturer’s instructions for applying the adhesive hook or strip. Press firmly and hold for the recommended time to ensure a strong bond.
By following these steps, you’ll create a clean and prepared surface that will maximize the adhesive’s effectiveness and minimize the risk of damage.
3.2 How to install adhesive guitar hangers safely?
Installing adhesive guitar hangers safely is essential to protect your guitar and prevent it from falling. Here’s a step-by-step guide:
- Choose the right hanger: Select an adhesive guitar hanger that is specifically designed for the weight and type of your guitar.
- Prepare the wall: Clean and degrease the wall surface as described in the previous section.
- Apply the adhesive: Follow the manufacturer’s instructions for applying the adhesive strip or hook. Press firmly and hold for the recommended time to ensure a strong bond.
- Allow curing time: Allow the adhesive to cure for the recommended time (usually 24-48 hours) before hanging the guitar. This allows the adhesive to fully bond with the wall surface.
- Hang the guitar: Carefully hang the guitar on the hanger, ensuring it’s balanced and secure.
- Test the stability: Gently tug on the guitar to ensure the hanger is firmly attached to the wall. If it feels loose or unstable, remove the guitar and reinforce the adhesive or choose a different mounting solution.
Regularly check the hanger’s stability to ensure it remains firmly attached to the wall. If you notice any signs of weakening, remove the guitar and replace the adhesive or choose a different mounting method.
3.3 How to set up Labrico brackets for guitar hanging?
Setting up Labrico brackets for guitar hanging requires some assembly, but the result is a sturdy and reliable no-drill solution. Here’s a step-by-step guide:
- Measure the height: Measure the distance between the floor and ceiling to determine the length of the 2×4 you’ll need.
- Cut the 2×4: Cut the 2×4 to the measured length.
- Attach the brackets: Attach the Labrico brackets to both ends of the 2×4 using screws.
- Position the post: Place the 2×4 post in the desired location, ensuring it’s vertical. Use a level to check the alignment.
- Adjust the tension: Use the thumbwheel on the ceiling side of the bracket to adjust the height and ensure a tight fit. The bracket should be snug but not overly tight, to avoid damaging the ceiling or floor.
- Attach guitar hangers: Attach standard guitar wall hangers to the 2×4 using screws.
- Hang the guitar: Carefully hang the guitar on the hangers, ensuring they’re balanced and secure.
By following these steps, you’ll create a sturdy and stable mounting solution that can hold multiple guitars or heavier instruments without damaging your walls.
3.4 How to ensure guitar safety with no-drill options?
Ensuring your guitar’s safety with no-drill options requires careful consideration and regular maintenance. Here are some tips:
- Choose the right option: Select a no-drill solution that is specifically designed for the weight and type of your guitar.
- Follow instructions: Carefully follow the manufacturer’s instructions for installation and usage.
- Prepare the surface: Clean and degrease the wall surface properly to ensure a strong adhesive bond.
- Allow curing time: Allow the adhesive to cure for the recommended time before hanging the guitar.
- Test the stability: Gently tug on the guitar to ensure the hanger is firmly attached to the wall.
- Regularly check: Regularly check the hanger’s stability and adhesive bond.
- Avoid overloading: Don’t overload the hanger with excessive weight.
- Consider placement: Choose a location that is away from high-traffic areas or potential hazards.
By following these tips, you can minimize the risk of your guitar falling and getting damaged, ensuring its safety and longevity.
4. Creative Ideas for Displaying Guitars Without Damage
4.1 What are some aesthetic considerations for no-drill guitar displays?
When setting up a no-drill guitar display, aesthetics are just as important as functionality. Here are some aesthetic considerations to keep in mind:
| Aesthetic Consideration | Description | Tips |
|---|---|---|
| Color Coordination | Matching the color of the hangers or stands with the guitar or room decor. | Choose neutral colors like black, white, or gray for a versatile look. Or, select colors that complement the guitar’s finish or the room’s color scheme. |
| Layout and Spacing | Arranging the guitars in a visually appealing manner. | Space the guitars evenly to create a balanced look. Consider arranging them by size, color, or style. Experiment with different layouts to find the most visually pleasing arrangement. |
| Lighting | Using lighting to highlight the guitars and create a focal point. | Install spotlights or LED strips to illuminate the guitars. Consider using different colors or intensities to create different moods. Make sure the lighting doesn’t damage the guitars (avoid direct sunlight). |
| Background | Choosing a backdrop that complements the guitars and enhances their visual appeal. | Use a neutral-colored wall or a decorative panel as a backdrop. Consider adding artwork or other decorative elements to create a cohesive look. |
| Minimalism | Keeping the display clean and uncluttered. | Avoid overcrowding the space with too many guitars or accessories. Focus on showcasing a few key instruments. Keep the area around the display tidy and organized. |
4.2 How to incorporate guitar displays into room decor?
Integrating guitar displays into your room decor can add a unique and personal touch to your space. Here are some ideas:
- Create a focal point: Position the guitar display in a prominent location, such as above a sofa or in a hallway, to draw attention to it.
- Use decorative elements: Add artwork, plants, or other decorative elements around the guitar display to create a cohesive look.
- Match the style: Choose guitar hangers or stands that match the style of your room decor. For example, use wooden hangers for a rustic look or metal hangers for a modern look.
- Incorporate lighting: Use lighting to highlight the guitars and create a dramatic effect.
- Personalize the display: Add personal touches, such as photos, memorabilia, or other items that reflect your passion for music.
By incorporating these ideas, you can create a guitar display that not only showcases your instruments but also enhances the overall aesthetic of your room.
4.3 Can you create a gallery wall with guitars?
Yes, creating a gallery wall with guitars is a fantastic way to showcase your instruments and add a unique artistic element to your space. Here’s how:
- Plan the layout: Before you start hanging guitars, plan the layout of your gallery wall. Consider the size, shape, and color of each guitar, as well as the overall aesthetic you want to achieve.
- Use a template: Create a template of the guitar shapes using cardboard or paper. Arrange the templates on the floor or wall to visualize the layout before you start hanging.
- Mix and match: Mix and match different types of guitars, as well as other artwork or decorative elements, to create a visually interesting gallery wall.
- Maintain balance: Ensure the gallery wall is balanced by distributing the weight and visual interest evenly.
- Use consistent spacing: Maintain consistent spacing between the guitars and other elements to create a cohesive look.
By following these steps, you can create a stunning gallery wall that showcases your guitars and adds a unique artistic touch to your space.
4.4 How to use lighting to enhance guitar displays?
Lighting can play a crucial role in enhancing guitar displays and creating a visually appealing focal point. Here are some ways to use lighting effectively:
- Spotlights: Use spotlights to highlight individual guitars and create a dramatic effect.
- LED strips: Install LED strips behind the guitars or along the edges of the display to create a soft, ambient glow.
- Track lighting: Use track lighting to provide flexible and adjustable illumination for your guitar display.
- Colored lights: Experiment with colored lights to create different moods and highlight specific features of the guitars.
- Natural light: Position your guitar display near a window to take advantage of natural light during the day.
When using lighting, be mindful of the heat generated by the bulbs, as excessive heat can damage the finish of your guitars. Opt for LED bulbs, which produce less heat and are more energy-efficient.
5. Maintenance and Care for No-Drill Guitar Setups
5.1 How often should you check the stability of no-drill hangers?
The stability of no-drill hangers should be checked regularly to ensure the safety of your guitars. Here’s a recommended schedule:
| Frequency | Action |
|---|---|
| Weekly | Visually inspect the hangers for any signs of loosening or damage. Gently tug on the guitar to ensure the hanger is firmly attached to the wall. |
| Monthly | Check the adhesive bond of adhesive hangers. If you notice any signs of weakening, remove the guitar and replace the adhesive. Check the tension of Labrico brackets and adjust as needed. |
| Annually | Conduct a thorough inspection of all hangers and mounting hardware. Replace any worn or damaged components. |
By following this schedule, you can identify potential issues early and prevent your guitars from falling and getting damaged.
5.2 How to clean and maintain adhesive surfaces for optimal hold?
Cleaning and maintaining adhesive surfaces is essential for ensuring optimal hold and preventing hanger failure. Here’s how:
- Dust regularly: Use a soft, dry cloth to dust the adhesive surface regularly.
- Clean with alcohol: If the adhesive surface becomes dirty or greasy, clean it with rubbing alcohol. Apply the alcohol to a clean cloth and gently wipe the surface.
- Avoid harsh chemicals: Avoid using harsh chemicals or abrasive cleaners, as they can damage the adhesive.
- Replace adhesive: If the adhesive loses its stickiness or becomes damaged, replace it with new adhesive strips or hooks.
By following these steps, you can maintain the adhesive surface and ensure a strong and reliable hold for your guitar hangers.
5.3 What are the signs of wear and tear to look for?
Regularly inspecting your no-drill guitar setups for signs of wear and tear can help you identify potential issues before they become serious. Here are some signs to look for:
| Sign of Wear and Tear | Description | Action |
|---|---|---|
| Loosening | The hanger feels loose or wobbly. | Tighten screws, adjust tension, or replace adhesive as needed. |
| Cracking | The hanger or mounting hardware shows signs of cracking or breaking. | Replace the damaged component immediately. |
| Discoloration | The adhesive surface becomes discolored or shows signs of deterioration. | Replace the adhesive. |
| Sagging | The guitar appears to be sagging or tilting. | Readjust the hanger or mounting hardware to ensure the guitar is properly supported. |
| Dust Buildup | Excessive dust buildup on the hanger or guitar. | Clean the hanger and guitar regularly. |
By being vigilant and addressing these signs of wear and tear promptly, you can ensure the safety and longevity of your no-drill guitar setups.
5.4 How to safely remove no-drill hangers without damaging walls?
Removing no-drill hangers safely without damaging walls requires careful technique and the right tools. Here’s a step-by-step guide:
- Read the instructions: Follow the manufacturer’s instructions for removing the hanger.
- Use a hairdryer: Apply heat to the adhesive surface using a hairdryer. This will soften the adhesive and make it easier to remove.
- Peel slowly: Gently peel the hanger away from the wall, starting at one corner. Use a putty knife or plastic scraper to help lift the adhesive.
- Remove residue: If there is any adhesive residue left on the wall, use rubbing alcohol or a specialized adhesive remover to clean it off.
- Clean the surface: Clean the wall surface with a damp cloth to remove any remaining residue.
By following these steps, you can remove no-drill hangers safely and effectively without damaging your walls.
6. Comparing Costs: Drilling vs. No-Drill Solutions
6.1 What are the initial costs associated with drilling?
Drilling into walls to hang your guitar might seem straightforward, but it comes with several initial costs that can add up. These include:
- Drill: A basic power drill can range from $30 to $100, depending on the brand and features.
- Drill bits: A set of drill bits suitable for various wall types (drywall, wood, plaster) can cost between $10 and $30.
- Stud finder: Essential for locating wall studs to ensure secure mounting, a stud finder typically costs $10 to $25.
- Level: To ensure your guitar hanger is perfectly straight, a level is necessary, priced around $5 to $15.
- Screws and anchors: Depending on the type of wall, you’ll need appropriate screws and anchors, costing approximately $5 to $10.
Therefore, the initial investment for drilling can range from $60 to $180, excluding the guitar hanger itself.
6.2 What are the costs of no-drill guitar mounting options?
No-drill guitar mounting options offer a cost-effective alternative to drilling, with varying price points depending on the chosen solution:
| No-Drill Option | Estimated Cost | Notes |
|---|---|---|
| Adhesive Hooks | $10 – $20 | Suitable for lighter guitars; consider the weight capacity. |
| Freestanding Stands | $20 – $50 | Price varies based on design and quality; offers portability. |
| Over-the-Door Hangers | $15 – $30 | Limited to door placement; check door compatibility. |
| Labrico Brackets | $40 – $70 | Requires a 2×4 lumber, adding to the overall cost; provides a sturdy, customizable solution. |
As shown, no-drill solutions can range from $10 to $70, making them generally more affordable upfront compared to drilling, especially if you don’t already own the necessary tools.
6.3 What are the potential repair costs from drilling damage?
One of the significant downsides of drilling is the potential for wall damage, which can lead to repair costs. These costs can include:
- Spackling: Filling small holes requires spackle, costing around $5 to $10.
- Paint: To match the existing wall color, you’ll need paint, which can range from $15 to $30 per quart.
- Tools: Sandpaper, putty knife, and brushes may be needed, adding another $10 to $20.
- Professional repair: If the damage is extensive (e.g., hitting a pipe or electrical wire), hiring a professional can cost $100 to $500 or more.
Therefore, the potential repair costs from drilling damage can range from a few dollars for minor fixes to several hundred dollars for major repairs.
6.4 Which option is more cost-effective in the long run?
In the long run, no-drill solutions are often more cost-effective, particularly for renters or those who frequently move. The initial investment is generally lower, and there are minimal to no repair costs associated with wall damage. Additionally, no-drill options offer flexibility and portability, allowing you to easily relocate your guitar display without the need for additional tools or repairs.
However, if you already own the necessary drilling tools and are confident in your ability to avoid wall damage, drilling can be a viable option. Ultimately, the most cost-effective choice depends on your individual circumstances, budget, and DIY skills.
7. Safety Tips for Hanging Guitars
7.1 What are the weight limits for different no-drill solutions?
Understanding the weight limits for different no-drill solutions is crucial to ensure the safety of your guitar and prevent accidents. Here’s a breakdown:
| No-Drill Option | Weight Limit (Approximate) | Notes |
|---|---|---|
| Adhesive Hooks | 5 – 10 pounds | Weight limits vary by brand and hook size; always check the manufacturer’s specifications. |
| Freestanding Stands | N/A | Weight limit depends on the stand’s construction; generally suitable for all guitar types. |
| Over-the-Door Hangers | 10 – 15 pounds | Check the door’s weight capacity and ensure the hanger fits snugly over the door. |
| Labrico Brackets | Up to 44 pounds | Weight limit per post; suitable for multiple guitars or heavier instruments. |
Always err on the side of caution and choose a no-drill solution that can safely support the weight of your guitar.
7.2 How to distribute weight evenly on hangers?
Distributing weight evenly on hangers is essential to prevent stress on the mounting hardware and ensure the guitar’s stability. Here are some tips:
- Use appropriate hangers: Choose hangers that are specifically designed for the weight and type of your guitar.
- Center the guitar: Position the guitar in the center of the hanger to distribute the weight evenly.
- Adjust the hanger: If the guitar appears to be leaning or tilting, adjust the hanger to ensure it’s properly balanced.
- Avoid overloading: Don’t hang additional items on the hanger, as this can overload it and compromise its stability.
By distributing weight evenly, you can minimize the risk of the hanger failing and your guitar falling.
7.3 What to do if a no-drill hanger fails?
If a no-drill hanger fails, it’s essential to act quickly to prevent damage to your guitar. Here’s what to do:
- Catch the guitar: If possible, catch the guitar before it hits the ground.
- Assess the damage: Inspect the guitar for any damage, such as scratches, dents, or cracks.
- Inspect the hanger: Examine the hanger to determine the cause of the failure (e.g., adhesive failure, broken hardware).
- Choose a new solution: Select a new no-drill solution that is more appropriate for the weight and type of your guitar.
- Repair the wall: If the failure caused any damage to the wall, repair it before installing the new hanger.
By taking these steps, you can minimize the damage from a hanger failure and ensure the safety of your guitar.
7.4 How to prevent accidental bumps or knocks?
Preventing accidental bumps or knocks is crucial to protect your guitar from damage. Here are some tips:
- Choose a safe location: Position your guitar display in a location that is away from high-traffic areas or potential hazards.
- Use protective padding: Add padding to the wall behind the guitar to cushion it from accidental bumps.
- Install bumpers: Install bumpers on nearby furniture to prevent it from bumping into the guitar.
- Use a display case: Consider using a display case to protect your guitar from dust, scratches, and accidental bumps.
- Educate others: Inform family members or roommates about the importance of being careful around the guitar.
By taking these precautions, you can minimize the risk of accidental damage to your guitar.
8. No-Drill Guitar Mounting for Different Wall Types
8.1 How does drywall affect no-drill hanger choices?
Drywall is a common wall material in many homes, but its composition can affect your no-drill hanger choices. Drywall is relatively soft and not as structurally sound as other materials like wood or concrete. This means that adhesive solutions may not hold as well, especially with heavier guitars.
For drywall, it’s crucial to:
- Use appropriate adhesive hooks: Choose hooks specifically designed for drywall and with a high weight capacity.
- Prepare the surface: Clean the wall thoroughly to ensure a strong bond.
- Consider alternatives: If you’re concerned about weight, consider freestanding stands or Labrico brackets, which don’t rely on the wall’s adhesive properties.
8.2 What are the best no-drill options for plaster walls?
Plaster walls can be tricky because they’re often textured and can chip easily. This requires a different approach to no-drill mounting.
The best options for plaster walls include:
- Adhesive Hooks: Ensure the adhesive is designed for textured surfaces and has a strong grip.
- Labrico Brackets: These are a great choice as they don’t directly attach to the wall, minimizing the risk of damage. The pressure-mounted system distributes weight evenly, making it suitable for plaster.
Avoid over-the-door hangers, as the constant movement of the door can cause vibrations that may loosen the plaster over time.
8.3 How to handle textured walls with adhesive solutions?
Textured walls pose a challenge for adhesive solutions because the uneven surface reduces the contact area for the adhesive. To handle textured walls:
- Clean thoroughly: Ensure the surface is free of dust and debris.
- Use heavy-duty adhesives: Opt for adhesive hooks or strips specifically designed for textured surfaces. These often have a stronger adhesive and a more flexible design to conform to the texture.
- Apply pressure: Press the adhesive firmly against the wall for the recommended time to ensure maximum contact.
- Allow ample curing time: Wait longer than the recommended curing time before hanging your guitar to allow the adhesive to fully bond with the surface.
If adhesive solutions consistently fail on your textured walls, consider alternative no-drill options like Labrico brackets.
8.4 Can you use no-drill solutions on brick or concrete walls?
Brick or concrete walls are very durable but also very challenging for drilling. Fortunately, no-drill solutions can still work, but you need to choose the right approach.
The best options for brick or concrete walls include:
- Heavy-Duty Adhesive Hooks: Look for industrial-strength adhesive hooks designed for concrete or brick. These hooks often use specialized adhesives that can bond to porous surfaces.
- Labrico Brackets: Again, these are an excellent choice as they don’t require any direct attachment to the wall. The brackets create a stable, vertical surface for mounting your guitar without damaging the brick or concrete.
When using adhesive hooks on brick or concrete, ensure the surface is clean and free of loose particles. You may need to use a wire brush to remove any debris before applying the adhesive.
9. Alternatives to Wall Mounting
9.1 What are guitar display cases and their benefits?
Guitar display cases are a great way to showcase your instrument while protecting it from dust, scratches, and accidental bumps. These cases come in various styles, from simple wall-mounted boxes to elaborate freestanding cabinets.
The benefits of using guitar display cases include:
- Protection: Shields the guitar from environmental factors and physical damage.
- Aesthetics: Adds a touch of elegance to your display, enhancing the visual appeal of your guitar.
- Security: Some cases come with locks to prevent theft or unauthorized handling.
- Preservation: Helps maintain the guitar’s condition, preserving its value over time.
However, display cases can be more expensive than other mounting options and may require more space.
9.2 How to use shelving units for guitar storage and display?
Shelving units offer a versatile and practical way to store and display your guitars. You can use a standard bookcase or create a custom shelving system to showcase your instruments.
To use shelving units effectively:
- Choose the right size: Select a shelving unit that is large enough to accommodate your guitars and any accessories you want to display.
- Use padding: Add padding to the shelves to protect the guitars from scratches.
- Arrange creatively: Arrange the guitars in a visually appealing manner, alternating between horizontal and vertical positions.
- Add accessories: Incorporate accessories like straps, picks, and sheet music to create a more dynamic display.
Shelving units provide ample storage space and allow you to create a personalized guitar display that reflects your style.
9.3 What are multi-guitar stands and when are they useful?
Multi-guitar stands are designed to hold multiple guitars in a single unit, saving space and providing a convenient storage solution. These stands are particularly useful for:
- Musicians with multiple guitars: Allows you to keep all your instruments within easy reach.
- Small spaces: Consolidates your guitars into a compact footprint, freeing up valuable floor space.
- Stage performances: Provides a quick and easy way to switch between guitars during a live performance.
- Home studios: Keeps your guitars organized and accessible in your recording space.
When choosing a multi-guitar stand, consider the number