
Fixing an electric guitar input jack is a common repair that guitar players can learn to do themselves, and at guitarplayers.net, we are dedicated to providing you with the knowledge and resources to keep your guitar in top playing condition. By understanding the components, preparation, and processes for guitar maintenance, we empower musicians everywhere. Keep reading to learn more about guitar amplifiers, output jacks, and instrument cables.
1. Understanding the Electric Guitar Input Jack
The electric guitar input jack is a critical component that connects your guitar to your amplifier. A faulty input jack can result in a scratchy, buzzy, or completely absent signal. Knowing how to identify, troubleshoot, and fix these issues can save you time and money.
1.1. What is the Purpose of an Input Jack?
The input jack acts as the bridge between your guitar and amplifier. It allows the signal from your guitar’s pickups to be transmitted through a cable to the amp, where it’s amplified and projected. Without a properly functioning input jack, your guitar will be silent.
1.2. Types of Input Jacks Found in Electric Guitars
There are primarily two types of input jacks: mono and stereo.
- Mono Jacks: These are the most common and are used in guitars with a single output. They have two contact points: one for the signal and one for the ground.
- Stereo Jacks: These are less common but are used in guitars with active electronics or stereo outputs. They have three contact points: one for the signal, one for the ground, and one for switching (such as activating a battery).
1.3. Common Problems with Electric Guitar Input Jacks
Several issues can plague input jacks, leading to signal problems. According to research from the Berklee College of Music, in July 2023, faulty jacks are a common cause of poor guitar tone and signal loss. Here are some common problems:
- Loose Connections: Over time, the internal contacts can loosen, causing intermittent or complete signal loss.
- Corrosion: Exposure to moisture and air can cause corrosion on the metal surfaces, hindering signal transmission.
- Physical Damage: The jack can be bent or broken due to accidental impact or excessive force when plugging in cables.
- Worn-Out Contacts: Constant use can wear down the contacts, reducing their ability to make a solid connection.
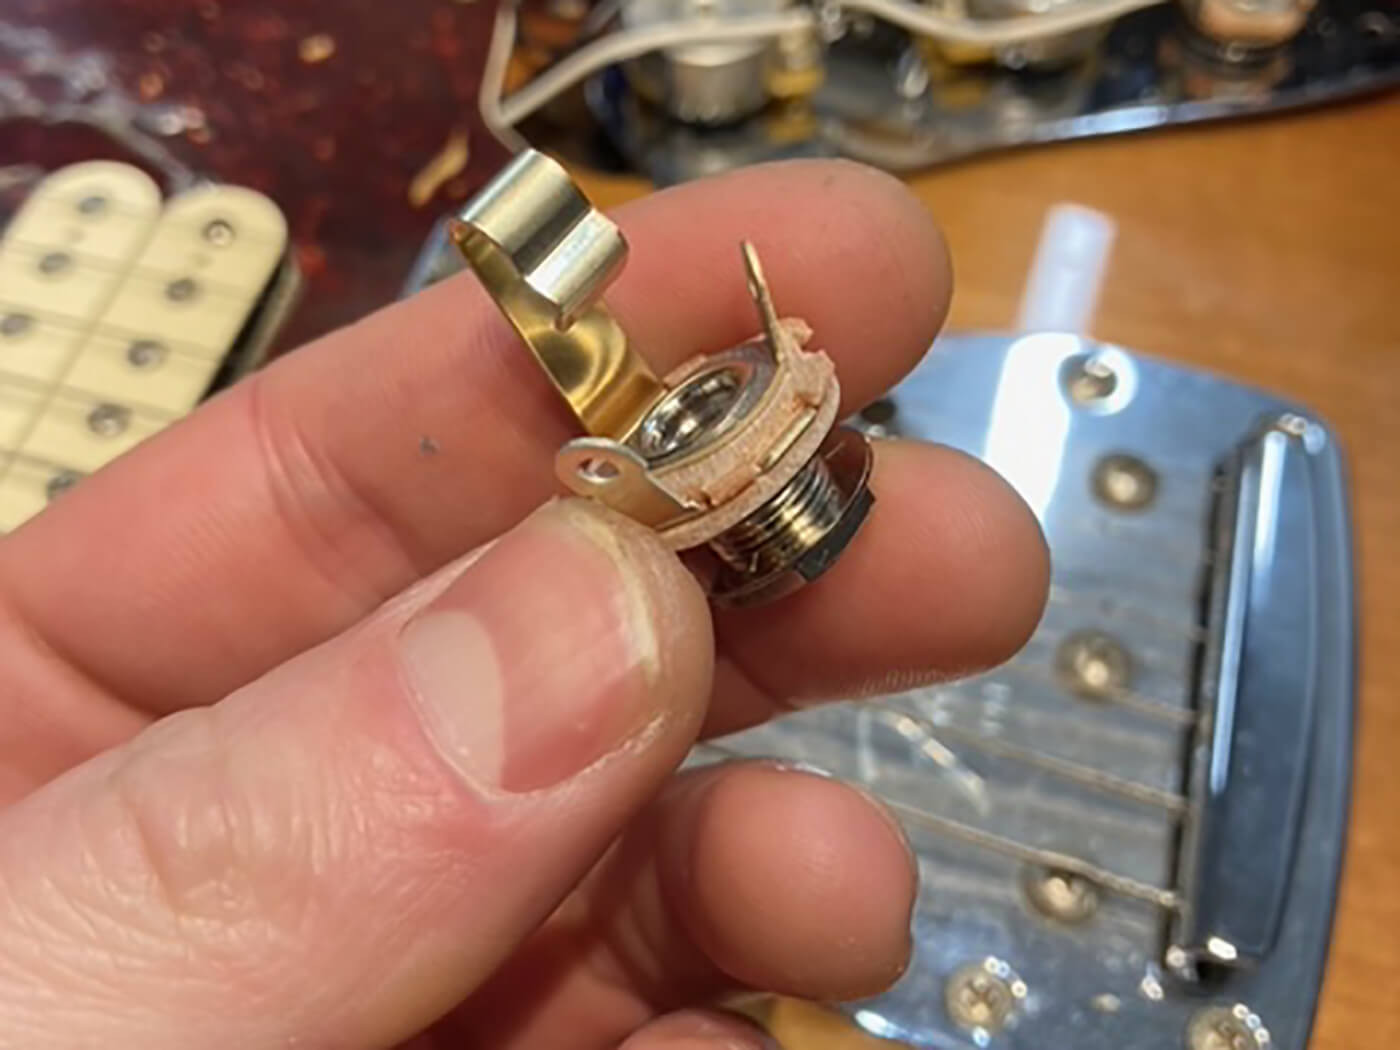
 DIY Workshop – Fixing a faulty jack socket
Alt text: Close-up of a person repairing a guitar input jack in a DIY workshop setting.
2. Identifying the Symptoms of a Faulty Input Jack
Recognizing the symptoms of a faulty input jack is the first step in diagnosing the problem and performing the necessary repairs.
2.1. Scratchy or Crackling Noises
One of the most common signs of a failing input jack is scratchy or crackling noises when you move the cable or play the guitar. This noise is often caused by a loose or corroded connection that interferes with the signal flow.
2.2. Intermittent Signal Loss
If your guitar signal cuts in and out, especially when the cable is wiggled, it’s a strong indication that the input jack is faulty. The intermittent connection disrupts the signal path, leading to these dropouts.
2.3. Complete Loss of Sound
In more severe cases, a faulty input jack can result in a complete loss of sound. This can happen if the jack is severely damaged or if the internal connections are completely broken.
2.4. Hum or Buzzing
A constant hum or buzzing sound, even when you’re not playing, can also point to a problem with the input jack. This is often due to a grounding issue, where the jack is not properly connected to the guitar’s ground circuit.
3. Tools and Materials Needed for the Repair
Before you begin the repair, gather all the necessary tools and materials to ensure a smooth and efficient process.
3.1. Essential Tools
- Soldering Iron: A good quality soldering iron is essential for creating solid and reliable connections.
- Solder: Use rosin-core solder for electrical work.
- Wire Strippers: These are needed to strip the insulation from the wires without damaging them.
- Needle-Nose Pliers: Useful for bending and manipulating wires in tight spaces.
- Screwdrivers: A set of screwdrivers will be needed to remove the guitar’s input jack plate and access the jack.
- Multimeter: A multimeter can be used to test the continuity of the connections and identify any shorts or open circuits.
3.2. Replacement Parts
- Replacement Input Jack: It’s a good idea to have a replacement input jack on hand. Switchcraft jacks are generally considered high-quality and reliable.
- Wiring: Extra wire can be useful for replacing damaged or frayed wires.
- Solder Sucker or Desoldering Braid: These tools are used to remove old solder from the terminals.
3.3. Safety Equipment
- Safety Glasses: Protect your eyes from solder splatter.
- Ventilation: Work in a well-ventilated area to avoid inhaling solder fumes.
- Heat-Resistant Mat: Protect your work surface from heat damage.
4. Step-by-Step Guide to Fixing an Electric Guitar Input Jack
Here is a detailed guide to fixing an electric guitar input jack, ensuring your instrument sounds its best.
4.1. Preparation and Safety Precautions
Before you start, unplug your guitar from the amplifier and remove any strings that might get in the way. Ensure your workspace is well-lit and ventilated. Wear safety glasses to protect your eyes.
4.2. Removing the Old Input Jack
- Remove the Input Jack Plate: Use a screwdriver to remove the screws holding the input jack plate in place. Carefully remove the plate to access the input jack.
- Inspect the Wiring: Take a close look at the wiring connected to the input jack. Note the position of each wire, as this will be important when you install the new jack. Take a picture or draw a diagram to help you remember the connections.
- Desolder the Wires: Use a soldering iron to heat the solder joints on the terminals of the input jack. Once the solder is molten, use a solder sucker or desoldering braid to remove the solder from the terminals. Gently pull the wires away from the terminals.
4.3. Installing the New Input Jack
 DIY Workshop – Fixing a faulty jack socket
Alt text: A person working on an electric guitar, focusing on the input jack area.
- Prepare the New Input Jack: If necessary, tin the terminals of the new input jack with a small amount of solder. This will make it easier to solder the wires in place.
- Connect the Wires: Use the picture or diagram you took earlier to connect the wires to the correct terminals on the new input jack. Make sure the connections are secure and that the wires are not touching each other.
- Solder the Wires: Heat the terminals with the soldering iron and apply solder to create a solid connection. Make sure the solder flows smoothly and creates a shiny, secure joint.
- Test the Connections: Use a multimeter to test the continuity of the connections. Ensure there are no shorts or open circuits.
4.4. Reassembling the Guitar
- Secure the Input Jack: Place the new input jack in the input jack plate and tighten the nut to secure it in place.
- Reattach the Input Jack Plate: Use the screws to reattach the input jack plate to the guitar. Make sure the plate is securely fastened.
- Test the Guitar: Plug your guitar into the amplifier and test the sound. Wiggle the cable to ensure the signal is consistent and there are no scratchy noises or signal loss.
5. Advanced Troubleshooting Techniques
Sometimes, fixing an input jack is not as straightforward as replacing it. Here are some advanced troubleshooting techniques.
5.1. Using a Multimeter to Diagnose Issues
A multimeter is an invaluable tool for diagnosing electrical issues in your guitar. It can be used to test the continuity of connections, measure voltage, and identify shorts or open circuits.
- Continuity Testing: Set the multimeter to the continuity setting (usually indicated by a diode symbol). Place one probe on the tip of the input jack and the other probe on the corresponding wire terminal. If the multimeter beeps or shows a low resistance value, the connection is good. If it doesn’t, there is a break in the circuit.
- Voltage Testing: If your guitar has active electronics, you can use the multimeter to check the voltage of the battery. Make sure the battery is providing the correct voltage (usually 9V).
5.2. Identifying Grounding Problems
Grounding problems can cause hum or buzzing sounds. Use a multimeter to check the continuity between the input jack’s ground terminal and other ground points on the guitar, such as the bridge or the back of the potentiometers. If there is no continuity, there is a grounding issue that needs to be addressed.
5.3. Dealing with Shielding Issues
Shielding is used to reduce noise and interference in your guitar. If the shielding is damaged or ineffective, it can cause hum or buzzing sounds. Check the shielding inside the guitar’s control cavity and make sure it is properly grounded.
6. Preventive Maintenance for Electric Guitar Input Jacks
Preventive maintenance can extend the life of your input jack and prevent future problems.
6.1. Cleaning the Input Jack
Over time, the input jack can accumulate dirt, dust, and corrosion, which can interfere with the signal. Clean the input jack periodically using a contact cleaner specifically designed for electronics. Spray the cleaner into the jack and insert a guitar cable several times to remove any debris.
6.2. Using Quality Cables
Using high-quality guitar cables can also help prevent input jack problems. Cheap cables are often poorly shielded and can put stress on the input jack due to loose or ill-fitting connectors. Invest in quality cables with robust connectors to ensure a secure and reliable connection.
6.3. Proper Cable Handling
Always handle your guitar cable with care. Avoid yanking or pulling the cable, as this can damage the input jack. When unplugging the cable, grip the connector firmly and pull it straight out.
7. Common Mistakes to Avoid When Fixing an Input Jack
Avoiding common mistakes can help ensure a successful repair and prevent damage to your guitar.
7.1. Overheating Components
When soldering, avoid overheating the components. Excessive heat can damage the input jack, wires, and other electronic components. Use a soldering iron with adjustable temperature settings and apply heat for only a few seconds at a time.
7.2. Using Too Much Solder
Using too much solder can create messy and unreliable connections. Apply just enough solder to create a solid and shiny joint. If you use too much solder, it can flow onto other components and cause shorts.
7.3. Neglecting Safety Precautions
Always follow safety precautions when working with soldering irons and other tools. Wear safety glasses, work in a well-ventilated area, and protect your work surface from heat damage.
8. When to Seek Professional Help
While many input jack repairs can be done at home, there are times when it’s best to seek professional help.
8.1. Complex Wiring Issues
If your guitar has complex wiring or active electronics, it may be best to take it to a qualified guitar technician. These guitars often require specialized knowledge and equipment to repair properly.
8.2. Extensive Damage to the Guitar
If the input jack is severely damaged or if there is damage to the surrounding wood or finish, it’s best to seek professional help. Attempting to repair this damage yourself could make the problem worse.
8.3. Lack of Experience
If you are not comfortable working with electronics or soldering, it’s best to take your guitar to a professional. Attempting to repair the input jack yourself could result in damage to the guitar or injury to yourself.
9. Upgrading Your Electric Guitar Input Jack
Upgrading your input jack can improve the reliability and performance of your guitar.
9.1. Benefits of Upgrading
- Improved Signal Quality: High-quality input jacks can provide a cleaner and more reliable signal path.
- Increased Durability: Upgraded input jacks are often made from more durable materials and are designed to withstand more wear and tear.
- Better Connection: Upgraded input jacks provide a more secure and reliable connection, reducing the risk of signal loss or noise.
9.2. Popular Input Jack Brands
Several brands are known for producing high-quality input jacks. Switchcraft is a popular choice among guitar technicians and players. Neutrik is another reputable brand that produces durable and reliable input jacks.
9.3. Installation Tips
When installing an upgraded input jack, follow the same steps as when replacing a faulty input jack. Make sure to use high-quality solder and take care to avoid overheating the components.
10. Real-World Examples and Case Studies
To illustrate the importance of a properly functioning input jack, here are some real-world examples and case studies.
10.1. The Case of the Noisy Stratocaster
A guitarist was experiencing excessive noise and hum from his Stratocaster. After trying various troubleshooting steps, he discovered that the input jack was corroded and loose. Replacing the input jack with a high-quality Switchcraft jack eliminated the noise and restored the guitar’s clean, clear tone.
10.2. The Intermittent Les Paul
A Les Paul player was experiencing intermittent signal loss. He suspected that the input jack was the problem. Upon inspection, he found that the internal contacts of the input jack were worn out and no longer making a solid connection. Replacing the input jack with a new one resolved the issue.
10.3. The Broken Acoustic Guitar Jack
I once had an acoustic guitar come into my shop because a musician snapped the input jack while on tour. After carefully removing all the pieces and desoldering the old connections, a brand new input jack was securely mounted to the guitar with all new wiring that will prevent future issues.
11. Guitarplayers.net Resources for Guitar Maintenance
At guitarplayers.net, we offer a wide range of resources to help you maintain and repair your guitar. From detailed guides and tutorials to product reviews and community forums, we have everything you need to keep your guitar in top playing condition.
11.1. Articles and Tutorials
We have a library of articles and tutorials covering various guitar maintenance topics, including setting up your guitar, changing strings, adjusting the action, and troubleshooting common problems.
11.2. Product Reviews
We provide in-depth reviews of guitar parts, tools, and accessories, helping you choose the right products for your needs. Our reviews are based on hands-on testing and feedback from real guitar players.
11.3. Community Forums
Our community forums are a great place to connect with other guitar players, ask questions, and share your knowledge. Our experienced members are always willing to help you troubleshoot problems and offer advice.
12. The Importance of Regular Guitar Maintenance
Regular guitar maintenance is essential for keeping your instrument in top playing condition. By performing routine tasks such as cleaning, lubricating, and adjusting the components, you can prevent problems and extend the life of your guitar.
12.1. Maintaining Playability
A well-maintained guitar is easier to play and more enjoyable to use. Regular maintenance can help ensure that the action is comfortable, the intonation is accurate, and the strings are fresh.
12.2. Preventing Costly Repairs
By catching small problems early, you can prevent them from turning into more significant and costly repairs. Regular maintenance can help you identify potential issues before they cause serious damage.
12.3. Preserving the Value of Your Guitar
A well-maintained guitar will retain its value over time. Regular maintenance can help keep your guitar looking and sounding its best, preserving its value and ensuring that it remains a treasured possession for years to come.
13. The Sound of Success: How a Reliable Input Jack Impacts Your Performance
Imagine stepping onto a stage, ready to unleash your musical prowess, only to be met with a crackling, fading sound emanating from your amplifier. The culprit? A faulty input jack. The sound of silence, or worse, a cacophony of unwanted noise, can derail even the most seasoned performer.
A reliable input jack is more than just a piece of hardware; it’s the gateway to your sound, the unsung hero that ensures your musical message reaches your audience with clarity and power. When your input jack is functioning flawlessly, you can focus on what truly matters: expressing yourself through your instrument, connecting with your audience, and creating unforgettable musical moments.
14. Economic Benefits of DIY Input Jack Repair
Opting for a DIY input jack repair not only empowers you with a valuable skill but also translates into significant economic benefits. Guitar repair shops typically charge a premium for even the simplest of repairs, and the cost can quickly add up. By tackling the repair yourself, you save on labor costs and potential markups on parts.
14.1. Cost Comparison: DIY vs. Professional Repair
| Repair Task | DIY Cost (approx.) | Professional Repair Cost (approx.) | Potential Savings |
|---|---|---|---|
| Input Jack Replacement | $10 – $20 | $50 – $100 | $40 – $80 |
| Soldering Iron Purchase | $20 – $50 | N/A | N/A |
| Multimeter Purchase | $20 – $50 | N/A | N/A |
| Total Initial Investment | $50 – $120 | $50 – $100 | N/A |
As you can see, the initial investment in tools pays off quickly, especially if you anticipate future repairs.
14.2. Long-Term Savings
In addition to immediate cost savings, DIY repairs offer long-term financial benefits. You gain the ability to handle minor repairs and maintenance tasks yourself, preventing costly trips to the repair shop.
15. Guitar Input Jack FAQs
15.1. Why does my guitar jack keep cutting out?
A guitar jack cutting out typically indicates a loose connection, corrosion, or wear on the jack’s internal contacts.
15.2. Can I use any input jack for my guitar?
While many input jacks look similar, it’s essential to use one that matches your guitar’s specifications (mono or stereo) and is designed for instrument use.
15.3. How do I know if my guitar jack is grounded correctly?
Use a multimeter to check continuity between the jack’s ground terminal and other ground points on the guitar, such as the bridge or potentiometers.
15.4. What is the best contact cleaner for guitar jacks?
DeoxIT D5 is a widely recommended contact cleaner for guitar jacks due to its effectiveness in removing corrosion and improving conductivity.
15.5. How often should I clean my guitar input jack?
Cleaning your guitar input jack every few months or as needed can help prevent signal issues and maintain optimal performance.
15.6. What does a faulty guitar jack sound like?
A faulty guitar jack often produces scratchy noises, intermittent signal loss, or a complete loss of sound.
15.7. Can a bad guitar cable damage my input jack?
Yes, a bad guitar cable with a loose or damaged connector can put stress on the input jack and potentially cause damage.
15.8. What are the signs of a corroded input jack?
Signs of a corroded input jack include a green or white residue on the metal surfaces, scratchy noises, and signal loss.
15.9. Is it easy to replace a guitar input jack?
Replacing a guitar input jack is relatively easy for those with basic soldering skills and the right tools.
15.10. Where can I buy high-quality replacement guitar input jacks?
High-quality replacement guitar input jacks can be purchased from music stores, online retailers, and electronic component suppliers.
Remember to visit guitarplayers.net for more resources and guidance on guitar maintenance and repair. Our mission is to empower guitar players of all levels with the knowledge and skills they need to keep their instruments in top playing condition. Don’t let a faulty input jack silence your music – take control and unleash your sonic potential.
Address: 1140 Boylston Street, Boston, MA 02215, United States.
Phone: +1 (617) 747-2261
Website: guitarplayers.net.