
A guitar strap is more than just an accessory; it’s a crucial piece of gear that unlocks your freedom to move and perform. Whether you’re practicing in your bedroom, jamming with friends, or commanding a stage, knowing how to properly attach a guitar strap is fundamental. It ensures your instrument is secure, allowing you to focus on your music without worrying about accidental drops or discomfort.
For guitarists of all levels, from beginners to seasoned pros, a correctly installed guitar strap is key to comfortable and ergonomic playing. It becomes an extension of your instrument, allowing you to stand, move, and express yourself musically. This guide will walk you through the essential steps to attach your guitar strap effectively, so you can get playing quickly and confidently.
Understanding Guitar Strap Attachment Methods
Guitars vary in their design, and so do strap attachment methods. The most common setups involve either two strap pins or a single pin combined with headstock attachment. Let’s explore both methods to ensure you can confidently strap up any guitar.
Guitars with Two Strap Pins: The Standard Approach
Electric guitars, basses, and many acoustic guitars typically feature two strap pins, also known as strap buttons. These are small, rounded posts designed to hold your strap securely. One pin is usually located at the bottom end of the guitar body, while the other is positioned either on the upper shoulder of the body or where the neck joins the body.
Here’s how to attach your strap to a guitar with two pins:
- Strap Orientation: Before attaching, take a moment to examine your strap. Many straps are designed with a specific orientation. If your strap has a plastic slider for adjustments, the end with overlapping material layers usually goes towards the bottom pin. Similarly, a thinner strap end often attaches to the bottom pin. Straps with logos or decorative elements generally attach to the pin closer to the guitar’s neck.
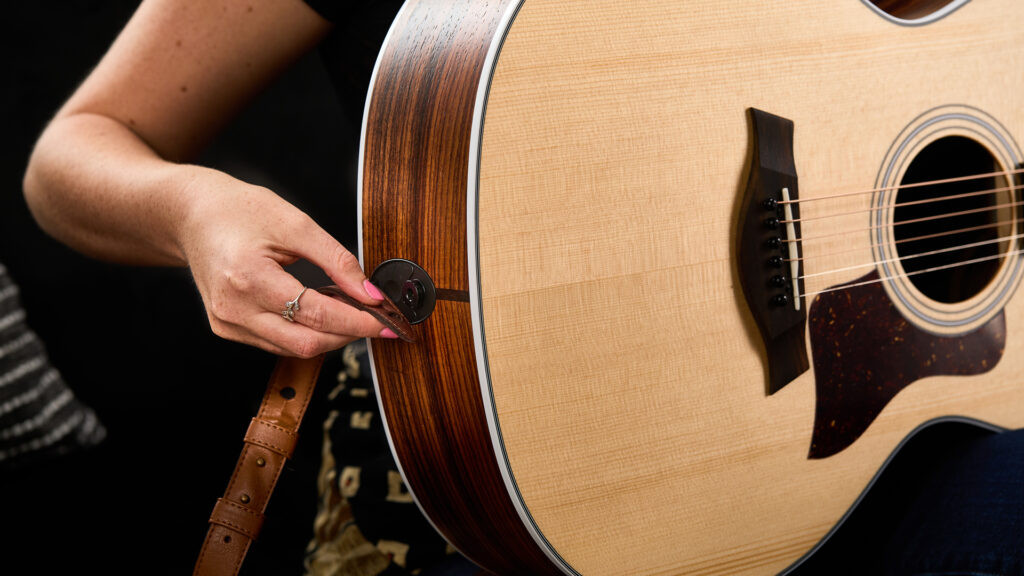
Image alt text: Attaching the guitar strap to the bottom strap pin of an acoustic guitar, showing correct strap end orientation.
-
Attaching to the Bottom Pin: Take one end of your guitar strap and locate the hole or slit designed for the strap pin. Firmly push the strap hole over the bottom strap pin of your guitar until it is securely in place. Ensure the strap end sits snugly around the pin.
-
Attaching to the Top Pin: Take the remaining end of the strap and repeat the process. Insert the top strap pin through the designated hole or slit on the other end of your strap.
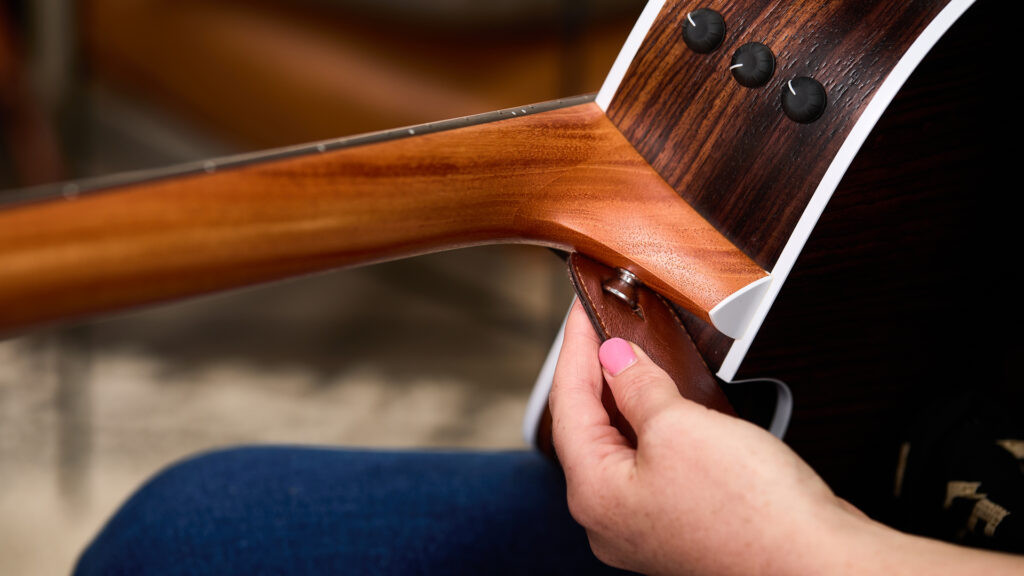
Image alt text: Securing the guitar strap to the top strap pin near the neck of an acoustic guitar, demonstrating a firm and proper fit.
- Security Check: Once both ends are attached, gently tug on each end of the strap to verify that they are firmly connected to the strap pins. This simple test ensures a secure connection before you start playing.
Even with two strap pins, some guitarists might prefer the feel of a headstock attachment method, which we’ll discuss next.
Guitars with One Strap Pin: Using the Headstock Method
Many acoustic guitars come with only one strap pin, typically located at the base of the instrument. While adding a second pin is an option, the traditional and straightforward way to attach a strap to a single-pin guitar involves using the guitar’s headstock. This method is easy and doesn’t require any modifications to your guitar.
After securing one end of your strap to the bottom pin (following steps 1 and 2 from the two-pin method), bring the other end of the strap towards the headstock. Since there’s no strap pin there, you’ll need to use an additional piece of material to secure the strap. Common solutions include a leather lace or a specialized strap adapter. Many guitar straps even come with a lace specifically for this purpose.
To attach using a lace or strap adapter:
-
Thread the Lace or Adapter: Feed the lace or strap adapter through the hole at the end of your guitar strap.
-
Secure to the Headstock: Thread the lace or adapter underneath the strings, close to the nut of the guitar’s headstock.
-
Fasten Securely: If using a lace, tie a secure double knot to ensure it’s tight and won’t slip. If using a strap adapter, fasten it according to the manufacturer’s instructions, typically involving a pin or button.
The headstock attachment method creates a different balance compared to the two-pin system. Headstock attachment often balances the guitar’s weight more towards the center, while two-pin setups can shift the center of gravity slightly towards the lower body of the guitar. Experiment with both if possible to discover your personal preference.
Fine-Tuning Your Fit: Adjusting Your Guitar Strap
Once your strap is attached, adjusting it to the right length is essential for playing comfort and proper hand positioning. A well-adjusted strap allows you to play without straining your wrist or shoulder, whether you’re sitting or standing.
Why Strap Adjustment Matters for Comfort and Playability
The ideal strap length is largely a matter of personal preference and playing style. However, ergonomic principles suggest that your strap should be adjusted so that you can reach notes and chords without excessively bending your wrist when standing. Maintaining a relaxed fret hand and wrist posture is crucial for preventing strain and potential injuries over time.
Adjusting Straps with Sliding Buckles
Many modern guitar straps feature a sliding plastic buckle for easy length adjustments. To adjust these straps while wearing your guitar:
- To Lengthen: Slide the buckle away from the neck and towards the lower body of the guitar.
- To Shorten: Slide the buckle towards the neck of the guitar.
You can typically make these adjustments while the strap is still attached to your guitar, allowing for quick, on-the-fly changes.
Adjusting Leather or Suede Straps
Traditional leather or suede straps often utilize a two-piece design for adjustment, rather than a sliding buckle. Adjusting these straps requires detaching a portion of the strap from the instrument.
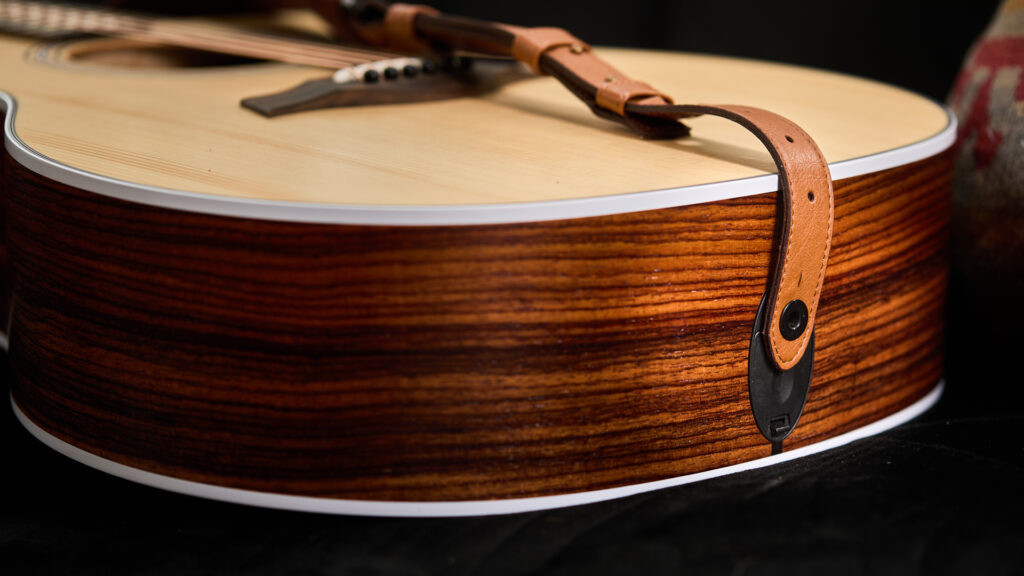
Image alt text: Adjusting a two-piece leather guitar strap using the slit and tab system to change the overall strap length.
Leather and suede straps typically have a wider main piece with slits and a thinner adjustment piece. To adjust the length:
-
Detach the Adjustment Piece: Separate the thinner adjustment piece from the main strap piece.
-
Select Desired Slit: The slits in the wider strap piece correspond to different strap lengths. Choose a slit that provides your desired length.
-
Re-thread and Secure: Thread the thin strap piece up through the underside of the main strap piece and pull it taut. Then, weave it back through itself by passing it through an adjacent slit. Continue threading it through at least one or two more slits to secure it firmly before re-attaching to your guitar. Experiment with different slit combinations to find your perfect strap height.
Adding Security: The Benefit of Guitar Strap Locks
For added peace of mind and guitar safety, consider using strap locks. Guitar strap locks are designed to replace your guitar’s strap buttons and provide a more secure connection, preventing accidental strap detachment and potential drops.
Preventing Accidental Drops: Why Use Strap Locks?
Strap locks are especially beneficial for active performers or anyone who wants extra security for their instrument. They essentially “lock” your strap onto the strap buttons, requiring a deliberate action to release it. This significantly reduces the risk of your strap slipping off, especially during energetic performances.
While the original article mentions a guide on strap locks, for this rewritten article, it’s sufficient to highlight their benefit as an optional upgrade for increased security.
Choosing the Perfect Guitar Strap for You
Knowing how to attach and adjust your guitar strap is only the beginning. With a vast array of materials, styles, and features available, selecting the right guitar strap is also crucial for comfort, durability, and even expressing your personal style.
Material Matters: Exploring Strap Materials
The material of your guitar strap impacts its durability, comfort, and price. Common guitar strap materials include:
- Leather: Durable, classic look, often padded for comfort, can be pricier.
- Vegan Leather: Ethical alternative to leather, offering similar durability and aesthetics.
- Suede: Soft, comfortable, and provides good grip, often associated with acoustic guitars.
- Denim: Casual, durable, and stylish, can be a good option for electric guitars.
- Cotton: Affordable, lightweight, breathable, and comfortable, popular for electric guitars, but may wear out faster than leather.
Regardless of the primary strap material, the ends that attach to the strap pins are typically made of leather or suede for a secure and tight fit.
Historically, leather and suede straps have been traditionally paired with acoustic guitars, while cotton straps are often favored for electric guitars. However, these are just general trends, and personal preference should always be your guide.
Consider your budget, playing style, and desired level of durability when choosing a strap material.
Padding for Comfort: When and Why You Need It
Guitar weight can add up, especially during long practice sessions or performances. Some guitar straps, particularly leather and suede options, come with added padding. This padding, usually made of foam or similar materials, provides extra cushioning and comfort for your shoulder and neck, especially when playing heavier guitars for extended periods.
While padding adds comfort, it also slightly increases the strap’s weight. Consider whether the added comfort outweighs the minimal extra weight based on your typical playing duration and guitar weight.
Width Considerations: Finding the Right Strap Width
Strap width affects how the guitar’s weight is distributed across your shoulder. Narrower straps concentrate the weight on a smaller area, while wider straps distribute it more evenly.
Wider straps (2.5″ to 3″) are generally preferred by players who primarily play standing up, as they offer better weight distribution and reduce pressure points. Standard cotton straps are typically around 2″ wide and can be suitable for lighter guitars or players who prefer a more streamlined feel.
Style and Aesthetics: Express Yourself with Your Strap
Your guitar strap is an opportunity to add a touch of personal style to your instrument setup. Straps come in countless colors, patterns, and designs, from simple and understated to bold and eye-catching.
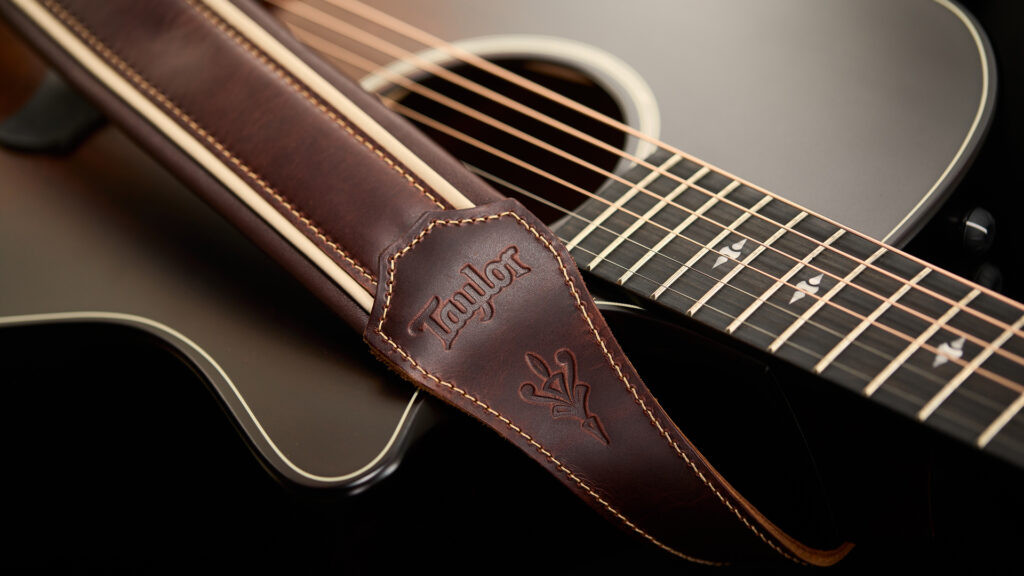
Image alt text: A stylish brown leather guitar strap showcasing aesthetic design and contrasting stitching detail.
Choose a strap that complements your guitar’s look or provides a striking contrast. Whether you prefer a classic black leather strap, a vibrant patterned cotton strap, or something in between, let your strap reflect your personality and musical style.
Conclusion: Get Strapped In and Play!
A guitar strap is an essential accessory that provides mobility, security, and even a chance to express your personal style. By understanding how to properly attach and adjust your guitar strap, and by choosing a strap that suits your needs and preferences, you’ll enhance your playing experience and ensure your instrument is always safely within reach.
Now that you’ve mastered the art of attaching a guitar strap, it’s time to strap in, grab your guitar, and make some music! Explore further guitar fundamentals to continue your musical journey and deepen your connection with your instrument.