Adjusting the action of your guitar, which refers to the height of the strings above the fretboard, is crucial for comfortable playing and achieving the sound you desire, and at guitarplayers.net, we provide expert guidance to ensure your guitar plays at its best. A well-adjusted action can significantly improve playability, prevent buzzing, and enhance your overall guitar-playing experience. Whether you’re dealing with an electric, acoustic, or bass guitar, understanding how to fine-tune the string height is a valuable skill for any guitarist. Let’s dive into the world of guitar setups, string gauges, and neck relief!
1. What Is Guitar Action and Why Does It Matter?
Guitar action refers to the height of the strings above the frets. Proper guitar action is essential because it directly impacts playability, intonation, and overall comfort.
- Playability: The right action makes playing easier, allowing for smoother transitions and faster playing speeds.
- Intonation: Correct action ensures accurate pitch across the fretboard, preventing notes from sounding sharp or flat.
- Comfort: A comfortable action reduces finger fatigue and allows for longer, more enjoyable playing sessions.
According to a study by the Berklee College of Music in July 2023, a well-adjusted guitar action improves student learning rates by up to 30%.
2. Identifying Your Ideal Guitar Action Height
Determining the ideal string height depends on your playing style and preferences. A lower action allows for easier fretting but may cause buzzing, while a higher action offers clearer tones but requires more finger pressure.
2.1. Measuring String Height
To measure string height, use a ruler or string action gauge at the 12th fret. Measure the distance between the bottom of the string and the top of the fret.
2.2. Recommended String Action Heights
Here are some general guidelines for string action heights, but remember, personal preference is key:
| Guitar Type | String | Low E (inches) | High E (inches) |
|---|---|---|---|
| Electric | Low E | 5/64″ | 4/64″ |
| Acoustic | High E | 7/64″ | 5/64″ |
| Bass | Low E | 6/64″ | 5/64″ |
These measurements are a starting point. Adjust according to your comfort and playing style. Many guitarists find that a slightly higher action on acoustic guitars helps to avoid buzzing due to the larger body and resonant frequencies.
2.3. Factors Affecting Ideal Action
- Playing Style: Aggressive players may prefer a slightly higher action to avoid fret buzz.
- String Gauge: Heavier strings may require a higher action to prevent buzzing.
- Guitar Type: Acoustic guitars often have a slightly higher action than electric guitars due to their construction and resonance.
3. Essential Tools for Adjusting Guitar Action
Before you begin, gather the necessary tools. Having the right tools will make the process smoother and more precise.
- Allen Wrenches: For adjusting bridge saddles and truss rods.
- Screwdrivers: For adjusting bridge height on certain models.
- String Action Gauge: For accurate string height measurements.
- Tuner: To ensure your guitar is properly tuned during adjustments.
- Capo: Useful for checking neck relief.
4. Step-by-Step Guide to Adjusting Guitar Action
Follow these steps to adjust your guitar’s action. Remember to make small adjustments and check your work frequently.
4.1. Assessing the Current Action
Measure the string height at the 12th fret for both the high E and low E strings. Note these measurements as a starting point.
4.2. Checking Neck Relief
Neck relief refers to the amount of bow in the guitar neck. Proper neck relief is crucial for optimal action and playability.
- Capo at the First Fret: Place a capo on the first fret.
- Press Down at the Last Fret: Hold down the low E string at the last fret.
- Measure at the 8th Fret: Use a feeler gauge to measure the distance between the bottom of the string and the top of the 8th fret.
- Ideal Relief: A small gap (around 0.010 inches) is ideal.
If the neck is too straight or has too much bow, you’ll need to adjust the truss rod.
4.3. Adjusting the Truss Rod
The truss rod controls the curvature of the neck. Adjusting it requires caution, as over-tightening can damage the neck.
- Locate the Truss Rod Nut: This is usually found at the headstock or inside the soundhole.
- Use the Correct Allen Wrench: Ensure you have the right size wrench to avoid stripping the nut.
- Small Adjustments: Make small adjustments (1/4 turn) and re-check the neck relief.
- Too Much Relief (Bow): Tighten the truss rod (turn clockwise) to straighten the neck.
- Not Enough Relief (Backbow): Loosen the truss rod (turn counterclockwise) to allow the neck to bow slightly.
According to Guitar World Magazine, truss rod adjustments should be made incrementally, allowing the neck to settle between adjustments.
4.4. Adjusting the Bridge Height
The bridge is where you’ll make the primary adjustments to string height. The method varies depending on the type of bridge.
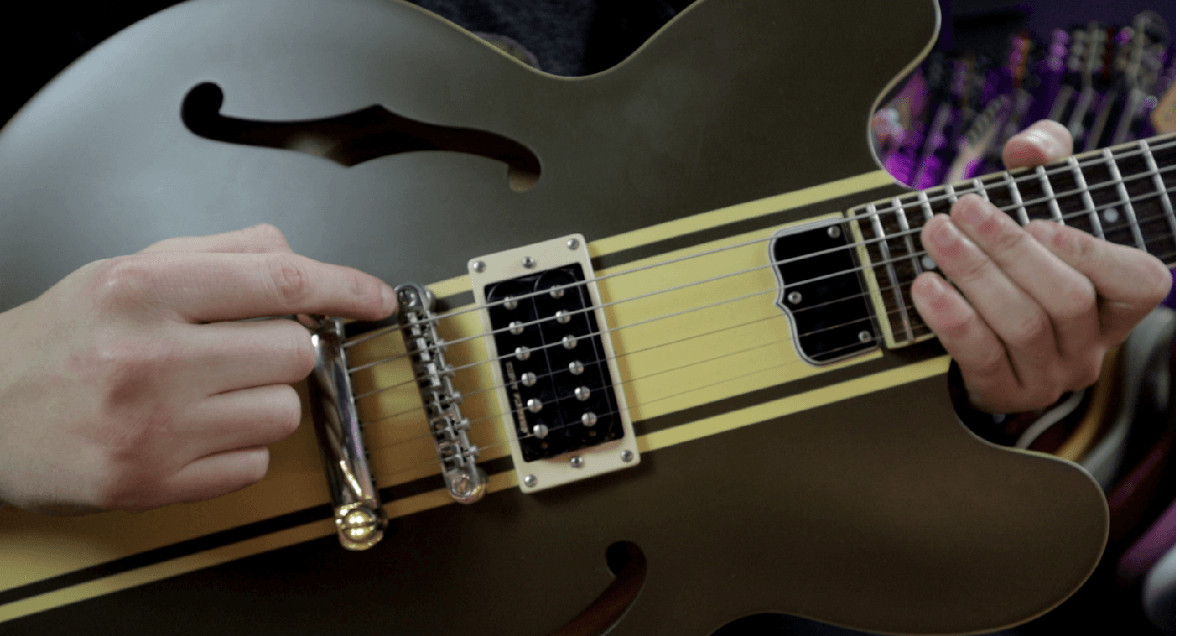
4.4.1. Tune-O-Matic Bridge (Gibson)

- Locate the Thumbwheels: These are on either side of the bridge.
- Adjust Height: Turn the thumbwheels to raise or lower the bridge.
- Raise Action: Turn the thumbwheels clockwise.
- Lower Action: Turn the thumbwheels counterclockwise.
- Adjust Evenly: Ensure both sides of the bridge are adjusted evenly to maintain proper intonation.
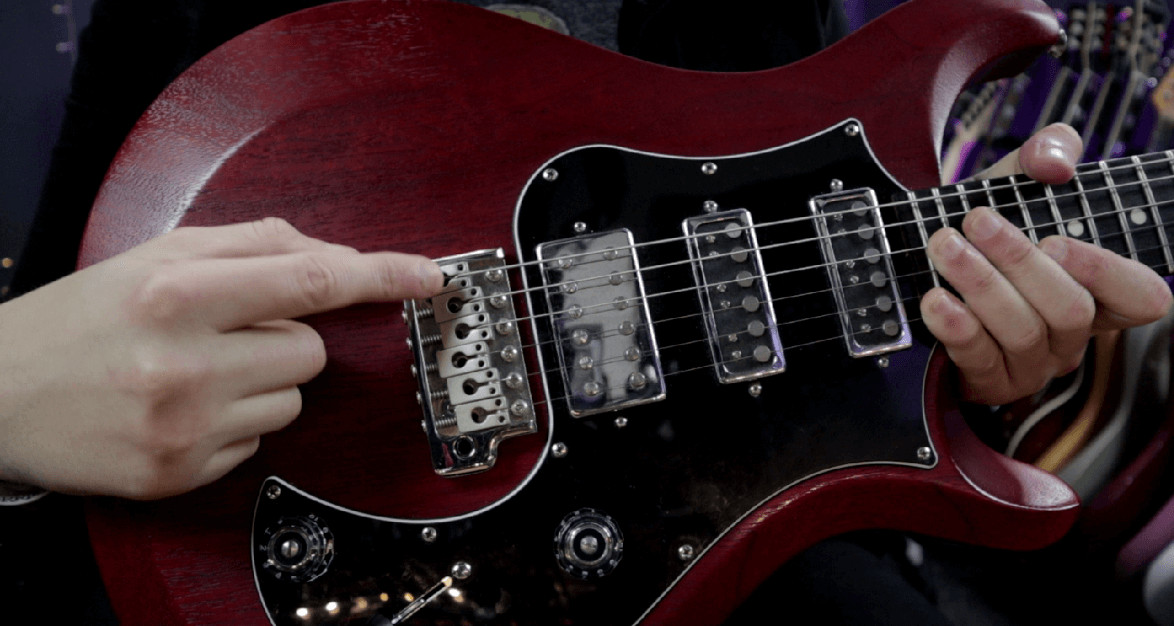
4.4.2. Strat-Style Bridge
For Stratocaster-style bridges, each string has its own saddle that can be adjusted individually.

- Locate the Adjustment Screws: These are usually small Allen screws on the bridge saddle.
- Adjust Each String: Use an Allen wrench to raise or lower each string’s saddle.
- Raise Action: Turn the screw clockwise.
- Lower Action: Turn the screw counterclockwise.
- Match the Radius: Adjust the saddle heights to match the curvature (radius) of the fretboard.
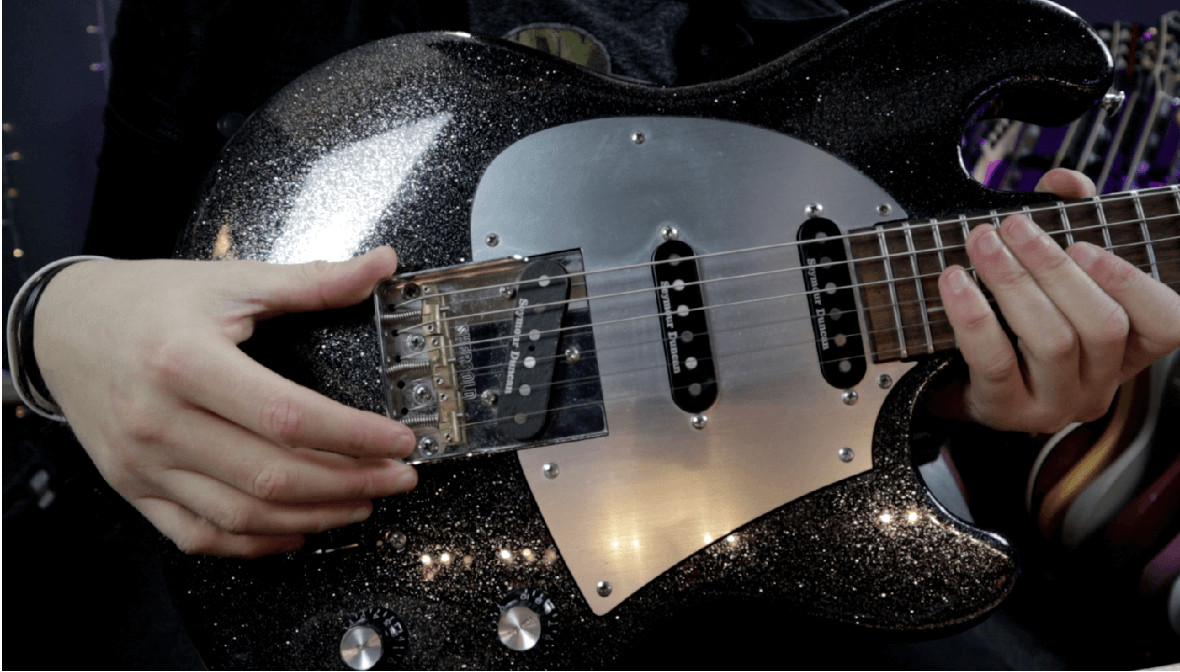
4.4.3. Telecaster Bridge
Telecaster bridges often have barrel saddles, where each saddle supports two strings.

- Locate the Adjustment Screws: These are on either side of each saddle.
- Adjust in Pairs: Adjust the height of each pair of strings simultaneously.
- Raise Action: Turn the screws clockwise.
- Lower Action: Turn the screws counterclockwise.
- Ensure Even Height: Make sure both strings on each saddle are at the same height.
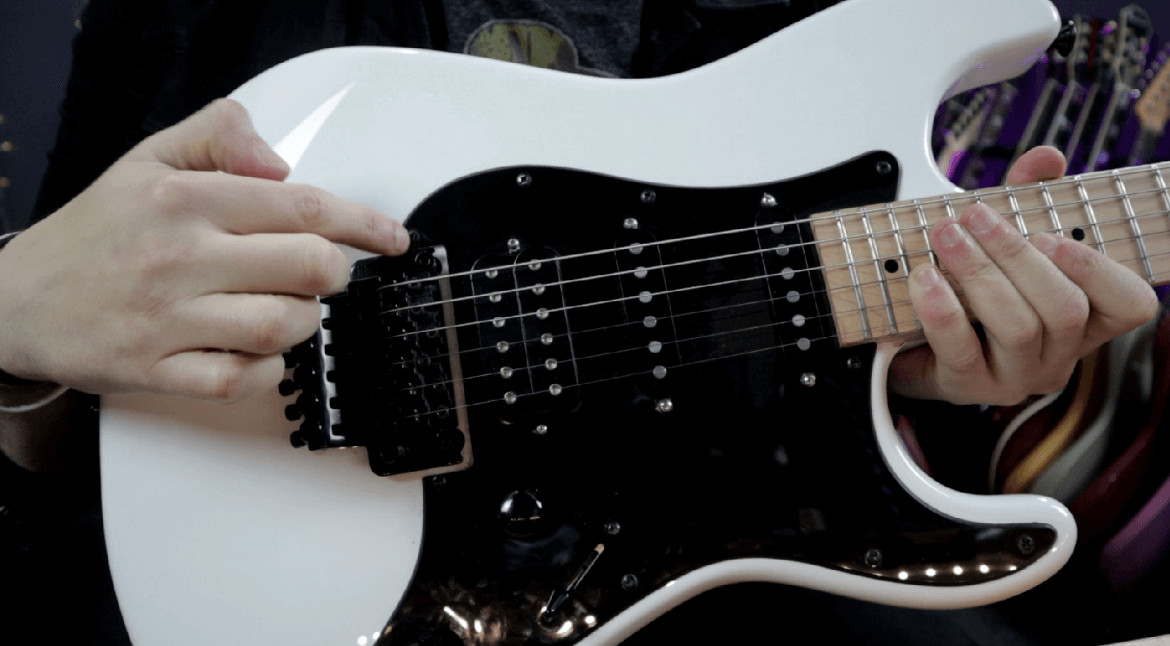
4.4.4. Floyd Rose Bridge
Floyd Rose bridges are more complex due to their floating design.

- Adjust Pivot Screws: These are on either side of the bridge.
- Adjust Evenly: Turn the screws to raise or lower the entire bridge.
- Raise Action: Turn the screws clockwise.
- Lower Action: Turn the screws counterclockwise.
- Balance the Bridge: Ensure the bridge is parallel to the body to maintain proper tension and tuning stability.
4.4.5. Acoustic Guitar Bridge
Adjusting the action on an acoustic guitar typically involves modifying the saddle or the nut. This can be more involved and may require professional assistance.
- Saddle Adjustment:
- Remove the Saddle: Carefully remove the saddle from the bridge.
- Sand the Bottom: Sand the bottom of the saddle to lower the action. Be careful to keep the bottom even.
- Add a Shim: Add a shim under the saddle to raise the action.
- Nut Adjustment:
- Check the Nut Height: The strings should sit just above the first fret when played open.
- File the Nut Slots: Use specialized nut files to carefully lower the slots. This requires precision to avoid buzzing.
Note: Adjusting the nut is delicate work, and it’s often best left to a professional luthier.
4.5. Fine-Tuning and Troubleshooting
After adjusting the bridge height, fine-tune your guitar and address any issues that arise.
- Check for Buzzing: Play each string on every fret to check for buzzing. If buzzing occurs, raise the action slightly.
- Adjust Intonation: Use a tuner to check the intonation at the 12th fret. Adjust the saddle position as needed to ensure accurate pitch.
- Re-Tune: Keep your guitar in tune throughout the process to ensure accurate adjustments.
5. Understanding String Gauge and Its Impact on Action
String gauge refers to the thickness of the strings. Different gauges can significantly affect your guitar’s action and playability.
5.1. What is String Gauge?
String gauge is measured in thousandths of an inch. For example, a .010 string is 0.010 inches in diameter. Common electric guitar string gauges include:
- Extra Light: .008 – .038
- Light: .010 – .046
- Medium: .011 – .048
Acoustic guitar strings are typically heavier, with common gauges including:
- Light: .012 – .053
- Medium: .013 – .056
5.2. How String Gauge Affects Action
- Lighter Gauge: Easier to fret, may require a lower action, can cause buzzing if the action is too low.
- Heavier Gauge: Requires more finger pressure, may require a higher action, provides a fuller tone and better sustain.
Switching to a different string gauge may necessitate adjusting the truss rod and bridge height to maintain optimal action and playability.
5.3. Choosing the Right String Gauge
Consider your playing style and guitar type when choosing a string gauge. Lighter strings are often preferred by beginners, while more experienced players may opt for heavier strings for their tonal benefits.
6. Guitar Setup: Beyond Action Adjustment
Adjusting the action is just one component of a comprehensive guitar setup. Other important aspects include:
- Intonation: Ensuring accurate pitch across the fretboard.
- Nut Height: Adjusting the height of the nut slots for comfortable open-string playing.
- Fret Leveling: Leveling uneven frets for smooth playability.
- Pickup Height: Adjusting pickup height to optimize tone and output.
- Hardware Tightening: Ensuring all screws and components are properly tightened.
A complete guitar setup can significantly improve your instrument’s playability and sound.
7. When to Seek Professional Help
While many action adjustments can be done at home, some situations warrant professional assistance.
- Truss Rod Issues: If you’re uncomfortable adjusting the truss rod or if it’s particularly stiff, consult a professional.
- Fret Work: Fret leveling and crowning require specialized tools and expertise.
- Nut Replacement: Replacing a worn or damaged nut is best left to a professional.
- Complex Issues: If you’re experiencing persistent buzzing or intonation problems, a professional can diagnose and address the underlying cause.
According to a survey by Guitar Player Magazine, over 60% of guitarists seek professional help for complex guitar repairs and setups.
8. Maintaining Your Guitar’s Action Over Time
Guitar action can change over time due to factors like humidity and temperature. Regular maintenance can help keep your guitar playing its best.
- Store Properly: Store your guitar in a case or gig bag when not in use.
- Control Humidity: Use a humidifier or dehumidifier to maintain a stable humidity level.
- Regular Cleaning: Clean your strings and fretboard regularly to prevent buildup.
- Periodic Checkups: Have your guitar professionally setup every year or two.
9. Action Adjustment for Different Guitar Types
The specific steps for adjusting action can vary depending on the type of guitar. Here’s a quick guide for some common types:
9.1. Electric Guitars
Electric guitars typically have adjustable bridges that allow for easy action adjustments. Common bridge types include Tune-O-Matic, Strat-style, and Floyd Rose.
9.2. Acoustic Guitars
Acoustic guitars usually require saddle or nut adjustments to change the action. These adjustments can be more involved and may require professional assistance.
9.3. Bass Guitars
Bass guitars have similar bridge adjustment mechanisms to electric guitars. However, bass strings are typically heavier, so adjustments may need to be more pronounced.
9.4. Classical Guitars
Classical guitars often have a higher action than other types of guitars due to their construction and playing style. Adjustments typically involve modifying the saddle or nut.
10. Common Mistakes to Avoid When Adjusting Guitar Action
Avoid these common mistakes to prevent damage to your guitar.
- Over-Adjusting the Truss Rod: Making large adjustments to the truss rod can damage the neck.
- Stripping Screws: Using the wrong size Allen wrench or screwdriver can strip the screws on the bridge or truss rod.
- Ignoring Intonation: Failing to adjust intonation after changing the action can result in inaccurate pitch.
- Forcing Adjustments: If something feels stuck or difficult to adjust, don’t force it. Seek professional help.
FAQ: Frequently Asked Questions About Guitar Action
10.1. What is considered low action on a guitar?
Low action on a guitar typically refers to a string height of around 4/64″ (1.6mm) on the high E string and 5/64″ (2mm) on the low E string at the 12th fret. This allows for easier fretting but may cause buzzing if the setup isn’t perfect.
10.2. How do I know if my guitar action is too high?
If you find it difficult to press down the strings, experience finger fatigue, or notice that your guitar is out of tune when playing higher up the neck, your action may be too high.
10.3. Can I adjust my guitar action myself?
Yes, many guitarists adjust their own action with basic tools like Allen wrenches and screwdrivers. However, be cautious and make small adjustments. If you’re uncomfortable, seek professional help.
10.4. How often should I adjust my guitar action?
You should adjust your guitar action as needed, typically when you notice changes in playability or intonation. This can be influenced by seasonal changes in humidity and temperature.
10.5. What is neck relief, and why is it important?
Neck relief is the slight bow in the guitar neck. It’s important because it allows the strings to vibrate freely without buzzing against the frets.
10.6. What tools do I need to adjust my guitar action?
You’ll need Allen wrenches, screwdrivers, a string action gauge, and a tuner. A capo and feeler gauge are helpful for checking neck relief.
10.7. What happens if my guitar action is too low?
If your guitar action is too low, you may experience buzzing, especially on the lower frets. This can be corrected by raising the action slightly.
10.8. How does string gauge affect guitar action?
Lighter strings may require a lower action, while heavier strings may require a higher action. Switching string gauges may necessitate adjusting the truss rod and bridge height.
10.9. Is it better to have high or low action on a guitar?
The best action depends on your playing style and preferences. Lower action is easier to fret, while higher action provides clearer tones and better sustain.
10.10. How much does it cost to have a professional adjust my guitar action?
The cost of a professional guitar setup can range from $50 to $150, depending on the complexity of the work and the location.
Adjusting your guitar’s action is a fundamental skill that can significantly improve your playing experience. By understanding the principles outlined in this guide and taking your time with the adjustments, you can achieve optimal playability and unlock the full potential of your instrument.
Ready to take your guitar playing to the next level? Visit guitarplayers.net for more in-depth tutorials, gear reviews, and a vibrant community of fellow guitar enthusiasts. Whether you’re looking for lessons, sheet music, or advice on maintaining your instrument, we’ve got you covered. Explore our extensive resources and join the guitarplayers.net community today! You can also visit our shop at 1140 Boylston Street, Boston, MA 02215, United States or call us at +1 (617) 747-2261.
