Changing your guitar strings is a fundamental maintenance task that every guitar player needs to learn. Fresh strings can dramatically improve your guitar’s sound, making it brighter and more resonant. This guide will walk you through each step of restringing your guitar, ensuring optimal sound and tuning stability.
Step 1: Prepare for Restringing and Cleaning
Before you start removing your old strings, this is the perfect opportunity to give your guitar a thorough cleaning. With the strings out of the way, you can access areas that are normally difficult to reach. This includes the fretboard, bridge, saddle, and even the soundhole if you have an acoustic guitar. Use a soft, dry cloth to wipe away dust and grime from these areas. For tougher buildup, you can use a guitar polish specifically designed for your guitar’s finish.
 Cleaning the guitar body during restringing
Step 2: Condition Your Fretboard with Lemon Oil
If your guitar has a dark wood fretboard, such as rosewood or ebony, consider applying lemon oil. These woods can dry out over time, especially in drier climates. Lemon oil helps to hydrate the wood, preventing cracks and keeping your fretboard in top condition. However, it’s crucial to use lemon oil sparingly and only on unfinished wood fretboards. Maple fretboards, which often have a finish, should not be oiled.
 Applying lemon oil to a guitar fretboard
Step 3: Apply Lemon Oil and Let it Soak
Apply a few drops of lemon oil to a clean cloth – avoid applying it directly to the fretboard. Work the oil into the wood along the grain of the fretboard, from the nut to the body of the guitar. Don’t wipe it away immediately; allow a small amount of oil to soak into the wood for about 30 seconds to a minute. This allows the oil to penetrate and moisturize the fretboard effectively.
Step 4: Hydrate the Bridge (Optional)
While you’re conditioning the fretboard, take a look at your guitar’s bridge. If it appears dry, especially on acoustic guitars, you can also lightly hydrate it with lemon oil. However, be extremely careful to avoid getting lemon oil on the saddle, particularly if it’s made of bone or Tusq. Lemon oil on the saddle can reduce friction and cause the strings to slip, affecting tuning stability. It’s best to remove the saddle before oiling the bridge, or carefully avoid it altogether.
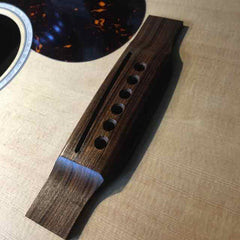 Hydrating the guitar bridge with lemon oil
Step 5: Prepare Your New Guitar Strings
Now it’s time to get your new strings ready. Open your new set of guitar strings and familiarize yourself with the string order. String sets are typically arranged from thickest to thinnest, corresponding to the low E string to the high E string. Knowing the correct order is essential for restringing your guitar properly and achieving the correct tuning.
 New guitar strings in packaging ready for restringing
Step 6: Bend the Ball End of the String
To improve tuning stability, especially on acoustic guitars, create a slight 45-degree bend at the ball end of each string before inserting it into the bridge. This bend helps to ensure that the ball end sits snugly against the bridge plate inside the guitar body, providing a more secure anchor point and reducing slippage.
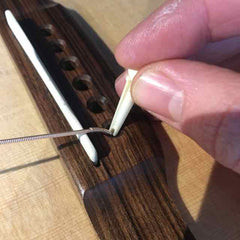 Bending the ball end of a guitar string for secure bridge insertion
Step 7: Insert the String and Bridge Pin
Insert the ball end of the string into the corresponding hole in the bridge. For acoustic guitars, you’ll use bridge pins to secure the strings. Place the bridge pin over the string, ensuring the string sits in the groove of the pin. Push the pin firmly into place. It’s crucial that the groove in the bridge pin is facing towards the soundhole and directly down the guitar neck to properly guide the string.
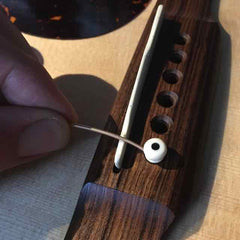 Inserting a guitar string and bridge pin into the bridge
Step 8: Secure All Strings at the Bridge
Repeat the process for the remaining five strings, inserting each string and securing it with a bridge pin. After inserting all the strings, gently pull on the tail of each string near the bridge to ensure that the ball end is properly seated against the bridge plate. This confirms that each string is anchored correctly before moving on to the tuning pegs.
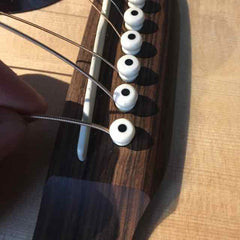 All guitar strings inserted and secured with bridge pins at the bridge
Step 9: Prepare the Machine Heads
Before threading the strings through the tuning pegs (machine heads), make sure the holes in each machine head are aligned straight down the guitar neck. This starting position makes it easier to insert the strings and ensures proper winding direction around the tuning posts, contributing to better tuning stability.
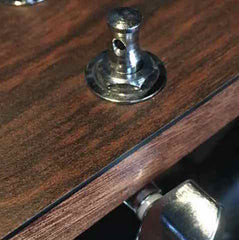 Guitar machine heads oriented straight down the neck for string insertion
Step 10: Thread the String Through the Machine Head
Now, bring the string up over the saddle and nut, and then thread the end of the string through the hole in the corresponding machine head. Pull the string through, leaving enough slack to wrap around the tuning post.
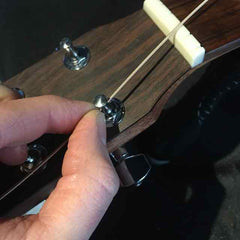 Threading a guitar string through the machine head
Step 11: Measure String Length for Winding
To determine the correct amount of string to wind around the tuning post, pull the string taut and measure approximately the distance to the next machine head along the headstock. This length provides enough string to create several winds around the post, which is essential for maintaining tuning stability.
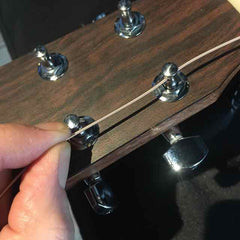 Measuring string length for winding around the tuning post
Step 12: Begin Winding the String
Pull the measured excess string back through the tuning post. Begin winding the tuning key, typically in an anti-clockwise direction for the lower strings and clockwise for the higher strings (this can vary depending on the machine head configuration, so observe the winding direction as you tighten). Maintain tension on the string as you wind to keep the measured slack consistent. Ensure that the string coming from the nut is positioned on the inside of the tuning post.
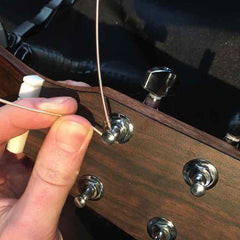 Winding the guitar string around the tuning post
Step 13: Ensure Proper String Winding Technique
As you wind the string, make sure the new windings are positioned below the previous windings, effectively pushing them downwards. This layering technique creates a neat and secure winding on the tuning post, preventing slippage and further enhancing tuning stability.
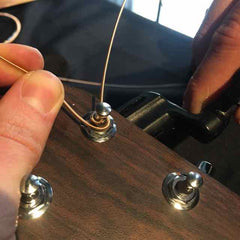 Close up of proper guitar string winding technique on the tuning post
Step 14: Initial String Tension
Continue winding the string until there is a slight amount of tension. At this stage, a couple of winds around the tuning post should be sufficient. You don’t need to bring the string up to full pitch yet; the goal is just to get it snug and ready for fine-tuning later.
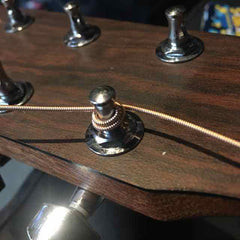 Initial tension applied to the guitar string during winding
Step 15: Trim Excess String
Using wire cutters, trim off the excess string extending beyond the tuning post. Cut the string as close to the post as possible to keep the headstock tidy and prevent the sharp ends from causing injury. A clean trim also contributes to a more professional look.
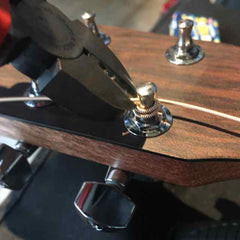 Trimming excess guitar string with wire cutters
Step 16: Restring All Strings
Repeat steps 10 through 15 for the remaining five strings. Work systematically, typically moving from the thickest string (low E) to the thinnest (high E). This methodical approach helps to distribute tension evenly across the guitar neck as you restring.
 All six guitar strings restrung and trimmed
Step 17: Tune Your Guitar
Once all strings are installed, it’s time to tune your guitar. Use a guitar tuner – a clip-on tuner is particularly convenient – to bring each string up to its correct pitch. Tune gradually, moving back and forth between each string. Avoid tuning any single string directly to pitch in one go, as this can put uneven stress on the neck. Instead, bring all strings up to pitch incrementally to balance the tension.
 Tuning the guitar with a clip-on tuner after restringing
Step 18: Stretch Your New Strings
New guitar strings need to be stretched to stabilize their tuning. Gently stretch each string by pulling it away from the fretboard in the middle of the neck. You don’t need to pull hard; a gentle stretch is sufficient. After stretching each string, retune your guitar. Repeat this stretch-and-tune process several times until the strings hold their pitch consistently. This crucial step minimizes tuning instability and reduces the frustration of constantly retuning new strings. After stretching and tuning, your guitar is ready to play!

