For any guitarist, the neck is arguably the most crucial Guitar Part when it comes to playability and feel. It’s the area you interact with most, shaping chords, bending notes, and navigating scales. The finish on the neck profoundly impacts this tactile experience. Like many players, I long favored satin finishes for their smooth, non-sticky feel. That preference held firm for years until I encountered a revelation: an Ernie Ball Music Man guitar with an “oil and wax” finish. The moment I played it, I was astounded by the incredible feel.
From that point on, as I planned my own guitar build, replicating that oil and wax finish on the neck became a must. This guide offers a straightforward walkthrough on achieving this surprisingly simple yet remarkably effective finish yourself. In my experience, the time invested is undeniably worth the exceptional result.
Why Choose an Oil and Wax Finish for Your Guitar Neck?
While gloss finishes can be visually striking and satin finishes offer a step away from stickiness, an oil and wax finish elevates the playing experience to a new level. Beyond just feel, this type of finish offers several compelling advantages for your guitar part:
- Unparalleled Smoothness: Oil and wax finishes are renowned for their silky smooth texture. They eliminate the slight tackiness sometimes found in satin finishes and the outright stickiness of gloss, allowing your hand to glide effortlessly along the neck.
- Enhanced Natural Beauty: Tru-Oil, a key component in this finish, has a subtle amber tint that beautifully enhances the natural grain of the wood, particularly stunning on figured woods like Birdseye Maple. It brings warmth and depth to the wood’s appearance.
- Breathability and Protection: Unlike thick, polymer-based finishes, oil finishes penetrate the wood, offering protection from within. They create a breathable barrier against moisture and corrosive hand oils, safeguarding the wood without suffocating its natural resonance.
- DIY Customization and Satisfaction: Applying an oil and wax finish is a rewarding DIY project. It allows you to personally tailor the feel of your guitar part to your exact preferences, achieving a level of customization not often found in factory finishes. The process itself is also deeply satisfying, connecting you more intimately with your instrument.
Gather Your Guitar Neck Finishing Supplies
Before embarking on this rewarding project, gather these essential supplies to ensure a smooth and successful guitar part finishing process:
- Birchwood Casey Tru-Oil Gun Stock Finish: This is the heart of the oil finish, a varnish known for its ease of application, durability, and beautiful amber hue.
- Birchwood Casey Gun Stock Wax: The wax complements the Tru-Oil, adding a final layer of smoothness and enhanced tactile feel to the neck.
- Soft Cloths: Use lint-free cotton cloths for applying both the Tru-Oil and wax. Old t-shirts or specialized application cloths work perfectly.
- 0000 Steel Wool: Super fine steel wool is crucial for smoothing the wood before finishing and for achieving an ultra-smooth surface between coats of Tru-Oil.
- Painter’s Tape (Blue Tape): Essential for masking off the fretboard and preventing finish from getting on the frets or fretboard surface.
- Mineral Oil (Optional): For conditioning the fretboard, especially for drier woods like Pau Ferro or Rosewood.
- Patience and Free Time: This project isn’t rushed. Allow ample drying time between coats and enjoy the process.
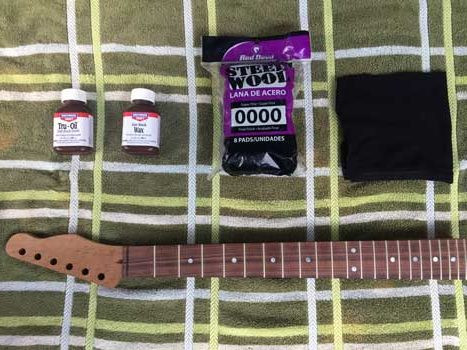 Guitar neck finishing supplies including Tru-Oil, wax, steel wool, and cloths.
Step-by-Step Guide to Applying Oil and Wax Guitar Neck Finish
Let’s delve into the process of applying this exceptional finish to your guitar part, transforming its feel and appearance.
Preparing Your Guitar Neck
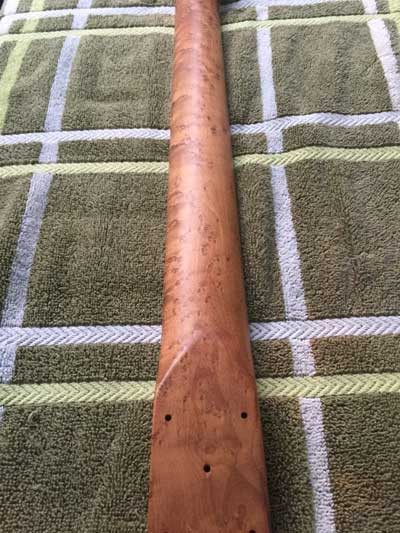
The ideal starting point is a bare wood neck. If you’re building a guitar from scratch, this is naturally the case. If you’re refinishing an existing neck, you’ll need to carefully remove the old finish using fine-grit sandpaper, working your way up to higher grits for a smooth surface.
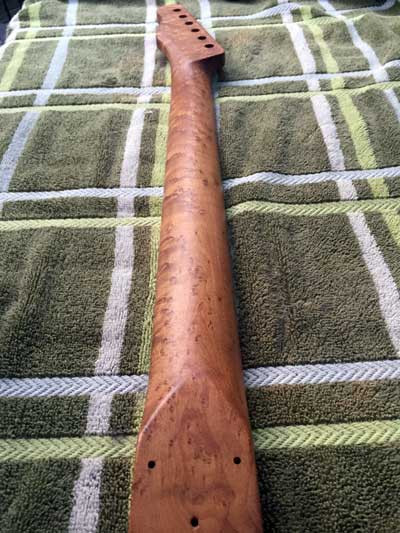
For this guide, I’m using a custom neck crafted from roasted birdseye maple, a stunning wood choice for a guitar part. “Roasted” signifies that the maple has been heat-treated, enhancing its stability and tonal qualities. It’s paired with a beautiful pau ferro fretboard, showcasing striking grain patterns even without any finish.
 Unfinished roasted birdseye maple guitar neck showing wood grain.
Inspect and Smooth the Surface
Before applying any finish to your guitar part, meticulous surface preparation is key. Even on a new neck, there might be minor imperfections that could affect the finish. Use 0000 steel wool to gently and evenly smooth the entire back of the neck. This step ensures the wood is perfectly receptive to the Tru-Oil and contributes to an even, flawless finish. Don’t overdo it; light, even passes are sufficient at this stage.
Masking the Fretboard
Protecting the fretboard and frets from the finish is crucial. Use painter’s tape to carefully mask off the edges of the fretboard, right where it meets the neck. Ensure the tape wraps slightly over the edge to prevent any Tru-Oil from seeping onto the fretboard sides. Using painter’s tape is important as it removes cleanly without leaving sticky residue – avoid using masking tape which can leave residue and create extra work.
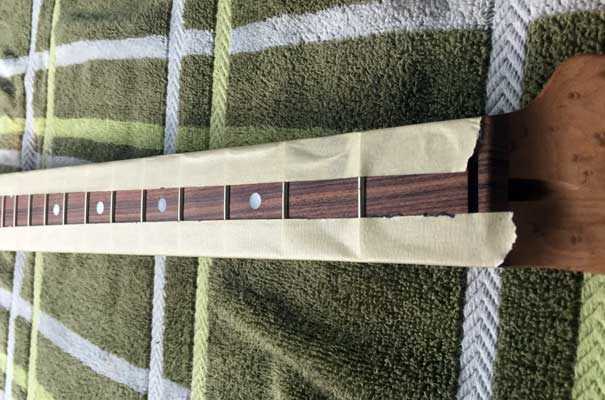 Taping the edges of a guitar fretboard for neck finishing.
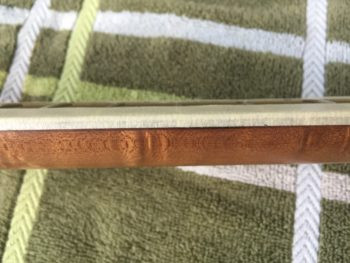 Close-up of painter's tape applied to guitar fretboard edges before finishing.
Applying Tru-Oil Guitar Neck Finish
With the neck prepped and masked, it’s time to apply the Tru-Oil finish to your guitar part. Tru-Oil acts as a protective barrier for the wood, shielding it from humidity fluctuations and the oils from your hands. Furthermore, its subtle amber tint enriches the wood’s natural color, making the grain patterns truly stand out.
Application is straightforward. Take a clean cotton cloth and apply a very small amount of Tru-Oil to it. A little goes a long way – for the first coat, I simply tipped the Tru-Oil bottle onto the cloth and back up, using that small amount for the initial coat on the entire neck.
Wipe the Tru-Oil onto the neck using long, even strokes, working from one end to the other. Maintaining consistent pressure is vital. Uneven pressure can lead to an uneven finish, with more finish being applied in areas with greater pressure. Tru-Oil dries relatively quickly, so work efficiently and carefully to ensure even coverage. You’ll likely need to add a touch more Tru-Oil to your cloth once or twice to coat the entire neck with a thin layer. Remember, thinner coats are better; you can always add more, but removing excess finish is much more challenging.
Here’s how my neck looked after the first coat:
 Guitar neck with the first coat of Tru-Oil finish applied.
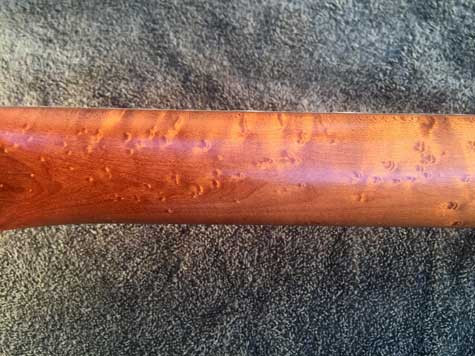
Allow each coat to dry completely before applying the next. Drying time can vary from a few hours to overnight, depending on the thickness of the coat and environmental conditions. Touch the surface to check for dryness; if it’s no longer sticky, it’s usually ready for the next coat. Apply subsequent coats in the same manner as the first. After two coats, you can already see the grain definition becoming more pronounced, with an almost three-dimensional effect, and the amber tint deepening the maple’s color to a richer golden brown.
 Guitar neck after two coats of Tru-Oil finish, grain enhanced.
Smoothing Between Coats
This step is crucial for achieving that signature silky smooth feel of an oil and wax finished guitar part. Once your first or second coat of Tru-Oil is completely dry, bring out your 0000 steel wool again. Using very light pressure, gently run the steel wool along the entire neck, back and forth, to smooth out any slight imperfections in the finish. Spend about 10-20 minutes on this step between each coat for optimal results. This smoothing process creates an incredibly slick and glassy feel, enhancing the playability of your guitar part. Make sure to perform this step between every Tru-Oil coat to maintain an even and smooth finish.
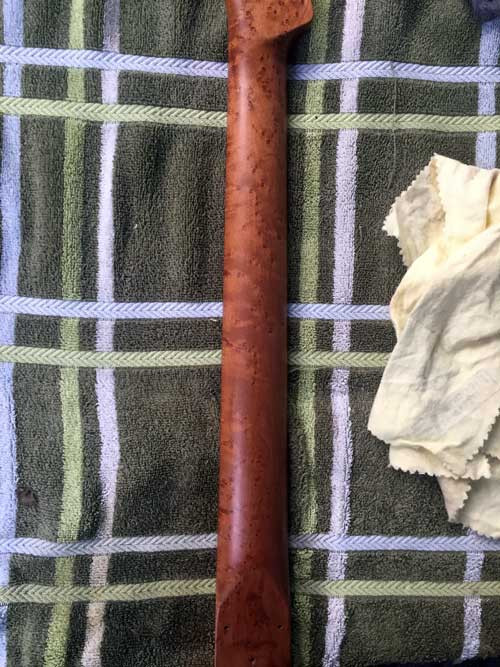
Continue applying coats of Tru-Oil, smoothing with steel wool between each, until you achieve the desired feel and build-up. I personally applied around 5-6 coats to reach a finish that felt substantial yet not overly thick, providing the perfect balance of protection and tactile feedback.
 Guitar neck with the final coats of Tru-Oil finish, ready for waxing.
Enhancing with Gun Stock Wax
The Birchwood Casey Gun Stock Wax is the final touch that truly elevates this finish. It enhances the feel even further, reducing any remaining hint of slipperiness and imparting a luxurious texture to your guitar part. While difficult to fully describe, the wax simply makes the neck feel even more incredible in your hands. This is a step you absolutely shouldn’t skip.
To apply the wax, use a fresh cloth (separate from the one used for Tru-Oil) and apply a small dollop of wax to it. Smoothly wipe the wax over the entire surface of the neck, similar to applying the Tru-Oil. The wax application is more forgiving, requiring less precision than the oil. I applied 2-3 light coats of wax, and each coat seemed to enhance the feel even more.
Behold the completed and finalized neck:
 Completed guitar neck finish with oil and wax, showcasing smooth surface.
Oiling the Fretboard (Optional)
With the neck finish complete, take a moment to admire your handiwork. But before you reassemble your guitar, consider the fretboard. Remove the painter’s tape, being careful to clean off any residue if present. Assess your fretboard’s condition. In my case, the pau ferro fretboard, while beautiful, was naturally a bit dry and could benefit from some conditioning oil.
I used mineral oil to apply two or three very light coats to the fretboard surface. To my delight, this dramatically enhanced the grain’s appearance, adding depth and richness, and eliminated any dryness, leaving the fretboard feeling wonderfully smooth and conditioned.
Observe the beautifully enhanced pau ferro grain after oiling:
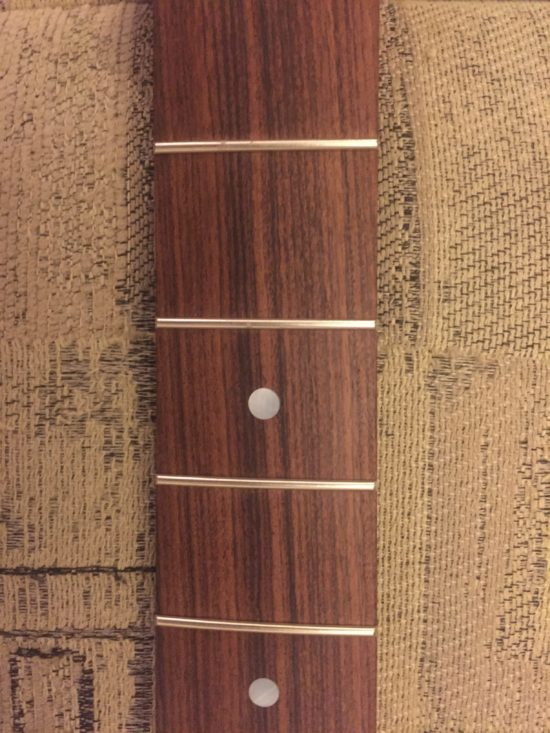 Pau Ferro guitar fretboard after oiling, grain enhanced and conditioned.
Dive In and Finish Your Guitar Neck
To my pleasant surprise, applying a custom neck finish wasn’t the daunting task I had anticipated. It was a genuinely enjoyable process that challenged my attention to detail and deepened my understanding of what contributes to an exceptional neck feel. I truly believe the finish I achieved on my guitar part is the best I’ve ever personally experienced, largely because I was able to tailor it precisely to my preferred feel.
I wholeheartedly encourage every guitarist, especially those embarking on guitar building or customization, to apply your own oil and wax finish to a neck. It’s an investment of time and effort that undeniably pays off in a guitar part that feels and looks truly exceptional.