Like many guitarists, my journey with unique guitar designs started young. Tired of seeing the same Strat and Telecaster shapes everywhere, I was drawn to something different, something innovative. That’s when I discovered the Parker Fly. Its radical design and reputation instantly captivated me, leading me to spend my hard-earned cash on an emerald green Parker Fly Deluxe. While that guitar is long gone, the occasional Parker Fly that comes into our repair shop always brings back memories and reminds me of just how ingeniously complex these instruments can be, especially when it comes to even seemingly simple repairs like the Guitar Output Jack.
Ken Parker’s genius as a luthier is undeniable, but his designs sometimes lean towards over-engineering. This brilliance, while contributing to the Parker Fly’s unique sound and feel, can make even routine maintenance a significant challenge. Replacing a guitar output jack is usually a straightforward job on most guitars, but on a Parker Fly, it’s a different story altogether. Despite the serviceability challenges, at our shop, we pride ourselves on tackling complex repairs, and the Parker Fly output jack is a perfect example of a task that requires patience, skill, and a bit of ingenuity.
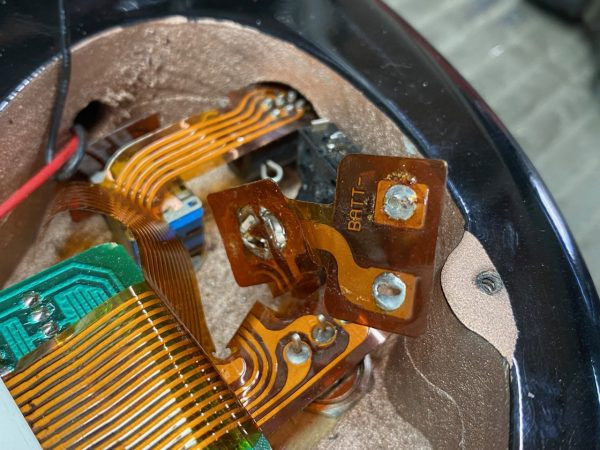
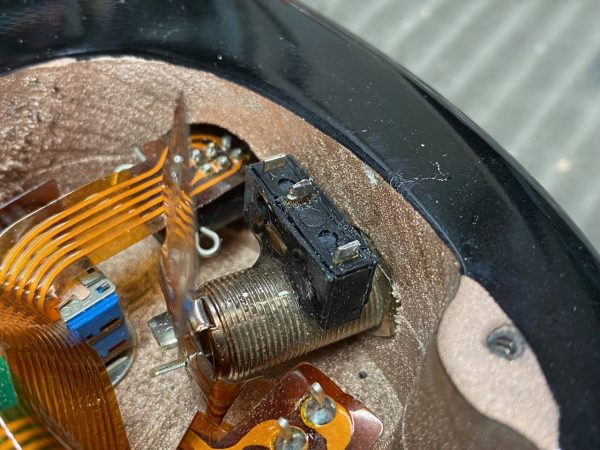
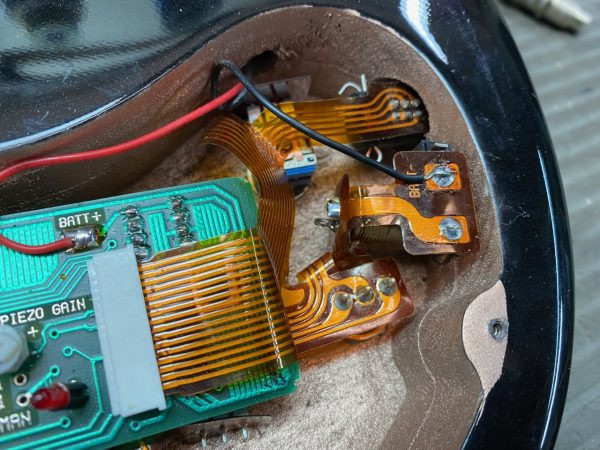
The complexity of replacing the output jack on a Parker Fly becomes immediately apparent when you see the electronics:
 Parker Fly electronics
The Parker Fly is designed as a versatile electric-acoustic hybrid, featuring both piezo and magnetic pickups. These signals are routed through an active preamp system before exiting via a single stereo output jack. What makes this unique is that the stereo guitar output jack is modified to handle both electric and piezo signals separately, and it also incorporates a switch to engage the battery for the active electronics when a cable is plugged in. This clever design, while functional, significantly complicates what would normally be a simple guitar jack replacement.
The first hurdle is disconnecting the ribbon cable without causing damage. Fortunately, years of experience have honed my dexterity, much like playing the game Operation. Using a soldering iron, solder sucker, and a steady hand, I carefully desoldered all five connections without melting the delicate ribbon cable.
 Desoldering Parker Fly output jack
Disclaimer: Attempting intricate electronics work without proper experience can lead to damage. Proceed with caution or consult a qualified technician.
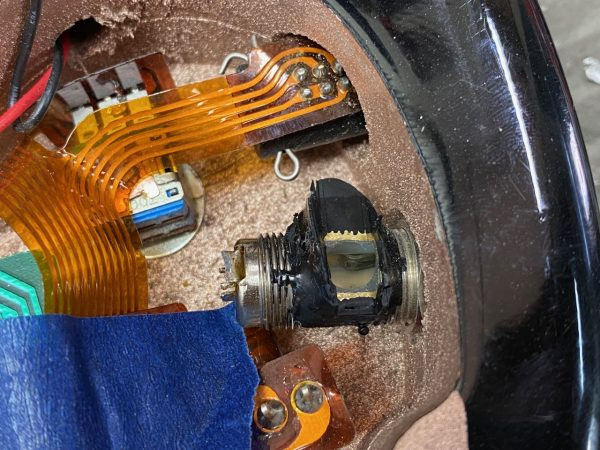
Next, the battery switch needed to be detached. This switch is epoxied to the output jack. Carefully applying heat with the soldering iron, I slowly softened the epoxy while gently working the switch free. Since the switch is plastic, overheating could easily melt and ruin it, demanding a delicate touch. With the epoxy softened, the switch is removed, revealing the modified guitar output jack beneath.
 Parker Fly output jack with switch removed
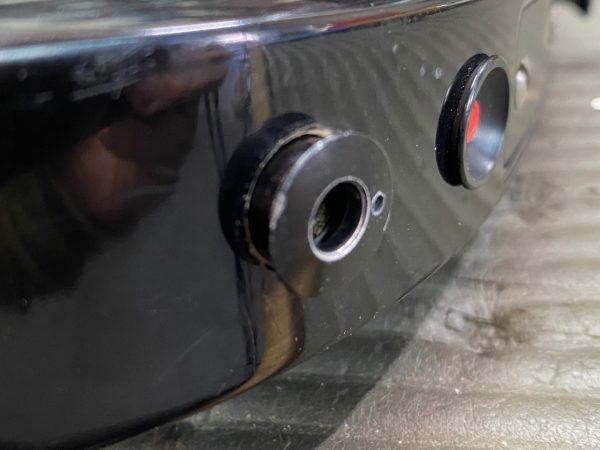
At our shop, we often joke, “ain’t nothing simple,” and the Parker Fly output jack repair perfectly embodies this. Even the jack’s physical attachment to the guitar body is unconventional. The end of the jack has been filed down to accommodate a screw-on cap. A tiny hole on the edge is designed for a specialized tool to unscrew it – a concept easier in theory than execution in practice, especially with years of wear and tear.
 Parker Fly output jack removal detail
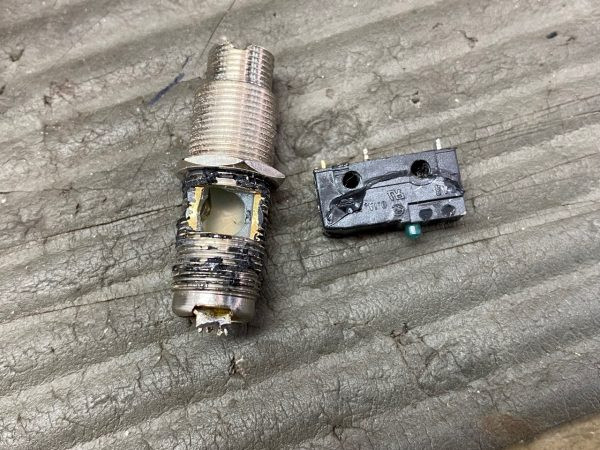
Finally, the old guitar output jack is out! Here’s a closer look at the original modified jack and the detached battery switch:
 Original Parker Fly output jack and battery switch
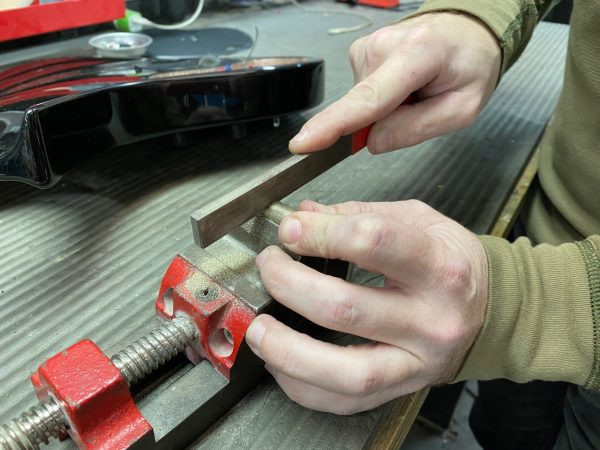
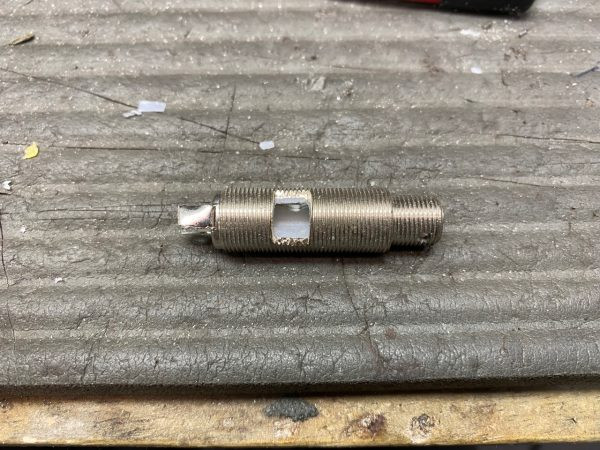
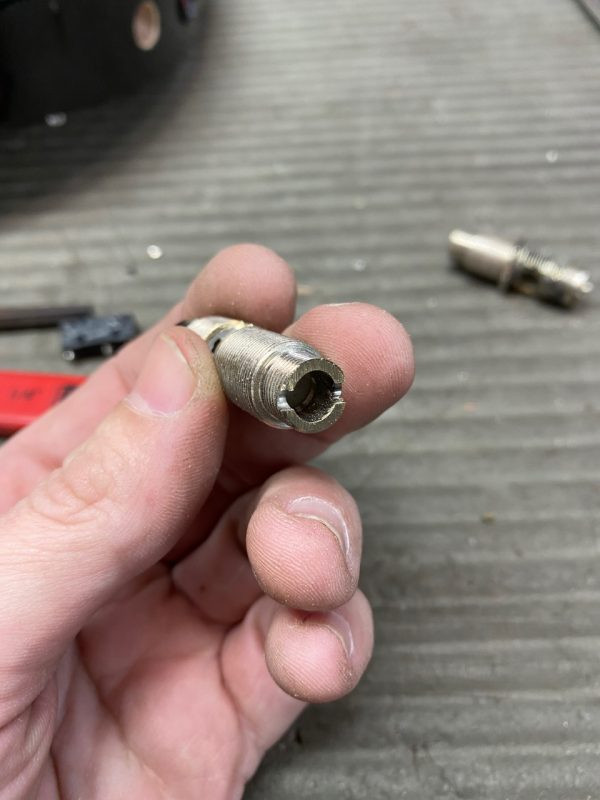
Now, the task was to create a replacement Parker Fly guitar output jack. I started with a robust Switchcraft stereo endpin jack. The end was carefully cut down and filed to match the original’s modified shape. Then, a crucial step: precisely cutting into the jack housing to accommodate the battery switch. This requires critical measurements. Cutting too deep would obstruct the guitar cable insertion, while incorrect placement along its length would prevent the cable from properly engaging the battery switch. Parker Guitars likely had specialized jigs for this process, but for infrequent repairs like this, careful measurements and meticulous execution are key.
 Modified Switchcraft jack for Parker Fly
 Switchcraft jack modification detail
 New output jack ready for installation
The final steps involved epoxying the battery switch onto the newly modified Switchcraft guitar output jack and carefully resoldering the connections to the ribbon cable, again being mindful of heat to avoid damaging components.
 Battery switch epoxied to new jack
 New output jack soldered and ready
With the new guitar output jack installed, this Parker Fly was once again ready to play. It was a rewarding experience to work on a Parker Fly again after so many years. They are truly exceptional guitars, just be prepared for a more complex repair process should you ever need to work on their unique electronics!