
For years, the idea of 3D printing an electric guitar body felt like a futuristic fantasy. Could a 3D-printed body truly withstand string tension? Would it warp over time? And most importantly, would it actually sound good? The internet offered glimpses of successful projects, but many lacked practical instructions, were overly complex, or relied on expensive components. The dream of a truly accessible, 3D-printed guitar seemed distant.
That’s why we embarked on a mission: to design a fully 3D-printable electric guitar from the ground up, specifically with accessibility and ease of construction in mind. And to make it even simpler, we’re leveraging the power of a readily available Guitar Kit to handle the crucial hardware components.
Design Priorities: Simplicity and Accessibility First
Our goal was to empower anyone with a desktop 3D printer to build their own amazing guitar. To achieve this, we established a clear set of design priorities:
- Simplicity is Key: Forget intricate, multi-part assemblies. We aimed for straightforward construction, easy for beginners to grasp.
- Affordability Matters: If you’re looking to spend a fortune, you’d probably buy a high-end guitar. This project should be budget-friendly, especially when combined with a guitar kit.
- Globally Sourced Hardware: Components should be easily obtainable worldwide, ensuring anyone, anywhere, can participate.
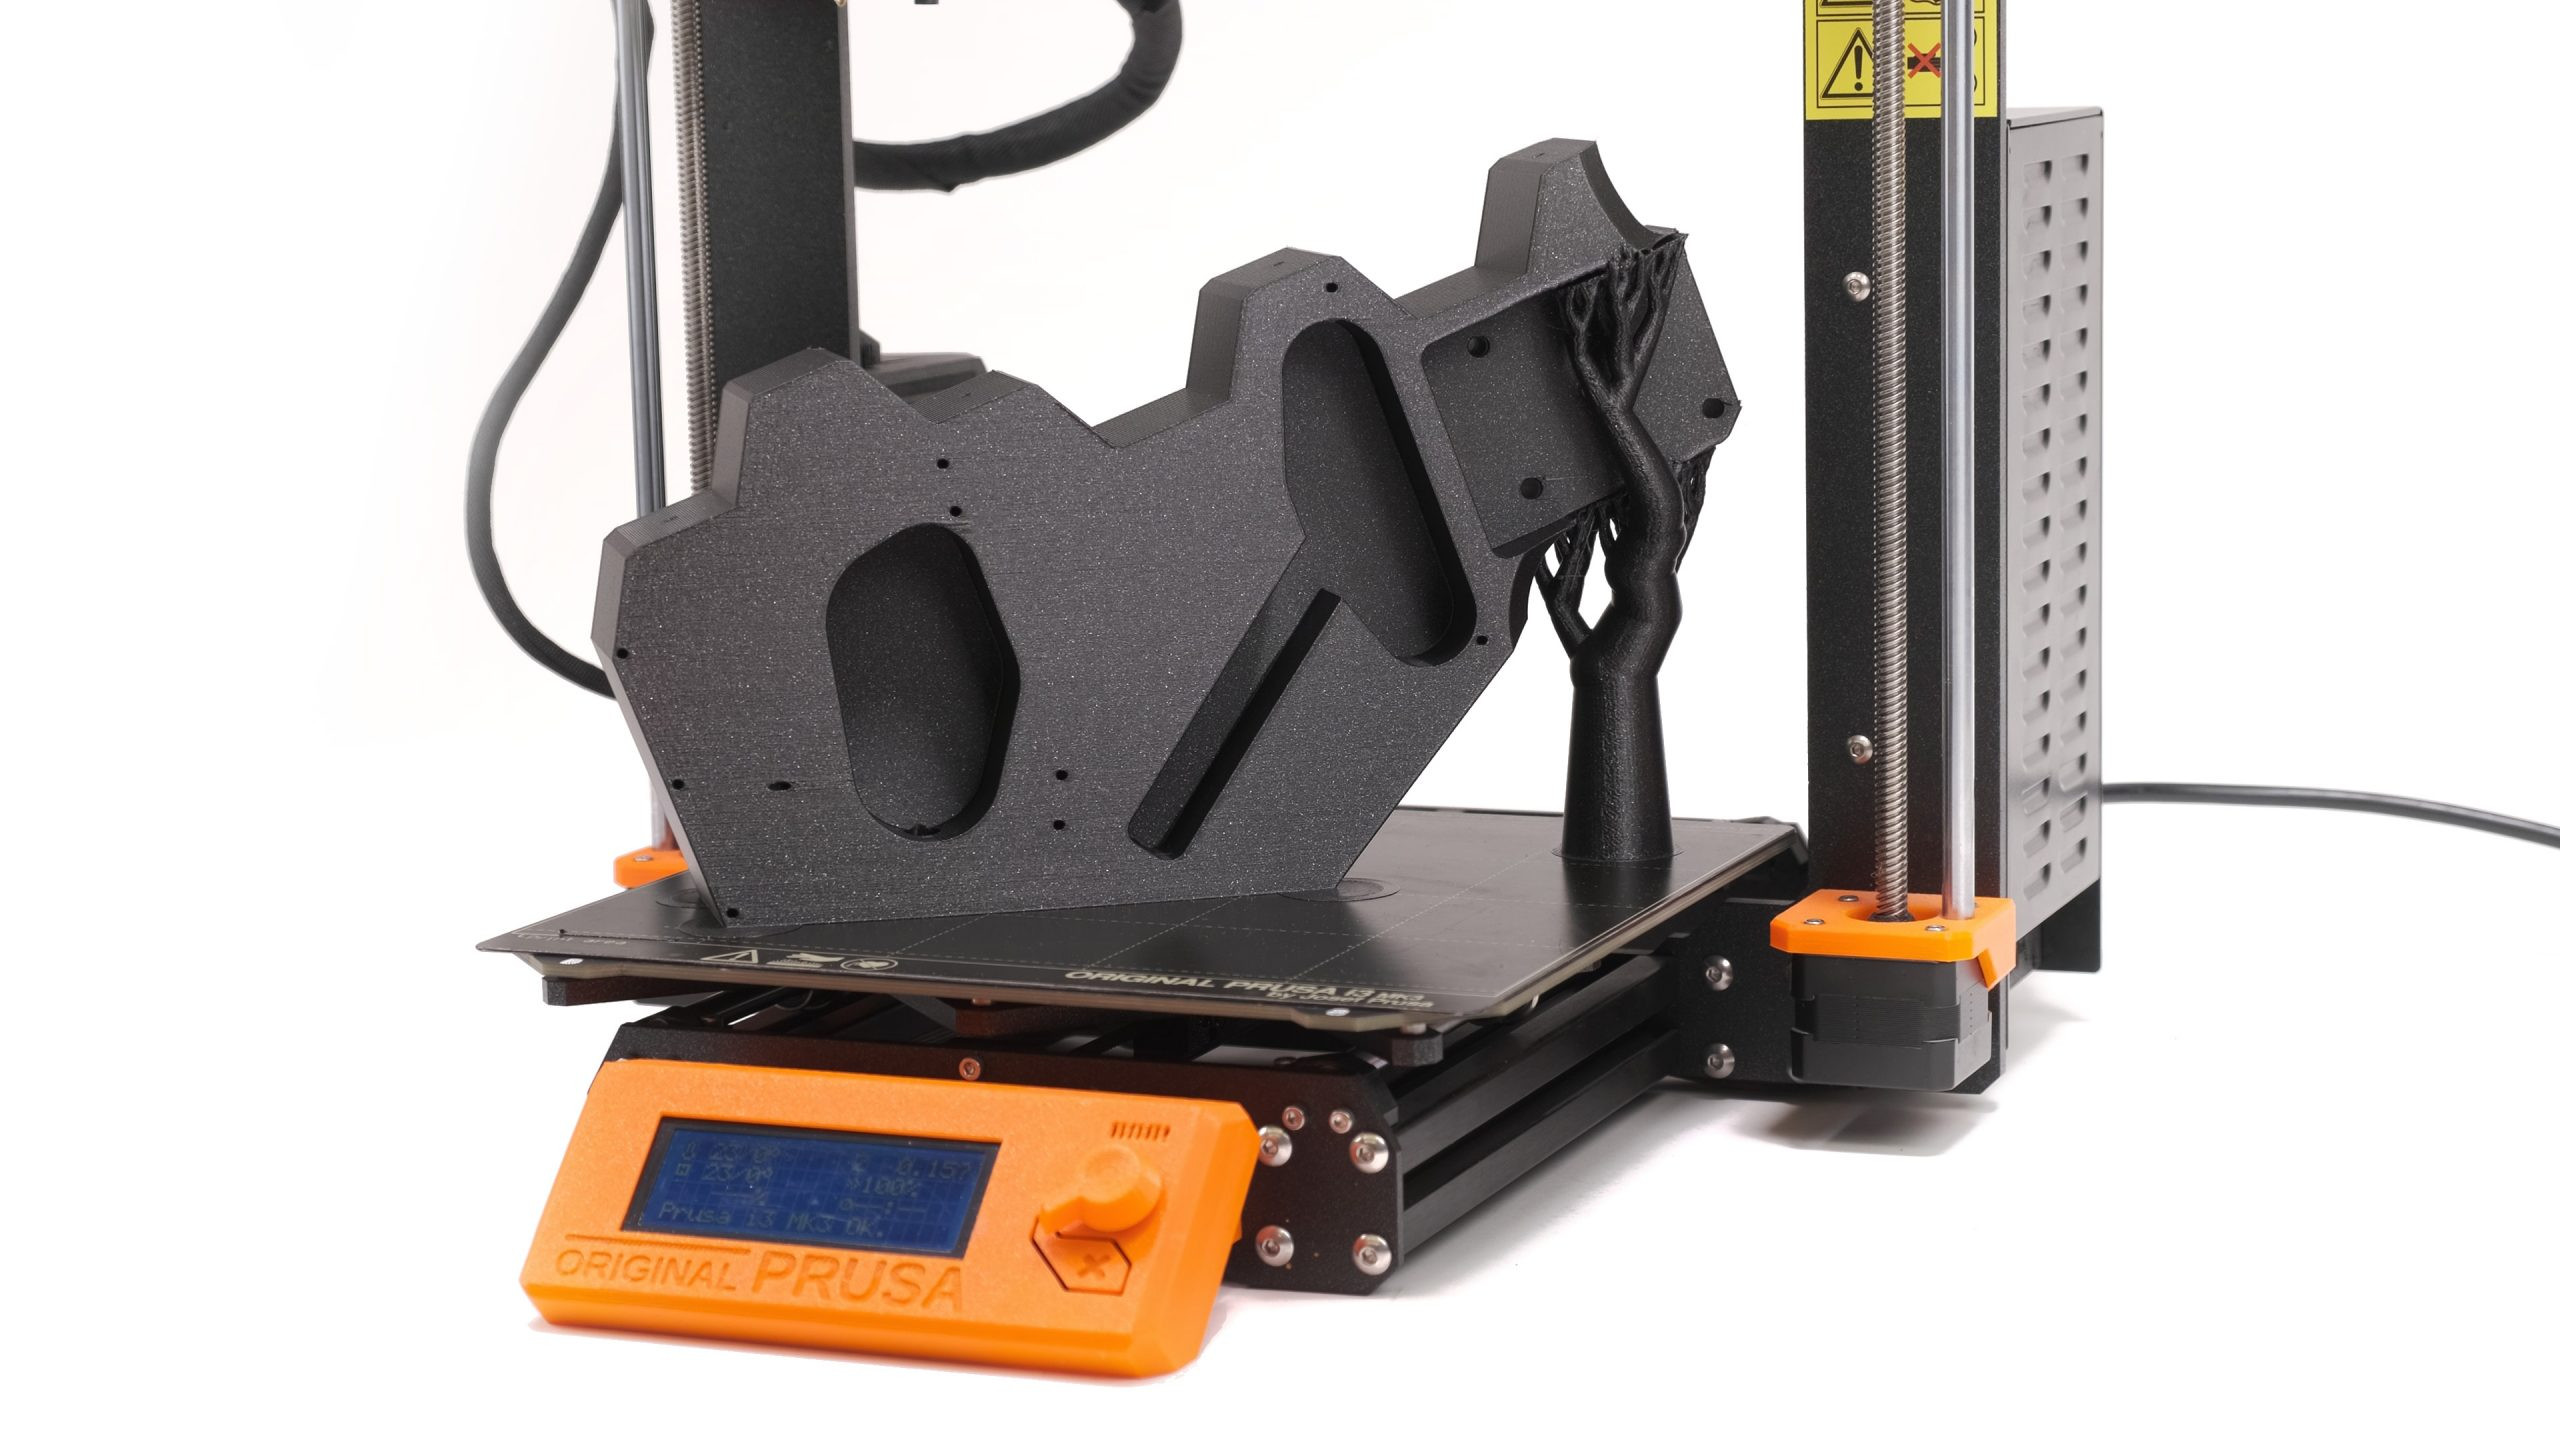
- Desktop 3D Printer Compatibility: Parts must fit on a Prusa i3 MK3S+ (25×21×21 cm) – a common and well-regarded printer. If it fits on this, it’s accessible to a wide audience.
- Playability is Paramount: This isn’t just a showpiece. It needs to play in tune across the fretboard – a functional instrument, not a plastic novelty.
- Visually Stunning Design: Let’s be honest, it needs to look awesome! 3D printing allows for unique aesthetics, and we wanted to capitalize on that.
Keeping it Simple: The Power of Smart Hardware Choices and Guitar Kits
The biggest hurdle in designing a 3D-printed guitar is string tension. Estimates vary, but a guitar is under roughly 50 kg (110 lbs) of force, trying to pull it apart. This stress impacts the body, the bridge, and especially the neck.
For the neck, the solution was clear: use a real wooden neck. While a fully 3D-printed guitar is a cool concept, the neck is too critical for experimentation. Wooden necks are precision-made, straight, durable, and feature adjustable truss rods for perfect setup. This also aligns perfectly with using a guitar kit, as most kits include a quality wooden neck.
The bridge, however, required more consideration. The bridge anchors the strings to the body and bears a significant portion of the string tension. Looking at common guitar bridge designs, one stood out as ideal for a 3D-printed build: the Telecaster bridge.
Unlike smaller bridges often held by just two screws, the Telecaster bridge is a substantial metal plate. It secures the strings, integrates the bridge pickup, and uses up to five widely spaced screws. This distributes the string tension across a larger area of the 3D-printed body, offering superior stability.
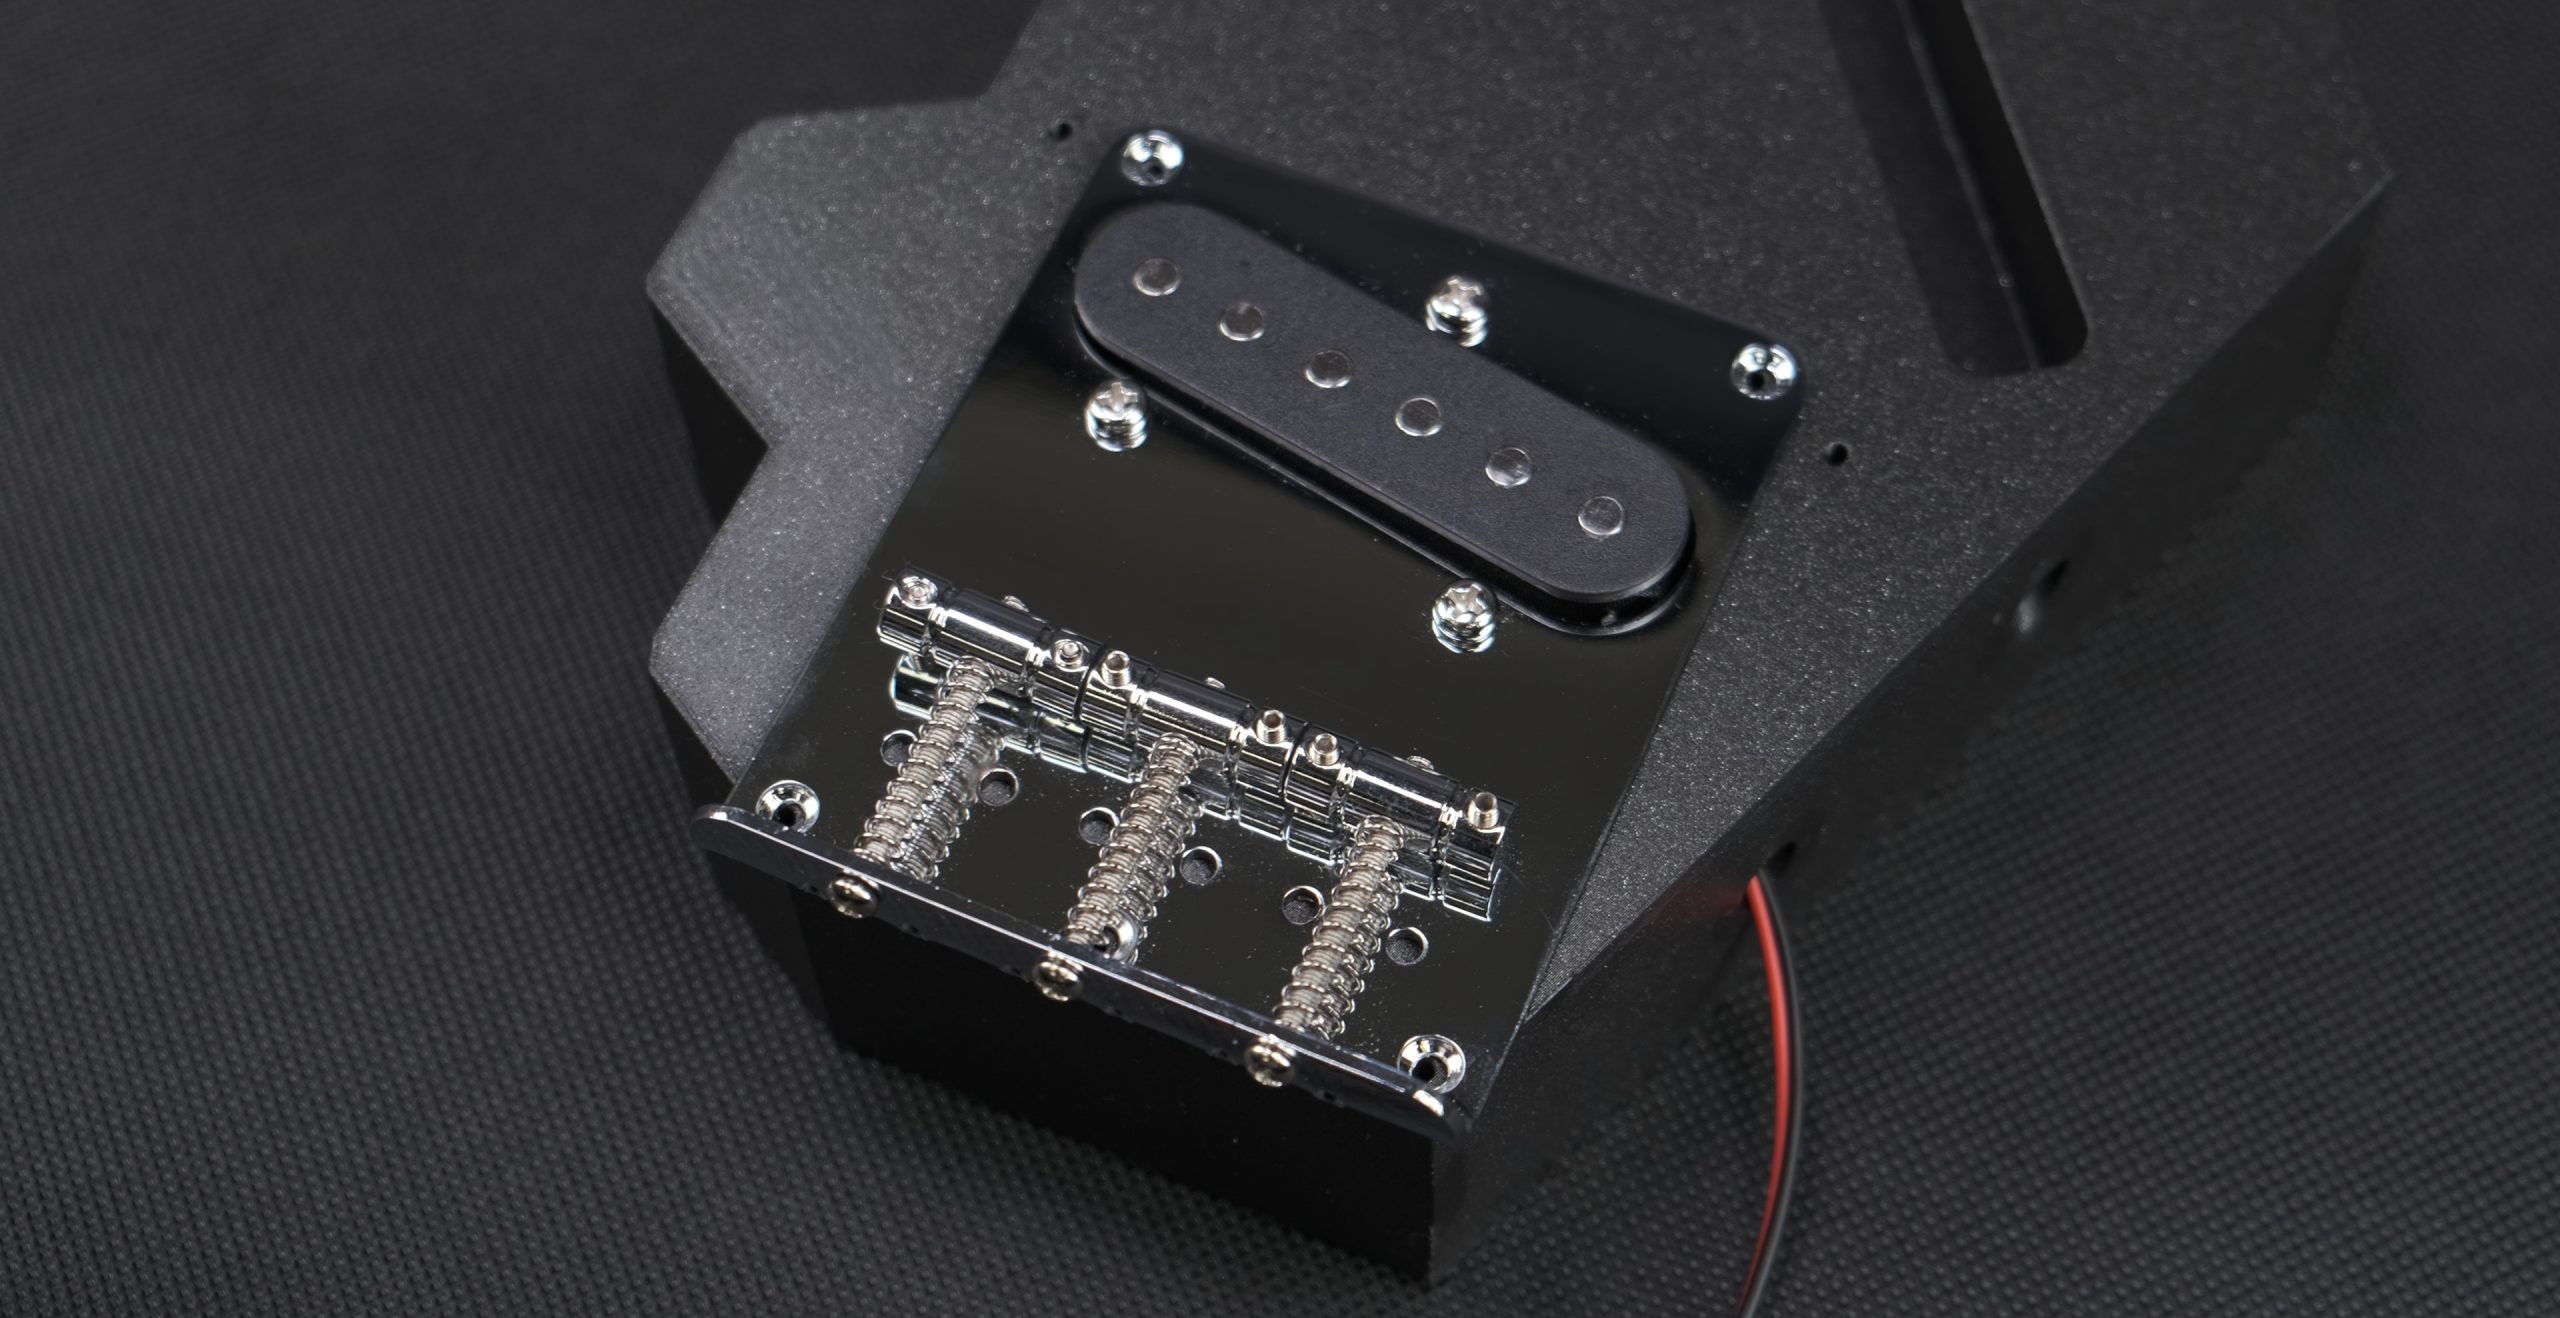
Furthermore, the Telecaster’s single additional pickup simplifies wiring and design. The volume and tone knobs, along with the pickup selector switch, are also mounted on a separate metal control plate, further streamlining the project. Again, perfect for a beginner-friendly 3D-printed guitar project, especially when using a guitar kit that provides pre-wired electronics.
The Ideal Hardware: Guitar Kits to the Rescue
With the Telecaster-style hardware chosen, sourcing the components became the next step. There are generally three options:
- Disassemble a cheap Telecaster guitar.
- Buy each part individually.
- Purchase a Telecaster guitar kit.
Dismantling a perfectly good guitar feels wasteful, unless you happen to find a heavily damaged one with salvageable hardware. Buying individual components, while feasible, quickly becomes expensive. Even budget-friendly parts can add up to hundreds of dollars.
This is where guitar kits shine. And we found an absolute gem: the Harley Benton Electric Guitar Kit T-Style! This kit is incredibly affordable, typically costing around $79 USD. And it includes everything you need: neck, tuners, pickups, bridge, control plate, and all pre-wired electronics with simple snap-together connectors. Sold by Musikhaus Thomann, a major global music retailer with worldwide shipping, it ticks all our boxes for accessibility and affordability.
This guitar kit transforms the project. Instead of sourcing dozens of parts, you simply order the kit and focus on 3D printing the body. The Harley Benton kit even includes a basic, unfinished wooden body, but we’ll be replacing that with our custom 3D-printed design.
Designing the 3D-Printed Body: Inspired by Classics
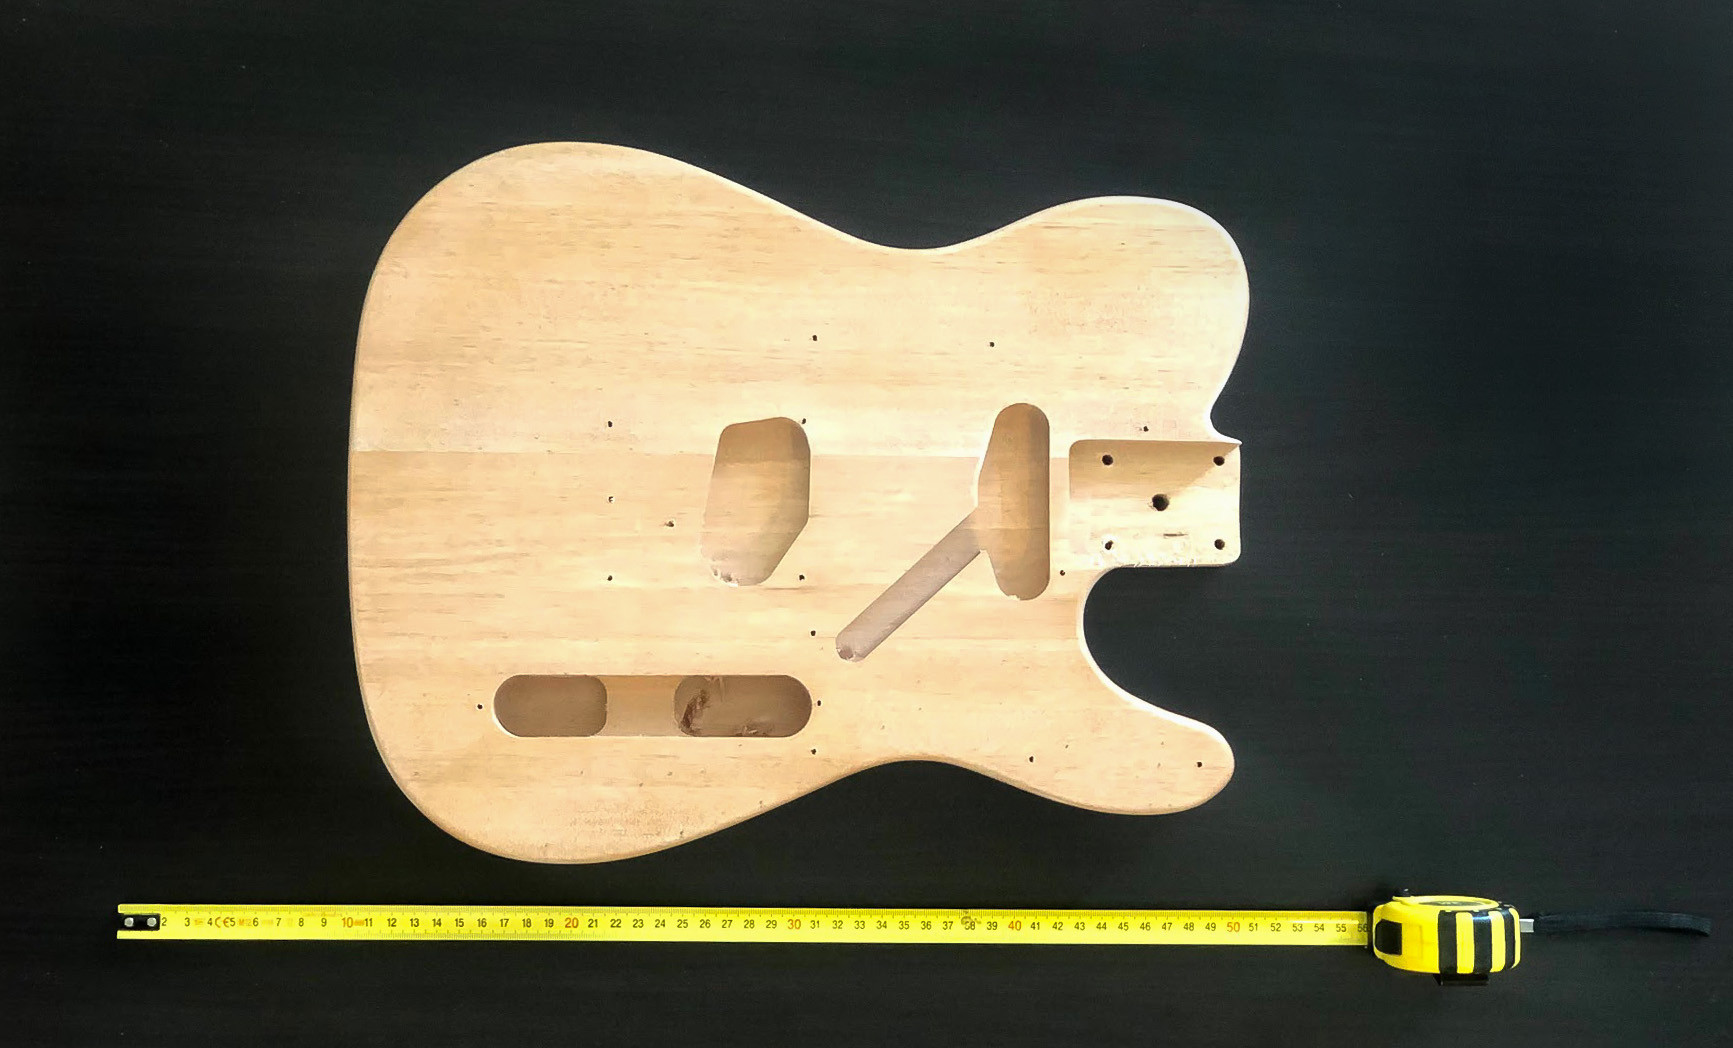
Using Fusion 360, we started designing the guitar body. Accurate placement of screw holes, neck mounting points, and electronics cavities was crucial. The included wooden body from the guitar kit became an invaluable template.
By photographing the wooden body with a ruler from a distance (to minimize perspective distortion) and using Fusion 360’s “Calibrate” tool, we created a precise digital template. Tracing the hole positions in a 2D sketch and verifying measurements with digital calipers ensured accuracy, especially for the critical bridge placement. Correct bridge placement is vital for proper string alignment and intonation – the guitar’s ability to play in tune across the neck.
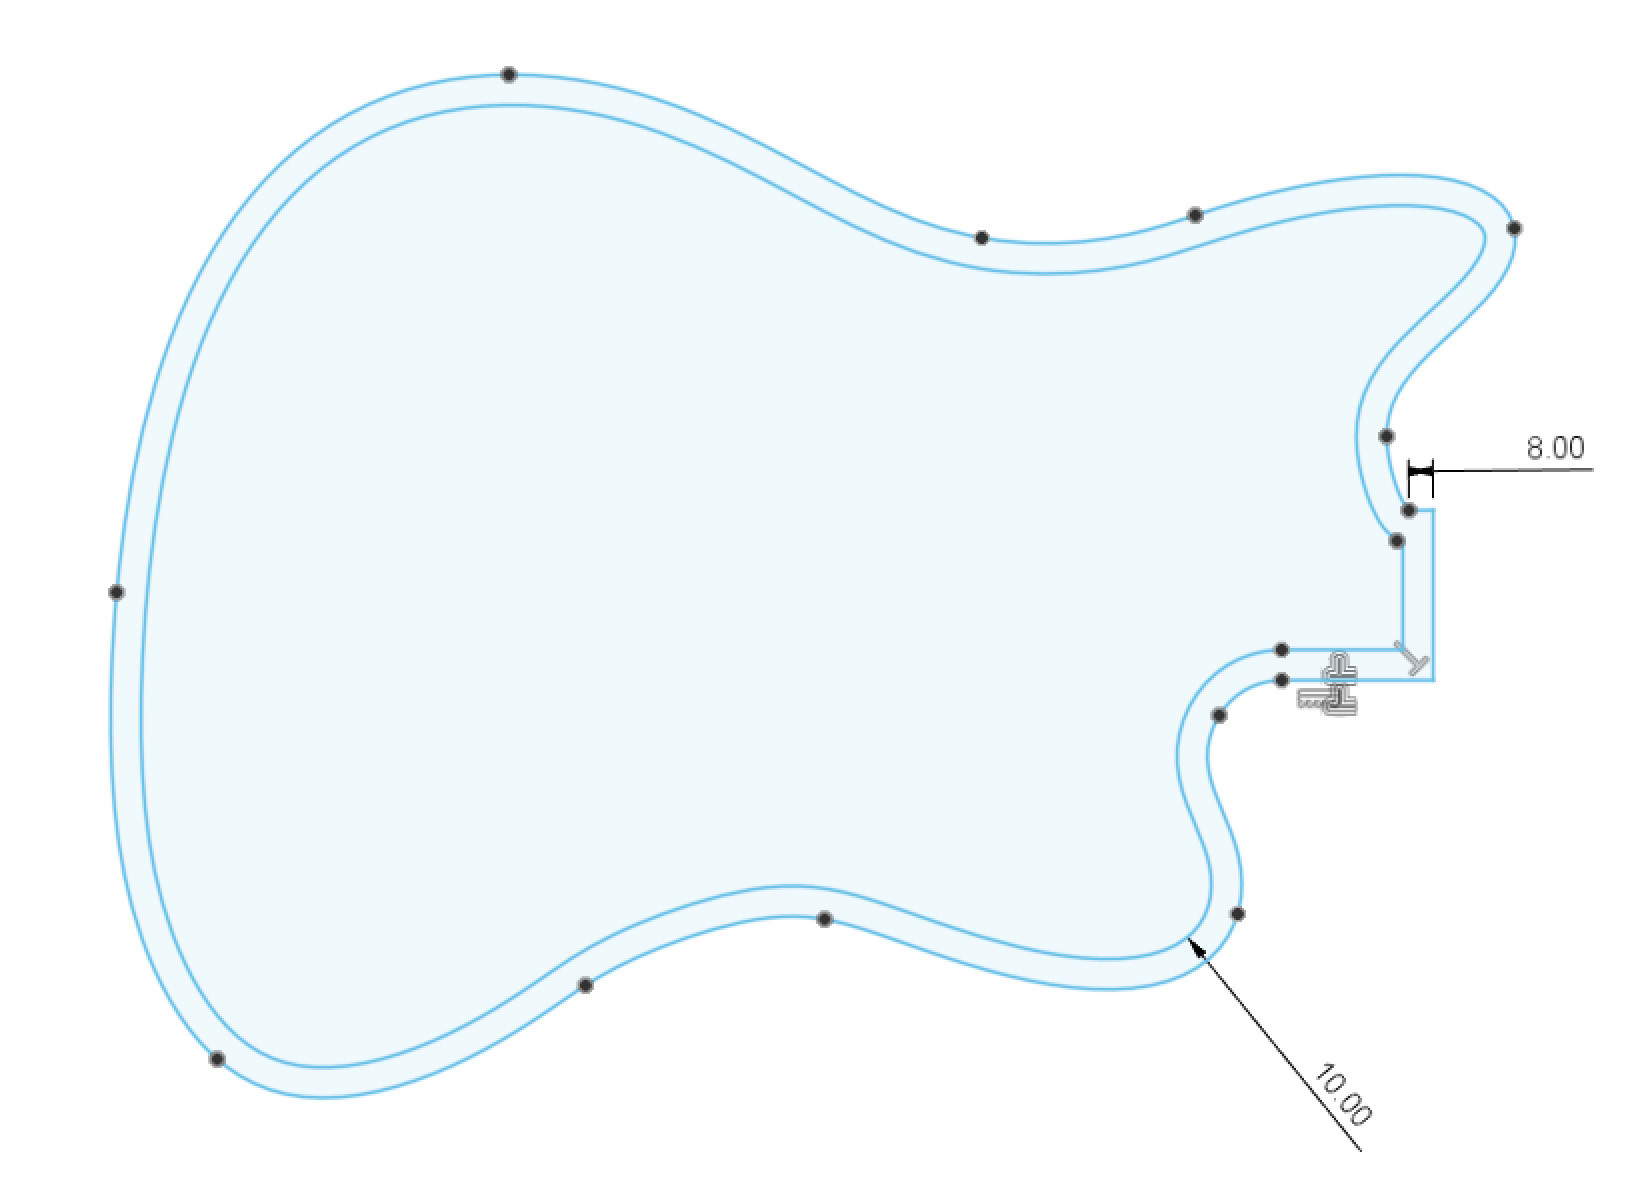
With the mounting points established, we could get creative with the shape. While using Telecaster hardware, we wanted a body shape with a modern twist. Drawing inspiration from Fender Jazzmaster and Mustang guitars, we used Fusion 360’s Spline tool to create a unique, yet familiar silhouette.
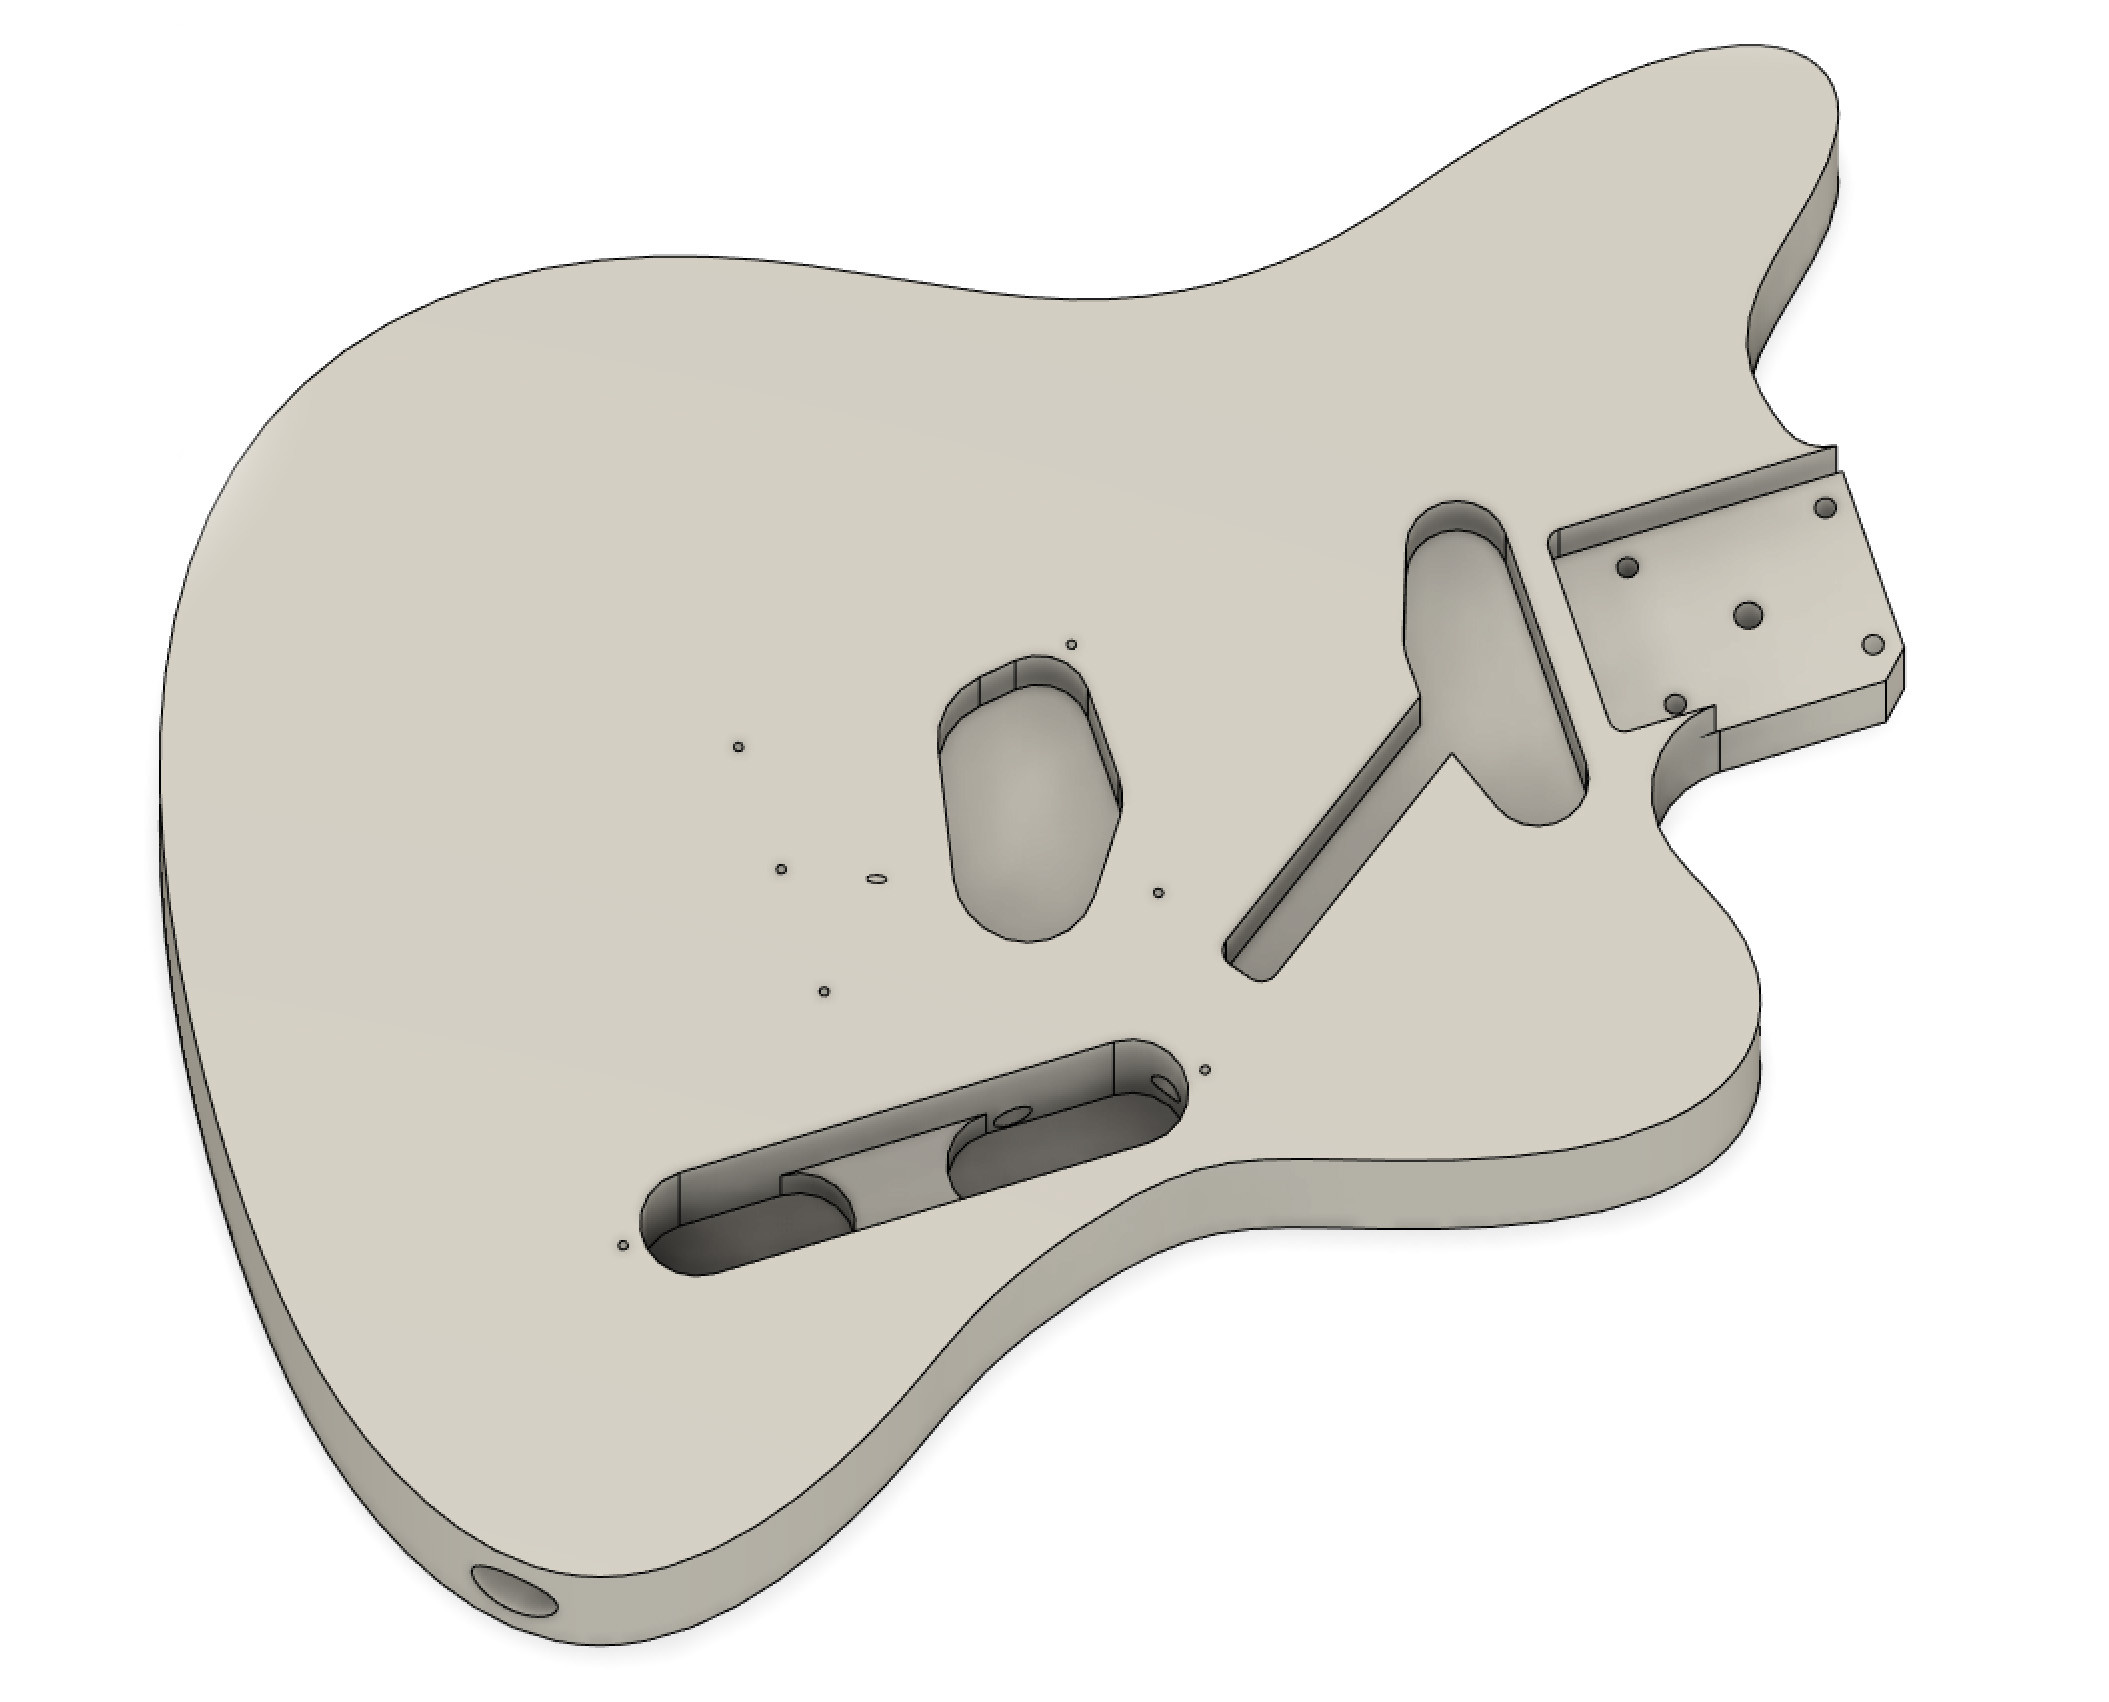
A standard guitar body thickness of 45mm was extruded from the sketch. Then, using the template, we cut out the necessary holes and cavities for the electronics. “Tunnels” were added to connect the cavities for wiring. The pickup slots could be slightly oversized as they would be covered by the bridge and pickguard. A larger hole on the bottom edge provided access for the control plate slot and output jack. The basic body model was complete!
Splitting the Body for 3D Printing and Adding Design Flair
The full body model was too large for most desktop 3D printers, including even the Prusa XL. Splitting it into printable sections was necessary. Beyond printability, we wanted to add a unique design element.
Remember the 50 kg of string tension? To maximize strength, we aimed to print the section between the neck and bridge as a single piece if possible. Luckily, this was achievable.
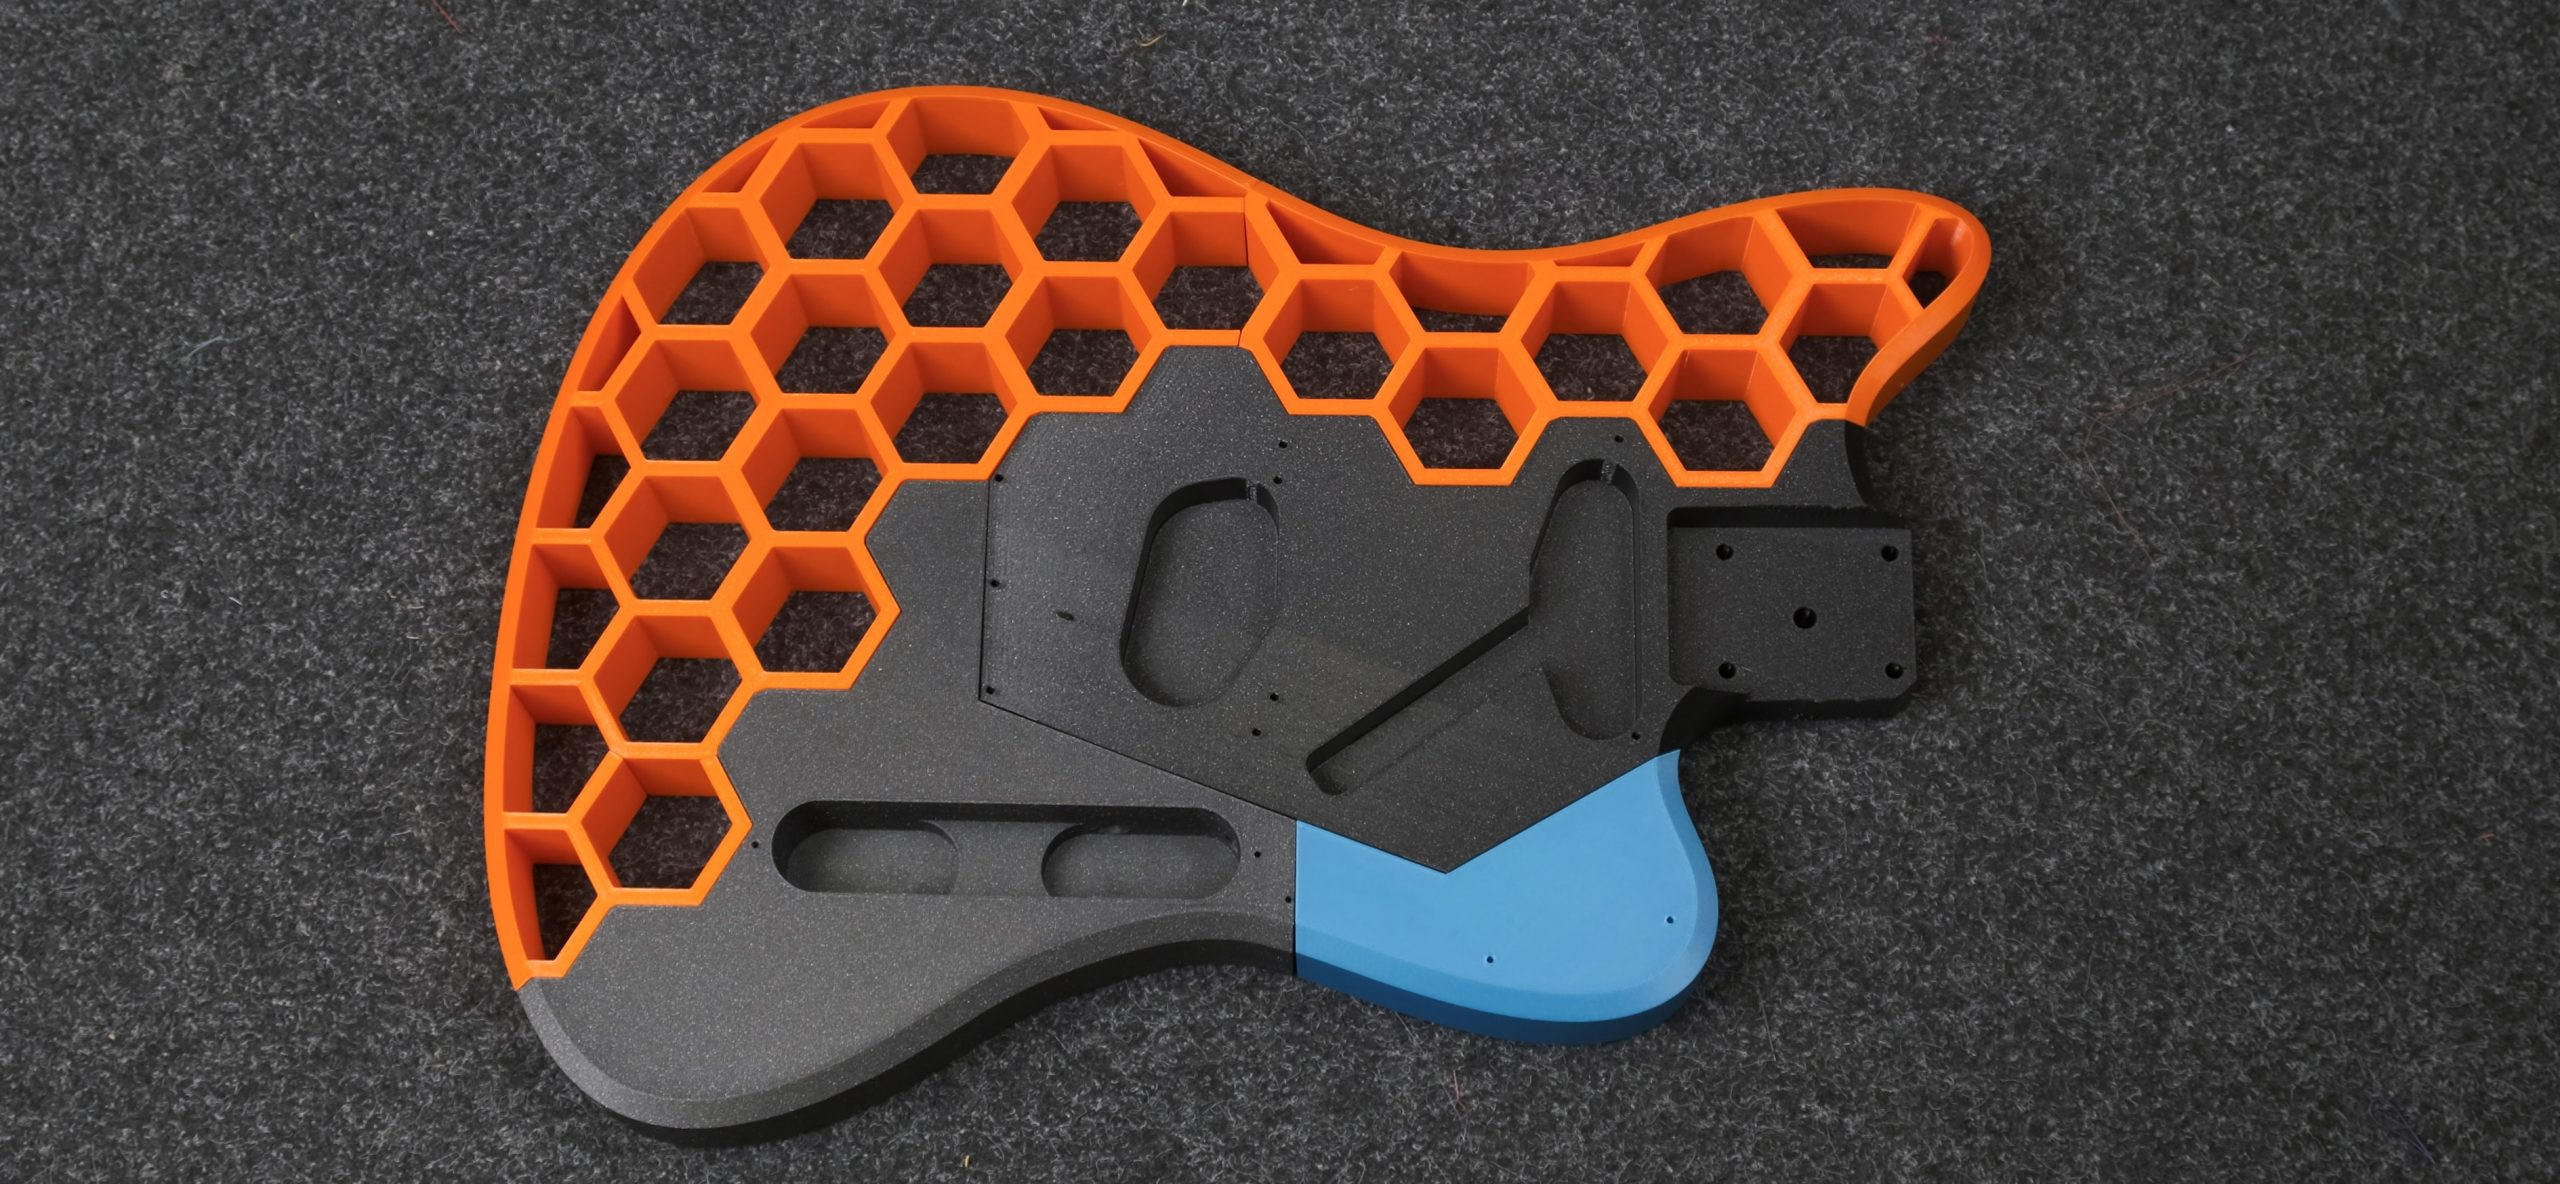
We experimented with cutouts and settled on a hexagonal pattern. Hexagons provided a visually interesting design and also created natural edges for splitting the model into parts. The seams would blend seamlessly into the design, appearing intentional. A large chamfer along the top edge added playing comfort.
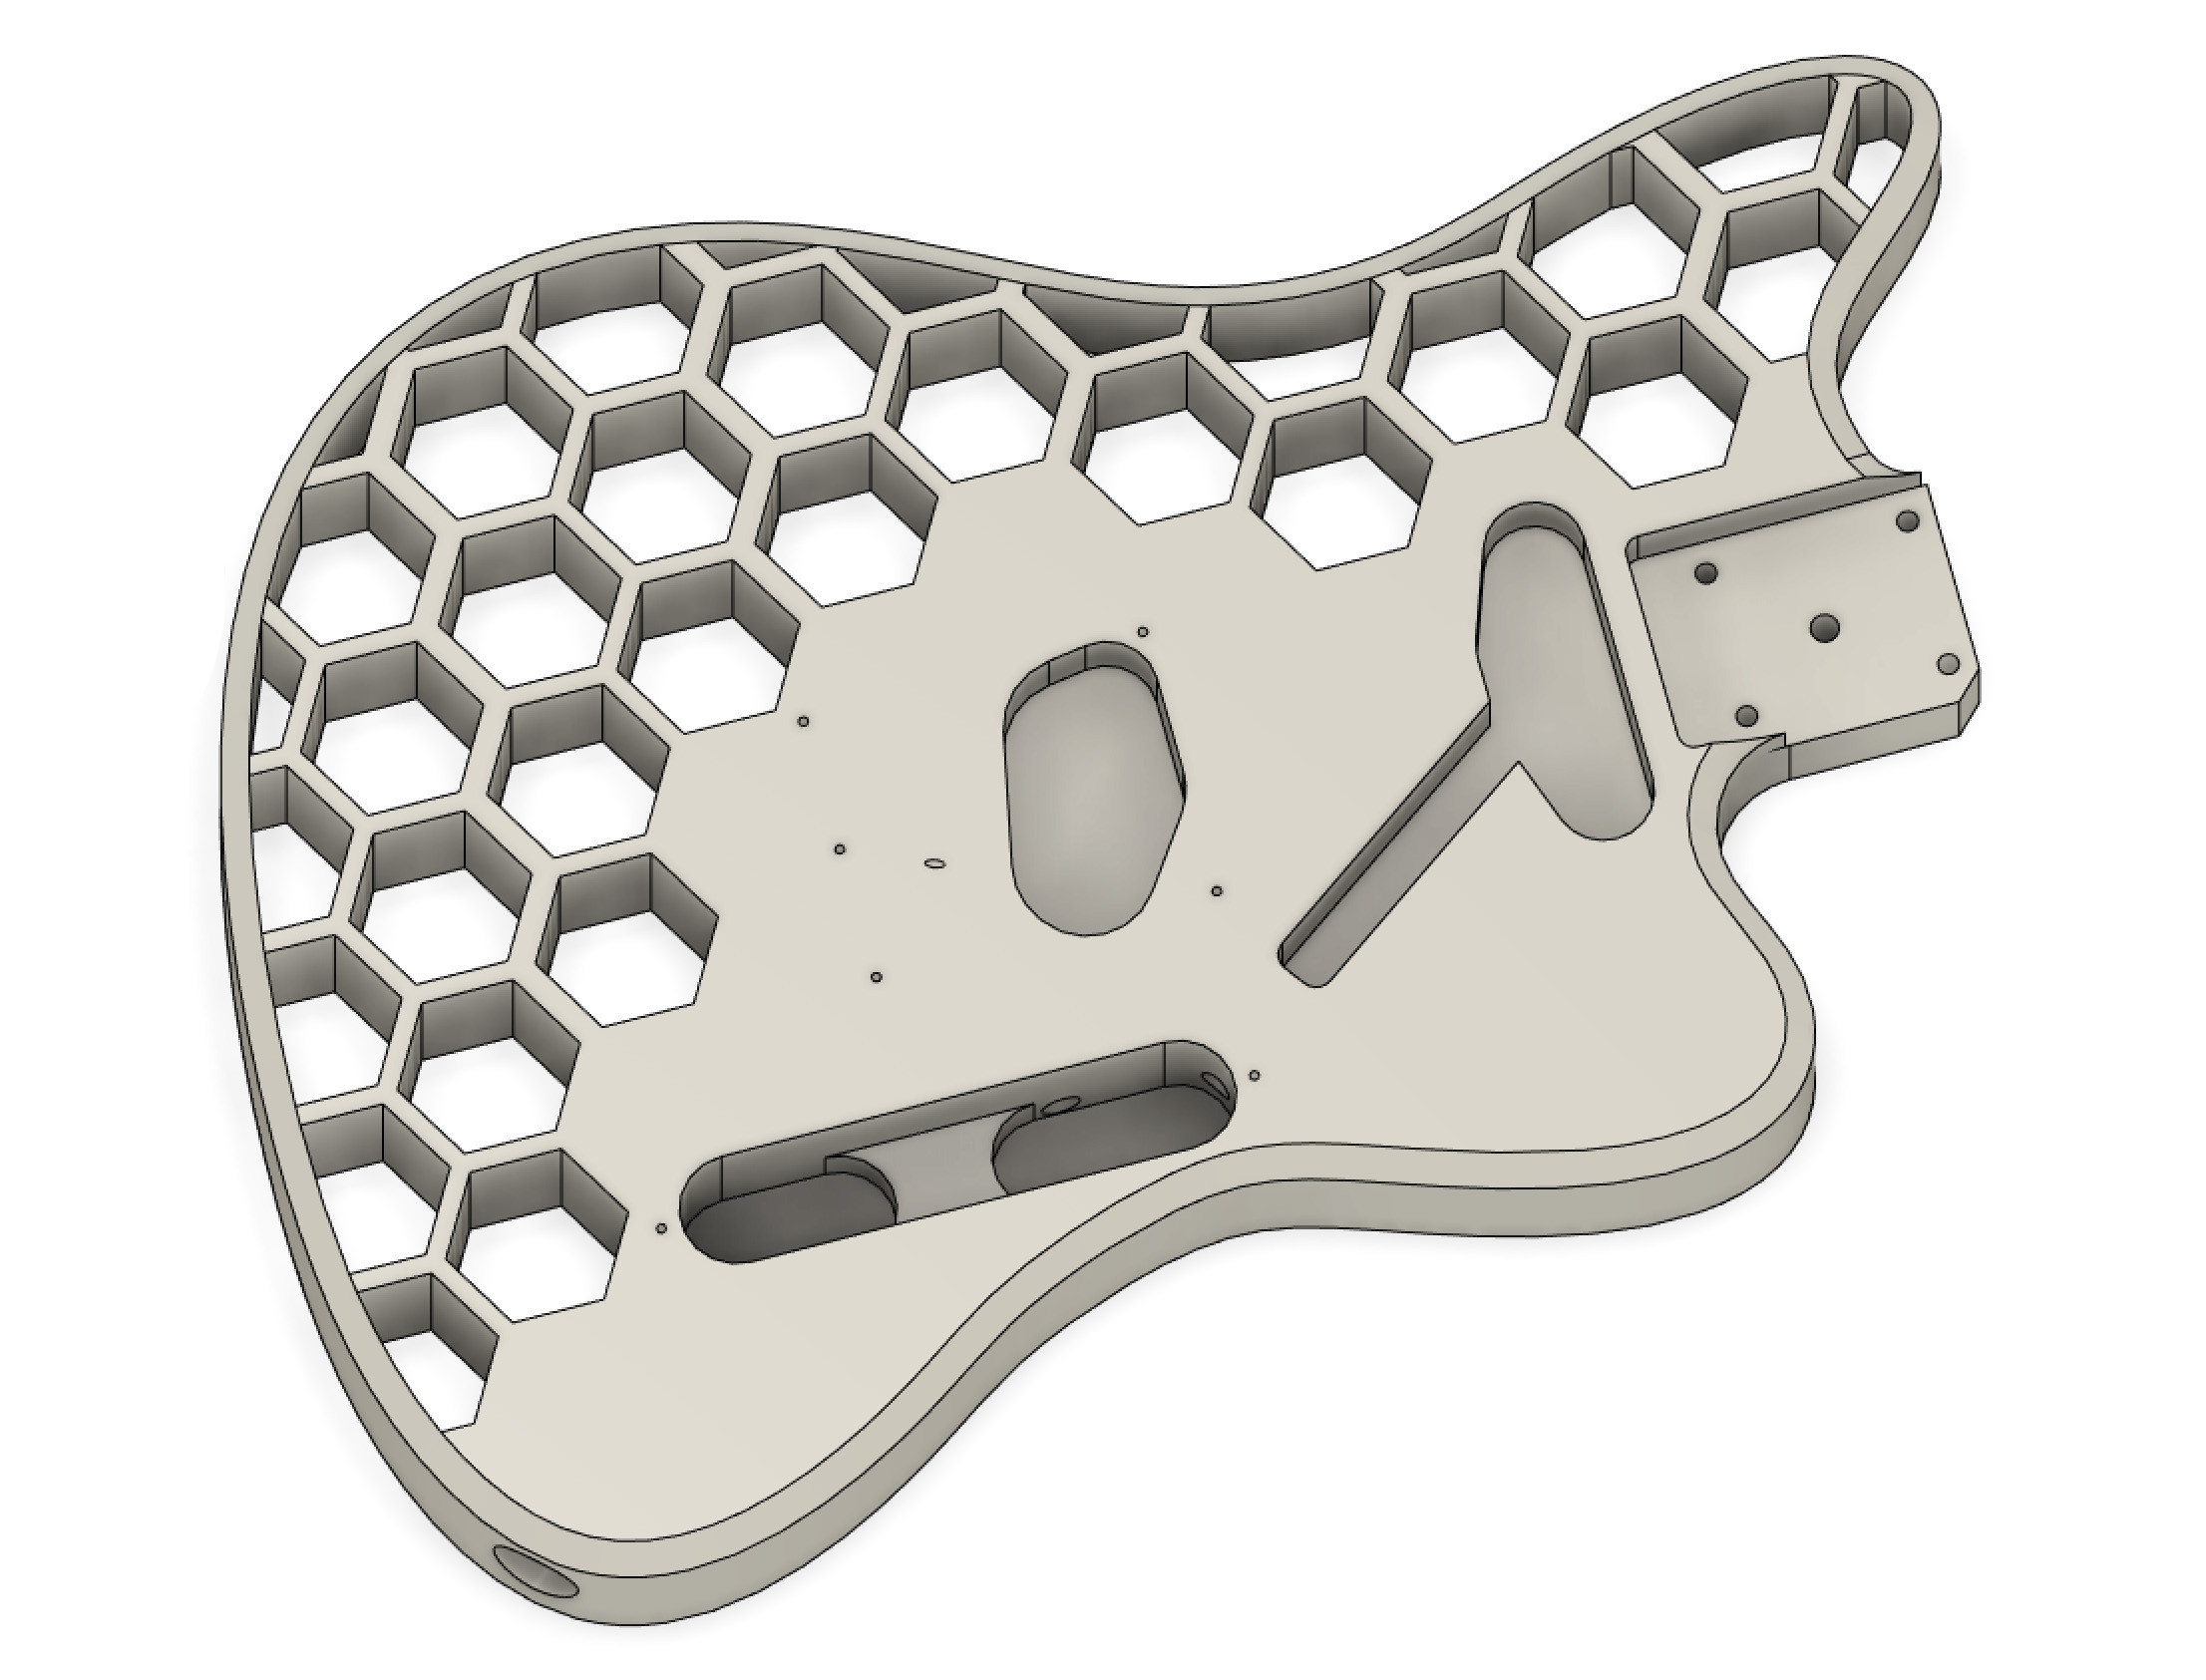
The top edge hexagon pattern and a cut beneath the bridge mounting holes defined the central piece. Clever orientation allowed this crucial piece to be printed diagonally on the MK3 build plate, even without supports (though organic supports were used for a smoother finish).
The remaining sections were split logically along the hexagon pattern to fit within the 25×21 cm print area. The bottom section was divided into two, and the top into three.
Finally, a pickguard was designed, serving as a mounting point for the neck pickup. Its shape followed the body contours, inset by 3mm.
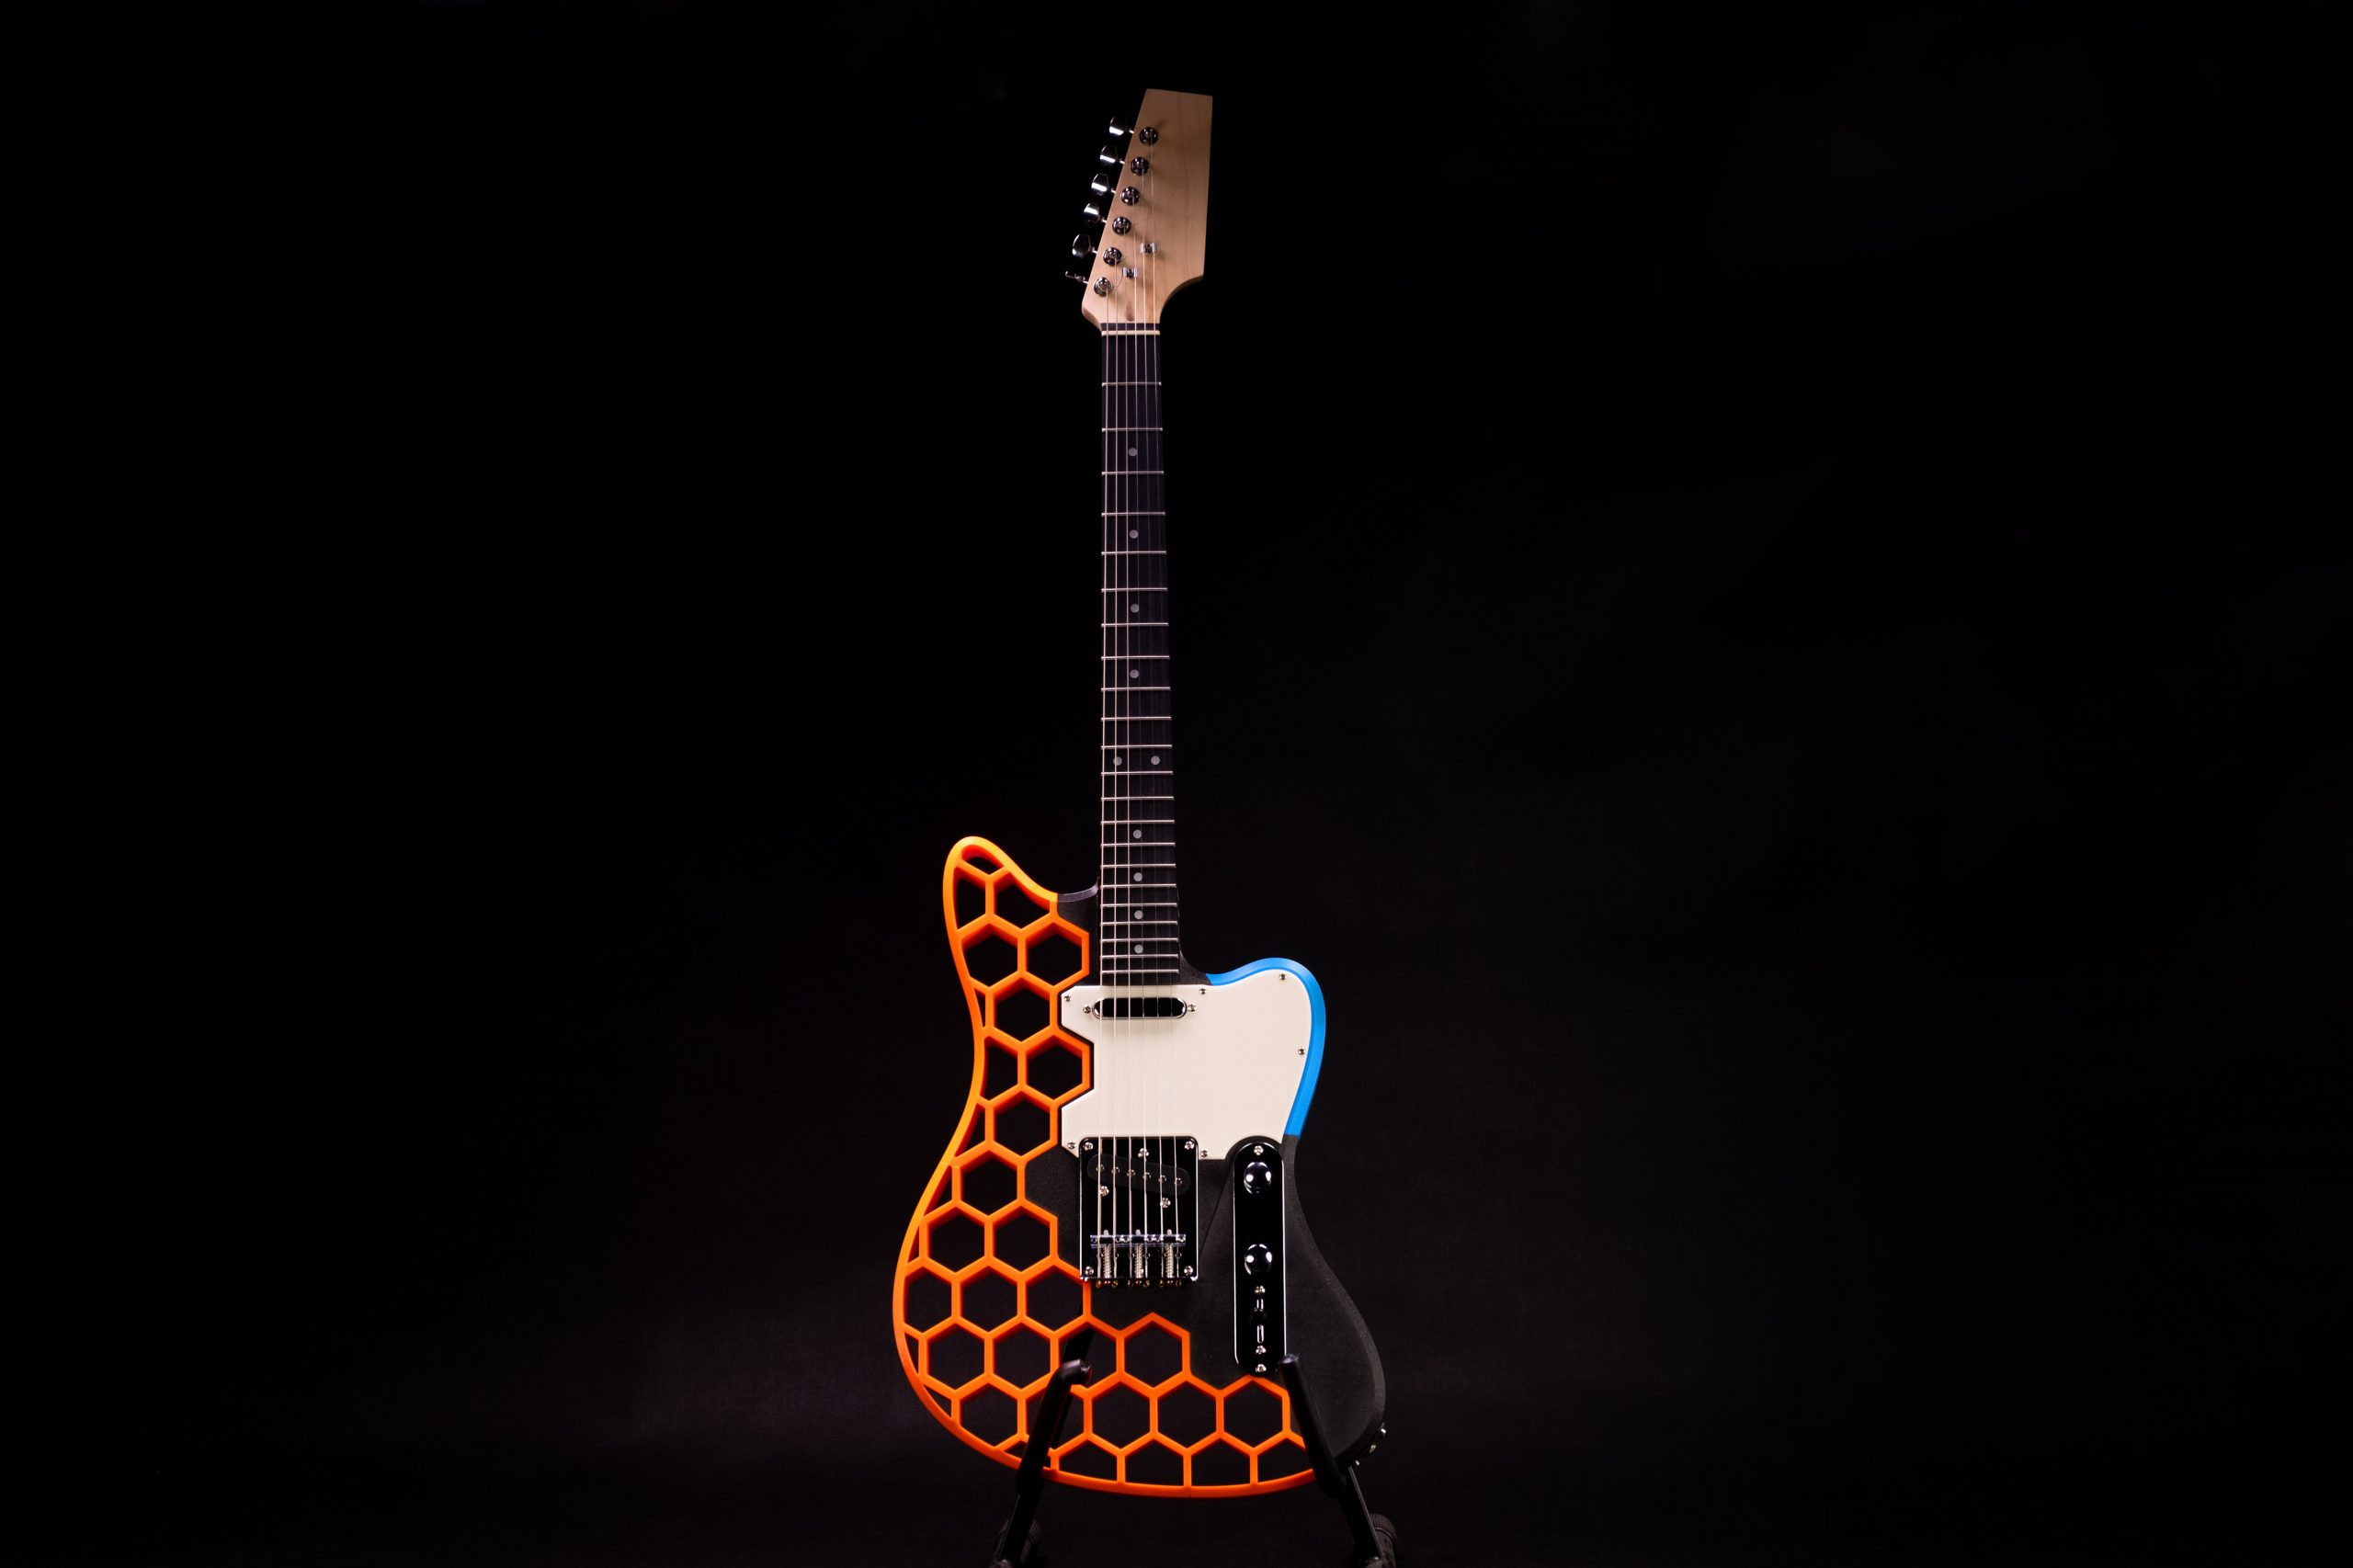
Splitting the body into sections offered an unexpected bonus: color customization. Using Prusa Research’s signature black and orange, with a touch of complementary teal, we created a visually striking, multi-colored guitar body.
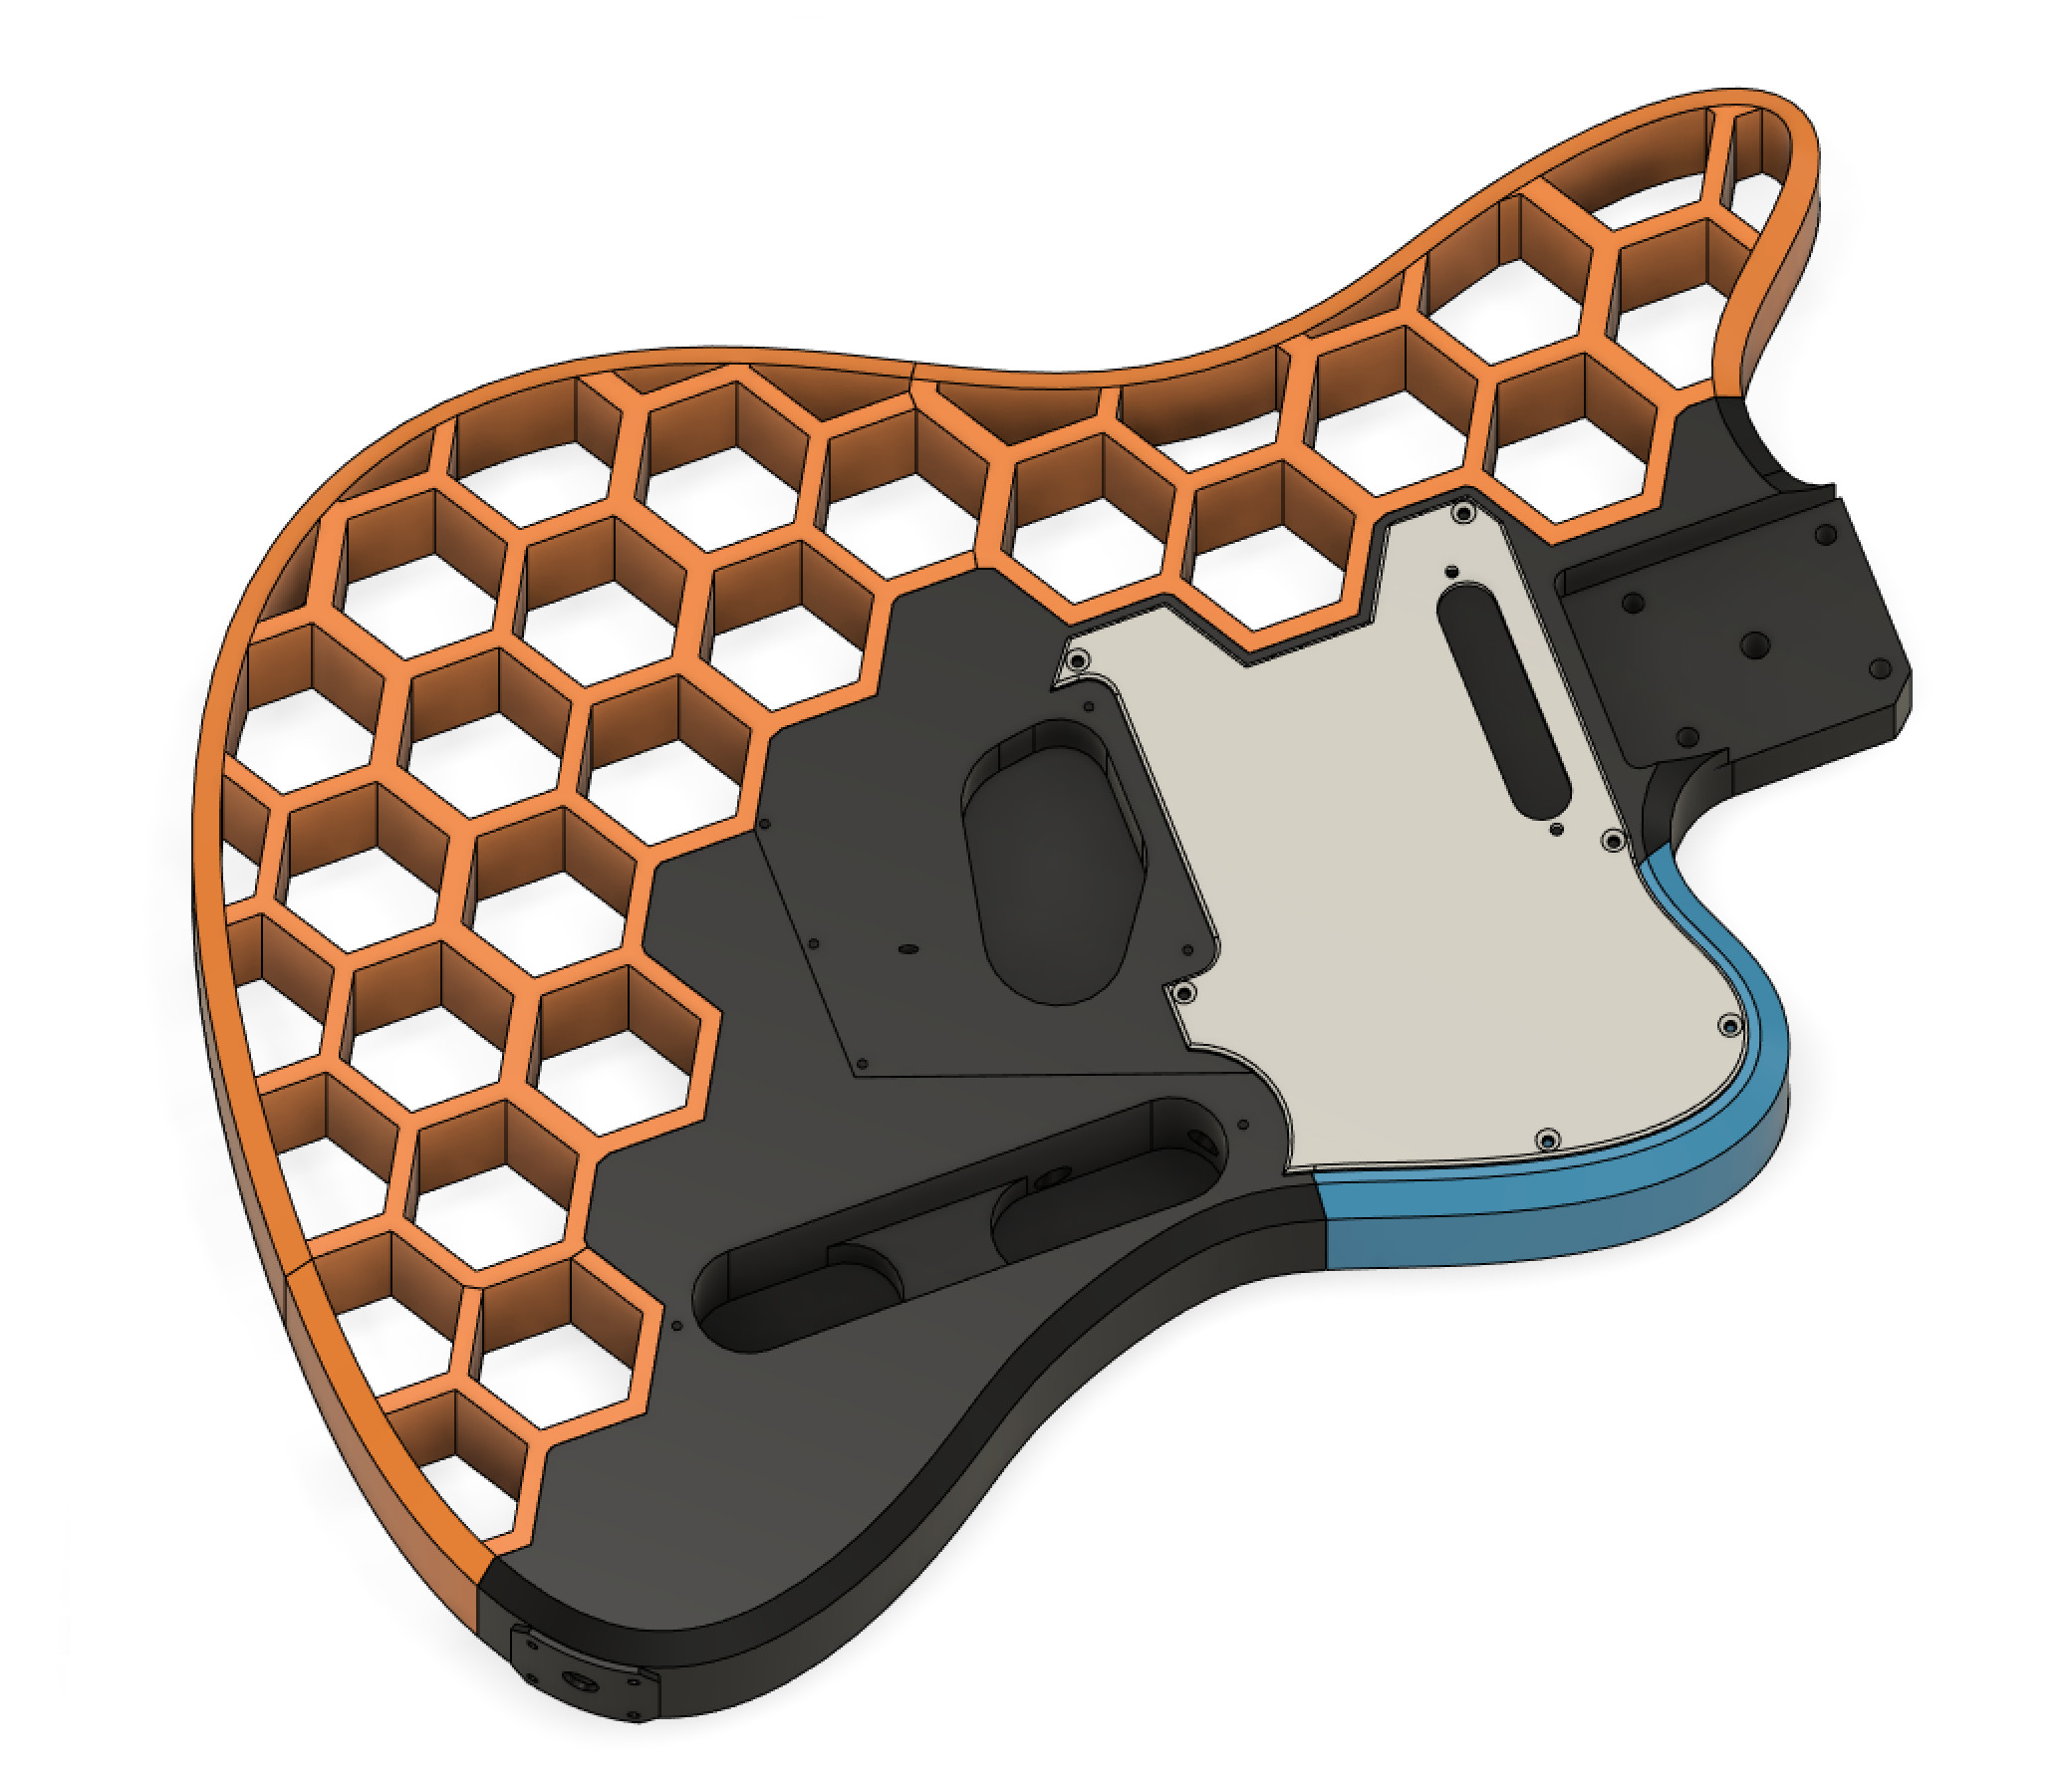
The “Prusacaster” model was complete, ready for printing and assembly using our guitar kit hardware!
Printing and Assembly: Bringing the Prusacaster to Life
Material Choice for the Center Piece: PLA for Stiffness
The center piece bears the brunt of the string tension. While PETG might seem like a stronger choice, we opted for PLA. PLA is surprisingly stiff (high bending modulus), crucial for resisting bending under load. It also aligns with the project’s goal of affordability and simplicity.
PLA’s main drawback is lower temperature resistance. While the hefty center piece can withstand sunlight for reasonable periods, leaving the guitar in a hot car could cause issues. For hotter climates or greater peace of mind, stiffer, temperature-resistant materials like Prusament PC Blend Carbon Fiber or PA11 Carbon Fiber are options, albeit more expensive and trickier to print. For Prague’s moderate climate, PLA proved sufficient and has held up perfectly for over a year.
To verify fit, a test print of the center piece was made using default PrusaSlicer settings. Everything fit perfectly. Attaching the neck, bridge, and strings to this minimalist body confirmed functionality – it played!
Addressing Material Creep: More Perimeters for Strength
Material creep, the slow deformation under constant stress, was a concern. And it proved valid. After a month under string tension, the initial center piece showed slight bending. This wasn’t surprising, as the default PrusaSlicer profile uses only 2 perimeters. Reprinting the center piece with 7 perimeters and 25% cubic infill completely resolved the issue.
String Gauge: Reducing Stress
Guitar strings come in various gauges (thicknesses). Lighter strings are easier to play but produce less volume and are more prone to breaking. Heavier strings offer more volume and sustain but require more finger pressure and, importantly, exert more tension on the neck! Using lighter gauge strings, like 9s, reduces stress on the 3D-printed body, especially the center piece.
Printing the Remaining Parts: PETG and PLA for Aesthetics
The remaining body parts experience minimal stress. Material choice here is primarily aesthetic. We printed the top hexagon sections in Prusament PETG Prusa Orange and the bottom sections in Prusament PLA Galaxy Black and Azure Blue, using default profiles.
Assembly: Super Glue and Optional Screws
The body sections have large contact areas with the center piece. Super glue securely joins the parts. While M3 screw holes are included in the hexagon sections for added strength (especially for strap button mounting), their use is optional due to accessibility.
Wiring the Electronics: Guitar Kit Simplicity
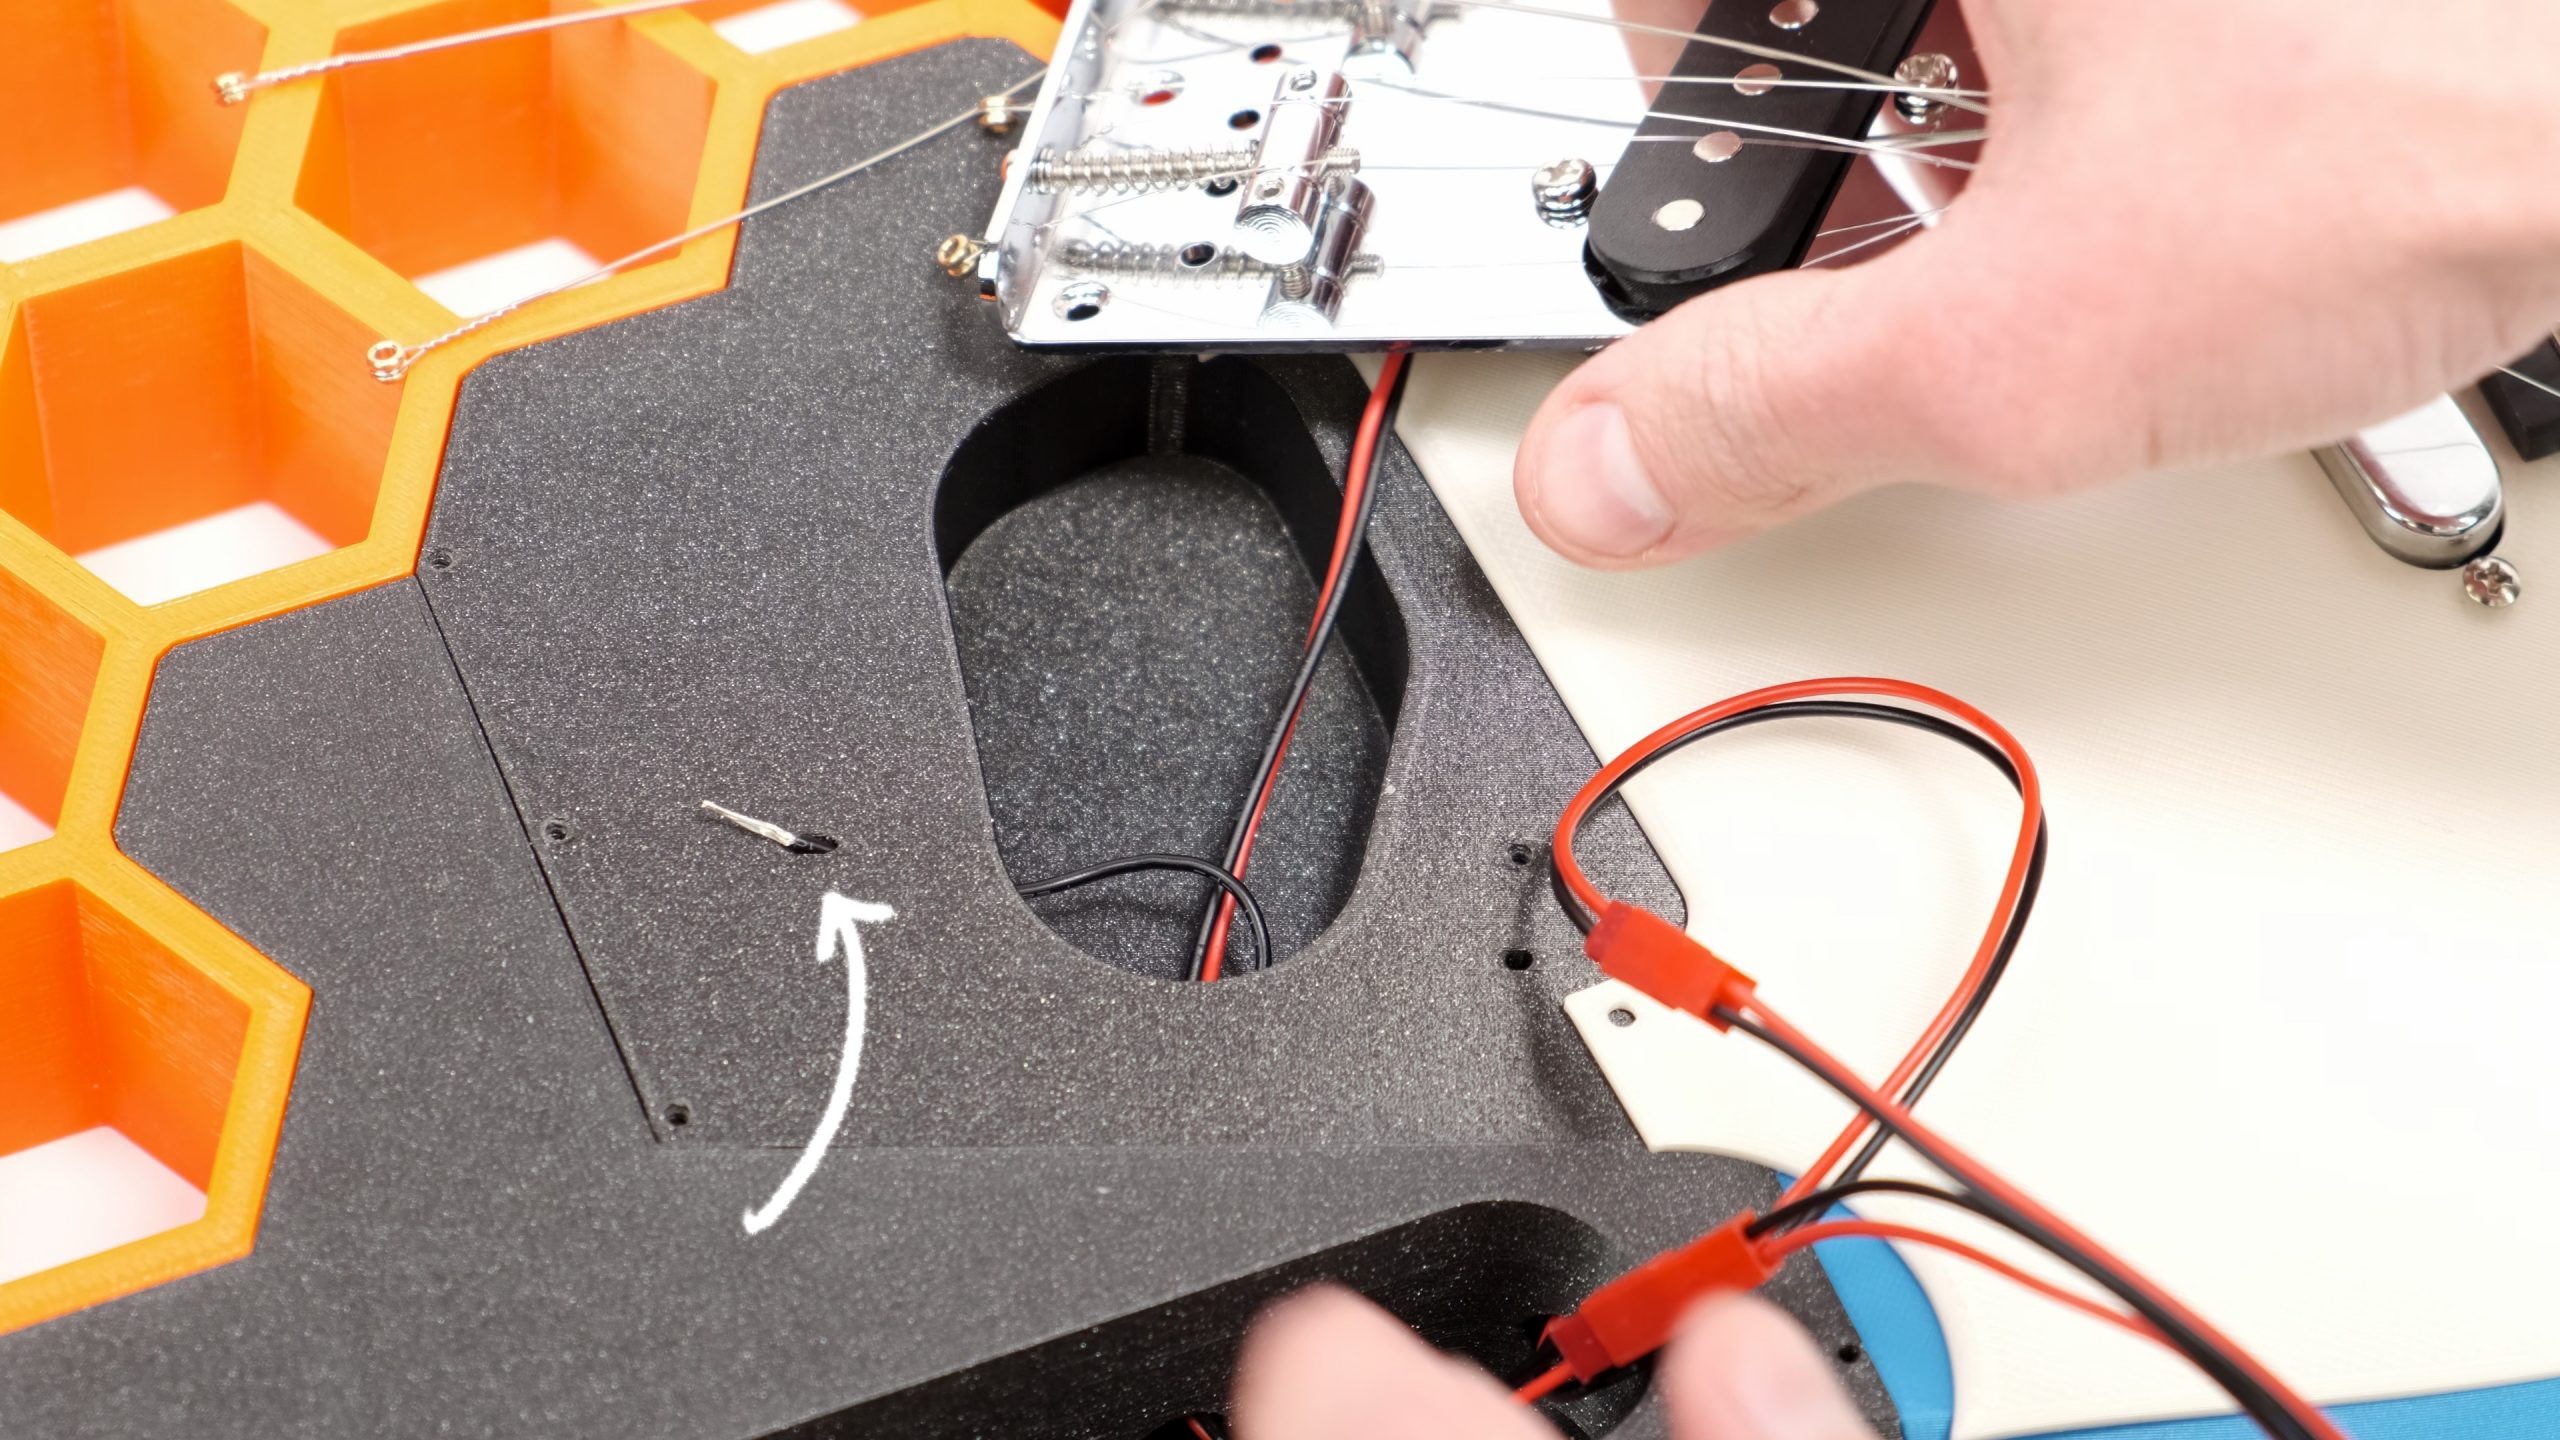
The Harley Benton guitar kit simplifies electronics with pre-wired JST connectors. Simply snap the connectors together, ensuring the top pickup cables connect to the corresponding selector switch wires to avoid reversed switch operation.
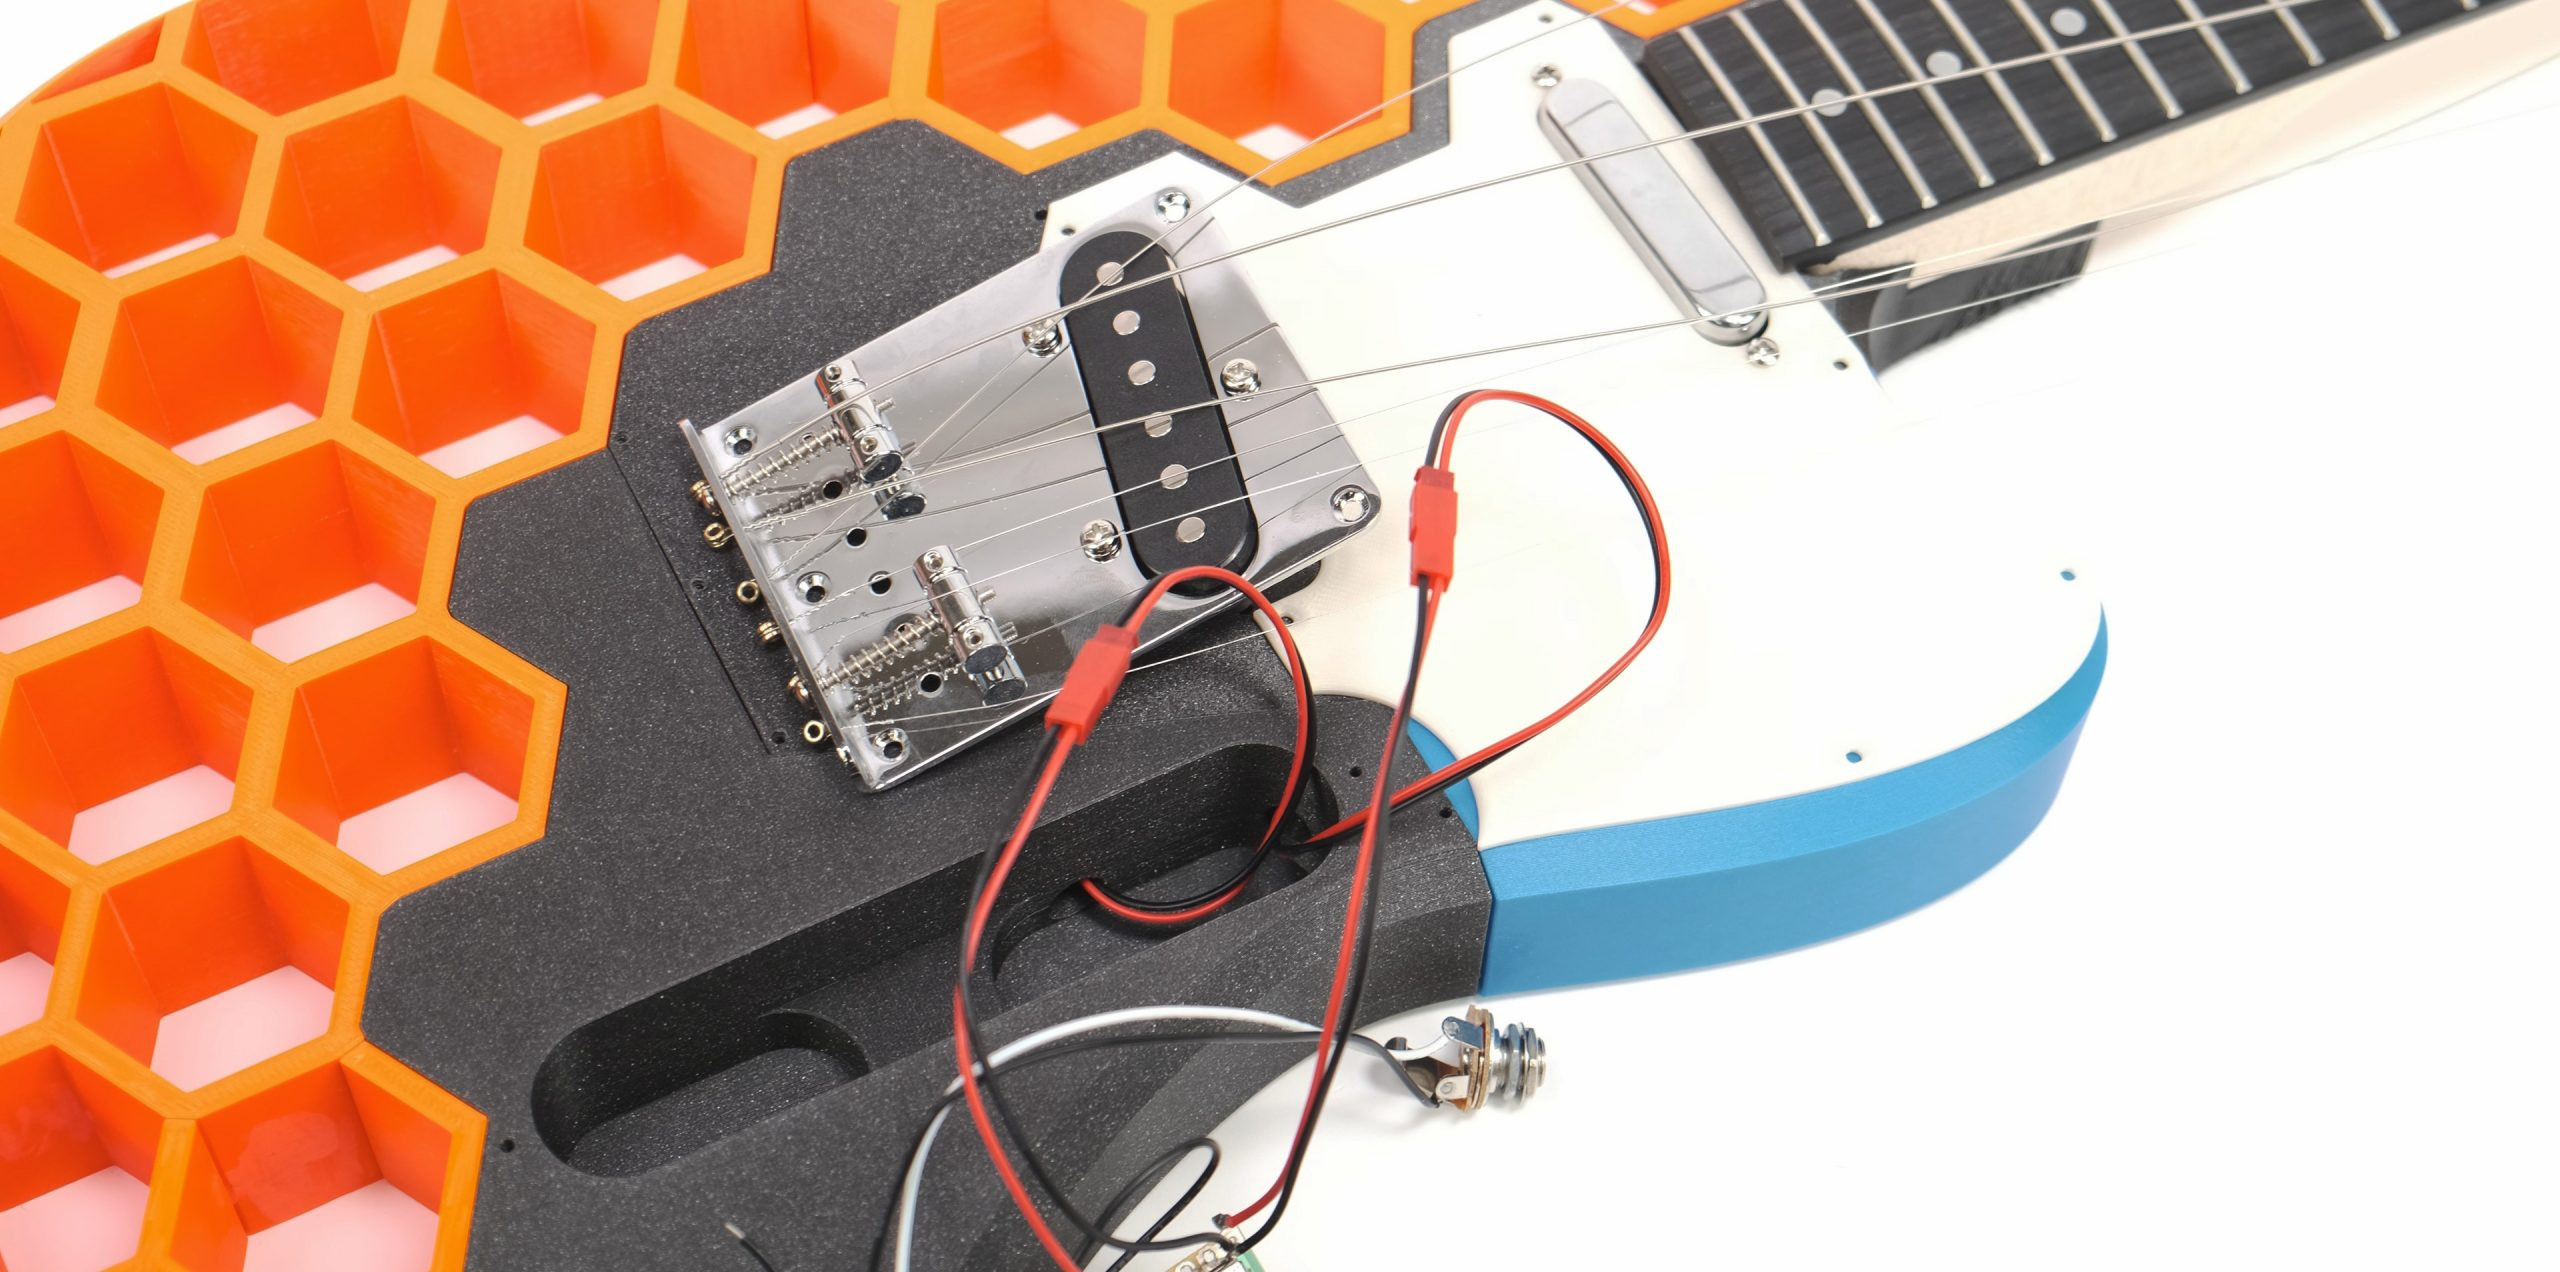
A single black wire in the kit grounds the strings, reducing buzz. Route this wire through the channel under the bridge, strip some insulation, and secure it by tightening the bridge screws. Grounding is crucial for minimizing unwanted noise, even on professional guitars.
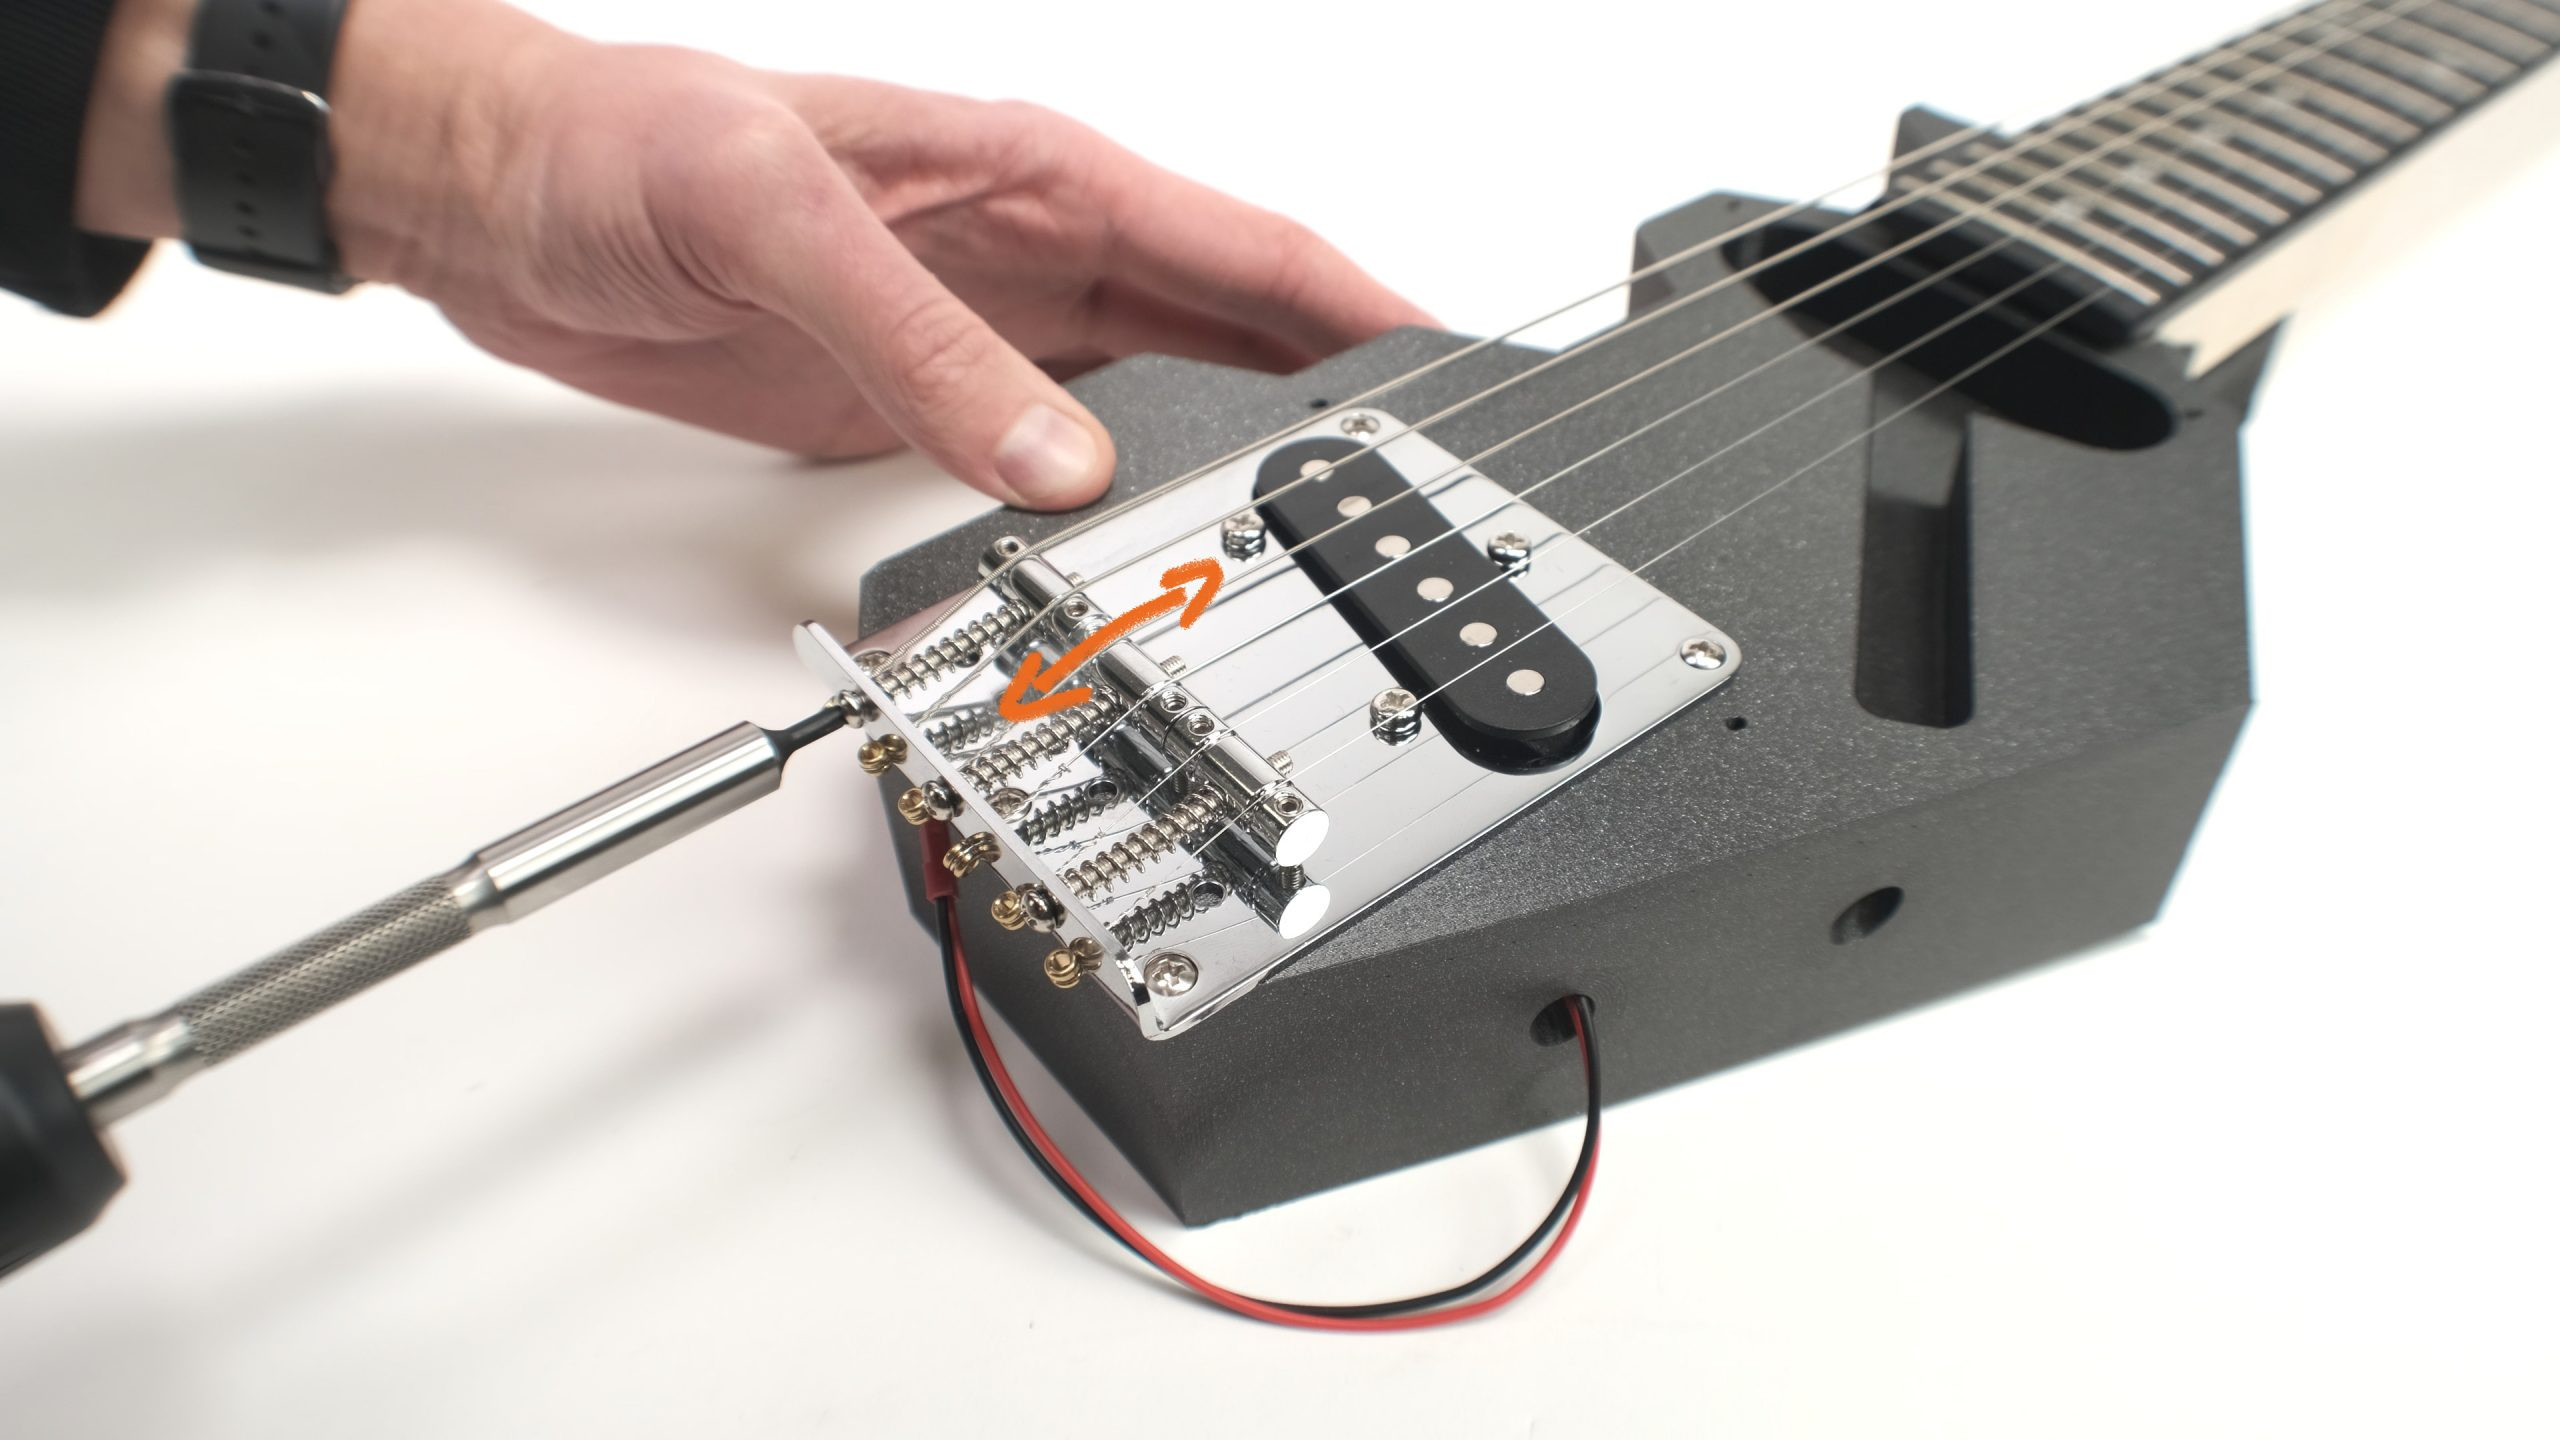
Final Adjustment: Setting Intonation
With the guitar assembled and strung using components from your guitar kit, tuning and intonation are the final steps. Intonation ensures the guitar plays in tune across the entire fretboard. After tuning, compare the open string note to the note at the 12th fret. If the 12th fret note is out of tune, adjust the bridge saddles. Telecaster bridges offer easy saddle adjustment. If the fretted note is flat, move the saddle towards the neck. If sharp, loosen the string slightly and move the saddle towards the bridge. Telecaster saddles often serve two strings, so find a compromise for both.
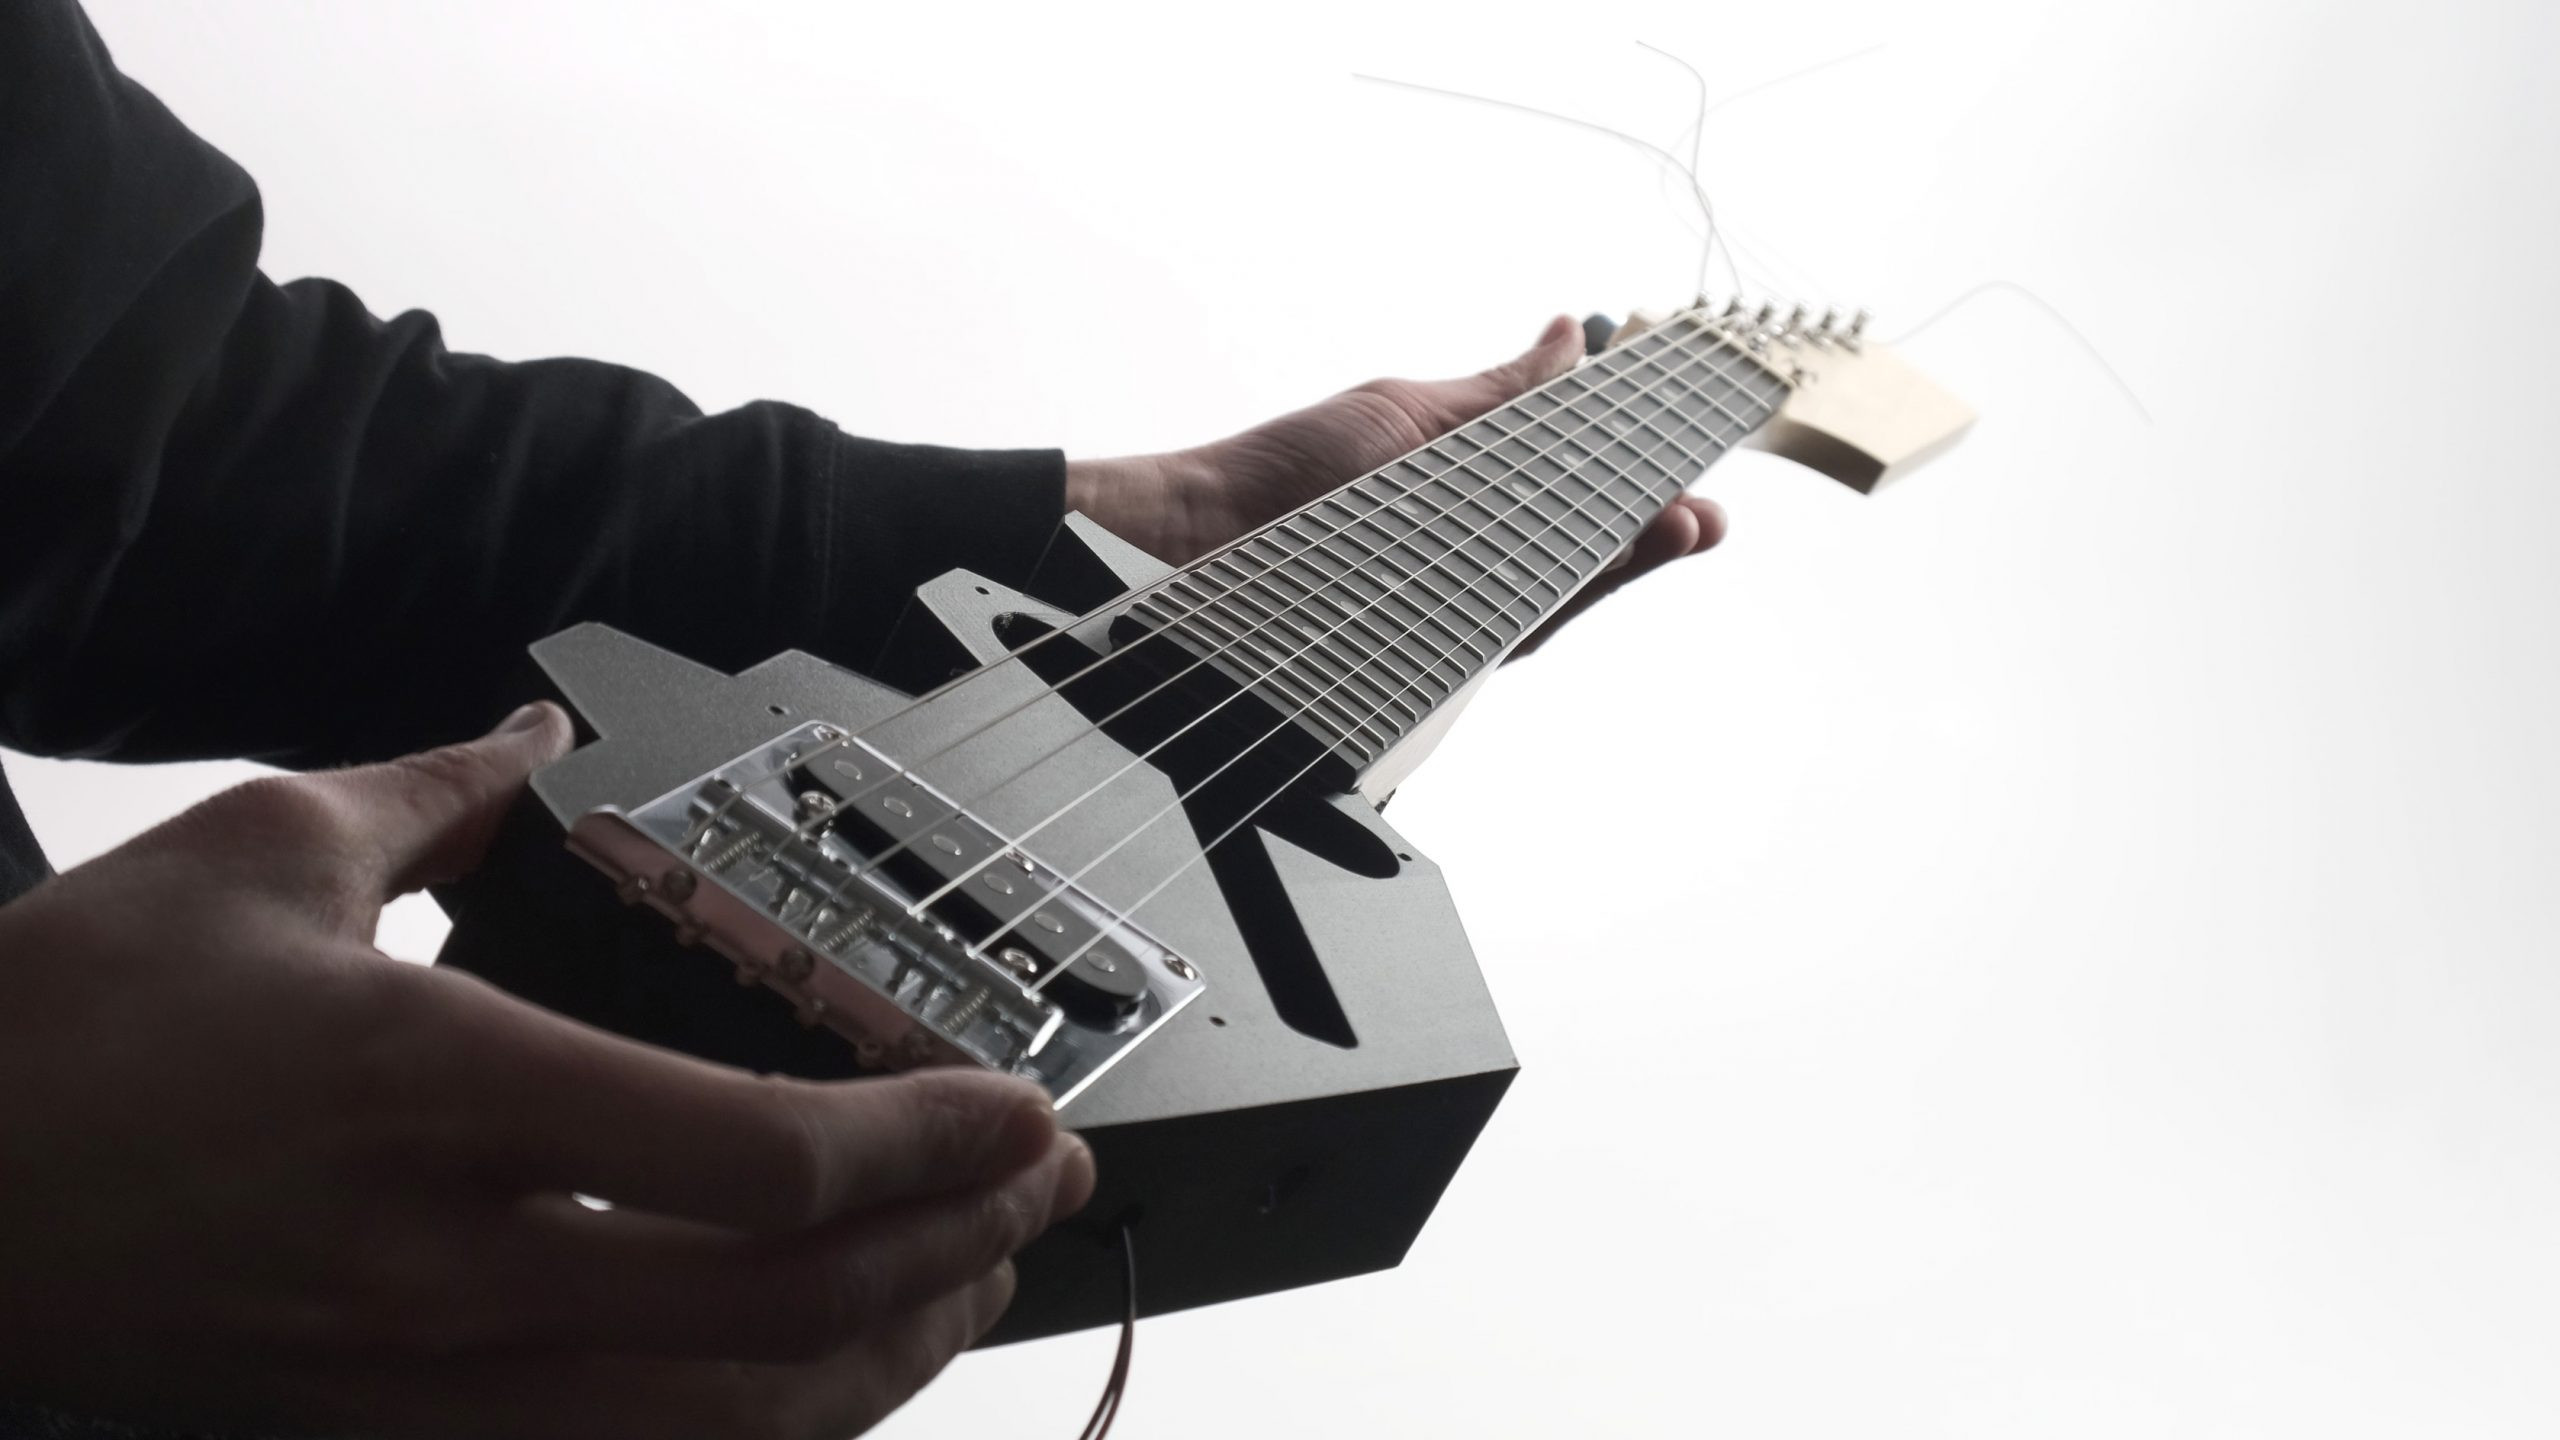
The Fully Assembled Prusacaster: Ready to Rock
How Does it Play? Surprisingly Well!
The Prusacaster plays remarkably well. Blindfolded, you might not guess it’s 3D-printed. Tuning stability and intonation are excellent. While it won’t outperform a boutique Telecaster due to the budget guitar kit components, the result is fantastic for the price and effort.
Download, Print, and Build Your Own Guitar Kit Masterpiece!
We’re thrilled with the Prusacaster. If you’re ready to build your own, download the 3D model from Printables.com! We’ve included STEP files and a DXF drawing of hole positions for customization.
Download the model from Printables.com
It’s a free download – dive in and experience the satisfaction of building your own 3D-printed guitar using a readily available guitar kit! We hope you enjoy the Prusacaster build as much as we did.