
Bring the vibrant music of Disney Pixar’s Coco to life with this easy and fun DIY Coco guitar tutorial! Perfect for completing a Miguel costume, adding a unique touch to your Coco fan collection, or simply enjoying a creative crafting project. This inexpensive guide will walk you through creating your own replica of Miguel’s iconic guitar, ensuring you’re ready to “Remember Me” in style.
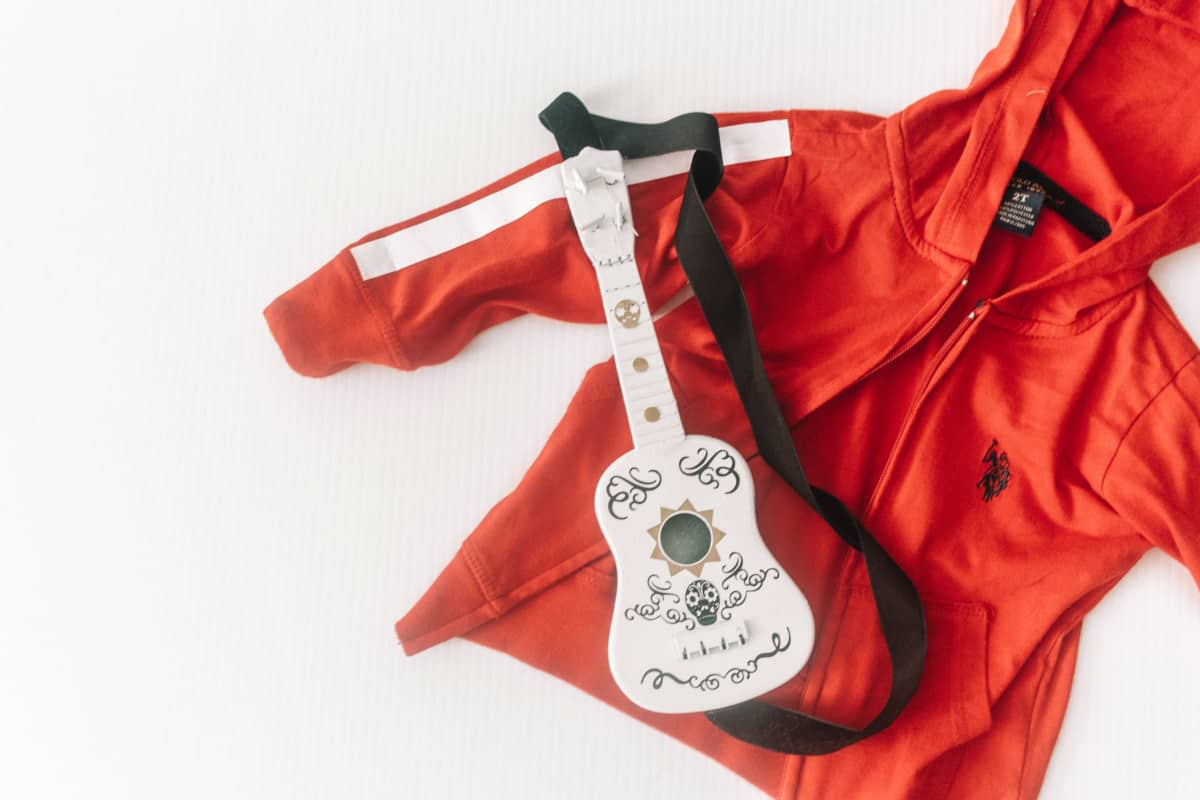 Close-up of the finished DIY Coco guitar, showcasing the detailed vinyl decals against the white spray-painted background.
Materials You’ll Need to Craft Your Coco Guitar
To embark on this musical DIY journey, gather these readily available materials:
- Toy Guitar: A budget-friendly plastic toy guitar or ukulele from a dollar store or online retailer will serve as the perfect base.
- White Spray Paint: Choose a white spray paint suitable for plastic to give your guitar a clean canvas.
- Black Vinyl & Gold Vinyl: These will be cut into intricate designs to mimic the decorations on Miguel’s guitar.
- Velvet Ribbon or Cord: For creating a comfortable guitar strap, allowing for easy carrying.
Essential Tools for Your DIY Project
Equip yourself with these tools to ensure a smooth crafting experience:
- Cricut Cutting Machine (or similar): While optional, a Cricut or other vinyl cutting machine will precisely cut the detailed vinyl designs. Scissors or craft knives can be used for hand-cutting for those without a cutting machine, though it will require more patience and precision.
- Cricut BrightPad (or light source): A BrightPad or lightbox is incredibly helpful for weeding intricate vinyl designs, especially black vinyl.
- Weeding Tools: Essential for removing excess vinyl from your cut designs.
- Scotch Tape or Transfer Tape: For transferring the delicate vinyl decals onto the painted guitar surface.
- Hot Glue Gun: To securely attach the ribbon strap to the guitar.
- Scissors or Craft Knife: For trimming vinyl and ribbon.
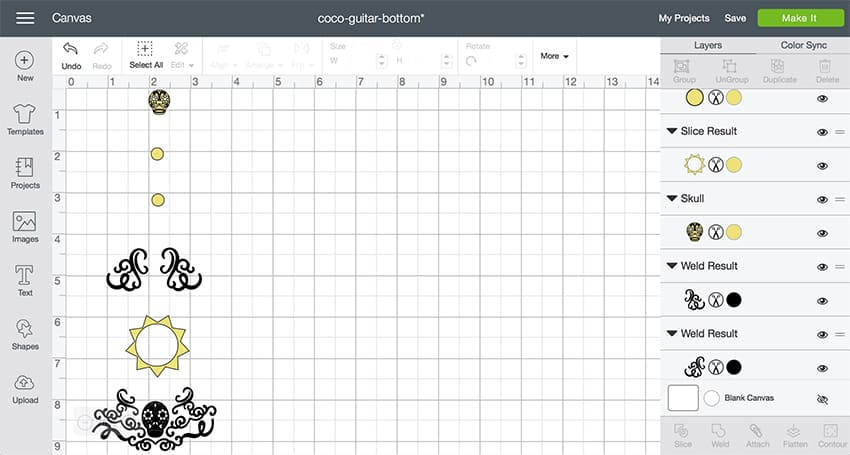 Overhead shot of the Cricut Design Space file on a computer screen, displaying the Coco guitar vinyl cutout design ready for resizing and cutting.
Step-by-Step Guide: Creating Your Coco Guitar
Let’s dive into the fun part – assembling your Coco guitar! Follow these detailed instructions to bring Miguel’s musical instrument to life:
1. Preparing Your Toy Guitar with White Spray Paint
Begin by preparing your toy guitar for its transformation. If your toy guitar has strings, you may find it easier to remove them temporarily for painting, as demonstrated in the original DIY. This allows for more even paint coverage.
In a well-ventilated area, apply light, even coats of white spray paint to the entire guitar. Multiple thin coats are better than one thick coat to prevent drips and ensure a smooth, streak-free finish. Allow each coat to dry completely before applying the next. This may take a few hours depending on the paint and environmental conditions.
 Close-up of the toy guitar being spray-painted white, showing the initial coat covering the original color of the toy.
2. Cutting and Weeding Your Vinyl Decals
Utilize the provided Cricut Design Space file: Coco Guitar Bottom Vinyl Cutout to cut your black and gold vinyl decals.
- Resizing: Adjust the design size within Cricut Design Space to perfectly fit your specific toy guitar. Measure the guitar’s surface to ensure accurate sizing before cutting.
- Cutting: Load your black and gold vinyl into your Cricut machine and send the design to cut. For those hand-cutting, carefully trace and cut out the designs from templates (which can be found online by searching “Coco guitar template”).
- Weeding: This is where the BrightPad or a well-lit area becomes invaluable. Carefully remove the excess vinyl from around the intricate designs, leaving only the desired guitar decorations on the backing sheet. The BrightPad illuminates the cut lines, making weeding, especially with black vinyl, significantly easier and more precise.
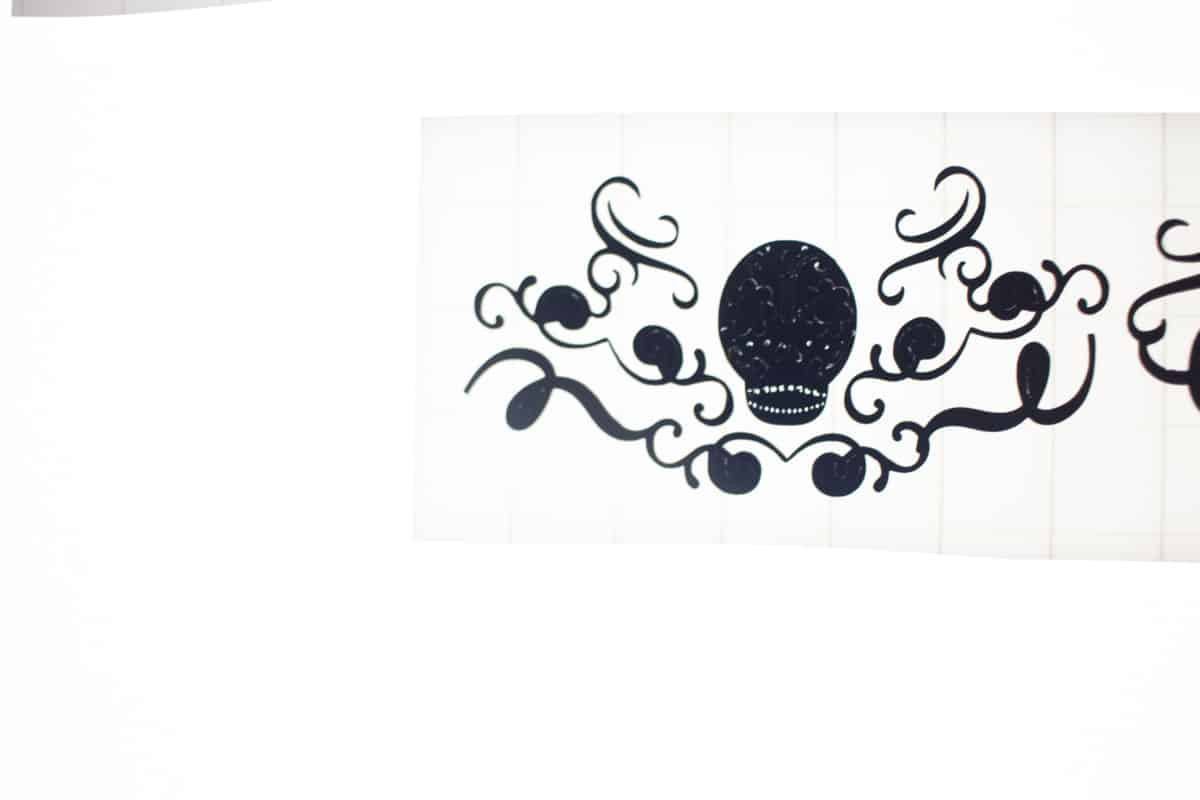 Detailed shot of the black vinyl decal being weeded on a BrightPad, showcasing the intricate design and the illuminated cut lines.
3. Applying the Vinyl Decals to Your Guitar
Once the white paint is completely dry and your vinyl decals are weeded, it’s time to apply them to the guitar.
- Transferring: Due to the delicate nature of the paint and the intricate vinyl design, using a less sticky transfer method like scotch tape (as suggested in the original tutorial) is recommended. Gently apply scotch tape over the weeded vinyl decal, ensuring it adheres to the vinyl. Carefully peel the decal away from its backing paper, with the design now sticking to the tape.
- Placement: Position the vinyl decals onto the white-painted guitar. Refer to images of Miguel’s guitar for accurate placement. Depending on your toy guitar’s shape, you might need to slightly adjust the decal placement or even cut and rearrange sections of the design to fit smoothly, as mentioned in the original DIY.
- Adhering: Once positioned, gently rub over the tape to ensure the vinyl decal adheres firmly to the painted guitar surface. Carefully peel away the scotch tape, leaving the vinyl design in place. Repeat this process for all vinyl decals, alternating between black and gold pieces to recreate the vibrant Coco guitar aesthetic.
4. Adding an Optional Guitar Strap
To make the Coco guitar more playable and costume-ready, add a ribbon strap.
- Attaching the Ribbon: Cut a length of velvet ribbon or cord suitable for a guitar strap. Use a hot glue gun to securely attach the ribbon to the guitar. Glue one end to the top of the guitar neck and the other end to the lower body of the guitar, as pictured in the original tutorial. Ensure the glue is fully dried and cooled before use. While hot glue provides a temporary hold suitable for costumes, stronger adhesives or drilling small holes to thread the ribbon through could be considered for a more permanent solution if desired.
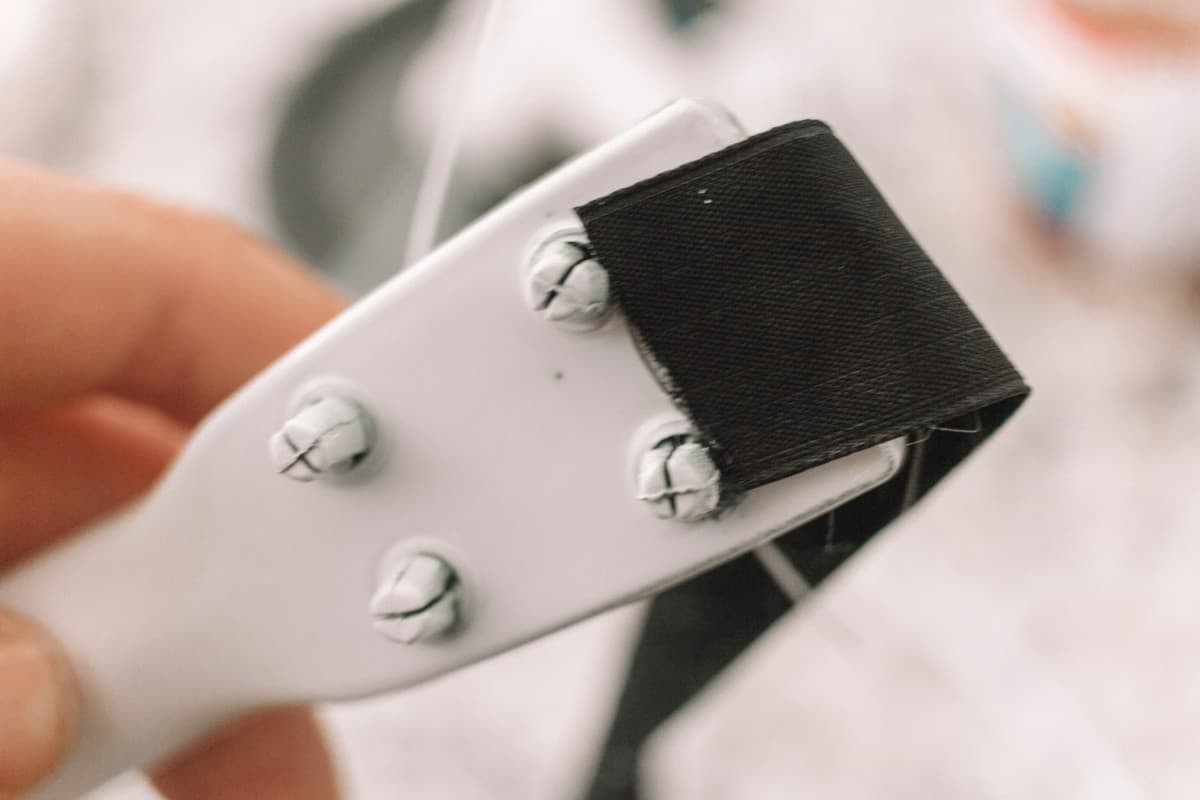 Image showing the velvet ribbon guitar strap being glued to the back of the DIY Coco guitar, allowing for over-the-shoulder carrying.
Your DIY Coco Guitar is Complete!
Congratulations! You’ve successfully crafted your own Coco guitar, ready to add a musical touch to your Coco costume or brighten up any fan’s day. This DIY project is not only a fun and engaging activity but also results in a fantastic replica of Miguel’s beloved guitar.
 Full shot of a child happily holding the completed DIY Coco guitar, showcasing the overall look and size of the finished prop.
Now you’re all set to celebrate the spirit of Coco and the magic of music! For those looking to complete the full Miguel look, be sure to check out other Coco costume tutorials for a truly immersive experience.