Guitar Hero on the Nintendo Wii brought motion-controlled music gaming into living rooms worldwide. Even years after its peak popularity in 2005, the thrill of shredding on a plastic guitar on the Wii remains a cherished memory for many. If you’re a fan dusting off your old Wii or Wii U for a Guitar Hero session, you might encounter a common problem: a broken guitar connector. Like many enthusiastic players, especially younger ones, equipment can take a beating, and the connector cable on your Guitar Hero Wii guitar is often the first point of failure.
Faced with a broken guitar, the immediate thought might be to replace it. While purchasing a new Guitar For Guitar Hero Wii is always an option, repairing your existing one is not only feasible but also a rewarding DIY project. This guide will walk you through a simple repair process, saving you money and getting you back to rocking out in no time.
Understanding the Problem: The Broken Connector
The weak point in many Guitar Hero Wii guitars is the connector that links the guitar to the Wii console. As you can see in the image, the typical failure is a break right at the connector plug. Fortunately, Nintendo used a standardized connector – the same one found on their Wii Nunchuk controllers. This clever design choice means we can repurpose a Nunchuk connector to breathe new life into your beloved guitar.
Gathering Your Tools and Sacrifices: What You’ll Need
To perform this repair, you’ll need a few basic tools and a donor Wii Nunchuk. Here’s what to gather:
- A Phillips head screwdriver: For disassembling both the Guitar Hero guitar and the Nunchuk.
- A soldering iron and solder: To create a secure and lasting electrical connection.
- Electrical tape or heat shrink tubing: To insulate your solder joints and protect them from shorts and strain.
- Wire strippers: To prepare the wires for soldering.
- A Wii Nunchuk: This will be sacrificed for its connector cable. An old, non-functional Nunchuk is ideal if you have one.
Step-by-Step Repair Guide: Bringing Your Guitar Back to Life
Let’s get started on the repair. Follow these steps carefully to replace your Guitar Hero Wii guitar connector.
Step 1: Disassembling the Guitar
The Guitar Hero guitar is designed to be partially disassembled for shipping. The first step is to detach the neck from the body. Once the neck is removed, locate and remove all the screws on the back of the guitar body. Set these screws aside in a safe place. Carefully remove the back cover to expose the internal circuit board and wiring.
Step 2: Preparing the Broken Connector
Inside the guitar, you’ll see the broken connector soldered to the main circuit board. If you are comfortable with soldering directly onto the board, you can desolder the old connector. However, for those less experienced with soldering and to minimize risk to the circuit board, a simpler method is to cut the wires of the broken connector a short distance away from the board. This gives you wires to work with without directly heating the circuit board.
Step 3: Nunchuk Connector Extraction
Now it’s time to prepare the replacement connector from the Nunchuk. Open the Nunchuk by removing its screws. Nintendo often uses tri-wing screws for their controllers, but standard Phillips head screws are also sometimes used. Once open, carefully detach the connector wire from the Nunchuk’s circuit board. You can either desolder it or, like with the guitar, cut the wires leaving enough length for soldering. The color coding of the wires is consistent between the Nunchuk and the Guitar Hero guitar, simplifying the next step.
Step 4: Soldering the New Connector
With both the guitar wires and the Nunchuk connector wires exposed, it’s time to solder. Strip the ends of each wire to expose the bare metal. Solder each wire from the Nunchuk connector to the corresponding wire from the Guitar Hero guitar, matching the colors. Solder one wire at a time to avoid confusion. After each solder joint, insulate it immediately with electrical tape or heat shrink tubing. This prevents short circuits and adds strength to the connection, ensuring a more durable repair. Tuck the soldered wires neatly under the circuit board inside the guitar body.
Step 5: Reassembly and Testing
Carefully route the new connector wire through the original strain relief inside the guitar body and feed the connector through the opening where it normally exits. Reassemble the guitar by putting the back cover back on and securing it with the screws you removed earlier. Reattach the guitar neck. Now, connect your repaired Guitar Hero Wii guitar to your Wii console and test it out! If you followed these steps correctly, you should be back to playing Guitar Hero.
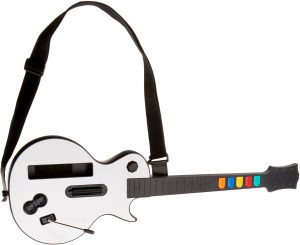
Alternatives and Buying New
If the thought of soldering and DIY repair isn’t appealing, or if you prefer a brand new guitar, purchasing a replacement is always an option. Amazon offers a variety of Wireless Guitars for Wii Guitar Hero and Rock Band Games available for purchase.
Conclusion
Repairing your Guitar Hero Wii guitar is a straightforward and satisfying DIY project. By sacrificing an old Wii Nunchuk and following these steps, you can fix the common connector issue and get back to enjoying your favorite music game. Not only will you save money compared to buying a new guitar, but you’ll also gain the satisfaction of repairing your own gaming equipment. So grab your tools, rescue that broken guitar from storage, and prepare to rock once again!