Guitar Diagrams are essential tools for guitar players of all levels. Whether you’re just starting to learn your first chords or exploring advanced music theory, understanding guitar diagrams will significantly enhance your learning and playing experience. This guide will break down what guitar diagrams are, how to read them, and why they are so crucial for mastering the guitar.
Guitar diagrams, in their simplest form, are visual representations of the guitar fretboard. They offer a straightforward way to understand chord shapes, scales, and arpeggios without needing to read traditional music notation. For beginners, guitar diagrams are often the first point of contact with chord shapes. They provide an accessible entry into understanding how chords are formed and played on the guitar.
Let’s explore the common types of guitar diagrams and how to interpret them:
Types of Guitar Diagrams
There are primarily two types of guitar diagrams you’ll encounter: chord diagrams and fretboard diagrams (used for scales, arpeggios, and general fretboard navigation).
Chord Diagrams
Chord diagrams are simplified representations of the guitar neck, showing you exactly where to place your fingers to play a specific chord.
- Grid Representation: Chord diagrams typically look like a small grid, representing a section of the guitar fretboard viewed from headstock to body.
- Strings and Frets: The vertical lines in the grid represent the guitar strings, with the thickest string (low E) usually on the left and the thinnest (high e) on the right. The horizontal lines represent the frets. The top line of the diagram is usually the nut of the guitar (fret zero), unless indicated otherwise.
- Numbers and Symbols:
- Numbers (1, 2, 3, 4): These indicate which finger to use to fret the string (1=index, 2=middle, 3=ring, 4=pinky).
- “x” above a string: This means the string should not be played or strummed (muted).
- “o” above a string: This means the string should be played open (without fretting).
- Black dots: These dots indicate where you should place your fingers on the fretboard.
- Chord Name: The name of the chord is usually written above the diagram (e.g., “C Major”, “Am”).
For example, a C Major chord diagram would show you which strings to fret and which fingers to use to create the C Major chord shape.
Fretboard Diagrams (Scale and Arpeggio Diagrams)
Fretboard diagrams are broader and used to visualize scales, arpeggios, and note positions across the entire guitar neck or a significant portion of it.
- Extended Grid: Unlike chord diagrams, fretboard diagrams can cover many frets, showing patterns that span up and down the neck.
- Note or Interval Markings: Instead of finger numbers, these diagrams often use:
- Note names (A, B, C, D, E, F, G): To show the specific notes within a scale or arpeggio.
- Interval numbers (1, 2, 3, 4, 5, 6, 7): To indicate the scale degrees or intervals relative to the root note.
- Dots of different colors/styles: To highlight root notes or important intervals within the pattern.
Fretboard diagrams are invaluable for understanding music theory on the guitar, allowing you to see how scales and arpeggios are structured and how they connect across the fretboard.
Reading and Using Guitar Diagrams Effectively
To effectively use guitar diagrams, follow these steps:
-
Identify the Diagram Type: Determine if it’s a chord diagram or a fretboard diagram. Chord diagrams will usually have a chord name and a compact grid. Fretboard diagrams will be more extended and might show note names or interval numbers.
-
Understand the Orientation: Remember that diagrams typically represent the guitar neck as if you are holding the guitar and looking down at the fretboard. Low E string is usually on the left, high e on the right.
-
Interpret Symbols and Numbers: Pay attention to the “x”s, “o”s, finger numbers, and note/interval markings. These are crucial for correctly playing the chords, scales, or arpeggios.
-
Practice Finger Placement: Use the diagram as a guide to position your fingers on the guitar. Start slowly to ensure accuracy and clean sound.
-
Apply Diagrams in Context: Use chord diagrams when learning songs and chord progressions. Use fretboard diagrams when practicing scales, improvising, or understanding music theory.
For instance, when restringing your guitar, diagrams can even be helpful! While not directly related to playing notes, string-tying diagrams, like the one below, guide you on how to properly secure the strings at the bridge.
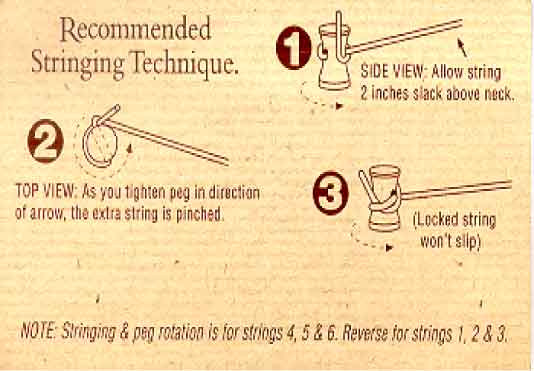 String Tying Diagram for Acoustic Guitar Bridge
This type of diagram, though different from chord or scale diagrams, is still a visual guide that helps guitarists perform a necessary guitar maintenance task.
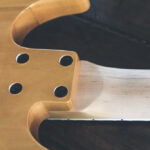
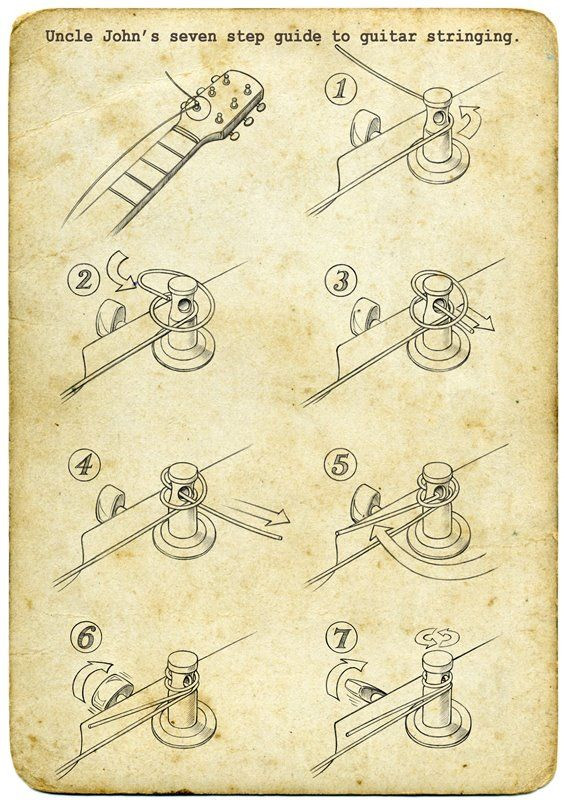
Similarly, different methods for stringing guitars at the tuning pegs can also be visualized with diagrams, ensuring correct string winding for tuning stability.
 Alternative String Tying Method for Guitar Tuning Pegs
Understanding these visual aids, whether for playing or maintenance, is part of becoming a well-rounded guitarist.
Why Guitar Diagrams are Important
- Visual Learning: Many guitarists are visual learners. Diagrams provide a visual representation of musical concepts, making them easier to grasp than purely textual explanations.
- Accessibility for Beginners: Guitar diagrams are far more approachable for beginners than standard music notation. They offer a quick way to start playing chords and melodies.
- Efficiency: Diagrams quickly convey information. Instead of describing finger positions in words, a diagram shows you instantly.
- Versatility: Guitar diagrams are used for chords, scales, arpeggios, and even guitar maintenance tasks like restringing. They are a versatile tool for all aspects of guitar playing.
- Understanding Music Theory: Fretboard diagrams, in particular, are excellent for learning and visualizing music theory concepts on the guitar. They help you see patterns and relationships between notes and intervals.
For example, understanding chord construction is made easier with diagrams. A diagram can show you the intervals within a chord shape visually.
 Guitar Chord Intervals Diagram Example
This type of diagram enhances your understanding beyond just finger placement, delving into the theoretical underpinnings of guitar playing.
Even animated diagrams, like the GIF below showing string winding, can be incredibly helpful for visualizing processes that are hard to describe with words alone.
Conclusion
Guitar diagrams are indispensable tools for anyone learning or playing the guitar. From simple chord shapes to complex scales and even maintenance procedures, guitar diagrams offer a visual and intuitive way to understand and navigate the guitar fretboard. By learning to read and utilize guitar diagrams effectively, you’ll accelerate your learning, improve your playing, and deepen your understanding of music on the guitar. Embrace guitar diagrams as a fundamental part of your guitar journey, and you’ll unlock new levels of musicality and skill.