

Creating a Guitar Cake might seem like a daunting task, but with the right approach and a little patience, you can craft a show-stopping dessert that’s perfect for any music enthusiast. This tutorial will guide you through the process of making a Gibson Les Paul Gold Top guitar cake, breaking it down into manageable phases to ensure your baking journey is smooth and successful. We’ll cover everything from preparing the neck and board to baking, carving, and decorating your musical masterpiece. Get ready to impress your friends and family with this unique and delicious guitar cake!
First, let’s watch this quick video for a visual overview of our guitar cake project:

A beautifully crafted Gibson Les Paul Gold Top guitar cake, showcasing its realistic details.
Here are the essential steps we’ll be following to construct this amazing guitar cake:

A step-by-step visual guide illustrating the process of creating a guitar cake, from neck preparation to final decoration.
Prep Work is Key for Your Guitar Cake
Before we dive into the cake itself, remember that the secret to a successful guitar cake lies in the preparation. A solid foundation and carefully crafted components are crucial. Let’s start with the guitar neck, a vital element of our edible instrument.
Making the Neck of Your Guitar Cake
The neck of the guitar cake needs to be firm to hold its shape and support the strings. It’s best to prepare it well in advance, ideally a week or two before assembly. For this, we’ll use rice Krispie treats, a sturdy and moldable base.
Follow a recipe similar to this one for rice Krispie treats ensuring a firm consistency. Mold the rice Krispie mixture into a guitar neck shape, using a flat surface to create one flat side and hand-shaping the top to be rounded. Pay close attention to shaping the headstock area, and don’t worry about perfection at this stage – you can trim it later when it’s dried.
Allow the neck to dry for a couple of days until it’s firm. Once dried, cover it with a thin layer of gumpaste. Gumpaste provides a smooth surface for fondant and adds extra rigidity. Similarly, create the guitar bridge from gumpaste, as it also needs to be strong enough to withstand the tension from the guitar strings. Let the gumpaste dry for another day before finally covering the entire neck with marshmallow fondant. The fondant will give a smooth, cake-like finish to the neck of your guitar cake.

Close-up showing the rice Krispie treat guitar neck being shaped and prepared for fondant covering.
Essential Assumptions for a Realistic Guitar Cake
When tackling a project like a guitar cake, making certain assumptions can simplify the process and guide your design. For this cake, we’re assuming the use of real guitar strings. Buttercream or dental floss simply won’t achieve the authentic look we’re aiming for. Real strings add a level of realism that elevates the guitar cake from a simple shaped cake to a true work of art.
Because we are using real guitar strings, the supporting structure of the guitar cake needs to be robust enough to handle the tension, however minimal. This means we need a way to securely attach the strings to a support system that is anchored to the cake board itself. This consideration will inform the next steps in preparing our cake board.
Crafting the Template for Your Guitar Cake
Creating a template is invaluable, especially if you aim for a life-size guitar cake. Using an actual guitar, ideally a Gibson Les Paul if you’re replicating that model, is the easiest way to ensure accuracy. Trace the outline of the guitar onto a large piece of cardstock to create your template.
This is also the stage where you’ll need to customize your template to accommodate the string support system. Cut a slot into the template where the support structure will be positioned. This slot will guide you when shaping both the cake board and the cake itself, ensuring everything aligns perfectly.

The guitar template being traced onto cardstock, a crucial step for shaping the cake and board accurately.
Preparing the Board for Your Guitar Cake Masterpiece
The cake board provides the stable base for your guitar cake. Purchase a 2′ x 4′ board from a home improvement store. Have it cut down to a size slightly larger than your guitar cake template. While you’re there, ask them to cut scraps to create a piece that will serve as the string housing. This piece should be about the width of the guitar body and tall enough to elevate the strings above the cake.
Before attaching the string housing, consider the neck support. The rice Krispie neck, despite being firm, will need additional support to stay elevated. Fashion a support structure using strips of cardboard cut from sheet cake boards.
Cover both the wooden board and the cardboard support with a cabinet wood print liner. This liner provides a clean, professional look and a surface that’s food-safe and easy to work with. Once covered, position the string housing piece using your template as a guide. Drill holes through the board and housing to securely attach them. With the board prepped, we’re finally ready to focus on the cake itself!

Assembling the cake board with wooden supports and preparing it to hold the guitar cake and string mechanism.
Baking and Assembling Your Guitar Cake
Now for the part we’ve all been waiting for – the cake! Believe it or not, when making a guitar cake like this, the cake itself is almost the last consideration. The board and structure are where the majority of the effort goes.
The Cake Itself: Baking for a Guitar Shape
Bake a half sheet cake and a quarter sheet cake. These sizes should provide enough cake to match your guitar cake template dimensions. Allow the cakes to cool completely before freezing them. Freezing is crucial for carving; it makes the cake firm and easier to shape. Freezing after cooling ensures a moist cake, while freezing a warm cake can dry it out. Freeze for at least 24 hours for optimal carving.

Baked sheet cakes, ready to be frozen and carved into the guitar body shape.
Carving and Shaping Your Guitar Cake
Work quickly once your cake is out of the freezer! Using your template, carve the half sheet cake portion into the main body of the guitar, remembering to cut out the slot for the string housing. Place the carved cake onto a cake board that has also been shaped using your template. Position the quarter sheet cake, carved to form the top part of the guitar body, on top.
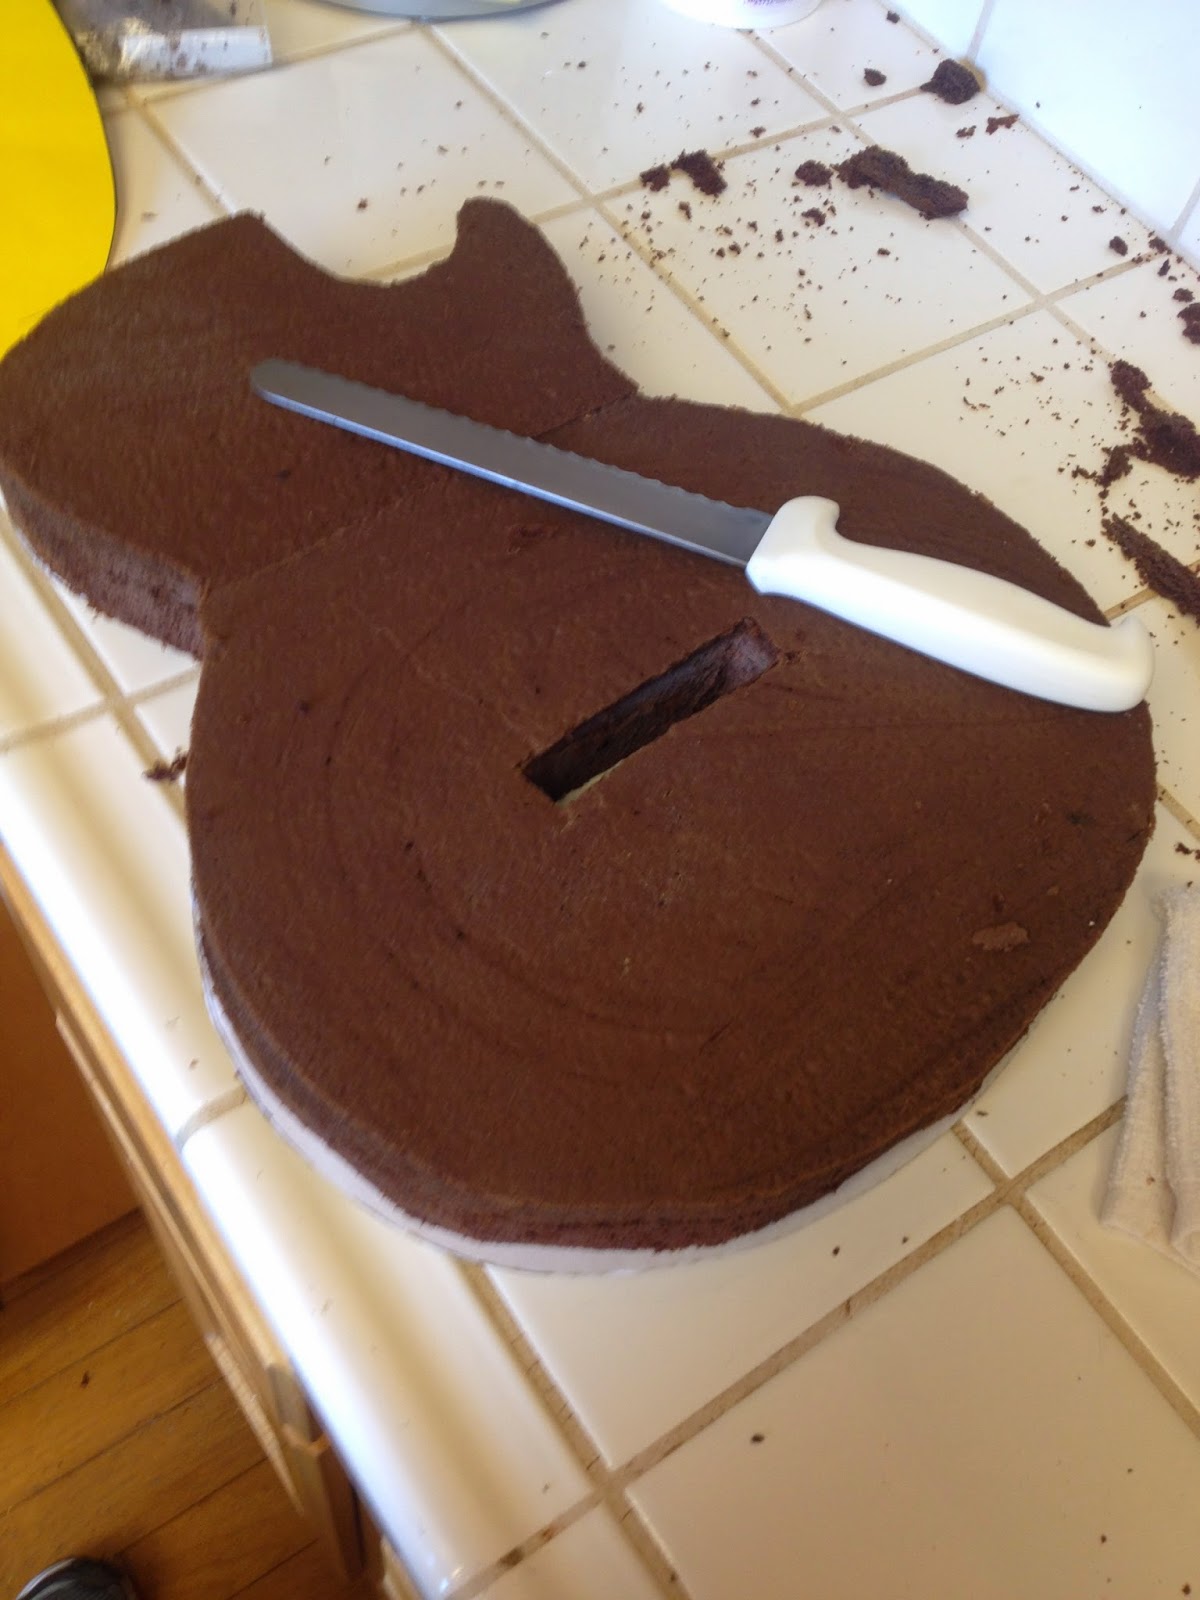
The frozen cake layers being carefully carved with a template to create the iconic guitar body shape.
Next, fill your guitar cake with your preferred filling. At this stage, the cake will start to soften. Refreeze the cake for a short period, no more than a few hours, to firm it up again for buttercream and fondant application.
Buttercream and Fondant: Bringing Your Guitar Cake to Life
Crumb coat the entire guitar cake with buttercream, again, ensuring you leave the slot for the string housing clear. To achieve the characteristic guitar curvature, build up the buttercream down the center of the guitar body.

Applying buttercream crumb coat to the carved guitar cake, preparing it for fondant.

Side view showing the buttercream application and shaping of the guitar body curves.

Covering the buttercream-coated guitar cake with a layer of tan fondant.

Smoothing out the fondant on the guitar cake for a professional finish.
Allow the buttercream to firm up at room temperature for a few hours. Then, lightly brush the buttercream with water before covering the cake with a template-cut piece of tan-colored marshmallow fondant. Once the fondant has set for a few hours, it’s time for the gold finish. Spray the fondant with metallic gold Americolor airbrush color to achieve the iconic gold top look of the Les Paul.
Detailing and Finishing Your Guitar Cake
Now comes the exciting part – adding the details that will truly make your guitar cake resemble a Gibson Les Paul Gold Top. This stage requires patience and an eye for detail, referencing images of the real guitar will be incredibly helpful.

Adding fondant details to the guitar body, including pickup and bridge areas.

Close-up of fondant details being meticulously applied to mimic guitar hardware.
Secure the fondant-covered neck to the cake body using toothpicks, pushing them into the cardboard support structure beneath. Attach other fondant details like pickups, knobs, and switches, also using toothpicks where needed for stability.
For the strings, gather them at the headstock using a small piece of wood with pre-drilled holes. Cut the strings to the appropriate length, bend the ends, and insert them into the rice Krispie treat headstock.
To paint the finer details, mix black and brown food coloring with vodka for a good paint consistency. Once dry, apply a thin coat of cooking oil to bring out the shine. Use silver highlighter and super pearl dust mixed with vodka to paint on the metallic details.

Attaching the guitar strings to the headstock, adding a realistic touch.

Painting fine details onto the guitar cake using edible paints for enhanced realism.

The completed Gibson Les Paul Gold Top guitar cake, a stunning and edible tribute to music.
Congratulations, you’ve made it! With careful planning and execution, you can create a fantastic guitar cake that will be the highlight of any celebration.
Good luck with your guitar cake project and happy caking!
Christie