Are you ready to unleash your inner rockstar? You don’t need expensive instruments to start making music. With a few simple household items, you can build your very own homemade guitar! This fun and easy craft project is perfect for kids and adults alike, offering a fantastic way to explore music and creativity. This DIY guitar is not only a blast to make but also a great introduction to the world of musical instruments. Let’s dive into how you can create your own cardboard guitar and start strumming your way to fun!
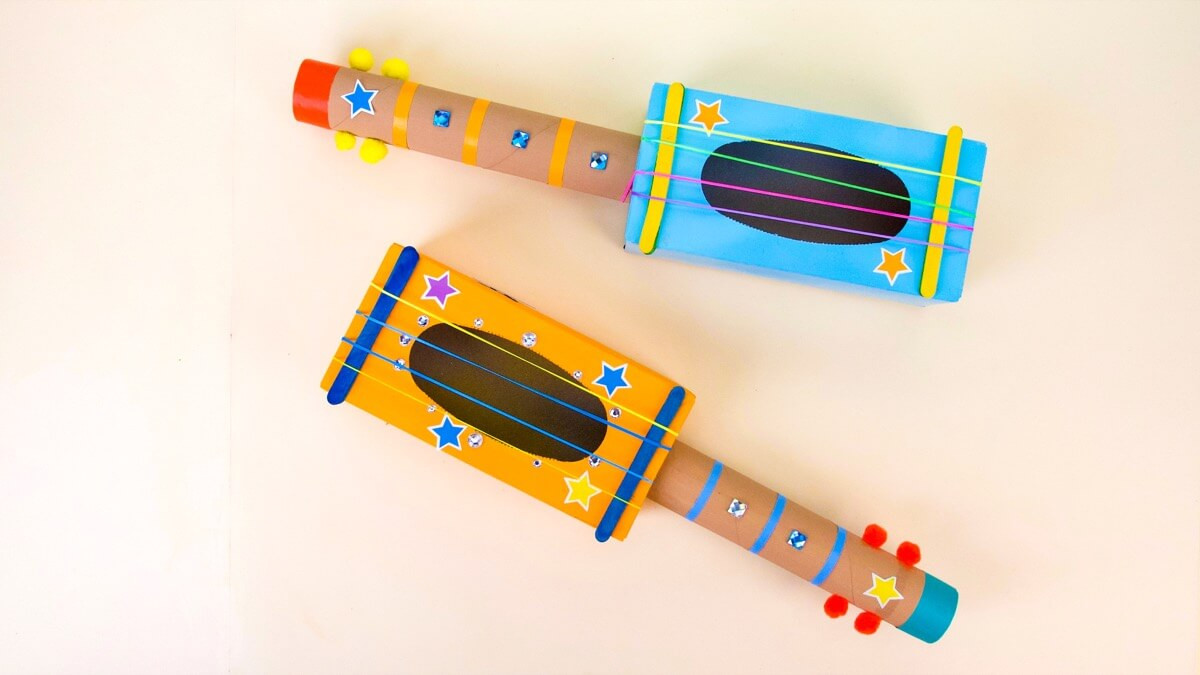
 Homemade Guitar Craft
Gather Your Supplies for a Cardboard Guitar
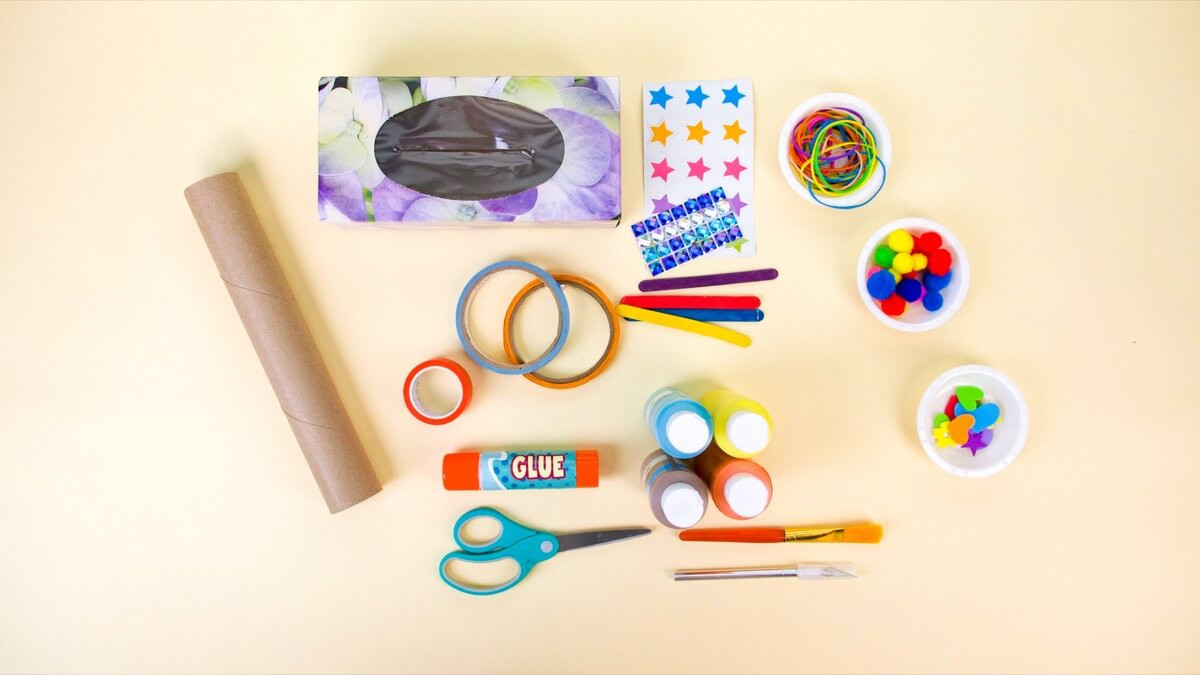
Before we get started, let’s gather everything you’ll need to construct your homemade guitar. The best part about this project is that you likely already have most of these items around your home!
 Homemade Guitar Craft
For the Body and Neck:
- Tissue Box: This will form the main body of your homemade guitar. Empty it and remove any plastic lining from the opening.
- Cardboard Paper Towel Tube: This sturdy tube will act as the neck of your guitar.
- Cardboard or Extra Tissue Box Flap: A small piece of cardboard can be useful for reinforcing the neck joint if needed.
For the Strings and Sound:
- Rubber Bands: You’ll need a variety of rubber bands – different sizes and thicknesses will produce different sounds when strummed.
- Popsicle Sticks (4): These will elevate the rubber band strings, improving the sound quality of your homemade instrument.
Tools and Decoration:
- Scissors: For cutting cardboard and other materials.
- Craft Knife (for adult use): Helpful for making precise cuts in the tissue box for the guitar neck. Adult supervision is required for using a craft knife.
- Craft Paint & Paintbrush: Choose your favorite colors to personalize your cardboard guitar.
- Glue Stick: To secure the popsicle sticks and decorations.
- Decorative Items: Pom poms, decorative tape, stickers, gems – let your imagination run wild and personalize your DIY guitar!
Step-by-Step Guide to Building Your Homemade Guitar
Let’s get crafting! Follow these simple steps to assemble your very own homemade guitar.
1. Prepare and Paint the Guitar Body:
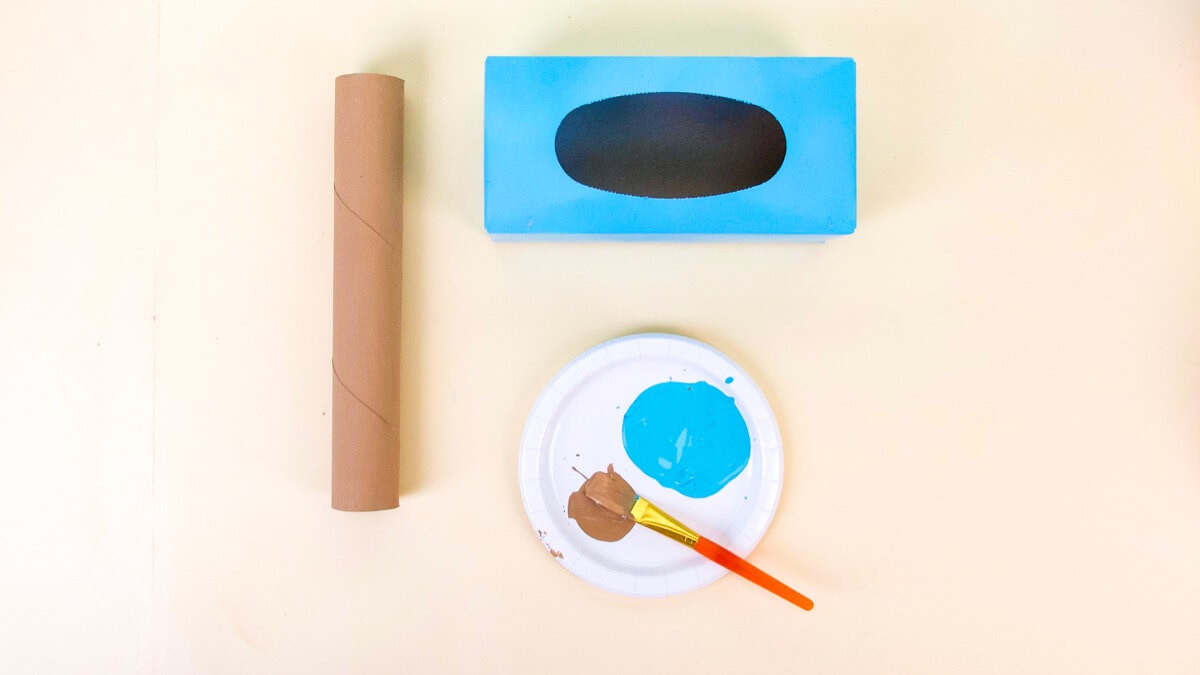
Start by taking your tissue box and ensuring it is empty and clean. Remove any plastic film from the opening of the box. Now, it’s time to get creative with paint! Choose your favorite colors and paint the outside of the tissue box. You might need to apply a few coats to fully cover any patterns on the box. Once painted, set the box aside to dry completely.
 Homemade Guitar Craft
2. Paint the Guitar Neck:
Next, take your cardboard paper towel tube and paint it to resemble a guitar neck. Brown is a classic choice for a traditional guitar look, but feel free to use any color you like! Just like the body, you might need a couple of coats of paint for full coverage. Let the tube dry thoroughly.
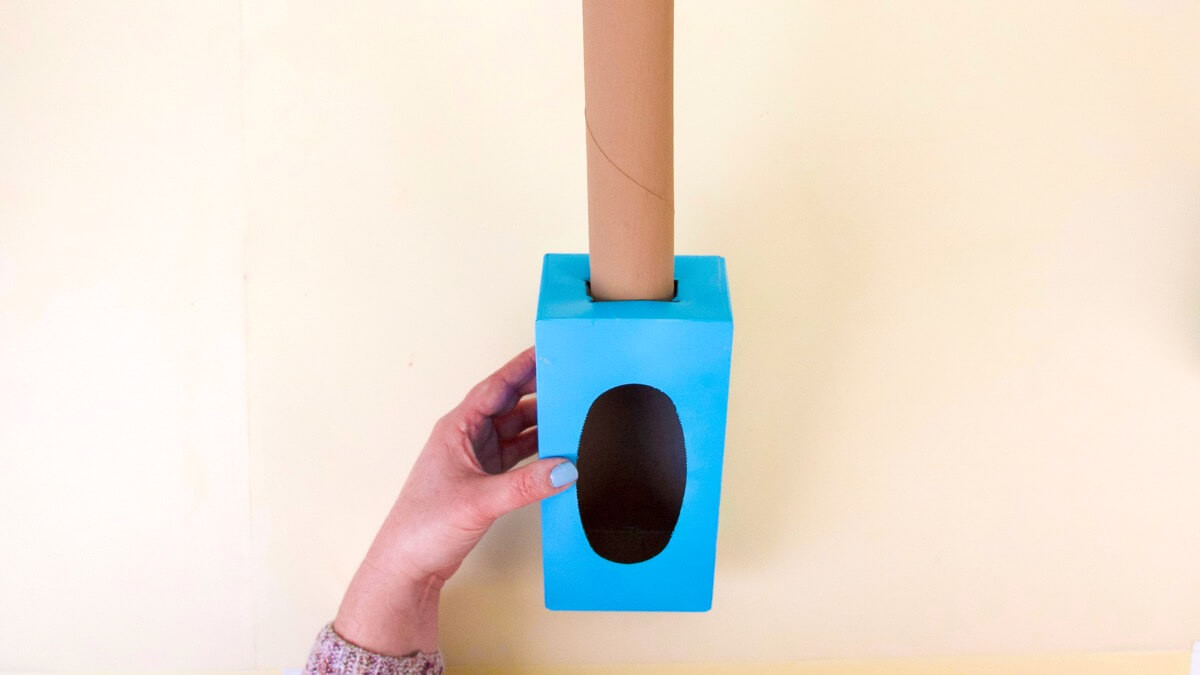
3. Create the Neck Hole:
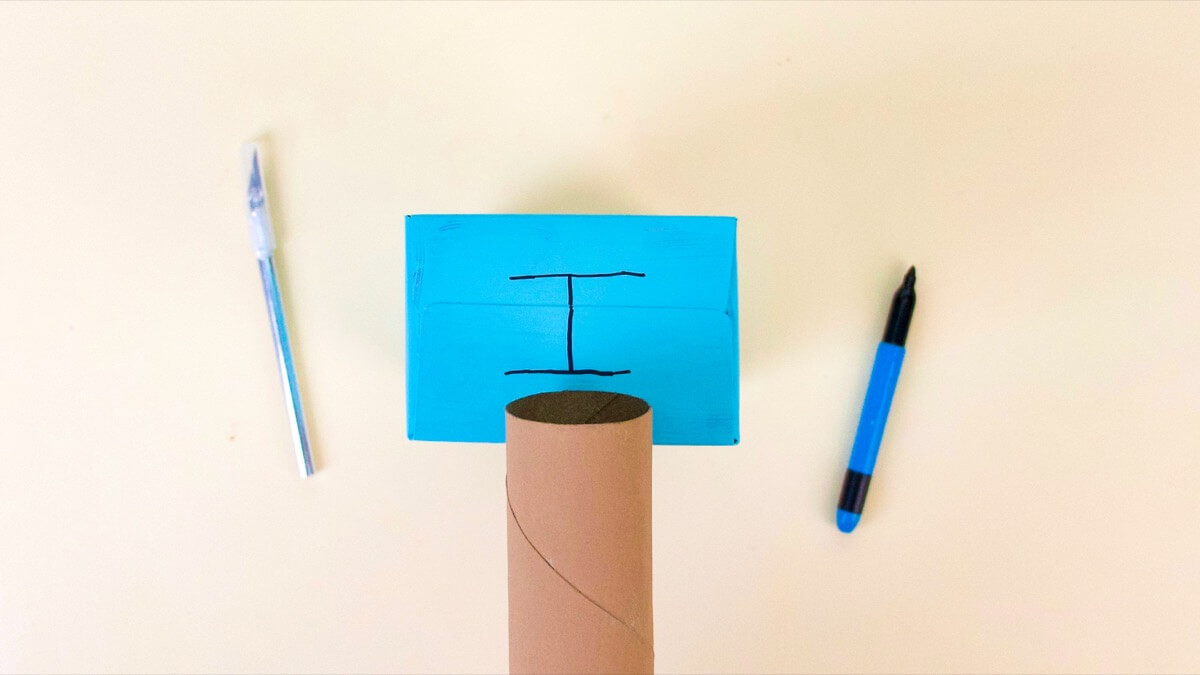
Decide which side of your guitar body the neck will extend from. For right-handed players, the neck typically comes out from the right side when looking down at the guitar. Left-handed players (like Caitie from Super Simple!) will position the neck on the left.
Hold the end of the cardboard tube against the chosen side of the painted tissue box. Draw two parallel lines on the box, matching the width of the tube’s end but slightly closer together. Connect these lines with another line to form an “H” shape.
 Homemade Guitar Craft
4. Insert the Guitar Neck:
Using a craft knife (adults only!), carefully cut along the “H” shaped lines you’ve drawn. Gently push the two small tabs of cardboard inwards. The hole should be slightly smaller than the tube’s diameter, ensuring a snug fit for the neck without needing glue. Insert the painted cardboard tube into the hole to attach the neck to the guitar body. If the fit is loose, use a small piece of extra cardboard or tissue box flap to reinforce and tighten the joint from the inside.
 Homemade Guitar Craft
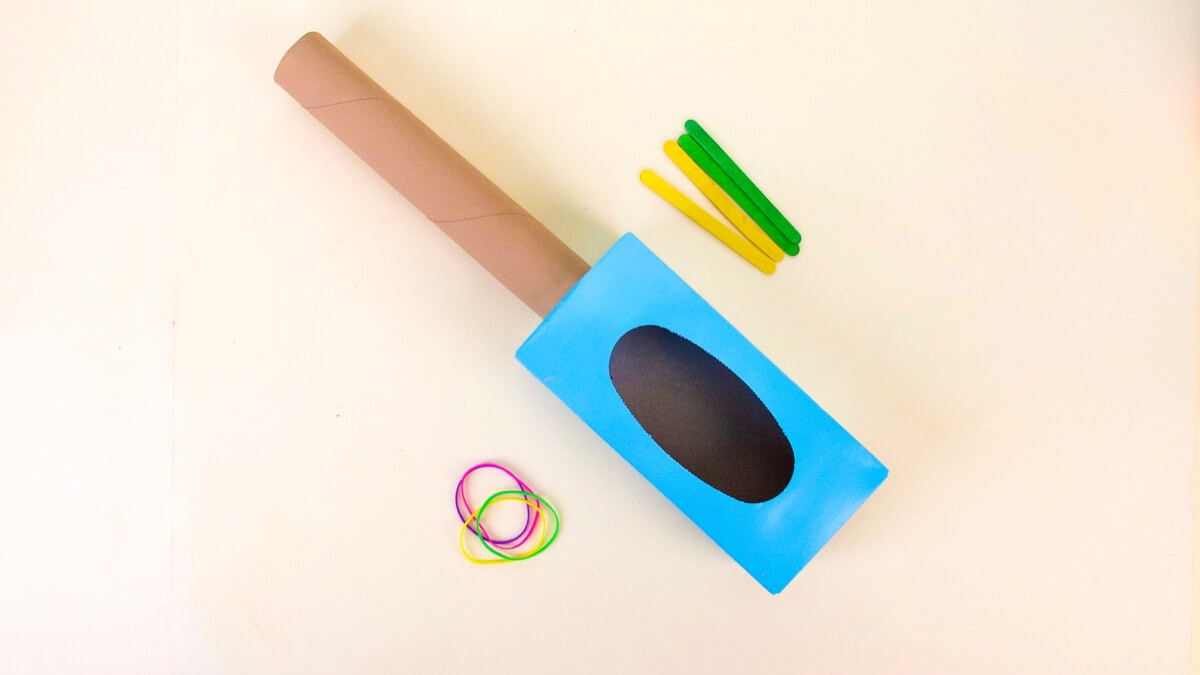
5. Add the Rubber Band Strings:
Now it’s time to add the strings to your homemade guitar! While real guitars usually have six strings, we’ll use four for this simplified version, similar to a ukulele.
 Homemade Guitar Craft
Stretch the rubber bands around the tissue box, positioning them over the opening in the center of the box. Experiment with different sizes and thicknesses of rubber bands to achieve varied sounds. Try placing two strings on each side of the neck for balanced sound.
6. Elevate the Strings with Popsicle Sticks:
To enhance the sound of your homemade guitar, we need to lift the rubber band strings slightly off the body. Glue two popsicle sticks together to make them thicker. Repeat this to create a second set. Once the glue is dry, slide these double popsicle sticks under the rubber bands on each side of the tissue box. This will raise the strings, allowing them to vibrate more freely and produce a clearer sound.
 Homemade Guitar Craft
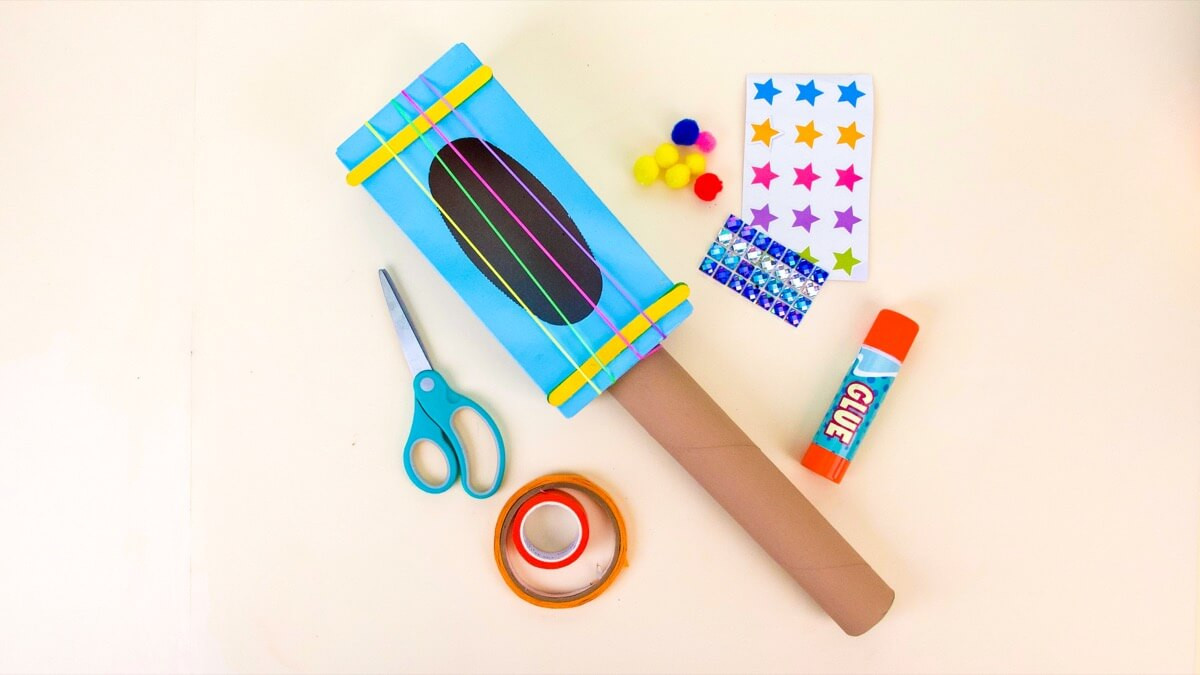
Decorate Your Cardboard Creation
With the construction complete, the real fun begins – decorating your homemade guitar!
 Homemade Guitar Craft
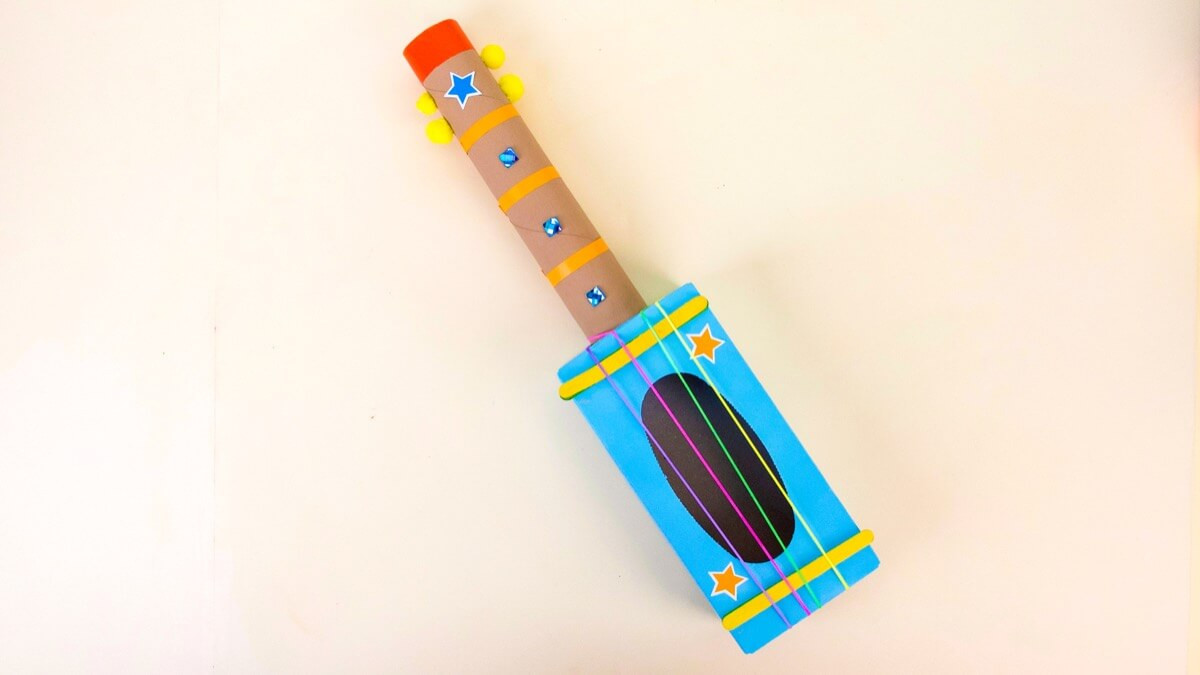
Use colorful tape to wrap around the neck to represent the frets on a real guitar. Frets are the raised lines on a guitar neck that help you play different notes. Attach pom poms to the head of the guitar neck to mimic tuning pegs. Finally, decorate the body of your DIY guitar with stickers, gems, markers, or any other craft supplies you have on hand. Let your personality shine and make it uniquely yours!
 Homemade Guitar Craft
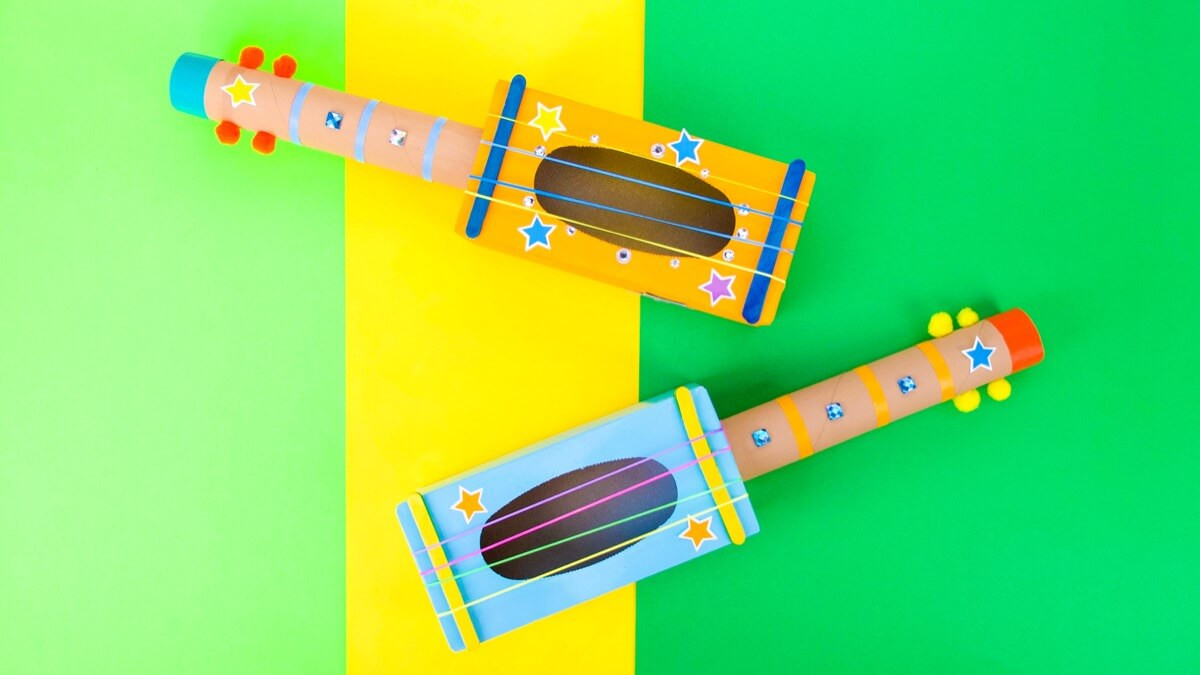
Time to Rock Out with Your Homemade Instrument!
Congratulations, your homemade guitar is complete and ready to play! Strum the rubber band strings and explore the different sounds you can create.
 Homemade Guitar Craft
This DIY guitar is a fantastic way to introduce children to musical instruments and encourage their creativity. For more musical fun and instrument crafts, be sure to explore our theme page for making music for even more videos, activities, and craft ideas to spark your musical journey! Have fun making music with your homemade guitar!