For those seeking a unique sonic palette, the Fretless Guitar, particularly the fretless bass, offers an expressive landscape unlike any other. The absence of frets opens up a world of smooth slides, vocal-like inflections, and the distinctive “mwah” tone that has captivated musicians and audiences alike. For years, I’ve been deeply immersed in the world of fretless instruments, and I’ve honed the craft of converting fretted basses into their fretless counterparts. My journey started about fifteen years ago with a Peavey B-Quad, a composite neck bass that presented a significant challenge for my younger self. Since then, I’ve successfully defretted numerous basses, including my prized 1974 Ovation Magnum, which is now my main instrument. Through these experiences, I’ve not only refined my technique but also discovered crucial nuances that elevate a fretless instrument’s playability beyond simply removing the frets.
Recently, my friend Kirk approached me with a request to convert his old Ovation acoustic bass to fretless. Kirk, primarily a guitarist, was venturing into the fretless realm for the first time. Understanding that setup is paramount to both the feel and the sound of a fretless instrument, I dedicated time to discuss the intricacies with Kirk, ensuring I grasped his vision for the bass. With Kirk’s preferences in mind, it was time to embark on the defretting process.
Upon receiving Kirk’s bass, the fretboard’s condition was immediately apparent – it was far from pristine. The presence of what seemed to be grain filler or wax indicated a history of neglect or perhaps some misguided attempts at maintenance. It was clear that the fretboard needed significant attention before the conversion could truly begin.
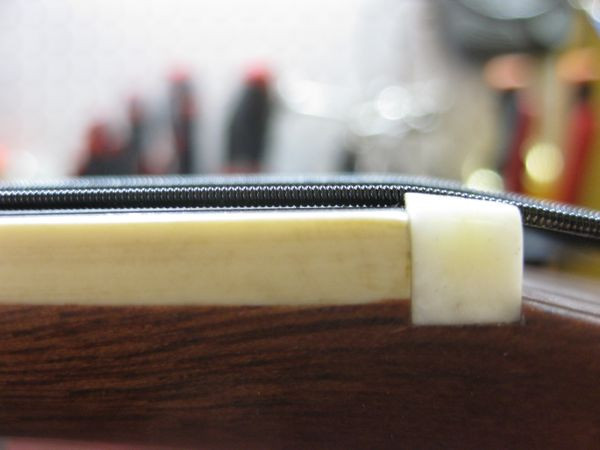
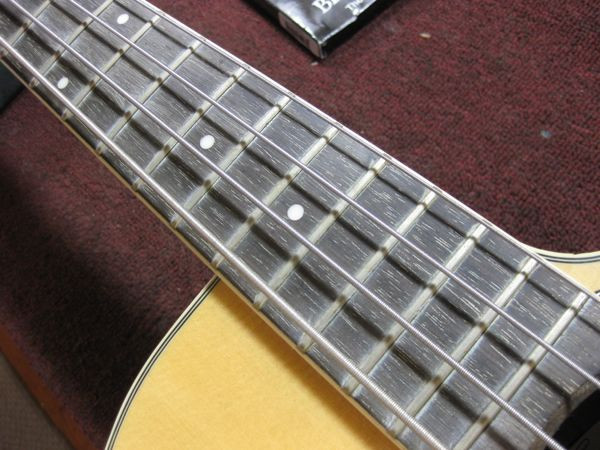 Close-up of the Ovation bass fretboard before defretting, showing a dirty and uneven surface
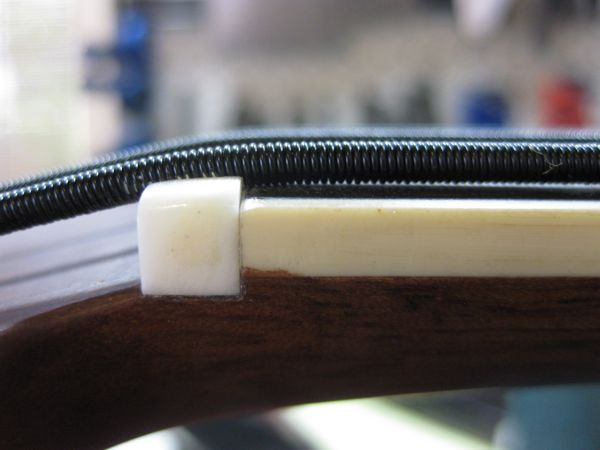
 Another angle of the worn fretboard highlighting the need for cleaning and restoration before conversion
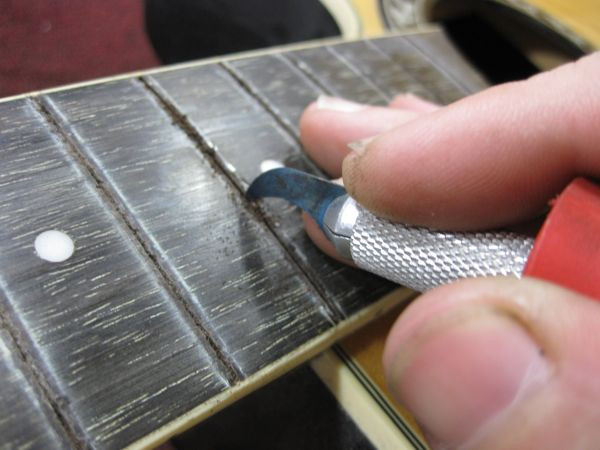
Before any modifications, meticulous measurements and documentation of the existing setup are essential. This provides a baseline and ensures that any adjustments made during the conversion are informed and controlled. Once this preliminary step was completed, I carefully removed the strings and began the delicate process of fret removal. Fingerboard chipping is a common risk when pulling frets, making proper tools and technique indispensable. While legend has it that Jaco Pastorius might have used his teeth, for a cleaner and more controlled process, I rely on Stew-Mac’s Fret Puller. Although a significant investment, this tool has consistently proven to be the most effective fret puller I’ve used. My technique involves a gradual approach, gently “walking” the fret out from one end rather than forcefully yanking it straight up. It’s also worth noting that some frets are glued in place, requiring the application of heat from a soldering iron to soften the adhesive before extraction. Fortunately, in this case, the frets came out relatively easily, avoiding the need for extensive chip-out repairs – a welcome start to the conversion.
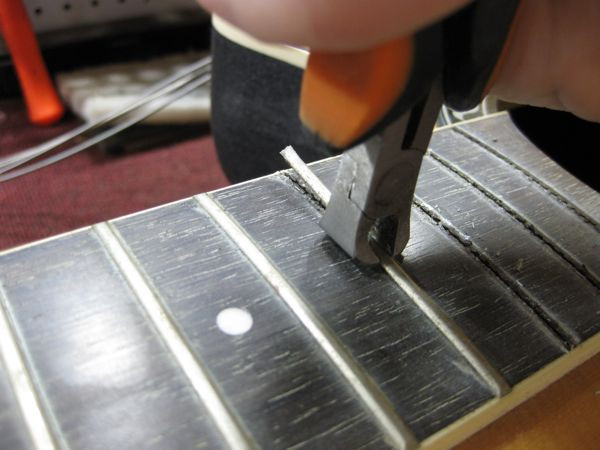 Frets partially removed from the bass fretboard, showcasing the initial stage of the defretting process
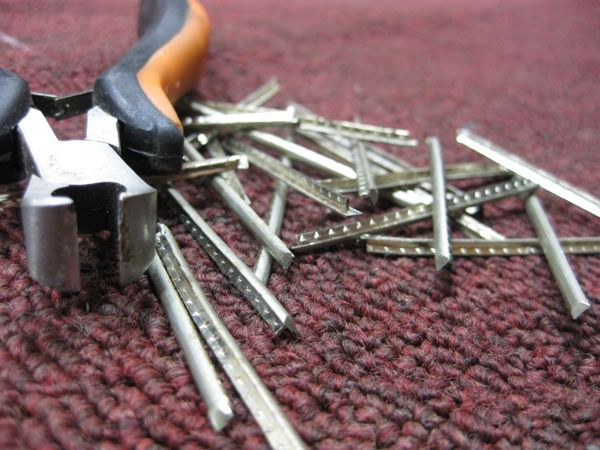 A pile of removed frets, symbolizing the transformation from fretted to fretless
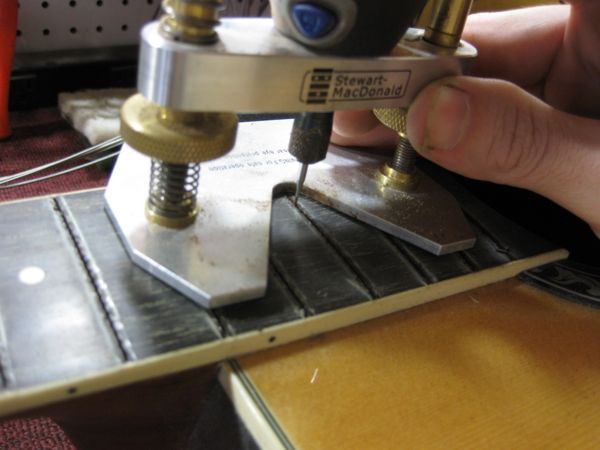
With the frets removed, the next crucial step is preparing the fret slots. Upon fret removal, the slots often appear rough, with small wood fibers pulled upwards. To address this, I first level the high spots using a long file. Following this, I refine and clean the slots using a Dremel tool equipped with a small drill bit. This precision work ensures clean, consistent slots ready for the next stage.
 Using a Dremel tool to clean and refine the fret slots after fret removal
 Close up view of the Dremel bit precisely cleaning the bass fret slots
The difference between a raw and a refined fret slot is significant. In the image below, the untreated slot at the top contrasts sharply with the cleaner, Dremel-treated slot below. This visual comparison underscores the importance of this meticulous step in achieving a smooth and professional fretless conversion.
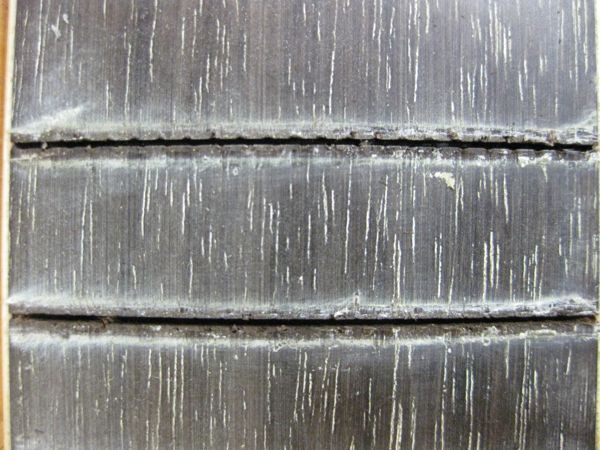 Comparison of a raw fret slot (top) and a cleaned fret slot (bottom) after Dremel treatment
Before proceeding, it’s vital to thoroughly clean the slots, removing any remaining debris. This ensures a clean surface for the fret markers and prevents any unwanted particles from interfering with the smoothness of the fretboard.
 Cleaning the fret slots with a brush to remove debris after routing
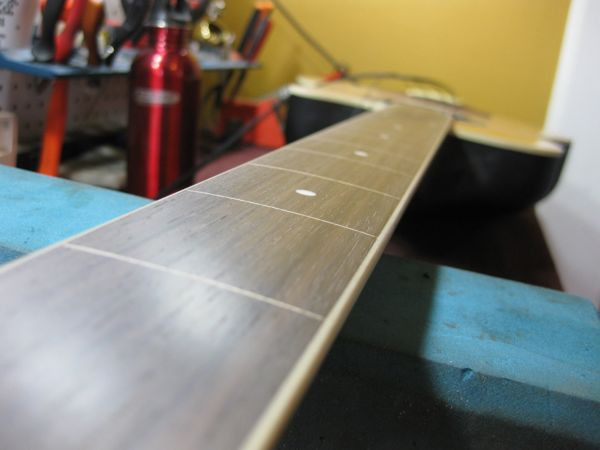
Given that this was Kirk’s first fretless bass, he requested visible fret lines as a visual guide. While plastic is sometimes used for fret lines, I prefer maple. Plastic can wear at a different rate than the fretboard wood, potentially creating an uneven, bumpy feel over time. Maple, on the other hand, wears uniformly with the rosewood fretboard and offers a more organic aesthetic. I carefully cut maple veneer strips to precisely fit each fret slot and secured them with Titebond wood glue. While superglue offers faster adhesion, the porous nature of this particular fretboard made Titebond a better choice, preventing potential dark spots from superglue soaking into the wood unevenly.
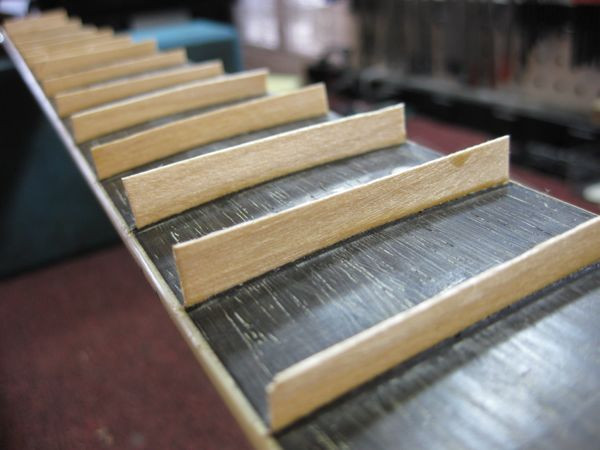 Inserting maple veneer strips into the cleaned fret slots to create fret lines
After allowing the glue to dry overnight, the excess maple veneer was trimmed flush with the fretboard using a razor blade. This step creates a smooth, level surface, integrating the fret markers seamlessly into the fretboard.
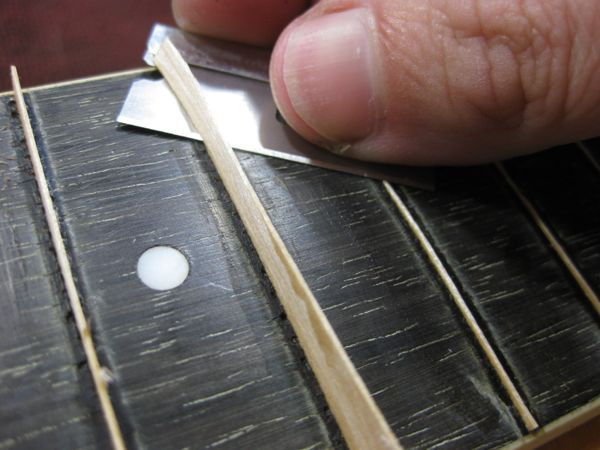 Trimming the maple veneer fret lines flush with the rosewood fretboard using a razor blade
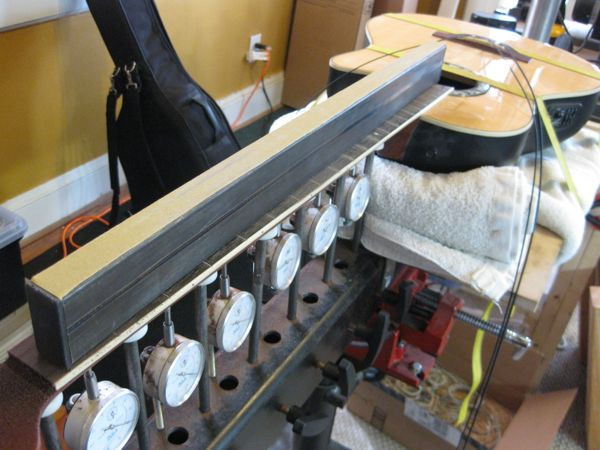
Leveling the fretboard is arguably the most critical aspect of a successful fretless conversion. As I often emphasize, precise fretwork is fundamental to the playability of any guitar, and this principle is amplified for fretless instruments. While fretted instruments require level frets for clean notes without buzzing, fretless instruments demand an absolutely flat fingerboard to achieve consistent buzz across all notes. This even buzz is the key to the sought-after “mwah” sound of a high-quality fretless bass. Any inconsistencies, high or low spots on the fretboard, will result in unpleasant, erratic buzzing, detracting from the instrument’s musicality.
Similar to fretted instruments, I utilize a neck jig, a flat beam, and radius blocks to level the fretboard. This ensures a perfectly flat playing surface and true radius. Crucially, always wear a mask during this process! Wood dust is hazardous and can be toxic. Respiratory protection is non-negotiable, even for seemingly brief tasks.
 Using a leveling beam and sandpaper to level the fretless bass fretboard on a neck jig
 Close-up of the leveling process, showing radius blocks used to maintain the fretboard curvature during sanding
This particular neck exhibited considerable unevenness, necessitating significant material removal to achieve flatness. However, this was somewhat intentional, as the fretboard’s initial condition was less than ideal, and I aimed to expose fresh, clean wood. I began with 80-grit sandpaper and progressively moved to 1000-grit, achieving a glass-like sheen on the wood even before applying any finish.
 The leveled rosewood fretboard after sanding, showing a smooth, even surface ready for finishing
To protect and seal the rosewood, I applied several coats of gunstock oil. The transformation from the original, rough fretboard to the smooth, finished surface is striking.
 Applying gunstock oil to the leveled fretboard to seal and protect the wood
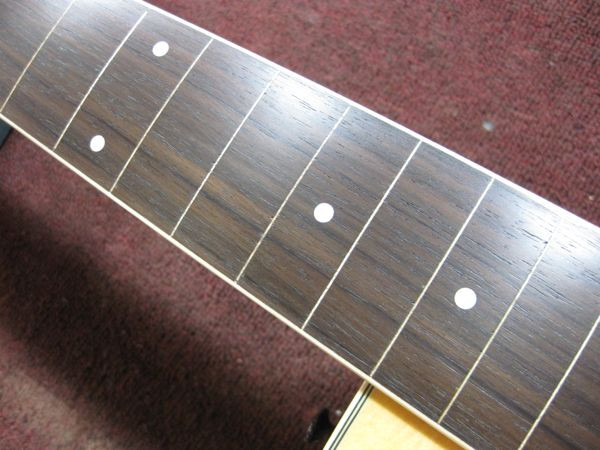
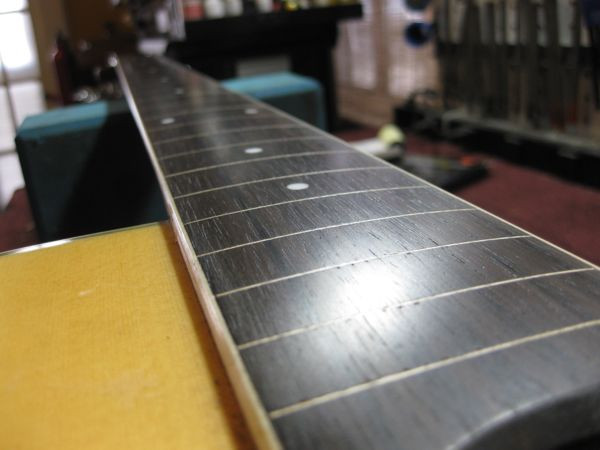 The finished fretless fretboard after oiling, showcasing the enhanced wood grain and smooth surface
The final, and equally vital, step is the setup. Fretless bass setup largely revolves around tonal preference, with two main approaches: low action for the characteristic “mwah” sound favored by many fretless players, or higher action for a louder, more upright bass-like tone. Regardless of action height, a low nut is crucial. A nut cut too high makes playing in the lower register difficult and significantly compromises intonation. Fretless instruments are already inherently challenging to play in tune; a high nut exacerbates this issue. I crafted a new nut from bone, ensuring it was exceptionally low.
 Close-up of the newly crafted bone nut, showing a very low string height for optimal fretless playability
 Side view of the bass headstock and nut, highlighting the low string action at the nut
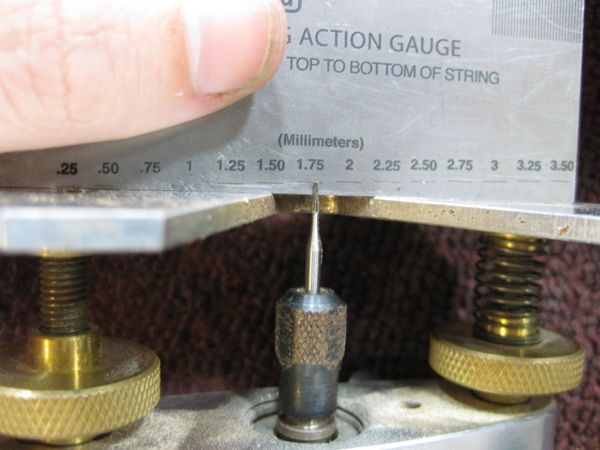
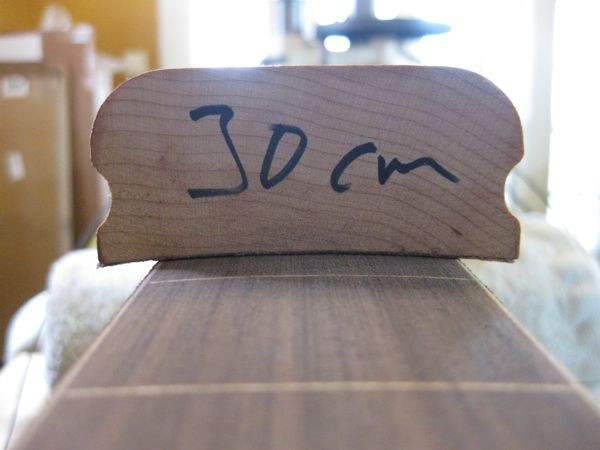
Generally, I prefer fretless necks to be almost perfectly straight. For low action setups, a minimal relief (around 0.05mm) might be introduced, while higher action setups benefit from a completely flat neck. For Kirk’s bass, I opted for a completely straight neck. I then adjusted the bridge saddle to match the 30cm fretboard radius and set the action to 2mm on the bass side and 1.75mm on the treble side.
With the setup complete, the fretless conversion was finished. After thoroughly testing the bass to verify my work, I was genuinely impressed with the resulting sound. The Ovation’s bowl-back design contributed a unique zing that accentuated the fretless qualities of the instrument. The conversion successfully breathed new life into Kirk’s old acoustic bass, transforming it into a unique fretless instrument. Now, the exciting part begins for Kirk – mastering the nuances of playing in tune on his newly fretless guitar.
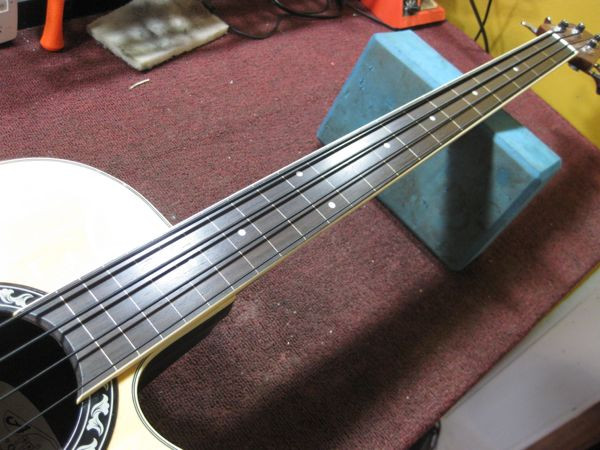 The completed fretless Ovation bass, showcasing the finished fretboard and setup