
Floyd Rose tremolo systems are renowned for their incredible tuning stability and expressive capabilities, making them a favorite among rock and metal guitarists. However, they can also be perceived as complex and daunting to maintain. If you own a Schecter or any guitar equipped with a Floyd Rose, mastering basic setup and maintenance is key to unlocking its full potential and avoiding frustrating headaches. This guide provides essential tips to help you confidently handle your Floyd Rose Guitar.
The Popsicle Stick Trick: Simplifying String Changes
One common challenge with Floyd Rose systems arises when changing strings. Unlike fixed bridges, the “floating” design of a Floyd Rose relies on a delicate balance between string tension and tremolo spring tension. Removing all strings at once will cause the bridge to sink into the guitar body, making restringing and re-balancing a tedious process.
A simple yet effective solution? Popsicle sticks! By propping up the bridge with popsicle sticks before removing the strings, you maintain the bridge’s position, preventing it from collapsing.
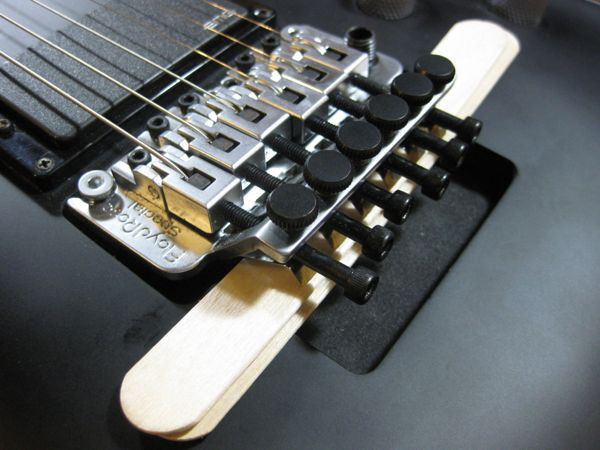 Popsicle sticks used to prop up a Floyd Rose bridge for easy string changes
Simply slide a few popsicle sticks under the rear of the tremolo bridge block until it’s level with the guitar body. This support allows you to remove all strings simultaneously without disrupting the bridge’s setup. Once you restring, the tension will naturally take over, and you can remove the sticks.
Tape It Down: Prevent String Block Mishaps
With the strings removed, another potential pitfall emerges: the small string blocks within the bridge can easily fall out and get lost. These tiny but crucial components are often difficult to replace, potentially halting your playing session.
To prevent this minor catastrophe, use tape to secure the string blocks in place during string changes or any maintenance work.
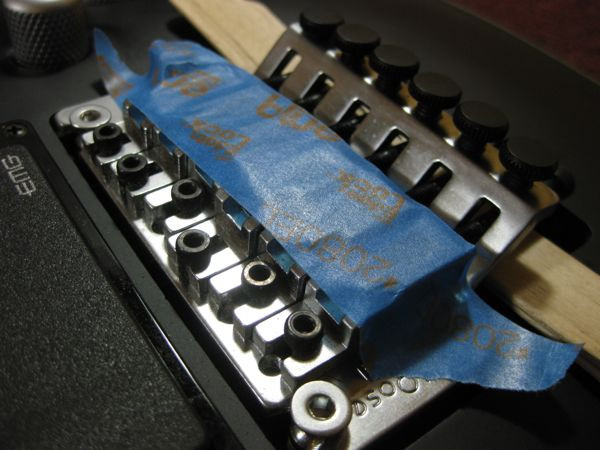 Painter's tape securing Floyd Rose string blocks to prevent loss during maintenance
Painter’s tape or masking tape works perfectly – apply a strip across the top of the bridge covering the string block area. Avoid overly sticky tapes like duct tape, which could leave residue. This simple step ensures these small parts stay put, even if you flip the guitar over for other adjustments.
The Wedge Method: Master Tremolo Balancing
Achieving the ideal tremolo balance is arguably the most intricate aspect of Floyd Rose setup. The goal is for the tremolo plate to sit parallel to the guitar body, ensuring smooth operation and reliable tuning stability. However, adjusting spring tension or string tuning can create a frustrating back-and-forth as each adjustment necessitates compensating for the other.
Enter the wedge – a game-changer for Floyd Rose balancing. A purpose-made wedge (or even a stack of guitar picks) inserted between the tremolo block and the guitar body can simplify this process dramatically.
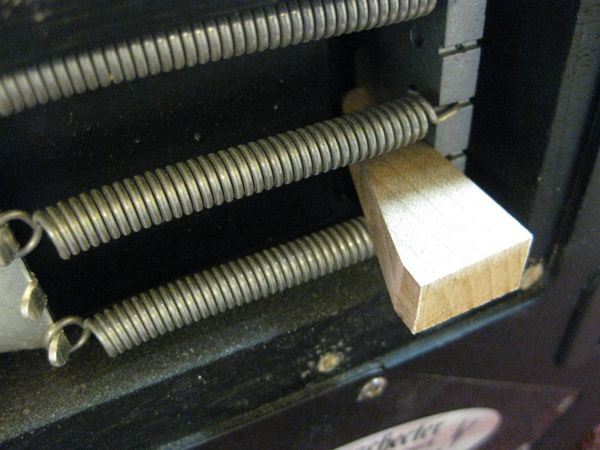 A wedge tool used to stabilize a Floyd Rose tremolo for easy tuning and spring adjustment
Wedge the tool in place to hold the tremolo plate at the desired level. With the bridge stabilized, you can tune your guitar to pitch without the bridge moving. Once tuned, gradually loosen the tremolo springs until the wedge falls out. The bridge will now be balanced at the correct position, drastically cutting down setup time from potentially hours to mere minutes.
Nut Adjustment: Lowering Action for Optimal Playability
Many Floyd Rose equipped guitars come from the factory with a nut that is set too high. This can lead to unnecessarily high action at the first few frets, making playing less comfortable and hindering proper intonation. While standard guitar nuts can be filed down, Floyd Rose locking nuts, often made of steel, require a different approach. Filing steel is difficult and can damage your tools, and even if you succeeded, it might compromise the locking mechanism.
The correct method to lower the action at a Floyd Rose nut is to remove material from the bottom of the nut itself, or, less commonly, from the guitar neck’s nut slot. Working on the nut is generally safer.
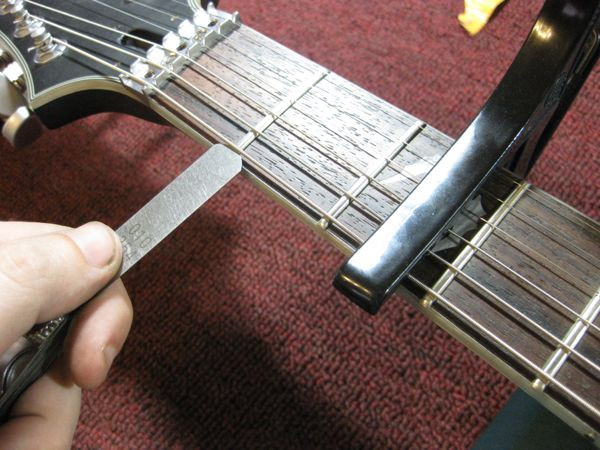 Measuring string action at the first fret with feeler gauges to determine nut height adjustment for a Floyd Rose guitar
Precise measurement is key. After ensuring the neck is straight using the truss rod, use a capo at the 3rd fret and measure the string height above the 1st fret with feeler gauges. Target action is typically around 0.3mm on the bass side and 0.15mm on the treble side. Calculate the difference between your measurement and target action to determine how much material needs to be removed from the nut’s base.
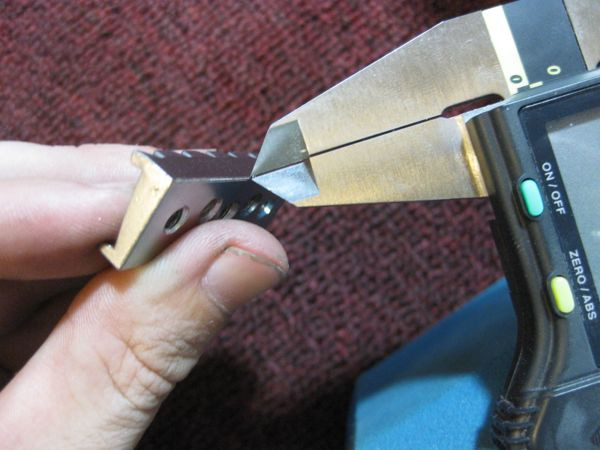 Calipers marking a precise line on a Floyd Rose nut to indicate material removal for action adjustment
Mark this tiny measurement on the nut with calipers. Sanding the bottom of the nut, often with a belt sander, is the next step. Work slowly and incrementally, as even minute changes at the nut significantly impact playability. Regularly reinstall and check the action to avoid over-sanding. Due to the precision and potential for irreversible changes, nut adjustments are often best left to experienced technicians.
Conclusion
Mastering Floyd Rose guitar maintenance doesn’t have to be an intimidating task. By incorporating these simple yet effective tips – using popsicle sticks for string changes, taping string blocks for security, employing a wedge for tremolo balancing, and understanding nut adjustment – you can confidently maintain your Floyd Rose equipped guitar, ensuring peak performance and unleashing its full sonic potential. With a little practice, you’ll find these techniques become second nature, allowing you to spend less time wrestling with your tremolo and more time playing.