Fingerpicking Guitar, often referred to as fingerstyle guitar, is a beautiful and versatile technique that allows you to play melodies, harmonies, and bass lines simultaneously on a single guitar. Instead of using a pick, fingerpicking involves plucking the strings directly with your fingers, offering a more nuanced and expressive sound. This guide will take you through the fundamentals of fingerpicking, from hand positioning to essential techniques and song examples, perfect for beginners and intermediate players alike.
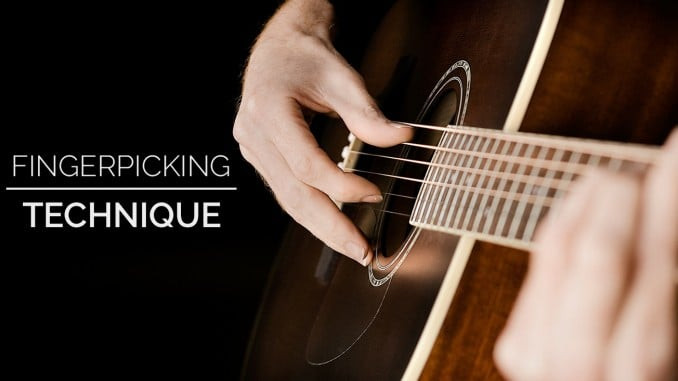 A close up shot of a guitar player's right hand expertly fingerpicking an acoustic guitar, showcasing the intricate movements and dexterity required for this technique.
Understanding Fingerpicking Basics
Before diving into techniques, it’s crucial to understand the finger designations used in fingerstyle guitar. Classical guitar notation uses Spanish terms to label the fingers of the picking hand, which are universally adopted in fingerpicking. Here’s a breakdown:
| English | Spanish | Abbreviation | Strings Typically Plucked |
|---|---|---|---|
| Thumb | Pulgar | p | 4th, 5th, and 6th (Bass Strings) |
| Index | Indice | i | 3rd String |
| Middle | Medio | m | 2nd String |
| Ring | Anular | a | 1st String |
| Pinky | Extremo | e or c | Rarely Used |
In standard fingerpicking, your thumb (p) is responsible for the bass strings (4th, 5th, and 6th), providing the rhythmic foundation. The index finger (i) plucks the 3rd string, the middle finger (m) the 2nd string, and the ring finger (a) the 1st string. While the pinky finger is generally not used in classical or basic fingerpicking, some advanced styles incorporate it.
Proper Hand Position for Fingerstyle Guitar
Correct hand position is paramount for efficient and comfortable fingerpicking. Position your picking hand so that your fingers approach the strings perpendicularly. This allows for a clean and direct pluck. To achieve this, your thumb should be positioned slightly ahead of your fingers, closer to the guitar’s headstock. This posture is fundamental for various fingerstyle techniques, ensuring each finger can access its designated strings without strain.
In the classical hand position, the fingers often rest lightly on their assigned strings when not actively plucking. Since the thumb handles the bass strings, it typically rests on the 5th or 6th string, ready to play the bass notes. This resting position helps maintain stability and prepares your fingers for the next pluck.
Fingerpicking Exercises for Beginners
Let’s start with some exercises to develop your fingerpicking coordination and technique.
Exercise 1: Fingerstyle Arpeggio
This exercise introduces arpeggios, where the notes of a chord are played individually rather than strummed together. Arpeggios are a cornerstone of fingerpicking patterns. Focus on using the finger designations (p, i, m, a) indicated above the musical staff as you practice.
When plucking the strings, aim for a smooth, controlled sound. Avoid pulling the strings excessively away from the fretboard, which can cause an unwanted “popping” sound. While this percussive effect has its place in some styles, it’s generally not desired in standard fingerpicking.
Exercise 2: Chordal Fingerpicking
Building upon arpeggios, this exercise introduces playing multiple strings simultaneously within a fingerpicking pattern. This technique adds richness and depth to your fingerstyle playing.
Exercise 3: Brushing Technique
Brushing is a technique where you sweep your finger across multiple strings, creating a strum-like effect within fingerpicking. For this exercise, we’ll focus on using the index finger (i). Use the fingernail side of your index finger (the side where you might apply nail polish) to brush downwards across the strings. Straighten your finger as you brush, extending it fully towards the floor upon completion of the motion.
In the following exercise, you’ll execute a brush stroke on beat 2 of the first four measures, brushing across the 3rd, 2nd, and 1st strings in that order. This adds a rhythmic and dynamic element to your fingerpicking.
Song Exercise: “House of the Rising Sun”
To apply your newly learned fingerpicking skills, let’s work on a classic song: “House of the Rising Sun.” This timeless folk song heavily utilizes arpeggio patterns throughout, making it an excellent choice for practicing fingerpicking in a musical context.
As you learn “House of the Rising Sun,” pay attention to how the arpeggiated chords create the song’s signature melancholic and flowing feel. This exercise will not only improve your fingerpicking technique but also expand your musical repertoire.
Exploring Travis Picking
Travis picking, named after the legendary guitarist Merle Travis, is a highly influential and recognizable fingerstyle technique. It’s characterized by an alternating thumb pattern on the bass strings (4th, 5th, or 6th), playing steady quarter notes, while the index and middle fingers weave a melody on the higher strings (1st, 2nd, and 3rd). This creates a rhythmic and melodic interplay that is distinctive to Travis picking.
Exercise 1: Steady Bass Line
The foundation of Travis picking is a consistent and rhythmic bass line played by the thumb. Practice the following example to develop a precise and even thumb rhythm on the bass strings. This steady bass provides the rhythmic backbone for Travis picking patterns.
Exercise 2: Adding a Melody Note
Once you’ve mastered the steady bass, the next step is to incorporate melody notes. This exercise introduces a melody note on beat 1, played specifically with the middle finger (m).
Exercise 3: Expanding the Melody
To complete the Travis picking pattern, we’ll add the remaining melody notes, further developing the interplay between the bass and melody. This exercise will help you coordinate your thumb and fingers to create the characteristic Travis picking sound.
Applying Travis Picking to Music
Travis picking is not limited to a single pattern. As you listen to fingerstyle songs, you’ll begin to recognize variations and applications of this technique. If you’re a songwriter, consider incorporating Travis picking into your compositions. The key is to experiment and have fun with this versatile and expressive style.
What To Do Next?
Congratulations on learning the basics of fingerpicking guitar! To continue your journey, explore songs that showcase fingerstyle techniques. “Blackbird” by The Beatles, “Dust in the Wind” by Kansas, and “Tears in Heaven” by Eric Clapton are excellent songs to learn and practice. You can also delve into classical guitar arrangements, which often feature intricate fingerpicking patterns.
Keep an eye on guitarplayers.net for more fingerstyle lessons and song arrangements, including upcoming classical arrangements. Consistent practice and exploration are key to mastering fingerpicking and unlocking a new dimension of guitar playing.