Embarking on guitar modifications and repairs can be a rewarding journey for any guitar enthusiast. After a hiatus, I decided to dive back into the world of guitar customization, starting with the often-overlooked but crucial component: the Fender Stratocaster Guitar Neck. My aim was to significantly improve the playability of my Strat without incurring excessive costs, blending the raw aesthetic of a punk rock guitar with the refined performance of a professional instrument. This article details my personal experience in upgrading and repairing my Fender Stratocaster neck, offering insights into practical modifications that can enhance your guitar’s performance and feel.
Neck Modifications and Repairs: A Step-by-Step Guide
Upgrading to Vintage Kluson Style Tuning Keys
Dragonfire Guitar Vintage Kluson Style Tuning Keys
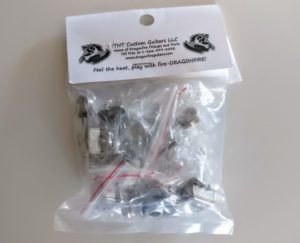 Dragonfire Vintage Kluson Style Tuning Keys for Fender Stratocaster Guitar Neck
Cost: $17.95 (free shipping)
Difficulty: 2/5
Rating: 4/5 stars
The Dragonfire Vintage Kluson Style Tuning Keys stand out as a truly impactful upgrade, especially for guitars equipped with older, less reliable tuning mechanisms. For owners of Squier Series guitars or any instrument featuring diamond-shaped tuning keys, this upgrade is highly recommended as a starting point. For a modest investment of under $20, these tuners offer a substantial improvement in tuning stability and ease of use. While premium tuners exist at higher price points, the Dragonfire keys provide exceptional value for their cost, particularly when replacing inferior stock tuners. In my case, the existing bushings were compatible, simplifying the installation process, although the included bushings would have worked just as well. A minor imperfection was noted on one tuning peg, requiring a bit of cleanup, but this was a small issue easily rectified.
Installation was straightforward. After removing the old tuners, the new Kluson-style tuners were positioned in place. Utilizing a ruler to ensure proper alignment, I marked pilot holes with a pencil. A small drill bit, significantly narrower than the mounting screws, was used to create pilot holes, with tape marking the desired drilling depth to prevent over-penetration. While attempting to conceal the original screw holes with maple wood filler yielded imperfect results, these minor cosmetic flaws are largely concealed once the new tuners are installed.
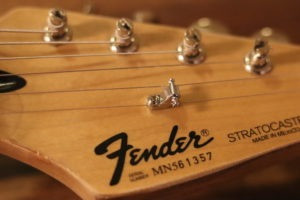
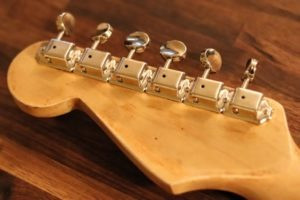 Fender Squier Series Guitar Neck with Upgraded Kluson Tuners
Enhancing String Performance with Fender American Series String Guides
Fender American Series String Guides
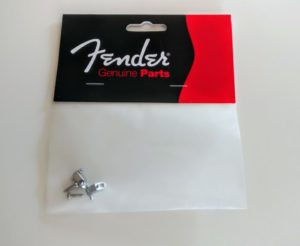 Fender American Series String Guides on a Stratocaster Guitar Neck
Cost: $7.92 (free Prime shipping)
Difficulty: 2/5
Rating: 4/5 stars
Upgrading to Fender American Series String Guides offers both aesthetic and functional benefits. These string trees not only enhance the visual appeal of the headstock but are also designed to reduce string stress, especially beneficial for players who frequently use the tremolo arm. This is an affordable upgrade, however, it does require drilling a new hole, which might be a point of hesitation for those unfamiliar or uncomfortable with modifying their guitar.
The installation involves drilling a new hole for the anchor post. To ensure accurate placement, I aligned the string tree, marked the drill point with a pencil, utilizing the original string tree hole and anchor post for reference. A drill bit of approximately the same diameter as the anchor post was used to create the new hole. My Stratocaster originally had only one string tree; while I replaced this single tree, I am considering adding a second string tree in the future to further optimize string tension and performance.
 Original String Tree on Fender Squier Series Guitar Neck Before Upgrade
Optimizing String Resonance with a Graphtech TUSQ Nut
Graphtech Strat Style Flat Bottom 42mm PT-5042-00 Nut
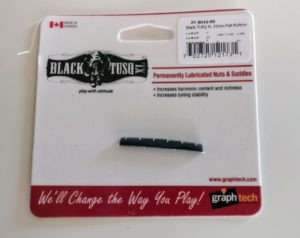 Graphtech Black TUSQ Nut for Fender Stratocaster Guitar Neck Upgrade
Cost: $11.99 (Prime Shipping)
Difficulty: 2/5
Rating: 4/5 stars
Replacing the guitar nut with a Graphtech TUSQ nut is a significant upgrade that impacts both tone and playability. The TUSQ material is engineered to enhance string vibration transfer to the neck, resulting in improved sustain and clearer tone. This particular modification presented the steepest learning curve in this project. Initially, the flat bottom nut I ordered was not a direct fit, leading to an ill-advised attempt to file the fretboard. It is crucial to avoid filing the fretboard. The correct approach is to modify the nut itself or, if necessary, order a replacement nut that is properly sized.
Despite the initial setback, Graphtech nuts are designed to be easily shaped. Using sandpaper and comparing the TUSQ nut to the original nut, I was able to carefully reduce its size to achieve a proper fit. For Stratocasters, particularly those with curved fretboards, a curved bottom nut is generally recommended to avoid such fitting issues in the first place. The key takeaway is to always modify the nut to fit the guitar neck, not the other way around.
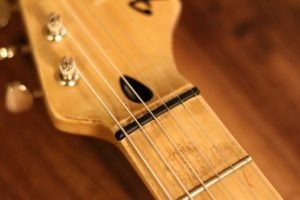 Original Nut on Fender Squier Series Guitar Neck Requiring Replacement
Mastering Truss Rod Adjustment for Neck Relief
Truss Rod Adjustment
Cost: Free (potentially costly if mishandled)
Difficulty: 2/5
Rating: 5/5 stars
Learning to adjust the truss rod is an invaluable skill for any guitar player. The truss rod controls the neck relief, which directly affects playability and can be customized to suit individual playing styles. Contrary to some myths, adjusting the truss rod yourself is not inherently dangerous to your guitar, provided it is done carefully and with proper knowledge. It’s essential to understand that neck relief is a personal preference and should be adjusted based on your playing style, not arbitrary standards.
While some may caution against DIY truss rod adjustments, the reality is that with careful learning and practice, it is a manageable task. However, caution is paramount. Before attempting any adjustments, thoroughly research the process. Watch instructional videos, read guides, and if possible, practice on a less valuable guitar first. Take your time, make small adjustments, and be patient. The risk of damaging the neck is minimal compared to the benefit of being able to fine-tune your guitar’s playability.
Fret Treatment: Addressing Fret Sprout and Unevenness
Fret Treatment
Cost: Free (potentially costly if mishandled)
Difficulty: 2/5
Rating: 5/5 stars
Similar to truss rod adjustments, learning basic fretwork can significantly improve your guitar’s feel and playability. This Stratocaster neck exhibited fret sprout and unevenness, common issues, especially in more affordable guitars. Fret sprout occurs when the fret ends protrude from the fretboard edges, often due to changes in humidity, and can feel sharp and uncomfortable. Uneven frets can cause buzzing and dead spots.
Addressing these issues involves a systematic process. First, mask the fretboard with painter’s tape to protect the wood. Then, mark the top of each fret with a marker. Use a fret rocker to identify uneven frets. Carefully sand down high frets using a sanding sponge, periodically re-checking for levelness. After leveling, use a fret crowning file to reshape the fret tops, restoring their rounded profile. Finally, polish the frets with steel wool for a smooth finish. Like truss rod adjustments, fretwork requires patience and careful technique, but the results in playability are well worth the effort.
Applying Stain and Lacquer for a Custom Neck Finish
Stain & Lacquer
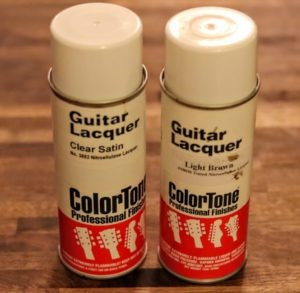 ColorTone Lacquer used for Fender Stratocaster Guitar Neck Refinishing
Cost: Approximately $35 for lacquers
Difficulty: 3/5
Rating: 2/5
Refinishing the guitar neck is a more advanced modification, primarily cosmetic but also impacting the neck’s feel. My goal was to achieve a DIY relic aesthetic, aligning with the guitar’s punk rock vibe. While I am personally satisfied with the outcome, the process was fraught with challenges and is not recommended for beginners or for those seeking a pristine, professional finish.
The process began with sanding the neck to remove the original finish. Uneven sanding led to inconsistent stain absorption, highlighting the importance of proper surface preparation. The light brown stain lacquer applied darker than anticipated, resulting in a less “roasted maple” look and more of a darker brown hue. The spray application was also problematic, with unevenness and drips. Attempting to correct the stain with nail polish remover resulted in a unique, slightly grey-brown stain, which ultimately contributed to the desired relic look.
Despite the staining mishaps, the subsequent clear satin lacquer finish was successful. Multiple thin coats of lacquer, with buffing between coats using a scouring pad, resulted in a smooth, satin feel. While the refinishing process was imperfect, it yielded a unique, playable neck finish that aligns with the guitar’s intended aesthetic.
Guitar Modifications and Repair: To Be Continued…
These neck modifications and repairs represent the first phase of upgrading this Fender Stratocaster. Future updates will detail modifications and repairs to the guitar body, continuing the journey to create a personalized and high-performing instrument.