
For any guitar enthusiast, the allure of crafting a personalized instrument is undeniable. This year, instead of adding another off-the-shelf guitar to my collection, I decided to embark on a different adventure: building one. Now, let’s be clear, when I say “build,” I’m talking about tackling a guitar kit – a fantastic middle ground between buying pre-made and the intricate art of true lutherie. As someone whose DIY skills are, shall we say, developing, a guitar kit seemed like the perfect gateway into the world of guitar construction, especially for achieving that iconic Explorer Guitar shape I’ve always admired.
Forget virtual guitar builders; I wanted to get my hands dirty and truly understand the anatomy of an explorer guitar. The idea of shaping wood from scratch was a bit daunting, and honestly, probably beyond my current skillset. I envisioned something less “luthier’s workshop” and more “successful weekend project.” An explorer guitar kit offered precisely that balance of challenge and achievable results.
The kit I chose was an explorer guitar style from Pit Bull Guitars. Several factors drew me to them. Being an Australian company, they offered quicker and more affordable shipping within Australia – a significant perk. More importantly, their range featured exactly what I was after: that aggressive explorer guitar body shape, clean and without a scratchplate.
My inspiration? None other than James Hetfield and his iconic white ESP explorer guitar from the late 80s. That guitar was instrumental in sparking my own guitar playing journey, and I wanted to pay homage to that influence with my own build. This wasn’t just about assembling parts; it was about creating my explorer guitar, infused with that same spirit.
With my goal firmly in mind – a sleek, off-white explorer guitar – I placed my order. When the package arrived, my initial reaction was surprise at its lightness. Having never received a guitar kit before, I wasn’t sure what to expect from a square box. However, upon opening it, skepticism turned into excitement. Everything was neatly packed, and the quality of the components looked impressive.
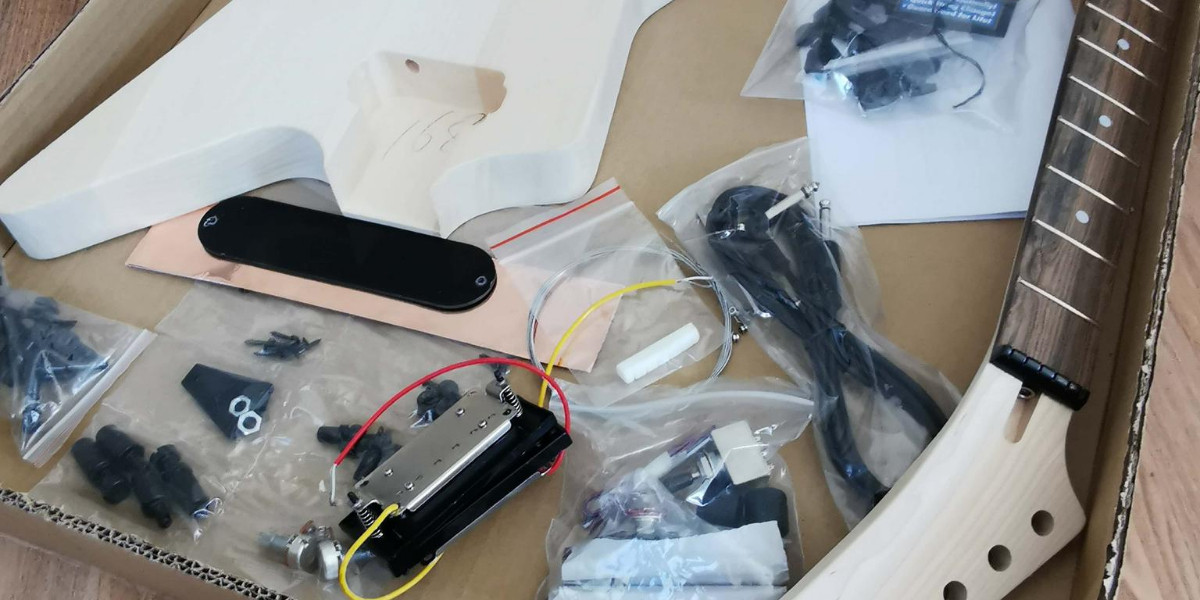 Guitar kit build contents showing the box opened to reveal wood components and hardware
I had opted for a few key upgrades to enhance my explorer guitar build. Grover locking tuners were a must for tuning stability, along with a bone nut for improved sustain and tone. I also chose copper shielding for the electronics cavities to minimize noise, and black hardware to replace the standard chrome, aligning with the stealthy aesthetic I envisioned for my explorer guitar. A pleasant bonus was that because I upgraded all the hardware to black, Pit Bull Guitars included both the standard tuners and the upgraded Grover locking tuners. Bonus spares!
As I mentioned, I’m no seasoned handyman. To successfully complete this explorer guitar kit build, I needed to acquire some essential tools. A trip to my local hardware store equipped me with everything necessary to prepare the guitar for assembly, gluing, and painting.
Everything, that is, except the inherent skills to wield these tools like a pro.
 Close up of guitar kit hardware including tuners, bridge, and other metal components laid out on a workbench
Following the hardware store run, I also invested in finer grades of sandpaper from an automotive supply store. These ultra-fine papers would be crucial for achieving a smooth, professional finish in the later painting stages of my explorer guitar project. For the most part, I felt well-prepared. Now, the real work – the explorer guitar build process – was about to begin.
Assembling Your Explorer Guitar Kit: Step-by-Step
The instructions from Pit Bull Guitars emphasized the importance of a “mock build” – a dry run before any permanent assembly. This involves laying out all the parts to verify everything is present and accounted for. My explorer guitar model features a set neck design, meaning the neck needs to be glued into the body. Crucially, before applying glue, it’s essential to check the fit and alignment of these two primary components. I did this, and to my untrained eye, everything seemed to align correctly for my explorer guitar.
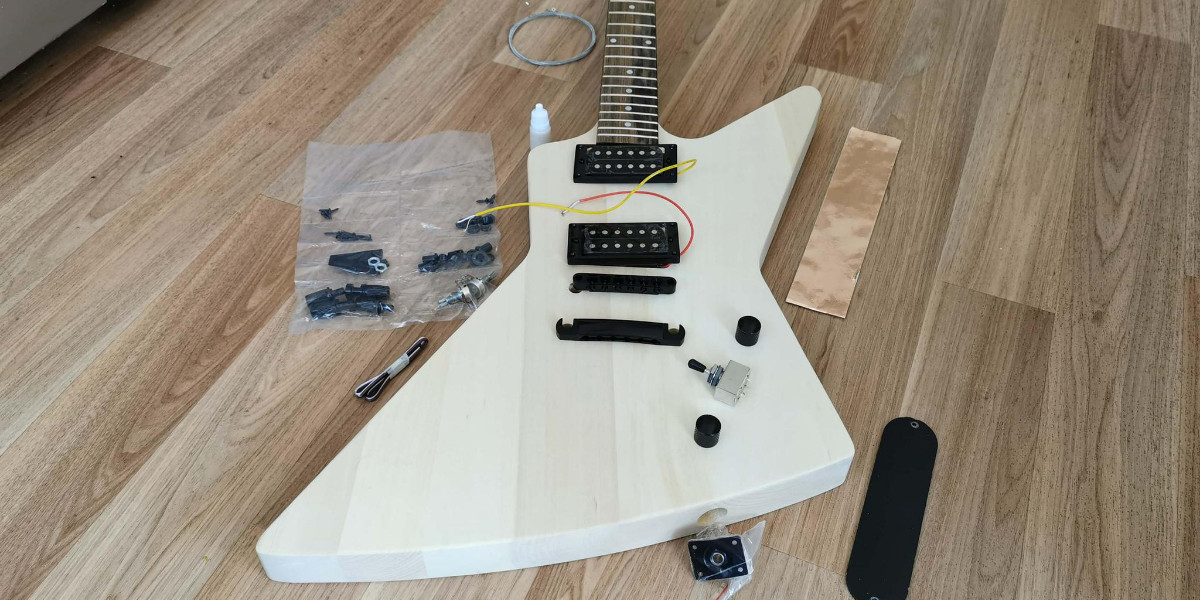 Guitar kit build mockup showing the guitar body and neck laid out to check fit before gluing
I was uncertain how to accurately assess the string action at this stage, as the neck needed to be firmly in place. Clamping alone wouldn’t realistically simulate string tension. Taking a bit of a leap of faith, I decided to proceed directly to the neck-gluing stage of the explorer guitar build. Perhaps, in hindsight, this was my first misstep.
After a minor sanding adjustment – the neck initially fit a tad too snugly into the neck pocket – it was time to apply the provided wood glue to the neck joint and body. I then carefully positioned clamps to secure the neck and body together. To protect the wood, I placed pieces of cardboard between the clamps and the guitar body, particularly within the neck pickup cavity and on the fretboard. While the clamps had rubber ends, I preferred to err on the side of caution. Ensuring a tight and clean neck joint is paramount for any guitar, especially an explorer guitar where sustain and resonance are key.
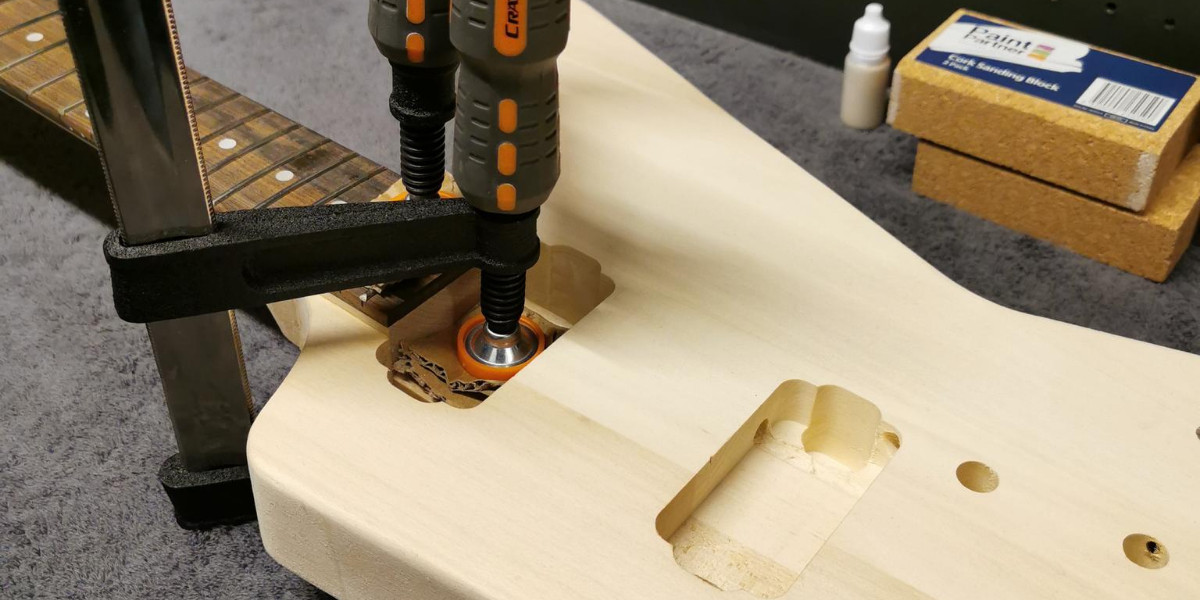 Guitar kit build neck gluing and clamping process with clamps holding the neck to the body
I promptly wiped away any excess glue that squeezed out from the joint under the clamp pressure. Then, I waited for the glue to fully dry and set. Looking back, I realize I could have potentially painted the body and neck separately before gluing. However, my aim was to achieve a seamless paint finish, eliminating any visible joint lines between the neck and body of my explorer guitar. That was the ambitious goal, at least.
Once the glue had cured, I began sanding the wood in preparation for painting. The Pit Bull Guitars forum offered helpful advice, and instructional videos were readily available. In fact, I probably watched around ten different guitar sanding videos, which, ironically, left me somewhat more confused than when I started. Despite the conflicting advice, I eventually sanded the wood to a stage that I deemed “ready for paint” for my explorer guitar.
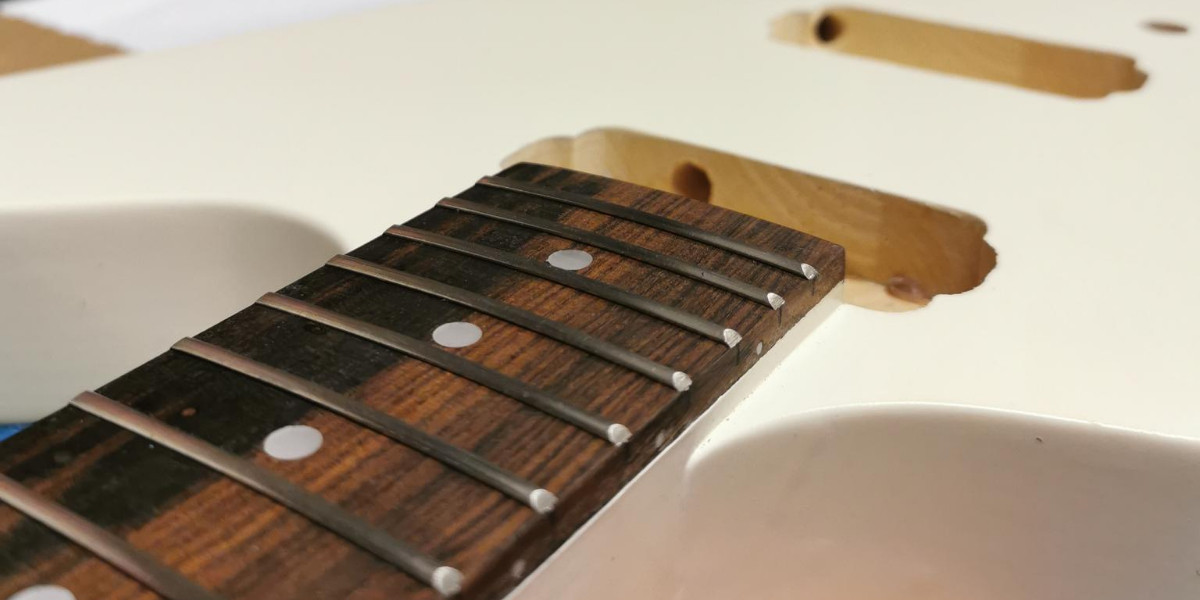
Following sanding, I carefully removed the plastic nut on the guitar neck, replacing it with the upgraded bone nut. I then meticulously masked off the fretboard and any body cavities to protect them during the painting process. Painting was the next hurdle, and frankly, the step that filled me with the most trepidation.
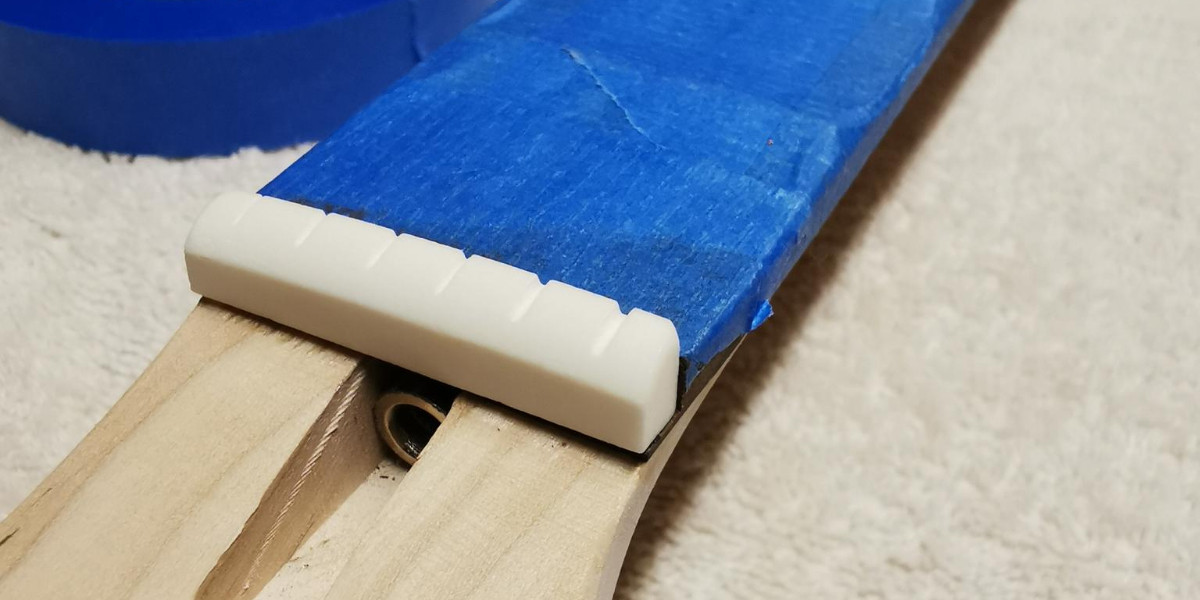 Guitar kit build nut replacement showing the old plastic nut being removed and the new bone nut ready to install
I was genuinely concerned about damaging the delicate strip of neck wood to which the original plastic nut was glued. However, I managed to remove it safely. The bone nut not only looked significantly better but would also complement the overall color scheme of my explorer guitar beautifully.
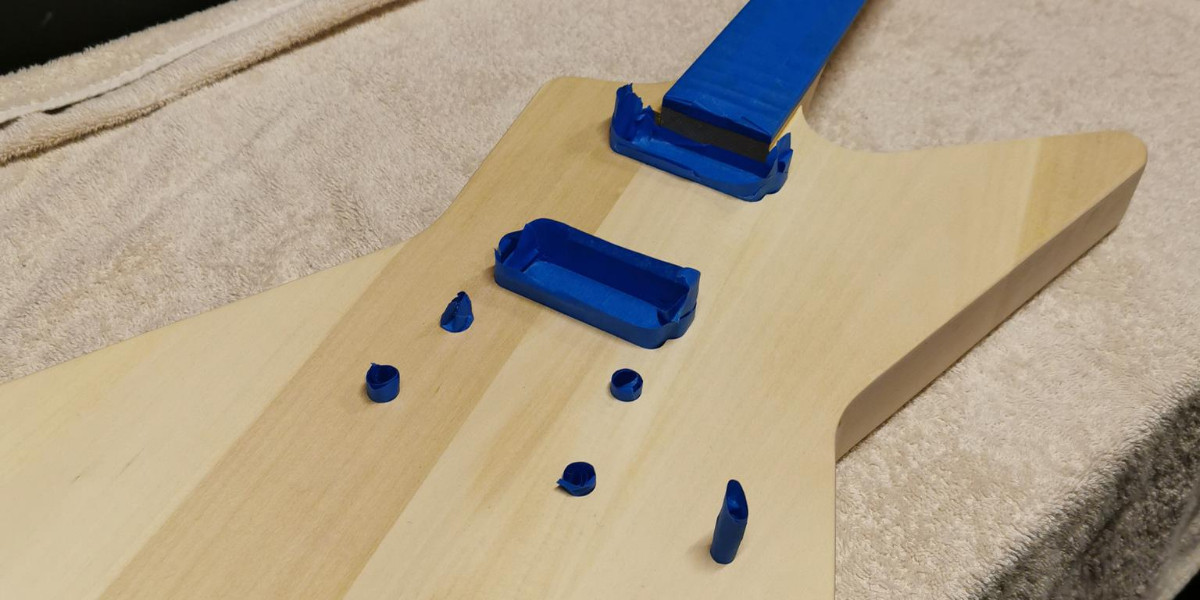 Guitar kit build masking preparation for painting showing blue masking tape covering hardware holes and fretboard
Instructional videos presented two main approaches to painting preparation. Some advocated for meticulously taping off all hardware holes, as I’d done. Others simply painted over everything. My concern was that excessive paint buildup could prevent the hardware – particularly the bridge and tailpiece – from fitting correctly. For my explorer guitar, I opted for careful masking, believing it to be the wiser approach.
Then came the moment of truth: painting. This stage genuinely terrified me. Having past spray-painting experiences marred by drips and runs, I lacked confidence in my painting abilities. Achieving a smooth, even finish on my explorer guitar seemed like a distant dream.
 Guitar kit build painting process showing the guitar body being spray painted in a garage setup
However, I must admit, I was reasonably pleased with the final paint job. I started with a primer/undercoat, followed by several coats of the chosen color, and finally, multiple layers of clear coat. Significant drying time – days, sometimes weeks – separated each stage. In retrospect, I should have extended the drying periods even further, as I later encountered paint curing issues. More on that later.
I created a makeshift paint booth in my unused garage and managed to contain most of the overspray. The key innovation during the painting process was what I now affectionately call the “paint pen.” This simple tool proved invaluable for achieving an even finish on my explorer guitar.
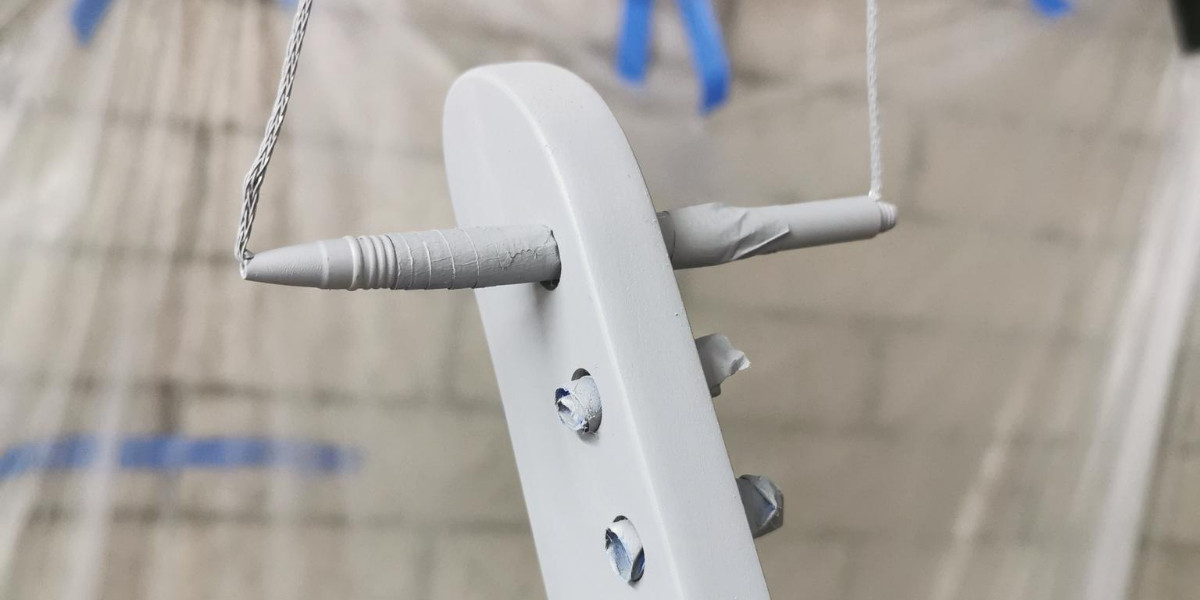 Guitar kit build paint pen showing a pen inserted into the neck pocket to hold the guitar for painting
Initially, I had suspended the guitar using wire, but the wire placement near the headstock hindered painting access. The “paint pen” – essentially a hollowed-out pen inserted into the neck pocket – allowed me to rotate the guitar freely and reach every angle with the spray paint. This, I believe, was my most ingenious moment in the entire explorer guitar kit build process.
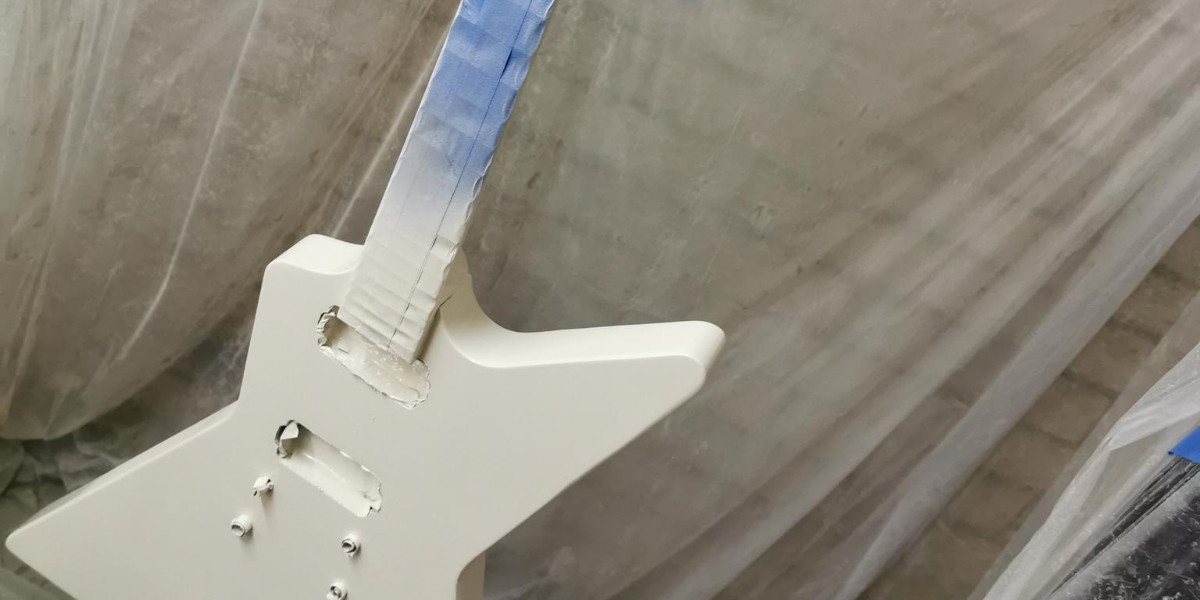
Once the paint was thoroughly dry, it was time to remove the masking tape – another moment of anticipation. I was genuinely surprised and delighted with the result. My explorer guitar was actually starting to look like a real instrument!
 Guitar kit build masking tape removal revealing clean paint lines
Some fine sanding and minor touch-ups were necessary, but the masking tape had largely done its job flawlessly. At this stage, I applied fretboard oil to nourish the wood and enhance its appearance. The fretboard darkened beautifully, the oil enriching the wood grain and softening the feel simultaneously. The quality of the kit components continued to impress me as I progressed with my explorer guitar build.
This marked the beginning of a seemingly endless cycle of sanding, polishing, buffing, and more sanding. I lost track of the exact sequence of steps in this phase. The goal was to achieve a smooth, glossy finish on my explorer guitar paintwork, and the effort eventually paid off with a respectable result.
The next step was applying copper shielding to the electronics cavities. This process was surprisingly straightforward and resulted in a clean, professional-looking shielded cavity for my explorer guitar’s electronics.
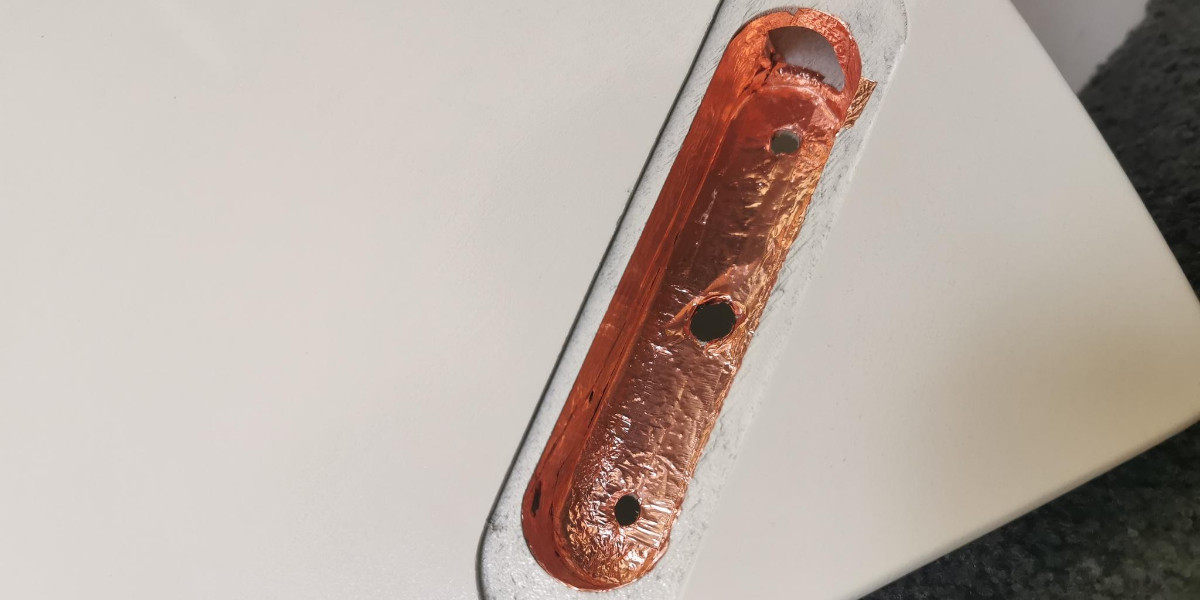 Guitar kit build electronics shielding showing copper tape applied inside the control cavity
The same shielding was applied to the pickup cavities on the front of the explorer guitar body. With shielding complete, I faced the most daunting task of the entire build for me: soldering.
Steady hands and sharp eyesight are not among my strengths. Soldering the electronics for my explorer guitar was always going to be a challenge.
Nevertheless, I was determined to tackle it. And, surprisingly, I managed reasonably well. Some of my solder joints are far from textbook perfect, but crucially, I succeeded in getting the guitar to produce sound through an amplifier. It might not be flawless, but it worked.
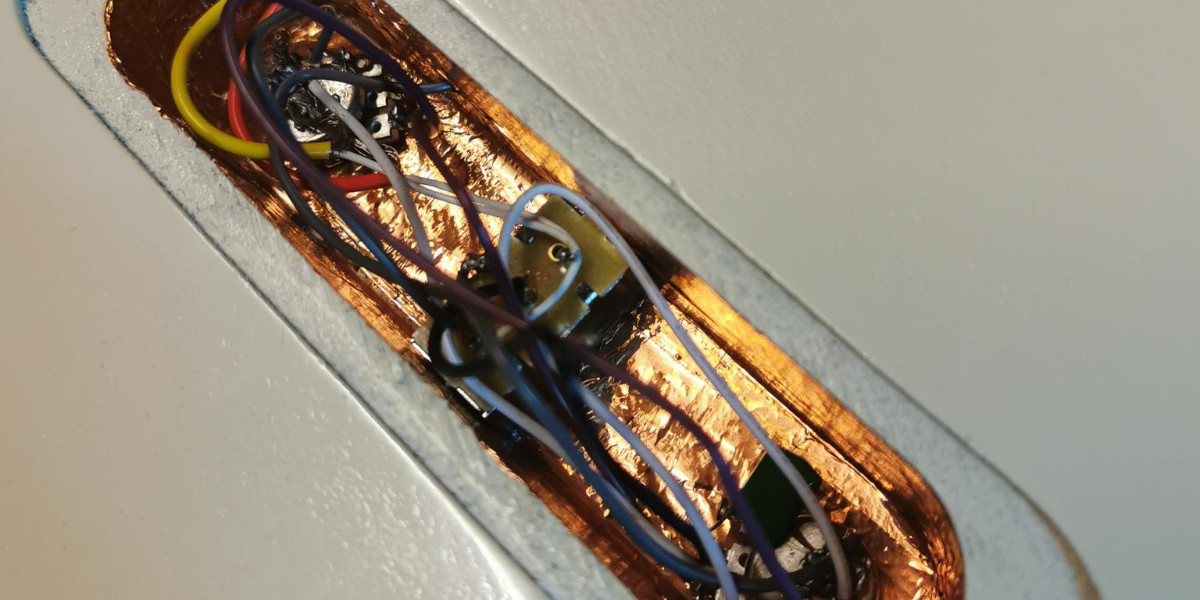 Guitar build kit soldering process showing wiring and soldering iron with visible solder joints
I suspect that I might eventually upgrade to solderless pickups in the future for potentially improved sound and ease of maintenance.
The subsequent step nearly derailed the entire project. This was the point where I made my biggest mistake and simultaneously discovered that my paint hadn’t fully cured as anticipated. In a moment of pure brain fade, I attempted to install the tailpiece poles into the bridge position. Yes, you read that correctly. Idiot move.
After a string of expletives and some painstakingly slow and careful removal, I corrected my error, installing the bridge and tailpiece in their rightful positions on my explorer guitar. Despite my caution, the fresh paintwork suffered some minor damage. Clearly, I hadn’t allowed sufficient curing time. Another valuable lesson learned in the explorer guitar building journey.
Initially, I was disheartened. However, after some reflection, I adopted a different perspective. This was my first attempt at building a guitar. Mistakes are inevitable learning experiences. Furthermore, some players intentionally pay a premium for “relic’d” guitars with artificial wear and tear. My explorer guitar now possessed a genuine, albeit accidental, relic job.
So, my explorer guitar now boasts “unique character features.” That’s how I’m choosing to frame it.
Following this hardware hiccup, I proceeded to install the remaining components. The locking tuners, in particular, looked fantastic, adding a touch of premium quality to the explorer guitar.
One slightly disappointing discovery was that, with all hardware in place, the guitar’s action was higher than my preferred setting. I spent several days making gradual truss rod adjustments, but I couldn’t achieve my desired low action without introducing fret buzz. The explorer guitar is perfectly playable, just not…perfectly optimized.
Despite this minor setback, I remained incredibly happy with the progress. The final touches were now needed, starting with a headstock logo for my explorer guitar.
Referencing my original inspiration, James Hetfield’s ESP explorer guitar, and acknowledging the kit’s Explorer body shape, I decided to combine these elements into a simple, impactful logo: EXP.
EXPlorer.
I explored various DIY headstock logo techniques in online videos. However, fearing further damage to my less-than-perfect paint finish, I opted for a simpler solution. I ordered a custom transfer sticker from Sticker Mule and applied it to the headstock of my explorer guitar.
![]() Guitar kit build headstock logo showing the applied "EXP" logo transfer sticker
Guitar kit build headstock logo showing the applied "EXP" logo transfer sticker
To complete the desired aesthetic, I ordered black pickup covers from eBay. While I doubt they’ll significantly impact the sound, they perfectly finalized the visual style I was aiming for with my explorer guitar.
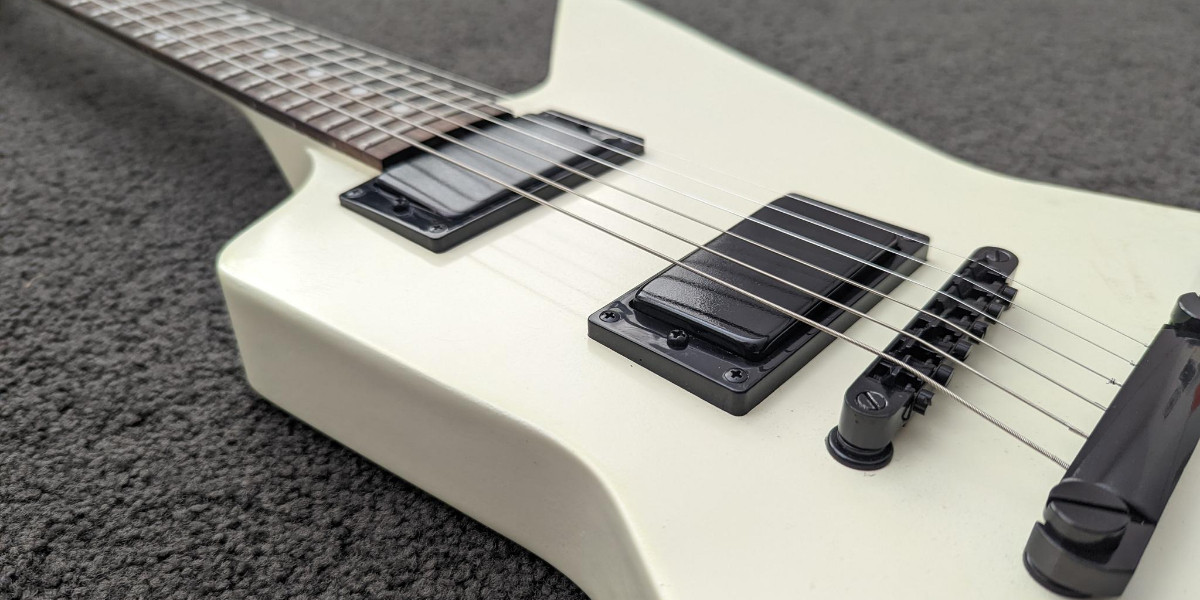 Guitar kit build pickup covers showing black pickup covers installed on the guitar
Would I embark on another guitar kit build? Possibly. However, if I were to repeat the process, I would strongly consider staining rather than painting the guitar. Furthermore, I would definitely prioritize a solderless kit for ease of electronics assembly. The overall experience of building the explorer guitar kit was immensely enjoyable. I thoroughly relished the process, even with my limited painting and soldering skills.
Lessons were learned, and a unique, awesome-looking explorer guitar was born.