Having your guitar readily accessible can significantly increase your playing time. Instead of keeping your instrument tucked away in its case, a guitar stand allows you to display it safely and beautifully, ready to be picked up at a moment’s notice. This Diy Guitar Stand project is designed to be incredibly simple, requiring minimal tools and woodworking experience, making it perfect for beginners and seasoned players alike. In just a short amount of time, you can create a functional and attractive stand that keeps your guitar safe and sound. Let’s dive into how to build this incredibly easy and practical guitar stand.
 Finished Guitar Stand
Tools and Materials for Your DIY Guitar Stand
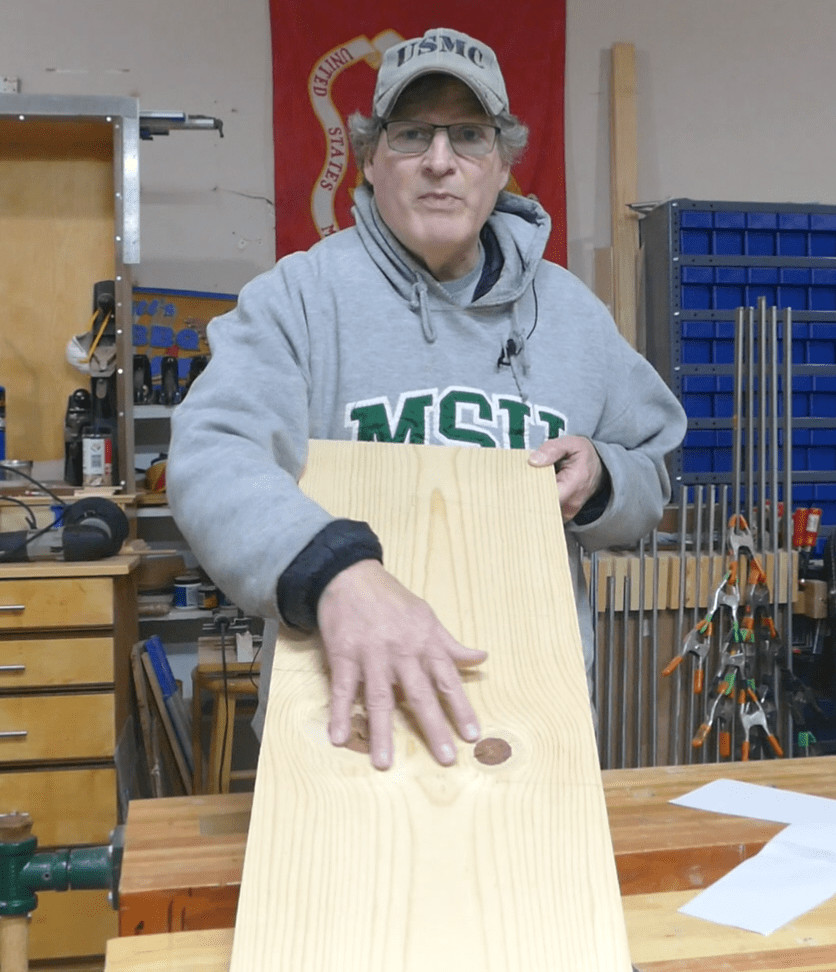
For this project, simplicity is key. The original creator opted for readily available 1×12 pine, valuing its accessibility. However, for a touch of elegance, hardwoods like walnut, cherry, or maple would also be excellent choices, offering richer tones and grain patterns. The beauty of this diy guitar stand is its adaptability to your material preferences.
The tool list is equally minimal. If you’re aiming for a truly basic approach, you’ll only need:
- Measuring tape: For accurate dimensions.
- Pencil: For marking your cuts.
- Hand saw: For cutting the wood pieces.
For those with a more equipped workshop, power tools can expedite the process, although they are certainly not essential for this easy diy guitar stand:
- Bandsaw: For making curved and straight cuts efficiently.
- Radial arm saw: For precise crosscuts.
- Oscillating belt sander: For shaping and smoothing curves.
- Random orbit sander: For surface sanding.
 Guitar Stand Materials
Simple Layout for a Functional Guitar Stand
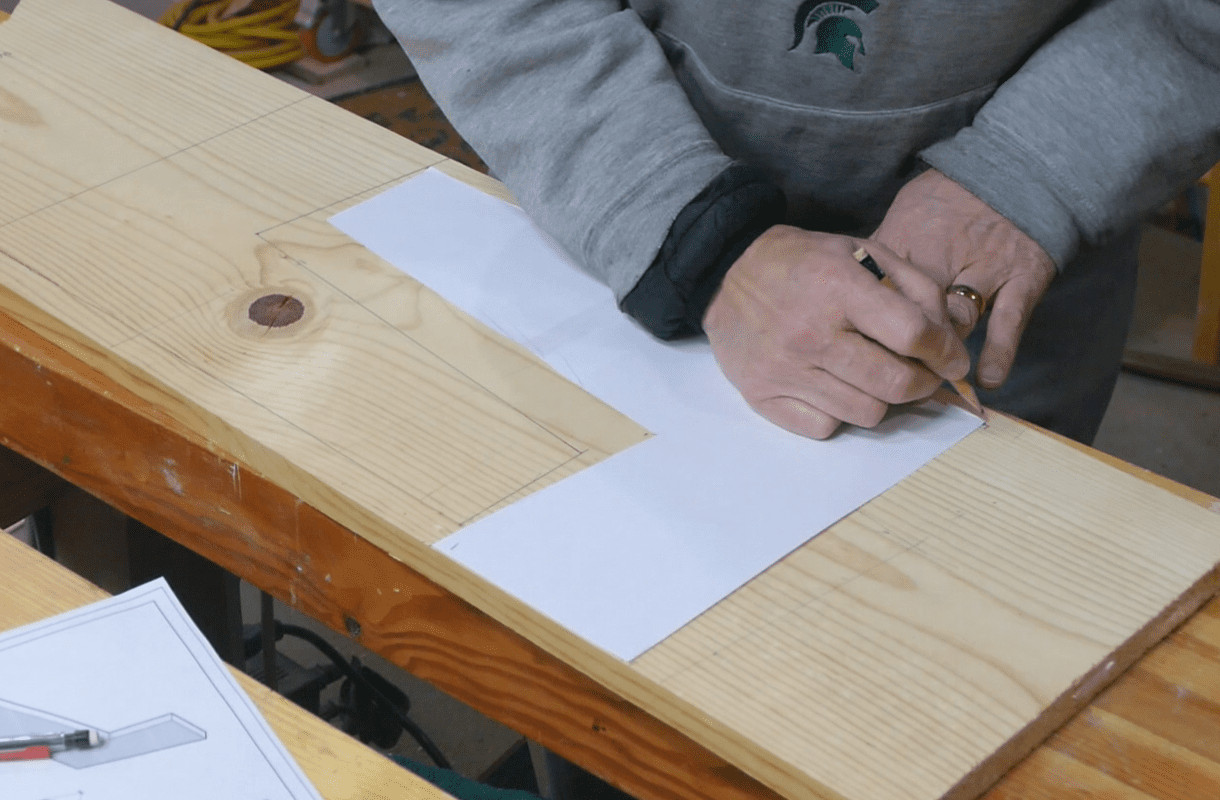
The layout for this diy guitar stand is remarkably straightforward. To ensure accuracy and visualize the final product before cutting, consider creating a paper template based on the provided sketch. This is especially helpful if your wood piece has knots or imperfections, allowing you to strategically position the parts for the best appearance and structural integrity.
Using a paper template offers a significant advantage: it lets you optimize wood usage. Instead of directly tracing the template, use it to mark critical points and then connect them with straight lines. This “connect-the-dots” method allows you to visualize how the parts nest together, minimizing waste and potentially reducing the amount of wood needed for your diy guitar stand.
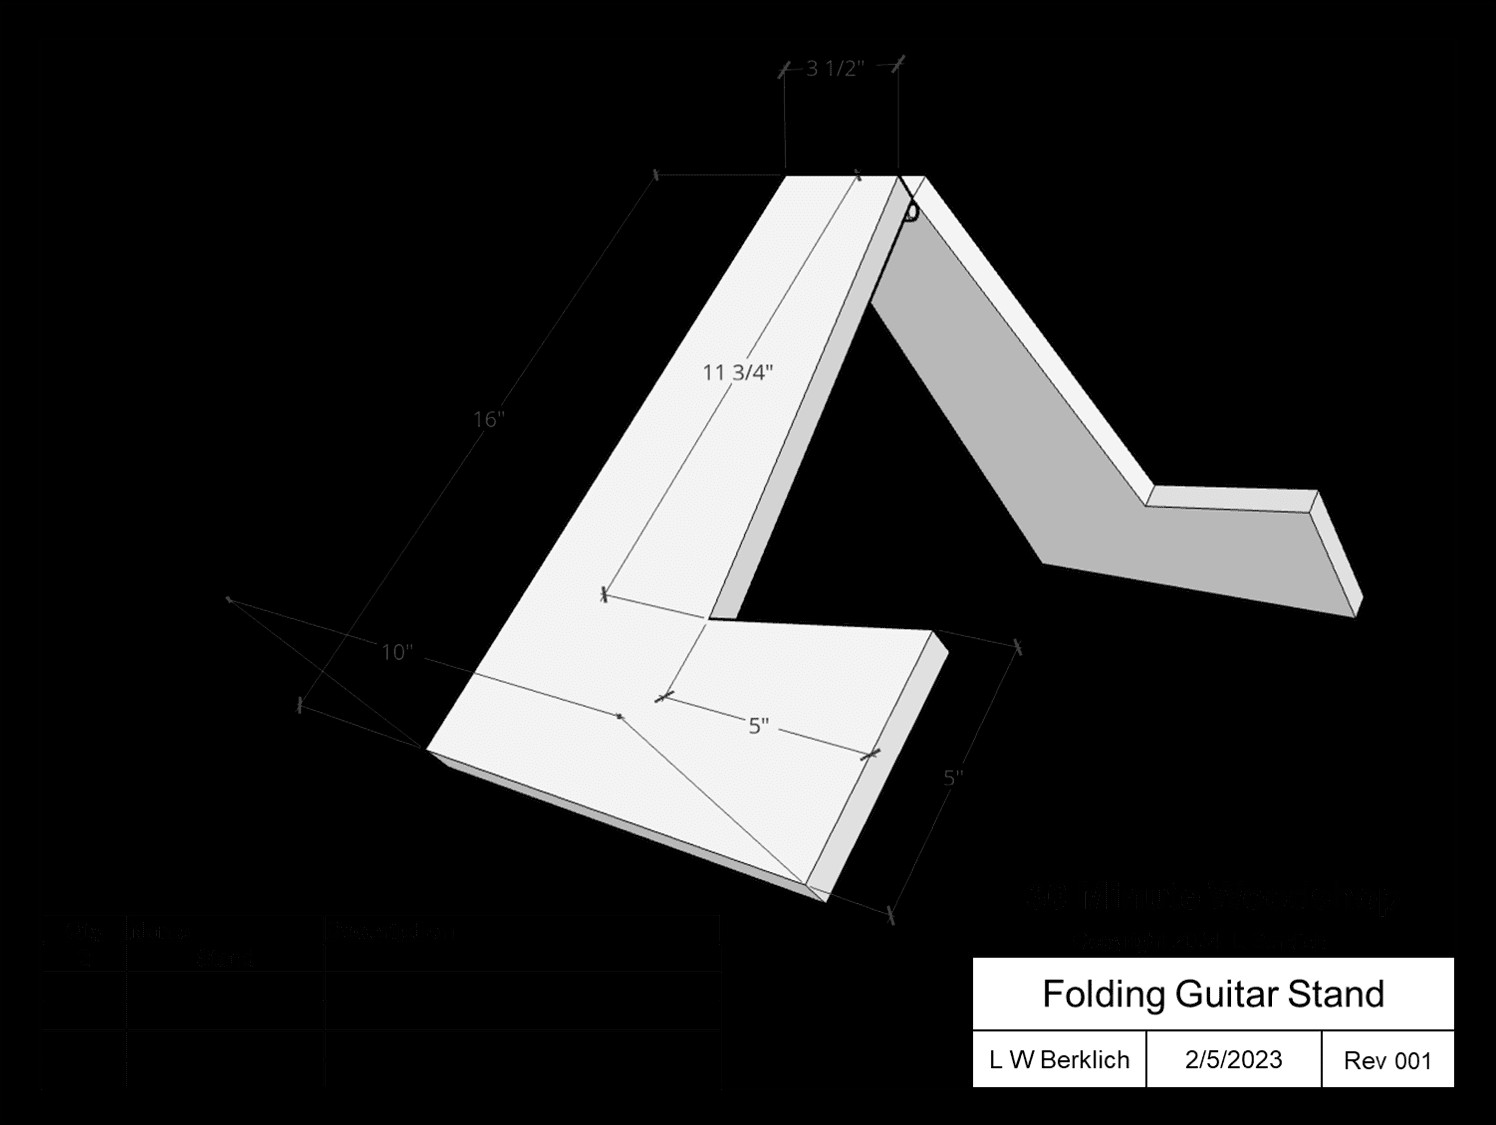 A detailed drawing illustrating the dimensions and layout of the folding DIY guitar stand, showing the two main pieces and hinge placement.
 Layout for the Guitar Stand
Cutting the Guitar Stand Pieces
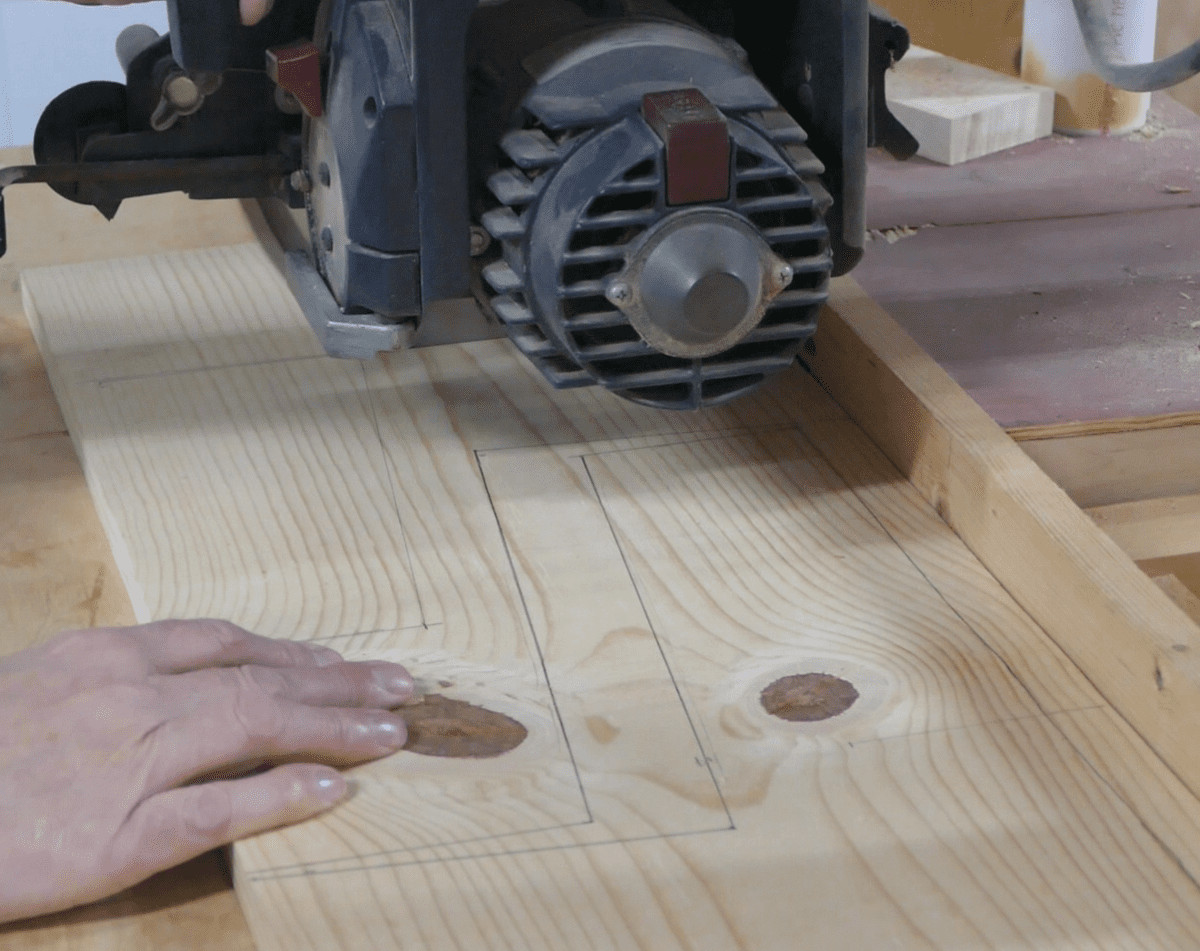
Before starting any cuts, crosscutting the 1×12 piece into a more manageable size is a practical first step, especially if you’re working with a longer board. This makes handling the wood safer and easier throughout the cutting process for your diy guitar stand.
With your layout marked, proceed to cut out the individual parts. A bandsaw is an efficient tool for this, allowing for smooth curves and straight lines. However, remember that this diy guitar stand is designed for simplicity. A hand saw or even a jigsaw will work just as well, proving that you don’t need extensive power tools to complete this project. Just follow your marked lines carefully to ensure accurate parts.
 Crosscutting
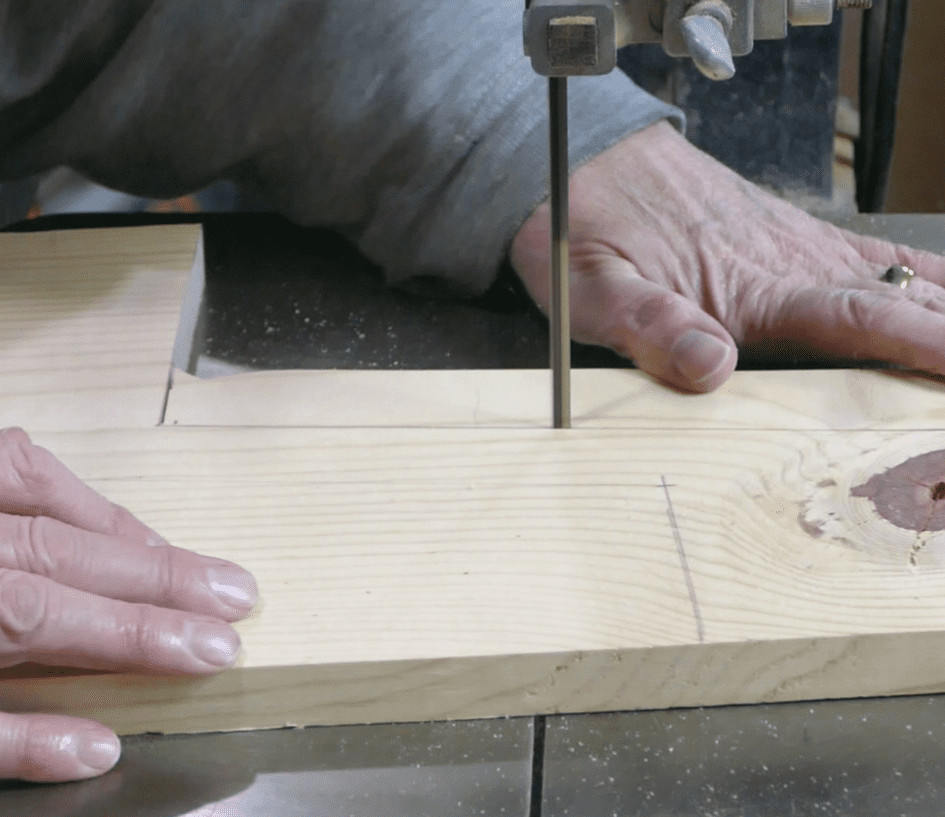 Cutting Guitar Stand Parts on the bandsaw
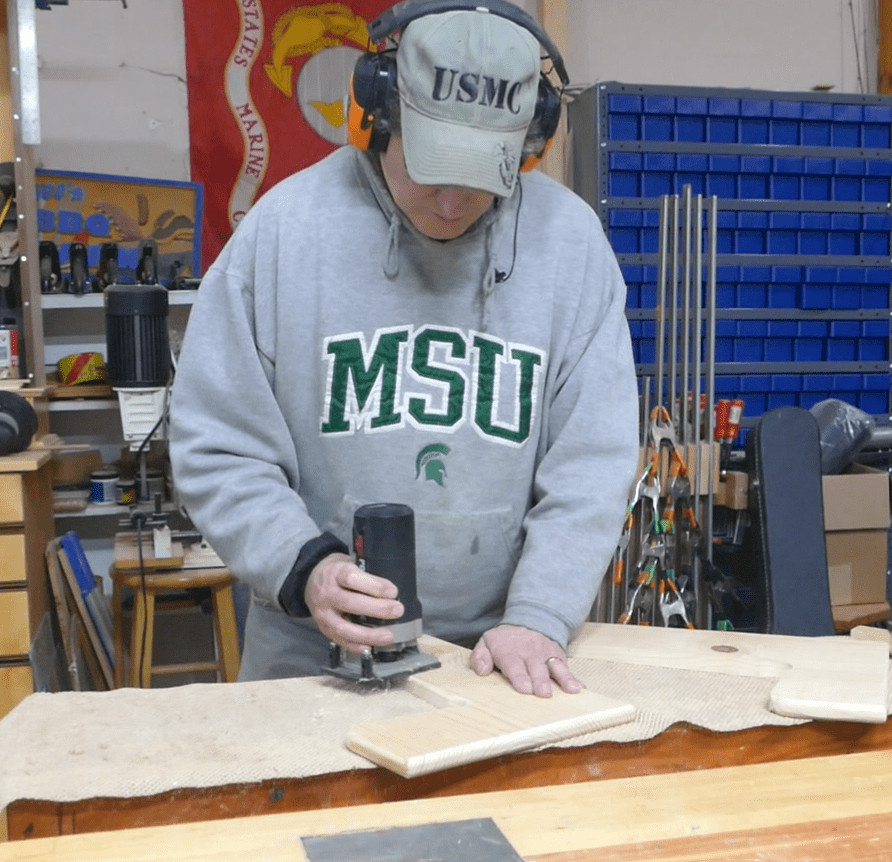
Shaping for Guitar Safety and Comfort
Once the pieces are cut, shaping becomes crucial. The goal is to make your diy guitar stand “guitar-friendly” by eliminating sharp corners and edges that could potentially scratch or damage your instrument. An oscillating belt sander is excellent for quickly rounding over edges, but various tools can achieve this: a jigsaw, hand saw, sandpaper, a file, or even a router.
Pay particular attention to rounding the lower and upper corners, as these are the primary contact points with your guitar. Additionally, sanding the flat surfaces at this stage is more efficient before routing. Notice in the images how the inside corner is also sanded – this small detail prevents the guitar’s edge from pressing against a sharp corner, showcasing thoughtful design in this diy guitar stand.
 Shaping parts
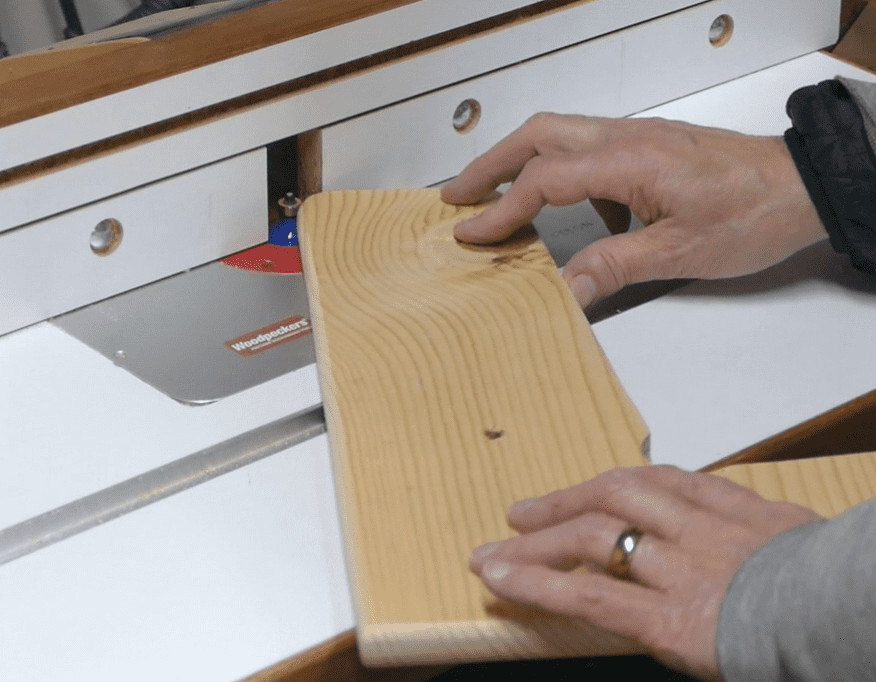
Routing the Edges for a Professional Finish
Routing adds a professional touch and further refines the edges of your diy guitar stand. This process is done in two steps with different router bits.
First, use a 3/8-inch radius round over bit for the top, back, and bottom edges of both pieces. This creates a substantial rounded edge for a comfortable feel and refined look.
Next, switch to a smaller 1/8-inch round over bit for the inside edges where the guitar will make contact. The smaller radius here is intentional. It softens the edge while maintaining a sufficient flat surface area for the protective leather or felt to adhere properly. This careful routing ensures both protection and a clean finish for your diy guitar stand.
 Routing outside edges
 Routing inside edges
Sanding for a Smooth Finish Ready for Stain
Sanding is essential for achieving a smooth, professional finish on your diy guitar stand. Begin by surface sanding both pieces with a random orbital sander and 220-grit sandpaper. This removes any remaining mill marks and smooths the broad surfaces.
Following the power sanding, hand sand all the edges and routed radii. Hand sanding allows for more control in these contoured areas, ensuring every surface is flawlessly smooth before applying any finish. This thorough sanding process prepares the wood perfectly for staining and varnishing, maximizing the beauty of your diy guitar stand.
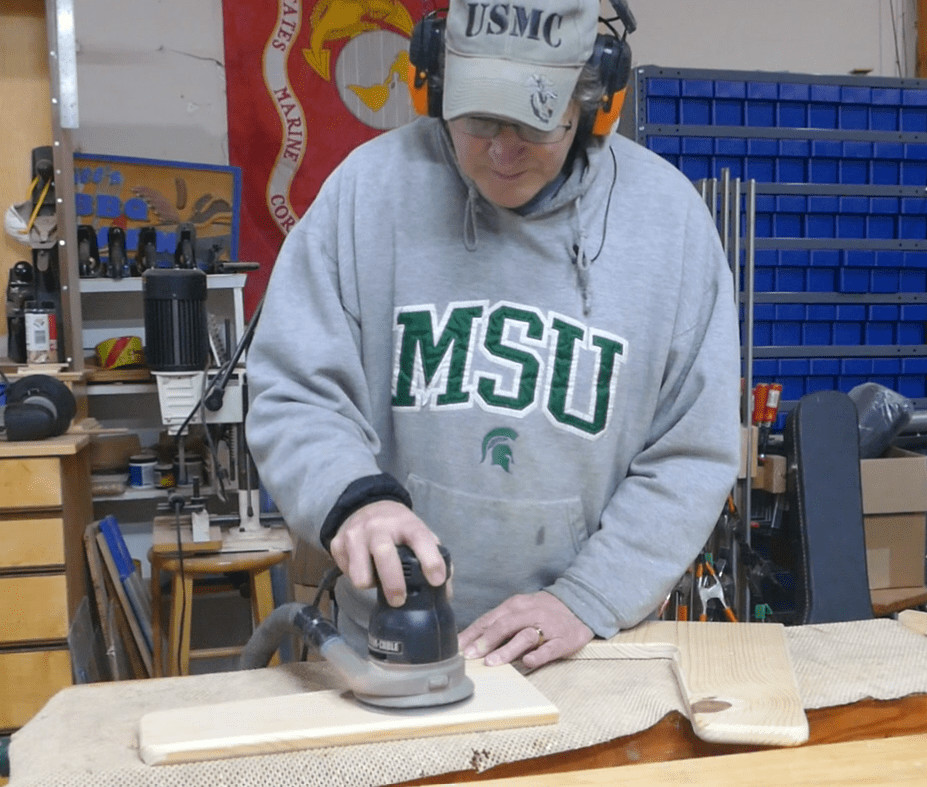 Flat Sanding Guitar Stand Parts
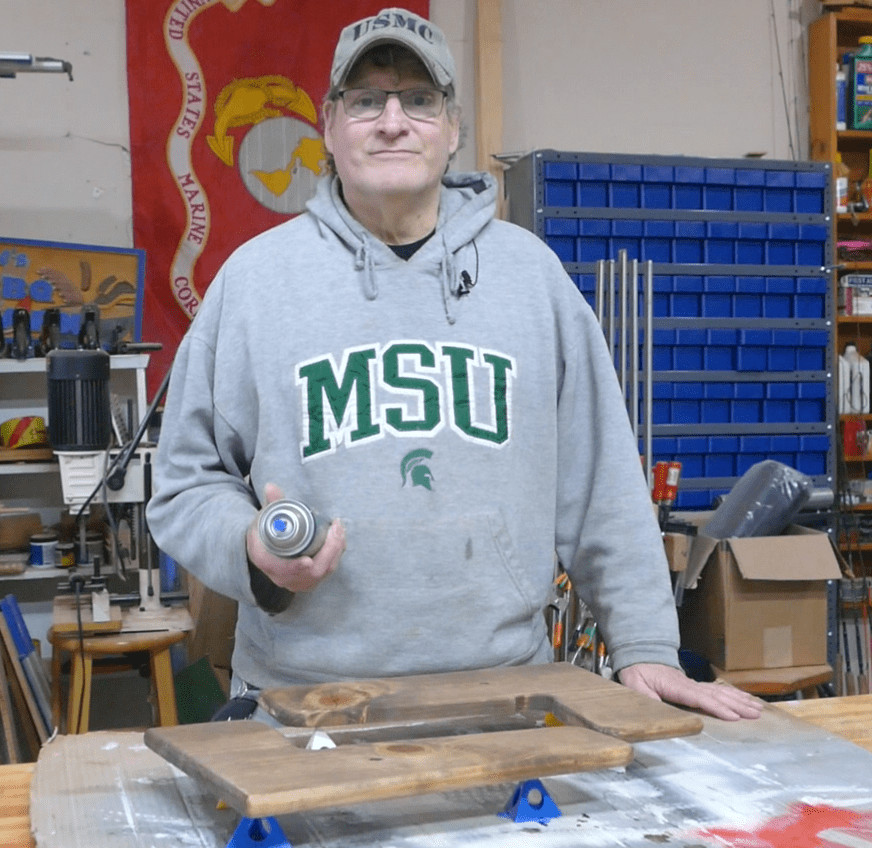
Staining and Finishing for Durability and Beauty
To achieve a rich, dark tone, a Minwax Special Dark stain was used. Pine, being a softwood, absorbs stain readily. Apply the stain evenly, let it sit briefly, and then wipe off the excess. Allow the stain to dry completely overnight to ensure proper curing before proceeding to the next step in finishing your diy guitar stand.
Once the stain is dry, apply a coat of oil-based urethane varnish. Using an oil-based varnish over an oil-based stain is crucial for proper adhesion. Water-based varnishes are not compatible with oil-based stains and may not adhere correctly. Oil-based urethane provides excellent durability and protection, ensuring your diy guitar stand will withstand regular use while showcasing the beauty of the stained wood.
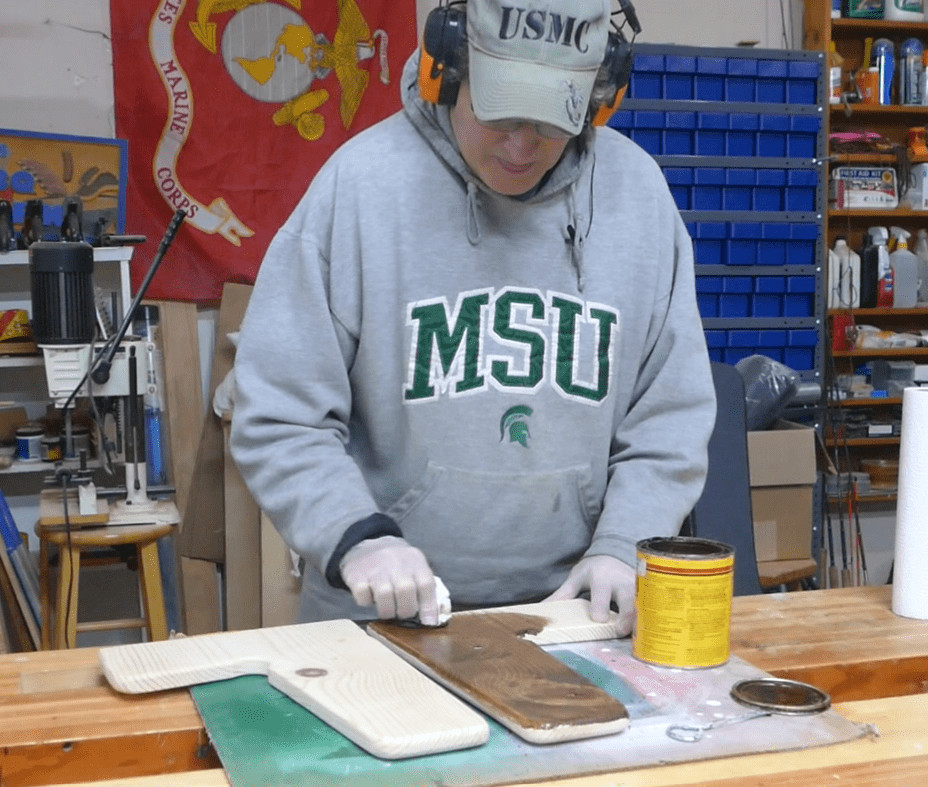 Staining parts
 Spraying on finish
Assembling Your DIY Guitar Stand
Assembly is the final, straightforward step in bringing your diy guitar stand to life. A salvaged sewing machine hinge was used in the original project, but any hinge of your choice will work effectively. Simply align the two wooden pieces and attach the hinge with screws.
After attaching the hinge, close the two pieces together and drill a ¼-inch hole through both. This hole is for the leather cord or strip that will control the stand’s opening angle. Thread a heavy leather boot lace or a similar cord through the holes and tie a Figure 8 knot or Stopper knot on each end to prevent it from slipping back through the hole. Alternatively, a strip of leather can be nailed in place as shown.
Adjust the opening by spreading the two halves to the desired width for your guitar, and then tie the second knot to secure the leather in place. This mechanism allows the diy guitar stand to fold flat for storage and open securely to hold your guitar.
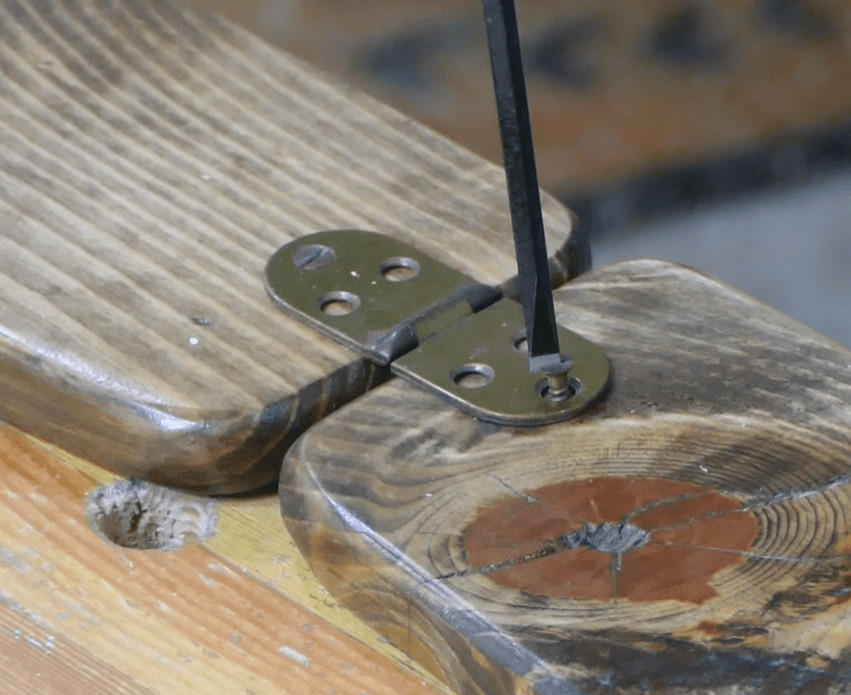 Attaching Hinges to the Guitar Stand
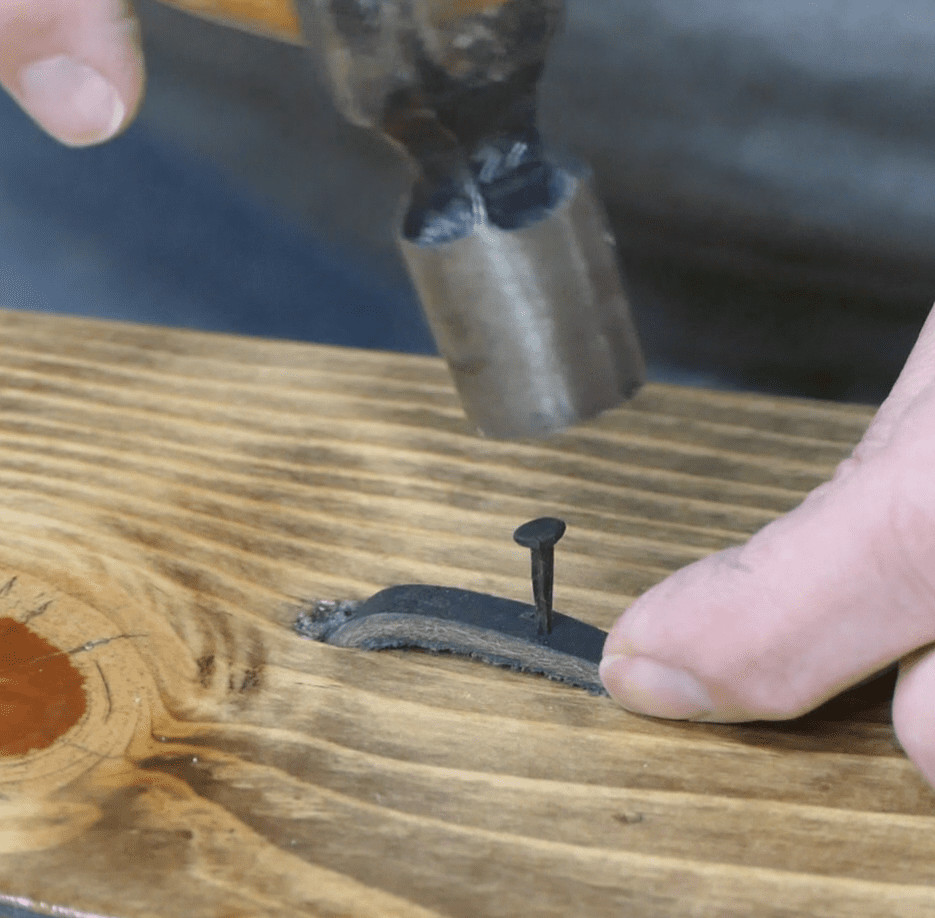 Nailing leather keeper in place
Applying Protective Leather or Felt Padding
The final touch is adding padding where your guitar will rest on the stand. Leather or felt are ideal materials for this, providing a soft, protective surface. Reusing leather from an old purse is a creative and sustainable option, or felt can be purchased inexpensively.
Cut the leather or felt to the appropriate width and apply glue to the wooden stand. Contact cement is recommended for leather, ensuring a strong and lasting bond. Clamp the padding in place and allow the glue to dry completely. If using felt, a wood glue like Titebond can be used sparingly to prevent bleed-through and maintain the felt’s softness, ensuring your diy guitar stand protects your guitar’s finish perfectly.
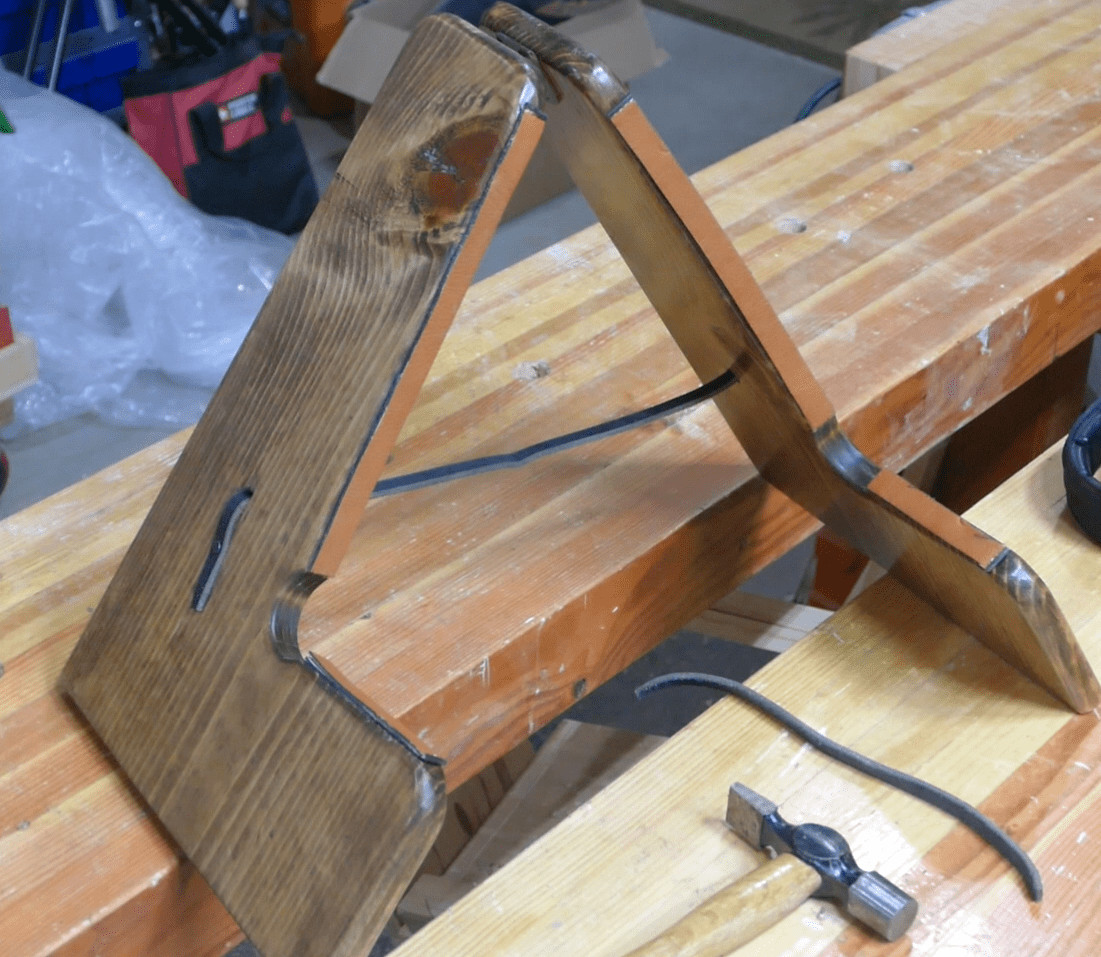
Congratulations on Your Completed DIY Guitar Stand!
Congratulations! You’ve now built a simple yet highly functional diy guitar stand. Like the original creator, you’ll likely find yourself using it constantly. The convenience of simply grabbing your guitar to play and then placing it back on the stand without the hassle of a case is a game-changer for frequent players.
Enjoy the ease and accessibility your new diy guitar stand provides. It’s a rewarding and practical project that enhances both your playing experience and your guitar display. Happy playing!
 Completed Guitar Stand
Visit my Etsy Store at www.etsy.com/shop/30MinuteWoodshop