
Summer days are perfect for unleashing creativity, and what better way to do it than with music? If your kids dream of forming a band and becoming rock stars, even if they haven’t picked up a real instrument yet, you can fuel their imagination with a fun and simple craft: a Cardboard Guitar!
 Excited girls posing with their DIY cardboard guitars, ready to rock
My daughter and her friends are a whirlwind of energy – always singing, dancing, and lost in pretend play. Their biggest dream? To be in a band, complete with fame, fabulous outfits, high heels, and makeup! The only minor detail is that none of them actually play any instruments… yet. But that’s no barrier to fun!
 Close-up of a decorated cardboard guitar, showcasing its simple construction and colorful design
While they wait for their musical talents to fully blossom, I thought, why not bring their rockstar dreams to life in a tangible way? Pretending to be rock stars is just as important as learning to play, especially for fostering creativity and teamwork. So, I decided to craft some electric guitars out of leftover cardboard. A bit of paint, a splash of color, and suddenly, cardboard transformed into rock ‘n’ roll magic!
The look in their eyes when I presented them with their cardboard guitars was priceless. It was the ultimate gift, the perfect prop for their make-believe concerts. According to these enthusiastic 6 and 3/4-year-olds, it was the “best pretending accessory ever!”
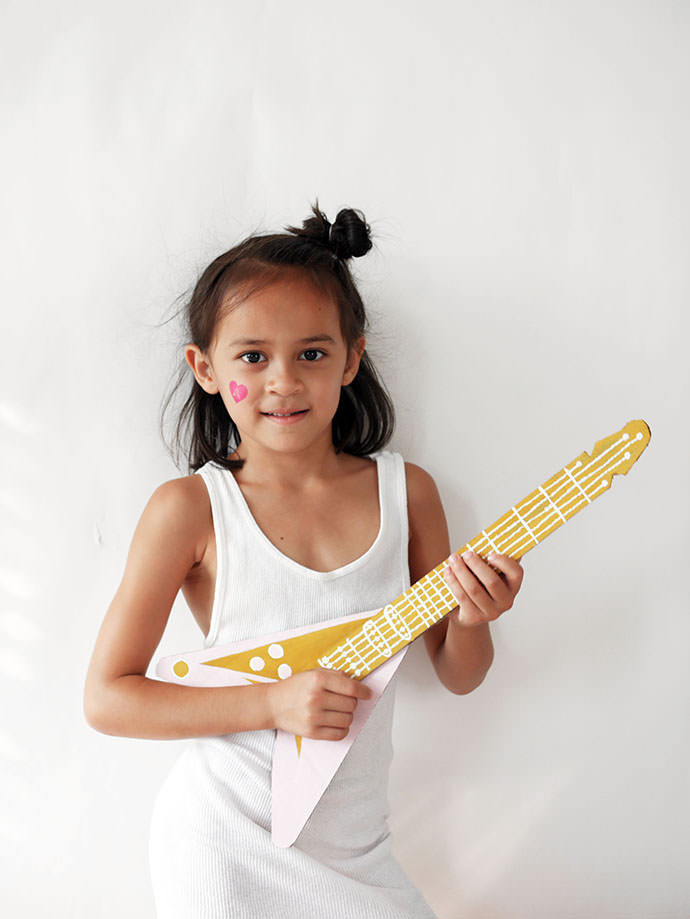 A young girl in a rockstar outfit enthusiastically playing her cardboard guitar during a pretend concert
Moments later, with makeup on, hair styled, and costumes ready, the concert began. And let me tell you, it was the most amazing performance I’ve ever witnessed! You absolutely have to experience this joy for yourself. Ready to get started and create some rockstar magic? Let’s dive into how to make your own cardboard guitar.
Gather Your Supplies to Build Your Cardboard Guitar
Before you begin this fun cardboard guitar project, make sure you have everything you need. This simple craft requires minimal materials, most of which you might already have at home. Here’s what you’ll need to get your mini rock band ready to perform:
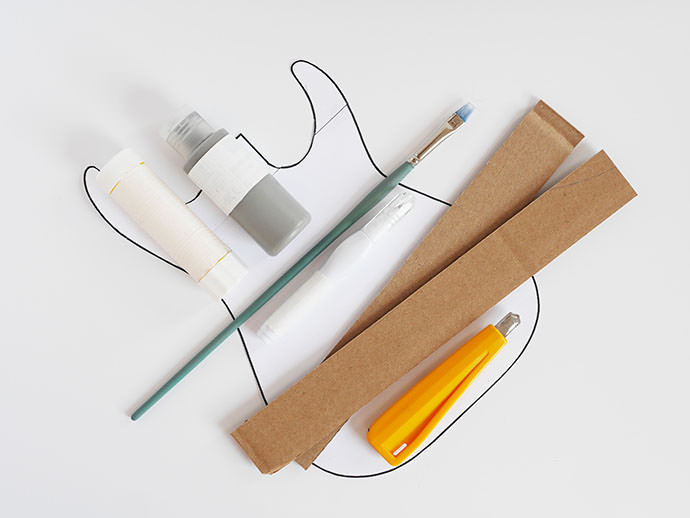 Materials needed to make a cardboard guitar, laid out on a table including cardboard, template, paint, glue, box cutter, paintbrush, and white-out
- Guitar Template: You can download a printable template here. This will be your guide for shaping the cardboard guitar.
- Cardboard: Recycled cardboard boxes are perfect! Cereal boxes, shipping boxes, or any sturdy cardboard will work. The thicker the cardboard, the more durable your cardboard guitar will be.
- Glue: School glue or craft glue will work well to assemble the cardboard guitar pieces. For faster drying, you can also use a hot glue gun with adult supervision.
- Box Cutter or Craft Knife: Adults only should handle this! A box cutter is essential for precisely cutting the cardboard shapes. Be sure to use a cutting mat or safe surface.
- Paint and Paintbrushes: Let your creativity shine! Acrylic paints are ideal for cardboard, and you can use various colors to make each cardboard guitar unique and vibrant.
- White-out or White Paint Pen: For adding details like fret markers on the neck of the cardboard guitar, a white-out pen or white paint pen is very useful.
Step-by-Step Guide to Crafting Your Cardboard Guitar
Now, let’s get crafting! Follow these simple steps to transform ordinary cardboard into awesome cardboard guitars that will ignite your kids’ imaginations and musical play.
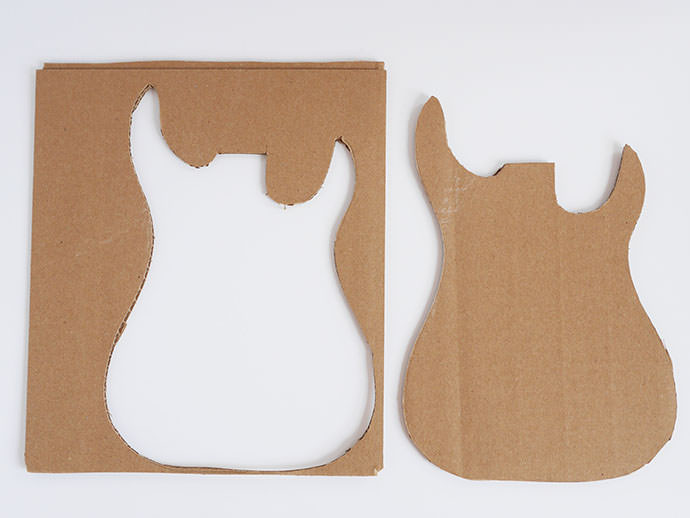 Step 1: Tracing the guitar template onto cardboard using a pencil
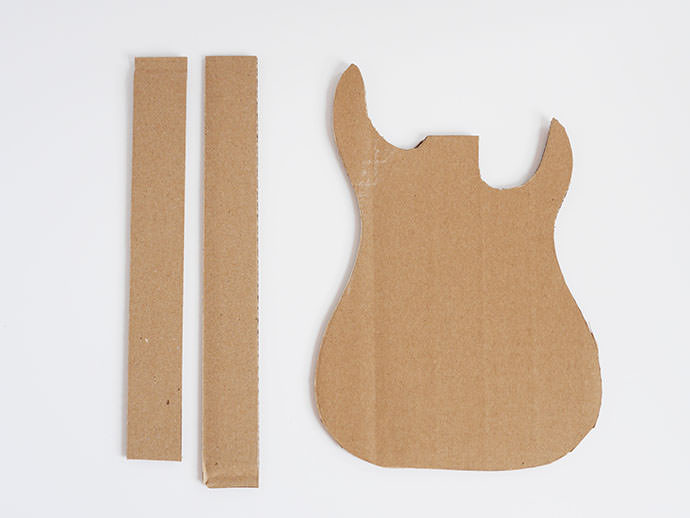
Step 1: Prepare Your Cardboard Guitar Shape
First, gather all your supplies, including the printed cardboard guitar template. Carefully cut out the template pieces. Lay the template on your cardboard and trace around it with a pencil. Once traced, use your box cutter to carefully cut out the cardboard guitar shape. Adult supervision is crucial for this step!
 Step 2: Cutting cardboard strips for reinforcing the guitar neck
Step 2: Cut Reinforcement Strips
To make your cardboard guitar sturdier, cut two rectangular strips of cardboard. Each strip should measure approximately 1 1/2 inches wide and 16 inches long. These strips will add strength to the neck of your cardboard guitar.
 Step 3: Gluing cardboard strips to the back of the guitar for neck reinforcement
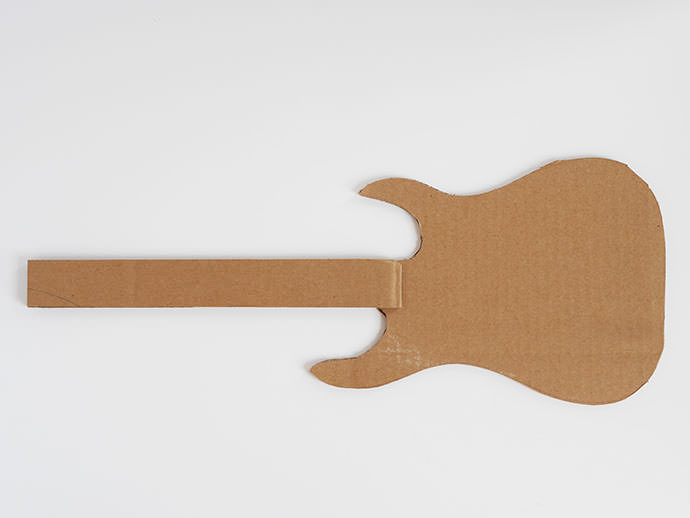
Step 3: Reinforce the Guitar Neck
Apply glue to one of the cardboard strips and attach it to the back of the cardboard guitar body, along the neck area. Let the glue dry slightly. Turn the cardboard guitar over and glue the second strip to the other side of the neck, mirroring the first strip. This double layer of cardboard will make the neck more robust and less likely to bend. Allow the glue to dry completely to ensure a strong bond.
 Step 4: Kids painting their cardboard guitars with bright colors
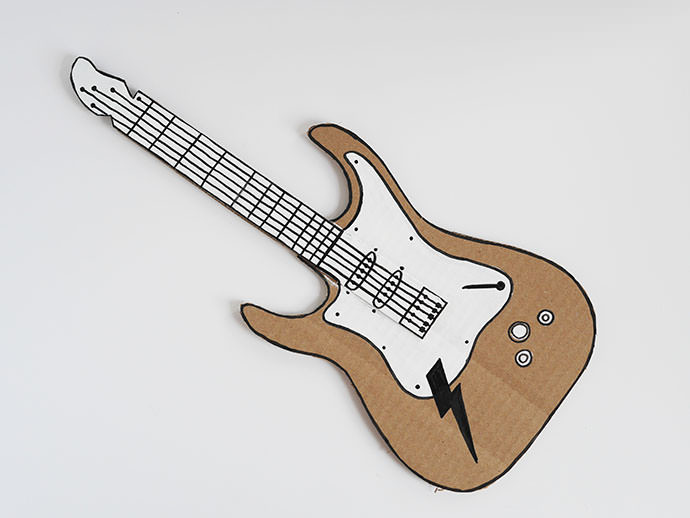
Step 4: Unleash Your Inner Artist with Paint!
Now for the most exciting part: decorating your cardboard guitar! This is where you and your kids can really get creative. Use paint to add colors, patterns, and designs to your cardboard guitar. Encourage your children to personalize their guitars – perhaps they want to mimic their favorite rock star’s guitar or create a completely unique design. Let the paint dry thoroughly. Once dry, you can add further details with white-out or paint pens to create fret markers or other embellishments.
Once the paint is dry, your cardboard guitars are ready to rock! Get ready to witness some amazing pretend concerts and fuel your children’s passion for music and creativity.
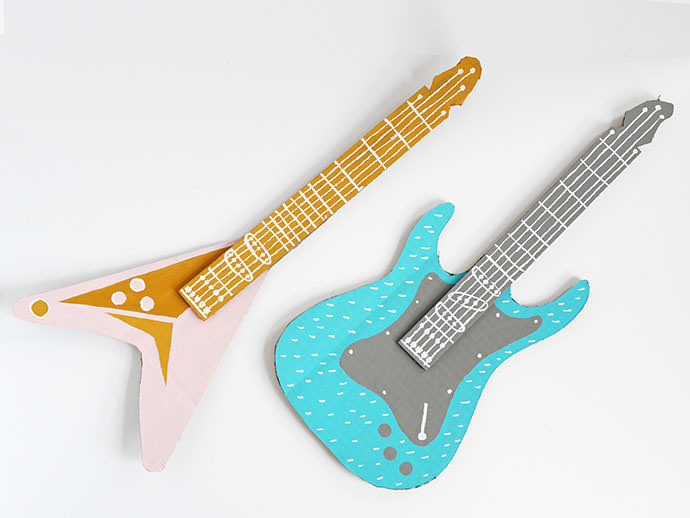
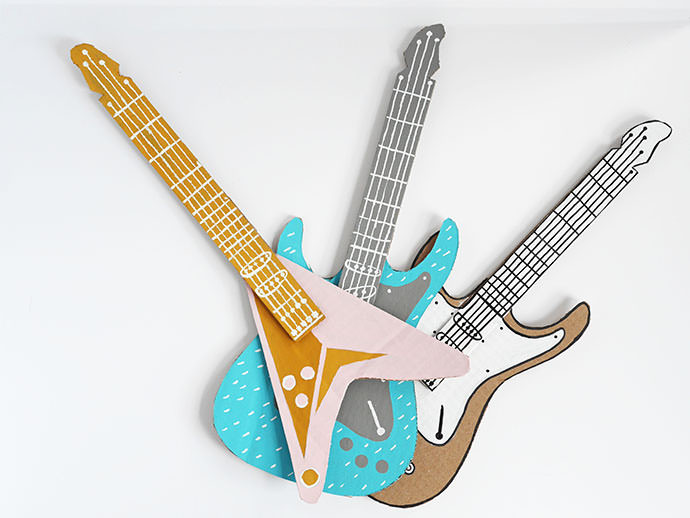 Two finished cardboard guitars, one decorated in blue and the other in pink, ready for kids to play