For any guitar enthusiast, the allure of owning a unique instrument is undeniable. This year, instead of adding another off-the-shelf guitar to my collection, I decided to embark on a different kind of musical adventure: building my own. Now, before you picture a full-blown luthier workshop, let me clarify – I opted for a guitar kit build. This seemed like the perfect middle ground between simply buying a guitar and crafting one from raw lumber, a step up from just designing one online with a virtual guitar builder.
Let’s be honest, my DIY skills are… limited. My wife can attest to that. Attempting to build a guitar from scratch, like a true craftsman – carving the body and shaping the neck – would likely have resulted in something abstract, at best, and certainly not a playable guitar.
A guitar kit, however, offered a much more manageable and, frankly, less disastrous path.
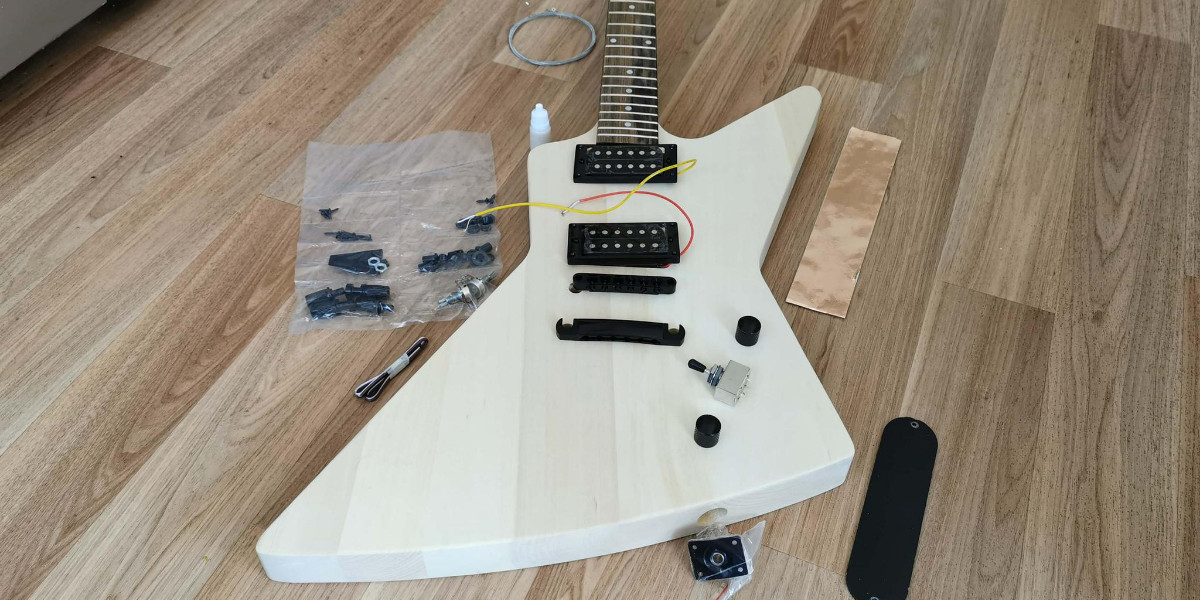
I chose an Explorer-style guitar kit from Pit Bull Guitars. They caught my attention for a few key reasons. Firstly, being an Australian company resonated with me as an Aussie myself, which thankfully meant reasonable shipping costs and delivery time. Secondly, their range had exactly what I was after: that iconic Explorer body shape, clean and without a scratchplate.
My inspiration was clear: the legendary off-white Explorer made famous by James Hetfield, the riff master who ignited my own guitar-playing passion. His late 80s ESP model was, and still is, the epitome of cool in my guitar-loving mind.
With my goal firmly in sight, I placed my order. When the package arrived, my initial reaction was skepticism. It felt surprisingly light. Having never received a guitar in a square box before, I wasn’t sure what to expect from a guitar kit. But as soon as I opened it, skepticism gave way to pure excitement. Everything was neatly packed, and the components looked fantastic.
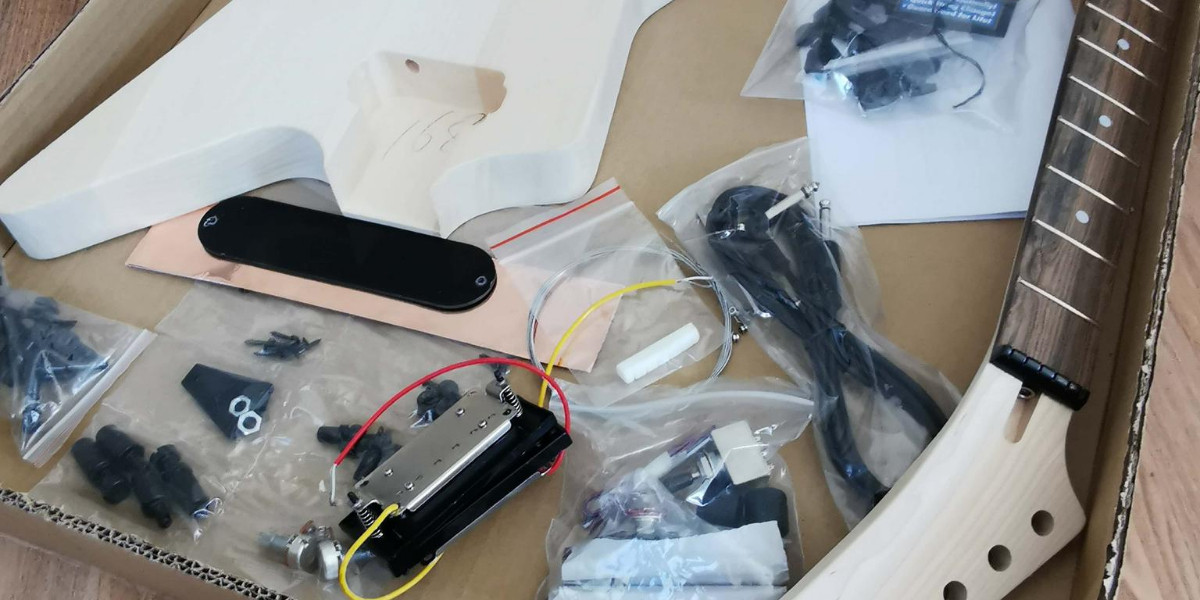 Partial view of guitar kit contents in the opened box
I had decided to enhance my guitar kit with a few upgrades. I opted for Grover locking tuners for tuning stability, a bone nut for improved sustain and tone, copper shielding tape for the electronics cavities to minimize noise, and sleek black hardware to replace the standard chrome. A pleasant bonus was that because I upgraded all the hardware to black, Pit Bull Guitars included both the standard black tuners and the upgraded Grover tuners. Bonus spares!
Being a novice in the handyman department, I quickly realized that completing this guitar build kit would require tools and equipment I didn’t possess. A trip to the local hardware store rectified that, and I returned home armed with everything I thought I needed to prepare the guitar for assembly and painting.
Everything, that is, except the inherent skills to wield these tools effectively and execute the necessary tasks flawlessly.
 Close-up of guitar kit hardware components including tuners, bridge, and knobs
Following this initial hardware run, I also invested in a range of finer sandpaper grades from an auto supply store. These extra fine grits would be crucial for achieving a smooth, professional finish during the later painting stages. For the most part, I felt well-prepared. Now, it was time to dive into the actual guitar build process.
Guitar Kit Build Process: From Mockup to Masterpiece (Almost)
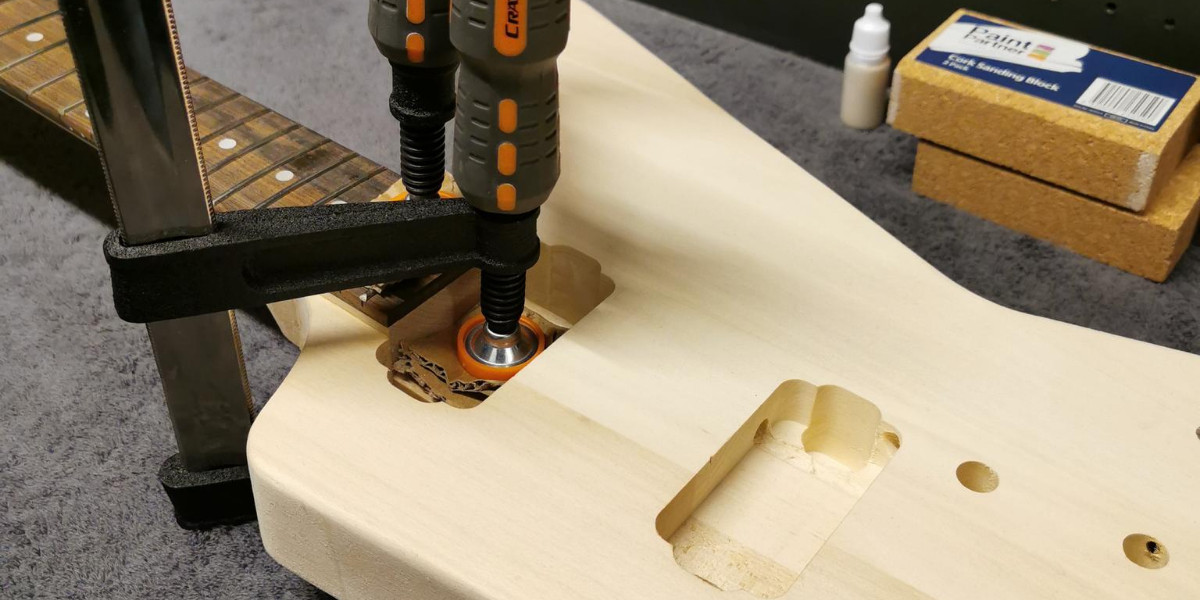
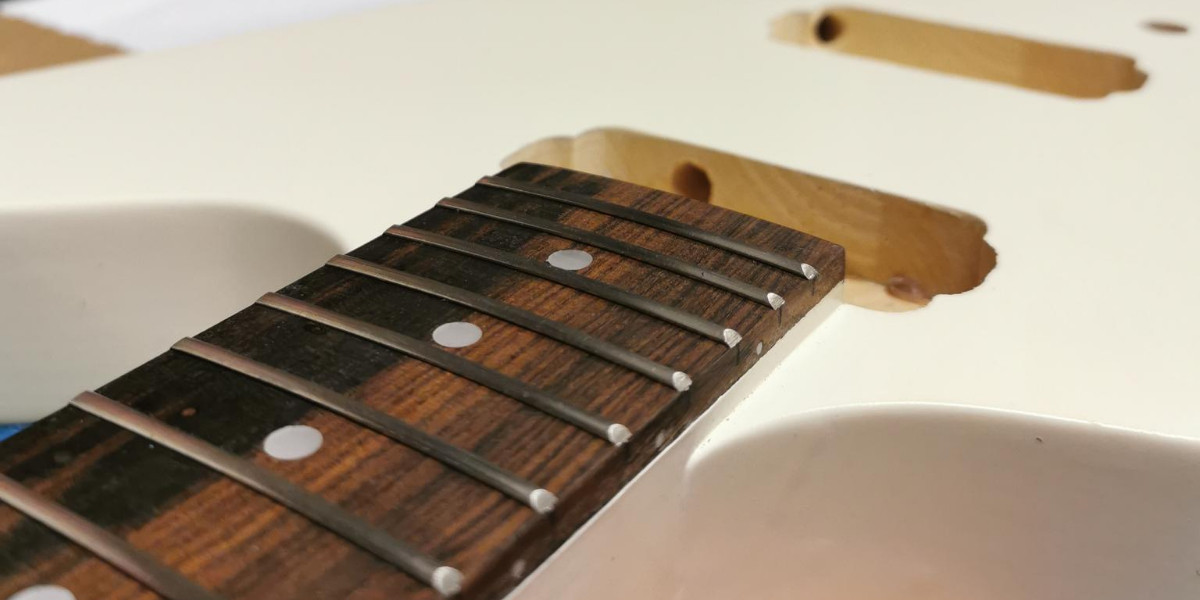
According to the comprehensive instructions provided by Pit Bull Guitars, a crucial first step is performing a mock build. This essentially means laying out all the guitar kit parts to ensure everything is present and accounted for. My chosen Explorer model features a set neck, which requires gluing the neck securely into the body. Before committing to glue, it’s vital to check the neck and body joint for a snug and proper alignment. I proceeded with this dry fit, and to my untrained eye, everything appeared to be in order.
 Guitar kit components laid out for a mock build before assembly
I wasn’t entirely sure how to accurately assess the guitar’s string action at this stage, as the neck needed to be firmly in place. Relying on clamps to simulate string tension didn’t seem reliable enough. So, perhaps a bit recklessly, I skipped this action check and moved directly to the neck-gluing stage of the guitar kit build. Possibly, mistake number one.
After a minor amount of sanding to refine the neck joint – the neck was initially a touch too tight for the neck pocket – it was time for the wood glue. I applied the supplied wood glue to the neck joint and body cavity, then secured the two pieces together with clamps. To prevent any unwanted impressions in the wood, I placed pieces of cardboard between the clamps and the guitar body, particularly around the neck pickup cavity and fretboard. Although my clamps had rubberized ends, I preferred to err on the side of caution.
 Neck being glued and clamped to the guitar body during the kit assembly
I diligently wiped away any excess glue that squeezed out from the joint under clamp pressure and then patiently waited for the glue to dry and fully set. It occurred to me later that I might have been able to paint the guitar body and neck separately before gluing them together. However, my vision was a seamless paint finish, with no visible joint line between the neck and body. That was the ambitious goal, at least.
Once the glue had cured, I moved onto sanding the wood in preparation for painting. The Pit Bull Guitars forum offered guidance on this stage, and there was also an instructional video. However, in true internet fashion, I also watched about ten other videos on guitar sanding techniques, which, ironically, left me more confused and conflicted than informed. Despite the information overload, I eventually sanded the wood to a level that I believed was ready for paint.
Following sanding, I carefully removed the plastic nut on the guitar neck and replaced it with the upgraded bone nut. Then, I meticulously taped off the fretboard and any body cavities to protect them from paint overspray. Now, the stage I had been both anticipating and dreading: painting. This was the process that truly terrified me. More on that impending paint-induced panic shortly.
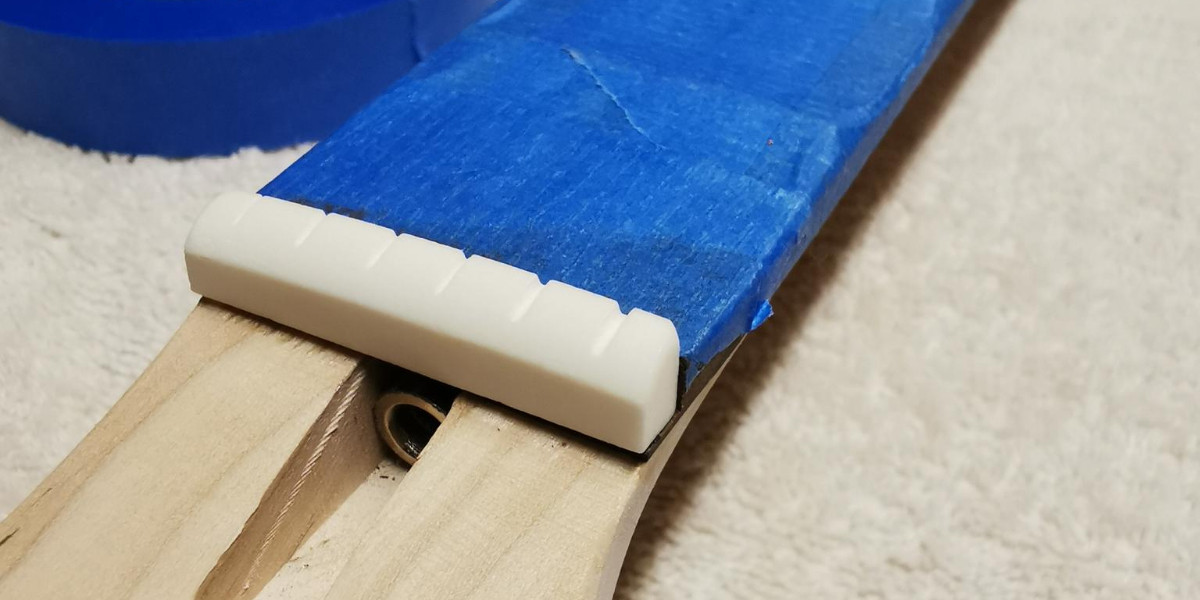 Replacing the plastic nut with a bone nut as part of the guitar kit upgrades
I was genuinely concerned about damaging the delicate strip of neck wood to which the original plastic nut was glued. Thankfully, I managed to remove it safely and cleanly. The bone nut looked immediately superior and would complement the guitar’s planned color scheme perfectly.
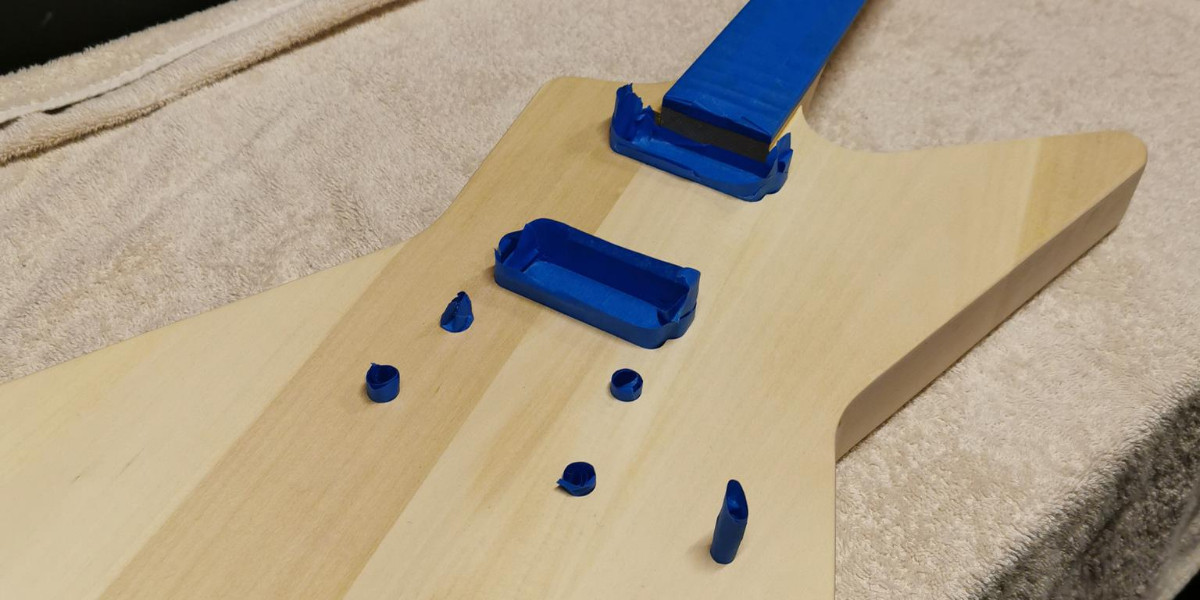 Guitar body masked and prepared for painting, protecting hardware cavities
I had watched numerous instructional videos on paint preparation, some advocating for taping every hardware hole, as shown above, while others simply painted over everything. My concern was that excessive paint layers might prevent the hardware – especially the bridge and tailpiece – from fitting properly. Ultimately, I believe my cautious approach of masking was the wiser choice.
Then came the moment of truth: painting. This stage filled me with absolute dread. I had never painted a guitar before, and my prior spray-painting experiences on other projects were marred by runs, drips, and uneven coverage. Let’s just say, “confident painter” is not on my resume.
 Applying paint to the guitar body in a DIY painting setup
Despite my painting anxieties, I’m actually quite pleased with how the paint job turned out. I started with a primer/undercoat, followed by several coats of the chosen paint color, and finally, multiple layers of clear coat for protection and gloss. There were days, sometimes weeks, of drying time between each stage of the painting process. In hindsight, I should have been even more patient with drying times, as I later encountered paint-related issues. More on that later.
I had created a makeshift painting booth in my unused garage and managed to contain most of the overspray. The ingenious trick I devised to suspend the guitar while painting, allowing access to every angle, was what I now affectionately call the paint pen.
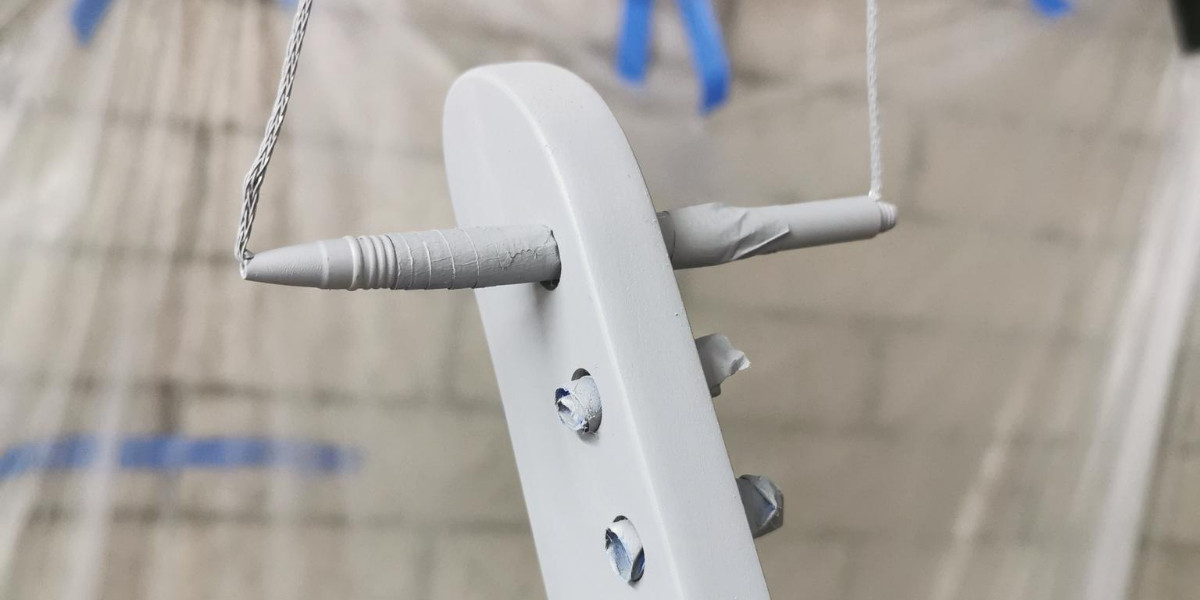 The "paint pen" setup used to hold the guitar body during the painting process
Initially, I had simply hung the guitar using wire, but the wire placement was too close to the headstock, hindering painting access. So, inspiration struck: I hollowed out a pen, and boom! This simple invention became my greatest moment of ingenuity in the entire guitar kit build.
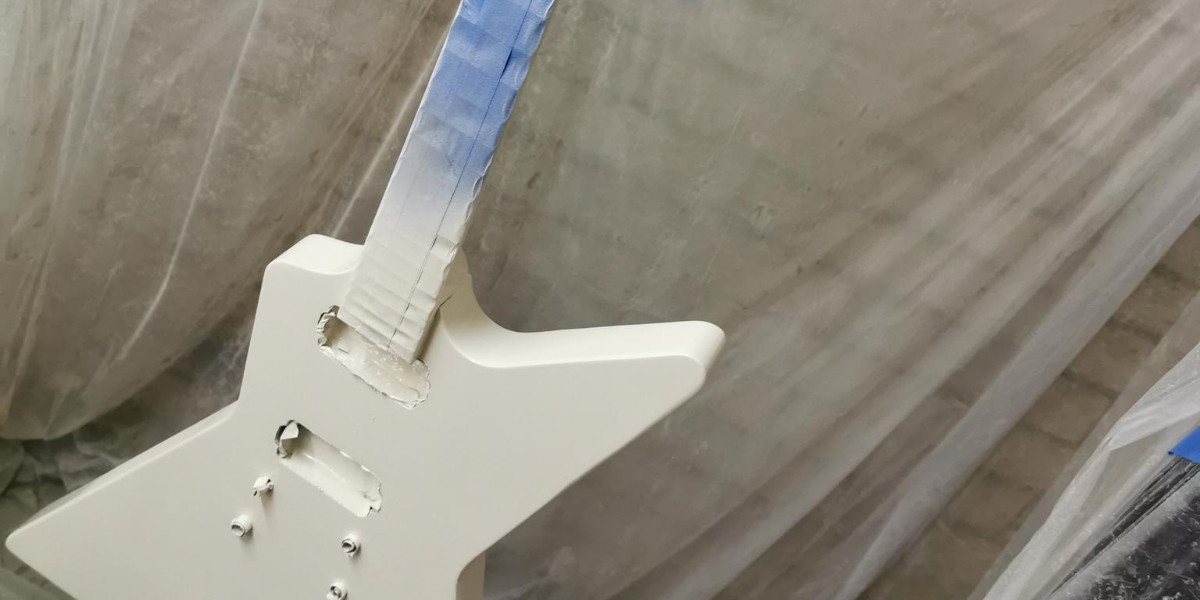
Once the paint was thoroughly dry, it was time for another nerve-wracking step: removing the masking tape. I must admit, I was genuinely surprised and relieved at this stage. It was actually starting to look like a real guitar!
 Masking tape removed revealing the painted guitar body
Some fine sanding and minor cleanup were needed, but overall, the masking tape had done its job admirably. I applied some fretboard oil at this point, eager to see the guitar’s true aesthetic emerge. The fretboard responded beautifully, the oil darkening the wood and imparting a smooth, conditioned feel.
Throughout the assembly, I was consistently impressed with the quality of the kit components.
This stage marked the beginning of extensive fine sanding and polishing. There were countless rounds of sanding, polishing, buffing, and more sanding. The exact order of operations in this sanding and polishing marathon is now a blur, but the result was a paint finish that looked reasonably decent, certainly acceptable for a first-time build.
Next up was applying copper shielding tape to the electronics cavities. This process was surprisingly straightforward and the shielding looked clean and professional once installed.
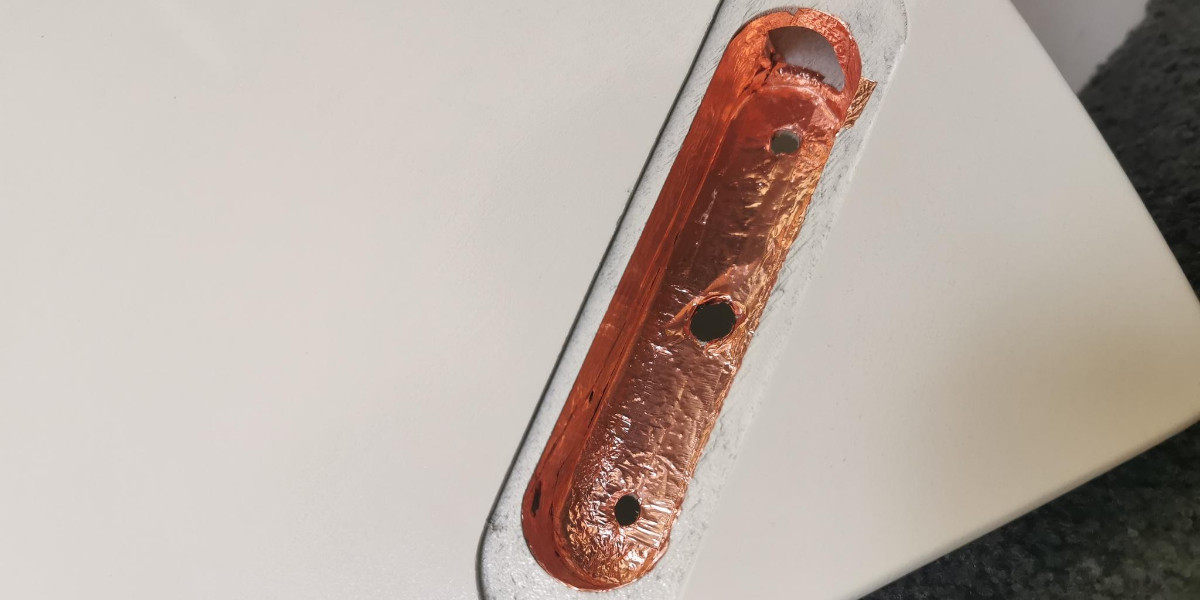 Electronics cavity shielded with copper tape to reduce noise
The same shielding treatment was applied to the pickup cavities on the front of the guitar body. With shielding complete, it was time to confront the most intimidating aspect of the guitar kit build for me: soldering.
I am not blessed with steady hands, nor particularly sharp eyesight. Soldering delicate electronics was always going to be a challenge.
Nevertheless, I was determined to give it my best shot. And, to my surprise, I managed to do… okay. Some of my solder joints are far from textbook perfect, but I did succeed in getting the guitar to produce sound through an amplifier by the end of the day. Imperfect, yes, but functional!
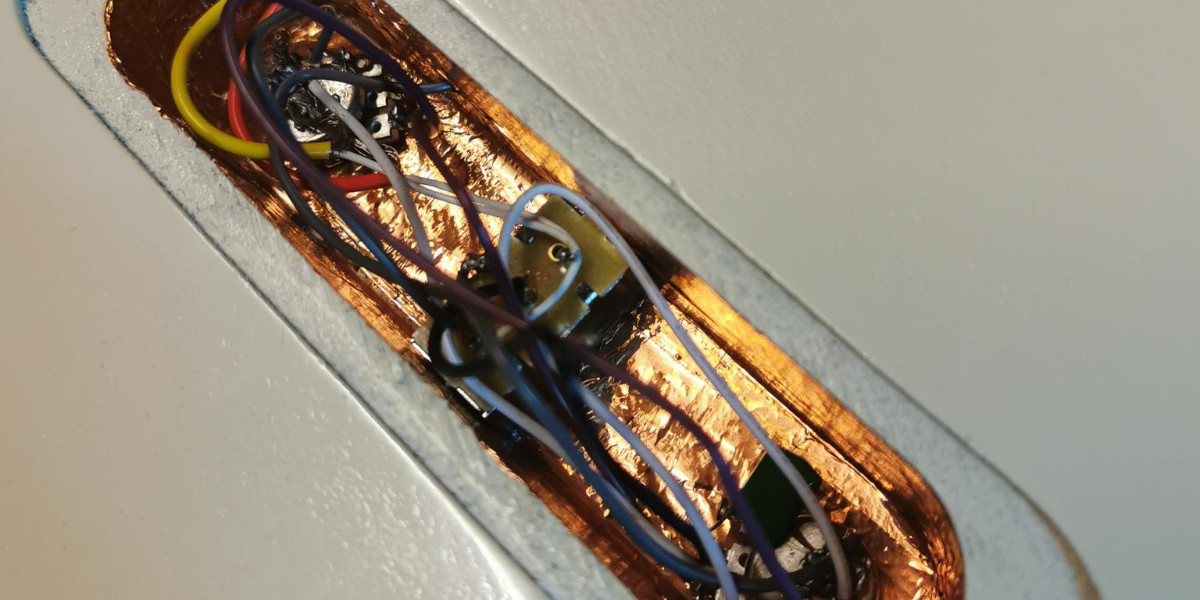 Close-up of soldering work in the guitar's electronics cavity
I suspect that one day I might upgrade to a solderless pickup set for a potentially cleaner and improved sound.
The subsequent step nearly brought me to the brink of despair. This is where I made my biggest blunder and simultaneously discovered that my paint hadn’t cured as thoroughly as I had hoped. Let’s just say… in my haste, I mistakenly tried to install the tailpiece hardware in the bridge position, and vice versa. Yes, idiot move.
Cue some colorful language and a very delicate, slow removal process. I managed to extract the tailpiece posts and correctly install the bridge and tailpiece in their rightful positions. However, despite my careful efforts, the guitar’s fresh paintwork suffered some damage. It became painfully clear that I hadn’t allowed sufficient curing time for the paint. Another valuable lesson learned.
Initially, I was deflated. But after a moment of reflection, I shifted my perspective. This is, after all, my first attempt at building a guitar. I needed to cut myself some slack. Besides, some people pay significant sums for guitars with a “relic” finish. Well, my guitar now had a genuine relic job, authentically earned through my own wear and tear.
So, my guitar now boasts “unique character features.” That’s how I’m choosing to view it.
After this hardware hiccup, I proceeded to install all the remaining components. The locking tuners, in particular, looked fantastic and added a touch of professional quality.
A slightly disheartening discovery was that, with all hardware in place and the guitar fully strung, the string action was higher than I preferred. I spent several days meticulously making small truss rod adjustments, but I couldn’t achieve the low action I desired without introducing fret buzz. The guitar is certainly playable, just not… perfect in its setup.
Despite this minor setup imperfection, I was still incredibly happy with the progress. It was time for the final cosmetic touches, starting with a headstock logo.
As mentioned earlier, my inspiration was a specific guitar model that held significant meaning for me: an Explorer shape, but not a Gibson Explorer; an ESP, but not explicitly labeled as an Explorer. So, I creatively merged these elements and designed my own headstock logo: EXP.
EXPlorer. Clever, right?
I had seen videos on creating custom headstock logos, but at this point, I was hesitant to risk further marring my less-than-perfect paint finish. Instead, I opted for a transfer sticker from Sticker Mule and applied it to the headstock. Simple and effective.
![]() Custom "EXP" headstock logo applied to the guitar
Custom "EXP" headstock logo applied to the guitar
To complete the desired aesthetic, I ordered black pickup covers from eBay. While I doubt they’ll sonically enhance the guitar, they perfectly finalized the visual style I was aiming for.
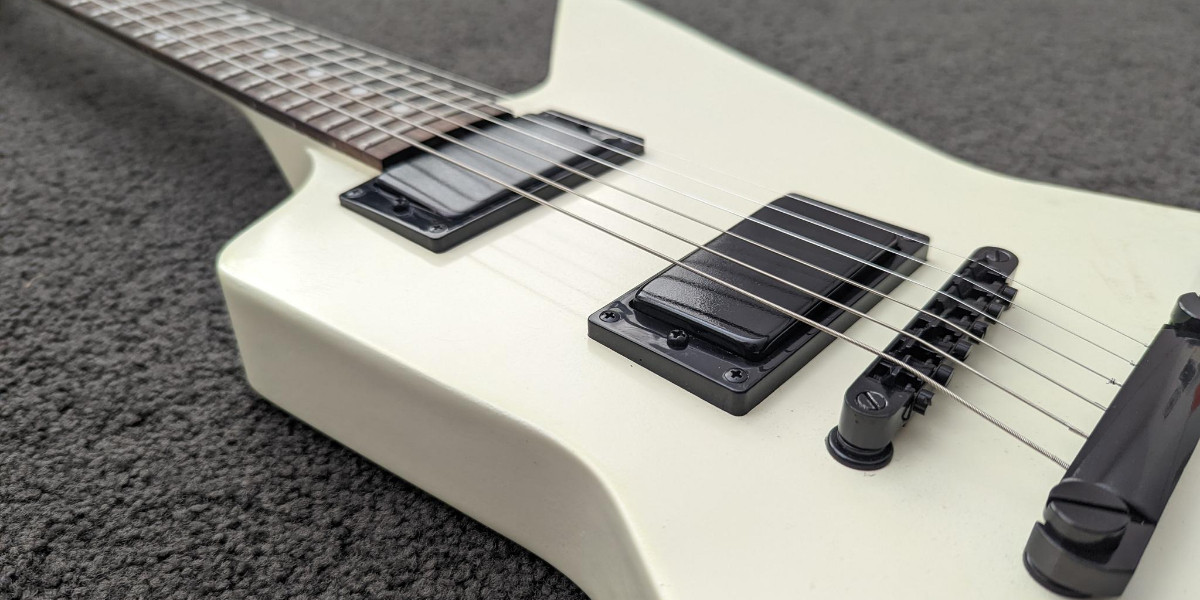 Black pickup covers installed on the guitar, completing the desired look
So, would I undertake another guitar kit build in the future? Possibly. But only if I were planning to stain the guitar, not paint it. And even then, I’d strongly consider a solderless kit for the electronics. The build process itself was undeniably enjoyable; I thoroughly relished the experience of assembling the guitar kit. However, my painting and soldering skills clearly need further development.
Lessons learned. Awesome-looking guitar achieved. Imperfections and all.