Guitar pedalboards are the backbone of countless guitarists’ rigs, acting as the central hub for their cherished effects pedals. For any guitarist venturing beyond a couple of stompboxes, a pedalboard isn’t just a matter of convenience; it’s essential for organization, efficiency, and protecting your investment in tone. This guide will walk you through everything you need to consider when building the Best Guitar Pedal Board for your unique playing style and needs.
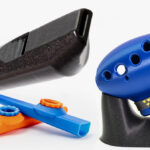
 Tiered Guitar Pedalboard Build by SixStringSensei
Alt text: Tiered guitar pedalboard construction featuring Creation Music Company Aero board and FIX bridges, showcasing an organized pedal layout.
Getting Started: Board Size and Pedal Count
Before diving into platforms, power supplies, or patch cables, you need to address two fundamental questions:
- How many pedals do you currently own?
- How many pedals do you realistically envision using in the future?
Your answers to these questions will directly dictate the size of the pedalboard you’ll need. Consider your influences – players known for expansive pedal setups like John Petrucci or The Edge often require larger boards. Conversely, if you prefer a minimalist approach, a smaller board might suffice. Personal preference is paramount.
It’s highly recommended to sketch out a rough layout of your desired pedal arrangement. This visual exercise helps ensure all your pedals will comfortably fit and allows for spacing considerations for cabling and power. Leave some extra room in your plan. Pedal collections tend to grow, and having a little extra space provides flexibility for future additions or adjustments without needing to completely rebuild your board. You can start with a simple pencil sketch or use digital design tools for a more precise layout.
DIY vs. Professional Pedalboard: Choosing Your Path
Once you have a size in mind, the next major decision is whether to build your pedalboard yourself (DIY) or purchase a professionally built or pre-made board.
DIY Pedalboards:
- Pros: Can be more cost-effective initially if you prioritize function over aesthetics and have the tools and skills. Offers complete customization in terms of size, shape, and materials. Provides a rewarding sense of accomplishment.
- Cons: Can become more expensive if you aim for a high-quality, aesthetically pleasing finish. Requires time, effort, and potentially specialized tools. The learning curve can be steep for beginners. Time spent building could outweigh the cost savings for some.
Professional/Pre-Made Pedalboards:
- Pros: Guarantees a professional finish and robust construction. Saves time and effort. Often includes features like built-in power supplies or cable management solutions. Many reputable brands offer a range of sizes and configurations.
- Cons: More expensive upfront. Less customizable than DIY. You are limited to the available sizes and designs offered by manufacturers.
If you’re handy with tools and enjoy a hands-on approach, a DIY pedalboard can be a fulfilling project. However, for many guitarists, especially those prioritizing convenience and a polished result, investing in a pre-made or professionally built pedalboard is often the better choice.
Several companies specialize in high-quality pedalboard platforms. Consider brands like:
- Creation Music Company: Known for their robust and versatile Aero series platforms, favored by many professionals.
- Schmidt Array: A high-end option renowned for exceptional craftsmanship and innovative designs.
- Voodoo Lab: Offers the popular Dingbat series, known for its durability and included tour-ready bags.
- Pedaltrain: A widely recognized brand offering a range of lightweight and sturdy aluminum pedalboards in various sizes.
These platforms provide a solid foundation upon which you can build your ideal pedal setup, whether you handle the wiring and component installation yourself or seek professional assistance for the entire build.
Powering Your Pedalboard: The Heart of Your Rig
Power is arguably the most critical aspect of any pedalboard. A poorly powered pedalboard can introduce unwanted noise, hum, and even damage your precious pedals. Before selecting a board or even pedals, consider your power requirements.
Guitar pedals operate at various voltages (typically 9V, 12V, 18V, or even 24V) and require different current draws. Understanding these requirements is crucial for choosing the right power supply.
Power Supply Options:
- Wall Warts and Power Strips: The simplest and cheapest option, but highly discouraged for pedalboards. This method is messy, unprofessional, prone to noise issues, and unreliable for gigging.
- Dedicated Multi-Output Pedal Power Supplies: The recommended solution for most pedalboards. These units provide multiple isolated outputs, ensuring clean and stable power for each pedal. Isolated outputs are crucial for minimizing noise and ground loops.
Key Power Supply Features to Consider:
- Voltage Options: Ensure the power supply can accommodate the voltage requirements of all your pedals (9V, 12V, 18V, etc.).
- Current Output: Verify that the power supply provides sufficient current (measured in milliamps – mA) for all your pedals. Each output should have enough current to power the pedals connected to it.
- Isolated Outputs: Crucial for noise reduction. Isolated outputs prevent ground loops and interaction between pedals.
- Number of Outputs: Choose a power supply with enough outputs to power your current pedal collection and allow for future expansion.
Top Pedal Power Supply Brands:
- Strymon: Zuma and Ojai series are highly regarded for their compact size, high current output, and isolated outputs.
- CIOKS: Known for their high-quality, versatile power supplies with various voltage and current options.
- Voodoo Lab: The Pedal Power series (including the Pedal Power 3 Plus) is an industry standard, offering reliable and isolated power.
Understanding Current Draw:
Each pedal requires a certain amount of current to operate. This is usually specified in the pedal’s manual or on the manufacturer’s website. When daisy-chaining pedals (connecting multiple pedals to a single power output), you must sum the current draw of each pedal. Ensure the total current draw does not exceed the output capacity of the power supply. Digital pedals generally draw significantly more current than analog pedals.
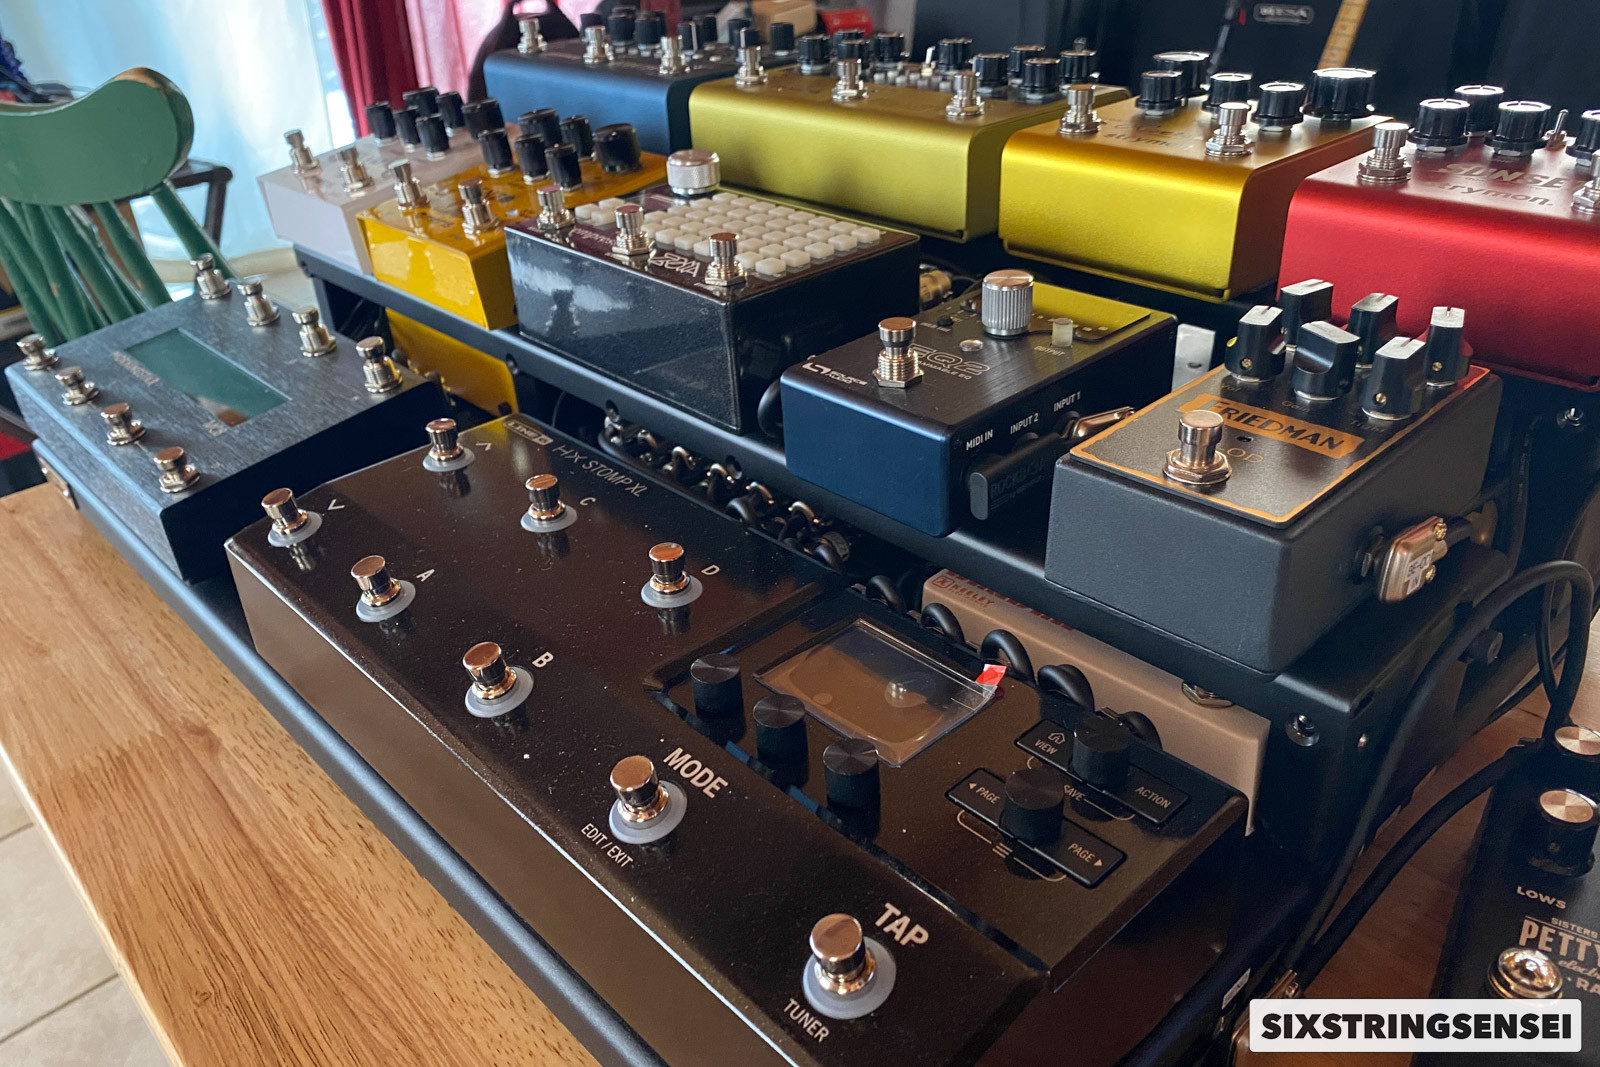
 Pedalboard Power Supply
Alt text: Close-up view underneath a guitar pedalboard, highlighting a Voodoo Lab Pedal Power 2 Plus power supply and meticulously organized wiring.
Patch Cables: Connecting Your Tone
Patch cables are the unsung heroes of any pedalboard, responsible for carrying your precious audio signal between pedals. Investing in quality patch cables is just as important as choosing good pedals and a power supply.
Patch Cable Types:
- Pre-made Patch Cables: Convenient and readily available in various lengths. Good for beginners or those who prefer simplicity. However, fixed lengths can lead to cable clutter.
- Custom-Made Patch Cables: The preferred choice for professional-level pedalboards. Allows for precise cable lengths, minimizing clutter and signal loss. Requires soldering or solderless assembly.
Soldered vs. Solderless Patch Cables:
- Soldered Cables: Considered the more reliable and professional option by many. Provide a robust and durable connection. Require soldering skills and tools.
- Solderless Cables: Offer convenience and ease of assembly. Ideal for DIYers and those who frequently change their pedalboard setup. Quality can vary; choose reputable brands.
Top Patch Cable Brands and Components:
- Switchcraft: Industry-standard plugs known for their durability and reliability. The Switchcraft 228 pancake plug is popular for its low profile, maximizing pedalboard space.
- Squareplug: Offers compact and high-quality plugs, excellent for tight pedalboard layouts.
- Mogami, Canare: Reputable cable brands known for their excellent shielding and signal integrity.
- George L’s, Planet Waves Cable Station: Popular solderless cable systems offering ease of customization.
When making your own patch cables, always use shielded cable to minimize noise and interference. Pay attention to cable stripping and soldering techniques to ensure a clean and reliable connection.
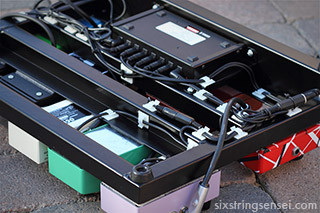
 Switchcraft 228 Pancake Guitar Cable Plug Lg
Alt text: Detailed shot of a Switchcraft 228 pancake plug, highlighting its flat, space-saving design, ideal for tight pedalboard configurations.
Pedal Order and Signal Flow: Crafting Your Sound
While not strictly part of the pedalboard construction itself, understanding pedal order is crucial for optimizing your tone. The order in which your pedals are arranged in the signal chain significantly impacts your overall sound.
General Pedal Order Guidelines (can be experimented with):
- Tuner: Typically first in the chain for a clean, direct signal.
- Wah Pedal: Placed early for optimal interaction with other effects.
- Compressor: Often used early to even out dynamics.
- Overdrive/Distortion/Fuzz: Gain-based effects are usually placed before modulation and time-based effects.
- Modulation (Chorus, Flanger, Phaser, Tremolo): Placed after gain for a more pronounced modulation effect.
- Delay: Typically placed after modulation.
- Reverb: Usually last in the chain to create a sense of space and ambience.
Experiment with different pedal orders to discover what works best for your desired sound. There are no hard and fast rules, and personal preference is key.
Attaching Pedals to the Board: Keeping Things Secure
The most common and effective method for attaching pedals to a pedalboard is using Velcro or Dual Lock.
- Velcro (Hook and Loop): A widely used and cost-effective option. Standard Velcro can be sufficient for lighter pedals, but heavy-duty Velcro is recommended for more secure attachment.
- 3M Dual Lock: A heavy-duty interlocking fastener that provides a much stronger and more secure hold than traditional Velcro. Ideal for gigging musicians who need their pedals to stay firmly in place.
Apply one side of the Velcro or Dual Lock to the bottom of your pedals and the other side to the pedalboard surface. Ensure the surface is clean and free of debris for optimal adhesion.
Pedalboard Cases and Transportation: Protecting Your Investment
Once your pedalboard is built, you’ll need a case to protect it during transport. The type of case you need depends on your travel needs and the level of protection required.
- Soft Cases/Gig Bags: Lightweight and convenient for local gigs and rehearsals. Offer basic protection against scratches and bumps.
- Hard Cases/ATA Cases: Provide superior protection for touring, air travel, and situations where your gear is at risk of damage. ATA-rated cases are built to withstand the rigors of airline baggage handling.
Choose a case that fits your pedalboard snugly and provides adequate padding and protection. Consider features like handles, shoulder straps, and storage compartments for cables and accessories.
Stepping into the Modern Era: MIDI and Advanced Routing
Modern pedalboards are increasingly incorporating MIDI switching systems and sophisticated routing solutions. These advancements offer greater control and flexibility, especially for complex rigs.
MIDI Switchers:
- Allow you to control multiple pedals with a single button press.
- Enable preset switching, allowing you to change multiple pedal settings simultaneously.
- Simplify complex signal routing and switching scenarios.
Popular MIDI Switcher Brands:
- RJM Music: PBC series switchers are highly regarded in the professional world.
- Morningstar Engineering: MC series controllers (MC8, MC6, MC3) offer powerful MIDI control in compact formats.
Advanced Routing Solutions:
- Stereo Rigs, Wet-Dry, Wet-Dry-Wet Setups: Modern pedalboards often incorporate routing for complex stereo and multi-amp rigs.
- Phase Correction and Ground Lifting: Advanced routing systems can address phase issues and ground loops in complex setups.
- Looping Systems: Sophisticated loop switchers provide extensive control over pedal order and signal path.
Ampless Rigs and Modeling:
The rise of amp modeling and direct-to-PA solutions has further transformed pedalboards. Many guitarists are now building “ampless rigs” centered around pedalboard-based amp modelers.
Popular Amp Modeling Pedals:
- Strymon Iridium: Renowned for its realistic amp and cab simulations.
- Line 6 HX Stomp/Helix: Powerful multi-effects processors with amp modeling capabilities.
- Universal Audio UAFX Pedals: Emulations of classic amps and effects with UA’s signature sound quality.
- DSM Humboldt Electronics Simplifier: A compact amp simulator with versatile routing options.
- Walrus Audio ACS1: Another popular amp and cab simulator pedal.
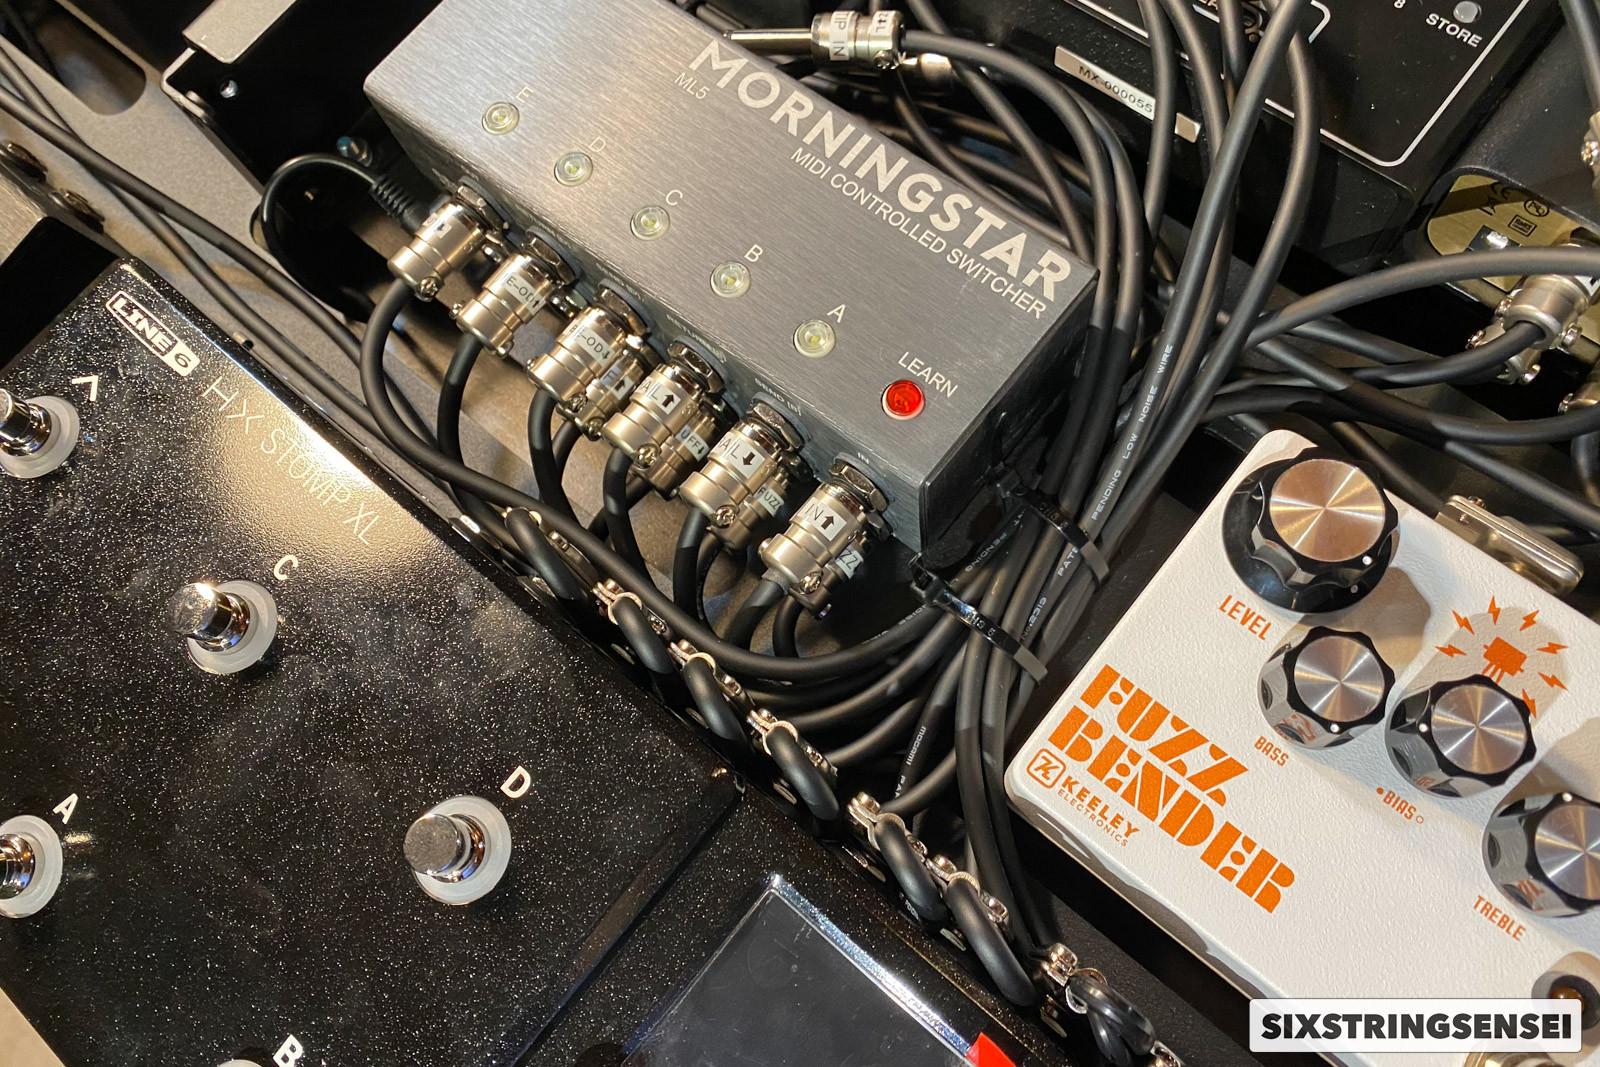 Guitar Pedalboard MIDI Switching Wiring
Alt text: Intricate wiring of a MIDI-controlled guitar pedalboard, showcasing a Morningstar Engineering ML5 MIDI switcher integrated into a complex pedal setup.
Conclusion: Building Your Best Pedalboard
Building the best guitar pedal board is a journey that’s deeply personal to each guitarist. There’s no single “right” way, but by carefully considering your needs, researching your options, and investing in quality components, you can create a pedalboard that enhances your playing experience, streamlines your setup, and unlocks new sonic possibilities. From selecting the right platform size to understanding power requirements, choosing patch cables, and considering advanced routing options, each decision contributes to the overall functionality and sonic integrity of your rig. Take your time, plan thoughtfully, and enjoy the process of crafting your ultimate pedalboard.