 Recording Acoustic Guitar – using multiple microphones
Capturing a decent acoustic guitar sound can be straightforward, but achieving a truly exceptional recording requires a deeper understanding of microphone techniques and choices. For content creators and musicians aiming for professional-quality sound, mastering the art of recording acoustic guitar with the right microphone is essential. This article dives into proven tips and methods favored by top producers and sound engineers, guiding you on how to elevate your acoustic guitar recordings.
Acoustic guitar is a cornerstone instrument across diverse music genres. Countless demos and professional tracks feature its rich tones, making it a critical element in modern music production. Generations of audio engineers have dedicated themselves to perfecting acoustic guitar recording, striving to capture its nuanced sound. While this pursuit has benefited listeners worldwide, it can be challenging for home studio enthusiasts to compete with polished commercial recordings.
This guide aims to bridge that gap by exploring various acoustic guitar recording techniques, drawing insights from the methods employed by renowned engineers and producers. While access to high-end studios and equipment may vary, we’ll also address how to adapt these techniques for budget-conscious setups and less-than-ideal recording environments. The goal is to empower you with the knowledge to select the best Acoustic Guitar Microphone and utilize optimal recording strategies, regardless of your resources.
Defining the “best” sound is subjective; every engineer has a personal ideal. Therefore, this article focuses on understanding how different factors in the recording and mixing process—particularly microphone selection and placement—influence the final timbre. By grasping these principles, you can refine your approach to achieve your desired acoustic guitar sound.
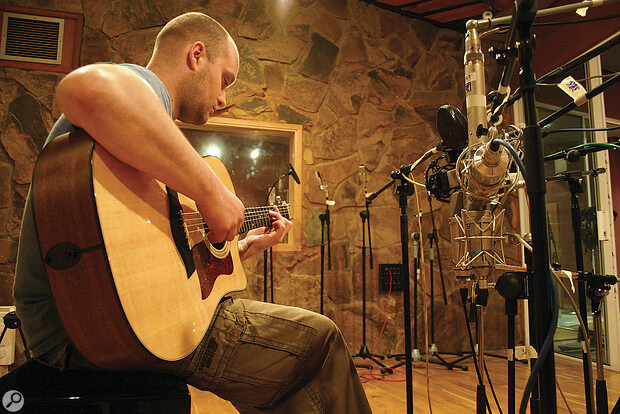
To illustrate these techniques practically, we conducted recording sessions at London’s Livingston Studios, using a variety of microphones and positioning methods on an acoustic guitar. These recordings serve as a practical demonstration, allowing you to discern by ear which microphone setups best suit your production needs. Furthermore, we’ll explore common mixing and sound-shaping techniques applicable to acoustic guitar recordings. Audio examples are available to complement this article, enabling you to directly assess the impact of different microphone techniques.
The Foundation: A Quality Instrument and Skilled Player
“I once asked Daniel Lanois for advice on how to get a good acoustic guitar sound,” recalls producer Pierre Marchand, “His answer was ‘first get a good‑sounding acoustic guitar’.” This fundamental advice underscores that no microphone, regardless of its quality, can compensate for an inferior instrument or poor playing. The time invested in selecting, setting up, and properly tuning the guitar is arguably the most impactful step in achieving a quality recording.
Producers frequently maintain collections of well-kept guitars, understanding that different instruments excel in different musical contexts. Bob Bullock emphasizes, “In country, the choice of the instrument is just as critical as the microphone. A big Gibson J200 gives you a very full, rich sound, which is great for padding the track. Taylor guitars offer a sharper, edgier sound, which is good for licks and solos.” Mike Clink further highlights the influence of the pick: “the pick determines quite a bit of the sound when someone’s playing, so I’ll experiment with a soft, medium and heavy pick, and make that choice.” He even suggests taping two picks together for a unique double-pluck effect.
Guitarists possess numerous ways to shape their sound, and collaboration between the engineer and player is crucial. Allowing the player time to refine their sound before microphone placement is paramount. Joe Zook emphasizes this collaborative spirit: “Recording acoustic instruments is a team sport. Nine times out of 10 a great acoustic sound happens when the player makes subtle adjustments, such as moving a couple of inches or changing picks. It’s all in the hands of the player.” Therefore, before focusing on microphone techniques, ensure the guitarist and the instrument are optimized for the desired sound.
Understanding Acoustic Guitar Sound Dispersion for Effective Microphone Placement
A key challenge in recording acoustic guitar lies in capturing a balanced representation of its complex sound. While instrument adjustments are vital, strategic microphone placement is equally crucial. Understanding how acoustic guitars project sound is essential for effective microphone technique.
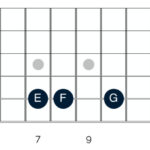
An acoustic guitar’s sound originates from two primary sources of resonance: the vibration of the wooden body panels and the resonance of the air within the guitar body. Panel resonances contribute to the overall character of the instrument’s tone in complex ways, while air resonance significantly enhances projection and sustain, particularly in the lower frequencies.
The air resonance is typically tuned around 100Hz during manufacturing. Placing a microphone directly in front of the soundhole can exaggerate this resonance, resulting in a “boomy” and undesirable low-frequency build-up. Certain notes may exhibit uncontrolled level peaks depending on their fundamental frequencies’ interaction with this resonance. As you move a close microphone away from the soundhole and towards the fretboard, the low-end intensity progressively diminishes. The air and panel resonances become less dominant, allowing the brighter, more direct sound of the strings to become more prominent.
The air resonance is usually tuned during the guitar’s manufacture to be somewhere around 100Hz, and its effects will be exaggerated if you stick a close mic on‑axis with the sound hole, producing an unattractive ‘booming’ quality, with uncontrolled low‑frequency level peaks on certain notes…
Another crucial principle is that body and air resonances project further than string sounds and mechanical noises (picking, fretting). If pick or fret noise is excessive, moving the microphone further away can reduce these noises, albeit potentially sacrificing some of the string “zing” captured at closer distances. String and mechanical noises are also richer in high frequencies and are more easily blocked by physical obstacles compared to lower-frequency body and air resonances. Therefore, microphone positions obstructed from a direct line of sight to the strings will sound warmer and more subdued.
It’s important to remember that an acoustic guitar isn’t a point source of sound. Its physical size, especially when close-miking, means different parts radiate varying frequencies in different directions. Close-miking a single point can easily lead to an unbalanced recording. While moving the microphone further back captures a more natural tone, it can also introduce excessive room reverberation and diminish the desirable immediacy of the string sound. Finding the right balance between capturing the instrument’s full sound and minimizing unwanted room ambience is key to achieving a professional acoustic guitar recording.
Exploring Optimal Acoustic Guitar Microphone Positions
Considering these principles of sound dispersion, let’s examine effective microphone positions for acoustic guitar. For single-microphone setups, the “vanilla” position stands out as a widely recommended starting point. This technique involves positioning the microphone aiming at the point where the guitar’s neck joins the body. This location typically captures a balanced mix of body and panel resonances while simultaneously picking up the lively sound of the strings – ideal for acoustic guitar parts intended for dense mixes. Fine-tuning the exact microphone angle and distance is often necessary, but this position provides a solid foundation for quickly achieving good results.
 MikeMike’s ‘vanilla position’ for acoustic guitar microphone placement, aiming at the neck-body joint. The precise angle and distance will be adjusted based on the guitar, song, and desired tone.
However, some engineers find that this “vanilla” position emphasizes string sound too much, potentially at the expense of the instrument’s body resonance. An alternative approach, favored by engineers like Steve Albini, Al Schmitt, and Jim Scott, focuses on capturing the sound from the front of the guitar body, aligning horizontally with the soundhole. To avoid excessive “boom” from air resonance, the microphone is positioned slightly off-axis vertically from the soundhole. Albini explains, “I don’t necessarily point the microphone straight at the sound hole. Sometimes you want to get it up in the air a little bit, looking down at the guitar so you can get more of the strumming and less projection of the hole. If the guitar is a little thin‑sounding, you want to have it more in front of the body.”
While understanding the logic behind these common positions is helpful, the unique resonant characteristics of different guitars necessitate a more empirical approach to microphone placement. Mike Clink prioritizes careful listening before microphone setup: “Because every guitar sounds different, and everybody plays the guitar differently, I move my head around to see where the best sound source is. Before I even place a mic on an acoustic guitar, I’ve got my ear moving around a radius trying to find out where the right sound is coming from.” Pierre Marchand advocates for relying on microphone feedback: spend “three minutes with the headphones turned up loud, moving the mic around the instrument until it sounds right, and leave it there.”
 Placing the microphone in an arc around the bridge, pointing towards it, offers an alternative single-mic position that reduces string emphasis compared to the 'vanilla position'.Microphone placement in an arc around the bridge, directed towards it. This single-microphone technique reduces the prominence of bright string sounds compared to the ‘vanilla’ neck-body joint position.
Experimentation is key, and beyond the two primary positions, consider exploring other locations. Moving a close microphone horizontally away from the soundhole on the bridge side offers a wide range of tonal variations based on the guitar’s front panel resonance. However, be mindful of potential high-frequency shadowing from the player’s arm and excessive pick noise. Placing microphones near the player’s ears is occasionally suggested, often reflecting the player’s perspective. In such cases, be cautious of high-frequency shadowing and position the microphone slightly forward of the player’s head, avoiding potential breathing noise.
Another fruitful area to explore is along an arc to the right of the player, centered around the bridge. This position is particularly useful when fret noise is a concern, such as in delicate fingerpicking styles, as it distances the microphone from the source of unwanted noise. Again, positions slightly above or below the guitar plane tend to yield better results, minimizing acoustic shadowing from the player. Maintaining a slightly forward microphone position relative to the instrument is also generally beneficial.
Microphone Distance, Polar Patterns, and the Role of Room Acoustics
Finding the right balance between capturing the various sonic components of the acoustic guitar and minimizing unwanted room ambience is crucial. Microphone distance is a primary variable in this equation. However, expert opinions on optimal microphone distance vary considerably, ranging from mere inches, as suggested by Bob Bullock and Frank Fillipetti, to two to three feet, favored by Steve Albini and Jim Scott.
This disparity stems partly from microphone choice and polar pattern. Directional microphones, when used very close, can unnaturally emphasize specific guitar areas, and proximity effect can lead to an overwhelming low-end response. Keith Olsen notes, “Acoustic guitar sounds terrible with a cardioid mic too close to it,” advocating for omnidirectional polar patterns instead. Omnidirectional microphones offer advantages: their lack of proximity effect provides greater placement flexibility, and their wider pickup pattern captures a fuller representation of the guitar, even at close distances where string high frequencies are concentrated.
While omnidirectional microphones inherently capture more room sound than cardioids in the same position, their ability to be placed closer to the instrument often minimizes this difference in practice. Furthermore, adding a small amount of acoustic absorption behind the microphone can further reduce room reflections. Simple solutions like upholstery or acoustic foam panels can be effective. For more specialized options, products like the SE Electronics Reflexion Filter or T‑Bone Mic Screen offer focused sound isolation.
Live or Dead Acoustic Environment: Shaping the Room’s Contribution
The extent to which room sound influences the recording is another point of debate. One approach advocates for recording in a highly damped acoustic environment. This allows for pulling the microphone further back to capture a more holistic instrument sound without room ambience concerns. Desired spaciousness and reverberation can then be added later during mixing using effects. This strategy can be beneficial with directional microphones, which often sound better at a distance and reduce spill when recording vocals and guitar simultaneously. However, this dead-room technique isn’t as prevalent as one might expect.
The reason, arguably, is that dead-room recording can make achieving a full, balanced acoustic guitar sound more challenging, especially with less-than-stellar instruments or players who move during performance. In a dead room, the microphone primarily captures a single, limited perspective of a complex sound source. More reflective environments, conversely, allow different facets of the guitar’s timbre to radiate outwards and bounce back from nearby surfaces, contributing to a more complete tonal representation. This reflected sound also tends to make microphone placement less critical, offering a more forgiving recording scenario. Consequently, many top producers prefer to incorporate some degree of reflected sound into their acoustic guitar recordings.
However, less-than-ideal recording spaces can introduce unwanted coloration and background ambience, making the guitar difficult to integrate into a mix. This can discourage home recordists from utilizing room reflections. Yet, achieving a good sound on a budget is often easier by embracing room reflections rather than attempting to deaden a domestic space inadequately. Careful room selection is key.
Budget-Friendly Acoustic Guitar Recording Environments
When choosing a recording space, avoid small rooms, especially improvised vocal booths or small cubic rooms common in home studios. Smaller rooms often suffer from resonance issues in the guitar’s low-mid range, leading to significant frequency response changes with minor shifts in instrument or microphone position. While room resonance problems can be managed with patience and trial-and-error, a less problematic room simplifies the recording process significantly.
Conversely, excessively large or reverberant rooms, reminiscent of “vaulted catacombs,” should also be avoided, even with close microphone placement. While early room reflections can be beneficial, excessive or prolonged reverb limits mixing flexibility. While a great-sounding recording room is ideal, capture only what you can confidently manage at the mixing stage, avoiding excessive or undesirable ambience.
If you can avoid problematic room modes and excessive reverb, leveraging reflections from hard surfaces can yield excellent results. This approach can create a more subjectively full instrument sound without requiring excessive microphone distance, minimizing unwanted room ambience and preserving mixing options. Closer microphone positions also allow for emphasizing string sound for a more upfront character. Utilize room walls or expose bare floors as reflectors. Portable hardboard panels or whiteboards (common in educational settings) can serve as adjustable reflectors to fine-tune the room acoustics.
Multi-Microphone Techniques: Expanding Sonic Possibilities
Regardless of the recording environment’s acoustics, employing multiple microphones offers another avenue to capture a more realistic and detailed acoustic guitar sound, even with close microphone placement. Each microphone can be positioned to capture different facets of the guitar’s tone, expanding your sonic palette and providing greater flexibility during mixdown. At the mixing stage, you can adjust the balance between these microphone signals to achieve optimal results within the context of the full arrangement.
A common but often problematic multi-microphone approach involves placing one microphone over the soundhole and another over the fretboard. This configuration frequently results in an unbalanced sound dominated by air-resonance boom, pick noise, string buzz, and fret squeaks. A more effective strategy starts with establishing a solid foundation using one of the single-microphone techniques discussed earlier, prioritizing either string presence or room ambience based on your sonic goals. The second microphone then becomes supplementary, enhancing specific aspects of the sound.
For instance, if the “vanilla” position microphone captures the desired string tone but lacks low-end warmth, a second microphone positioned to capture more body resonance (perhaps in the player’s acoustic shadow or away from the strings) can be added. Conversely, if a frontal microphone position captures ample body resonance but needs string definition, a high-pass-filtered second microphone positioned near the fretboard can provide articulation without excessive mechanical noise. Experimentation is key to finding the ideal placement for the second microphone to complement the primary microphone’s sound.
Addressing Phase Relationships and Comb Filtering in Multi-Mic Setups
When using multiple microphones, the phase relationship between the microphone signals becomes a critical factor. Phase differences arise because sound waves reach each microphone at slightly different times due to varying distances from the sound source. These time differences can lead to frequency cancellation effects, known as comb filtering, when the microphone signals are combined. If the combined sound of multiple microphones is inferior to the individual microphone sounds, phase cancellation is likely the issue.
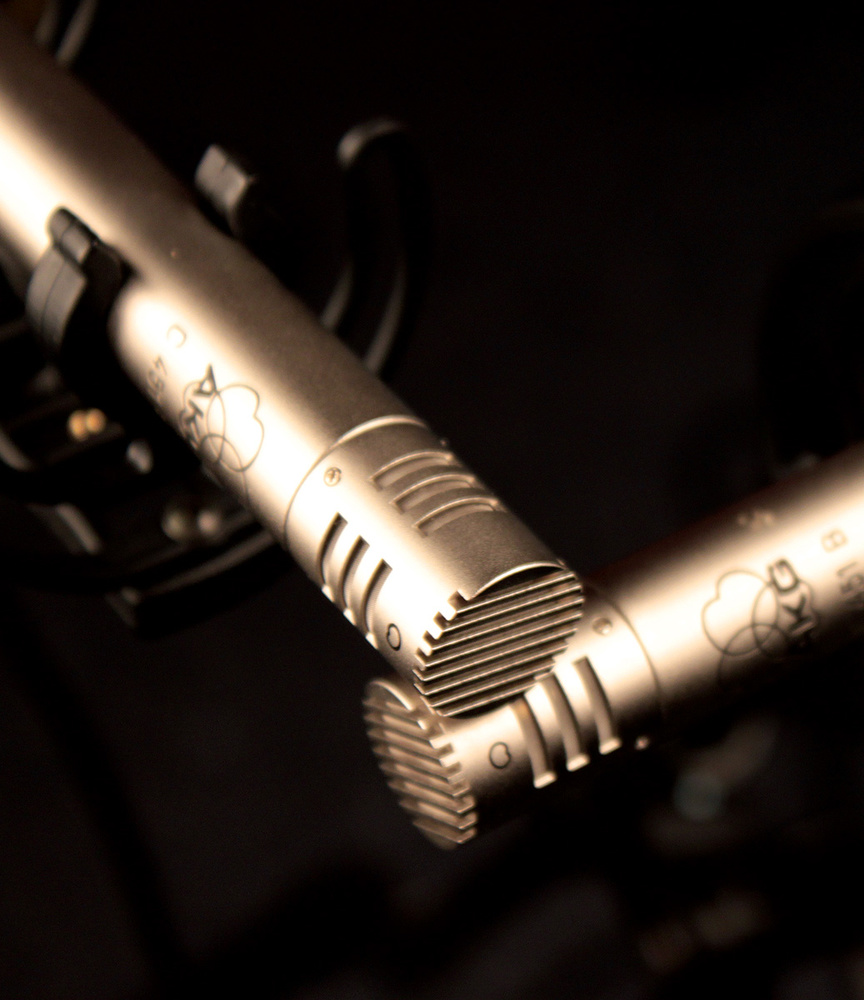 The X-Y crossed-pair mic technique minimizes phase cancellation and offers plenty of tonal flexibility on acoustic guitar.The X-Y crossed-pair microphone technique, ideal for acoustic guitar recording. It minimizes phase cancellation and provides excellent tonal flexibility.
Quick fixes for phase issues include inverting the polarity (flipping the phase) of one microphone signal, particularly when microphones are on opposite sides of the instrument. However, a more refined approach involves subtly adjusting the microphone distance of one microphone. Small position changes can significantly alter comb filtering characteristics without drastically changing the individual microphone’s tone. Listening to the combined guitar sound while making these adjustments helps to quickly identify the most desirable timbre. Once the optimal combined sound is achieved, securely clamp down microphone stands to prevent movement during the recording session. Invest in sturdy, non-sagging microphone stands for reliable positioning.
Maintaining consistent player position is also important, both during and between takes. Player movement can alter microphone-performer distances, leading to phasing inconsistencies. Using gaffer tape to mark chair and foot positions can help. If the player is highly mobile, using a secondary microphone in a less prominent role can mitigate phase issues, as comb filtering is most pronounced when both microphones are at similar levels.
While multi-microphone close-miking can capture a fuller sound, the potential for phase issues often leads to a preference for coincident microphone techniques. The X-Y crossed pair technique, popular in Nashville, is a prime example. Chuck Ainlay, a Nashville engineer, describes it: “I like to record acoustic guitar with the XY pattern — one capsule pointing towards the fretboard and the other one more towards the hole — placed somewhere off the 12th fret, about where the neck combines with the body of the guitar.” Bob Bullock, another Nashville veteran, uses a similar approach, noting that “it lets me get the sound of the low and high strings with more definition, which means I use less EQ, and it gives me a good combination of room and guitar resonance.”
The exact microphone distance and angle within the X-Y pair will influence the sound. However, distances within a foot (Bullock suggests 4-6 inches) typically provide separate control over low and high frequencies. Balancing the two signals becomes akin to EQ adjustment, simplifying tone shaping compared to single-microphone techniques. The horizontally elongated polar pattern of the X-Y pair is also well-suited for capturing the width of the acoustic guitar’s sound.
Mixing Acoustic Guitar Recordings for Polish and Presence
Well-recorded acoustic guitars often require minimal mixing effort. In dense mixes, subtle low-end reduction and a slight boost in the 15kHz “sparkle” region can help the guitar cut through. Gentle, low-ratio insert compression can add sustain, or parallel compression can be used if insert compression sounds too restrictive. Conservative use of darker-sounding global send-return reverbs can effectively place the guitar within the mix without exaggerating pick and fret noises.
With multi-microphone recordings, re-evaluating the balance and phase relationship between microphones is worthwhile during mixing. Without time pressure from the performer, experiment by subtly adjusting the relative timing of tracks or using phase-alignment plugins like Little Labs IBP or Voxengo’s PHA979 (freeware options like Betabugs’ Phasebug and Tritone Digital’s Phasetone are also available).
 If you encounter phase problems during the mix, you could try using a phase-alignment tool such as Little LabsPhase alignment tools like Little Labs’ IBP can help resolve phase issues encountered during mixing multi-microphone acoustic guitar recordings.
Stereo placement of acoustic guitars offers various creative possibilities. Double-tracking with opposite panning is a common technique for creating stereo width in rhythm parts. Layering alternative tunings, another often-overlooked technique, can further enhance richness (refer to SOS March 2009’s Guitar Technology column for guidance). When double-tracking, precise timing is paramount, even requiring editing to align audio segments. Otherwise, rhythmic inconsistencies and stereo flamming can occur. Always check mono compatibility, as hard-panned tracks can diminish significantly when summed to mono.
 Mike tested a range of microphones and mic techniques described by over 20 of the worldExtensive microphone and technique testing was conducted, drawing on the expertise of over 20 top producers, to provide practical insights into acoustic guitar microphone techniques.
Using two microphones allows for stereo widening by panning them left and right. While seemingly unnatural, this can create a more realistic and three-dimensional guitar sound. Bob Bullock pans his two acoustic guitar microphones “the same way I would a piano, with the lower frequencies on the left and the higher ones on the right, which creates a fuller, but still very natural sound.” However, avoid excessive panning that results in an unrealistically wide stereo image. Al Schmitt advises subtle panning: “It would just be a little off — a little left and a little right of centre – just to give it a little bit of stereo.”
Subtle stereo width can also be added to mono recordings using modulation effects, as suggested by Jason Goldstein and Renaud Letang. Short ambience reverbs offer another option, although excessive short reverb can comb-filter with the dry signal, altering its tone. However, some engineers, like Jon Gass and Manny Marroquin, intentionally use reverb for creative tonal modification.
By understanding these microphone techniques and mixing strategies, you can significantly improve your acoustic guitar recordings, achieving professional-sounding results regardless of your recording environment or budget. The key is experimentation and careful listening to find the acoustic guitar microphone and techniques that best capture the unique sound of your instrument and musical vision.