A guitar strap is indispensable for any guitarist aiming for stage presence or comfortable practice sessions. It grants you the freedom to move, perform standing up, and ensures your instrument is always within easy reach. Whether you wield an electric guitar, an acoustic guitar, or a bass, understanding how to properly attach your strap is fundamental. Given that the strap is a primary contact point between you and your guitar, correct installation is crucial for playing comfort and instrument security.
This guide will walk you through the process of attaching a guitar strap correctly, ensuring you can get to playing your music quickly and confidently. We’ll cover different guitar types and strap attachment methods, providing you with all the information you need to get strapped in and ready to rock.
Attaching a Guitar Strap to a Two-Pin System
Strap pins, often referred to as strap buttons, are the standard attachment hardware on most guitars. These are small, rounded metal posts designed to secure your guitar strap to the instrument’s body. Electric guitars and basses almost universally feature two strap pins, and many acoustic guitars are similarly equipped.
In a two-pin setup, you’ll typically find one pin located at the bottom end of the guitar’s body. The second pin’s placement can vary, often positioned either on the upper shoulder of the body or at the heel of the neck where it joins the body.
Here’s a step-by-step guide to attaching your guitar strap to a guitar with two pins:
-
Strap Orientation Matters: While some guitar straps are designed to be symmetrical, most have a specific orientation. If your strap includes a plastic slider for length adjustment, the end with the overlapping material layers should be oriented towards the bottom pin of the guitar. Similarly, if one end of the strap is noticeably thinner, this end is also typically designed for the bottom pin. Decorative elements or logos on the strap often indicate the end that should be attached near the guitar’s neck.
-
Bottom Pin Attachment: Begin by taking one end of your guitar strap. Locate the leather or reinforced end piece with a buttonhole. Carefully insert the bottom strap pin through this hole. Ensure the strap is snugly fitted around the pin to prevent slipping. You might need to apply slight pressure or maneuver the strap to get it securely in place.
 Attaching guitar strap to bottom pin
 -
Top Pin Attachment: Now, take the remaining end of your strap. Locate the other strap pin, typically near the neck or on the upper shoulder. Insert this pin through the buttonhole on the free end of the strap, mirroring the process you used for the bottom pin. Again, ensure a snug and secure fit.
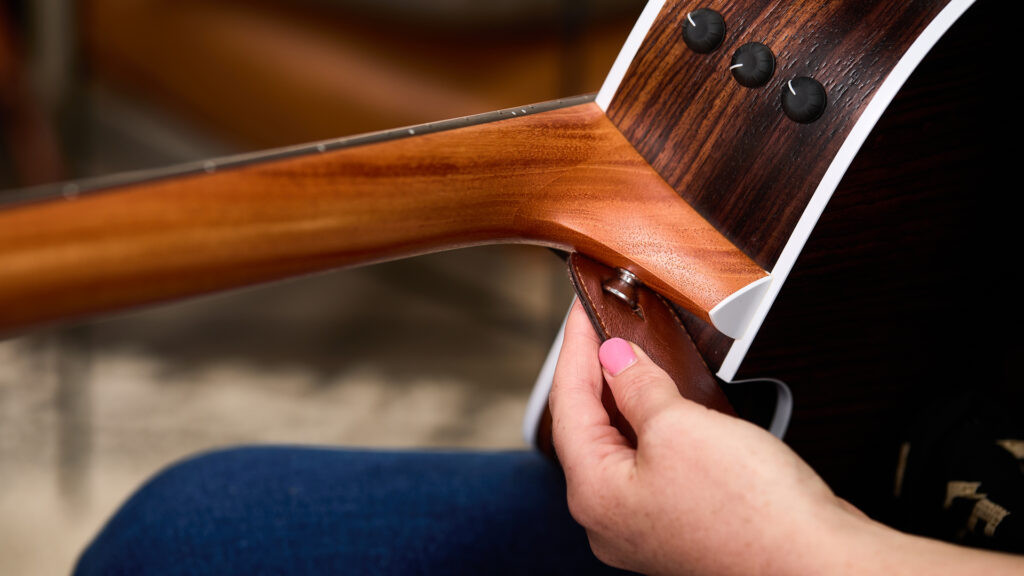 Attaching guitar strap to top pin
 -
Security Check: Before trusting your guitar to the strap, it’s essential to test the connection. Gently tug on each end of the strap to confirm that both ends are firmly attached to the strap pins. This simple check can prevent accidental drops and ensure your guitar is safely secured.
Even with a two-pin system, some players prefer the strap configuration used for guitars with only one pin, which we’ll discuss next.
Utilizing a Guitar Strap with a Single Pin
Many acoustic guitars are manufactured with only a single strap pin, located at the base of the guitar. While adding a second pin is an option, the traditional method for attaching a strap to a one-pin guitar is straightforward and avoids any need for drilling or modifications.
To start, follow the initial orientation step described for the two-pin method to determine the correct direction of your strap. Then, secure one end of the strap to the bottom strap pin, just as you would with a two-pin guitar. For the other end, instead of attaching to a pin, you will secure it to the guitar’s headstock.
Since there’s no strap pin on the headstock, you’ll need to use an additional piece of material to create a secure loop. This can be a leather lace, a piece of strong cord, or a specialized Strap Adapter designed for this purpose. Many guitar straps are even sold with a lace specifically for this headstock attachment method.
Thread your chosen material through the buttonhole at the free end of the strap. Then, carefully thread each end of the material under the guitar strings, just above the nut on the headstock. If you are using a lace or cord, tie a secure double knot to fasten the strap to the headstock. If using a strap adapter, follow the manufacturer’s instructions to secure it properly.
You’ll notice a difference in how the guitar balances depending on whether the strap is attached at the headstock versus near the neck joint. Headstock attachment often balances the guitar’s weight more centrally, while two-pin systems may shift the center of gravity slightly towards the guitar’s lower body. Experimenting with both methods can help you find your preferred balance and playing comfort.
Adjusting Your Guitar Strap to the Perfect Length
Setting your guitar strap to the right length is critical for playing comfort and ergonomics. Being able to quickly adjust your strap is also very useful, especially when switching between sitting and standing.
The ideal strap length is largely a matter of personal preference and playing style. However, a general ergonomic guideline is to adjust the strap so that you can play chords and notes without excessively bending your wrist when standing. Maintaining a relaxed wrist and fret hand is crucial for preventing strain and potential injuries over time.
Adjusting your strap’s length is usually simple. If your strap has a sliding plastic buckle, this is your adjustment mechanism. To lengthen the strap, slide the buckle away from the guitar’s neck, towards the lower body. To shorten it, slide the buckle towards the neck. This adjustment can typically be done while wearing the strap, without needing to detach it from your guitar.
Leather or suede straps often employ a different adjustment system. These straps are typically made in two pieces that interlock. Adjusting these straps requires detaching the narrower piece from the wider one.
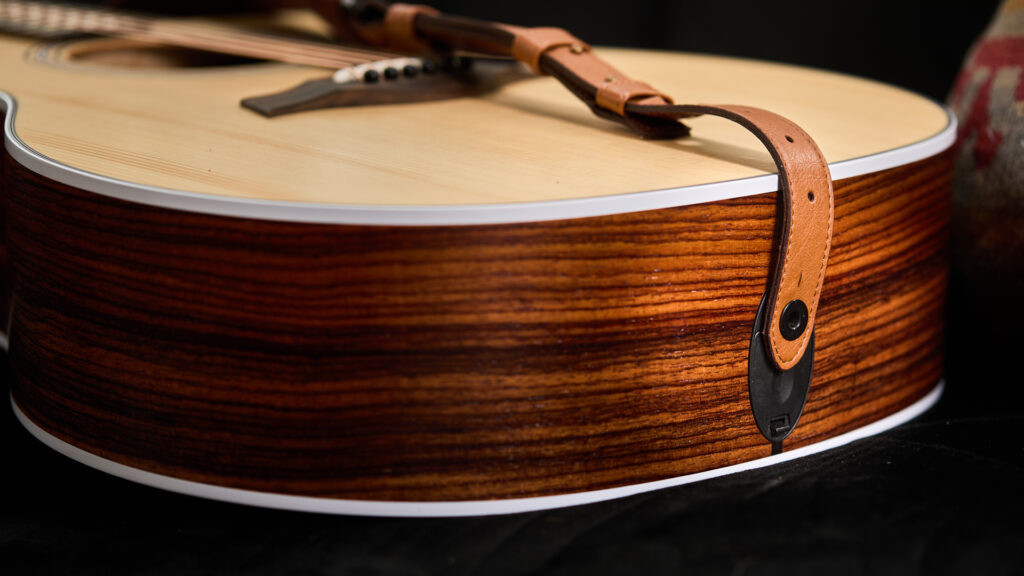 Adjusting leather guitar strap length
The wider strap piece will have a series of slits designed for length adjustment. Thread the thinner strap piece upwards from the underside of the wide strap, pulling it taut. Then, thread it back through itself by passing it through an adjacent slit. Finally, continue threading it through at least one more slit as it makes its way down to connect to the bottom strap button. By experimenting with different slit combinations, you can fine-tune the strap length to your preferred playing height.
Enhancing Guitar Security with Strap Locks
Once you’ve found your ideal strap length and are confident in your strap attachment, consider adding strap locks for an extra layer of security. Guitar strap locks are designed to prevent your strap from accidentally detaching from the strap pins, protecting your guitar from potentially damaging falls.
There are various types of strap lock systems available. For a detailed look at options and installation, you can explore guides specifically on how to use strap locks with an acoustic guitar. These systems generally replace your existing strap buttons with a locking mechanism that securely holds your strap in place.
Choosing the Right Guitar Strap for Your Needs
Knowing How To Put On A Guitar Strap is only the first step. With a vast array of materials, styles, and features available, selecting the right guitar strap is equally important for comfort, style, and performance. Let’s explore key factors to consider when choosing a guitar strap.
 Different guitar strap materials
Material Considerations
The material of your guitar strap significantly impacts its durability, comfort during long playing sessions, and price. Popular guitar strap materials include:
- Leather: Known for its durability, classic look, and comfort as it molds to your body over time.
- Vegan Leather: An ethical and often more affordable alternative that mimics the look and feel of leather while being animal-free.
- Suede: Offers a soft, luxurious feel and excellent grip, helping to prevent guitar slippage.
- Denim: Provides a casual, stylish look, and can be quite durable.
- Cotton: A budget-friendly, lightweight, and breathable option, often favored for electric guitars.
Regardless of the main strap material, the ends that attach to the strap pins are typically made of leather or suede for enhanced security and a snug fit.
While material choice is largely personal, some materials are traditionally associated with certain guitar types or music genres. Leather and suede straps are often paired with acoustic guitars, while cotton straps are commonly seen with electric guitars. However, personal style and comfort should ultimately guide your choice. Leather straps and suede straps are classic choices, while cotton straps offer a different aesthetic and feel.
In terms of cost, leather and suede straps generally represent a higher investment but often offer greater longevity. Cotton straps are more economical but may show wear and tear more quickly.
Padding for Comfort
A guitar, while not excessively heavy, can become a burden on your shoulder and neck during extended playing periods. Straps with padding, especially those made of leather or suede, offer added comfort for longer rehearsals or performances. This padding, usually a thin layer of foam or similar material, cushions your shoulder and distributes the guitar’s weight more evenly.
While padding enhances comfort, it does add a slight amount of extra weight to the strap itself. This weight is usually negligible, but it’s something to consider if you prefer the lightest possible setup.
Width for Weight Distribution
The width of your guitar strap also plays a role in comfort, particularly in how the guitar’s weight is distributed across your shoulder. A narrower strap concentrates the weight on a smaller area, which can lead to discomfort over time. A wider strap distributes the weight more broadly, which is often preferable for players who primarily play standing up.
Standard cotton straps are typically around 2 inches wide, while leather and suede straps can range from 2.5 to 3 inches or more in width, offering greater weight distribution.
Aesthetic and Personal Style
Finally, your guitar strap is an opportunity to express your personal style and complement your guitar’s appearance. Guitar straps are available in every color imaginable and with a wide array of designs, from simple and understated to elaborately decorated with embroidery or nickel conchos.
 Brown leather guitar strap
For a striking visual effect, consider choosing a strap that contrasts with your guitar’s finish, such as a vibrant blue denim strap on a sunburst guitar. Alternatively, for a more subtle and cohesive look, select a strap that complements the color palette and style of your instrument.
Ultimately, choosing a guitar strap is about finding one that resonates with you personally. Select a strap that you find appealing, comfortable, and that enhances your playing experience.
Get Strapped In and Play!
A guitar strap is more than just an accessory; it’s an essential piece of gear that enables you to play your guitar freely and comfortably, while also reflecting your personal style. The ideal strap combines comfort and aesthetics, and at [guitarplayers.net], we believe in applying the same level of craftsmanship and attention to detail to our straps as we do to our guitars.
Now that you’re equipped with the knowledge to properly attach and choose a guitar strap, you’re ready to take your playing to the next level. Explore other essential guitar skills, such as mastering how to hold a pick and learning how to tune your acoustic guitar, to further enhance your musical journey.
