As a content creator for guitarplayers.net, and a seasoned guitar technician, I’ve seen my fair share of guitars. When I was a young, budding guitar enthusiast, around 17, the market seemed saturated with the same classic designs. Strats and Teles, while iconic, felt like relics of a bygone era to my teenage eyes. I craved innovation, something that broke the mold. That’s when I discovered the Parker Fly. It was revolutionary. Its sleek lines and unconventional construction immediately captivated me. Driven by teenage desire, I worked tirelessly at a fast-food job, saving every penny until I could afford my own emerald green Parker Fly Deluxe. It was a significant purchase, my first and only high-end guitar, and I was thrilled. Though my original Parker is long gone, the occasional visit of one to my repair shop always reignites my appreciation for its brilliance and reminds me of the unique challenges it presents.
Ken Parker is undeniably a visionary in guitar design. However, his relentless pursuit of innovation sometimes leads to designs that, while ingenious, aren’t exactly technician-friendly. Even seemingly simple tasks, like replacing an output jack, become intricate operations on a Parker Fly, unlike the straightforward process on most other guitars. Despite the serviceability challenges inherent in Ken Parker’s designs, our job is to fix instruments, and we rarely back down from a complex repair.
The complexity of replacing the output jack on a guitar parker fly stems from its sophisticated electronics:
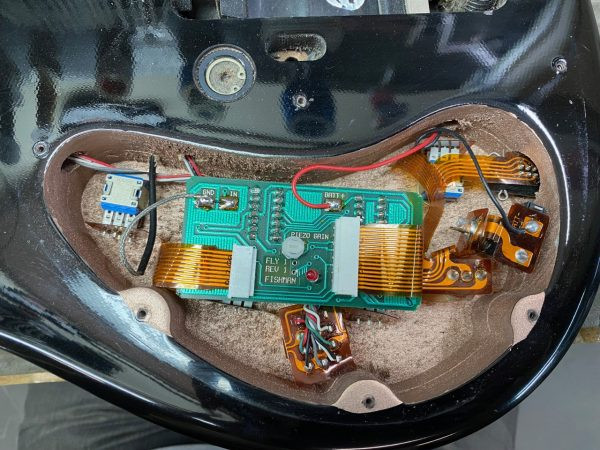 Parker Fly electronics
The Parker Fly is designed as both an electric and acoustic guitar. It features both piezo and magnetic pickups, running through an active preamp system and converging into a single stereo output jack. Everything is interconnected with ribbon cables, and the output jack itself has five soldered connections. This stereo output jack is uniquely modified to allow for separate routing of electric and piezo signals. It also incorporates a clever battery switch integrated into the jack housing, which engages the active electronics when a cable is inserted. It’s an incredibly smart design, but it transforms a routine repair into a significantly more complex procedure.
The initial hurdle is detaching the ribbon cable without causing damage. Fortunately, years of experience have honed my dexterity, and armed with a soldering iron, solder sucker, and considerable patience, I managed to carefully desolder all five connections without harming the delicate ribbon cable.
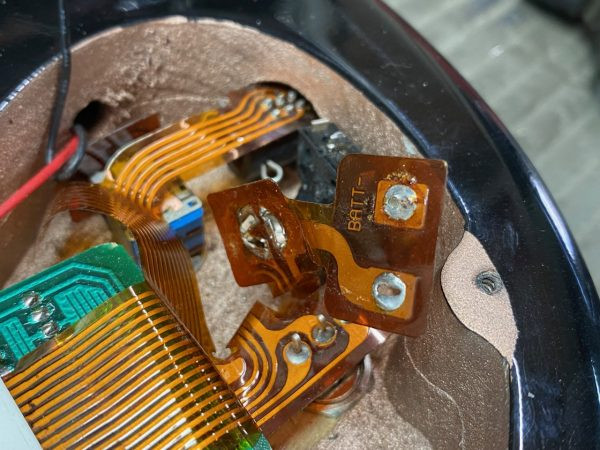 Soldering the Parker Fly output jack
Disclaimer: Guitar electronics repair should be performed by qualified technicians.
Next, the battery switch needed to be removed. This switch is secured to the jack with epoxy, which I carefully softened using a soldering iron while gently freeing the switch. Because the switch is plastic, it’s crucial to apply heat delicately to avoid melting and destroying it. Here’s the switch removed, revealing the custom-modified jack beneath:
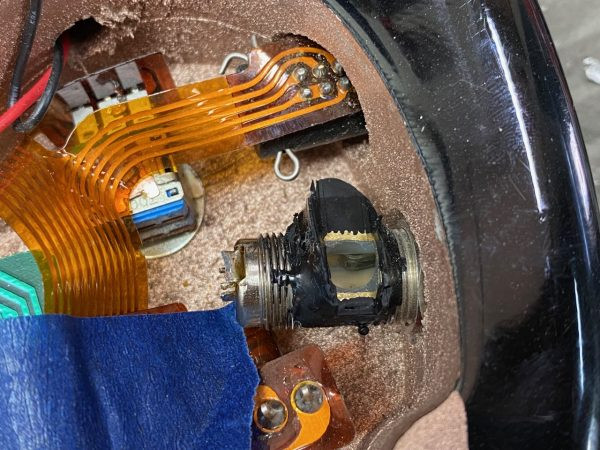 Parker Fly output jack with battery switch removed
Around our shop, we often joke, “ain’t nothing simple,” and the Parker Fly output jack repair perfectly embodies this sentiment. Even the jack’s attachment to the guitar body is unconventional. The end of the jack is filed down to accommodate a screw-on cap. A tiny hole on the outer edge is designed for a specialized tool to unscrew it – a task that proves more challenging in practice than theory.
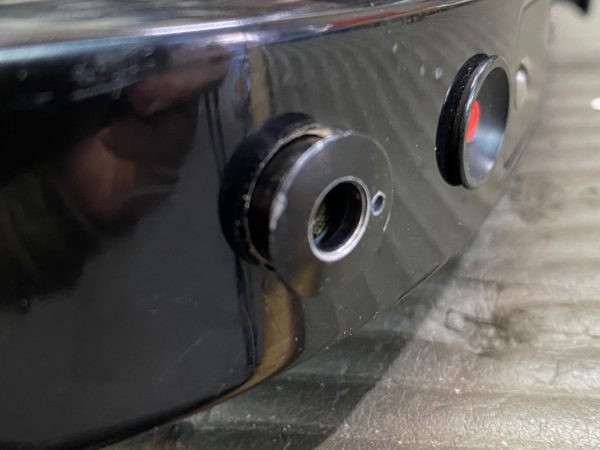 Parker Fly output jack removal detail
Finally, the original jack is out! Here’s the original modified jack alongside the battery switch:
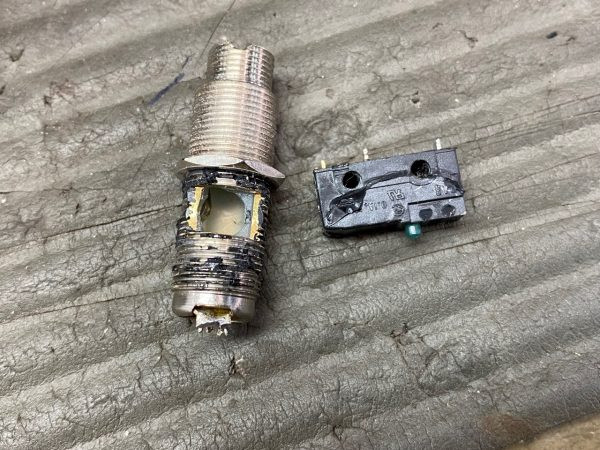 Original Parker Fly output jack and battery switch
Now, the task was to fabricate a replacement guitar parker fly output jack. I started with a robust Switchcraft stereo endpin jack. I carefully cut down the end and then meticulously filed into the housing to accommodate the battery switch. Precision is paramount here. Cutting too deep would obstruct the guitar cable insertion, and incorrect placement along its length would prevent the cable from engaging the battery switch. Parker Guitars likely had specialized jigs for this process, but for the occasional repair we undertake, careful measurements and a steady hand are essential.
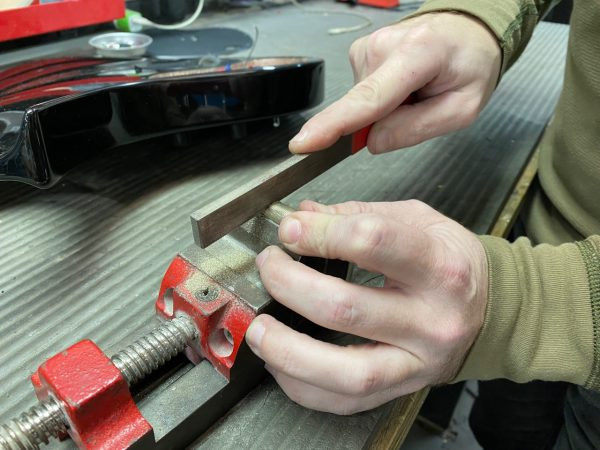 Modified Switchcraft jack for Parker Fly – Step 1
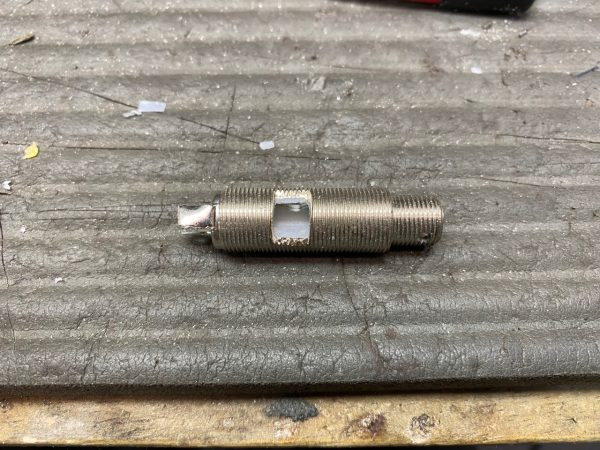 Modified Switchcraft jack for Parker Fly – Step 2
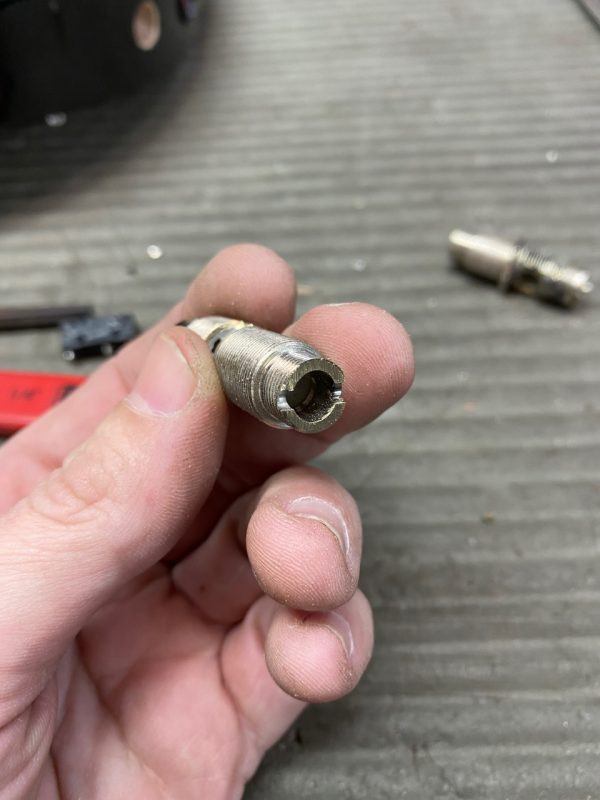 Modified Switchcraft jack for Parker Fly – Step 3
The final step was to epoxy the battery switch onto the newly prepared output jack and resolder all the connections to the ribbon cable, again being extremely careful to avoid overheating and damaging anything.
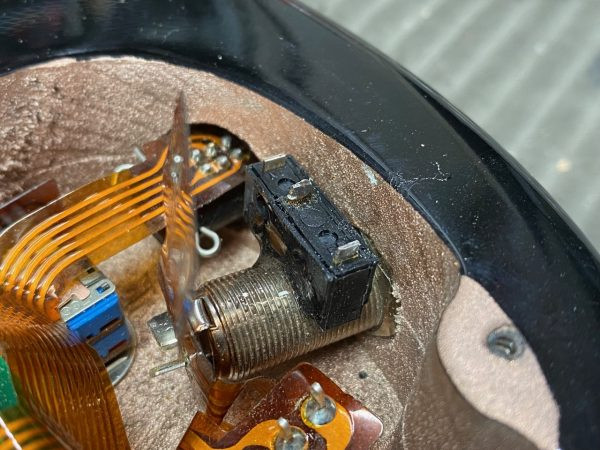 Parker Fly output jack reassembly – Step 1
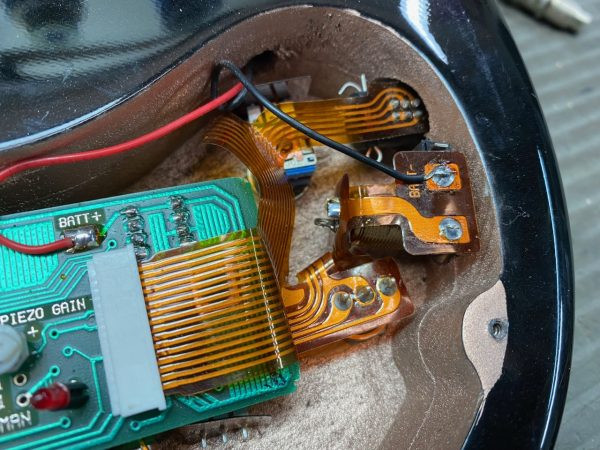 Parker Fly output jack reassembly – Step 2
With a brand-new output jack installed, this guitar parker fly is once again ready to take flight! It was a genuine pleasure to work on a Parker again after so many years. They are truly exceptional instruments, even if they can be a bit demanding when it comes to repairs!
