
The allure of vintage guitars, particularly those hailing from the 1950s, is undeniable. A significant part of their charm lies in the iconic finishes, especially the legendary sunburst. This era of guitar paint is highly sought after, not just for its aesthetic appeal, but also for the nostalgic connection to a golden age of music. For guitar enthusiasts and DIYers, replicating the look of 1950’s era guitar paint is a rewarding project. This guide delves into the techniques and materials needed to refinish your guitar and capture the spirit of those classic finishes.
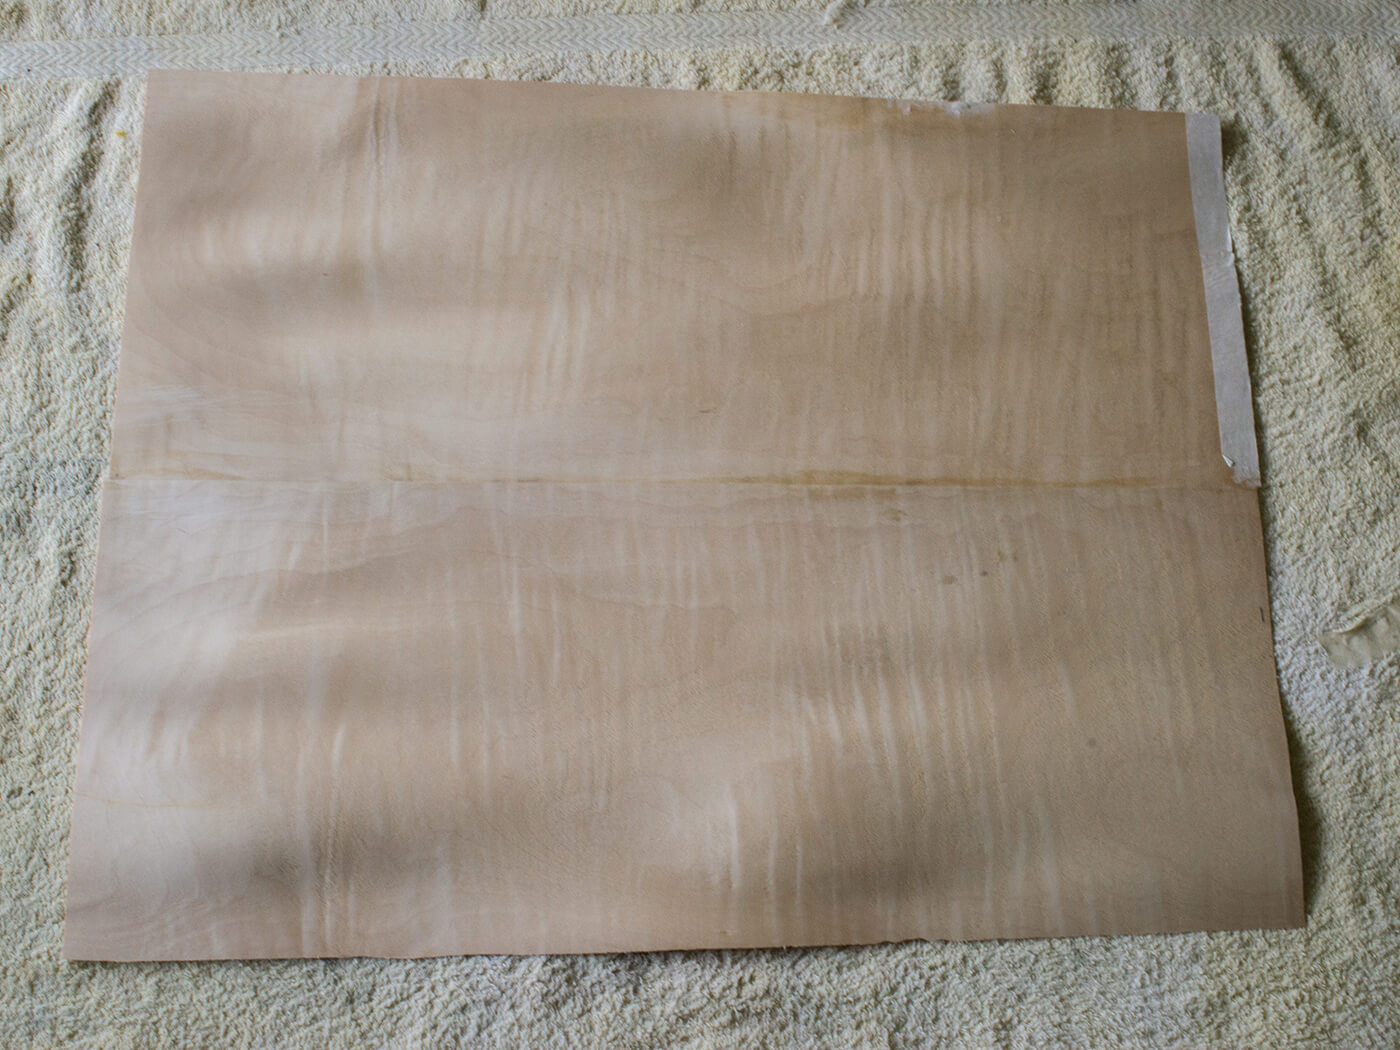 Bookmatched sheets of curly maple veneer need to be glued together before fixing onto the body
Stripping Down and Preparation for a 1950’s Style Finish
Before embarking on the journey of applying a 1950’s era guitar paint finish, preparation is key. This project assumes the guitar has already been stripped of its previous finish. For a truly authentic vintage aesthetic, especially when aiming for a sunburst, consider veneering the top. Curly maple veneer is an excellent choice, mirroring the figured tops commonly seen on guitars from the 1950s.
The process begins with carefully joining bookmatched veneer sheets. These sheets, chosen for their symmetrical grain patterns, need to be seamlessly glued together. This creates the foundation for the figured top that is characteristic of 1950’s era guitar paint jobs. Once joined, the veneer is ready to be applied to the guitar body.
Gluing the veneer to the guitar body is a crucial step. Using a vacuum press ensures even pressure distribution across the curved surface of the guitar, resulting in a strong and flawless bond. This technique is particularly important when working with thin veneers and aiming for a professional-looking 1950’s era guitar paint finish.
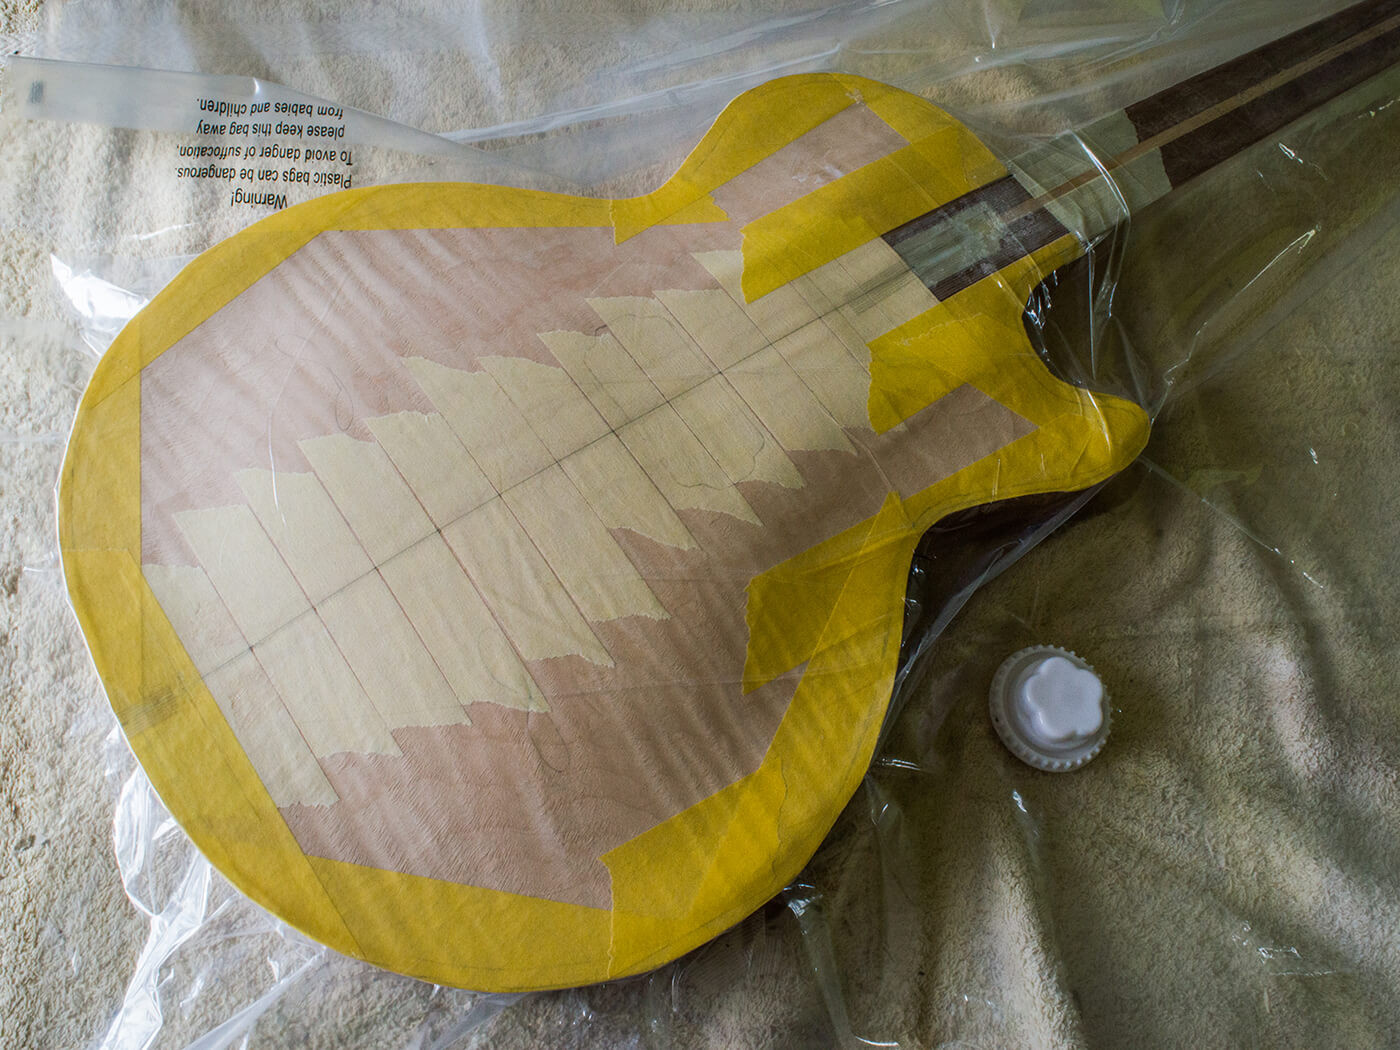 The yellow masking tape strengthens the edges and the pale masking tape is fixed across the centre join before the body goes into the vacuum press
After the veneer is securely bonded, the edges need to be trimmed flush with the guitar body. Any pre-existing holes for hardware should be carefully re-established. This meticulous preparation ensures the body is perfectly ready for binding and the subsequent stages of achieving that desirable 1950’s era guitar paint look.
 Cascamite glue proves to be a good choice and the centre join survives the process intact
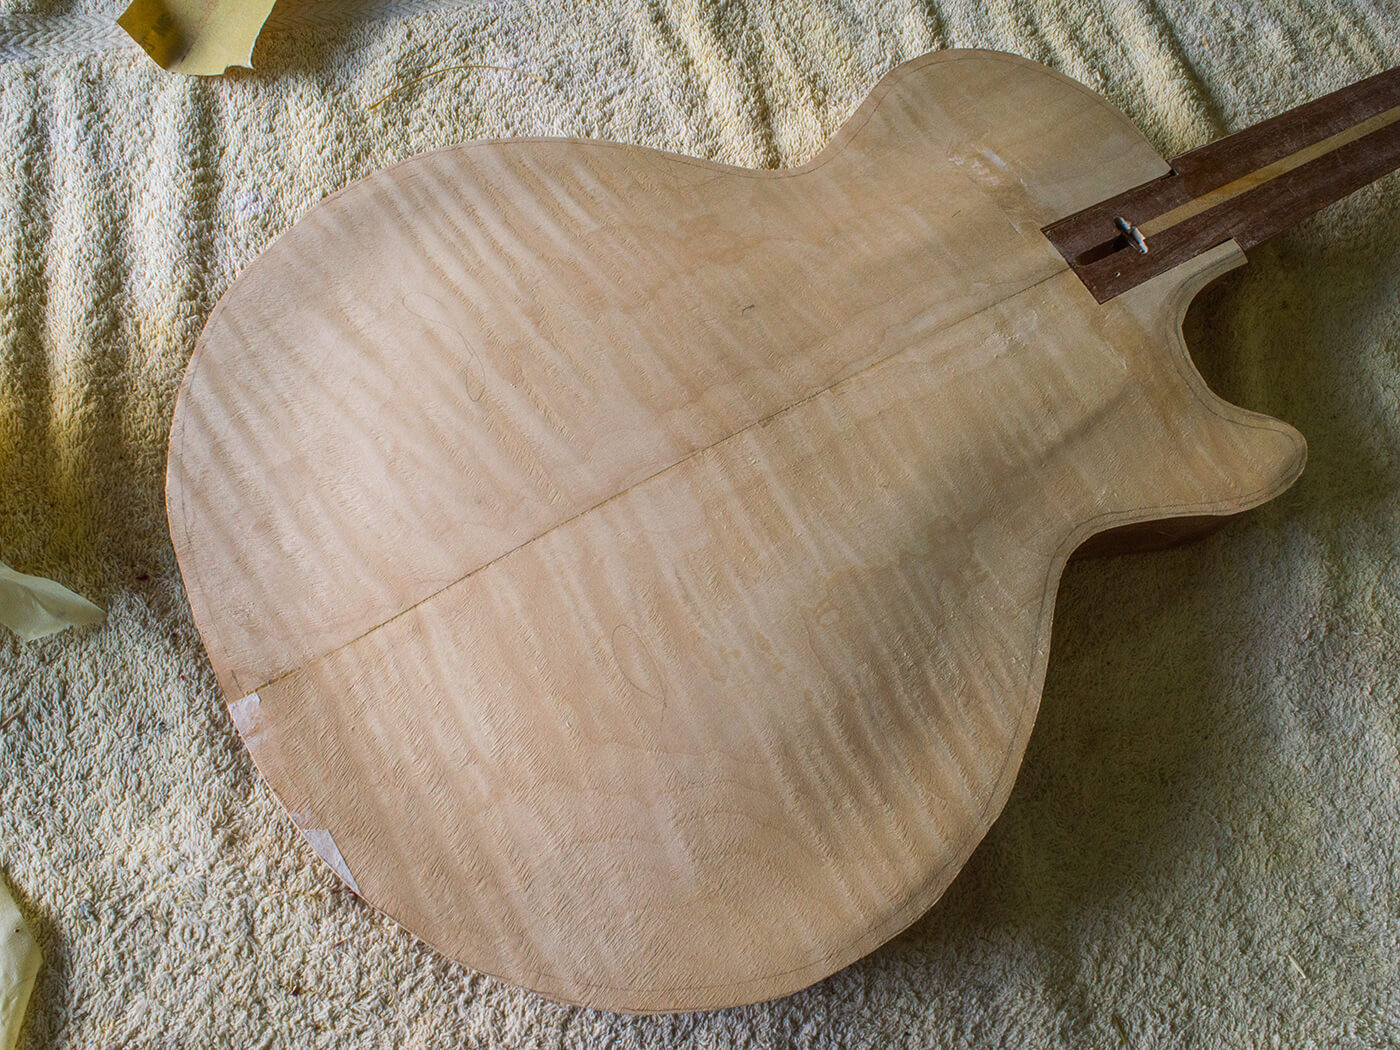
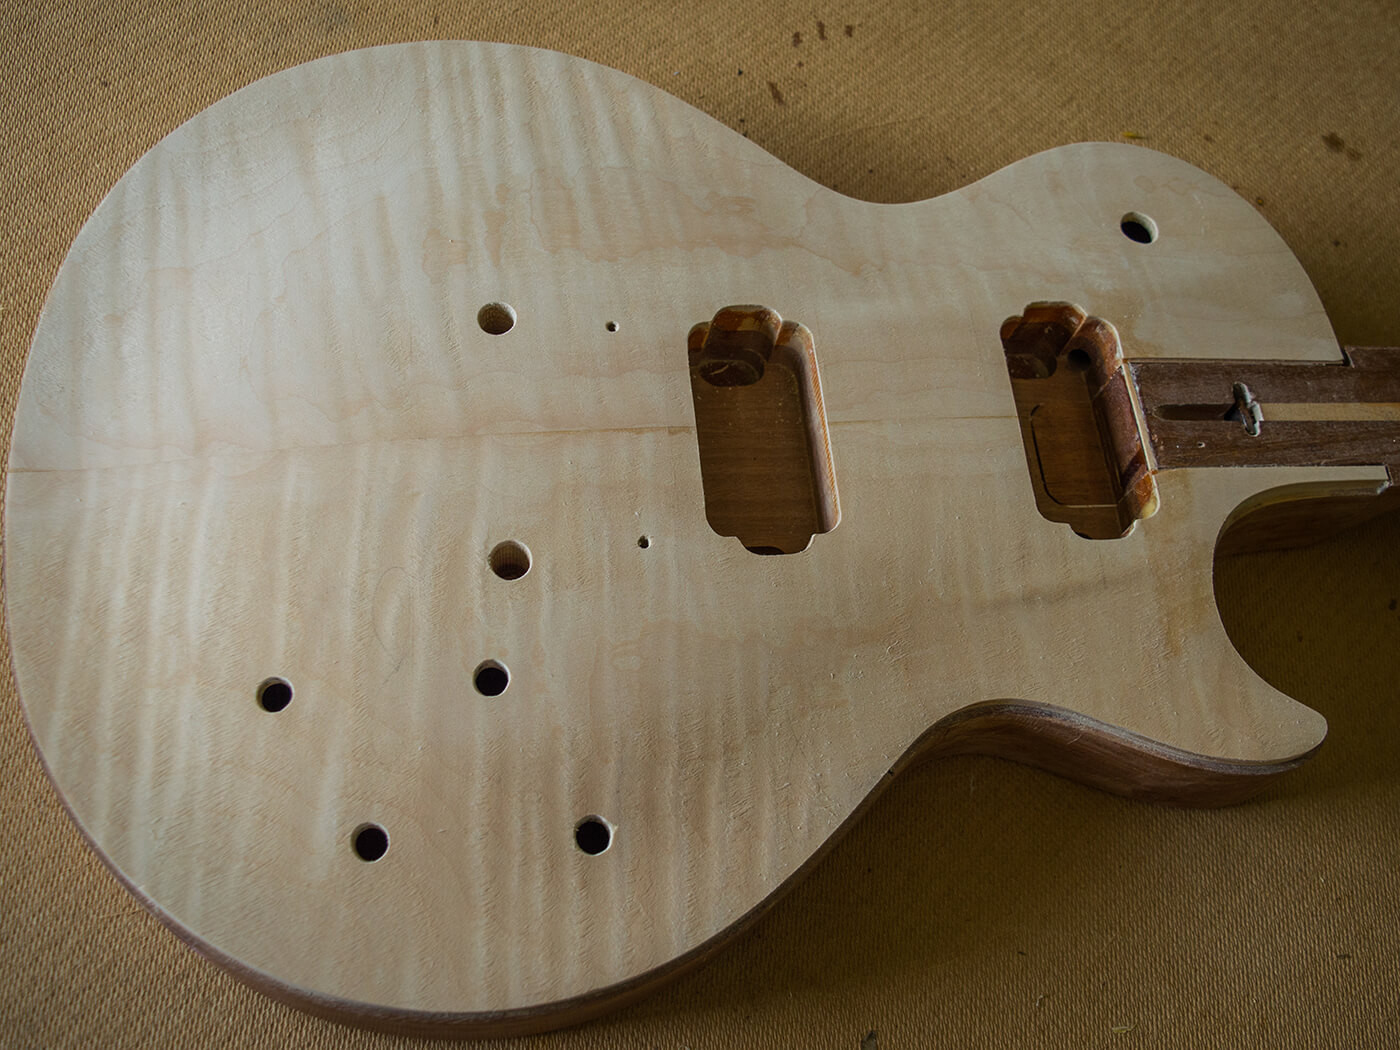 The veneer is trimmed and the holes re-established to ready the body for binding and final sanding
Binding and Neck Preparation for Vintage Accuracy
With the veneered top prepared, the next step in recreating a 1950’s era guitar paint job is to address the binding. Off-white binding is typical of guitars from this period and finding the correct thickness is important for maintaining vintage accuracy. Carefully heating the binding allows it to be bent and shaped around the guitar’s contours, particularly in the cutaway and horn areas. Tape and surgical tubing are useful tools to hold the binding in place while the adhesive dries.
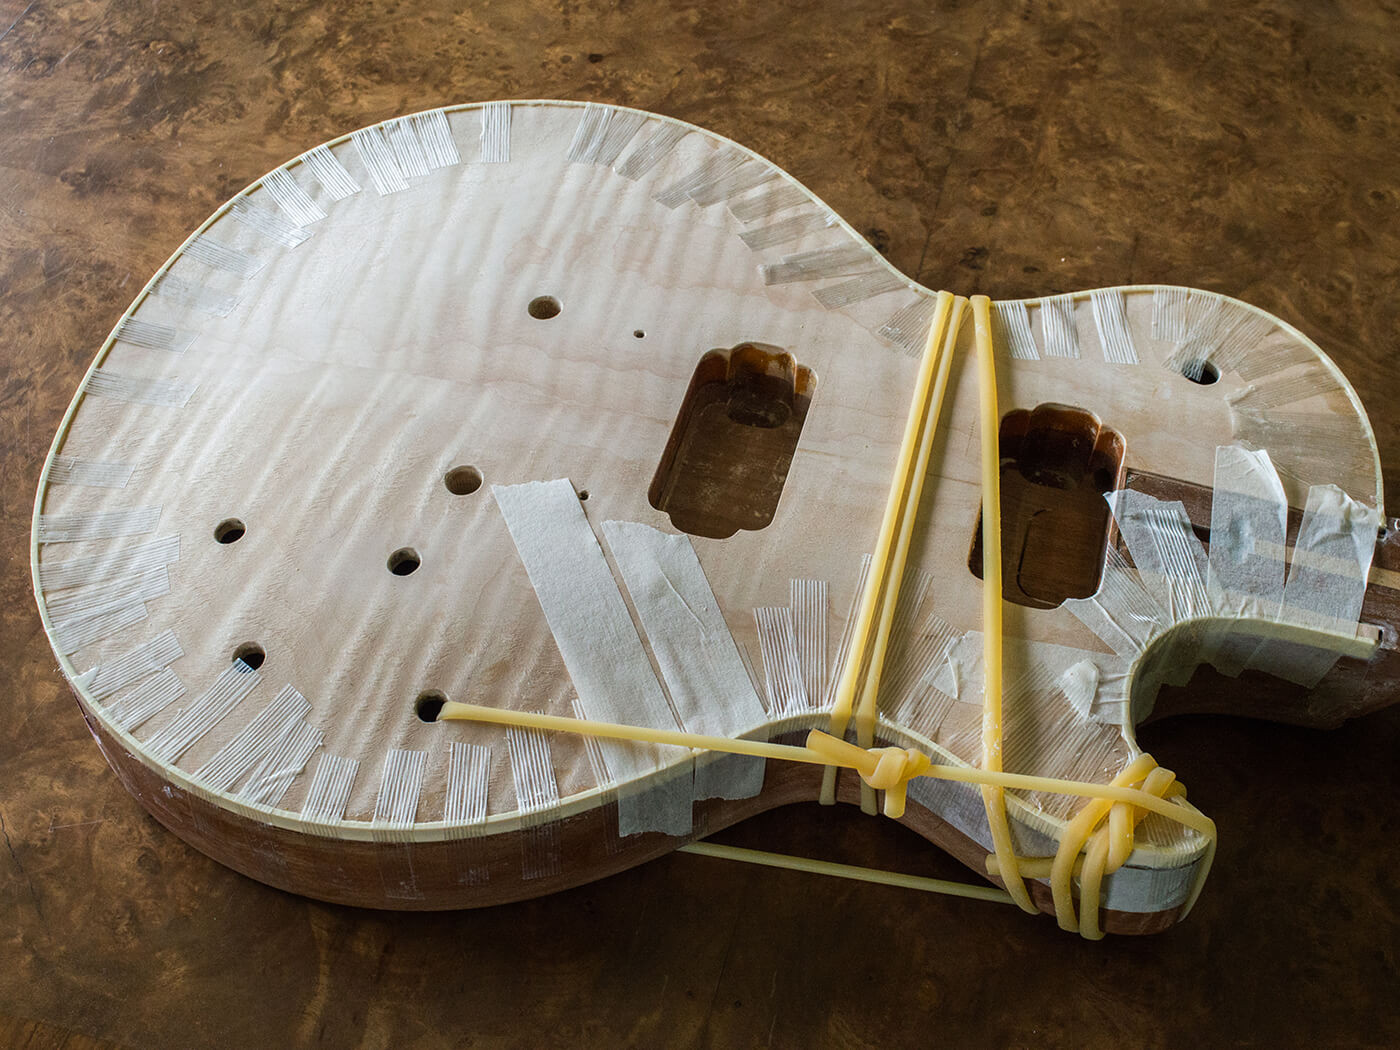 The binding has to be heated to bend around the cutaway and horn, with tape and surgical tubing holding it in position as the binding cement dries
If the neck depth was altered during the preparation phase, fresh fretboard binding may also be necessary. Side dots, often made from materials like tortoiseshell plastic, are another detail that contributes to the overall vintage feel. Once the binding is complete and the top veneer has been sanded level with the neck extension, the fretboard can be glued back onto the neck.
Before moving on to the painting stage of this 1950’s era guitar paint project, it’s wise to reassemble the guitar temporarily. This allows for testing of the electronics and hardware to ensure everything is functioning correctly before the finish is applied. It’s also an ideal time to refine the neck profile, perhaps referencing templates taken from actual 1950s Les Pauls for ultimate vintage accuracy.
Seeing Red: The Foundation of 1950’s Era Guitar Paint with Grain Filler
Red grain filler was a common practice for Gibson guitars in the 1950s, especially for sunburst finishes. Using a cherry red grain filler is essential to authentically replicate 1950’s era guitar paint. Mahogany, being an open-pore wood, requires grain filling to create a smooth surface for painting.
Alt text: Applying Dartford’s cherry red thixotropic grain filler to mahogany guitar body, an essential step for achieving the smooth base of 1950s era guitar paint finishes.
The application process, while sometimes messy, is crucial. Masking off the binding and the front of the body is necessary to prevent the red grain filler from staining these areas. After allowing the filler to dry overnight, it should be sanded back to create a smooth, even surface. This red grain filler not only prepares the wood but also contributes to the depth and richness of the final 1950’s era guitar paint finish.
Alt text: Guitar body after red grain filling, showing the binding needing cleanup from stray filler, a detail-oriented step in preparing for 1950s era guitar paint application.
Spraying the Base Coats for Depth and Smoothness
With the grain filled and sanded, the spraying process for achieving 1950’s era guitar paint begins with clear coats. Starting with a couple of mist coats of clear lacquer, followed by heavier coats of sanding sealer, builds a solid foundation. These coats are then leveled by sanding with fine-grit sandpaper, creating a perfectly smooth surface for the color coats.
For the color coats, aniline cherry lacquer is a suitable choice, echoing the materials used in 1950’s era guitar paint. Applying several coats to the neck and body builds up the desired depth of color. While a cherry red is historically accurate, experimenting with slightly darkening the red grain filler with a touch of black can add subtle variations and personal touches to your 1950’s era guitar paint project.
Alt text: Masking tape removed after spraying aniline red lacquer, showing the contrast and amount of paint applied to the guitar body and neck, a stage in creating 1950s era guitar paint.
Beginning the Burst: Aniline Yellow and DIY Spraying Techniques
The hallmark of many 1950’s era guitar paint finishes is the sunburst. Achieving a vintage-style sunburst requires understanding the materials and techniques of the era. Aniline dyes were commonly used by Gibson in the 1950s, and their tendency to fade over time is a key element in replicating the authentic look of aged 1950’s era guitar paint.
The sunburst process typically begins with aniline yellow. However, pre-mixed aniline yellow lacquer aerosols are not readily available. This necessitates mixing your own. For DIYers without professional spray equipment, affordable solutions exist. Modeling airbrushes with propellant cans and Preval sprayers offer accessible ways to spray tinted lacquer. Preval sprayers, in particular, attach to containers of lacquer, allowing you to use custom-mixed colors without needing a compressor and spray gun.
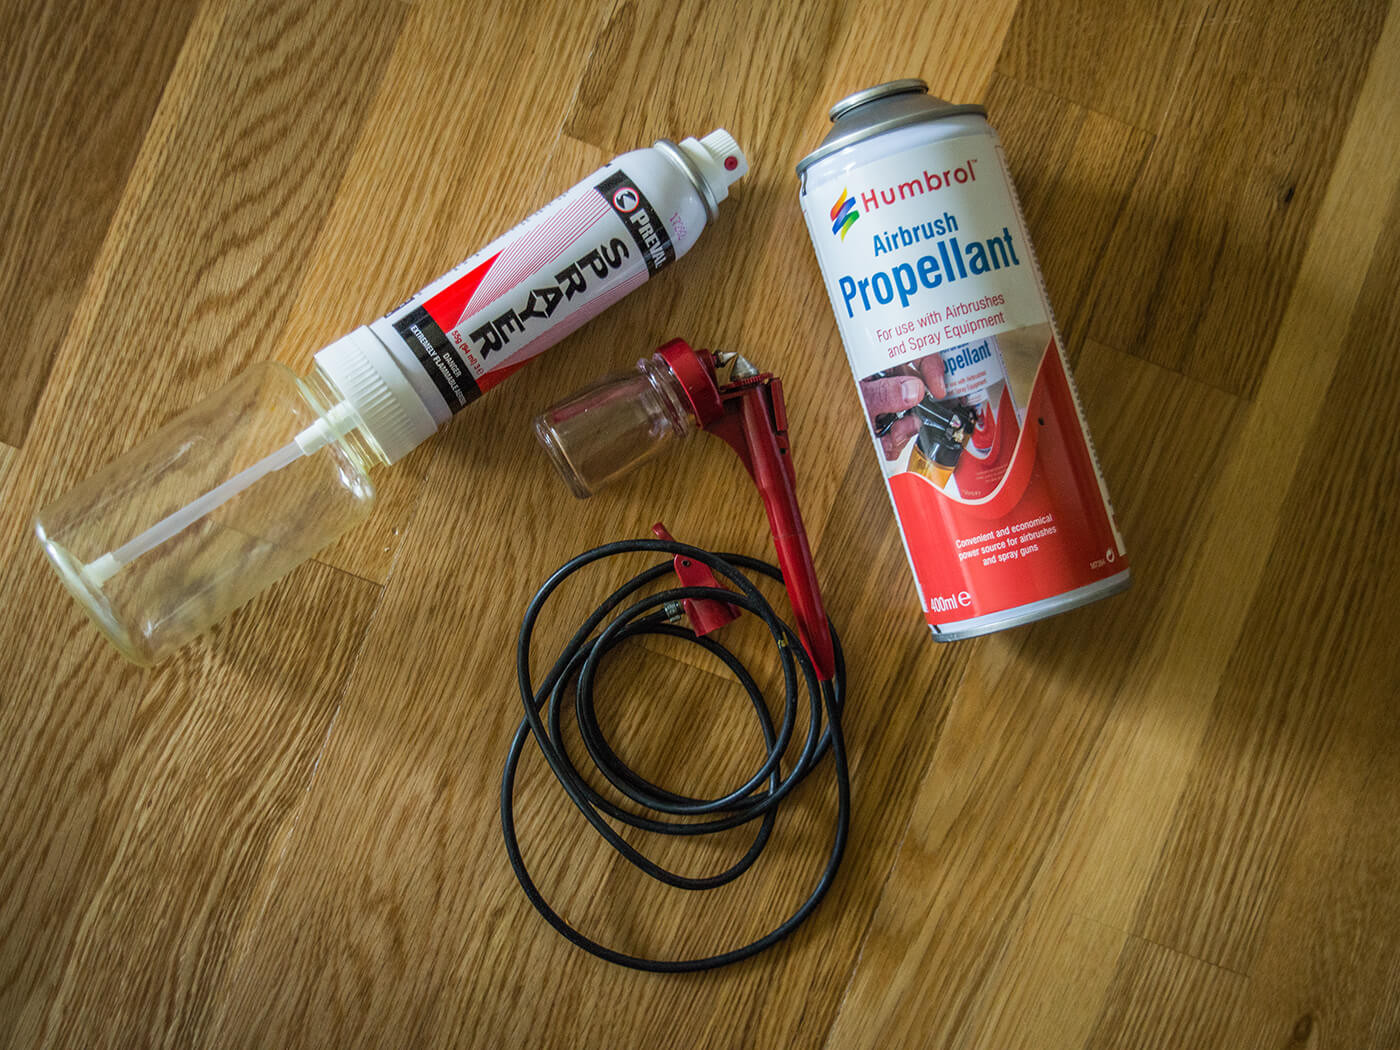 The Preval sprayer is used for the aniline yellow and the airbrush is used for shading the edges and applying the aniline red
To create the aniline yellow, alcohol-soluble yellow aniline dye powder is dissolved in isopropyl alcohol with a touch of acetone. This mixture is then filtered and added to clear lacquer. When thinning the lacquer for spraying, the alcohol and acetone used to dissolve the dye should be factored into the thinner ratio. A ratio of approximately 60:40 lacquer to thinner/solvent is generally suitable. After testing the color, mask off everything except the maple top and apply several coats of the DIY aniline yellow using a Preval sprayer.
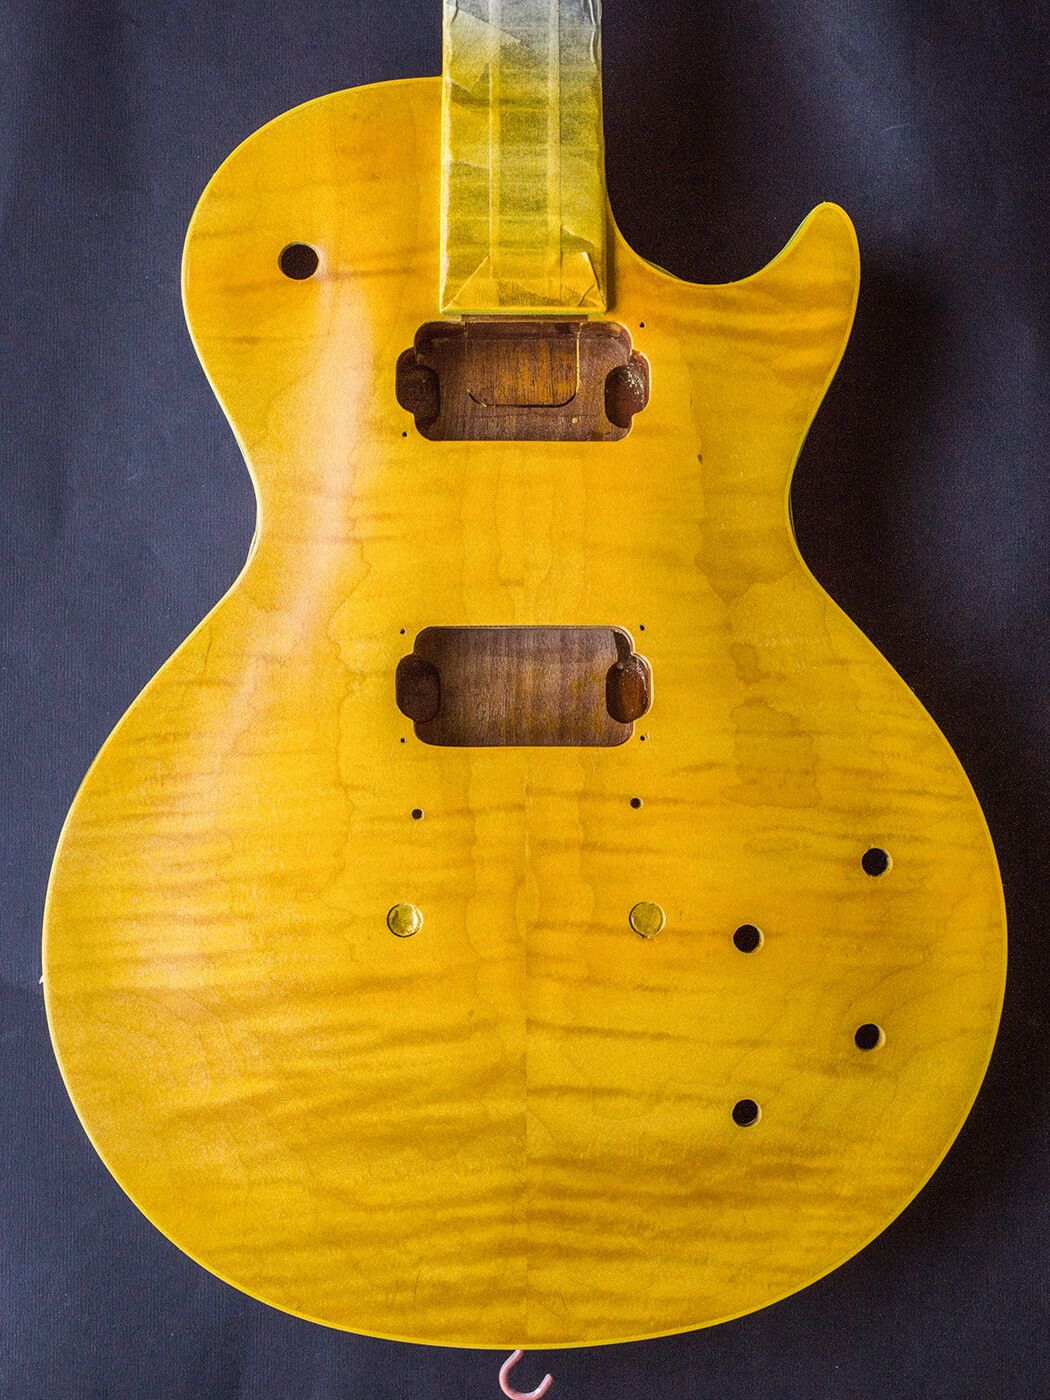 After achieving a level surface with cellulose sanding sealer, the bursting process begins with two coats of aniline yellow
In the Shade: Adding Depth with Edge Shading
An unexpected but effective technique in achieving authentic 1950’s era guitar paint sunburst is applying a subtle edge shading coat before the red. A mixture of blue, medium brown, and a hint of black, thinned with cellulose thinners and mixed with gloss cellulose, creates a greenish-grey shadow around the edges of the guitar top. This “unburst” effect mellows the aniline yellow and adds depth to the final sunburst. An airbrush is ideal for applying this shading coat, allowing for precise control and gradual build-up of color.
 Blue, brown and black are mixed to apply a shading coat around the edges, which results in a greenish grey shadow
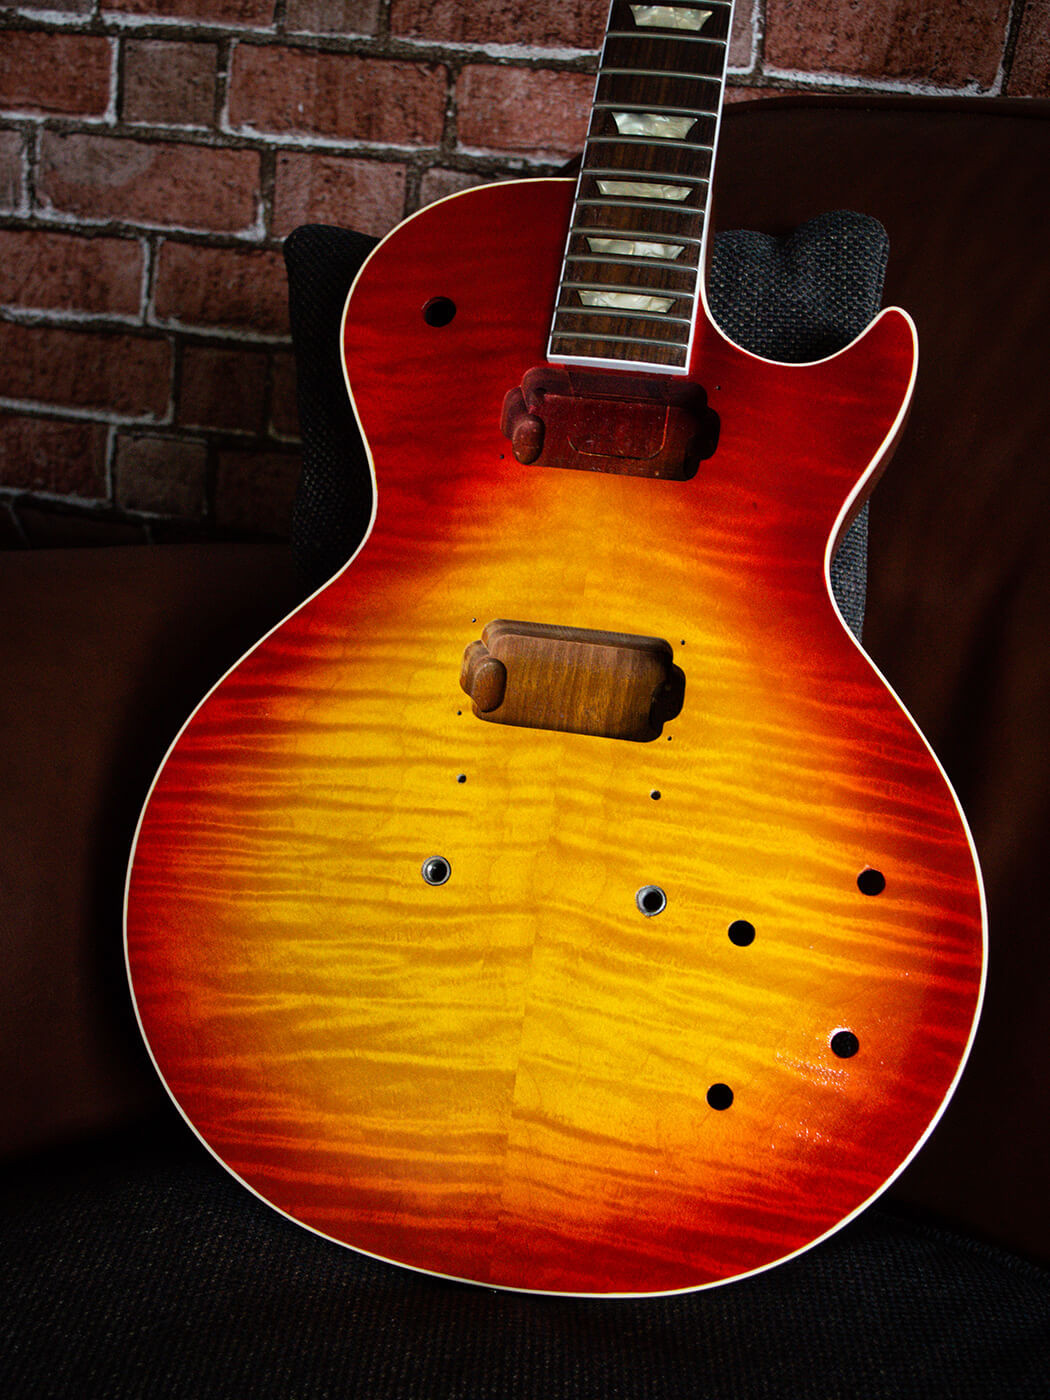
Applying Aniline Red for the Burst’s Signature Color
The final color in the sunburst of 1950’s era guitar paint is aniline red. While the cherry red lacquer used for the body and neck might be an option, a pre-mixed aniline red lacquer, like those available from Eurospruce, can provide a more authentic hue for the burst. Again, an airbrush is the preferred tool for applying the aniline red, as its fine atomization allows for smooth transitions and precise control over the burst’s shape and intensity.
Alt text: Aniline red being applied with an airbrush to complete the sunburst effect, crucial for achieving smooth color transitions in 1950s era guitar paint.
Building the burst gradually is key. Spray light coats of aniline red, building up the color slowly to achieve the desired transition from yellow to red. Remember that lacquer color can change as it dries, and lighting conditions can also affect your perception of the color. Working in stages, and allowing yourself time to assess the burst, is essential, especially for those new to spraying 1950’s era guitar paint finishes.
 DIY Workshop How To Spray Paint Sunburst
Conclusion: Capturing the Essence of 1950’s Era Guitar Paint
Achieving the look of 1950’s era guitar paint, particularly a sunburst finish, is a rewarding DIY project. By understanding the materials and techniques used in that era, and utilizing readily available tools, you can replicate the iconic finishes of vintage guitars. From preparing the body and applying grain filler to mixing and spraying aniline dyes, each step contributes to the final vintage aesthetic. While mastering these techniques takes practice, the ability to mix your own colors and control the spraying process allows for achieving a truly personalized 1950’s era guitar paint finish that captures the spirit of the golden age of guitars. The next steps in this project involve applying clear gloss coats, and potentially relic’ing the finish to further enhance the vintage vibe, before final reassembly.