One of the most frustrating issues a guitar player can face is dealing with frets that just won’t stay in place. Loose frets can lead to a host of problems, from annoying buzzing and dead notes to intonation issues that throw your entire playing experience off. If you’re noticing that your frets are lifting or shifting, it’s crucial to address the problem promptly to maintain your guitar’s playability and prevent further damage.
This guide will walk you through the common causes of frets coming loose, how to identify them, and, most importantly, what you can do to fix frets that won’t stay in your guitar neck. While some fretwork is best left to professionals, many minor issues can be tackled at home with the right tools and a bit of know-how.
Identifying Frets That Are on the Move
Before you start any repairs, it’s important to accurately diagnose the problem. Here are some tell-tale signs that your guitar frets are not staying put:
- Buzzing or Dead Notes: A fret that has lifted even slightly can cause strings to buzz against the next fret down the neck. You might also experience dead notes where the string loses sustain because it’s not making solid contact with the fret.
- Visible Fret Lift: Carefully inspect your fretboard. Look for any gaps between the fret tang (the part of the fret that goes into the wood) and the fretboard wood. You might see the fret end sticking up slightly or notice movement when you gently press on it.
- Uneven Fret Height: Run your finger along the frets. Do you feel any that are noticeably higher than others? Uneven frets can indicate that some have shifted or lifted. A fret rocker tool (or even a credit card edge) can help you accurately check for unevenness.
- Intonation Problems: While intonation issues can stem from various causes, loose frets can disrupt the precise string length needed for accurate intonation, especially if frets have shifted horizontally.
Common Causes of Frets Coming Loose
Understanding why frets become loose is the first step in preventing future issues. Several factors can contribute to this problem:
- Humidity Changes: Wood is hygroscopic, meaning it absorbs and releases moisture from the air. Fluctuations in humidity cause the wood of your guitar neck to expand and contract. This can stress the fret slots and eventually cause frets to loosen, especially if the frets were not initially installed perfectly.
- Poor Initial Fret Installation: If a guitar was manufactured with poorly seated frets from the start, they are more likely to become loose over time. Insufficient glue or improperly sized fret slots can lead to instability.
- Age and Wear: Over many years, the constant tension of the strings and general wear and tear can weaken the fret seating. Older guitars are more susceptible to fret issues simply due to age.
- Neck Movement: Extreme neck bowing or warping can also put stress on the frets and contribute to them becoming loose.
Tools You Might Need to Fix Loose Frets
For minor fret issues, you can often perform a fix at home with a few essential tools. Having these on hand will make the process smoother and more effective:
-
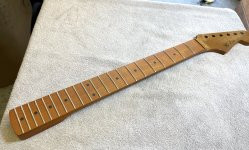
Notched Straight Edge: This is crucial for assessing the straightness of your guitar neck before and after any fretwork. A straight neck is essential for accurate fret leveling and repair.
 Notched Straight Edge
Alt text: A close up of a guitar neck showing fret ends that are not properly dressed, highlighting potential issues with fret installation. -
Fret Hammer (or Soft-Faced Hammer): A specialized fret hammer, or a regular hammer with a soft face (like brass or plastic), is used to gently tap frets back into place without damaging them or the fretboard.
-
Fret Rocker: This small, notched tool is invaluable for identifying uneven frets. By placing it across three frets at a time, you can quickly pinpoint any high frets that need attention.
-
Caul and Clamps (Optional): For gluing loose frets, a caul (a shaped block of wood or metal) that matches the fretboard radius and clamps are helpful to apply even pressure while the glue dries.
-
Super Glue (Thin or Medium Viscosity) or Wood Glue: A small amount of thin or medium viscosity super glue can be wicked under loose fret ends to secure them. For larger gaps or more significant loosening, specialized wood glue for luthiery may be more appropriate.
-
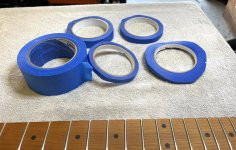
Masking Tape: Protect your fretboard finish by masking off the areas around the fret you are working on. This prevents accidental scratches or glue spills on the wood.
Steps to Fix Frets That Won’t Stay in Place
Important Note: If you are uncomfortable working on your guitar or if the fret issues are extensive (multiple loose frets, significant fret lift, neck problems), it’s always best to take your guitar to a qualified luthier or guitar tech. Attempting repairs beyond your skill level can potentially cause more damage.
Here are steps for addressing minor loose fret issues:
-
Assess the Neck Relief: Before doing any fretwork, ensure your guitar neck relief is properly adjusted. Use your notched straight edge to check the neck straightness. A neck that is too bowed or too straight can exacerbate fret problems.
-
Identify the Loose Frets: Use a fret rocker or carefully examine each fret for signs of lifting or movement as described earlier. Mark the loose frets with masking tape to easily identify them.
-
Try Tapping the Fret Back In: For slightly lifted frets, sometimes a gentle tap with a fret hammer is enough to reseat them. Place a piece of wood (like a small block of maple or a fret caul) on top of the fret to distribute the pressure and prevent damage. Tap gently but firmly, checking frequently to see if the fret is seating properly.
 Masking Tape on Fretboard
Alt text: Painter’s tape applied to a maple guitar fretboard to protect it during fretwork, a common practice when addressing loose frets. -
Apply Glue (If Tapping Isn’t Enough): If tapping doesn’t fully reseat the fret, or if it lifts again quickly, you’ll need to use glue.
- Preparation: Clean the area around the loose fret with a soft brush to remove any dust or debris. Mask off the fretboard around the fret to protect the finish.
- Glue Application: Use a very small amount of thin or medium super glue. Carefully wick a drop or two of glue along the edges of the fret, where it meets the fretboard. Capillary action will draw the glue into the gap. For larger gaps, wood glue may be more appropriate, but use it sparingly.
- Clamping (Optional but Recommended): For best results, especially with wood glue, use a radius caul and clamps to apply even pressure to the fret while the glue dries. This ensures the fret is firmly seated and prevents it from lifting again. Let the glue dry completely according to the manufacturer’s instructions.
-
Clean Up Excess Glue: Once the glue is dry, carefully remove any excess glue with a sharp razor blade or hobby knife, being very cautious not to scratch the fretboard finish.
-
Check and Level (If Necessary): After fixing the loose frets, re-check the fret height with a fret rocker and the neck relief with a straight edge. You may need to perform a fret level and crown if the repair has caused any unevenness. (Fret leveling is a more advanced procedure that may require further research or professional help).
Prevention is Key
While fixing loose frets is a necessary skill, preventing them in the first place is even better. Here are some tips to help keep your frets firmly in place:
- Maintain Proper Humidity: Keep your guitar in a stable humidity environment, ideally between 40-50%. Use a humidifier in dry climates and a dehumidifier in humid climates.
- Regular Guitar Setup: Regular setups by a qualified tech can catch potential fret issues early on and address them before they become major problems.
- Gentle Handling: Avoid exposing your guitar to extreme temperature changes or physical shocks, which can stress the neck and frets.
Dealing with frets that won’t stay in your guitar neck can be frustrating, but with a little understanding and the right approach, you can often resolve minor issues yourself and keep your guitar playing its best. Remember to prioritize careful diagnosis and when in doubt, seek professional help to ensure your instrument remains in top condition.