
After a decade or two away from the workbench, diving back into guitar modifications and repairs felt like revisiting an old passion. My initial focus? Guitar neck mods. I envisioned creating detailed video logs of each upgrade for YouTube, but reality bit – my skills were rusty, and the footage was less than stellar. Instead of a poorly edited video, I’m offering concise reviews of each modification I undertook, detailing the process and the outcomes.
My objective for this project was clear: elevate the playability of my guitar without emptying my wallet, while simultaneously reigniting my hands-on experience with Guitar Mods and repair. I aimed to retain the punk rock spirit of this guitar, a project from 20 years prior, but refine its performance and sound to meet adult standards. This is a personal endeavor, driven by curiosity and budget, with no sponsorships or freebies involved.
Check out my previous post about this guitar here
Neck Mods and Repairs
Dragonfire Guitar Vintage Kluson Style Tuning Keys
Cost: $17.95 (Free Shipping)
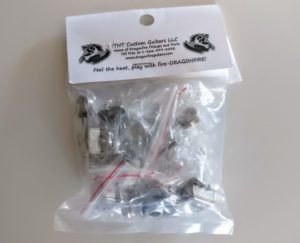 Dragonfire Vintage Kluson Style Tuning Keys for Guitar Neck Mod
Difficulty: 2/5
Rating: 4/5 stars
Tools Required:
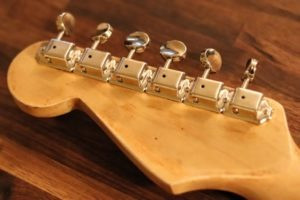 Fender Squier Series Guitar with Upgraded Kluson Tuners for Neck Modification
These tuning keys are a game-changer, especially for guitars like older Squier Series models equipped with diamond-shaped tuners. For under $20, the improvement in tuning stability and ease is remarkable. While premium tuners exist, these Dragonfire keys are unbeatable for the price, offering a significant upgrade over stock, lower-quality tuners. Installation was straightforward; no additional bushings were needed, and the originals worked perfectly. My only minor issue was a small piece of excess metal on one tuning peg, which required a bit of trimming and sanding.
Installation involved removing the old tuners and fitting the new Kluson-style replacements. Using a ruler to ensure level alignment, I marked pilot hole positions with a pencil. A small drill bit, sized much smaller than the mounting screws, was used to create pilot holes, with tape marking the desired drilling depth to prevent over-penetration. Attempting to conceal the original screw holes with maple wood filler yielded less-than-perfect results, though thankfully, only one hole remains visible after tuner installation.
Fender American Series String Guides
Cost: $7.92 (Prime Shipping)
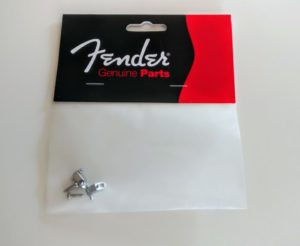 Fender American Series String Guides for Guitar Neck Mods
Difficulty: 2/5
Rating: 4/5 stars
Tools Required:
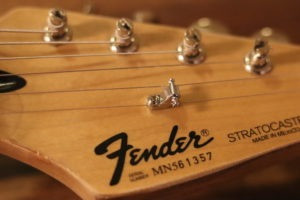 Upgraded String Tree on Fender Squier Series Guitar Neck
These Fender American Series string trees are not just aesthetically superior to the originals; they also appear to reduce string stress, particularly beneficial for players who frequently use the whammy bar. This is a budget-friendly upgrade, but it does require drilling a new hole, which might be daunting for some. If you’re hesitant about drilling into your guitar, you might consider skipping this mod.
Installation necessitates drilling a new hole for the anchor post. Ensuring correct alignment, I marked the new hole position with a pencil. This was done with the strings still on, using the original string tree hole as a reference point for tracing the new position. The new hole was drilled with a bit of approximately the same diameter as the anchor. My guitar initially had only one string tree, which I replaced. However, I am considering adding a second string tree in the future to further enhance string tension and stability.
Graphtech Strat Style Flat Bottom 42mm Nut
Cost: $11.99 (Prime Shipping)
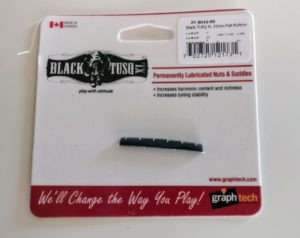 Graphtech Black TUSQ Nut for Strat Guitar Neck Modification
Difficulty: 2/5
Rating: 4/5 stars
Tools Required:
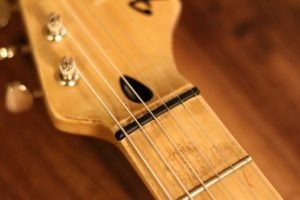 Original Nut of Fender Squier Series Guitar Before Upgrade
Replacing the nut proved to be the most challenging aspect of these neck modifications. In a novice mistake, the ordered nut didn’t fit correctly, and instead of ordering the correct size, I attempted to file the fretboard to accommodate it – a definite amateur error. Do not file your fretboard! Always modify the nut, or better yet, order a correctly sized replacement if you encounter issues.
Fortunately, Graphtech nuts are easily filed down if necessary. For this Stratocaster, a curved bottom nut would have been the more appropriate choice. However, using sandpaper and comparing it to the original nut, I managed to shape the Graphtech nut to the required dimensions.
In summary: always modify the nut to fit the guitar neck, never the other way around.
Truss Rod Adjustment
Cost: Free (Potentially Expensive if Mishandled!)
Difficulty: 2/5
Rating: 5/5 stars
Tools Required:
Mastering truss rod adjustment is an invaluable skill for any guitar player. Firstly, adjustments should be based on your personal playing style, not someone else’s preference. Secondly, dismiss the outdated warnings about damaging your guitar by removing all strings or adjusting the truss rod yourself. While caution is necessary, learning to adjust your truss rod is more likely to improve your guitar’s playability than to ruin it.
That being said, mishandling the truss rod can indeed damage your guitar. Therefore, thorough research is crucial. Watch numerous YouTube tutorials, read extensively on the topic, start practicing on a less valuable guitar, take your time, and proceed cautiously. With careful learning, you’re far more likely to successfully set your neck relief than to destroy your guitar neck.
Fret Treatment
Cost: Free (Potentially Expensive if Mishandled!)
Difficulty: 2/5
Rating: 5/5 stars
Tools Required:
Similar to truss rod adjustments, learning basic fretwork, guided by online resources like YouTube videos, is a highly beneficial skill.
This particular guitar exhibited minor fret sprout and unevenness. Fret sprout is the term for fret ends protruding from the fretboard edges, often felt as sharpness along the neck, especially common in budget-friendly guitars. Uneven frets can be identified using a string action gauge as a rocker across three frets. Position the gauge perpendicular to the frets, centrally aligned, and rock it gently. Rocking indicates an uneven or high fret.
My fret treatment process began by taping off the fretboard with painter’s tape, protecting the wood from sandpaper contact. Next, I marked the top of each fret with a Sharpie. The rocking test was performed on every fret, marking high frets on the tape. A sanding sponge was used to level all frets evenly, re-testing uneven frets and sanding until level. Finally, a fret crowning tool reshaped the fret tops, followed by a final polish with steel wool.
Stain & Lacquer
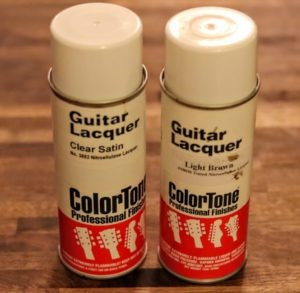 ColorTone Aerosol Guitar Lacquer for Neck Finishing
Cost: Approximately $35 for Lacquers
Difficulty: 3/5
Rating: 2/5
Tools Required:
While I personally appreciate the final aesthetic of the neck, aligning with a DIY punk rock vibe and a relic-like finish, I wouldn’t recommend this neck staining and lacquering process to others, even for payment. Numerous issues arose during this stage.
The process began with sanding, which I underestimated. Uneven sanding resulted in inconsistent stain absorption, with some areas barely taking the stain while others became overly saturated. Proper sanding technique is crucial. The light brown stain lacquer sprayed on significantly darker than anticipated, resembling a burnt s’more rather than roasted maple – a graham cracker brown hue. The aerosol can also performed poorly, sputtering and dripping stain unevenly, creating a messy application. Dissatisfied with the initial result, I used nail polish remover to undo the staining. This process left a subtle brown/grey tint, which remains today and contributes to the unique, slightly aged look.
Following the stain mishap, I applied multiple coats of clear satin lacquer. After each coat, I allowed drying time and buffed with a scouring pad, repeating this process six or seven times. The resulting neck finish feels exceptionally smooth and satin-like to the touch.
Guitar Mods and Repair: To Be Continued…
This concludes the overview of the guitar neck modifications and repairs performed on this Fender Stratocaster. Stay tuned for future updates detailing the guitar body modifications and repairs in the next post.