Dealing with a belly bulge on a 12-string guitar? It’s a common issue, much like a cat that can’t resist scratching furniture – seemingly inherent to their nature. Just as that feline friend might be perfect in every other way, but still claws your couch, 12-string guitars often come with their own set of quirks. From sunken spots near the soundhole to excessive neck relief, loose bridges, and the dreaded belly bulge, these instruments can present challenges. This bulge, in particular, can contribute to a cascade of problems.
My Experience with a Bellied 12-String Guitar Repair
My wife owns a cherished Takamine 12-string guitar. It’s a beautiful instrument with a solid Sitka spruce top, solid Sapele back, and layered Sapele sides. The guitar boasts fantastic action, a rich dreadnought sound, and electronics that faithfully capture its acoustic tone. However, over the past year, a noticeable belly bulge began to develop. We’ve always taken preventative measures, tuning our 12-strings down a whole step and using a capo to reach concert pitch, understanding that 12-strings are prone to bellying over time. Despite these precautions, the bulge appeared, much like my own after indulging in a rack of ribs cooked by my wife.
The JLD Bridge Doctor: An Easy Solution
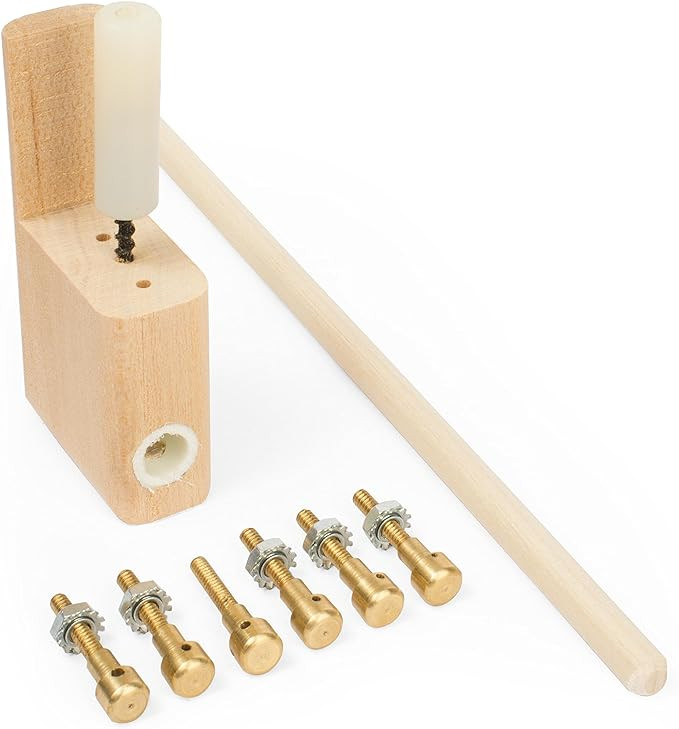
To address this belly bulge quickly and effectively, I turned to the JLD Bridge Doctor. This ingenious device offers a straightforward solution. The single bolt version requires minimal drilling into the bridge and guitar top, while the brass pin version simplifies installation even further by eliminating drilling altogether. Remarkably, the bolt-through-the-bridge model is priced similarly to a good set of guitar strings, and the brass pin style is comparable to a set of quality bridge pins.
With some basic luthier skills, installing a Bridge Doctor can indeed be a swift 10-minute job. However, in the spirit of managing expectations, I allocated an hour for the task. In reality, it took closer to two hours to get the guitar back in playing condition.
Here’s a breakdown of the factors that extended the installation time. This isn’t meant as a critique of JLD, but rather as a series of “lessons learned” to assist fellow guitar enthusiasts in navigating this effective repair process smoothly.
For this repair, I opted for the Bridge Doctor model with six brass pins. This choice was primarily due to space constraints, making drilling for the bolt and aesthetically placing the pearl cover dot challenging. Opting for pins also meant a string change was necessary, as the brass pins replace the existing bridge pins for six of the twelve strings. Furthermore, I had always been dissatisfied with the original bridge pins on this guitar. Therefore, the remaining six white plastic pins were replaced with rosewood pins featuring abalone dots, complementing the bridge and fretboard markers while offering a more secure hold compared to the original slippery plastic pins.
To get acquainted with the general installation procedure for the JLD Bridge Doctor, please refer to the official website: https://www.jldguitar.net/
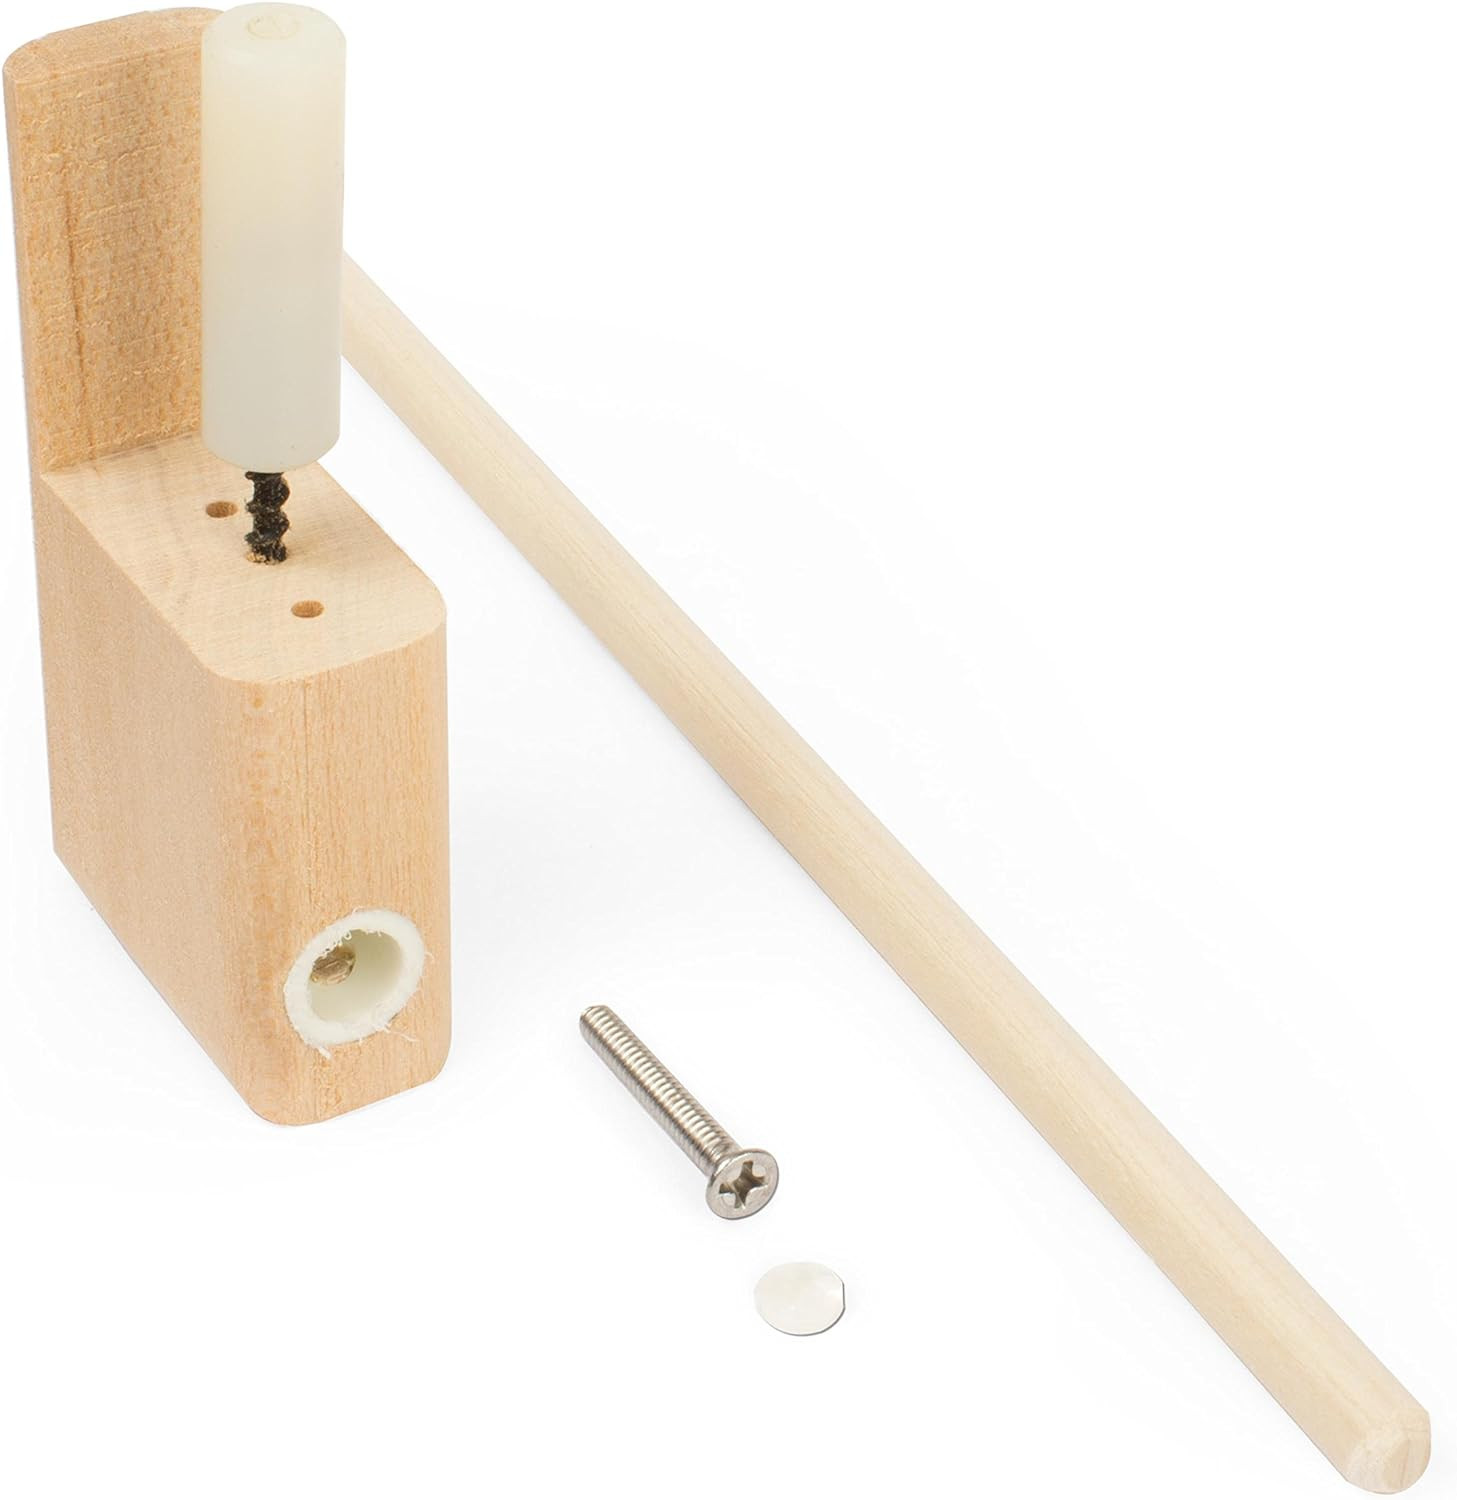
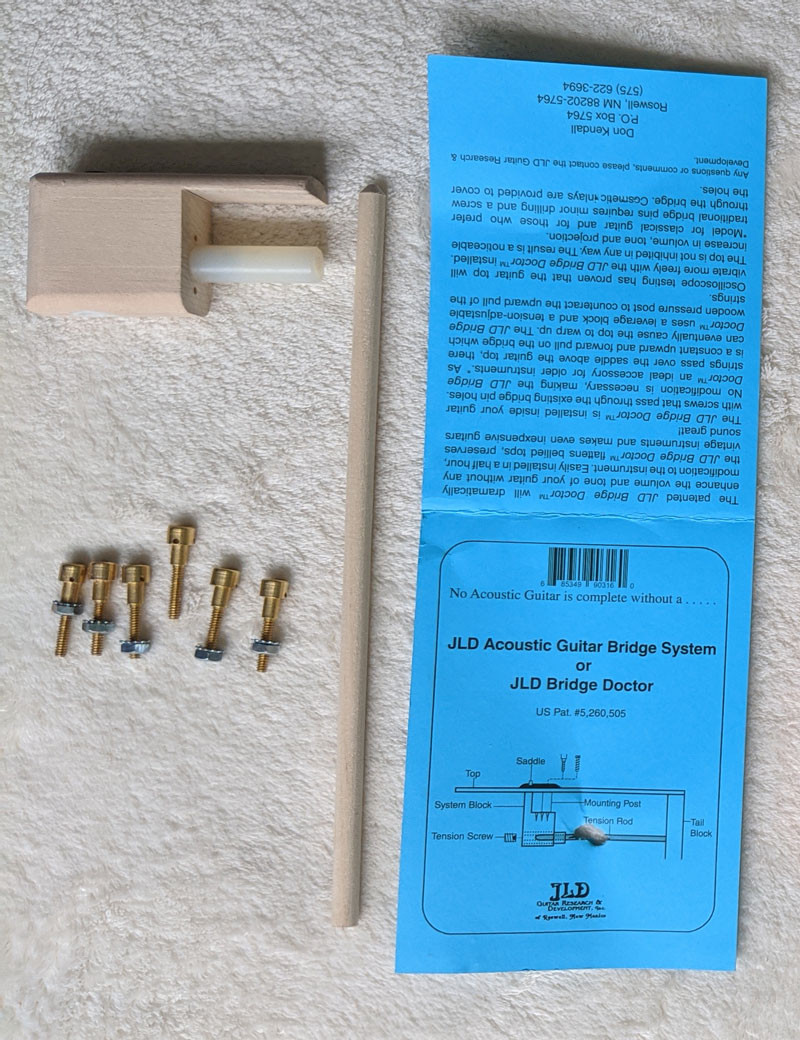 JLD Bridge Doctor with brass pins
 Bridge Doctor installed on a guitar
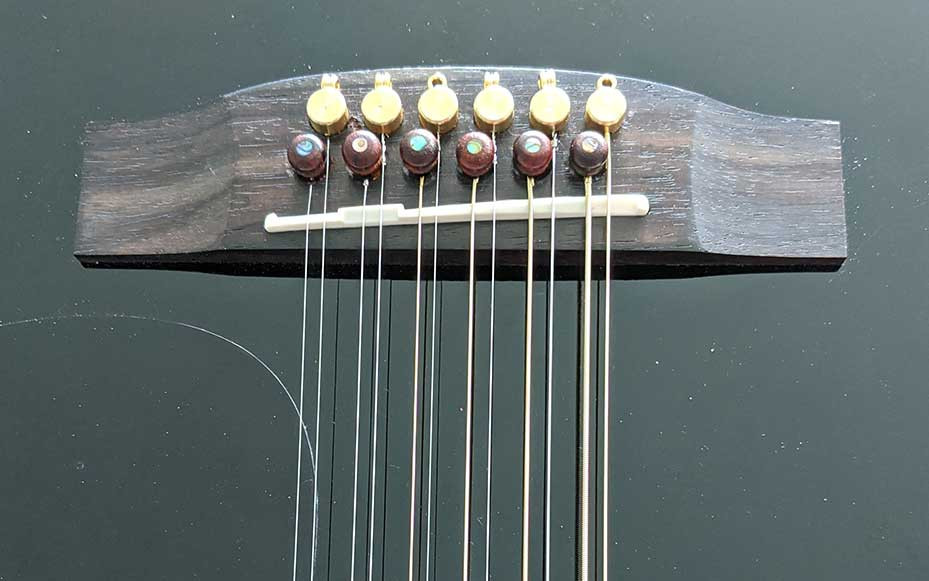 Close-up of Bridge Doctor bridge pins
The JLD Bridge Doctor with brass pins, both in its packaging and installed. These images document my repair process.
Key Lessons Learned During Bridge Doctor Installation
Mistake #1: Overlooking Essential Tools. I realized I needed a safety pin to act as a wrench for tightening the brass pins. After a brief search, I located one being used to adjust my wife’s shirt (apologies, dear!). This seemingly minor detail turned into a classic “for want of a nail” moment.
The string holes in the brass pins, especially those for the unwound strings, are incredibly small. This necessitates bending the trailing end of the string (the part that wraps around the ball-end) completely flush. This is delicate work primarily done with fingertips, akin to teaching a tiny crab fine motor skills.
Lesson Learned: When preparing your tools, ensure you have a safety pin – choose the sturdiest one that will fit into the micro-holes of the brass pins. Additionally, you’ll need two needle-nose pliers. One to firmly hold the unwound string near the ball end, while the other helps to crimp down any protruding wire ends. These ends absolutely must be flush to pass through the pinholes.
Mistake #2: Lack of a Mirror. I used a book light for internal visibility within the guitar, but couldn’t find my dental mirror.
Lesson Learned: Your smartphone’s rear camera serves as an excellent substitute for a dental mirror. It provides a clear view and took me a while to realize its utility as a functional equivalent of a mirror on a stick for guitar work.
Mistake #3: Incorrect Tension Rod Length. The wooden dowel rod within the Bridge Doctor system gently presses against the guitar’s tail block. A trial fitting and trimming to length is required – seemingly straightforward! However, I positioned it against part of the endpin electronics jack. Oops! I cut the rod a full inch too short. (No matter how many times I recut it – it remained too short! Just kidding.) Fortunately, I had purchased both the bolt and pin versions of the Bridge Doctor. This provided a spare dowel rod to fit correctly.
Lesson Learned: Consider buying an extra dowel rod from a hardware store as a precaution before starting your repair. I’m not the first to need a replacement. Be sure to shape the end that interfaces with the tension screw to match the factory dowel rod.
Mistake #4: Bridge Pins and Strings – Unexpected Time Sink. Fitting the six rosewood bridge pins required reaming the bridge holes and sanding the pins for a proper fit. This consumed a significant amount of time. Furthermore, handling the small brass pins, especially for someone with larger hands, proved fiddly. Expect dropped lock nuts and fumbled pins.
And then there are the strings. Twelve of them. Adding to the fun, the aforementioned furniture-scratching cat decided to “help” by playing with the strings, bridge pins, and the string winder… It was all very entertaining for him!
Lesson Learned: Factor in any additional tasks beyond the Bridge Doctor installation when estimating your repair time. For me, it was bridge pins and strings. For others, it might involve re-gluing a bridge or brace.
Conclusion: The Bridge Doctor – A Worthwhile Solution for Guitar Belly Bulge
If you are a 12-string guitar owner, be prepared for the eventual possibility of a belly bulge repair. Thankfully, installing a JLD Bridge Doctor is a relatively simple and effective process. The repair’s effectiveness is impressive, the product design is excellent, and the material cost is very reasonable.
For a well-equipped guitar workbench, this could genuinely be a 10-minute repair. If you’re working from your kitchen table, like I was, the time will depend on how well you anticipate the minor challenges that instrument repairs can present.
Explore the JLD Bridge Doctor further through these links:
Pin/Bolt-Mount Version (the one I utilized):
 JLD Bolt-Mount Bridge Doctor
Single Bolt-Mount Version (uses original bridge pins):
 JLD Pin-Mount Bridge Doctor
For an audio demonstration of the guitar after the Bridge Doctor repair, visit the NekkidMusic YouTube Channel.
Consider subscribing to our blog for more insights into acoustic and traditional music. Subscribing to NekkidMusic.com also grants you a FREE e-guide to start learning the 5-string banjo! You’ll learn the fundamentals to play chords, rolls, and classic tunes on the instrument that launched a thousand ships of bluegrass dreams. Subscribe now!
Thanks for reading! Come back again soon for more guitar discussions.