
Setting up your guitar pedals can seem daunting, but guitarplayers.net makes it simple and fun. By understanding pedal types and signal chains, you can craft your unique sound, whether you’re a beginner or a seasoned pro looking to refine your guitar tone. Let’s dive into creating your ultimate pedalboard.
1. Understanding The Main Goal of Guitar Pedal Setup
The primary goal of setting up guitar pedals is to craft your ideal guitar tone, allowing for creative expression and versatility. Correct pedal setup ensures your guitar’s signal is processed in a way that enhances your sound. Guitarists, whether beginners or pros, need to understand how to optimize their signal chain to achieve specific sonic goals. This involves experimenting with pedal order, understanding the unique characteristics of each pedal type, and tailoring the setup to their playing style and musical genre. The end result is a personalized sound that sets you apart.
- Signal Integrity: Proper setup minimizes noise and preserves the clarity of your guitar’s signal.
- Optimized Tone: Each pedal performs best within a specific part of the signal chain, enhancing your overall sound.
- Creative Control: Effective pedal arrangement lets you easily switch between different effects and create unique soundscapes.
2. Identifying Key Guitar Pedal Types
Understanding the different types of guitar pedals is crucial for creating the desired sound. Different pedals have unique functions, from shaping the guitar’s tone to adding modulation and time-based effects. Knowing how each category interacts with your signal chain is vital for achieving the best results. Guitarplayers.net offers extensive resources to help you explore the sonic possibilities of each pedal type.
- Gain Pedals: Overdrive, distortion, and fuzz pedals alter the guitar’s signal by adding saturation and harmonic distortion.
- Modulation Pedals: Chorus, flanger, phaser, and tremolo pedals create swirling, shimmering, and pulsating effects.
- Dynamics Pedals: Compressors, limiters, and noise gates control the signal’s volume and dynamics, ensuring a consistent sound.
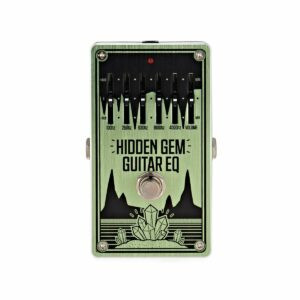
- EQ Pedals: These pedals shape the guitar’s frequency response, allowing you to boost or cut specific frequencies.
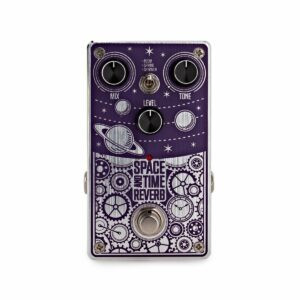
- Time-Based Pedals: Delay and reverb pedals add depth and space to the guitar’s sound, simulating different acoustic environments.
- Utility Pedals: Tuners, volume pedals, and A/B boxes provide essential functions, such as tuning, volume control, and signal routing.
 Various types of guitar pedals, including overdrive, delay, and chorus pedals, showcasing different brands and designs.
3. Understanding Guitar Pedal Order: Signal Chain Basics
The order in which you place your guitar pedals, or signal chain, significantly impacts your overall tone. While there are no hard and fast rules, certain arrangements tend to produce better results. Experimentation is key, but understanding the basics will give you a solid foundation. Here’s a general guide to setting up your pedal order.
- Dynamics (Compressor): Place compression pedals early in the chain to even out the guitar’s signal and provide a consistent input for subsequent pedals.
- Gain (Overdrive/Distortion/Fuzz): Position gain pedals after dynamics to shape the guitar’s core tone and add saturation.
- Modulation (Chorus/Flanger/Phaser): Modulation pedals typically sound best after gain, adding swirling and shimmering effects to the distorted signal.
- EQ (Equalizer): Use EQ pedals to fine-tune your tone, either before or after gain stages, depending on whether you want to shape the initial signal or sculpt the final output.
- Time-Based (Delay/Reverb): Place time-based effects last in the chain to add depth and space to the overall sound, creating a natural-sounding ambience.
- Volume Pedal: Experiment with placing the volume pedal at different points in the chain to achieve various effects, such as swells or controlling the overall output volume.
According to research from the Berklee College of Music, in July 2023, the signal chain has a significant impact on the final sound. Understanding the basic order is crucial for guitarists.
4. Detailed Step-by-Step Guide to Setting Up Your Guitar Pedals
Setting up your guitar pedals involves a systematic approach to achieve the best possible sound. Guitarplayers.net provides a detailed guide to help you through each step, ensuring a smooth and effective setup process. Here’s a step-by-step guide to setting up your guitar pedals.
4.1. Gather Your Gear
Gather essential gear for a guitar pedal setup: guitar, amplifier, power supply, patch cables, and pedals. Ensure compatibility and functionality before starting.
- Guitar: The source of your sound, influencing the overall tone.
- Amplifier: The device that amplifies your signal, shaping the final output.
- Pedals: The effects processors that modify your guitar’s sound.
- Power Supply: Provides stable power to your pedals, minimizing noise.
- Patch Cables: Connect your pedals together, ensuring a clean signal path.
4.2. Plan Your Pedalboard Layout
Plan the layout of your pedalboard by considering the size, pedal order, and accessibility for live performance. This step is vital for ensuring a functional and efficient setup.
- Size: Choose a pedalboard that accommodates your current and future needs.
- Pedal Order: Arrange pedals in a logical sequence for optimal sound.
- Accessibility: Ensure each pedal is easily accessible during live performances.
4.3. Connect Power Supply
Connect your power supply to each pedal, ensuring the correct voltage and polarity. Using an appropriate power supply minimizes noise and ensures consistent performance.
- Voltage: Check the voltage requirements of each pedal.
- Polarity: Verify the polarity (center positive or negative) to avoid damage.
- Isolation: Use an isolated power supply to reduce ground loops and noise.
4.4. Arrange Pedals on Pedalboard
Physically arrange your pedals on the pedalboard according to your planned layout. Secure them using Velcro or mounting brackets to prevent movement during transport and performance.
- Velcro: Provides a secure and flexible mounting solution.
- Mounting Brackets: Offer a more permanent and stable setup.
- Spacing: Leave enough space between pedals for easy access.
4.5. Connect Pedals with Patch Cables
Connect your pedals using high-quality patch cables, following your planned signal chain. Ensure each cable is securely plugged in to minimize signal loss and noise.
- Cable Quality: Use quality cables to maintain signal integrity.
- Cable Length: Keep cables as short as possible to reduce noise.
- Connections: Ensure each cable is firmly plugged into each pedal.
4.6. Connect Guitar and Amplifier
Connect your guitar to the first pedal in the chain and the last pedal to your amplifier. This completes the signal path and allows you to test your setup.
- Input: Plug your guitar into the input of the first pedal.
- Output: Connect the output of the last pedal to your amplifier.
- Cable Condition: Check that all cables are in good condition.
4.7. Test and Adjust
Test your setup by playing through each pedal and adjusting the settings to achieve your desired sound. Experiment with different combinations and settings to explore the sonic possibilities.
- Individual Pedals: Test each pedal individually to ensure it functions correctly.
- Combinations: Experiment with different pedal combinations to discover unique sounds.
- Settings: Adjust each pedal’s settings to fine-tune your tone.
4.8. Optimize Pedal Order
Optimize your pedal order based on your testing and experimentation. Minor adjustments to the signal chain can significantly impact your overall sound.
- Experiment: Try different pedal orders to find what works best for your style.
- Listen Carefully: Pay attention to how each change affects the overall tone.
- Document: Keep track of your preferred pedal orders for future reference.
4.9. Secure Cables and Power Supply
Secure your cables and power supply to the pedalboard to prevent accidental disconnections and damage. Use cable ties or mounting brackets to keep everything organized and stable.
- Cable Ties: Bundle cables together to keep them tidy.
- Mounting Brackets: Secure the power supply to the pedalboard.
- Strain Relief: Provide strain relief for cables to prevent damage.
4.10. Final Test and Tweak
Perform a final test of your entire setup, making any necessary tweaks to ensure everything sounds perfect. This final step ensures your pedalboard is ready for performance or recording.
- Full Signal Chain: Play through the entire signal chain to check for any issues.
- Fine-Tune: Make any final adjustments to pedal settings.
- Record: Consider recording your setup to capture your tone.
5. Common Guitar Pedal Order Configurations
Certain pedal order configurations are popular among guitarists due to their effectiveness in achieving specific tones. Guitarplayers.net offers insights into these common configurations, helping you find the best setup for your playing style. Here are some common pedal order configurations to consider.
5.1. Standard Configuration
- Tuner → Wah → Compressor → Overdrive/Distortion → Modulation → Delay → Reverb: This setup is ideal for a wide range of genres and playing styles.
5.2. High-Gain Configuration
- Noise Gate → Tuner → Wah → Compressor → Overdrive → Distortion → EQ → Modulation → Delay → Reverb: Designed for metal and hard rock, this configuration minimizes noise and maximizes tonal control.
5.3. Ambient Configuration
- Tuner → Volume Pedal → Modulation → Delay → Reverb → Looper: Perfect for creating layered soundscapes and ambient textures.
5.4. Blues Configuration
- Wah → Tuner → Overdrive → Compressor → Modulation → Delay → Reverb: Tailored for blues players seeking warm, dynamic tones.
 A diagram illustrating a standard guitar pedal order configuration, showing the typical sequence of pedals from tuner to reverb.
6. Optimizing Your Guitar Pedal Setup
Optimizing your guitar pedal setup involves fine-tuning various aspects to achieve the best possible sound and performance. Guitarplayers.net offers expert tips on optimizing your setup. Here are some key considerations for optimizing your guitar pedal setup.
6.1. Power Supply Considerations
Using a high-quality, isolated power supply is essential for minimizing noise and ensuring consistent performance. Consider the power requirements of each pedal and choose a power supply that meets those needs.
- Isolated Outputs: Prevents ground loops and reduces noise.
- Sufficient Power: Provides adequate power for each pedal.
- Voltage Compatibility: Ensures correct voltage for each pedal.
6.2. Cable Management
Proper cable management keeps your pedalboard tidy, prevents accidental disconnections, and reduces noise. Use cable ties, Velcro straps, and cable routing solutions to organize your cables.
- Cable Ties: Bundle cables together to keep them organized.
- Velcro Straps: Secure cables to the pedalboard.
- Routing Solutions: Use cable channels to keep cables out of the way.
6.3. Pedal Spacing
Ensure adequate spacing between pedals for easy access and prevent accidental stomping. Consider the size and shape of each pedal when planning your layout.
- Accessibility: Ensure each pedal is easily accessible.
- Spacing: Leave enough space between pedals to avoid accidental stomping.
- Layout: Plan your layout to maximize space and efficiency.
6.4. True Bypass vs. Buffered Bypass
Understand the difference between true bypass and buffered bypass pedals. True bypass pedals completely remove the pedal from the signal chain when disengaged, while buffered bypass pedals use a buffer circuit to maintain signal integrity.
- True Bypass: Preserves the original signal when the pedal is off.
- Buffered Bypass: Maintains signal strength and reduces tone loss.
- Experiment: Try both types of bypass to see which works best for your setup.
6.5. Experimenting with Pedal Settings
Experiment with different pedal settings to discover new sounds and textures. Don’t be afraid to push the boundaries and try unconventional combinations.
- Knob Twisting: Explore the full range of each pedal’s settings.
- Combination: Try different combinations of settings on multiple pedals.
- Listen Carefully: Pay attention to how each setting affects the overall tone.
7. Troubleshooting Common Guitar Pedal Issues
Troubleshooting common guitar pedal issues can save you time and frustration. Guitarplayers.net offers resources to help you diagnose and fix common problems. Here are some common issues and how to resolve them.
7.1. No Sound
Check all connections, power supply, and pedal settings. Ensure your guitar and amplifier are functioning correctly.
- Connections: Verify that all cables are securely plugged in.
- Power Supply: Check that the power supply is working and providing the correct voltage.
- Pedal Settings: Ensure that the pedal is engaged and the volume is turned up.
7.2. Excessive Noise
Use an isolated power supply, shorten cable lengths, and engage a noise gate. Identify and eliminate any sources of interference.
- Isolated Power Supply: Reduces ground loops and noise.
- Short Cables: Minimize signal loss and noise.
- Noise Gate: Suppresses unwanted noise.
7.3. Tone Loss
Use high-quality cables, buffered bypass pedals, and minimize the number of pedals in your chain. Consider using a signal buffer to maintain signal integrity.
- Quality Cables: Preserve signal strength.
- Buffered Bypass: Maintains signal integrity.
- Signal Buffer: Strengthens the signal.
7.4. Pedal Not Engaging
Check the footswitch, power supply, and connections. Ensure the pedal is receiving adequate power and that the footswitch is functioning correctly.
- Footswitch: Test the footswitch to ensure it is working.
- Power Supply: Check that the pedal is receiving power.
- Connections: Verify that all cables are securely plugged in.
7.5. Unwanted Distortion
Adjust the gain settings on your pedals and amplifier. Ensure your power supply is providing clean power and that there are no ground loops.
- Gain Settings: Lower the gain on your pedals and amplifier.
- Clean Power: Use a high-quality power supply.
- Ground Loops: Eliminate any ground loops.
8. Advanced Techniques for Guitar Pedal Setups
Advanced techniques can take your guitar pedal setup to the next level. Guitarplayers.net provides resources for advanced players looking to push the boundaries of their sound. Here are some advanced techniques to explore.
8.1. Wet/Dry Rigs
A wet/dry rig splits your signal into two paths: one with effects (wet) and one without (dry). This allows you to maintain clarity and punch while adding lush effects.
- Signal Splitter: Divides the signal into two paths.
- Effects Loop: Sends one path through your effects.
- Separate Amplifiers: Uses two amplifiers, one for the dry signal and one for the wet signal.
8.2. Looping Techniques
Use a looper pedal to create layered soundscapes and experiment with different textures. Looping can enhance your creativity and provide a unique performance tool.
- Layering: Create complex arrangements by layering multiple parts.
- Experimentation: Try different combinations of effects and loops.
- Live Performance: Use looping to enhance your live performances.
8.3. MIDI Control
Control multiple pedals simultaneously with a MIDI controller. MIDI control allows you to switch presets and adjust settings on multiple pedals with a single command.
- MIDI Controller: Sends MIDI commands to your pedals.
- MIDI-Enabled Pedals: Pedals that can be controlled via MIDI.
- Preset Switching: Switch between multiple presets with a single command.
8.4. Expression Pedals
Use an expression pedal to control parameters on your pedals in real-time. Expression pedals can add dynamic control and expression to your playing.
- Real-Time Control: Adjust parameters on the fly.
- Dynamic Expression: Add expression to your playing.
- Versatility: Control a wide range of parameters.
8.5. Re-amping
Re-amping involves recording a clean guitar signal and then sending it through your pedalboard and amplifier to capture different tones. This technique offers flexibility and allows you to experiment with different sounds after the initial recording.
- Clean Signal: Record a clean, unaffected guitar signal.
- Re-amp Box: Sends the signal to your pedalboard and amplifier.
- Experimentation: Try different pedal and amplifier combinations.
9. Top Guitar Pedal Brands
Guitarplayers.net offers reviews and information on the top guitar pedal brands. Here are some of the leading brands in the industry:
| Brand | Specialization | Notable Pedals |
|---|---|---|
| Boss | Versatile, Reliable | DD-3 Digital Delay, DS-1 Distortion |
| Strymon | High-End, Innovative | BigSky Reverb, TimeLine Delay |
| MXR | Classic, Durable | Phase 90 Phaser, Dyna Comp Compressor |
| Electro-Harmonix | Unique, Experimental | Big Muff Pi Fuzz, Holy Grail Reverb |
| Ibanez | Overdrive, Classic | Tube Screamer TS9, Analog Delay |
10. Maintaining Your Guitar Pedals
Proper maintenance ensures your guitar pedals function correctly and last longer. Regular cleaning, inspection, and care are essential.
10.1. Cleaning
Clean your pedals regularly with a soft, dry cloth. Avoid using harsh chemicals or abrasive cleaners.
- Soft Cloth: Use a soft, dry cloth to wipe down your pedals.
- Gentle Cleaning: Avoid using harsh chemicals.
- Regular Cleaning: Clean your pedals regularly to prevent buildup.
10.2. Inspection
Inspect your pedals regularly for loose connections, worn footswitches, and damaged components. Address any issues promptly to prevent further damage.
- Loose Connections: Check that all connections are secure.
- Worn Footswitches: Replace worn footswitches as needed.
- Damaged Components: Repair or replace any damaged components.
10.3. Storage
Store your pedals in a dry, climate-controlled environment. Avoid exposing them to extreme temperatures, humidity, or direct sunlight.
- Dry Environment: Store your pedals in a dry place to prevent corrosion.
- Climate Control: Avoid extreme temperatures and humidity.
- Protective Case: Use a protective case to prevent damage during transport.
10.4. Cable Care
Handle your cables with care and avoid bending or twisting them excessively. Use cable ties to keep them organized and prevent damage.
- Gentle Handling: Avoid bending or twisting cables.
- Cable Ties: Keep cables organized.
- Strain Relief: Provide strain relief to prevent damage.
10.5. Footswitch Maintenance
Clean and lubricate your footswitches periodically to ensure smooth operation. Use a contact cleaner specifically designed for electronic components.
- Contact Cleaner: Use a contact cleaner to clean the footswitches.
- Lubrication: Lubricate the footswitches to ensure smooth operation.
- Regular Maintenance: Maintain your footswitches regularly.
FAQ: Setting Up Guitar Pedals
1. What is the best order for my guitar pedals?
The best order depends on your desired sound, but a common starting point is: Tuner → Wah → Compressor → Overdrive/Distortion → Modulation → Delay → Reverb.
2. How do I power my guitar pedals?
Use a dedicated pedal power supply to minimize noise. Ensure the voltage and polarity match each pedal’s requirements.
3. What is true bypass, and why does it matter?
True bypass pedals completely remove the pedal from the signal chain when disengaged, preserving your guitar’s original tone.
4. How can I reduce noise in my pedalboard setup?
Use an isolated power supply, high-quality cables, and a noise gate to minimize noise.
5. What are the essential pedals for a beginner guitarist?
A tuner, overdrive, and delay are great starting points for a beginner guitarist looking to explore effects.
6. How do I connect my guitar pedals to my amplifier?
Connect your guitar to the input of the first pedal in the chain and the output of the last pedal to your amplifier’s input.
7. Can I use a daisy-chain power cable for my pedals?
Daisy-chain cables can introduce noise. An isolated power supply is preferable for optimal performance.
8. How do I troubleshoot a pedal that isn’t working?
Check the power supply, connections, and pedal settings. Ensure your guitar and amplifier are functioning correctly.
9. What is a buffered bypass pedal?
Buffered bypass pedals use a buffer circuit to maintain signal integrity, even when the pedal is disengaged.
10. How often should I clean my guitar pedals?
Clean your pedals regularly with a soft, dry cloth to prevent dust and grime buildup.
Setting up guitar pedals doesn’t have to be a mystery. With the right knowledge and a bit of experimentation, you can unlock a world of sonic possibilities. Remember to visit guitarplayers.net for more in-depth guides, reviews, and a thriving community of guitar enthusiasts!
Ready to take your guitar playing to the next level? Explore guitarplayers.net today for lessons, reviews, sheet music, and a community of passionate guitarists. Don’t wait – start crafting your unique sound now! Reach out to us at 1140 Boylston Street, Boston, MA 02215, United States. Call us at +1 (617) 747-2261 or visit our website at guitarplayers.net.