Connecting your guitar to an audio interface is a game-changer for guitar players, and guitarplayers.net is here to guide you. This allows you to record, practice with amp sims, and explore a world of sonic possibilities, enhancing your guitar playing experience. We’ll explore everything from selecting the right cables to optimizing your settings, ensuring a seamless connection and superior sound quality.
1. Understanding the Basics: What is an Audio Interface?
An audio interface is an external hardware device that acts as a bridge between your guitar and your computer, and it’s a must-have for any serious guitarist looking to record or experiment with digital audio.
It converts the analog signal from your guitar into a digital signal that your computer can understand. Unlike your computer’s built-in sound card, an audio interface is designed specifically for music production, offering superior sound quality, lower latency (the delay between playing and hearing the sound), and specialized inputs for instruments and microphones. Think of it as the central hub for all your audio needs.
Why Do You Need an Audio Interface for Your Guitar?
- Superior Sound Quality: Audio interfaces use high-quality preamps and converters, resulting in cleaner, more detailed recordings compared to plugging directly into your computer.
- Low Latency: Reduces the delay between playing a note and hearing it back, crucial for real-time performance and recording.
- Versatility: Provides inputs for guitars, microphones, and other instruments, as well as outputs for headphones and studio monitors.
- Software Compatibility: Works seamlessly with Digital Audio Workstations (DAWs) like Ableton Live, Logic Pro X, and Pro Tools.
2. Gear Up: Essential Equipment You’ll Need
Before you start connecting your guitar, make sure you have these essential items:
- Audio Interface: Choose one with an instrument input (Hi-Z input) for optimal guitar signal.
- Guitar Cable: A high-quality instrument cable to connect your guitar to the interface.
- Computer: PC or Mac, with a compatible USB or Thunderbolt port for the audio interface.
- Headphones or Studio Monitors: For monitoring your guitar sound.
- Digital Audio Workstation (DAW): Software for recording, editing, and mixing your guitar tracks.
3. Step-by-Step Guide: How to Connect Your Guitar to an Audio Interface
Follow these steps to get your guitar connected and ready to rock.
3.1. Connecting the Audio Interface to Your Computer
Connect your audio interface to your computer using the provided USB or Thunderbolt cable.
- Locate the USB or Thunderbolt port: Find an available port on your computer.
- Plug in the cable: Connect one end of the cable to the audio interface and the other to your computer.
- Power on the interface: Some interfaces are bus-powered (powered by the USB connection), while others require an external power supply.
3.2. Installing Drivers and Software
Install the necessary drivers and software for your audio interface.
- Visit the manufacturer’s website: Go to the website of your audio interface manufacturer (e.g., Focusrite, PreSonus, Universal Audio).
- Download the drivers: Find the drivers specific to your audio interface model and your computer’s operating system (Windows or macOS).
- Install the drivers: Follow the on-screen instructions to install the drivers.
- Install the software: Many interfaces come with bundled software, such as control panels or lite versions of DAWs. Install these as well.
3.3. Connecting Headphones or Studio Monitors
Connect your headphones or studio monitors to the audio interface for monitoring.
- Locate the output jacks: Find the headphone output and the monitor outputs on the back of the interface.
- Connect headphones: Plug your headphones into the headphone jack.
- Connect monitors: Use balanced TRS cables to connect your studio monitors to the line outputs (usually labeled “Left” and “Right”).
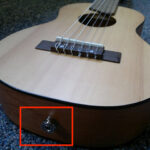
3.4. Connecting Your Guitar
Connect your guitar to the audio interface using a guitar cable.
- Locate the instrument input: Find the 1/4″ instrument input (Hi-Z input) on the front of the audio interface.
- Plug in the cable: Connect one end of the guitar cable to your guitar’s output jack and the other end to the instrument input on the interface.
3.5. Setting the Input Level
Adjust the input level to get a clean signal without clipping.
- Locate the gain knob: Find the input gain knob for the instrument input on the audio interface.
- Play your guitar: Strum or pick your guitar while watching the input meter on the interface or in your DAW.
- Adjust the gain: Turn the gain knob until the meter shows a healthy signal level, peaking around -12dBFS to -6dBFS. Avoid letting the signal clip (turn red).
3.6. Configuring Your DAW
Set up your DAW to recognize the audio interface as the input and output device.
- Open your DAW: Launch your preferred Digital Audio Workstation (e.g., Ableton Live, Logic Pro X, Pro Tools).
- Open audio preferences: Go to the audio preferences or settings menu.
- Select your audio interface: Choose your audio interface as the input and output device.
- Create a new track: Create a new audio track in your DAW.
- Select the input: Set the input of the track to the input on your audio interface where your guitar is connected.
- Arm the track: Enable recording on the track.
- Test the signal: Play your guitar and check if you see a signal in the track’s meter.
4. Optimizing Your Sound: Tips and Tricks
Here are some tips to optimize your guitar sound when using an audio interface:
4.1. Use a High-Quality Cable
According to Guitar World, a good quality cable is crucial for a clean signal. Invest in a quality instrument cable to avoid noise and signal loss.
4.2. Adjust Input Gain Properly
Setting the correct input gain is essential for a good recording. Too low, and you’ll have a noisy signal. Too high, and you’ll get clipping and distortion. Find that sweet spot.
4.3. Experiment with Amp Sims and Effects
DAWs offer a wide range of amp simulations and effects plugins. Experiment to find the perfect tone for your guitar.
4.4. Monitor Your Sound
Use headphones or studio monitors to accurately monitor your guitar sound. This will help you make better mixing and recording decisions.
4.5. Reduce Latency
Latency can be a problem when recording. Adjust your DAW’s buffer size to reduce latency, but be careful not to set it too low, as this can cause performance issues.
4.6. Use a DI Box (If Needed)
If you’re experiencing noise or impedance issues, use a DI (Direct Injection) box between your guitar and the audio interface.
5. Troubleshooting Common Issues
Encountering issues? Here’s how to troubleshoot common problems.
5.1. No Sound
- Check connections: Ensure all cables are properly connected.
- Check power: Make sure the audio interface is powered on.
- Check input selection: Verify that the correct input is selected in your DAW.
- Check gain: Ensure the input gain is turned up.
- Check monitoring: Make sure your headphones or monitors are connected and the volume is turned up.
5.2. Distorted Sound
- Check input gain: Reduce the input gain to avoid clipping.
- Check cable: Use a different cable to rule out a faulty cable.
- Check guitar: Make sure your guitar’s volume is not set too high.
5.3. Latency Issues
- Adjust buffer size: Lower the buffer size in your DAW’s audio settings.
- Update drivers: Ensure your audio interface drivers are up to date.
- Close unnecessary programs: Close any programs that may be using system resources.
5.4. Noise Issues
- Use a balanced cable: Use a balanced TRS cable for your studio monitors.
- Check grounding: Ensure your electrical outlets are properly grounded.
- Use a power conditioner: A power conditioner can help reduce noise from your electrical supply.
6. Choosing the Right Audio Interface: Key Considerations
Selecting the right audio interface is crucial for achieving the best possible sound quality and recording experience. Here’s what to consider.
6.1. Number of Inputs and Outputs
Consider how many inputs and outputs you need. If you plan to record multiple instruments or microphones simultaneously, you’ll need an interface with multiple inputs.
6.2. Sound Quality
Look for an interface with high-quality preamps and converters. Check reviews and specifications to ensure it meets your sound quality requirements.
6.3. Compatibility
Make sure the audio interface is compatible with your computer’s operating system (Windows or macOS) and your DAW.
6.4. Latency
Choose an interface with low latency for real-time recording and monitoring.
6.5. Connectivity
Consider the connectivity options, such as USB, Thunderbolt, or FireWire. Thunderbolt generally offers lower latency and higher bandwidth.
6.6. Budget
Audio interfaces range in price from affordable to high-end. Set a budget and find an interface that meets your needs within that budget.
6.7. Features
Consider additional features such as built-in effects, headphone outputs, and monitor control.
7. Top Audio Interfaces for Guitarists in 2024
Here are some of the top audio interfaces for guitarists in 2024.
| Audio Interface | Inputs | Outputs | Connectivity | Key Features | Price |
|---|---|---|---|---|---|
| Focusrite Scarlett 2i2 | 2 | 2 | USB | Great preamps, easy to use | $159.99 |
| PreSonus AudioBox USB 96 | 2 | 2 | USB | Affordable, includes Studio One Artist DAW | $99.95 |
| Universal Audio Apollo Twin X | 2 | 4 | Thunderbolt | High-end preamps, UAD plugin processing | $999 |
| IK Multimedia Axe I/O | 1 | 2 | USB | Designed for guitar, amp modeling software included | $349.99 |
| Native Instruments Komplete Audio 6 MkII | 4 | 4 | USB | Versatile, includes software bundle | $279 |
Prices may vary.
8. Exploring Guitar Plugins and Amp Sims
One of the biggest advantages of connecting your guitar to an audio interface is the ability to use guitar plugins and amp sims.
8.1. What are Guitar Plugins and Amp Sims?
Guitar plugins and amp sims are software that emulates the sound of amplifiers, effects pedals, and other guitar gear. They allow you to create a wide range of tones without the need for physical equipment.
8.2. Popular Guitar Plugin Brands
- Neural DSP: Known for their realistic amp simulations and innovative features. Neural DSP plugins are used by many professional guitarists, including Tosin Abasi of Animals as Leaders.
- Positive Grid: Offers a wide range of amp sims and effects, including the popular BIAS Amp and BIAS FX.
- Waves: Provides a variety of guitar-related plugins, including amp simulations, effects, and mixing tools.
- Line 6: Famous for their Helix Native plugin, which emulates the sounds of their popular Helix hardware processors.
- Native Instruments: Offers Guitar Rig, a versatile amp and effects simulation suite.
8.3. How to Use Guitar Plugins
- Install the plugin: Download and install the guitar plugin on your computer.
- Open your DAW: Launch your DAW and create a new audio track.
- Insert the plugin: Insert the guitar plugin as an effect on the audio track.
- Adjust the settings: Experiment with the plugin’s settings to create your desired tone.
- Play your guitar: Play your guitar and listen to the sound through the plugin.
9. Recording Your Guitar: A Step-by-Step Guide
Once you have your guitar connected to your audio interface and your DAW set up, you can start recording.
9.1. Setting Up Your Recording Session
- Create a new project: Create a new project in your DAW.
- Create an audio track: Create a new audio track for your guitar.
- Select the input: Set the input of the track to the input on your audio interface where your guitar is connected.
- Arm the track: Enable recording on the track.
- Set the tempo and time signature: Set the tempo and time signature of your song.
- Set the metronome: Enable the metronome to help you stay in time.
9.2. Recording Your Guitar Track
- Get a good sound: Dial in a good tone using amp sims and effects plugins.
- Monitor your sound: Wear headphones or use studio monitors to accurately monitor your sound.
- Record a test: Record a short test to make sure everything is working properly.
- Start recording: Press the record button and start playing your guitar.
- Stop recording: When you’re finished, press the stop button.
9.3. Editing and Mixing Your Guitar Track
- Edit your recording: Use your DAW’s editing tools to clean up your recording, remove mistakes, and tighten up your performance.
- Mix your track: Adjust the volume, EQ, and compression of your guitar track to make it sit well in the mix.
- Add effects: Add additional effects, such as reverb and delay, to enhance your guitar sound.
- Listen to your mix: Listen to your mix on different speakers and headphones to make sure it sounds good on all systems.
10. Advanced Techniques: Reamping and More
Once you’re comfortable with the basics, you can explore advanced techniques like reamping.
10.1. What is Reamping?
Reamping is the process of sending a previously recorded guitar signal back through an amplifier and recording it again. This allows you to experiment with different amp tones and effects after you’ve already recorded your guitar part.
10.2. How to Reamp Your Guitar
- Record a clean DI signal: Record your guitar signal directly into your audio interface without any amp sims or effects.
- Send the signal to an amplifier: Use an output on your audio interface to send the DI signal to your guitar amplifier.
- Mic up the amplifier: Place a microphone in front of the amplifier.
- Record the amplified signal: Record the amplified signal back into your audio interface.
- Mix the reamped signal: Mix the reamped signal with your other tracks.
10.3. Other Advanced Techniques
- Using MIDI controllers: Control your amp sims and effects plugins with a MIDI controller for more expressive performance.
- Experimenting with different microphones: Try different microphones to capture different tones from your guitar amplifier.
- Using multiple microphones: Use multiple microphones to capture a more complex and nuanced sound from your guitar amplifier.
11. The Role of Guitarplayers.net in Your Musical Journey
At guitarplayers.net, we are committed to providing you with the resources and support you need to excel in your musical journey. Whether you are a beginner or a seasoned professional, our platform offers a wealth of information and tools to help you hone your skills and achieve your musical goals.
11.1. Access to Comprehensive Learning Materials
We offer a wide range of lessons and tutorials covering various aspects of guitar playing, from basic chords and strumming patterns to advanced techniques and music theory.
11.2. In-Depth Gear Reviews and Recommendations
Choosing the right gear can be daunting. Our detailed reviews and recommendations help you make informed decisions, ensuring you invest in equipment that meets your specific needs and budget.
11.3. A Vibrant Community of Guitar Enthusiasts
Connect with fellow guitar players from around the world in our community forums. Share your experiences, ask questions, and get feedback on your playing.
11.4. Stay Updated with the Latest Trends and Innovations
The world of guitar playing is constantly evolving. We keep you informed about the latest trends, technologies, and innovations in the industry.
11.5. Personalized Support and Guidance
Our team of experienced guitar players and music educators is here to provide personalized support and guidance. Whether you need help with a specific technique or advice on your musical career, we are here to assist you.
12. Conclusion: Unleash Your Guitar Potential
Connecting your guitar to an audio interface opens up a world of possibilities for recording, practicing, and experimenting with sound. By following these steps and tips, you can achieve professional-quality recordings and unlock your full guitar potential. Remember, practice and experimentation are key to mastering these techniques.
Ready to take your guitar playing to the next level? Visit guitarplayers.net today to explore our lessons, reviews, and community forums.
Address: 1140 Boylston Street, Boston, MA 02215, United States
Phone: +1 (617) 747-2261
Website: guitarplayers.net
FAQ: Common Questions About Connecting Guitar to Audio Interface
1. Why Should I Use an Audio Interface Instead of Plugging Directly into My Computer?
Using an audio interface provides superior sound quality, lower latency, and specialized inputs for instruments, resulting in cleaner and more detailed recordings.
2. What Kind of Cable Do I Need to Connect My Guitar to an Audio Interface?
You need a high-quality 1/4″ instrument cable to connect your guitar to the instrument input (Hi-Z input) on the audio interface.
3. How Do I Know if My Audio Interface is Compatible with My Computer?
Check the audio interface manufacturer’s website for compatibility information regarding your computer’s operating system (Windows or macOS) and connectivity options (USB, Thunderbolt).
4. How Do I Set the Input Level on My Audio Interface?
Adjust the input gain knob until the meter shows a healthy signal level, peaking around -12dBFS to -6dBFS, avoiding clipping (red indicator).
5. What is Latency, and How Do I Reduce It?
Latency is the delay between playing a note and hearing it back. Reduce it by adjusting your DAW’s buffer size, updating drivers, and closing unnecessary programs.
6. Can I Use Any Headphones with My Audio Interface?
Yes, you can use any headphones with a standard headphone jack. However, studio headphones are recommended for accurate monitoring.
7. What are Amp Sims, and How Do I Use Them?
Amp sims are software that emulates the sound of amplifiers. Install the plugin in your DAW, insert it as an effect on the audio track, and adjust settings to create your desired tone.
8. Do I Need a DI Box When Connecting My Guitar to an Audio Interface?
A DI box is not always necessary, but it can help reduce noise or impedance issues.
9. What is Reamping, and How Do I Do It?
Reamping is sending a recorded guitar signal back through an amplifier to record it again. You need a clean DI signal, an output on your audio interface, a guitar amplifier, and a microphone.
10. Where Can I Find More Resources and Support for Guitar Playing?
Visit guitarplayers.net for lessons, reviews, community forums, and personalized support.