
Making guitar strings easier to press is a common goal for guitar players of all levels, and at guitarplayers.net, we’re here to help you achieve it by showing you how to optimize your guitar’s setup for comfortable play. By understanding string action, neck relief, and other key adjustments, you can transform your guitar into an instrument that feels effortless to play. Unlock your guitar’s full potential with our advice on lighter gauge strings, professional setups, and intonation adjustments for ultimate playability.
1. What Makes Guitar Strings Hard to Press Down?
Guitar strings can be difficult to press down due to high action, heavy gauge strings, and improper neck relief. These factors require more finger strength and can hinder your playing experience. Addressing these issues can significantly improve comfort and playability.
1.1. High String Action: A Common Culprit
High action, the distance between the strings and the fretboard, is a primary cause of difficulty. When the action is too high, you must exert more force to press the strings down to the frets, leading to finger fatigue and discomfort.
- Beginner Challenges: New guitarists often struggle with high action because they haven’t yet developed the necessary finger strength and calluses. This can make learning chords and scales a painful and frustrating experience.
- Solutions: Lowering the action involves adjusting the bridge saddle and possibly the nut. This reduces the distance the strings need to travel to meet the frets, making them easier to press. A guitar technician at guitarplayers.net can perform these adjustments precisely.
1.2. Heavy Gauge Strings: Volume vs. Playability
Heavier gauge strings provide a fuller, louder sound, but they require more tension and finger strength to press down. While some players prefer the robust tone of heavier strings, they can be challenging for beginners or those with weaker hands.
- Trade-offs: Heavier strings (12-53 or 13-56 gauge) offer a richer tone and increased volume, which can be advantageous for certain playing styles like bluegrass. However, they demand more finger strength and can be less forgiving for intricate fingerwork.
- Lighter Alternatives: Switching to lighter gauge strings (10-47 or 11-52) can significantly reduce the tension and make the strings easier to press. While you might sacrifice some volume and tonal depth, the improved playability can enhance your practice sessions and overall enjoyment.
1.3. Neck Relief: The Subtle Curve
The neck of a guitar should have a slight concave curve, known as neck relief. This curve allows the strings to vibrate freely without buzzing against the frets. If the neck is too straight or has a back-bow, the strings can be harder to press and may produce unwanted buzzing.
- Assessing Neck Relief: To check the neck relief, fret the low E string at the first fret and where the neck joins the body (usually the 14th fret). Look at the gap between the bottom of the string and the top of the frets around the middle of the neck (7th-9th frets). There should be a very slight gap, approximately the thickness of a business card.
- Adjusting the Truss Rod: The truss rod, a metal rod inside the neck, controls the amount of relief. Adjusting the truss rod can correct excessive or insufficient relief. However, this adjustment should be done carefully, as over-tightening or loosening the truss rod can damage the neck. If you’re unsure, it’s best to consult a professional luthier at guitarplayers.net.
2. How to Lower the Action on Your Guitar
Lowering the action on your guitar involves adjustments to the nut and saddle, which can be done professionally or, with caution, at home. The goal is to reduce the distance between the strings and the fretboard for easier playability.
2.1. Assessing the Action at the Nut
The nut is a small piece located at the headstock end of the fretboard. Its slots guide the strings and determine their height at the first fret. If the nut slots are too high, the strings will be harder to press down in the first few frets.
- Testing Nut Height: Fret each string at the third fret. The string should just clear the first fret. If there’s a significant gap, the nut slots are too high.
- Nut Adjustment: Lowering the nut slots requires specialized tools and skills. It’s a delicate process that involves filing down the slots without going too low, which can cause buzzing. Because of the risk, we recommend consulting a professional luthier at guitarplayers.net.
2.2. Adjusting the Saddle Height
The saddle, located on the bridge, supports the strings and determines their height at the other end of the fretboard. Lowering the saddle can significantly reduce the action across the entire neck.
- Saddle Material: Saddles are typically made of bone, plastic, or synthetic materials. Bone saddles are often preferred for their tonal qualities but can be more challenging to work with.
- Sanding the Saddle: To lower the action, the saddle must be removed and sanded down on the bottom. This process should be done gradually, checking the action frequently to avoid over-sanding. It’s essential to maintain a flat and even surface to ensure consistent string height and tone.
- Professional Assistance: Sanding the saddle can alter the instrument’s intonation if not done correctly, so it’s another task best left to the experts at guitarplayers.net.
2.3. The Role of the Bridge
The bridge is a fixed component of the guitar that holds the saddle. In some guitars, the entire bridge can be adjusted, allowing for further control over the action.
- Adjustable Bridges: Some acoustic guitars, particularly those with archtops or resonators, have adjustable bridges that allow you to raise or lower the entire bridge. This can be a convenient way to make quick action adjustments.
- Fixed Bridges: Most acoustic guitars have fixed bridges, meaning the bridge is glued to the body. In these cases, the saddle is the primary means of adjusting the action at the bridge end.
- Considerations: When adjusting the bridge or saddle, it’s essential to consider the overall balance and intonation of the guitar. Making significant changes to the action can affect these aspects, so it’s best to proceed with caution and consult with a professional if needed.
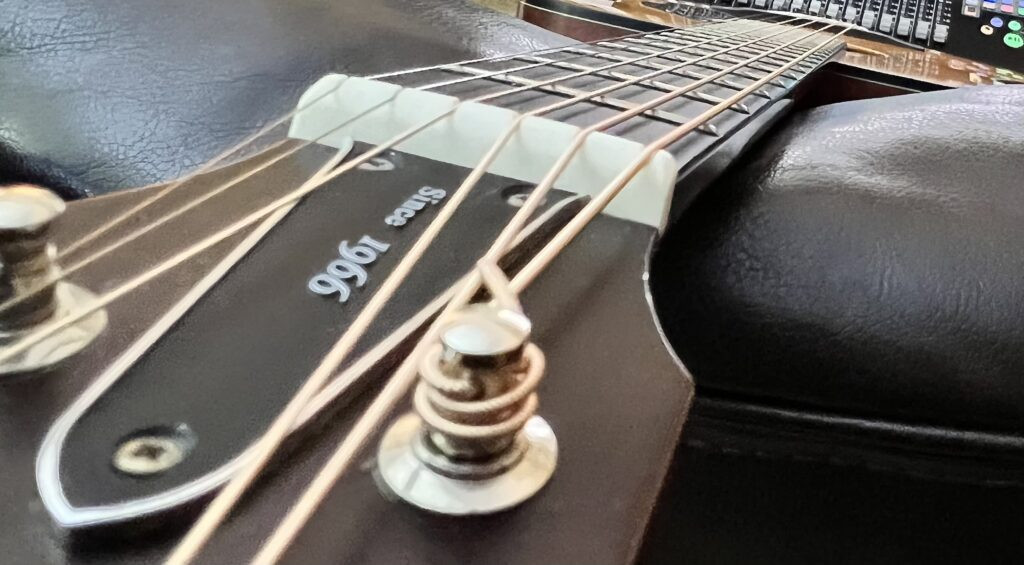 A guitar neck, seen from the headstock down on the bass side.
3. Choosing the Right Guitar Strings for Easier Playability
Selecting the right strings is crucial for achieving comfortable playability. Lighter gauge strings and the right material can make a significant difference in how easy your guitar is to play.
3.1. Understanding String Gauges
String gauge refers to the thickness of the strings. Lighter gauge strings have less tension, making them easier to press down, bend, and fret.
- Extra Light (0.010-0.047): These strings are the easiest to play, requiring minimal finger strength. They are ideal for beginners or players with hand or finger issues. However, they produce a softer tone and may not be suitable for all playing styles.
- Light (0.012-0.053): A popular choice for many players, light gauge strings offer a good balance of playability and tone. They are easier to press than medium gauge strings but still provide a decent volume and projection.
- Medium (0.013-0.056): Medium gauge strings deliver a fuller, richer tone and increased volume. They are favored by players who need more projection, such as bluegrass musicians. However, they require more finger strength and can be harder to play for extended periods.
- Hybrid Sets: These sets combine lighter gauge treble strings with heavier gauge bass strings, offering a compromise between playability and tonal response.
3.2. String Materials: Tone and Feel
The material of the strings also affects their feel and playability. Different materials produce different tones and have varying levels of tension.
- 80/20 Bronze: These strings are made of 80% copper and 20% zinc. They have a bright, crisp tone but tend to lose their brilliance relatively quickly.
- Phosphor Bronze: These strings contain a small amount of phosphorus, which extends their lifespan and provides a warmer, more balanced tone. They are a popular choice for acoustic guitars due to their versatility and durability.
- Silk and Steel: These strings have a silk core wrapped with steel or silver-plated copper. They have a very soft, mellow tone and are extremely easy to play. They are often used on smaller-bodied guitars or by players with delicate fingers.
- Coated Strings: These strings have a thin polymer coating that protects them from dirt and moisture, extending their lifespan. While they may feel slightly different than uncoated strings, they offer consistent performance and reduced finger noise.
3.3. String Tension and Scale Length
String tension is influenced by both the string gauge and the scale length of the guitar. Scale length is the distance from the nut to the bridge saddle. Guitars with shorter scale lengths generally have lower string tension, making them easier to play.
- Short Scale Guitars: These guitars, typically with a scale length of 24-25 inches, have lower string tension than longer scale guitars. They are often preferred by players with smaller hands or those who want a more relaxed playing experience.
- Long Scale Guitars: These guitars, typically with a scale length of 25.5 inches or more, have higher string tension. They produce a brighter, more resonant tone but require more finger strength.
4. Adjusting the Truss Rod for Optimal Neck Relief
Adjusting the truss rod is crucial for maintaining proper neck relief, which affects string height and overall playability. This adjustment should be done with care to avoid damaging the guitar.
4.1. Identifying the Truss Rod
The truss rod is a metal rod inside the guitar neck that counteracts the tension of the strings. It can be adjusted to correct excessive or insufficient neck relief.
- Location: The truss rod adjustment nut is typically located either inside the soundhole, near the neck joint, or at the headstock, under a cover plate.
- Tools: Adjusting the truss rod requires a specific size Allen wrench or truss rod wrench. Using the wrong tool can damage the nut.
4.2. Determining the Need for Adjustment
Before adjusting the truss rod, it’s essential to determine whether an adjustment is necessary.
- Symptoms of Excessive Relief: If the strings are too high in the middle of the neck, or if the guitar is difficult to play in the higher frets, the neck may have excessive relief.
- Symptoms of Insufficient Relief: If the strings buzz against the frets, particularly in the middle of the neck, the neck may have insufficient relief or even a back-bow.
- Checking Neck Relief: As mentioned earlier, fret the low E string at the first fret and where the neck joins the body. Look at the gap between the bottom of the string and the top of the frets around the middle of the neck. There should be a very slight gap.
4.3. Making Small Adjustments
Adjusting the truss rod should be done in small increments, typically no more than a quarter turn at a time.
- Tightening the Truss Rod: Turning the truss rod clockwise will tighten it, straightening the neck and reducing relief. This is done to correct excessive relief.
- Loosening the Truss Rod: Turning the truss rod counter-clockwise will loosen it, allowing the neck to bow slightly and increasing relief. This is done to correct insufficient relief or a back-bow.
- Patience: After making an adjustment, allow the neck to settle for a few hours before checking the relief again. It may take several adjustments to achieve the desired result.
- Professional Assistance: If you’re unsure about adjusting the truss rod, it’s best to consult with a professional luthier at guitarplayers.net. Incorrect adjustments can cause permanent damage to the neck.
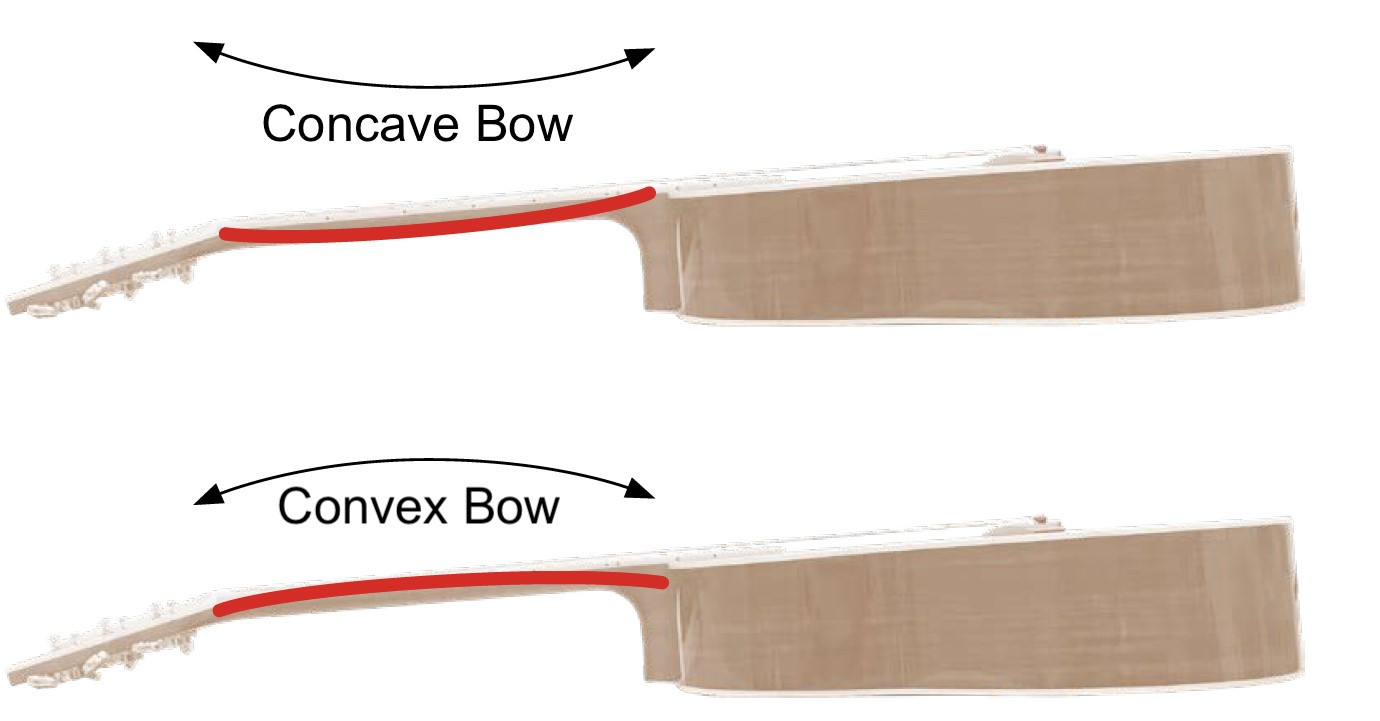 Illustration of guitar showing concave and convex neck bows.
5. The Importance of a Professional Guitar Setup
A professional guitar setup involves a comprehensive assessment and adjustment of all aspects of the guitar, including the action, nut height, saddle height, neck relief, and intonation. This ensures optimal playability and tone.
5.1. What a Luthier Does
A luthier is a skilled craftsman who specializes in building and repairing stringed instruments. They have the knowledge, experience, and tools to perform precise adjustments that can transform a guitar.
- Assessment: A luthier will start by assessing the guitar’s current condition and identifying any issues that need to be addressed.
- Adjustments: They will then make adjustments to the nut, saddle, truss rod, and other components to optimize the guitar’s playability and tone.
- Intonation: Setting the intonation ensures that the guitar plays in tune across the entire fretboard. This involves adjusting the saddle position so that the notes at the 12th fret match the open string notes.
- Cleaning and Polishing: As part of the setup, a luthier will also clean and polish the guitar, ensuring that it looks and feels its best.
5.2. Benefits of a Professional Setup
Investing in a professional guitar setup offers numerous benefits:
- Improved Playability: A well-setup guitar is easier and more comfortable to play, reducing finger fatigue and allowing you to play for longer periods.
- Enhanced Tone: Proper adjustments can optimize the guitar’s resonance and projection, resulting in a richer, more balanced tone.
- Accurate Intonation: Accurate intonation ensures that the guitar plays in tune across the entire fretboard, allowing you to play chords and melodies in any position without sounding off.
- Long-Term Health of the Instrument: Regular setups can help maintain the long-term health of the guitar by preventing issues such as neck warping and bridge lifting.
- Increased Enjoyment: A well-setup guitar is simply more enjoyable to play, inspiring you to practice more and explore your musical creativity.
5.3. Finding a Qualified Luthier
Finding a qualified luthier is essential for ensuring that your guitar receives the best possible care.
- Reputation: Look for luthiers with a good reputation in the local music community. Ask other guitarists for recommendations.
- Experience: Choose a luthier with extensive experience in setting up and repairing acoustic guitars.
- Tools and Equipment: A qualified luthier will have the specialized tools and equipment needed to perform precise adjustments.
- Communication: Choose a luthier who is willing to listen to your needs and preferences and explain the setup process in detail.
- Guitarplayers.net Resources: Consult our directory on guitarplayers.net for luthiers in the USA with customer reviews.
6. The Role of Proper Hand and Finger Technique
Even with a well-setup guitar and light gauge strings, proper hand and finger technique is essential for effortless playing.
6.1. Finger Placement and Pressure
Using the correct finger placement and applying the right amount of pressure can significantly reduce the effort required to press down the strings.
- Finger Tips: Use the tips of your fingers to fret the strings, rather than the pads. This allows you to apply pressure more directly and efficiently.
- Close to the Fret: Place your fingers as close as possible to the fret without touching it. This reduces the distance the string needs to travel to meet the fret, making it easier to press down.
- Minimal Pressure: Apply just enough pressure to produce a clear, clean note. Avoid pressing down too hard, as this can cause finger fatigue and intonation problems.
6.2. Hand Position and Posture
Maintaining a relaxed and balanced hand position is crucial for comfortable playing.
- Curved Fingers: Keep your fingers slightly curved, rather than straight. This allows them to apply pressure more evenly and reduces the strain on your joints.
- Thumb Position: Position your thumb on the back of the neck, opposite your fingers. This provides support and leverage.
- Wrist Angle: Keep your wrist straight and relaxed. Avoid bending or twisting your wrist, as this can lead to pain and injury.
- Shoulder and Arm Relaxation: Keep your shoulders and arms relaxed. Avoid tensing up, as this can transfer tension to your hands and fingers.
6.3. Exercises for Finger Strength and Dexterity
Regular exercises can help build finger strength and dexterity, making it easier to play guitar.
- Finger Exercises: Practice scales, arpeggios, and chord progressions to develop finger strength and coordination.
- Stretching: Stretch your fingers and hands before and after playing to prevent stiffness and injury.
- Grip Strengtheners: Use grip strengtheners to build finger and hand strength.
- Warm-Ups: Warm up your fingers and hands before each practice session by playing simple exercises.
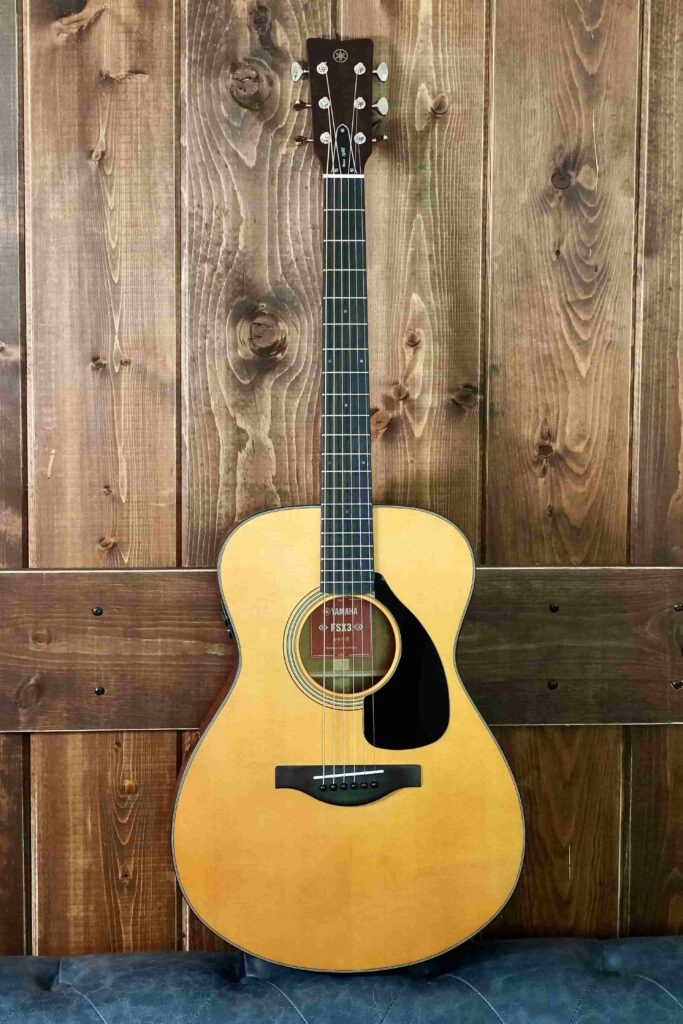 An acoustic guitar.
7. Maintaining Your Guitar for Optimal Playability
Regular maintenance is essential for keeping your guitar in top playing condition. This includes cleaning, string changes, and periodic check-ups.
7.1. Cleaning Your Guitar
Keeping your guitar clean can prevent dirt and grime from building up on the strings and fretboard, which can affect playability.
- Wipe Down After Each Use: Wipe down the strings and fretboard with a clean, soft cloth after each playing session.
- String Cleaners: Use a string cleaner to remove dirt and oil from the strings.
- Fretboard Conditioners: Use a fretboard conditioner to keep the fretboard moisturized and prevent it from drying out and cracking.
- Polishing: Polish the body of the guitar with a guitar polish to remove smudges and fingerprints.
7.2. Changing Strings Regularly
Old strings can become corroded and lose their elasticity, making them harder to press down and affecting their tone.
- Frequency: Change your strings every one to three months, depending on how often you play.
- Signs of Old Strings: Signs that your strings need to be changed include a dull tone, difficulty staying in tune, and visible corrosion.
- String Winders: Use a string winder to make changing strings faster and easier.
7.3. Humidity Control
Maintaining proper humidity levels is crucial for preventing damage to your guitar.
- Ideal Humidity: The ideal humidity level for a guitar is between 45% and 55%.
- Humidifiers: Use a guitar humidifier to add moisture to the air inside the guitar case.
- Dehumidifiers: Use a dehumidifier to remove excess moisture from the air.
- Hygrometers: Use a hygrometer to monitor the humidity level in your guitar case or room.
8. Ergonomic Accessories to Aid Playability
Ergonomic accessories can provide additional support and comfort, making it easier to play guitar for extended periods.
8.1. Guitar Straps and Support Systems
Using a comfortable guitar strap or support system can reduce the strain on your shoulders and back, allowing you to play for longer periods.
- Wide Straps: Choose a wide strap with padding to distribute the weight of the guitar evenly.
- Adjustable Straps: Use an adjustable strap to position the guitar at a comfortable height.
- Support Systems: Consider using a guitar support system, such as a neck-up or Dynarette cushion, to provide additional support and improve your posture.
8.2. Finger Exercises and Warm-Up Tools
Using finger exercises and warm-up tools can help prepare your hands and fingers for playing.
- Hand Exercisers: Use hand exercisers, such as grip strengtheners or finger stretchers, to build finger strength and dexterity.
- Warm-Up Routines: Develop a warm-up routine that includes stretching, finger exercises, and simple scales and chords.
- Guitarplayers.net Resources: We will soon be offering guided instructional videos on hand and finger exercises at guitarplayers.net.
8.3. Seating and Posture Aids
Maintaining good posture while playing guitar can prevent pain and injury.
- Ergonomic Chairs: Use an ergonomic chair with adjustable height and back support.
- Footrests: Use a footrest to elevate your leg and improve your posture.
- Proper Positioning: Position the guitar so that it is comfortable to reach and play. Avoid slouching or hunching over.
9. Overcoming Common Challenges
Even with the right setup and technique, you may still encounter challenges when trying to make guitar strings easier to press. Here are some tips for overcoming common obstacles.
9.1. Finger Pain and Fatigue
Finger pain and fatigue are common among beginner guitarists. Here are some tips for managing and preventing these issues.
- Practice in Short Sessions: Start by practicing in short sessions, 15-20 minutes at a time, and gradually increase the duration as your fingers get stronger.
- Take Breaks: Take frequent breaks during practice sessions to rest your fingers.
- Ice or Warm Water: Apply ice or soak your fingers in warm water to relieve pain and inflammation.
- Calluses: Develop calluses on your fingertips by playing regularly. Calluses will make your fingers less sensitive and more resistant to pain.
9.2. Buzzing Strings
Buzzing strings can be caused by several factors, including low action, uneven frets, and insufficient neck relief.
- Check Action: Make sure the action is not too low. If the strings are too close to the frets, they may buzz against them.
- Check Neck Relief: Ensure that the neck has the proper amount of relief. Insufficient relief can cause buzzing.
- Uneven Frets: Have a luthier check the frets for unevenness. Uneven frets can cause buzzing and intonation problems.
- Guitarplayers.net Forum: Ask for advice and support from other players in our buzzing strings forum at guitarplayers.net.
9.3. Intonation Issues
Intonation problems can make your guitar sound out of tune, even when it is properly tuned.
- Check Tuning: Make sure the guitar is properly tuned using an accurate tuner.
- Adjust Saddle Position: Adjust the saddle position to ensure that the notes at the 12th fret match the open string notes.
- Professional Setup: Have a luthier set the intonation as part of a professional setup.
- String Gauge: Ensure you are using the appropriate string gauge for your instrument.
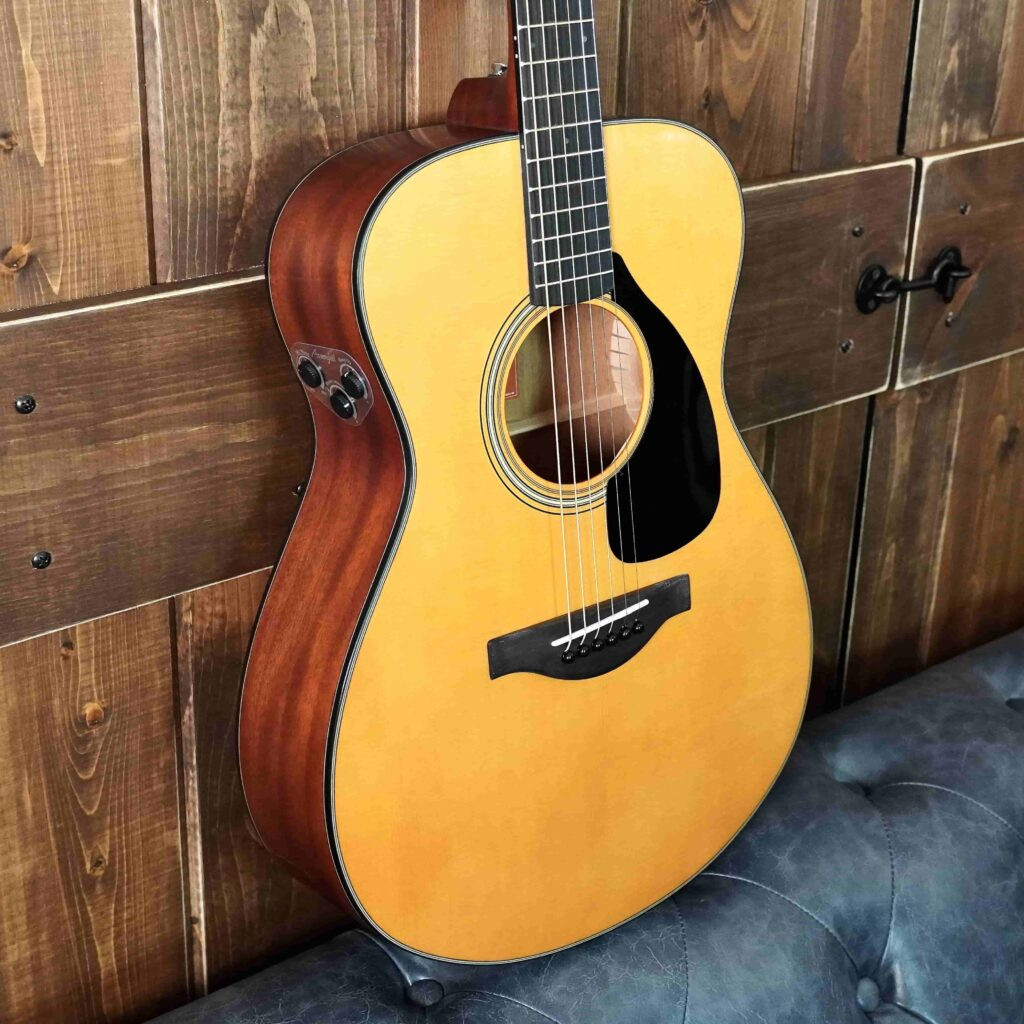 An acoustic guitar showing pickup controls.
10. Exploring Guitar Lessons and Community Support
Taking guitar lessons and joining a community of fellow guitarists can provide valuable support and guidance.
10.1. Benefits of Guitar Lessons
Guitar lessons can help you develop proper technique, learn new skills, and stay motivated.
- Personalized Instruction: A qualified guitar teacher can provide personalized instruction tailored to your needs and goals.
- Structured Learning: Guitar lessons can provide a structured learning path, helping you progress steadily.
- Feedback and Guidance: A teacher can provide valuable feedback and guidance, helping you correct mistakes and improve your technique.
- Motivation and Accountability: Guitar lessons can help you stay motivated and accountable, making it more likely that you will stick with it.
- Guitarplayers.net Lessons: We have partnered with top online guitar instructors to bring you affordable guitar lessons in a variety of styles.
10.2. Finding a Qualified Instructor
Finding a qualified guitar instructor is essential for ensuring that you receive the best possible instruction.
- Experience and Qualifications: Look for instructors with extensive experience and proper qualifications.
- Teaching Style: Choose an instructor whose teaching style matches your learning style.
- References: Ask for references from other students.
- Trial Lesson: Take a trial lesson to see if the instructor is a good fit for you.
- Guitarplayers.net Directory: Browse our directory of guitar teachers in the USA, including their qualifications and specialties.
10.3. Joining a Guitar Community
Joining a guitar community can provide valuable support, encouragement, and inspiration.
- Online Forums: Participate in online guitar forums, such as the guitarplayers.net forum, to ask questions, share tips, and connect with other guitarists.
- Local Groups: Join a local guitar club or jam session to meet other guitarists in person.
- Social Media: Follow guitar-related social media accounts to stay up-to-date on the latest news and trends.
- Concerts and Events: Attend guitar concerts and events to see professional guitarists perform and connect with other fans.
- Guitarplayers.net Community: Interact with other guitar players from all over the USA and the world, in our dedicated community forum.
By addressing these challenges and seeking support from qualified instructors and communities, you can overcome obstacles and achieve your musical goals. Visit guitarplayers.net to discover lessons, reviews, sheet music, and connect with fellow guitar players in the USA.
FAQ: Making Guitar Strings Easier to Press
1. Why are my guitar strings so hard to press down?
Your guitar strings might be hard to press down due to high action (the distance between the strings and the fretboard), heavy gauge strings, or improper neck relief. These factors require more finger strength.
2. How can I lower the action on my acoustic guitar?
You can lower the action by adjusting the saddle height (the piece that holds the strings on the bridge) or the nut (the piece at the headstock). Sanding down the saddle or adjusting the nut slots can reduce the string height.
3. What are the best guitar strings for beginners?
The best guitar strings for beginners are lighter gauge strings, such as extra light (0.010-0.047) or light (0.012-0.053). These strings are easier to press down and require less finger strength.
4. How does neck relief affect string playability?
Neck relief is the slight concave curve in the guitar’s neck. Proper neck relief allows the strings to vibrate freely without buzzing. If the neck is too straight or has a back-bow, the strings can be harder to press and may produce unwanted buzzing.
5. What is a truss rod, and how does it help?
A truss rod is a metal rod inside the guitar neck that counteracts the tension of the strings. Adjusting the truss rod can correct excessive or insufficient neck relief, improving playability.
6. Is a professional guitar setup worth it?
Yes, a professional guitar setup is worth it. A luthier can optimize all aspects of your guitar, including action, neck relief, intonation, and more, resulting in improved playability and tone.
7. How often should I change my guitar strings?
You should change your guitar strings every one to three months, depending on how often you play. Old strings can become corroded and lose their elasticity, making them harder to press down and affecting their tone.
8. Can ergonomic accessories help with guitar playability?
Yes, ergonomic accessories like comfortable guitar straps, finger exercisers, and seating aids can provide additional support and comfort, making it easier to play guitar for extended periods.
9. What are some exercises to improve finger strength for guitar?
Exercises like practicing scales, arpeggios, and chord progressions, using grip strengtheners, and stretching your fingers and hands can help build finger strength and dexterity.
10. Where can I find guitar lessons and community support?
You can find guitar lessons online or with a local instructor. Joining a guitar community, such as the guitarplayers.net forum, can provide valuable support, encouragement, and inspiration.
Visit guitarplayers.net today for a wealth of free resources, including lessons, reviews, and a vibrant community forum for players in the USA! Reach us at 1140 Boylston Street, Boston, MA 02215, United States or call +1 (617) 747-2261.