Changing your acoustic guitar strings might seem daunting at first, but it’s a fundamental skill every guitar player should master. Fresh strings can dramatically improve your guitar’s sound, making it brighter, clearer, and more resonant. This guide will walk you through each step of restringing your acoustic guitar, ensuring a smooth process and optimal playing experience.
Gather Your Tools
Before you begin, gather everything you’ll need. Having your tools ready will make the process much smoother and faster. Here’s what you’ll need:
- New Acoustic Guitar Strings: Choose your preferred gauge and material.
- String Winder (Optional but Recommended): This tool speeds up winding the strings around the tuning pegs.
- Wire Cutters: To trim excess string length.
- Peg Winder/Bridge Pin Puller (Often combined with string winder): To remove bridge pins easily.
- Guitar Cleaner and Polish: For cleaning your guitar while the strings are off.
- Lemon Oil (For Rosewood or Ebony Fretboards – Optional): ToCondition the fretboard wood.
- Soft Cloths: For cleaning and applying lemon oil.
Step-by-Step Guide to Restringing Your Acoustic Guitar
Follow these steps carefully, and you’ll have your acoustic guitar restrung and ready to play in no time.
Step 1: Remove the Old Strings
Start by removing the old strings. If they are very old and brittle, be careful not to break them sharply as they could snap back. Using a string winder can make loosening the strings much faster. Turn the tuning pegs to loosen each string until they are slack enough to remove from the tuning pegs and bridge.
Step 2: Remove the Bridge Pins and Old Strings from the Bridge
Acoustic guitars use bridge pins to hold the strings in place at the bridge. Use a bridge pin puller (often part of a string winder tool) to gently remove each pin. If you don’t have a puller, you can carefully use pliers, but be cautious not to damage the pins or the guitar’s bridge. Once the pins are removed, you can pull out the ball end of each string from the bridge. Discard the old strings responsibly.
Step 3: Clean Your Guitar
With the strings off, this is the perfect opportunity to clean your guitar. Dust and grime can accumulate in areas that are normally hard to reach, such as under the strings and around the bridge. Use a guitar cleaner and a soft cloth to wipe down the body, neck, and headstock.
Step 4: Condition Your Fretboard (Optional)
If your acoustic guitar has a rosewood or ebony fretboard, you can apply lemon oil to condition the wood. These darker woods can dry out over time, and lemon oil helps to moisturize them, preventing cracking and keeping the fretboard in good condition.
 Applying lemon oil to a rosewood fretboard of an acoustic guitar for conditioning.
Apply a few drops of lemon oil to a clean, soft cloth.
 Close-up of lemon oil drops being placed on a soft cloth for guitar fretboard maintenance.
Gently rub the lemon oil into the fretboard wood, working it up and down the neck. Don’t saturate the fretboard; a little oil goes a long way. Let the oil soak in for a few minutes, around 30 seconds to a minute, but not too long as you don’t want it to get sticky.
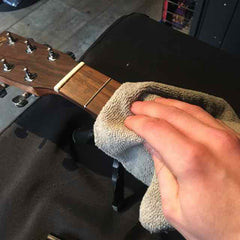 Detailed view of lemon oil being worked into the acoustic guitar fretboard with a cloth.
You can also lightly hydrate the bridge with lemon oil if it appears dry. However, be careful to avoid getting oil on the saddle, as this can cause the strings to slip and affect tuning stability. Remove the saddle before oiling the bridge if you are concerned.
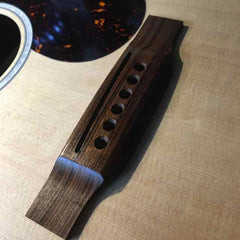 Hydrating the bridge of an acoustic guitar with lemon oil, ensuring saddle is avoided to prevent string slippage.
Step 5: Prepare Your New Strings
Open your new set of acoustic guitar strings. It’s helpful to lay them out in order before you start, noting the gauge and position they will occupy on the guitar (thickest to thinnest, low E to high e). Familiarize yourself with the string order to ensure you install them correctly.
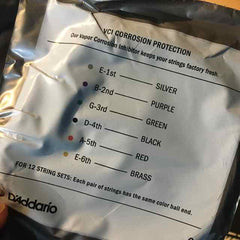 New acoustic guitar string set laid out to show correct order for restringing.
Before inserting the string into the bridge, create a slight bend, about 45 degrees, at the ball end of the string. This bend helps to seat the ball end correctly against the bridge plate inside the guitar, improving tuning stability and resonance.
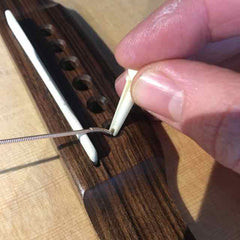 Close-up showing a 45-degree bend being applied to the ball end of a new acoustic guitar string.
Step 6: Install the Strings at the Bridge
Insert the ball end of the first string into the corresponding hole in the bridge. Make sure the bent part of the string is pointing towards the soundhole. Push the bridge pin firmly into place to secure the string. Ensure that the string tail sits in the groove of the bridge pin and that this groove is facing towards the neck of the guitar. This ensures proper string alignment and prevents buzzing.
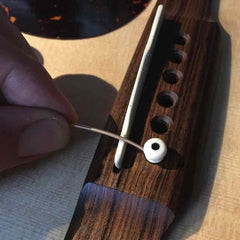 Installing a new acoustic guitar string at the bridge, showing correct bridge pin insertion.
Repeat this process for all six strings, ensuring each string is correctly placed and secured with a bridge pin. After installing all the strings at the bridge, gently pull on the tail of each string to confirm that the ball end is properly seated against the bridge plate inside the guitar body.
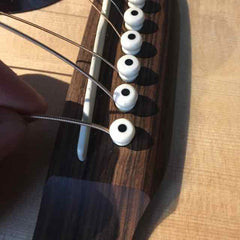 All six new strings installed at the bridge of an acoustic guitar with bridge pins in place.
Step 7: Thread Strings Through Tuning Pegs
Before threading the strings, make sure the holes in the tuning pegs are aligned straight down the neck. This will make string insertion easier.
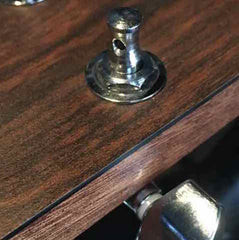 Tuning pegs of an acoustic guitar aligned straight down the neck in preparation for string threading.
Guide the string over the saddle, across the nut, and then thread it through the hole in the corresponding tuning peg.
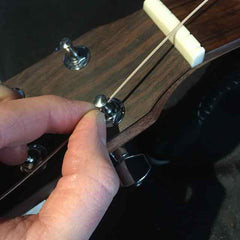 Threading a new acoustic guitar string through the tuning peg hole after passing over the nut and saddle.
Pull the string taut and measure about two tuning pegs’ distance past the peg you are stringing. This extra length will provide enough string to wrap around the tuning peg for good tuning stability.
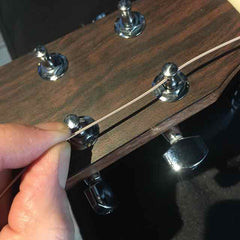 Measuring excess string length against tuning pegs for winding around the post.
Pull the measured excess string back through the tuning peg hole. Begin winding the tuning peg counter-clockwise (for the lower strings E, A, D and G, and clockwise for the higher strings B and e), ensuring you maintain tension on the string so that your measurement is retained. The string coming from the nut should always be on the inside of the tuning peg post.
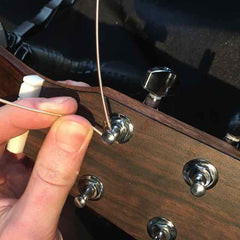 Winding a new acoustic guitar string around the tuning peg post in a counter-clockwise direction.
Make sure that the new string wraps go below the previous wraps, effectively pushing them downwards. This technique helps to lock the string in place and further enhances tuning stability.
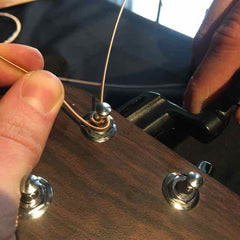 Close-up of string wraps on a tuning peg, showing new wraps below previous ones for stability.
Start tightening the string until it has a slight amount of tension. A couple of winds around the tuning post at this stage is usually sufficient.
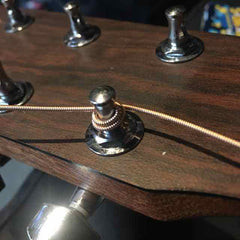 Applying initial tension to a new acoustic guitar string with a few winds around the tuning peg.
Step 8: Trim Excess String Length
Use wire cutters to trim off the excess string beyond the tuning peg. Cut as close to the tuning peg as possible to keep things neat and prevent the sharp ends from poking you.
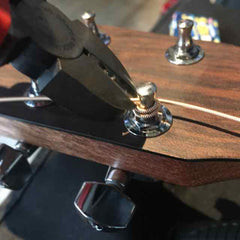 Trimming excess acoustic guitar string length close to the tuning peg with wire cutters.
Step 9: Repeat for Remaining Strings and Tune Up
Repeat steps 6-8 for the remaining five strings, working from the thickest string to the thinnest.
 All six new acoustic guitar strings installed and trimmed at the tuning pegs.
Once all the strings are installed, begin to bring them up to pitch. Tune the strings gradually, moving back and forth between each string. This helps to distribute the tension evenly across the guitar neck and prevent warping.
Using a clip-on tuner makes this process easier and more accurate.
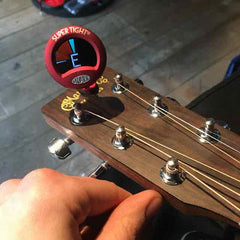 Tuning new acoustic guitar strings using a clip-on tuner for accurate pitch adjustment.
Step 10: Stretch the Strings
New strings need to be stretched to hold their tuning properly. Gently stretch each string by pulling it away from the fretboard in the middle, then retune. Repeat this process several times until the strings hold their pitch consistently after stretching. This step is crucial to avoid constant retuning while playing.
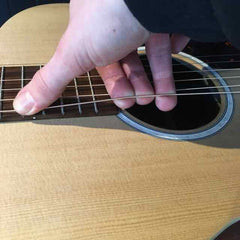 Stretching new acoustic guitar strings to improve tuning stability and reduce retuning frequency.
Final Thoughts
Congratulations! You’ve successfully restrung your acoustic guitar. With fresh strings, your guitar will sound its best, and you’re ready to enjoy playing. Regular string changes, along with proper guitar maintenance, will keep your instrument in top condition and ensure a great playing experience for years to come. Now, grab your pick and play some music!


