
As a guitar tech at Strange Guitar Works, neck resets are a bread-and-butter job. Almost every acoustic guitar will need a neck reset at some point in its life. The constant tension from the strings eventually pulls the neck forward, altering the neck angle and requiring adjustment at the neck-body joint. Over the years, I’ve become quite proficient at this common repair. However, this past week presented a unique and exciting challenge: performing a neck reset on a 1934 National Dobro.
This resonator guitar, affectionately nicknamed “Rusty” by its owner, John Lisi (a phenomenal slide guitar player you should definitely check out at johnlisi.com), was practically unplayable in standard tuning. The action was incredibly high due to a severely under-set neck angle and a significant neck bow. John’s goal was to transform Rusty into a high-performance instrument, and it was clear the guitar wasn’t currently up to the task. His only instruction to me was simple: “make it awesome.”
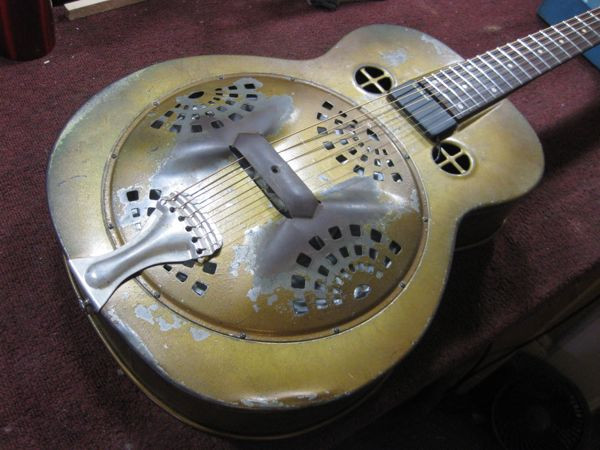
Rusty arrived at the shop stringless and partially disassembled:
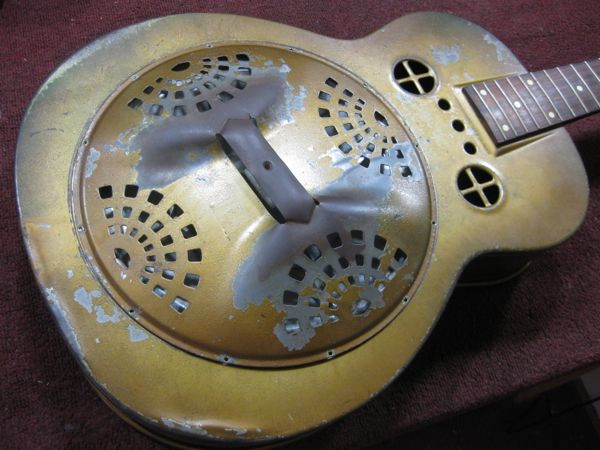 Rusty's arrival in pieces, showcasing the disassembled state of the vintage National resonator guitar
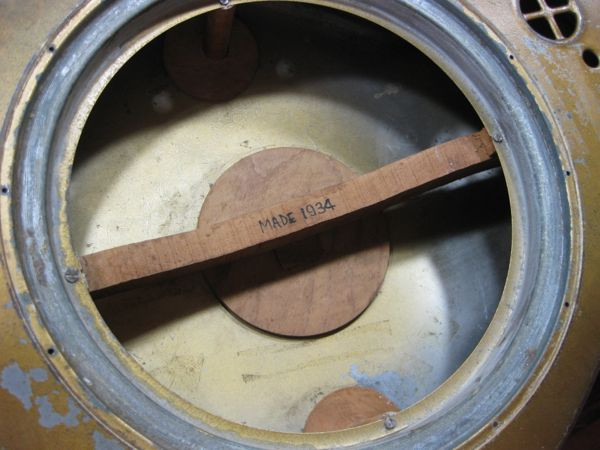
My first step was to string it up to properly assess the situation. Even without strings, the neck looked problematic, but with a set of 12-gauge strings, the issue became dramatically clear. While capturing the neck bow in a photograph is difficult, suffice to say it was extreme. Before disassembling the neck, I carefully took measurements and inspected the guitar’s internal structure to anticipate any unforeseen complications.
Resonator guitars utilize a different neck attachment system compared to standard acoustic guitars. Acoustic guitars typically employ a dovetail joint, a sophisticated and elegant method of joining the neck and body. In contrast, resonator guitars are constructed with the neck screwed into a neck block. This is further stabilized by a long crossbar that applies pressure against the back and tail of the instrument. The neck angle in a resonator guitar is determined by the neck heel and crucially, by the position of this crossbar relative to the guitar’s back and top. This might sound a bit complex initially, but hopefully, the following images and explanations will clarify the mechanics.
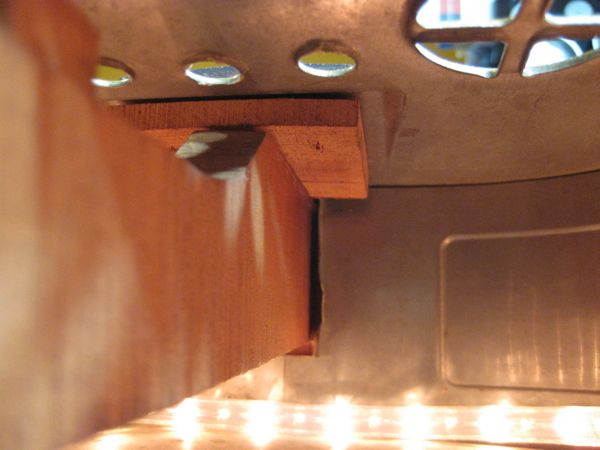
Here’s a view of the crossbar inside the resonator body, showing round shims positioned underneath it to press against the back:
 Crossbar with shims pressing against the back of the National resonator guitar, illustrating the neck angle adjustment mechanism
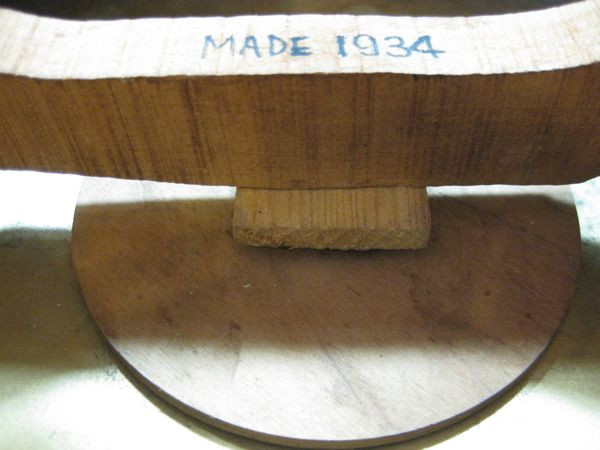
The crossbar also interacts with the top and tail block of the guitar:
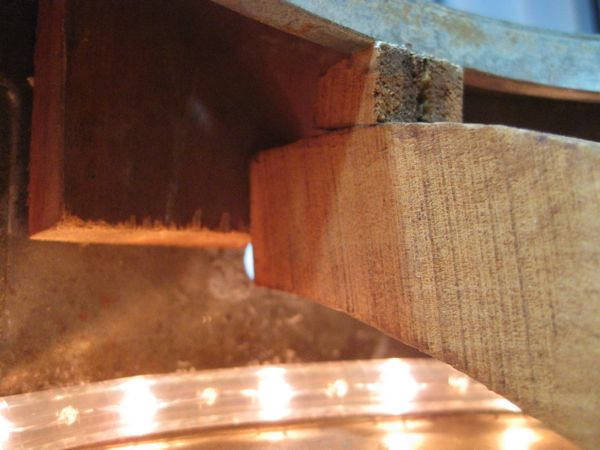 Crossbar positioned against the top and tail block of the resonator guitar, showing its role in structural integrity
And here’s a closer look at the crossbar attaching to the neck and the neck block where the fingerboard is screwed in:
 Crossbar attachment to the neck and neck block of the National resonator guitar, detailing the connection points
The initial hurdle in removing the neck was accessing the screws that secured the fingerboard. These screws were concealed under five dot inlays. Ordinarily, I might simply drill these out and replace them. However, given that this was a vintage instrument with original ivory dots, a less destructive approach was necessary. I carefully softened the hide glue holding the dots using heat and moisture, then delicately pried them out using a thin razor blade:
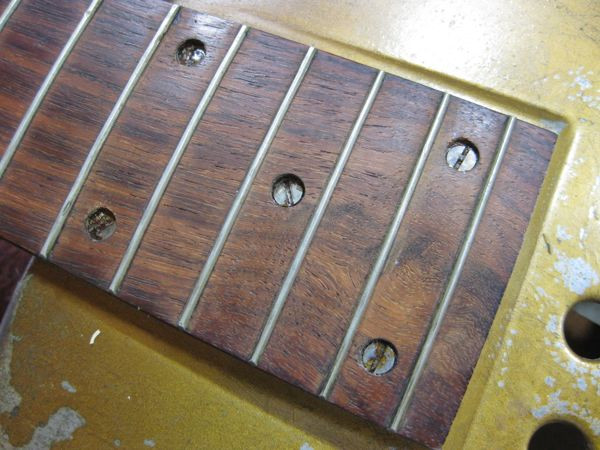 Close-up of removed ivory dot inlays from the vintage resonator guitar
With the dots removed, detaching the neck became straightforward. I simply unscrewed the fingerboard and the crossbar, and then carefully slid the entire neck assembly out of the body:
 Close-up of the resonator guitar body with the neck removed, showing the neck joint
The real challenge now became apparent. The neck lacked a truss rod and exhibited excessive relief (upward bow). Compounding this, the neck angle was significantly under-set. My task was to straighten the neck, incorporate the correct amount of relief, and simultaneously achieve the proper neck angle. While measurements and calculations would serve as valuable guides, achieving precise results would largely depend on my experience and intuition. Fortunately, my extensive experience with vintage pre-truss rod Martin neck resets was directly applicable and crucial for successfully tackling this resonator guitar neck reset.
Given the severity of the neck warp, I employed a series of heat presses to gradually bring the neck to a reasonably straight condition. Straightening the neck as much as possible before refretting minimizes wood removal when planing the fretboard, preserving the original wood as much as possible.
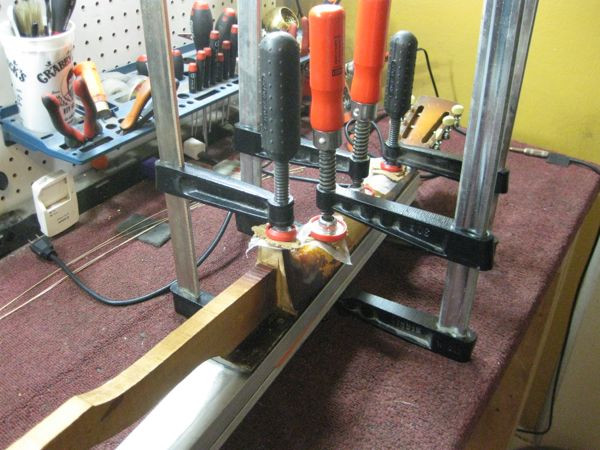 Heat pressing the neck of the vintage resonator guitar to correct warping
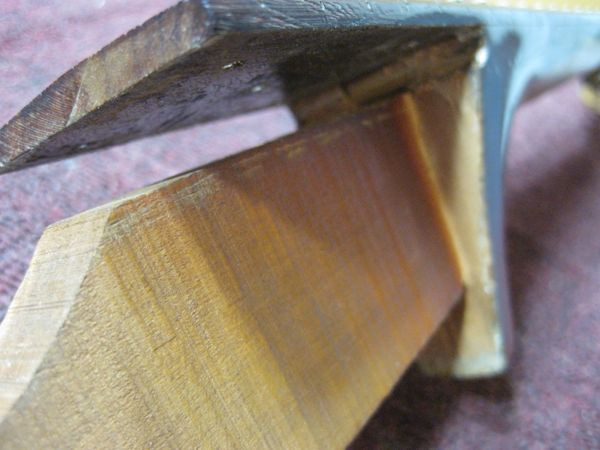
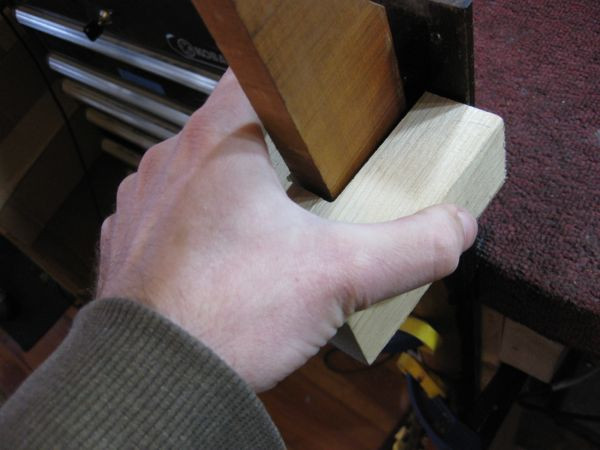
Once the neck was reasonably straight, the next step was reshaping the heel to correct the neck angle. I began by carefully carving away the inner portions of the heel. This shaping ensures the heel edges conform perfectly to the rounded shoulders of the resonator guitar body, creating a snug and stable fit.
 Reshaping the neck heel of the resonator guitar to adjust the neck angle
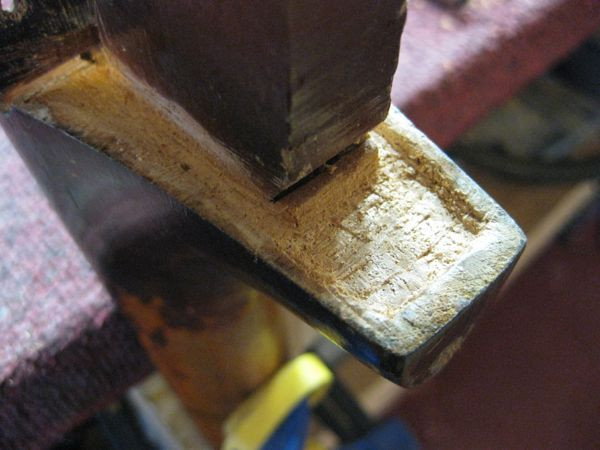
This was the critical stage where measurements and intuition had to work in concert. I decided to remove 2mm from the bottom edge of the heel. This adjustment would significantly increase the neck angle, intentionally over-setting it slightly. This decision was based on several strategic considerations: a slightly over-set neck angle necessitates a taller saddle, which in turn increases the string break angle over the saddle towards the tailpiece. This improves string stability and reduces unwanted buzzing. Additionally, it brings the strings closer to the player’s hand under the resonator cover plate, providing a feel more akin to a standard guitar, which is often preferred by players transitioning to resonators. Furthermore, increased downward pressure on the resonator cone can potentially enhance projection and volume. Finally, this slight over-set anticipates future neck movement. As the neck inevitably pulls forward over decades, the action can be easily adjusted downwards by simply lowering the saddle, extending the lifespan of the optimized setup.
I marked a line 2mm back from the heel’s edge, created a custom sanding block to match the angle, and meticulously sanded away the marked wood:
 Sanding the neck heel of the resonator guitar using a custom block for accurate angle adjustment
With the neck heel reshaped, I reinstalled the neck and repositioned the crossbar. Due to the altered neck angle, the original large shims where the crossbar pressed against the top and tail block were now too large, while the shims at the back were no longer sufficient to firmly contact the bar. I removed the top shims and fabricated a new, appropriately sized block for the back. This ensured the crossbar was firmly in place, effectively stabilizing the neck at the corrected angle.
 Crossbar with new block properly positioned in the resonator guitar body
As you can see, performing a neck reset on a National Resonator Guitar leans more towards carpentry than traditional luthiery techniques! It’s a fascinating and rewarding process.
I tested the neck angle, and it was remarkably close to my target. However, final confirmation would only come after refretting the neck. This process involves planing the fingerboard to remove the remaining bow and then building in the correct amount of relief during fret installation. There was a slight element of suspense, as adjustments are less forgiving without a truss rod. But thankfully, my experience and intuition paid off. I absolutely nailed the neck angle! Success!
I refretted the guitar with durable stainless steel fretwire, crafted a new bone nut, shaped a rosewood saddle, and installed a Lace Ultra Slim humbucker pickup (more details at Lace Ultra Slim humbucker). Finally, I performed a complete setup. The transformation was incredible. From virtually unplayable, Rusty had become a blues shred machine! The final action was set to a comfortable 1.5mm at the 12th fret, John’s preferred specification. Every note rings out clearly, and the guitar now truly sings! Fantastic!
 Full view of the restored National resonator guitar, ready for stage and studio
John Lisi and his band, Deltafunk, are scheduled to perform at Jazzfest this year, and I’m really hoping to see old Rusty take the stage with him.