
A guitar strap is more than just an accessory; it’s an essential piece of gear that unlocks your playing potential. Whether you’re performing on stage, jamming with friends, or practicing in your room, a guitar strap provides the freedom to play your electric or acoustic guitar comfortably in any position. It’s the primary point of contact between you and your instrument (after the guitar’s body itself), making correct installation crucial for both comfort and playing ergonomics.
This guide will walk you through the process of attaching a guitar strap correctly, ensuring you’re ready to play with confidence and comfort in no time.
Understanding Guitar Strap Attachment Methods
Guitars vary in their design, especially when it comes to strap attachment points. The most common setups involve either two strap pins or a single pin combined with a headstock tie. Let’s explore each method in detail.
Method 1: Attaching a Strap to a Guitar with Two Strap Pins
Strap pins, often called strap buttons, are the small, rounded metal knobs that protrude from the guitar body. These are designed to secure your strap firmly to the instrument. Electric guitars and basses almost universally feature two strap pins, and many modern acoustic guitars are also equipped with this system for its security and balance.
Typically, on a two-pin guitar, you’ll find one pin at the lower bout (the bottom of the guitar body). The second pin’s location can vary; it’s commonly found on the upper shoulder of the guitar body or sometimes at the base of the neck heel where it joins the body.
Here’s a step-by-step guide to attaching your strap to a guitar with two pins:
-
Identify the Strap Orientation: Guitar straps aren’t always symmetrical. Many are designed with a specific top and bottom. Look for features that indicate orientation.
- Sliding Buckles: If your strap has a plastic sliding buckle for length adjustment, the end with two layers of material or the finished end is usually intended for the bottom pin of the guitar.
- Tapered Ends: Often, one end of the strap will be slightly thinner than the other. The thinner end is generally designed for the bottom pin.
- Logos and Designs: Decorative elements or brand logos are usually placed on the end that attaches near the guitar’s neck or upper body.
-
Attach the Strap to the Bottom Pin: Take one end of your guitar strap and locate the buttonhole or slit at the end. Slide this hole over the bottom strap pin of your guitar. Ensure the strap is securely fitted around the pin. You might need to apply a little pressure to get it snugly in place.
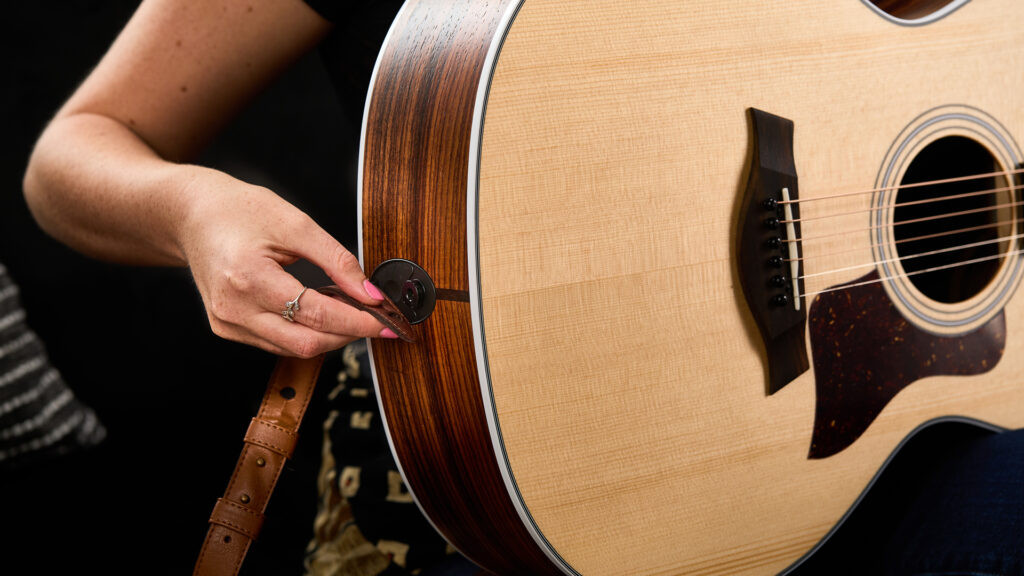 Guitar strap being attached to the bottom strap pin
 -
Attach the Strap to the Top Pin: Take the remaining end of the strap and repeat the process, fitting the buttonhole or slit over the second strap pin located near the neck or on the upper shoulder of the guitar. Again, ensure a snug and secure fit.
 Guitar strap being attached to the top strap pin
 -
Perform a Security Check: Before entrusting your guitar to the strap, gently tug on both ends of the strap where they connect to the pins. This test confirms that the strap is securely fastened and won’t slip off during playing. It’s a quick but crucial step to prevent accidental drops.
Even with two strap pins, some players prefer the weight distribution offered by the one-pin method, especially on acoustic guitars. Let’s look at that next.
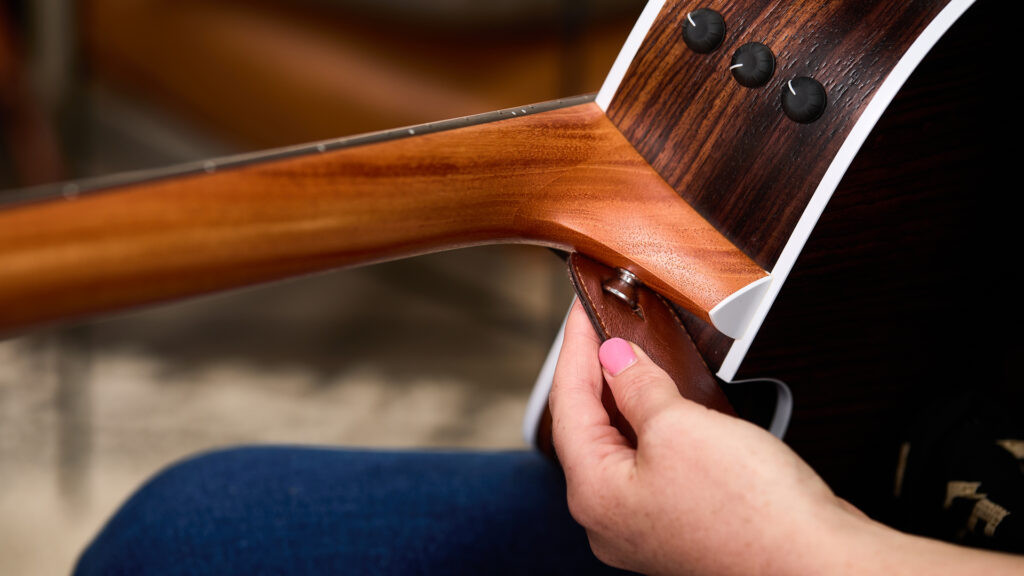
Method 2: Using a Strap with a Single Strap Pin (and Headstock Attachment)
Many traditional acoustic guitars come with only one strap pin, located at the guitar’s bottom. While you can install a second pin, the classic method for these guitars involves using the single bottom pin in conjunction with a tie-on method at the headstock. This method is straightforward and doesn’t require any modifications to your guitar.
To attach a strap to a guitar with a single pin, follow these steps:
-
Start with the Bottom Pin: Begin by attaching one end of your strap to the bottom strap pin, just as described in step 1 and 2 of the two-pin method.
-
Prepare the Headstock Attachment: The other end of your strap will need to be secured to the guitar’s headstock. This is usually done using a piece of leather or lace, or a specialized strap adapter. Many straps actually come with a piece of leather or sturdy lace specifically for this purpose. A strap adapter is a purpose-made accessory that offers a more refined and sometimes more secure headstock attachment.
-
Thread the Lace or Adapter: Take the lace or strap adapter and thread it through the buttonhole at the free end of your guitar strap.
-
Secure to the Headstock: Now, carefully thread the lace or adapter underneath the guitar strings, just above the nut (the point where the strings pass from the headstock to the fretboard). Position it between the tuning pegs.
- Using Lace: If you’re using lace, bring the two ends together and tie a secure double knot. Ensure the knot is tight and won’t come undone easily.
- Using a Strap Adapter: If you’re using a strap adapter, follow the manufacturer’s instructions to secure it around the headstock. Typically, this involves looping it around and fastening it with a provided buckle or pin.
-
Check for Balance and Security: Once attached, test the strap’s security by gently tugging on it. Also, observe how the guitar hangs. Headstock attachment shifts the guitar’s weight distribution compared to a two-pin system.
You’ll likely notice that a headstock-attached strap makes the guitar feel more balanced towards the center of your body. In contrast, two-pin systems can sometimes cause the guitar to feel like it’s pulling slightly downwards towards the lower bout. Some players prefer the centered balance of headstock attachment even on guitars with two pins – feel free to experiment to find your preference.
Adjusting Your Guitar Strap for Optimal Playing Comfort
Simply attaching your strap is only the first step. Adjusting the strap to the correct length is crucial for playing comfort and proper technique. A well-adjusted strap allows you to play without straining your wrists or shoulders.
The ideal strap length is largely a matter of personal preference and playing style, but ergonomic principles should guide your adjustment. Generally, aim for a strap length that allows you to play chords and notes without excessively bending your wrist when standing. Maintaining a relaxed wrist and fret hand is key to preventing strain and potential injuries over time.
Here’s how to adjust your strap length:
-
Straps with Sliding Buckles: Many modern straps, especially those made of nylon or similar materials, use a plastic sliding buckle for easy adjustments.
- To Lengthen: Slide the buckle away from the guitar’s neck and towards the lower bout. This increases the length of the strap.
- To Shorten: Slide the buckle towards the guitar’s neck. This decreases the strap length.
You can usually make these adjustments while the strap is still attached to your guitar, allowing for quick, on-the-fly changes.
-
Leather and Suede Straps (Two-Piece Adjustment): Traditional leather and suede straps often use a two-piece system for adjustment. These straps require detaching one piece from the other to change the length.
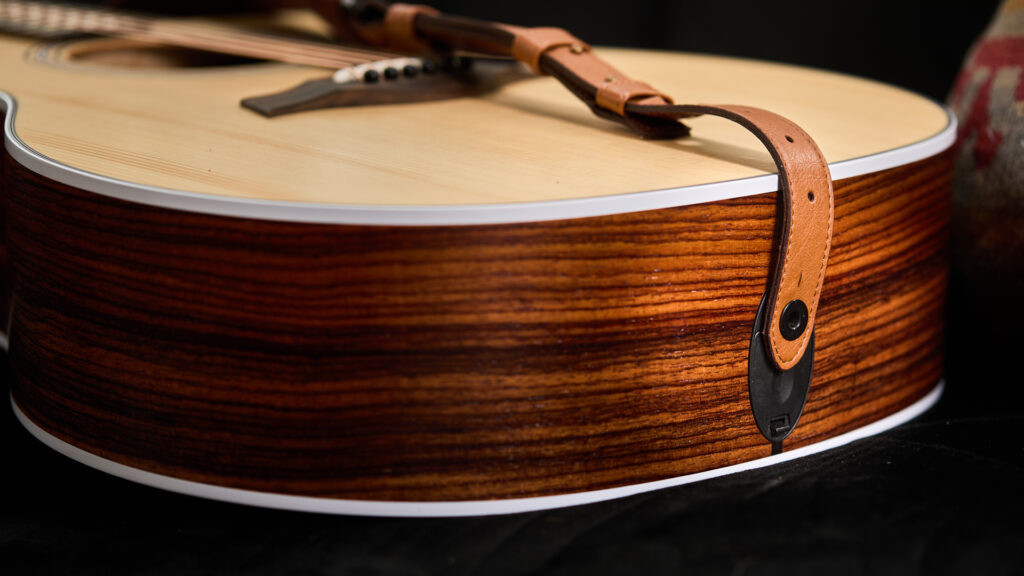 Two piece leather guitar strap adjustment
- Detach the Thin Piece: Locate where the thinner adjustment piece is threaded through the wider main strap piece and carefully detach it.
- Select a New Slit: The wider strap piece will have a series of slits or holes designed for length adjustment. Choose a different slit to change the length.
- Re-thread and Secure: Thread the thin piece back through the chosen slit, going from the underside of the strap upwards. Pull it tight to secure. Then, weave it back through itself by passing it through an adjacent slit and then through at least one more slit as it travels towards the bottom strap button.
- Test and Refine: Reattach the strap to your guitar and test the new length. Repeat the process, experimenting with different slits until you find the perfect height for your playing style.
Enhancing Security: The Role of Strap Locks
Once you’ve found your ideal strap length, consider adding strap locks to your setup. Guitar strap locks are invaluable accessories that significantly reduce the risk of your strap accidentally detaching from the strap pins, potentially saving your guitar from a damaging fall.
Strap locks replace your guitar’s existing strap buttons with a locking mechanism. The strap end is then modified to securely clip onto these locking buttons. Various strap lock systems are available, offering different designs and levels of security. Exploring different types and understanding how to install them is a worthwhile step for any guitarist, especially those who perform or move around a lot while playing.
Choosing the Right Guitar Strap for Your Needs and Style
Knowing how to put on and adjust your strap is essential, but selecting the right strap in the first place is equally important. With a vast array of materials, widths, padding options, and styles available, choosing the right guitar strap becomes a matter of both comfort and personal expression.
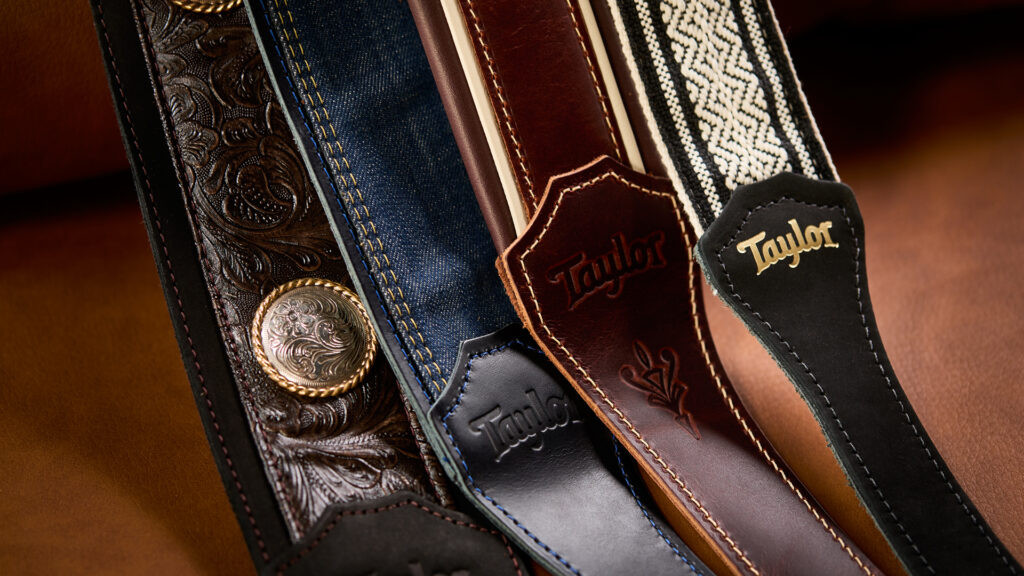 Variety of guitar strap materials
Here are key factors to consider when choosing a guitar strap:
-
Material: The material of your guitar strap impacts its durability, comfort, and price. Common materials include:
- Leather: Durable, classic look, often padded for comfort, can be pricier.
- Vegan Leather: Ethical alternative to leather, offering similar look and feel, varying levels of durability.
- Suede: Soft, comfortable, provides good grip, can be less durable than leather.
- Denim & Cotton: Affordable, lightweight, breathable, comfortable for long sessions, may wear out faster than leather or suede.
Regardless of the main strap material, the ends that attach to the strap pins are typically made of leather or suede for a secure and snug fit.
While material choice is largely personal, certain materials are traditionally associated with different guitar types or genres. Leather and suede often complement acoustic guitars, while cotton straps are frequently seen with electric guitars. However, these are just general trends, and personal preference should always be the deciding factor.
-
Padding: For longer playing sessions or heavier guitars, padding can significantly enhance comfort. Padded straps, often found in leather and suede options, incorporate a layer of foam or similar material to cushion your shoulder and neck. While padding adds a bit of bulk and potentially slight extra weight, the comfort benefits are often worth it.
-
Width: Strap width affects how the guitar’s weight is distributed across your shoulder.
- Narrower Straps: (around 2 inches or less) are streamlined and lightweight but concentrate the guitar’s weight on a smaller area, potentially leading to discomfort over time, especially with heavier guitars.
- Wider Straps: (2.5 to 3 inches or more) distribute weight more evenly across your shoulder, offering greater comfort, particularly for players who stand for extended periods. Wider straps are often preferred for heavier guitars like Les Pauls or basses.
-
Aesthetics: Your guitar strap is also an opportunity to express your personal style. Straps come in countless colors, patterns, and designs. From simple, functional cotton straps to elaborately decorated leather straps with embroidery or metal accents (“conchos”), you can find a strap that matches your guitar’s look and your personal taste.
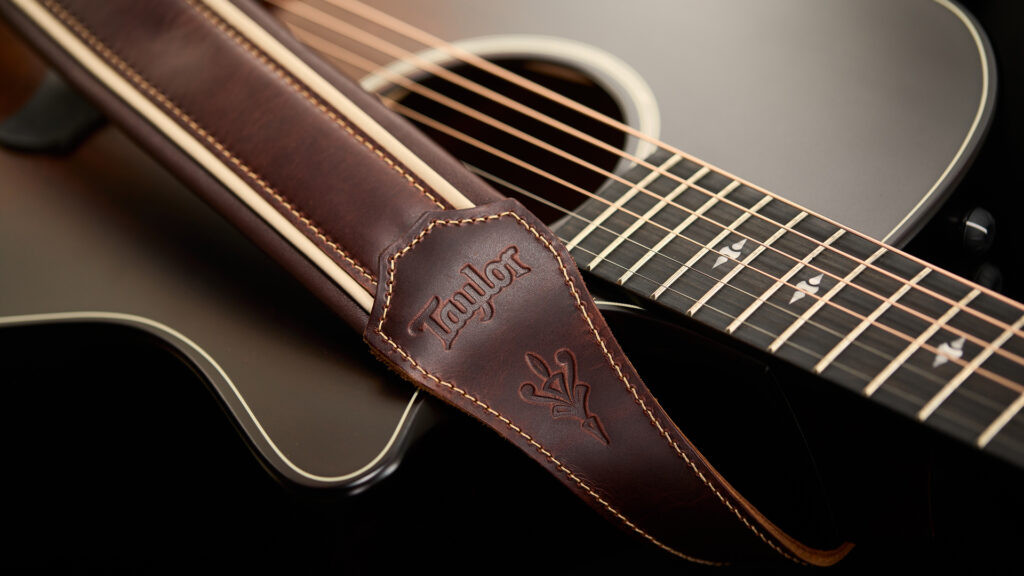 Brown leather guitar strap
Consider whether you want a strap that contrasts with your guitar for a bold statement or one that complements its finish for a more subtle, cohesive look. Ultimately, choose a strap that you find visually appealing and that reflects your personality as a musician.
Get Strapped In and Start Playing!
A guitar strap is an indispensable tool for any guitarist. It enables you to play comfortably and expressively in any setting, and it’s a reflection of your individual style. A great strap should be both comfortable and aesthetically pleasing – a philosophy that guides the design of high-quality guitar straps.
With your guitar securely strapped on, you’re now ready to explore other essential guitar skills. Consider learning how to properly hold a guitar pick or mastering the art of tuning your acoustic guitar to further enhance your playing journey.