
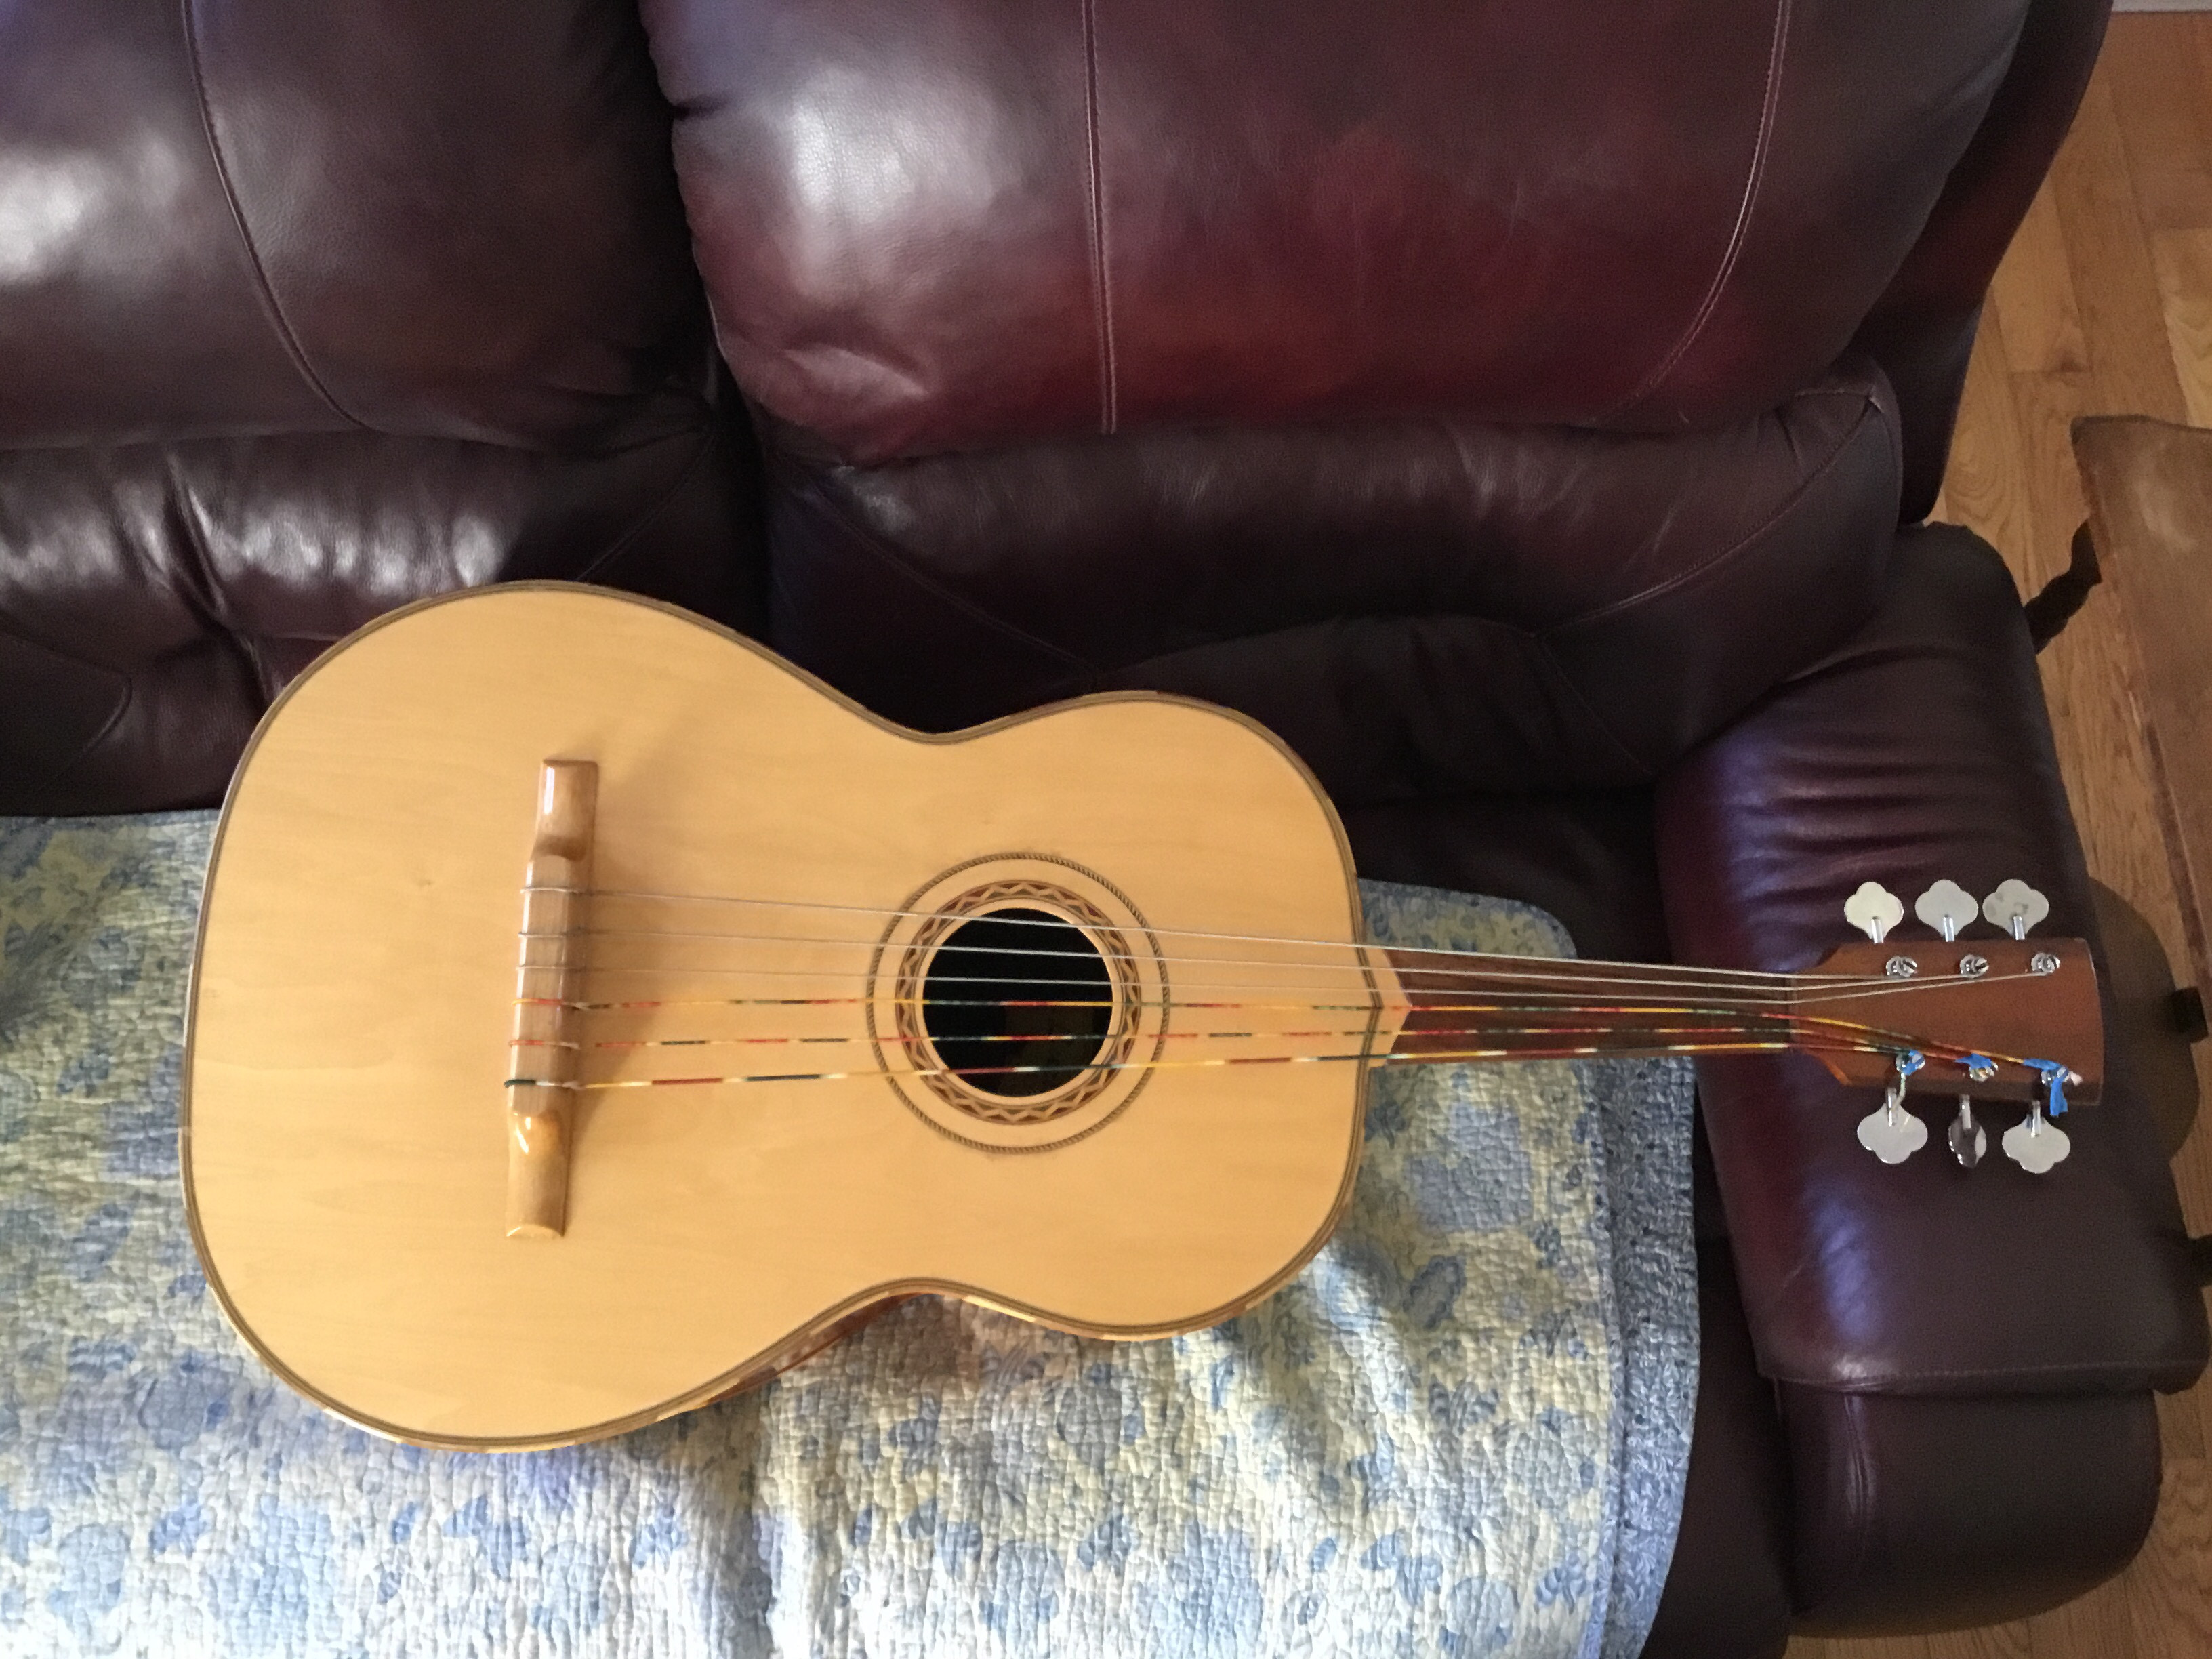
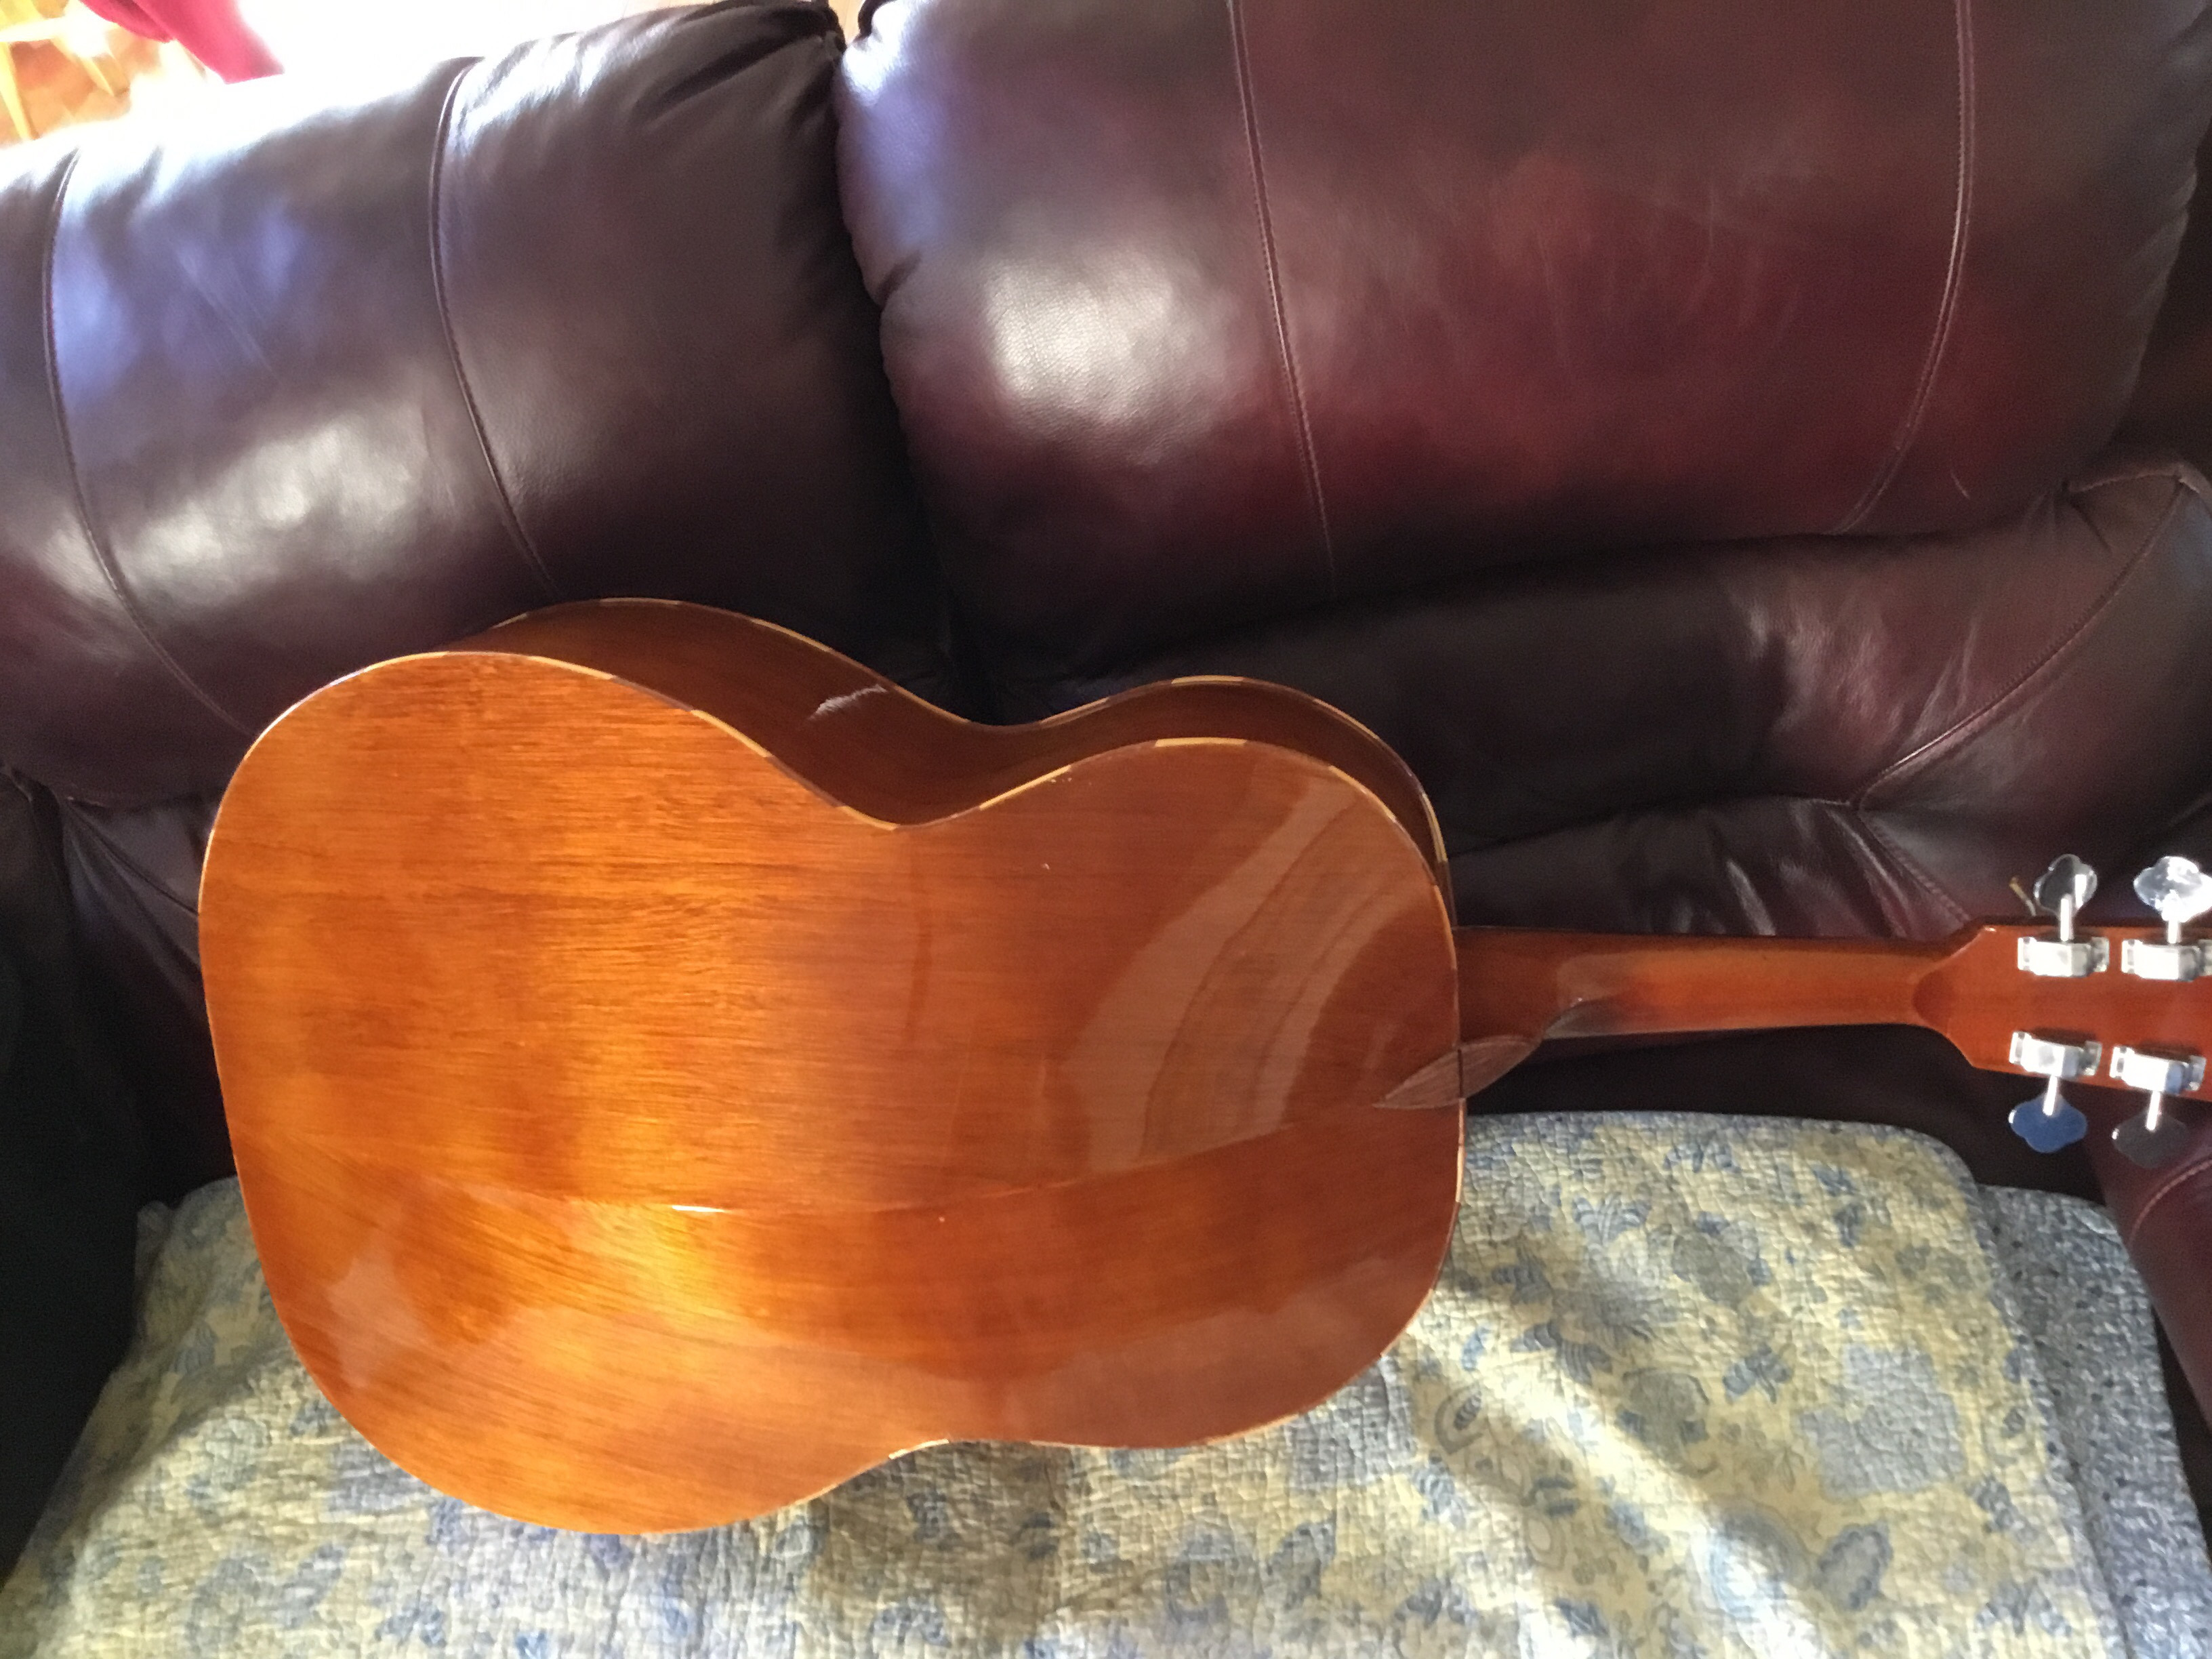
Occasionally, extraordinary instruments grace the workshop at Wimberly Guitar & Luthiery. Recently, a magnificent Guitarron, the heart and soul of Mariachi bands, found its way in for some much-needed care. This colossal acoustic six-string bass, tuned A1, D2, G2, C3, E3, A2 – mirroring guitar intervals but starting from a low A – shares its tuning principle with a guitar. However, as we soon discovered, the similarities largely end there.
 Close-up of a Guitarron showing its large size and six strings
 Full view of the Guitarron leaning against a wall in the workshop, highlighting its proportions
The story of this Guitarron’s arrival begins at a local farm’s weekend barn sale. Passing by regularly, we’d often mused about stopping in. Finally, curiosity won, and we explored the array of items in the farm buildings. Drawn as always to anything guitar-related, a large, guitar-shaped sign caught my eye inside one building. Beside it stood Mitch, the owner. “How much for the sign?” I immediately asked. Mitch chuckled, “Not for sale, nothing in here is.” He explained his wife ran the sale, and this was his workshop space. This sparked a conversation about guitars. Mentioning my profession as a luthier, Mitch revealed he owned a Guitarron in need of repair. He had acquired it broken, recognizing its unique charm, hoping to find someone to restore it. Discovering we were neighbors, he handed me his card, suggesting I contact him about the Guitarron. Naturally, I followed up. A visit later that week to examine the instrument revealed the extent of the damage. It appeared to have suffered a significant impact, with the top and back almost completely detached. A crack near the neck joint and a separating back seam added to the list of woes.
“Think you can fix this?” Mitch inquired, hopeful yet uncertain.
“Yup,” I replied confidently. And with that, the Guitarron repair project commenced.
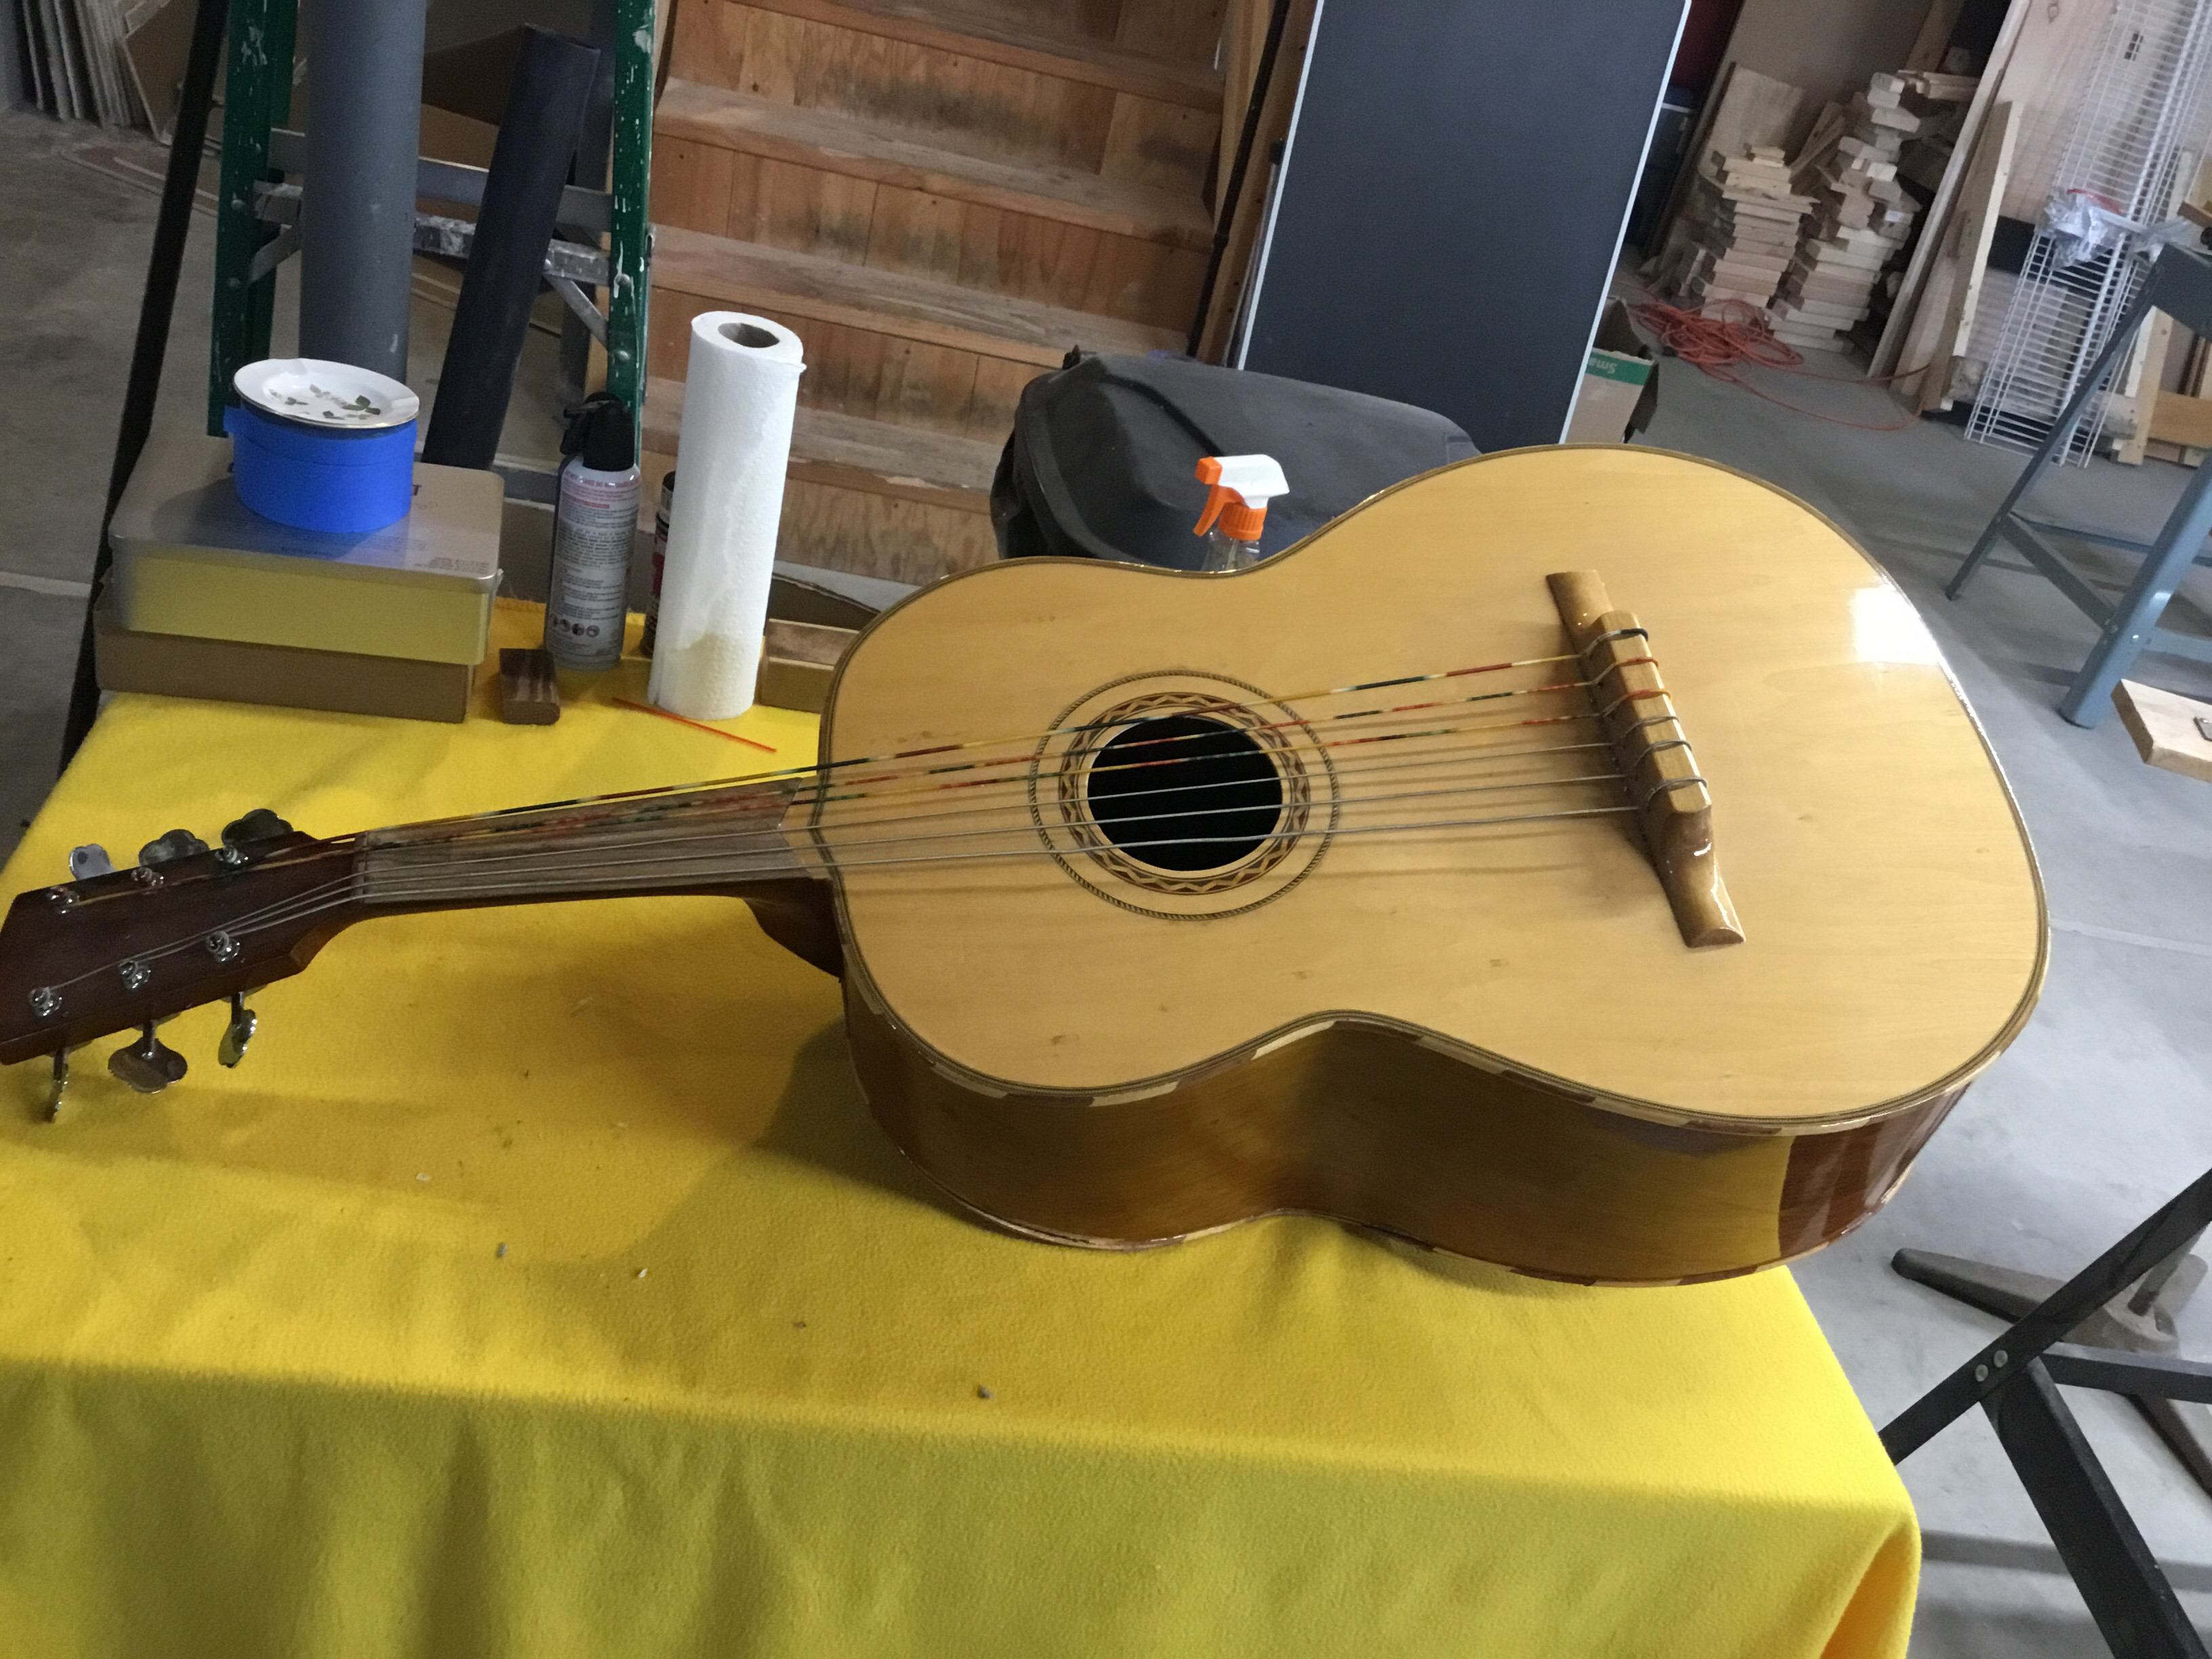 Guitarron lying on a workbench, showcasing the separated top and back, ready for repair
Assessing the Damage and Preparing for Repair
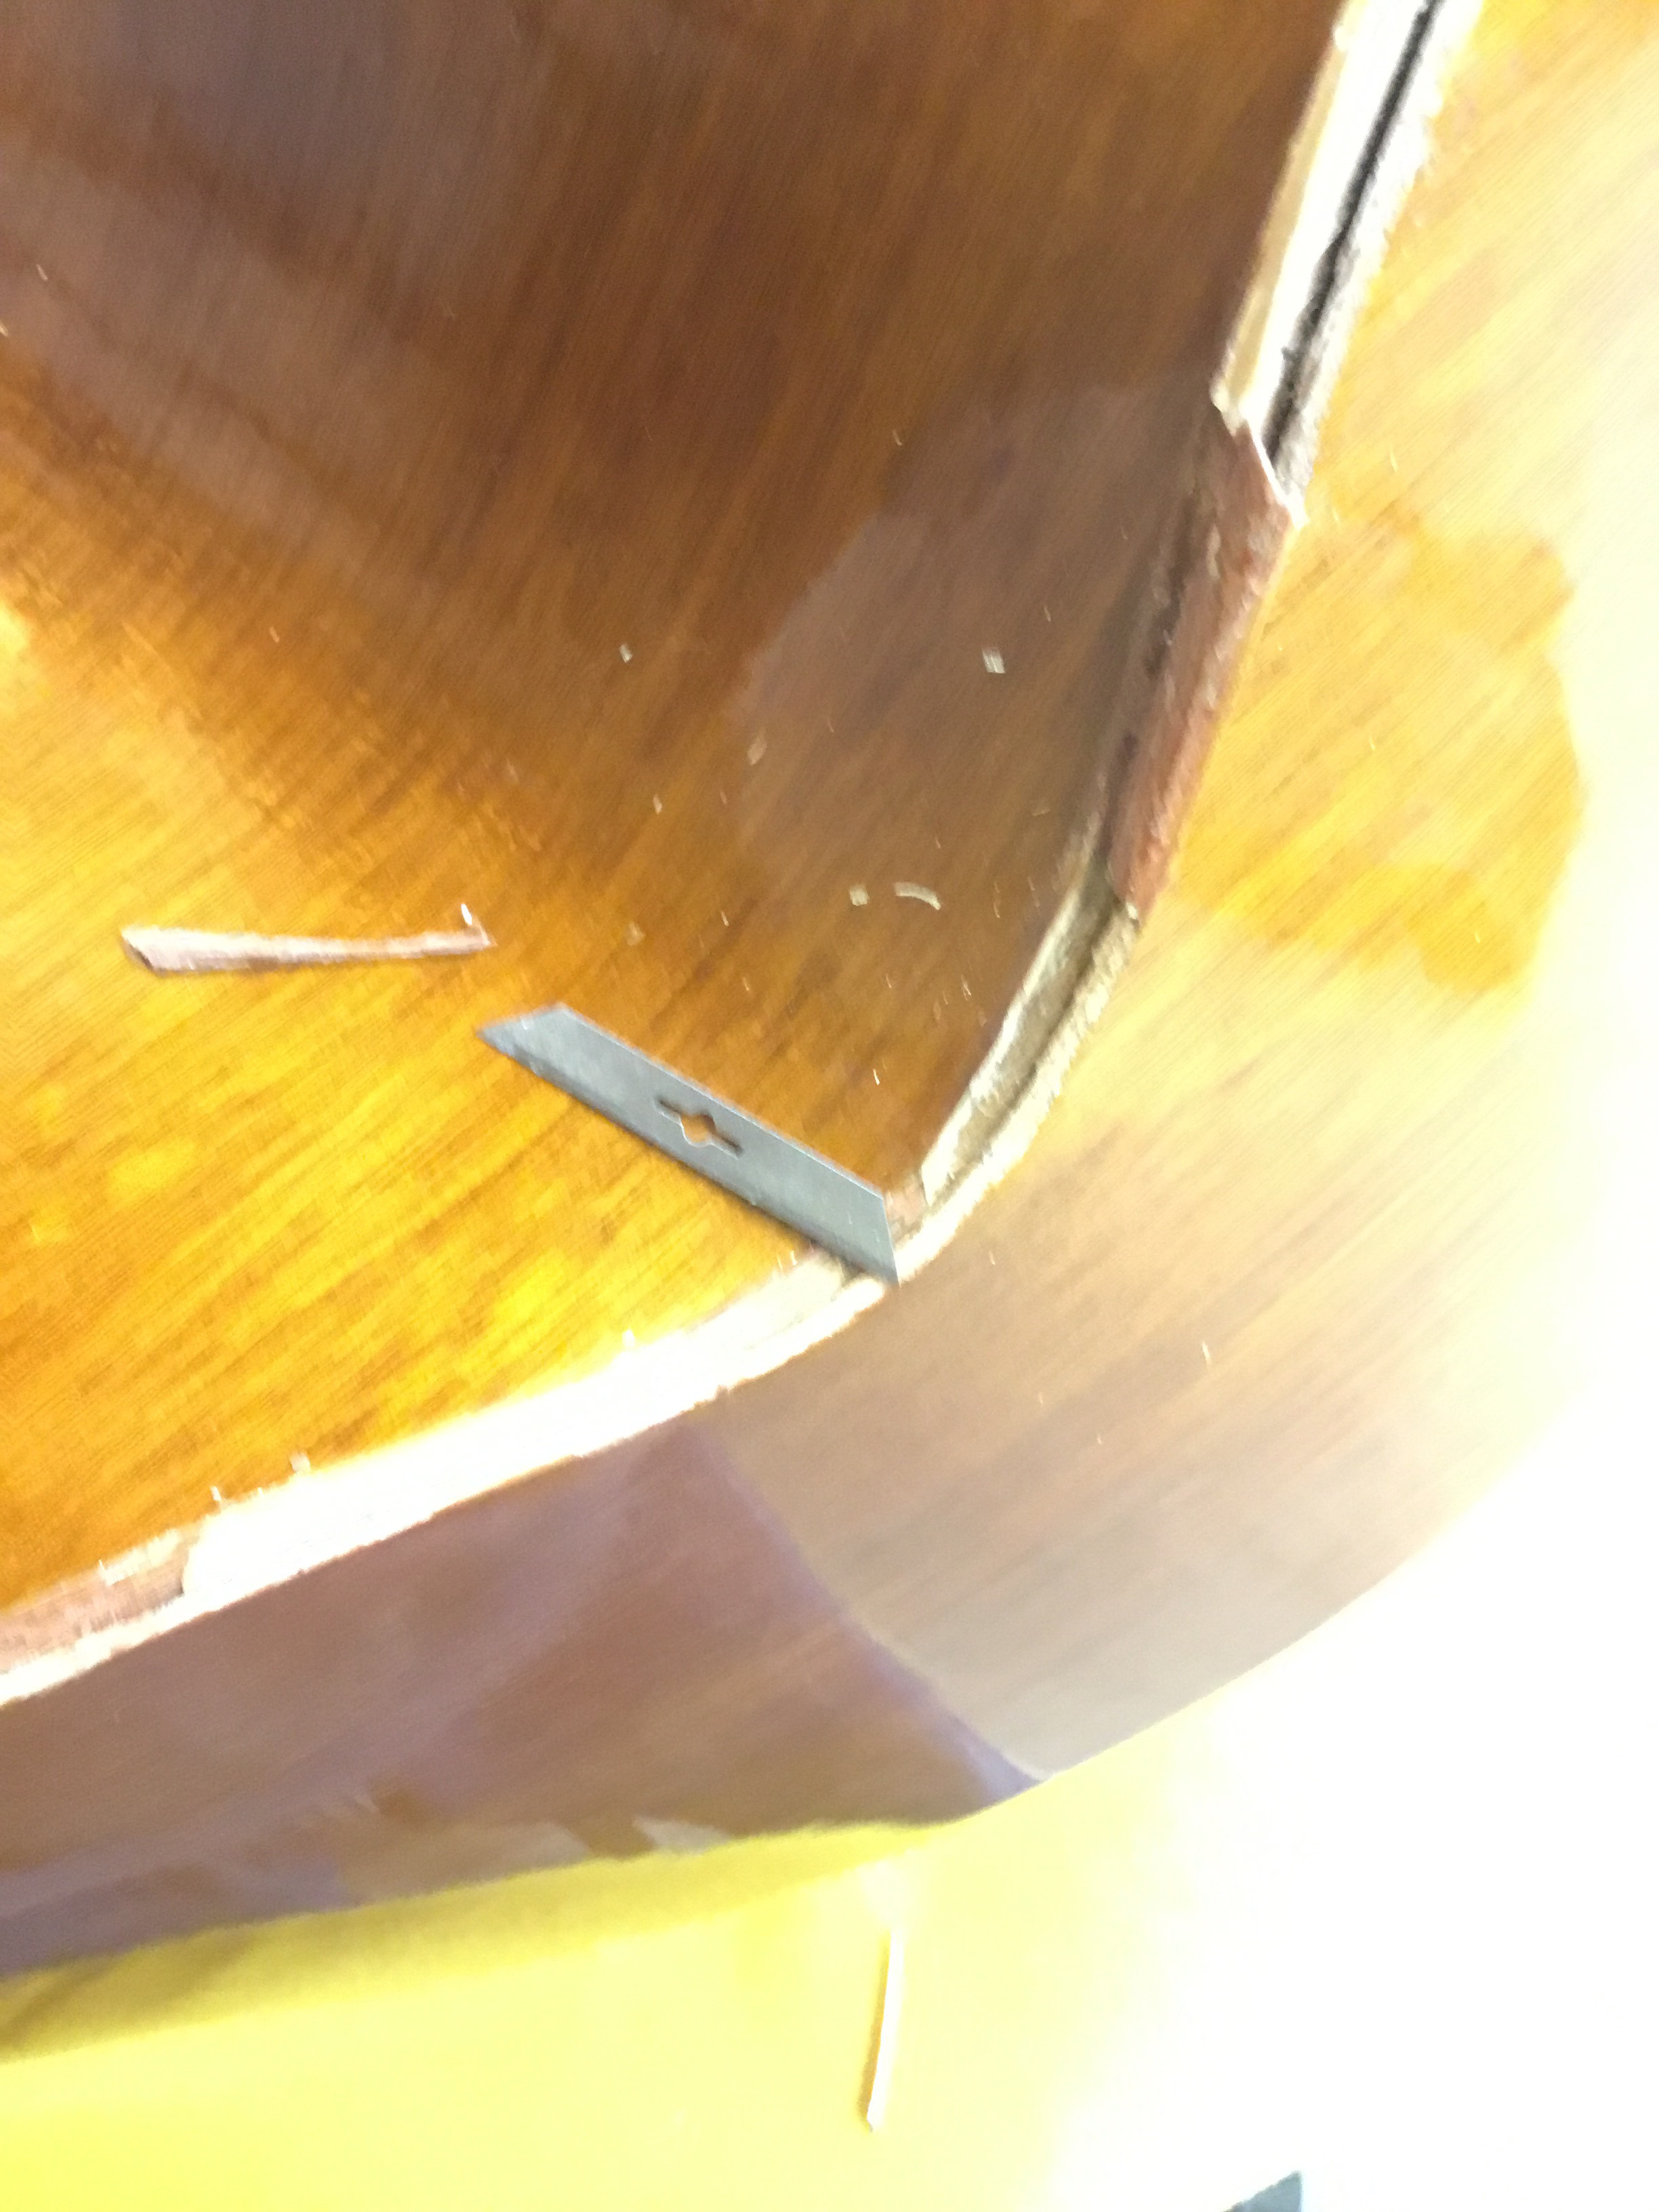
The initial stage of the Guitarron repair involved a careful assessment of the damage. The most pressing issue was the separation of the back and top from the sides of the instrument’s body, or soundbox. Before any re-assembly could begin, the remnants of the old binding needed to be removed. Much of it was already missing, while the remaining sections were fractured and splintered. Employing a luthier’s best practice, I carefully taped the adjacent edges to protect the surrounding wood from accidental damage. Then, armed with chisels and razor blades, I meticulously worked to remove the old binding material. Despite the careful approach, some wood tear-out was unavoidable, and a slight chisel slip resulted in a small gouge on the side. However, these minor imperfections are part of the reality of instrument repair, often addressed and concealed later in the process. After all, perfection is a high bar, even for seasoned luthiers.
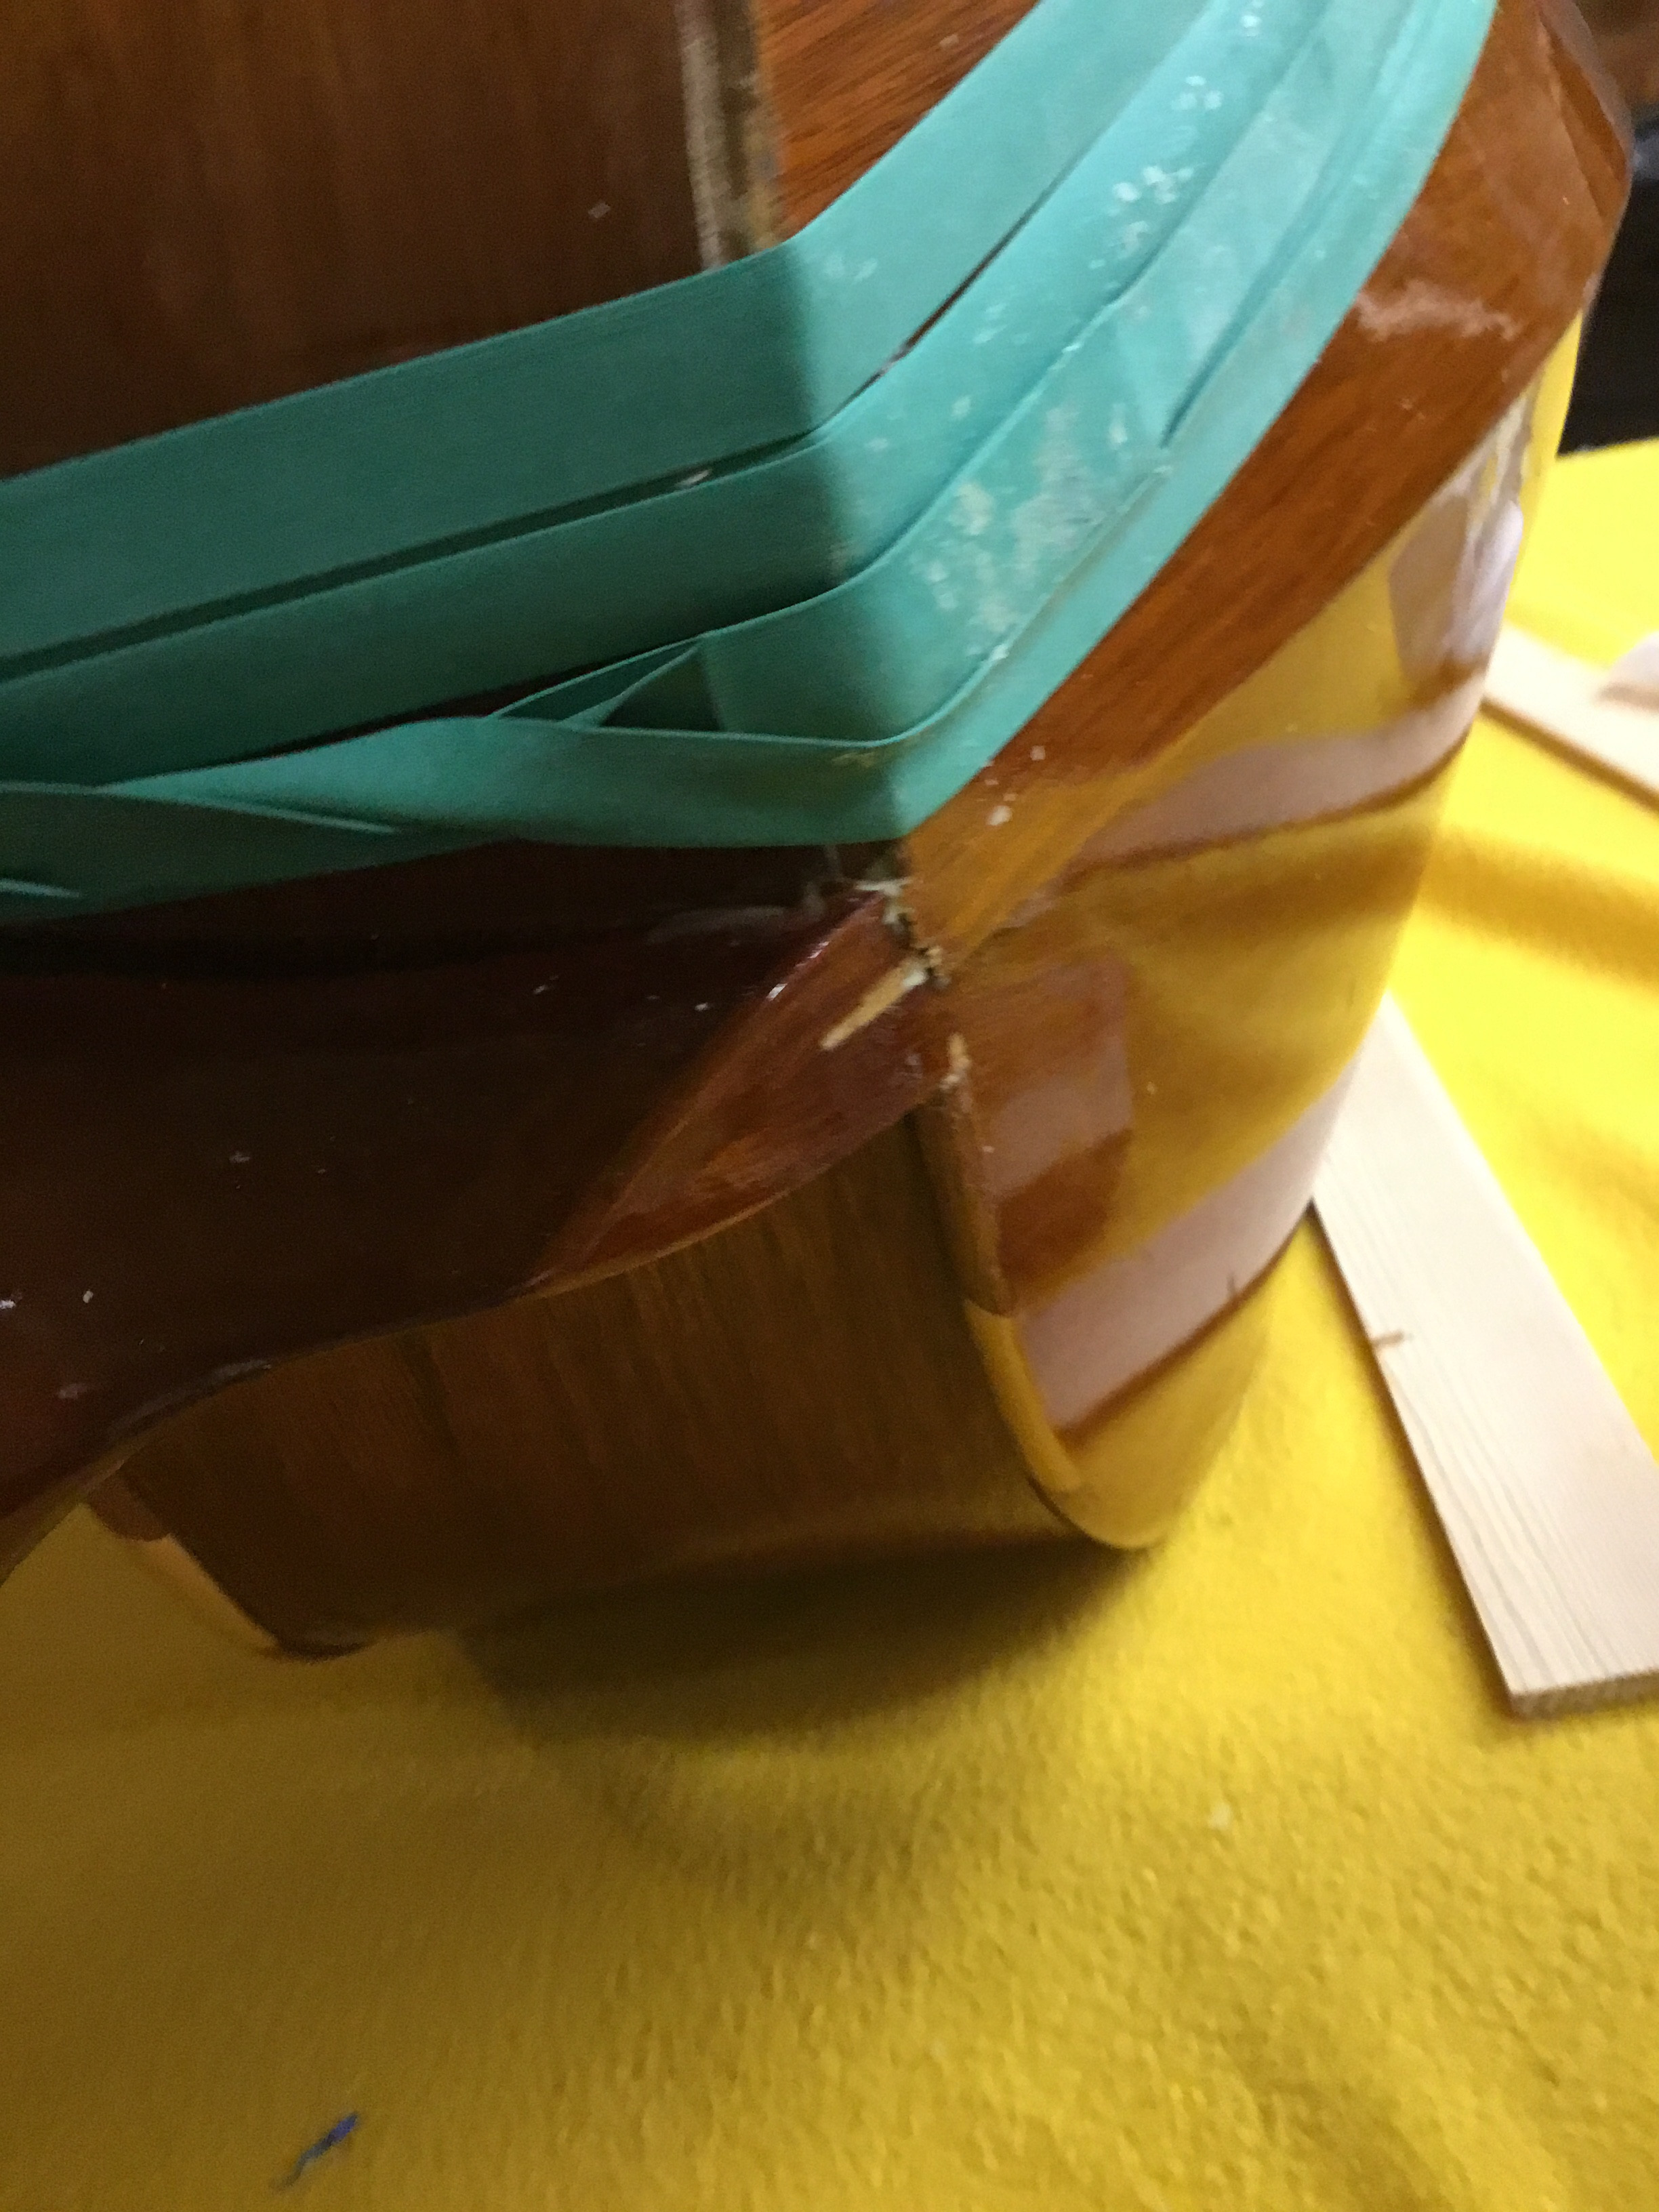
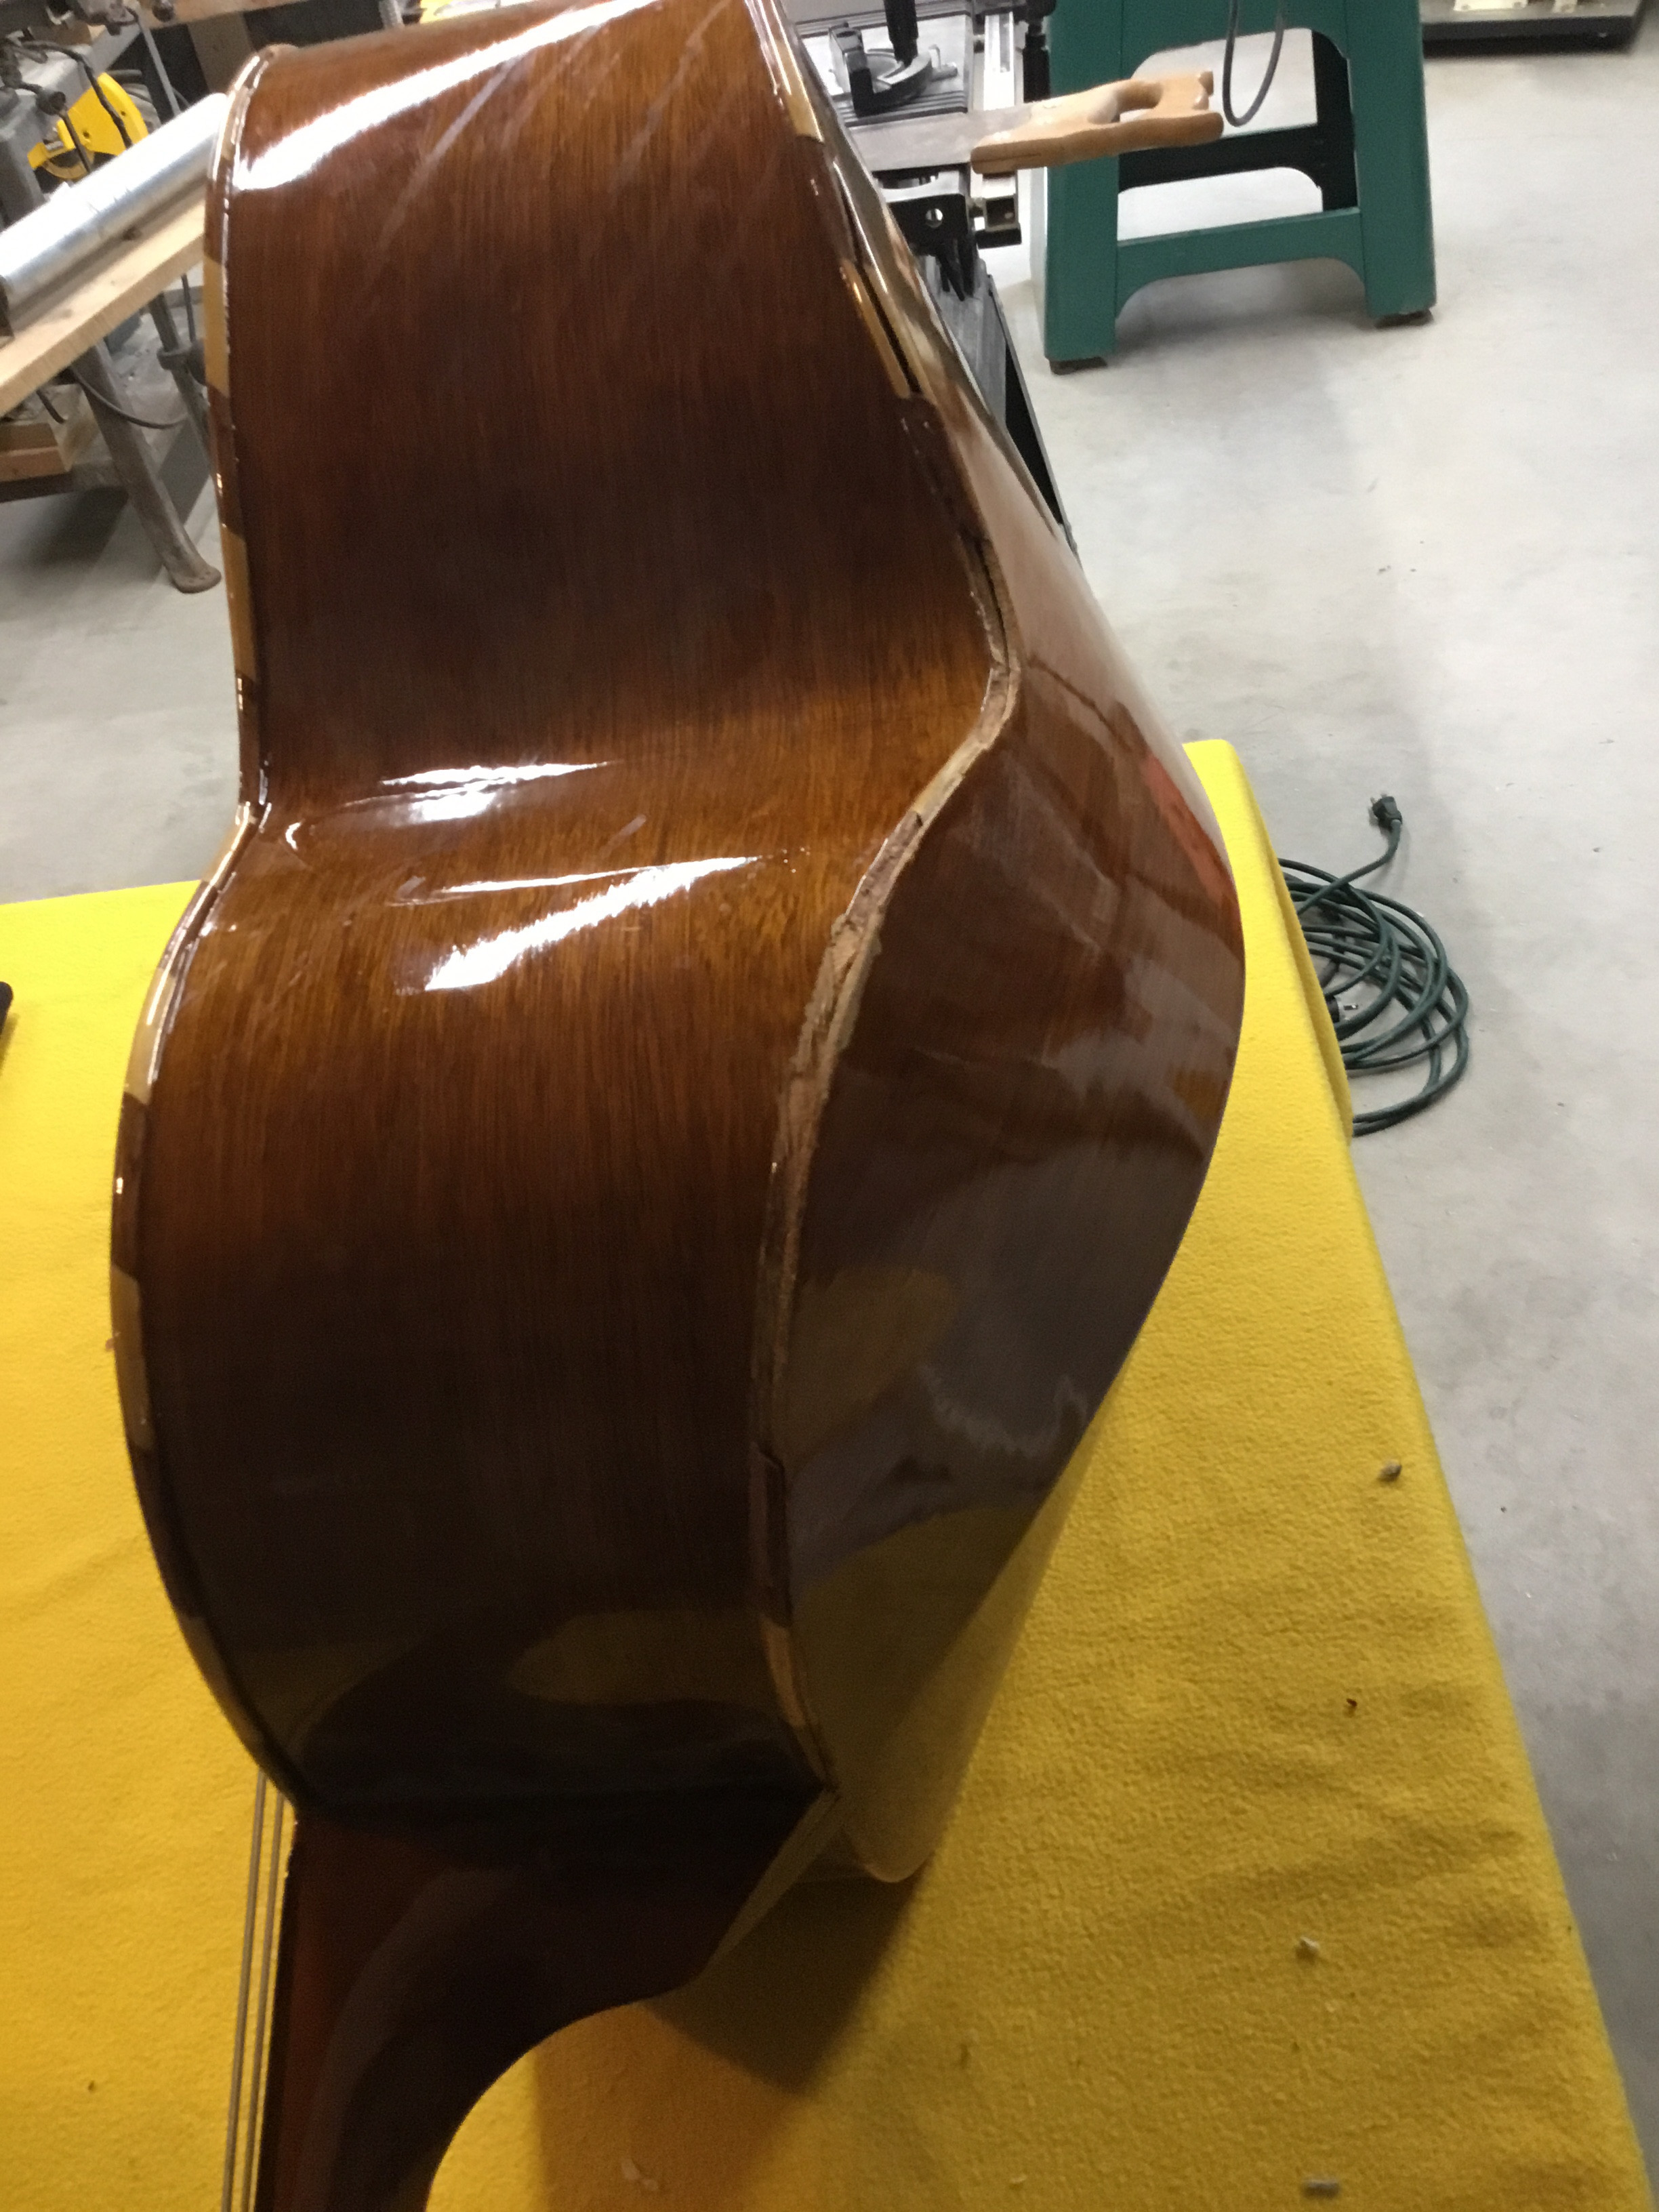 Close-up showing the breached soundbox edge of the Guitarron, highlighting the separated top and back
 Tools laid out next to the Guitarron: razors and chisels used for removing the old binding
 Protective tape applied to the edges of the Guitarron body before binding removal
 Detailed view of the damaged edge of the Guitarron, showcasing splintered wood and missing binding
 Close-up of razors and chisels carefully working on the damaged binding of the Guitarron
The Kerfing Conundrum: Adapting Guitar Techniques to the Guitarron
Guitars typically utilize internal linings called kerfing. This kerfing, glued along the instrument’s seams, provides a reinforced connection between the sides and the top and back. Kerfing is usually triangular and features regular cuts, allowing it to flex and conform to the curved contours of a guitar body. However, Guitarrons traditionally lack kerfing, presenting a structural challenge in this repair. Recognizing the added strength and stability kerfing provides, I decided to incorporate it into the Guitarron’s repair to reinforce the vulnerable seam between the top and back. But the unique construction of the Guitarron introduced a complication.
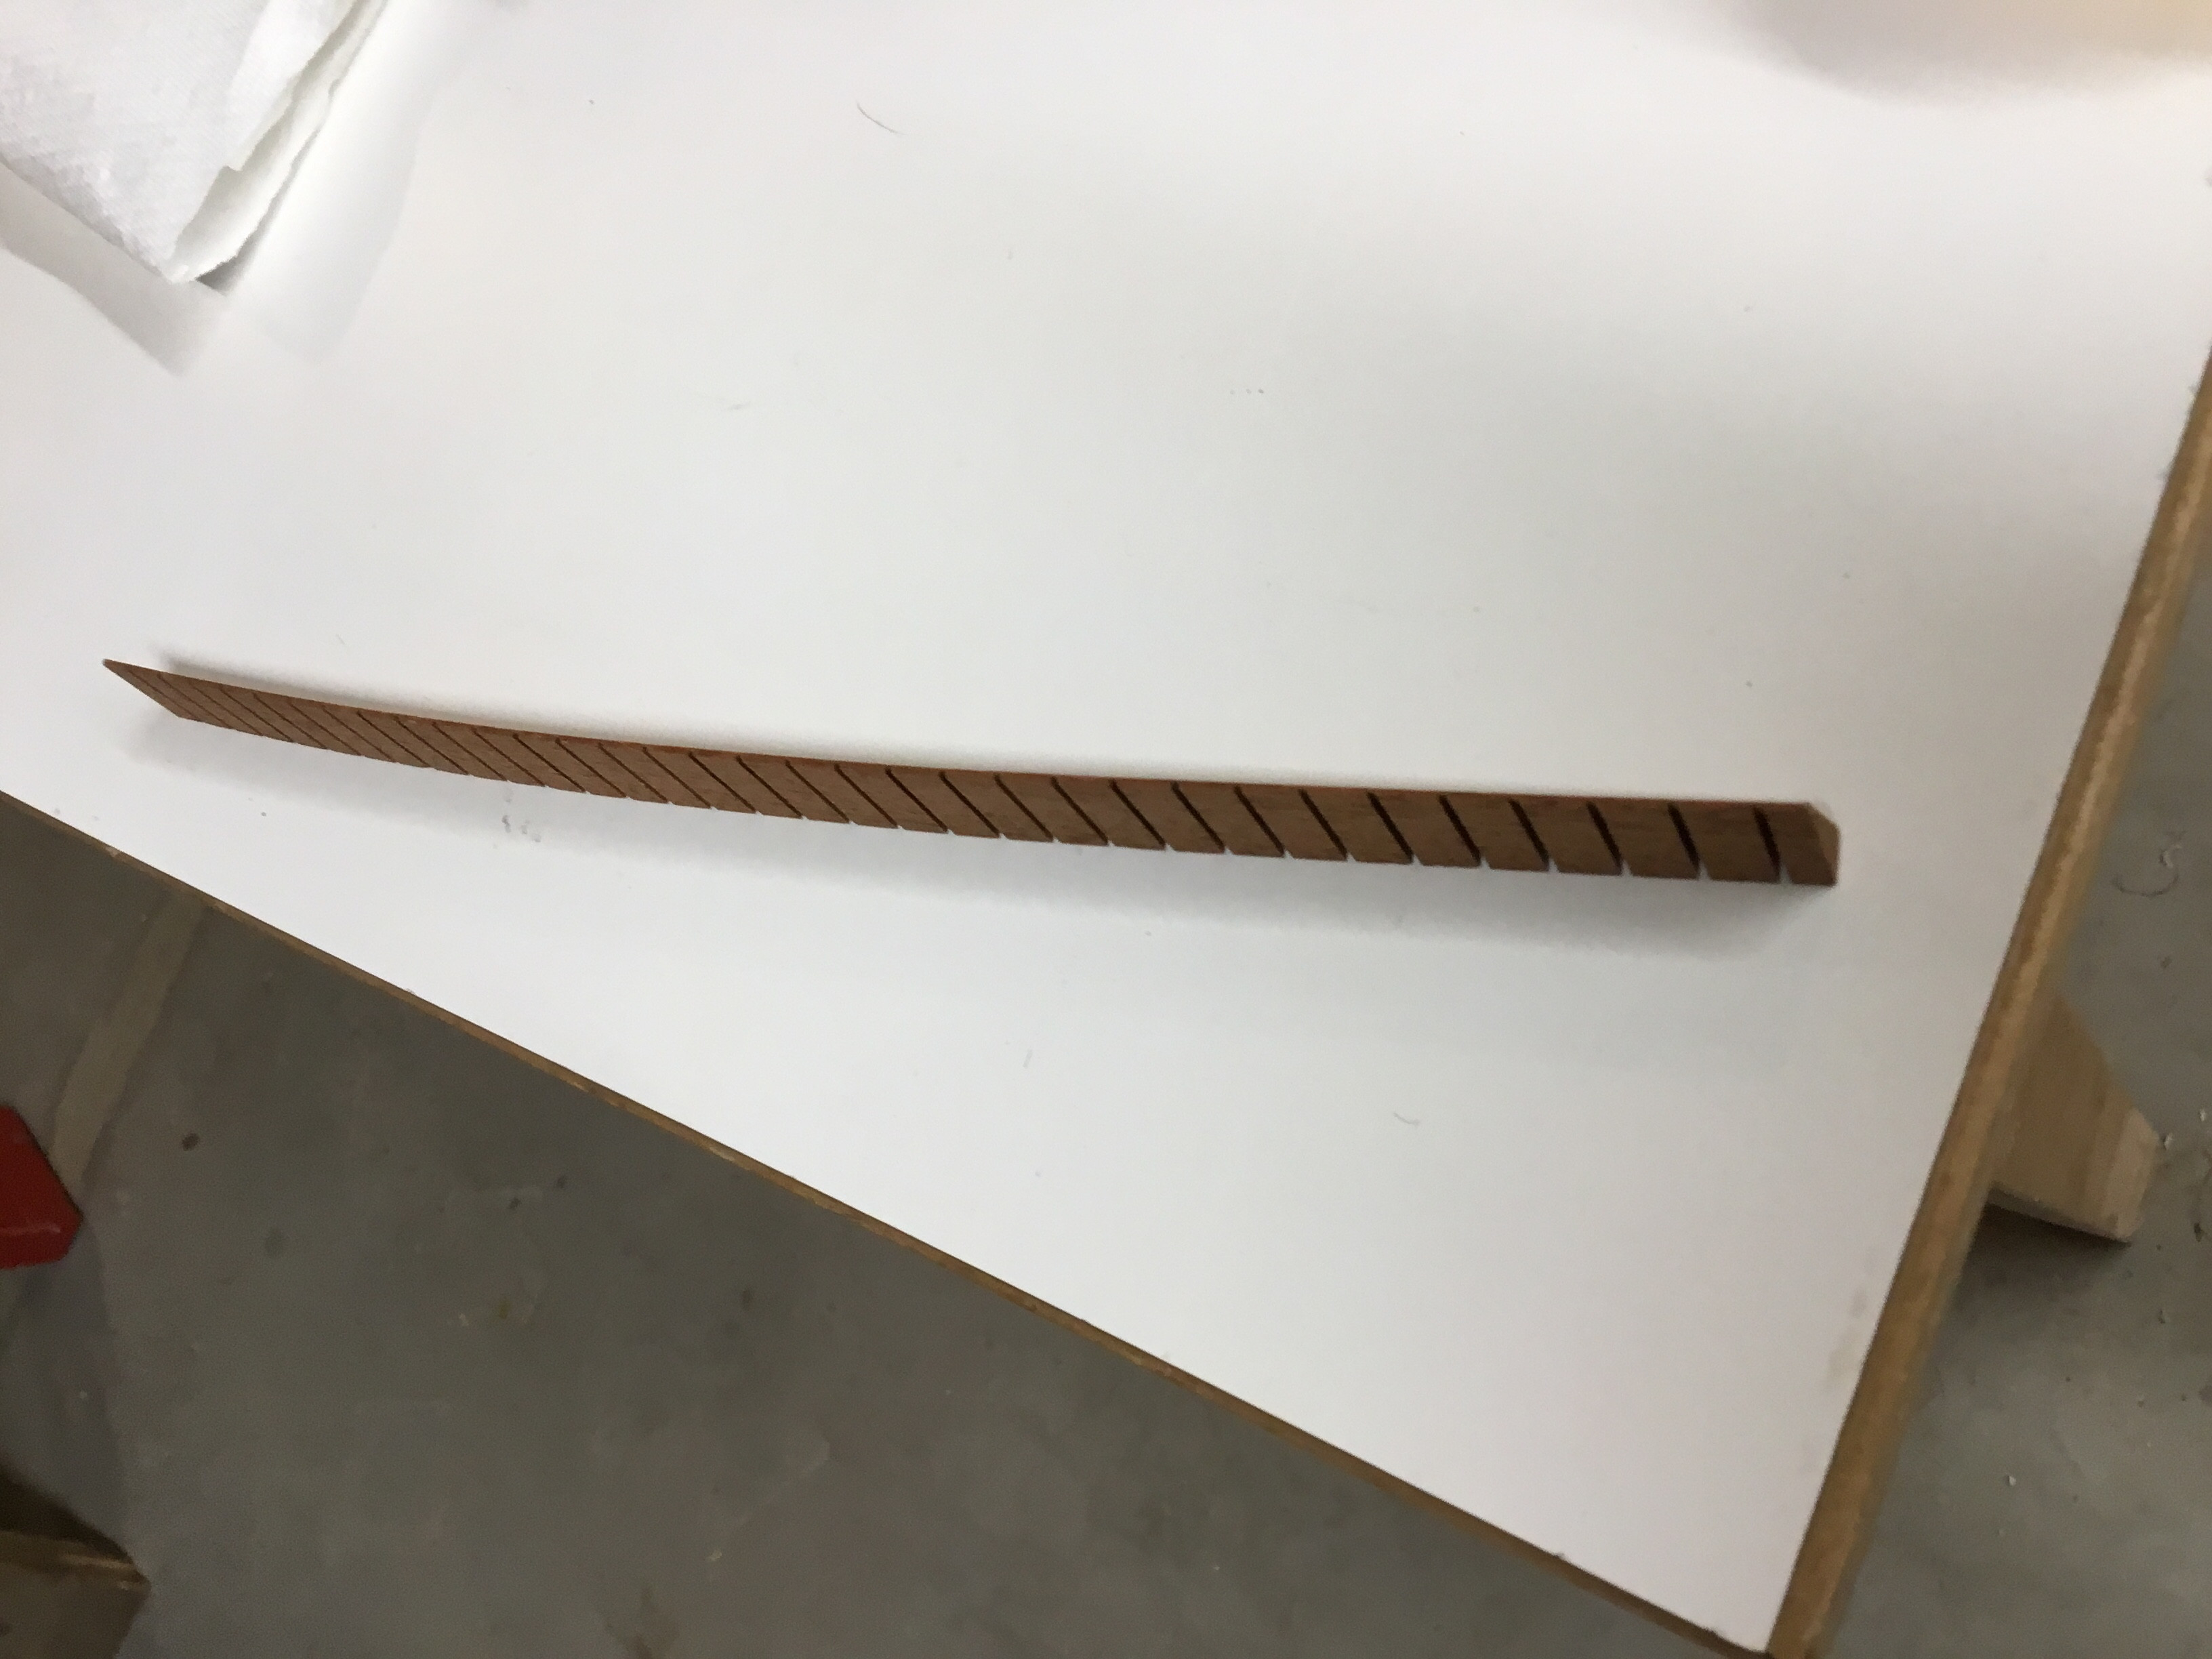 Close-up of kerfing strips, illustrating their shape and flexible design
The challenge stemmed from the Guitarron’s distinctive shape. Unlike guitars with relatively flat backs, the Guitarron features a rounded back with a central seam, and a body that tapers significantly from bottom to top. My existing clamps and tools are primarily designed for instruments with flatter backs and 90-degree angles where the back meets the sides – standard guitar, mandolin, and violin construction. Standard triangular kerfing is also designed for these 90-degree angles. The Guitarron’s non-perpendicular back angle meant a direct application of standard kerfing and clamping techniques wouldn’t be effective.
Undeterred, I opted to glue the kerfing to the sides first, hoping this would create a sufficient ledge to then introduce glue into the seam between the back and sides. It was a calculated gamble, requiring a bit of faith in the process.
Clamping and Gluing: Employing Innovative Techniques
With the kerfing partially in place, the next hurdle was clamping the Guitarron’s back to the sides. Traditional guitar construction often employs spool clamps for this task. However, for this uniquely shaped instrument, I recalled a technique from renowned luthier William Cumpiano. He utilized a continuous strip cut from a truck tire inner tube to tightly wrap and clamp guitar bodies. While sourcing a truck inner tube was an option, specialized giant rubber bands are conveniently available from luthier supply companies. I chose this more readily available solution. After applying a generous amount of Titebond wood glue to the seams, I wrapped the Guitarron body tightly with these large rubber bands. The rubber bands proved remarkably effective at conforming to the Guitarron’s contours, providing consistent pressure for a strong bond. To further enhance stability, I added extra glue to the kerfing and back joint.
 Collection of large rubber bands, demonstrating the tool used for clamping the Guitarron
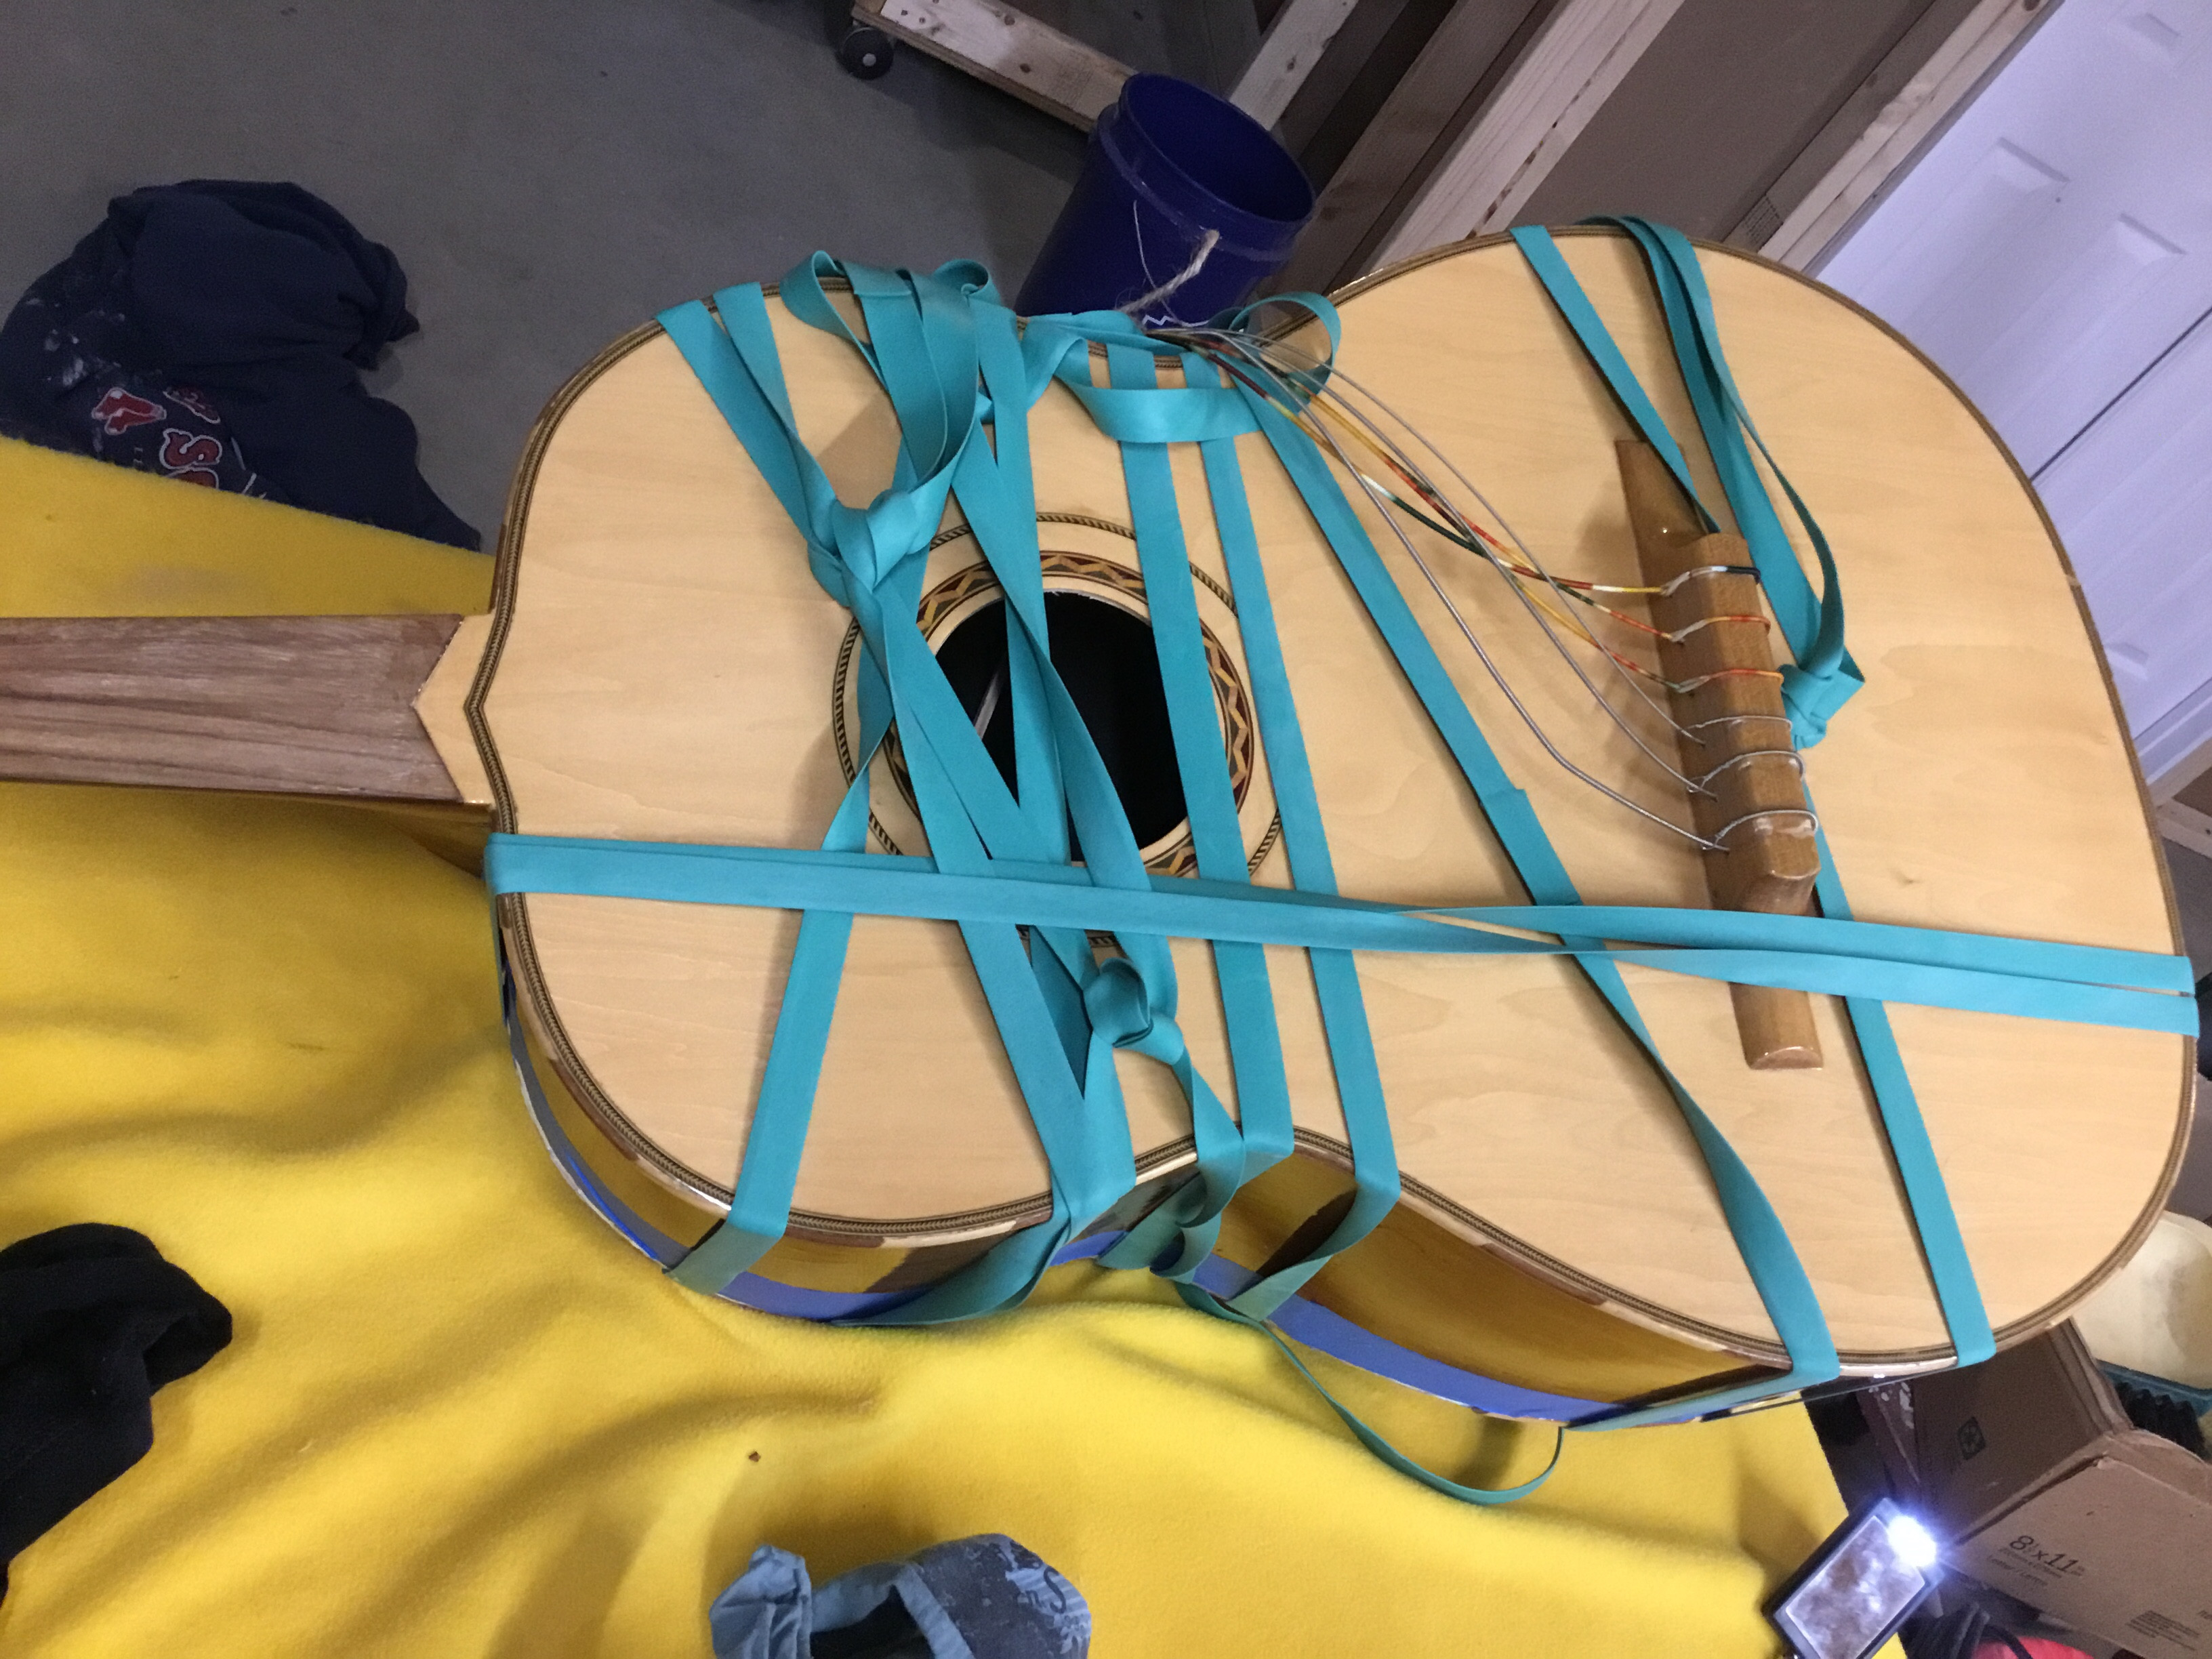
 Rubber bands being progressively tightened around the Guitarron's body, clamping the back to the sides
 Humorous shot of the large rubber bands, highlighting their size and potential alternative uses
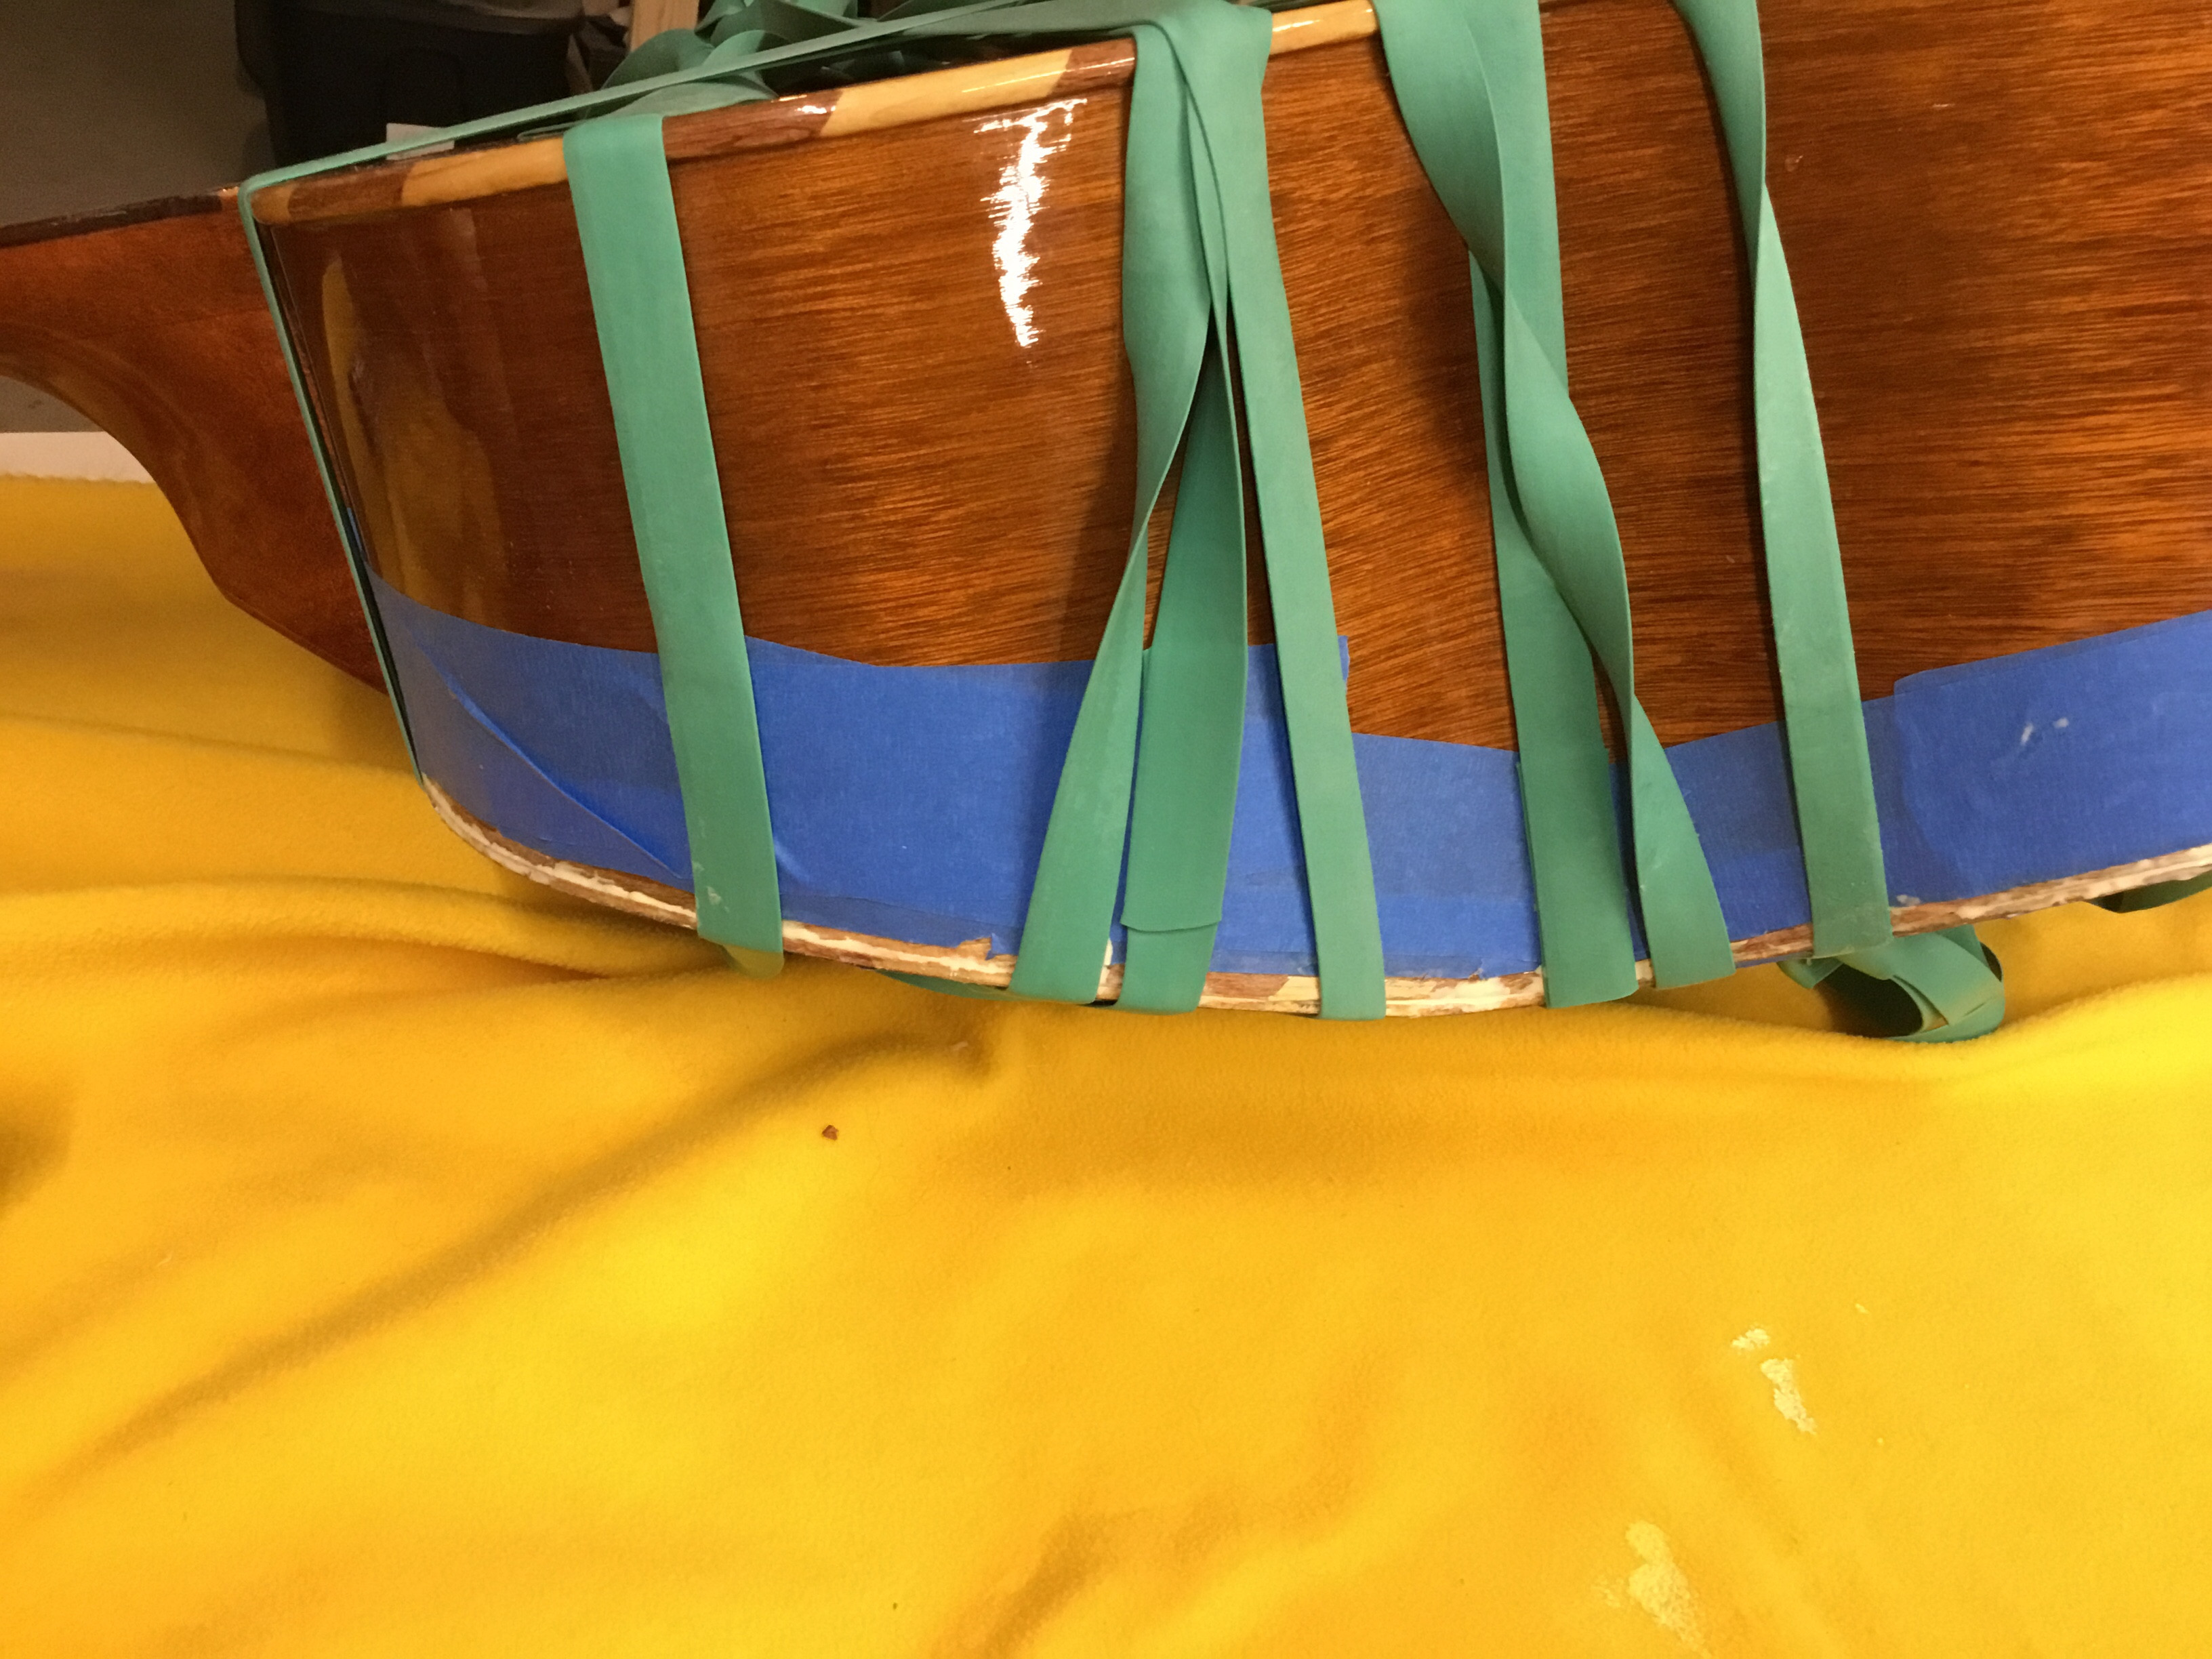
 Guitarron fully wrapped with rubber bands, ensuring a tight bond during the gluing process
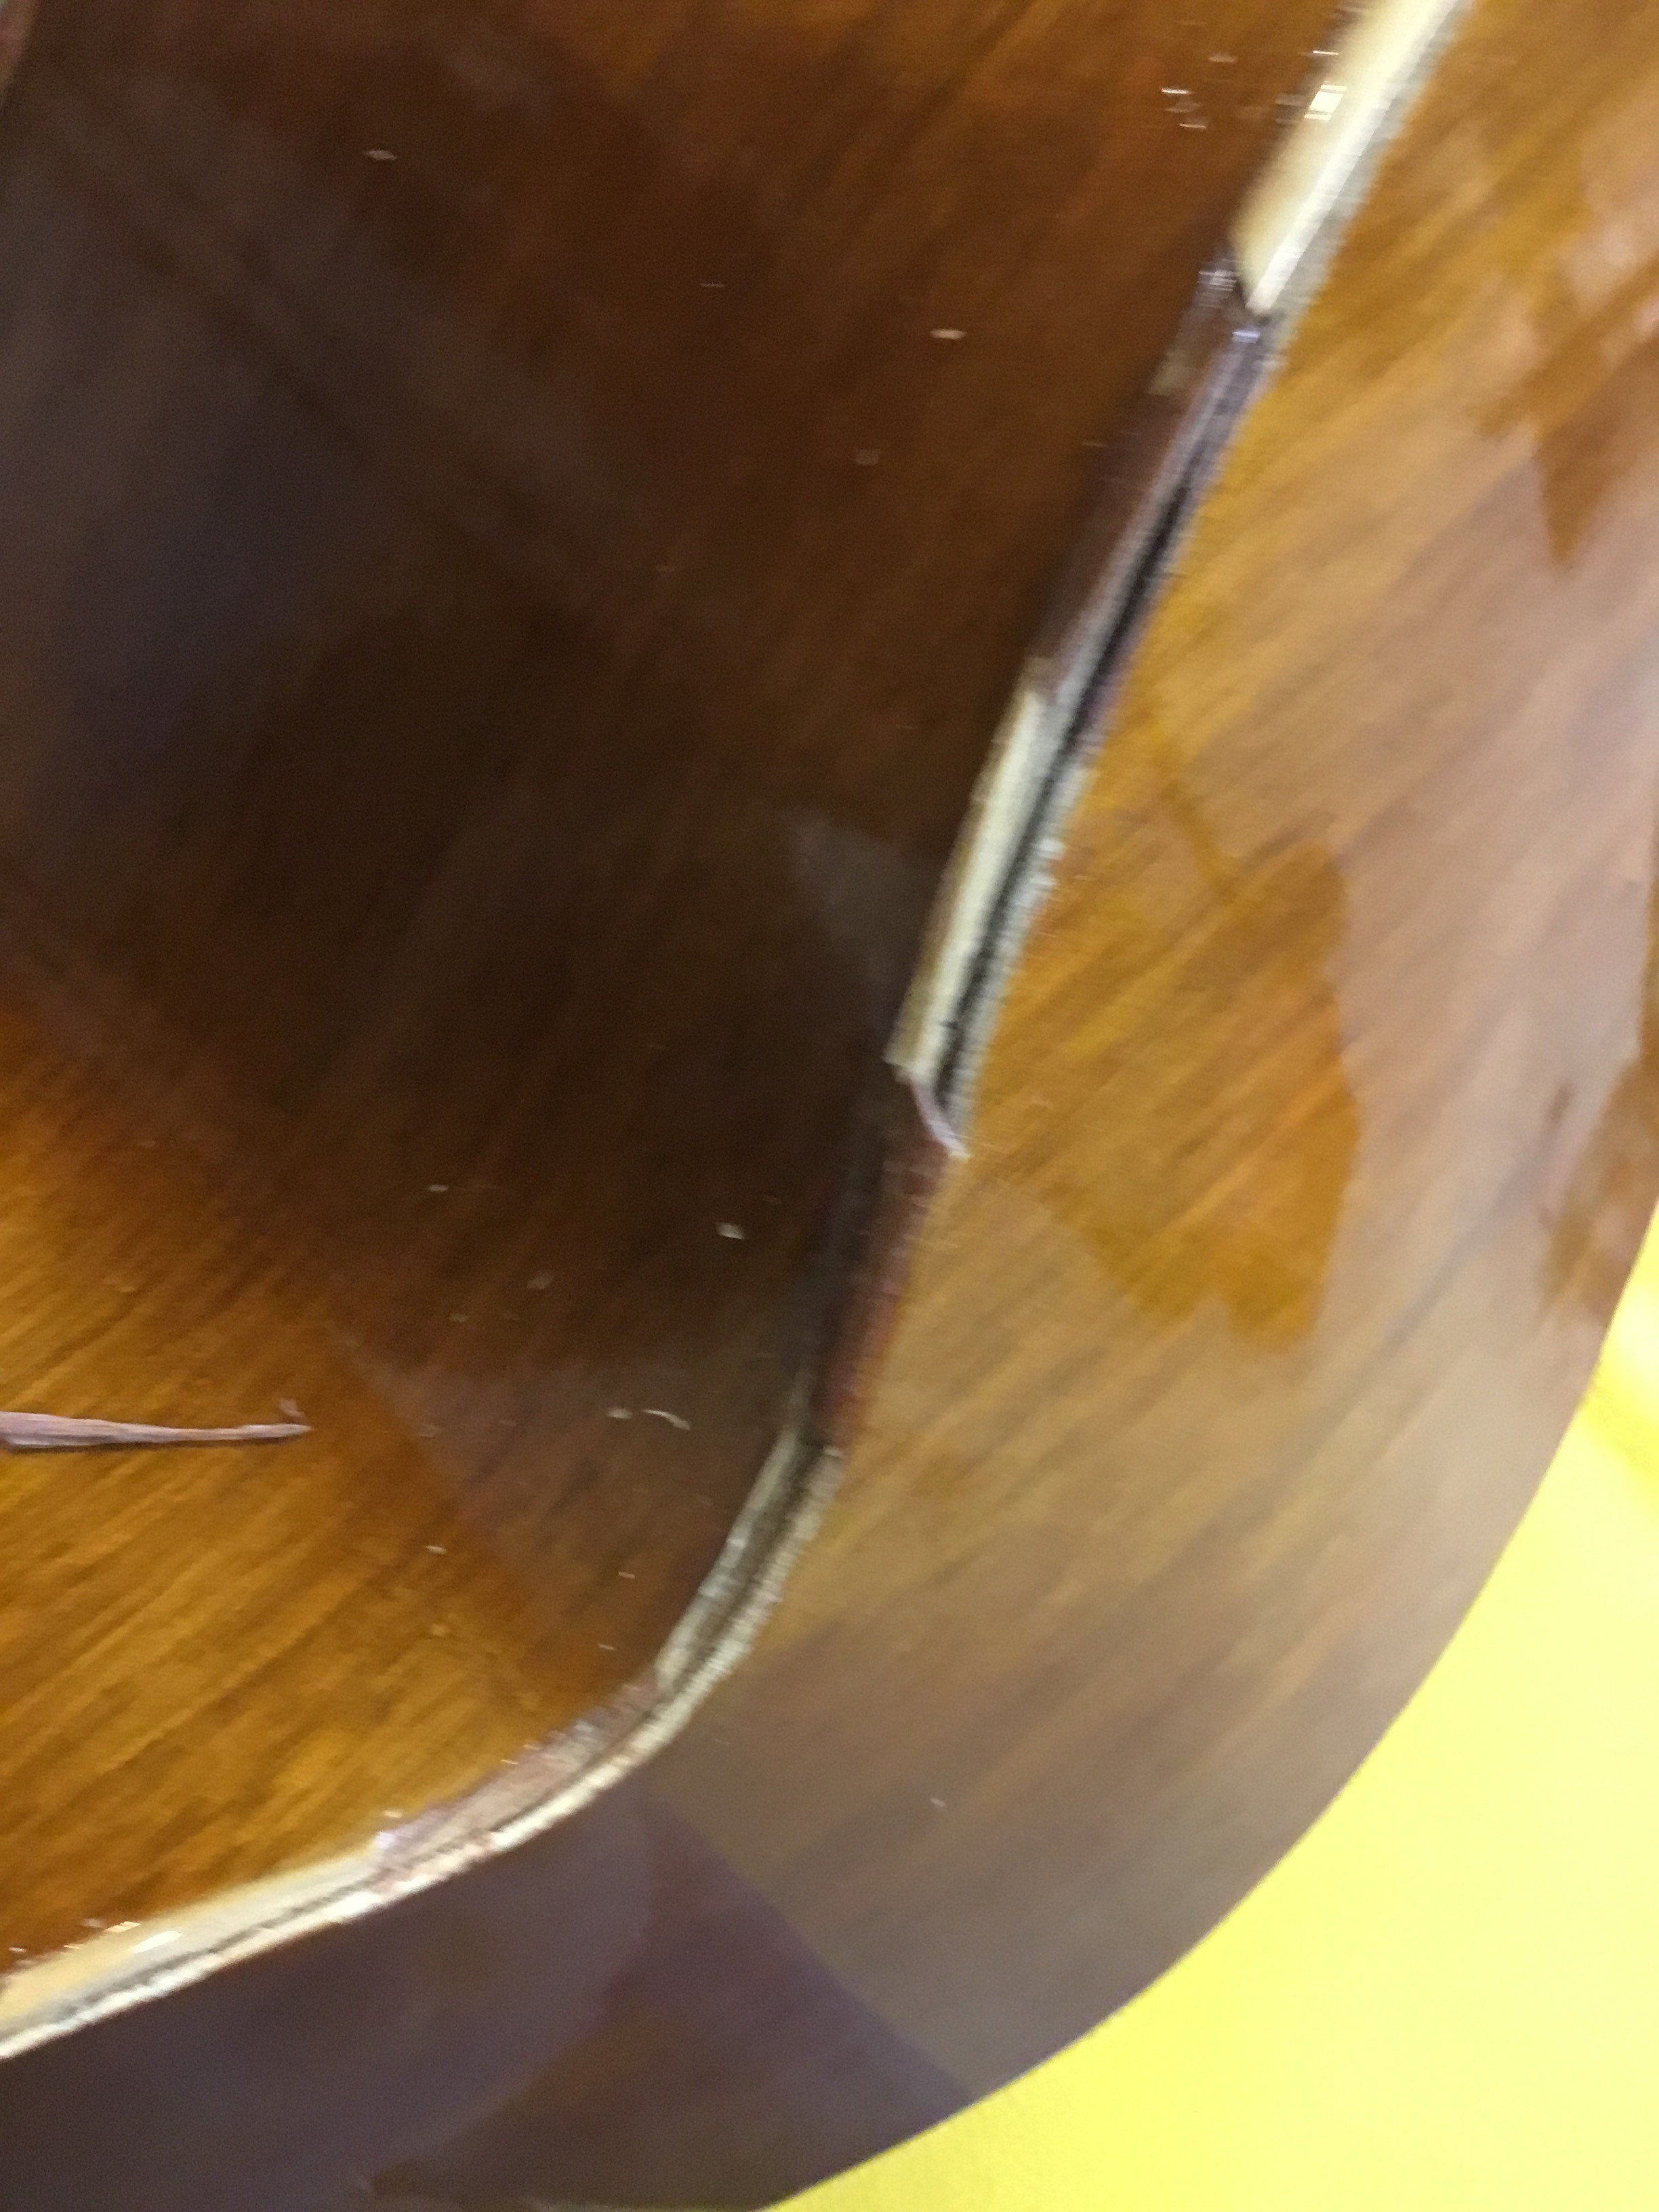
Reinforcing the Back Crack and Addressing Bindings
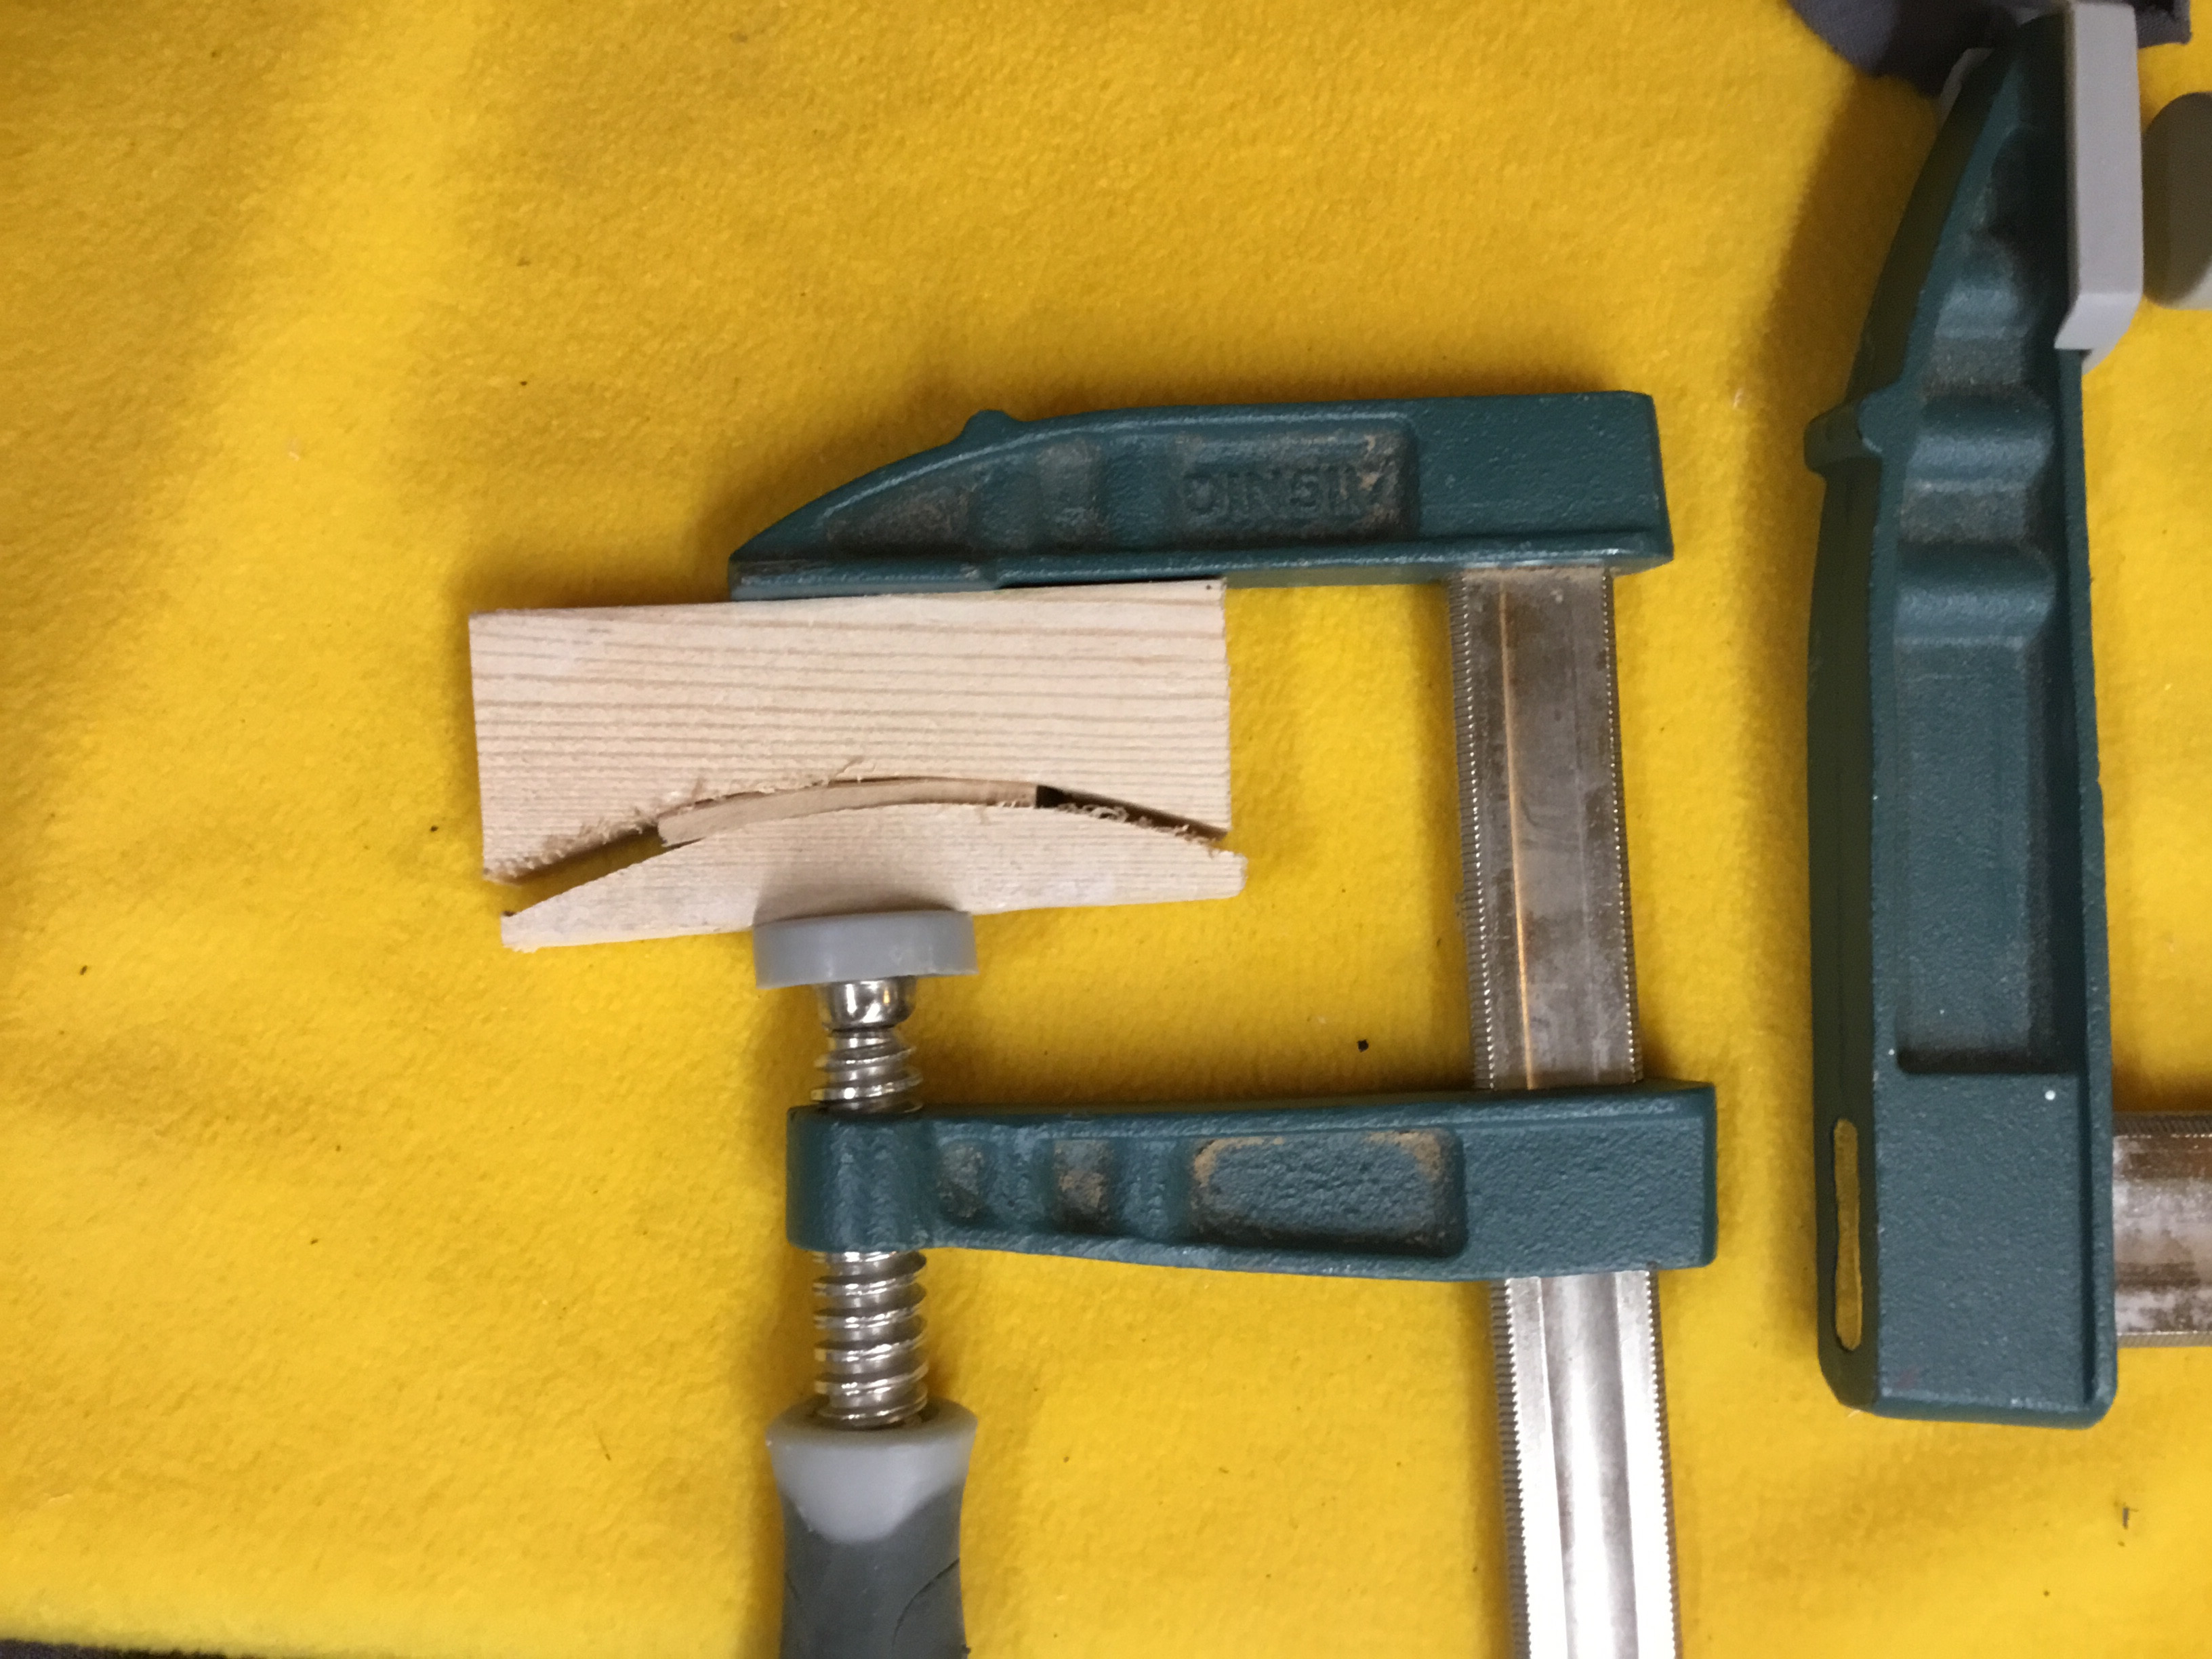
Once the back was securely reattached to the sides, attention turned to the crack along the back seam, near the neck joint. To reinforce this area, I fashioned a mahogany brace, approximately ½ inch wide, 3 inches long, and 3/8 inch thick. This brace was glued diagonally across the cracked seam, in a section of the back with a less severe curve. This provided critical support to prevent further separation. For added reinforcement along the entire seam, I cut a thin mahogany strip, about ½ inch wide, 5 inches long, and a mere 1/16 inch thick. Its thinness allowed it to be pressed into the curved contour of the seam, effectively sealing the crack. Titebond wood glue once again proved invaluable in this process.
With the structural repairs complete, the next phase focused on the Guitarron’s decorative bindings. The instrument featured alternating mahogany and maple bindings, adding an elegant visual detail. The challenge lay in replicating these curved bindings, which followed complex contours in two directions simultaneously. The Guitarron’s tapered body, wider at the lower bout and narrower at the upper bout, combined with its guitar-like shape, created intricate curves. Likely manufactured in a Chinese factory with CNC machinery and automated binding processes, replicating these bindings by hand required a different approach. I decided to create new bindings by carefully shaping and contouring wood strips and then bending them to match the instrument’s curves. Bent wood possesses greater strength than wood forced into shape without bending, making it a structurally sound choice. I crafted small molds that mirrored the Guitarron’s side profiles and slowly bent the wood strips to the desired shapes using clamps. This was a time-consuming process, but the resulting bindings were well worth the effort. Wood bending can be achieved through various methods: soaking (less ideal), heat bending (common for guitar sides), or dry bending (the chosen method here). I opted for dry bending, gradually clamping the wood into the molds and allowing them to set overnight, retaining their curved shape. Finally, these shaped bindings were glued to the edges of the Guitarron body.
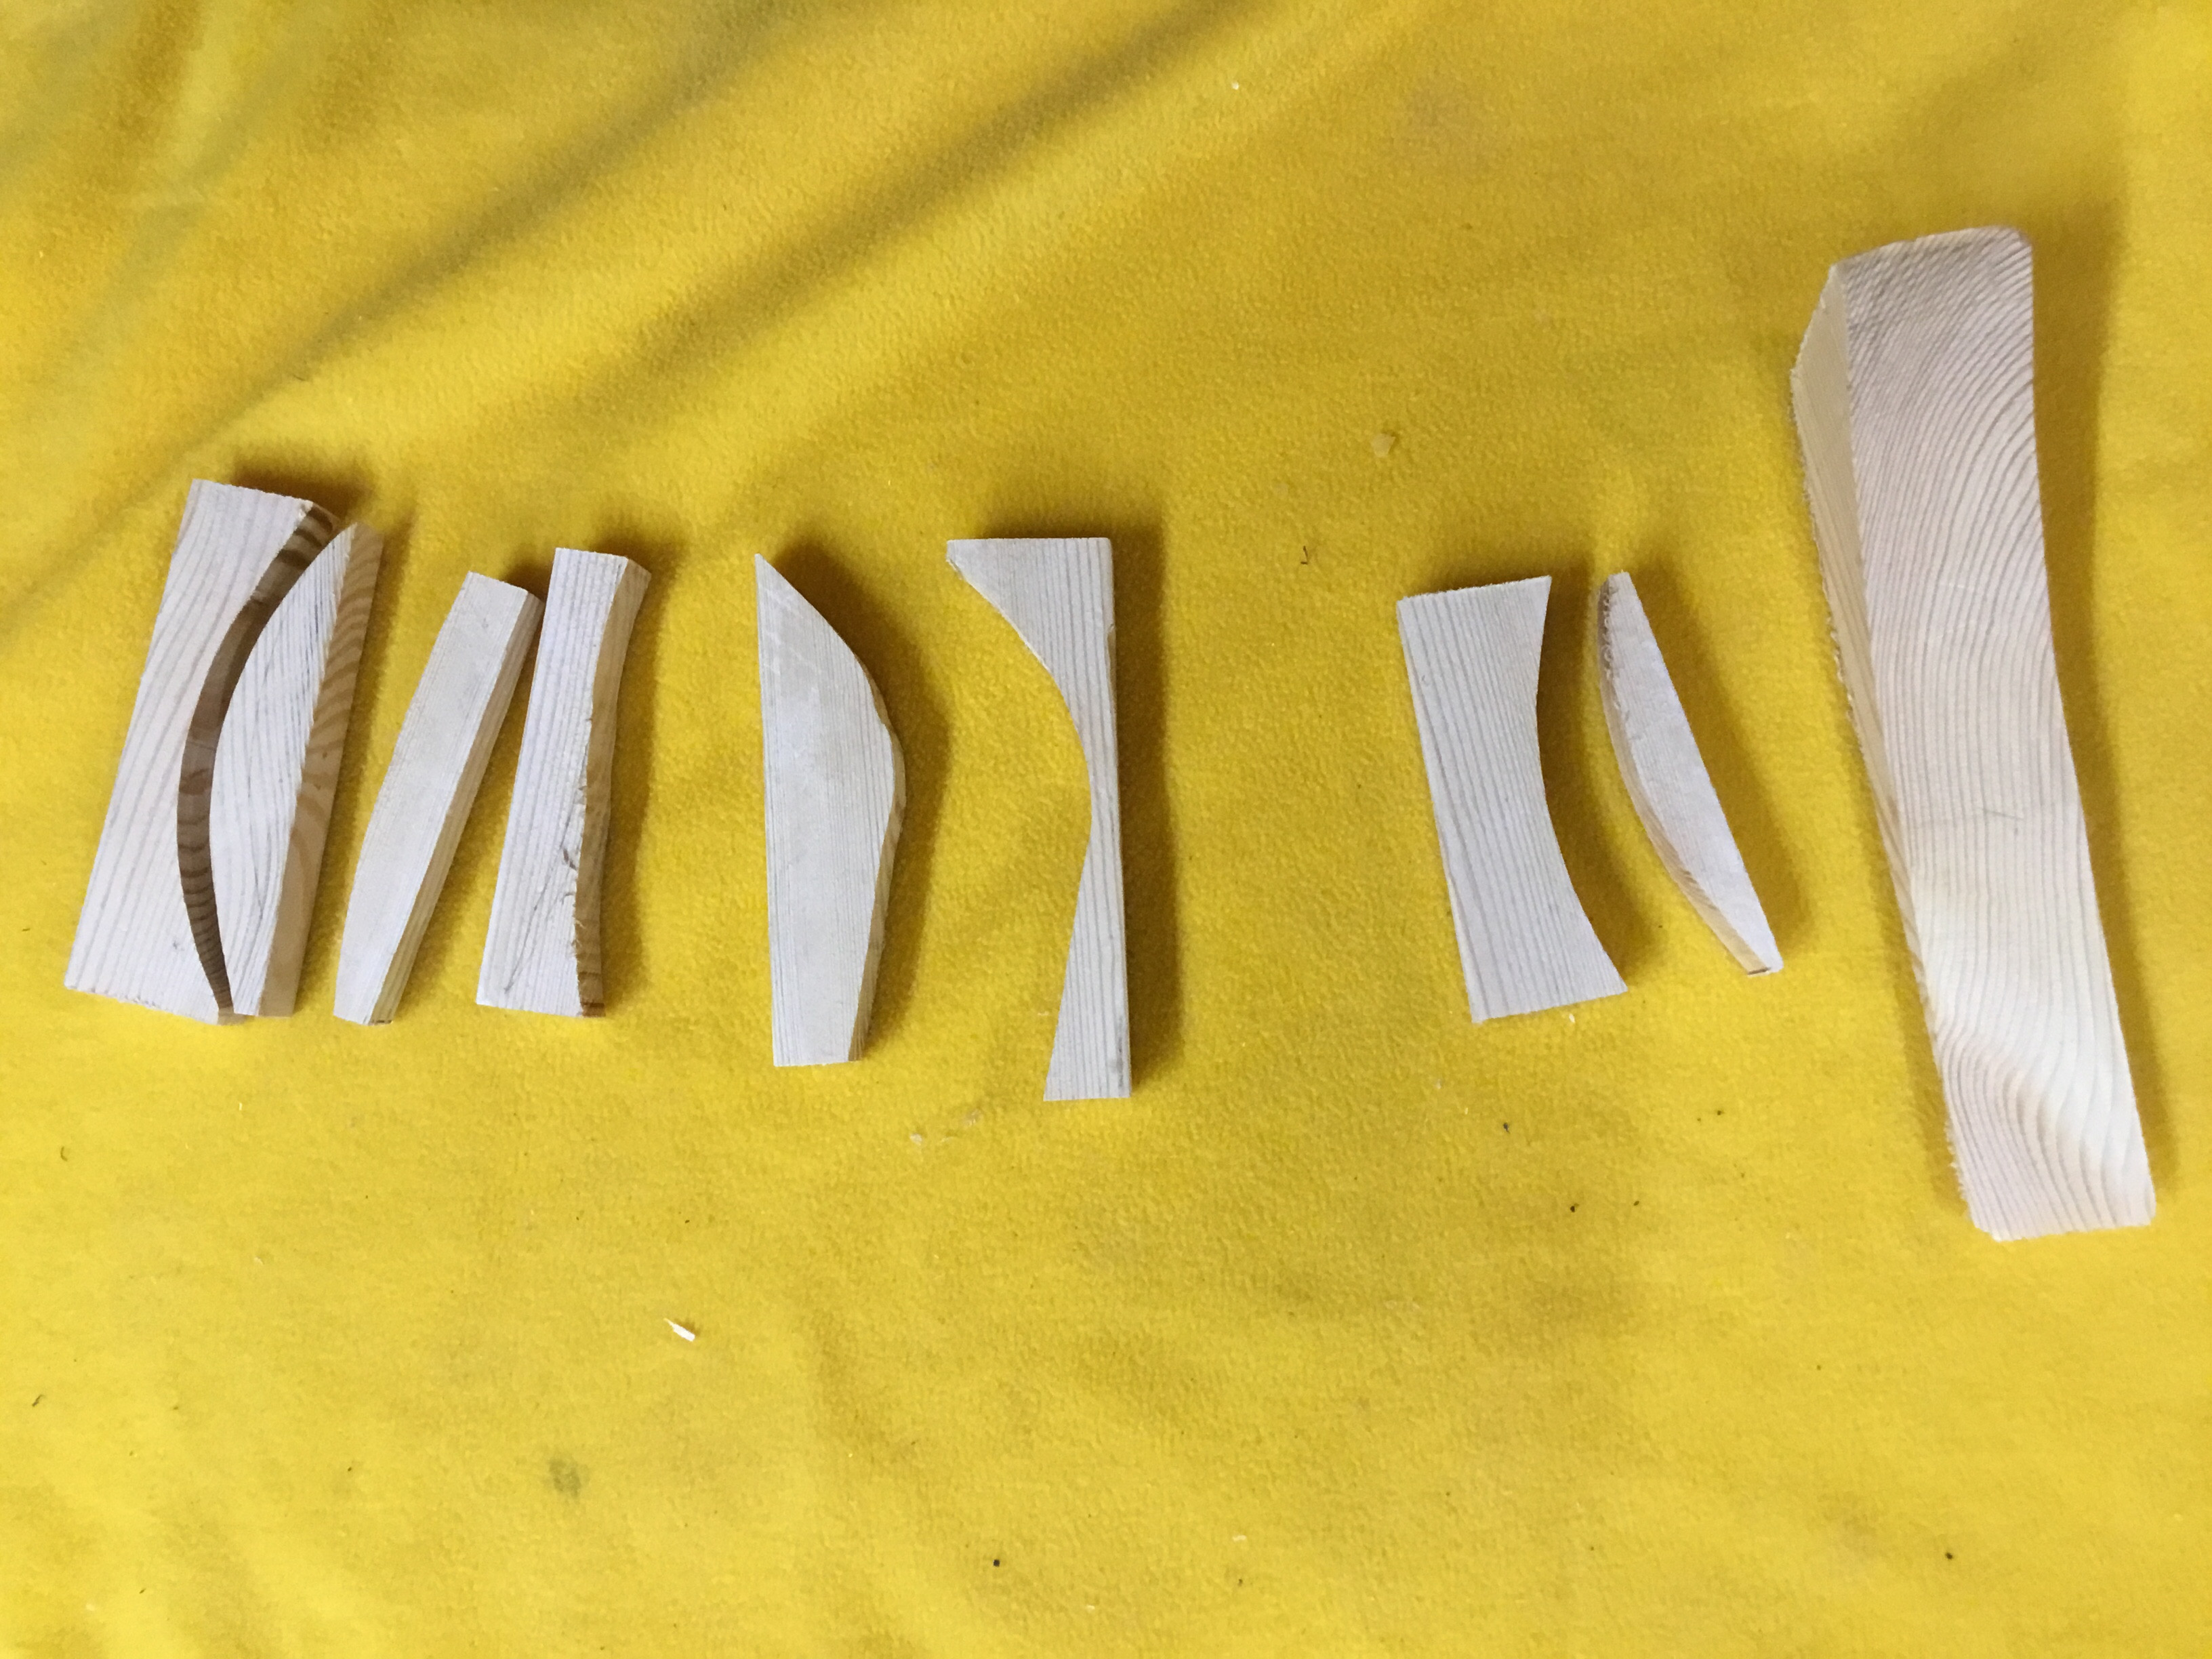 Wooden molds fashioned to match the Guitarron's side contours for bending the bindings
 Bindings clamped into the molds, undergoing the wood bending process
 Mahogany binding strip, showcasing the material used for the replacement bindings
 Checking the contour of a wooden mold against the Guitarron's side to ensure accurate binding shape
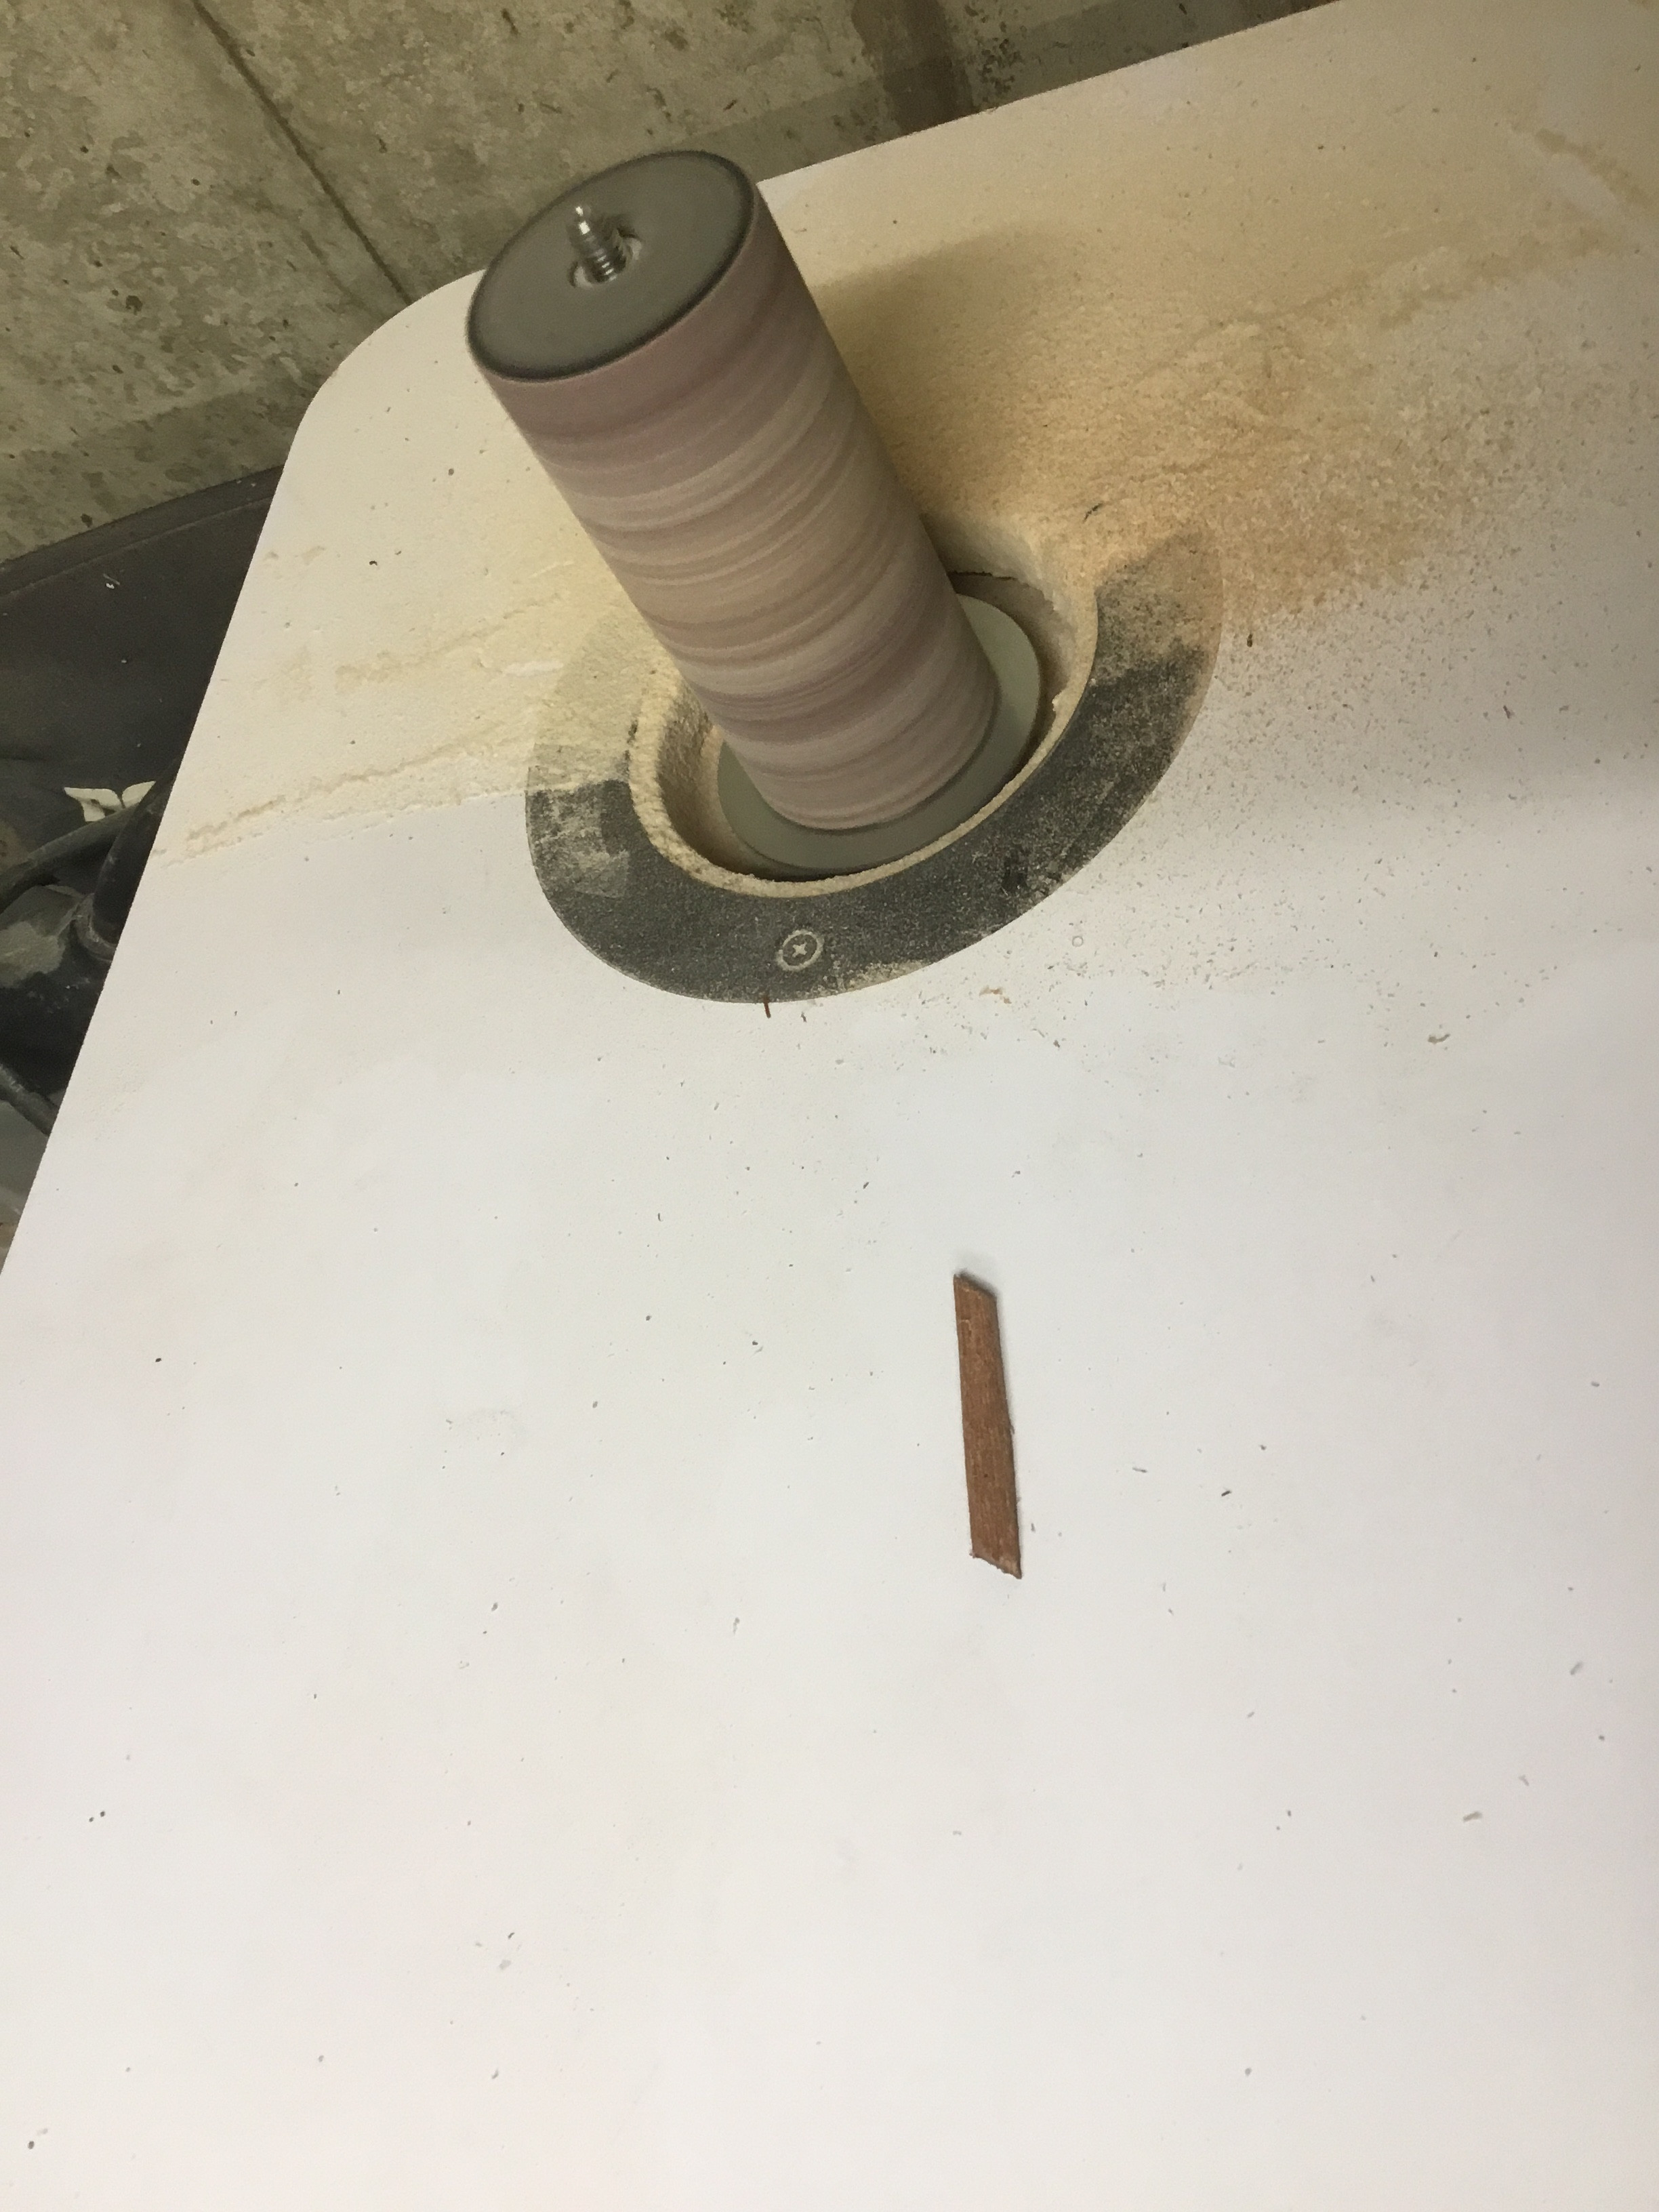 Using a spindle sander to refine and finish the shaped wooden bindings
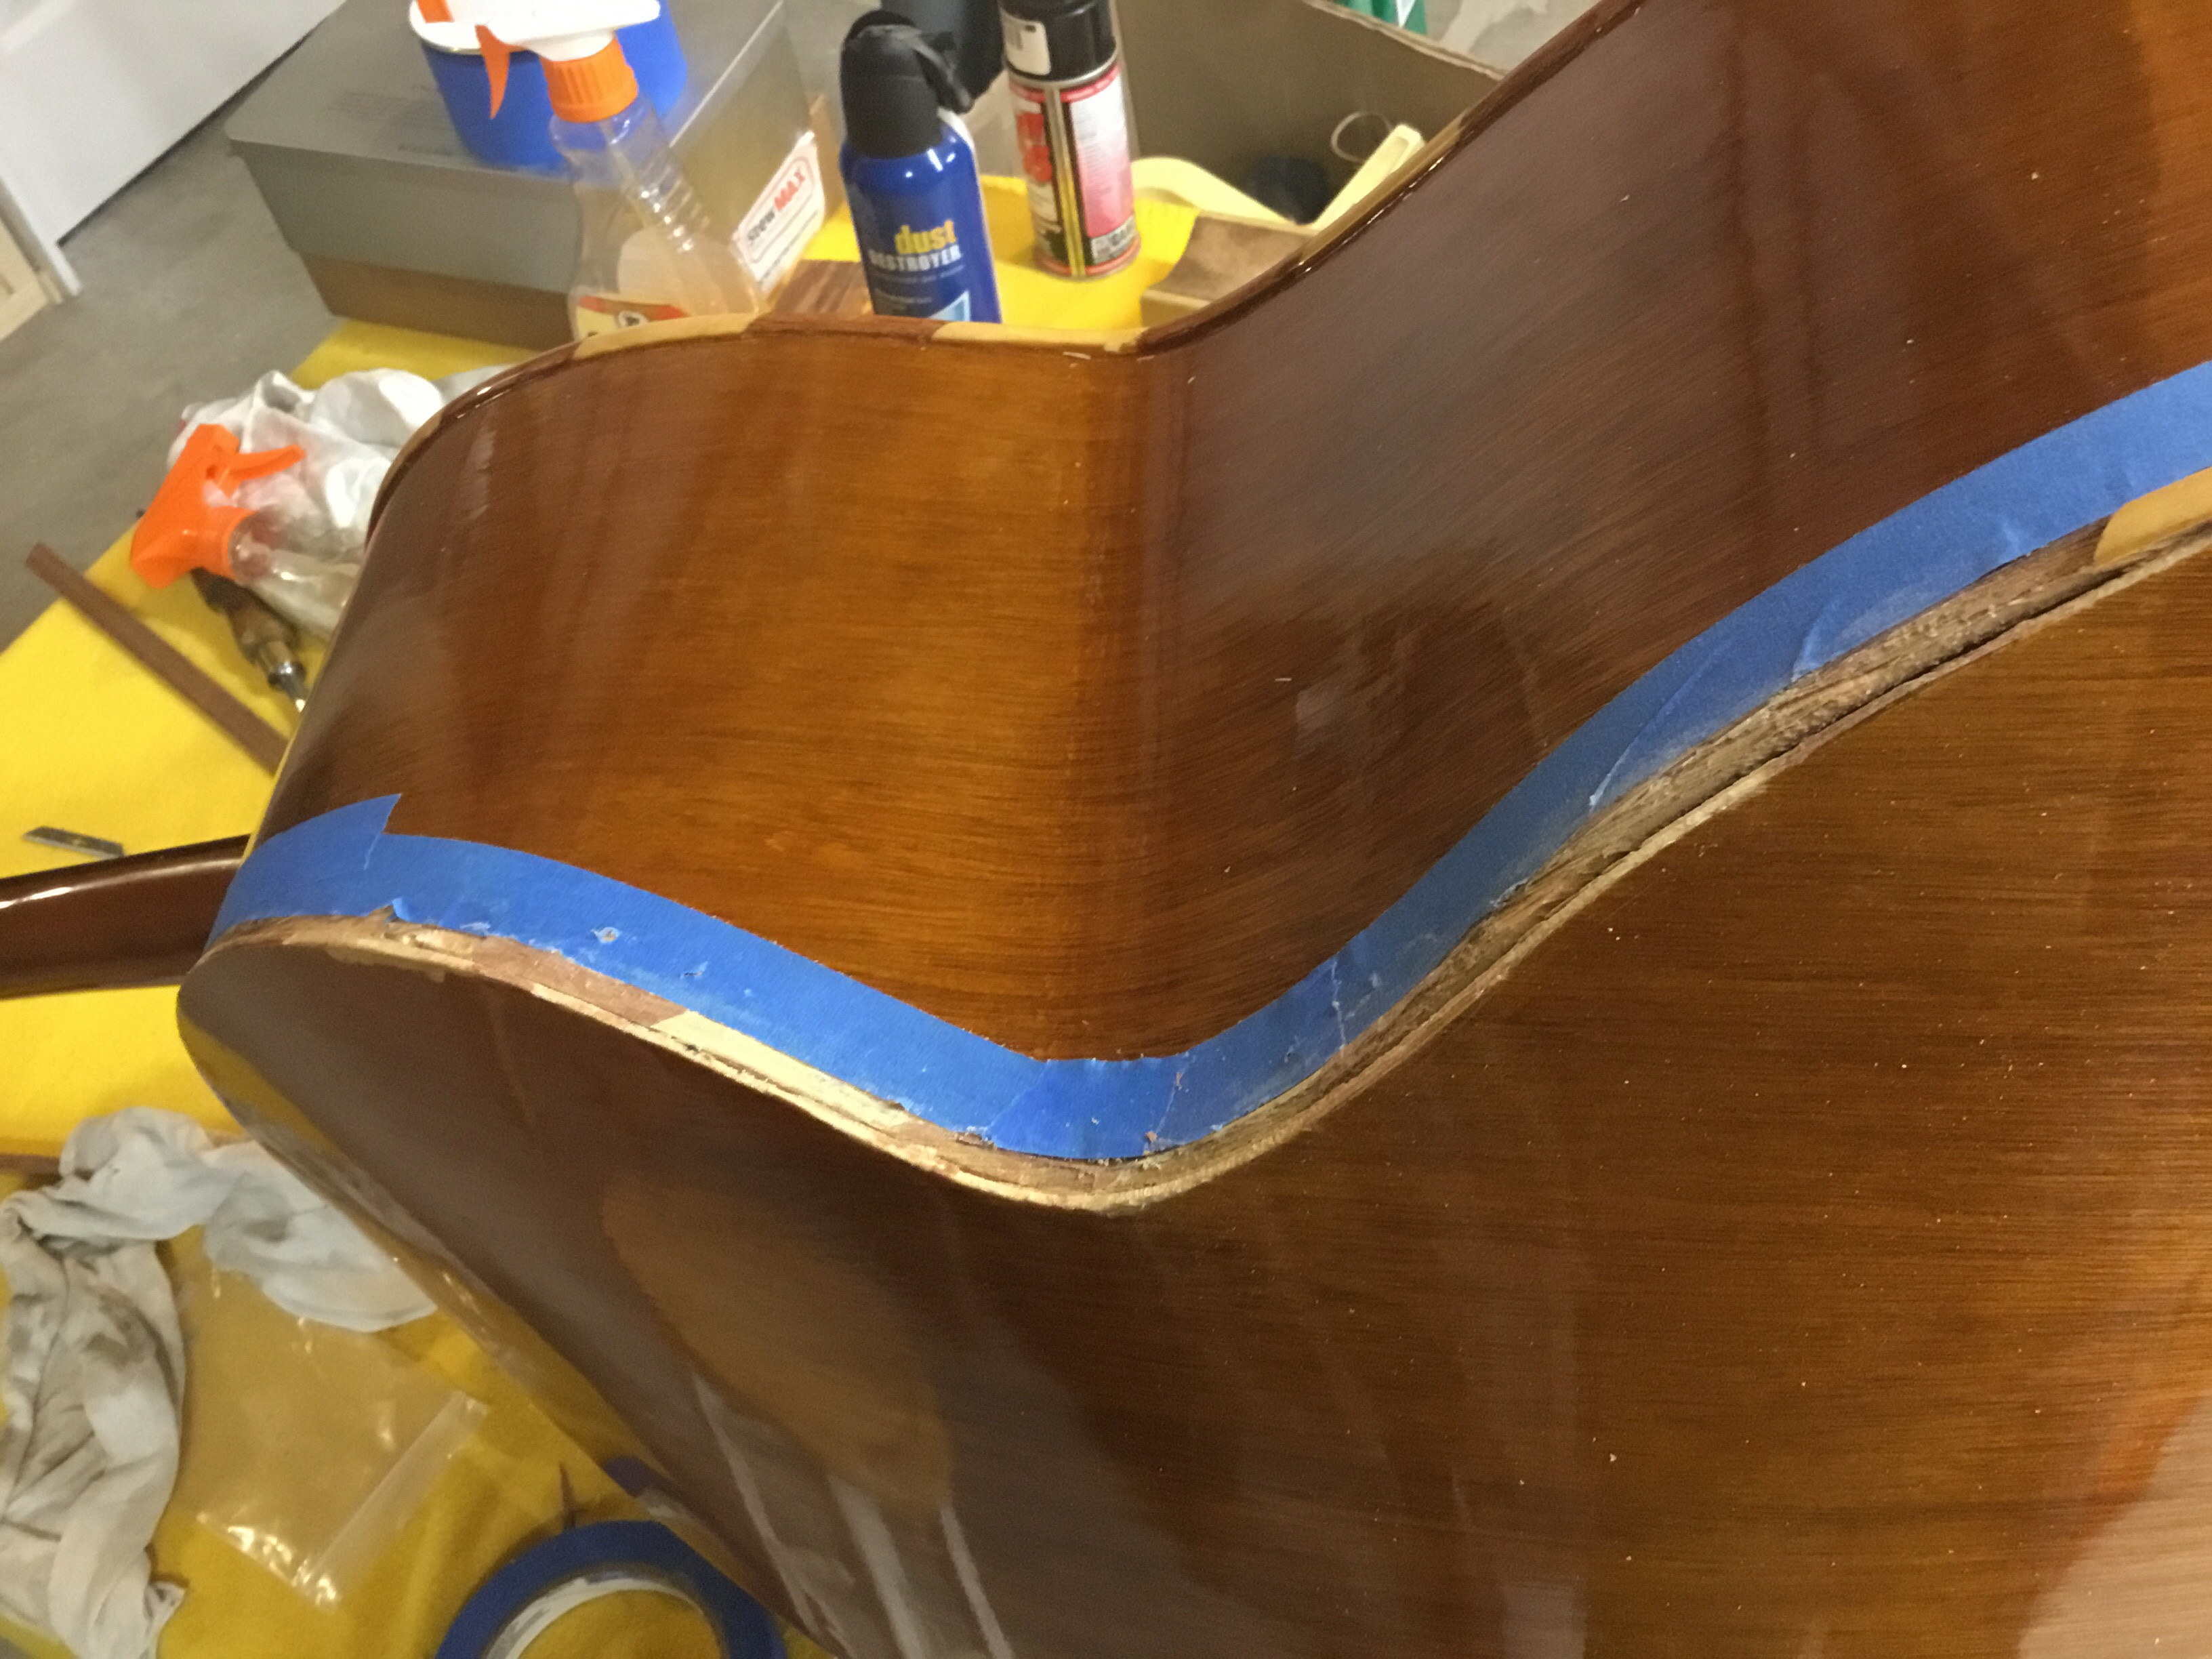
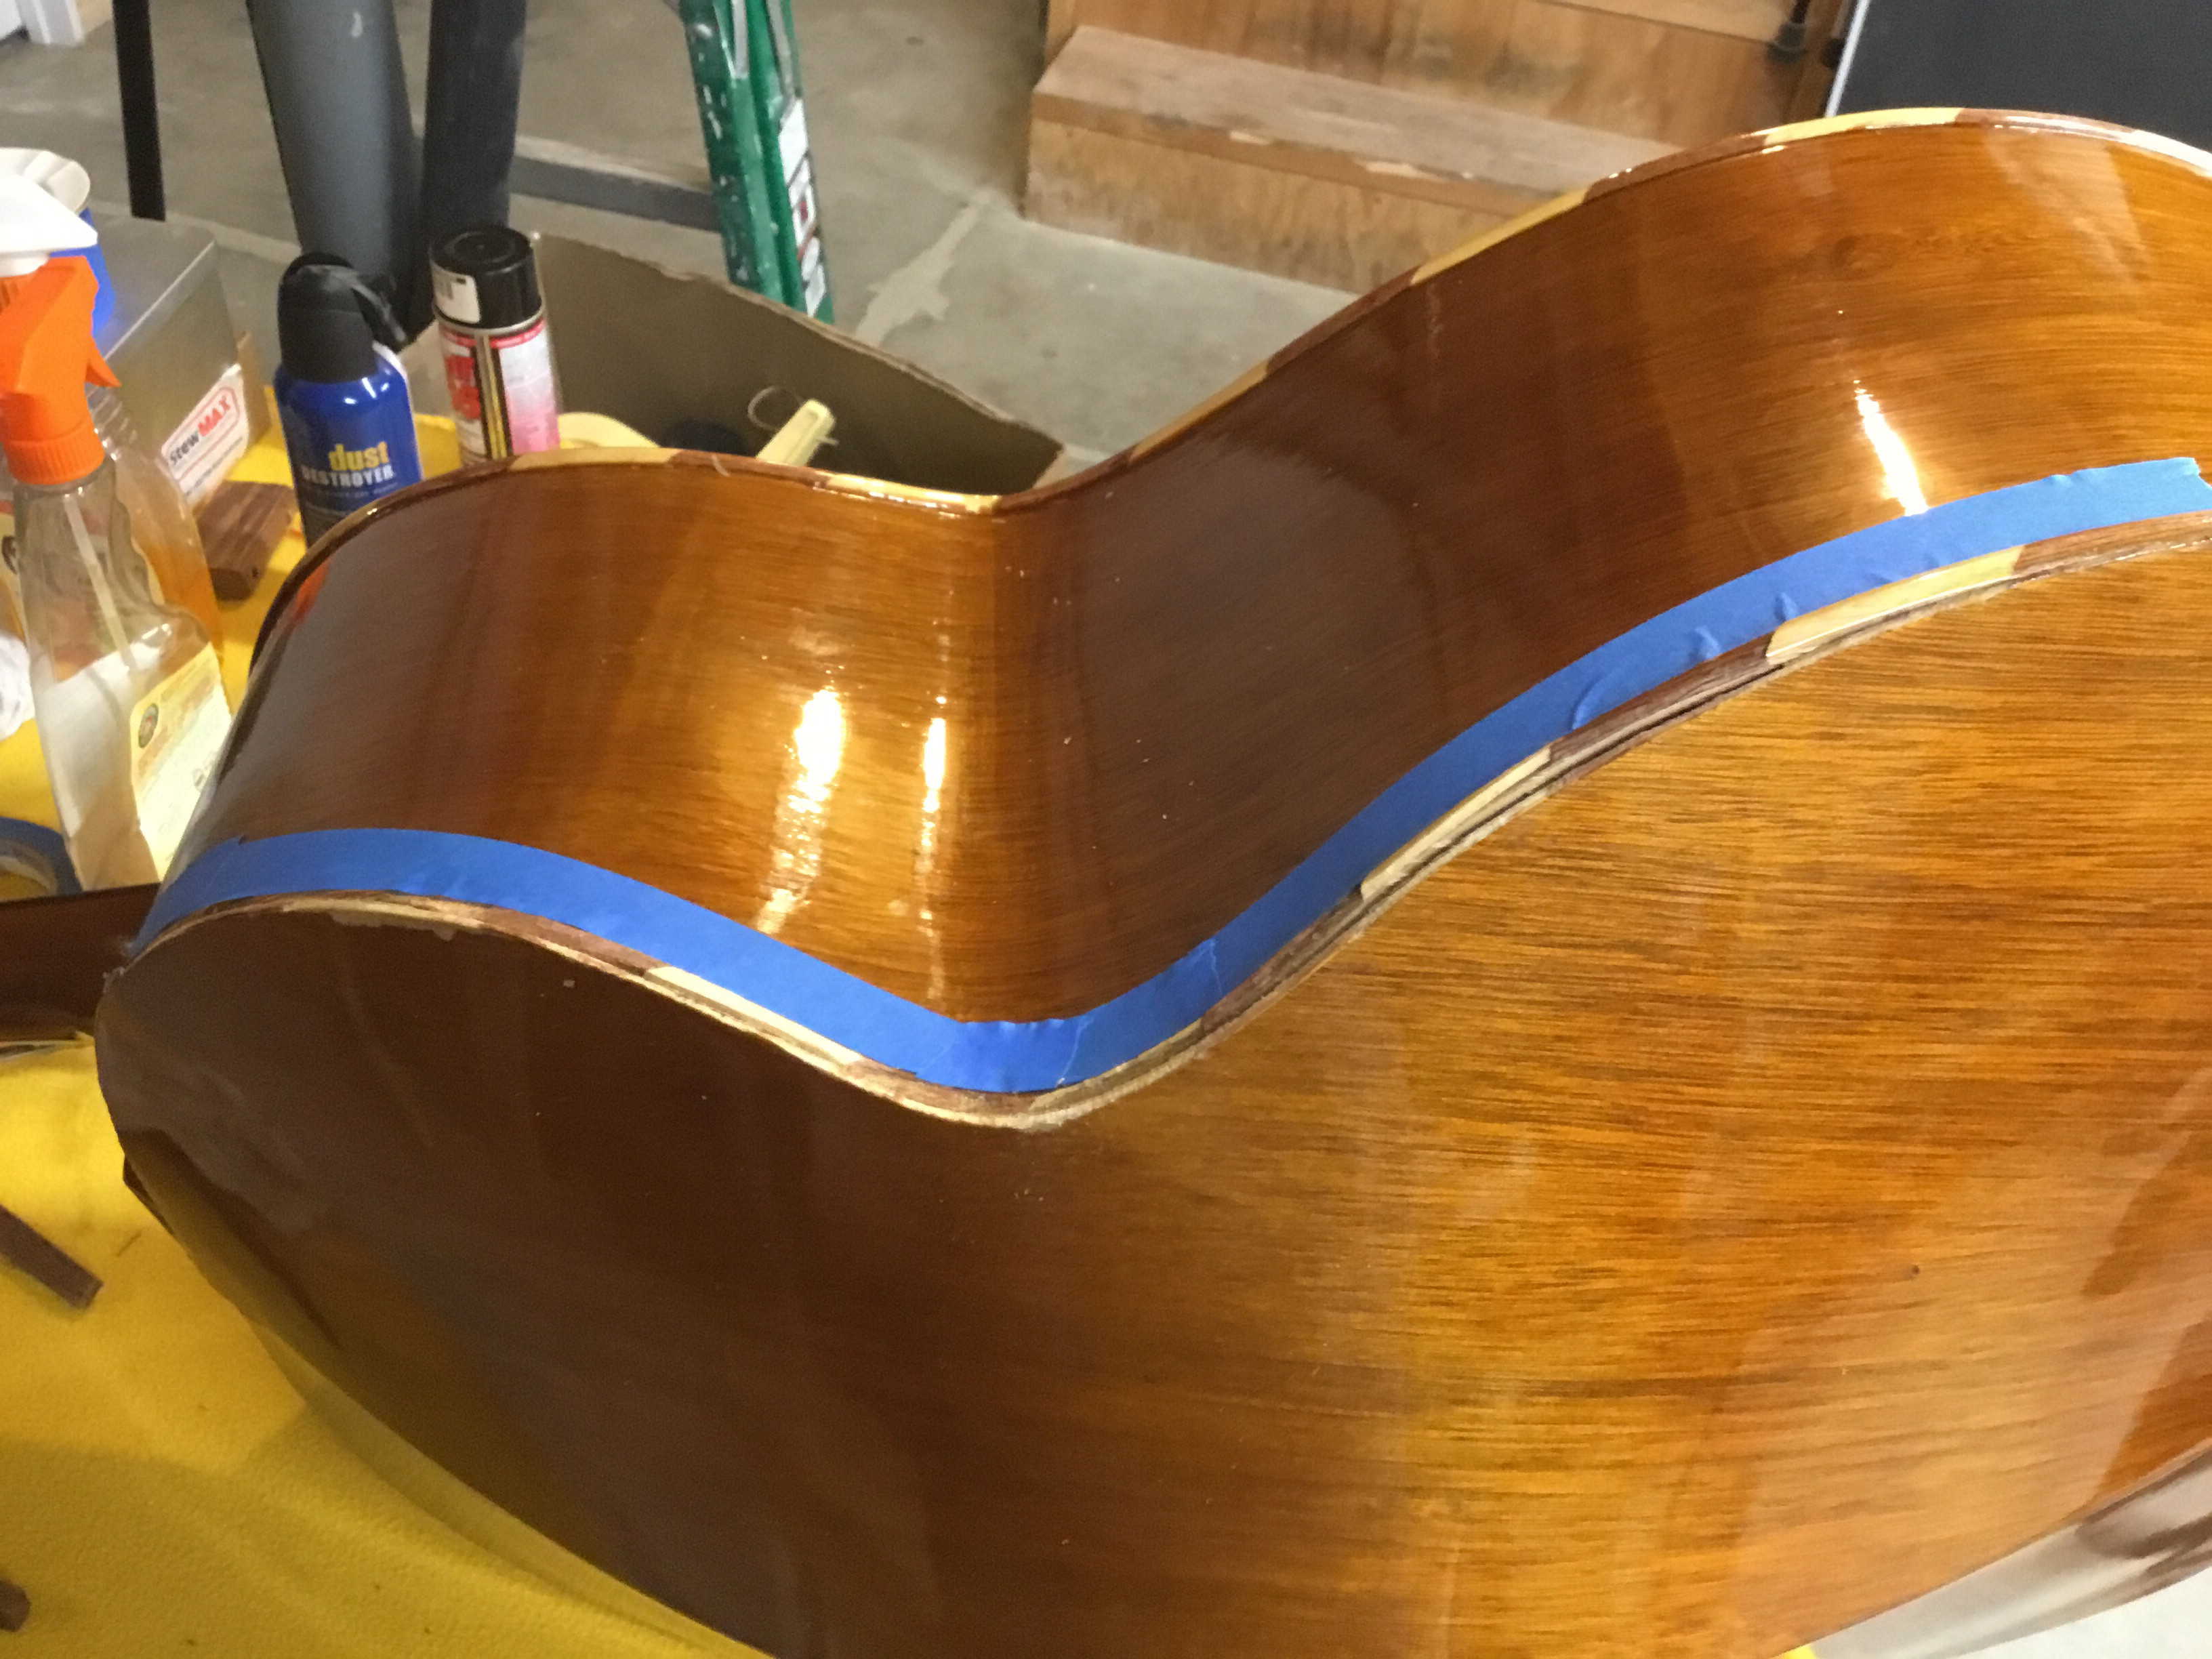
 Completed bindings glued in place on the Guitarron, restoring the instrument's edge detail
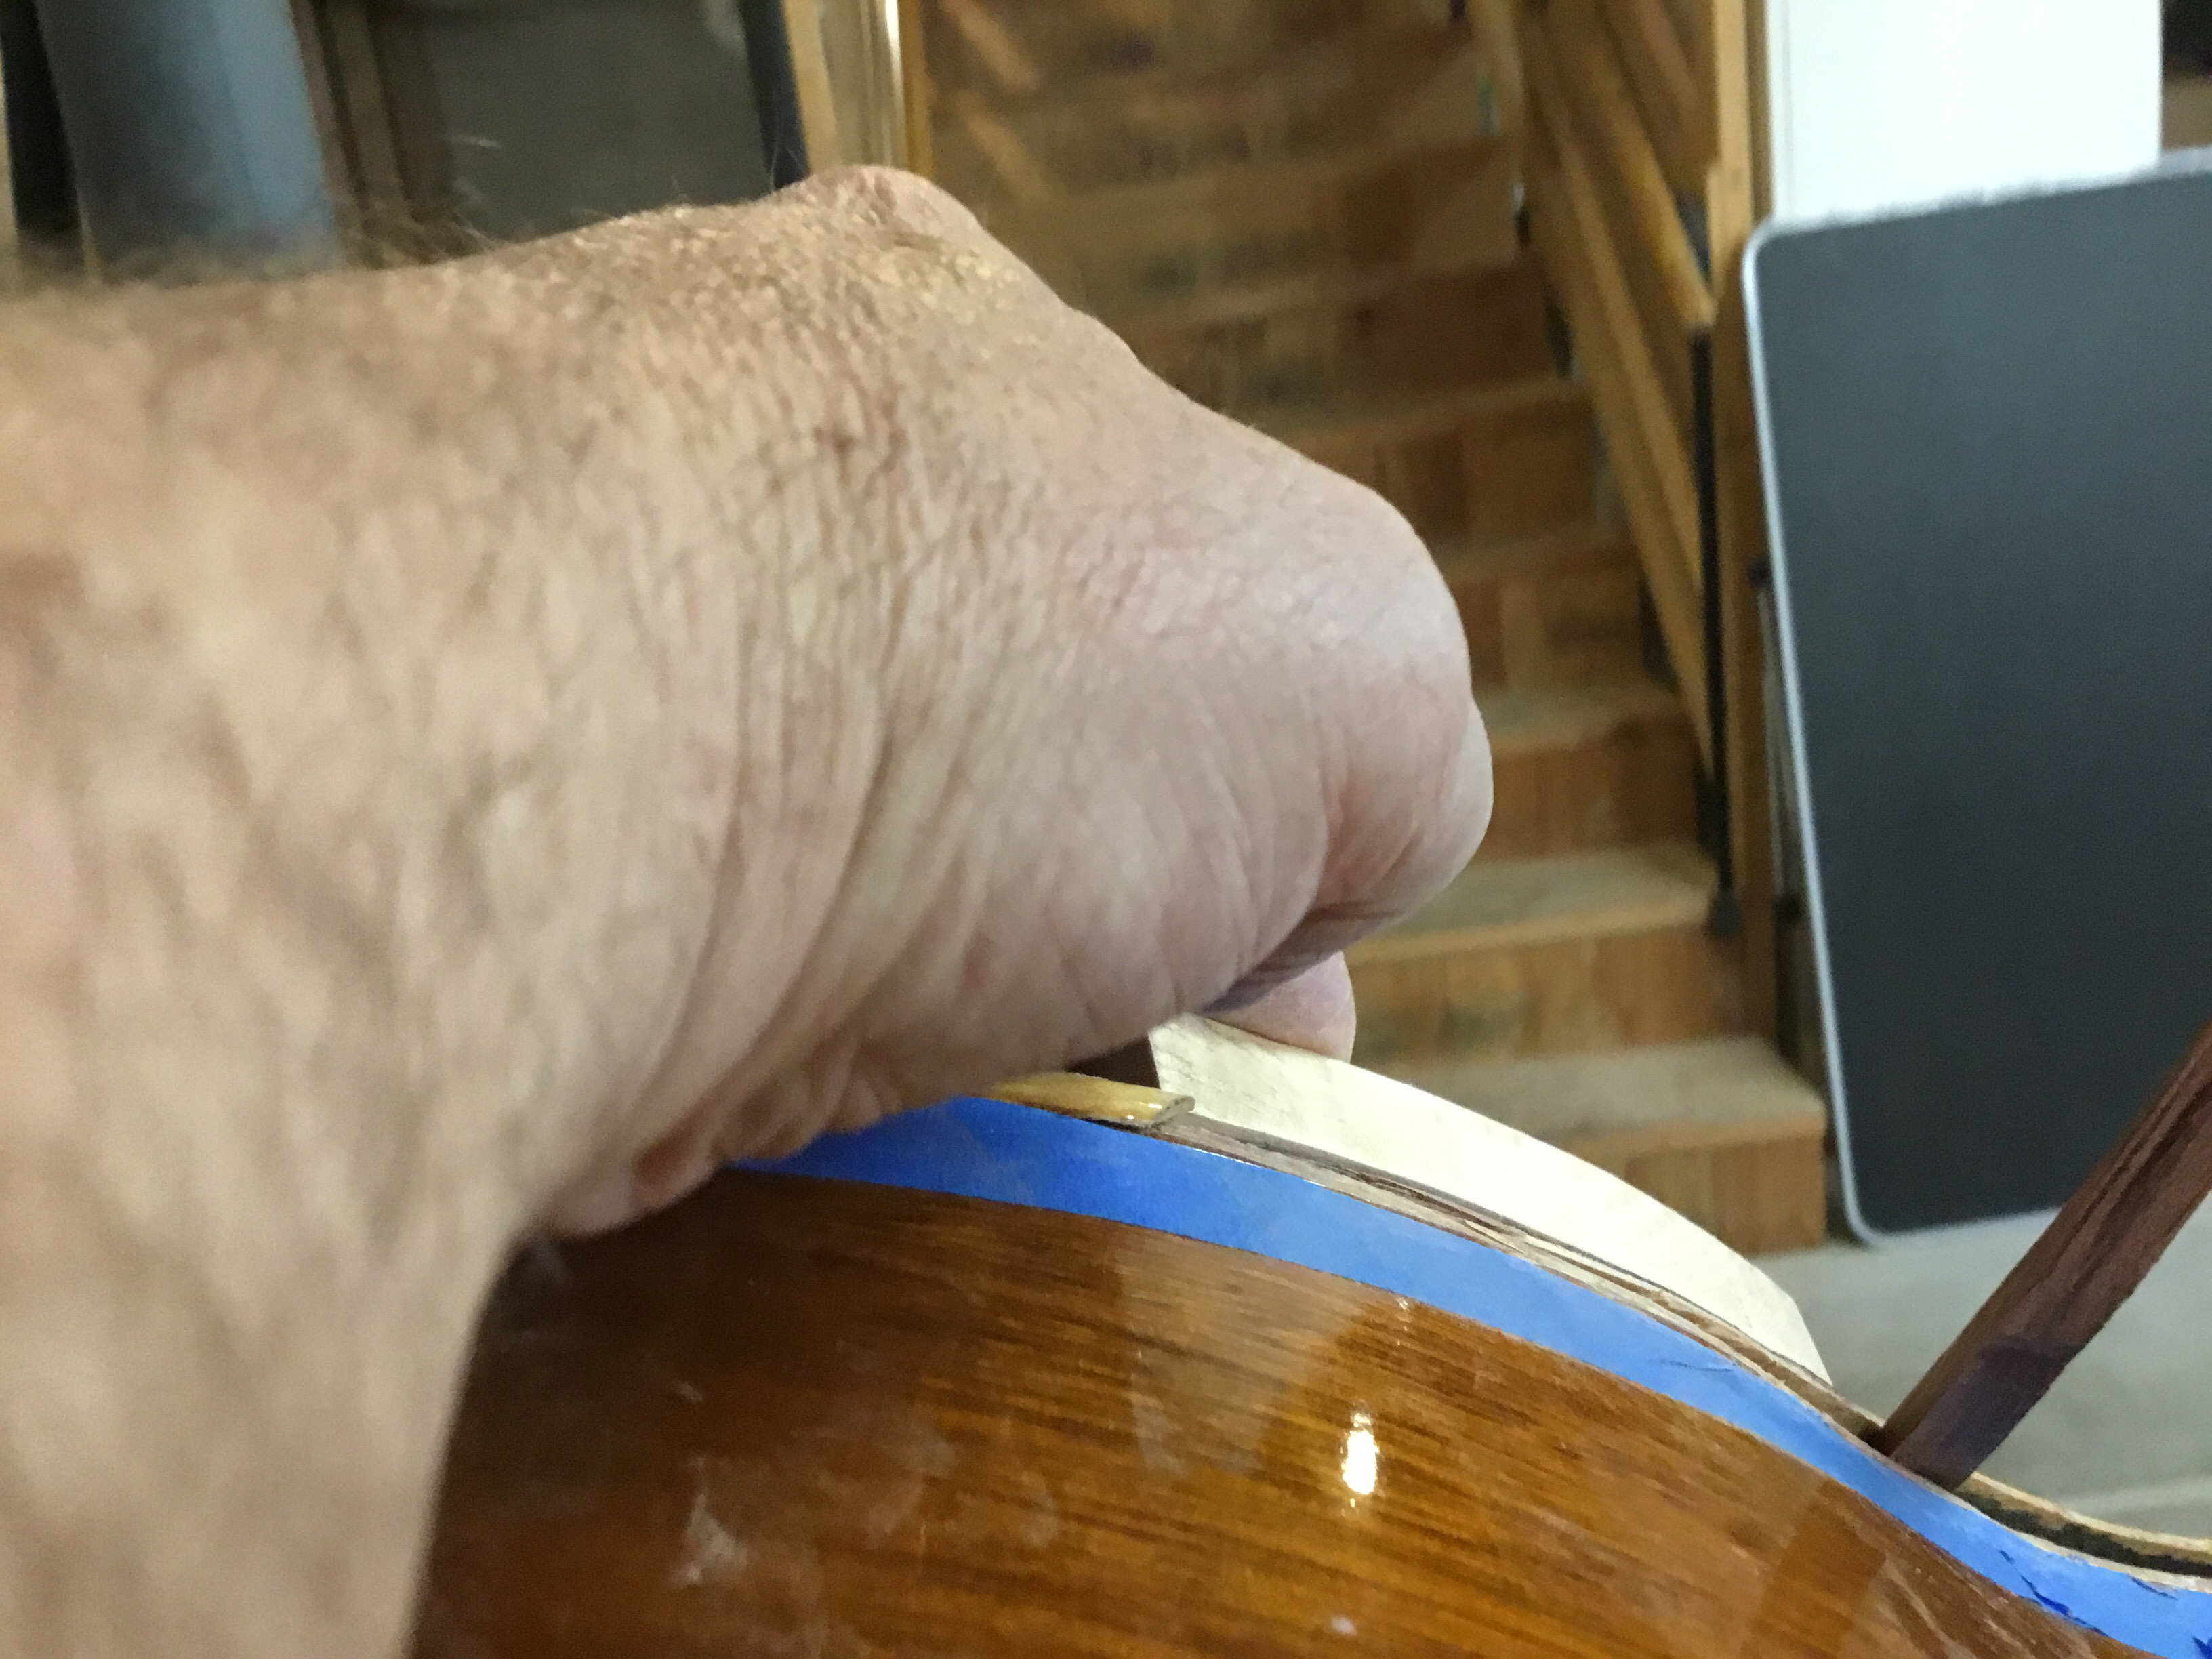
Heel Caps and Finishing Touches: Completing the Restoration
The penultimate step involved creating heel caps. These small pieces serve both aesthetic and structural purposes, concealing any tear-out at the base of the neck and, more importantly, adding reinforcement to prevent future separation of the repaired back seam near the neck joint. I crafted these heel caps from thin mahogany pieces, shaping them on a bandsaw and smoothing them with a spindle sander. As the heel caps were being attached directly to the finished Guitarron – finished with polyurethane rather than traditional nitrocellulose lacquer – a polyurethane-based glue was necessary. Titebond polyurethane glue was chosen for its superior adhesion in this application, proving a better choice than more commonly known polyurethane glues.
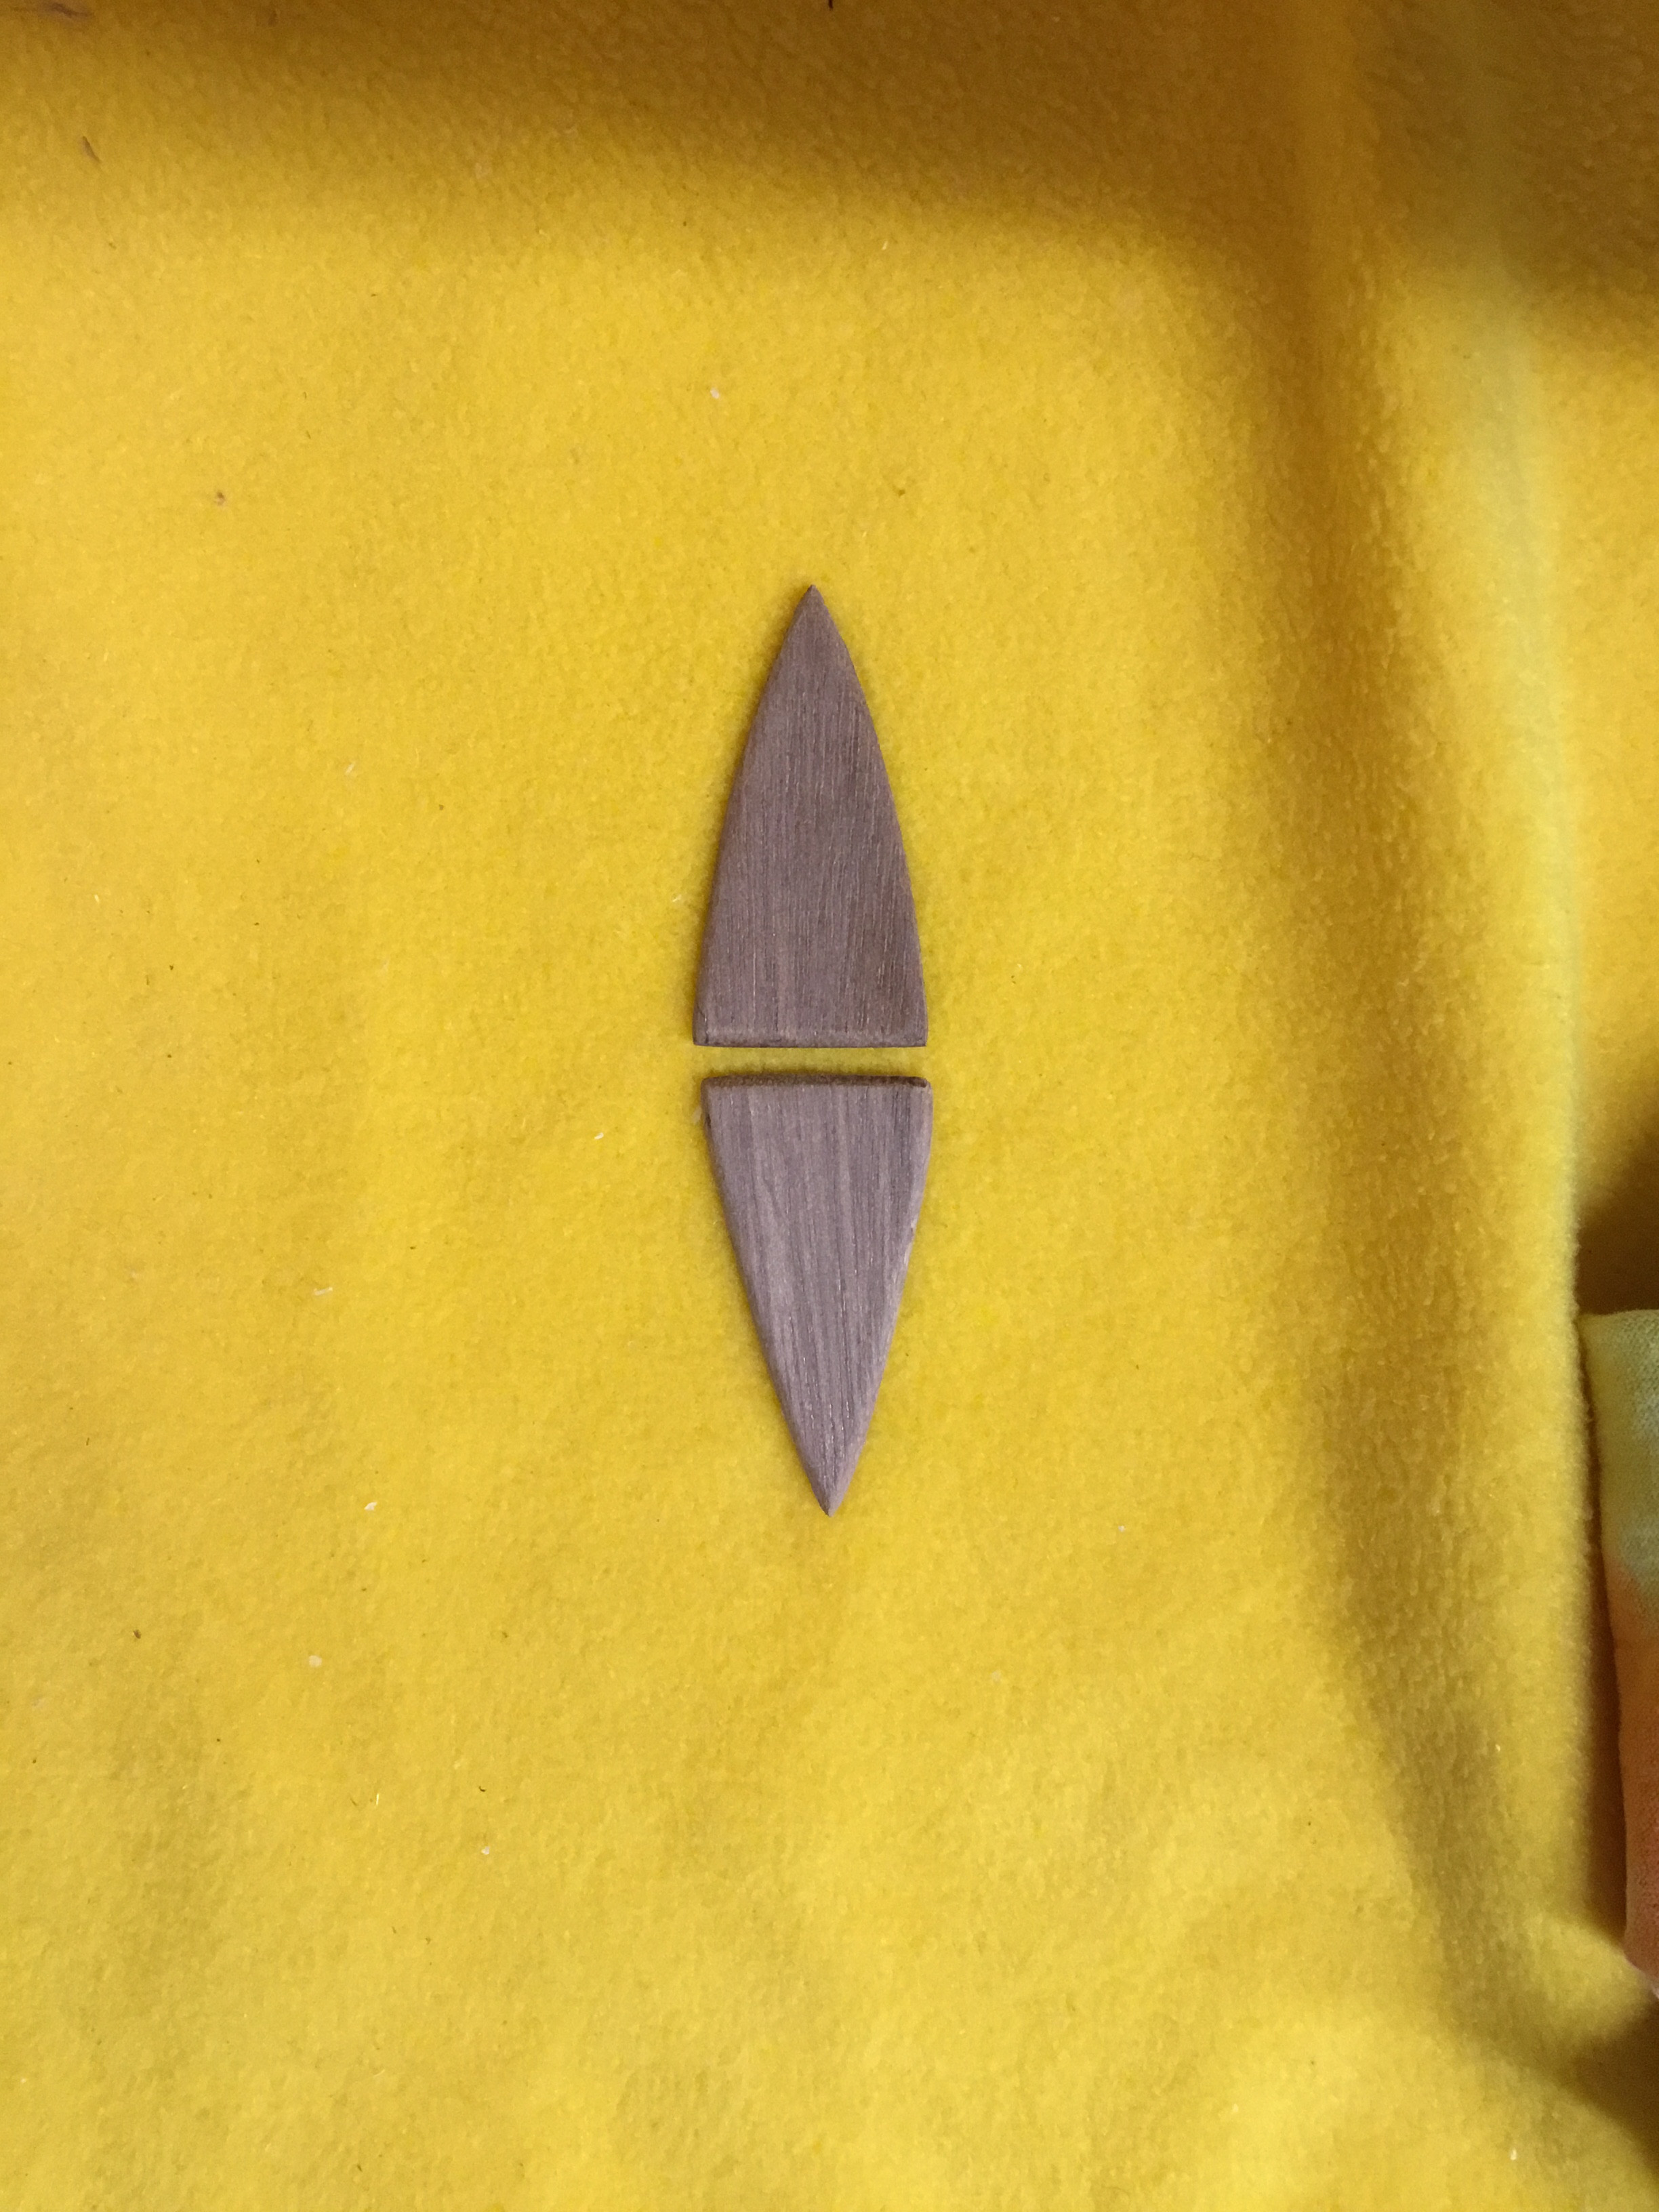 Mahogany heel plates, ready to be shaped and applied to the Guitarron's neck joint
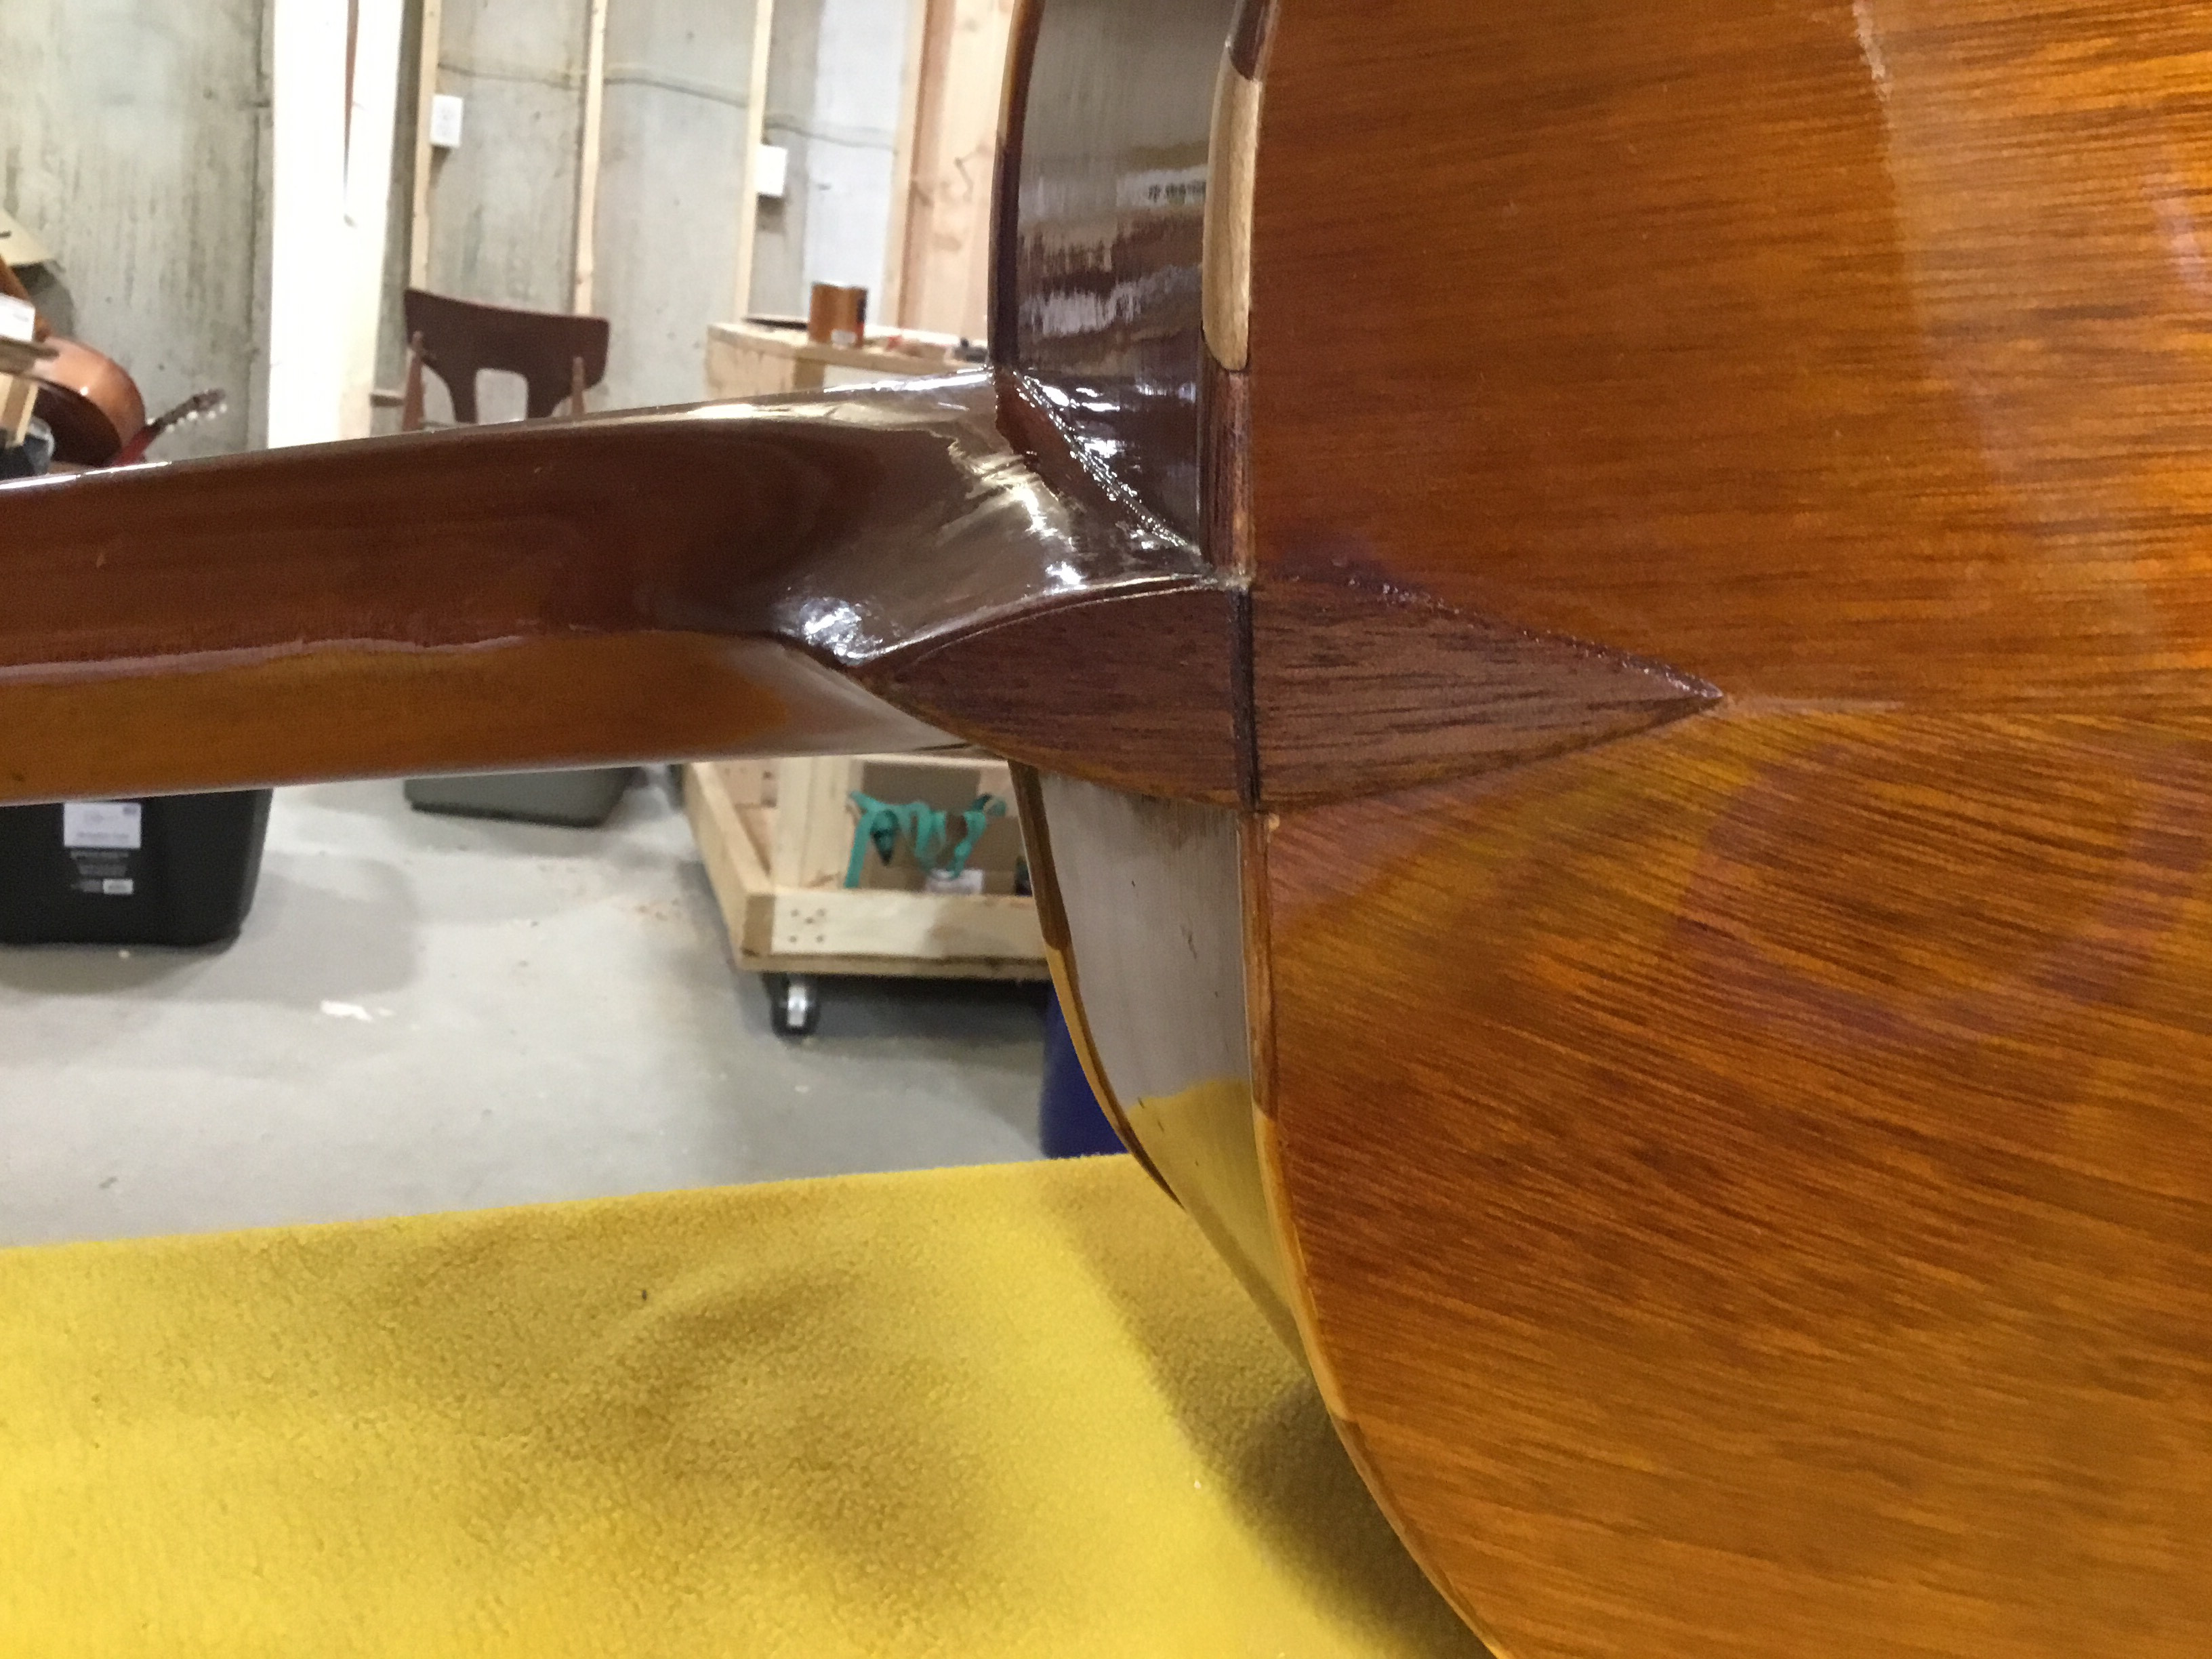
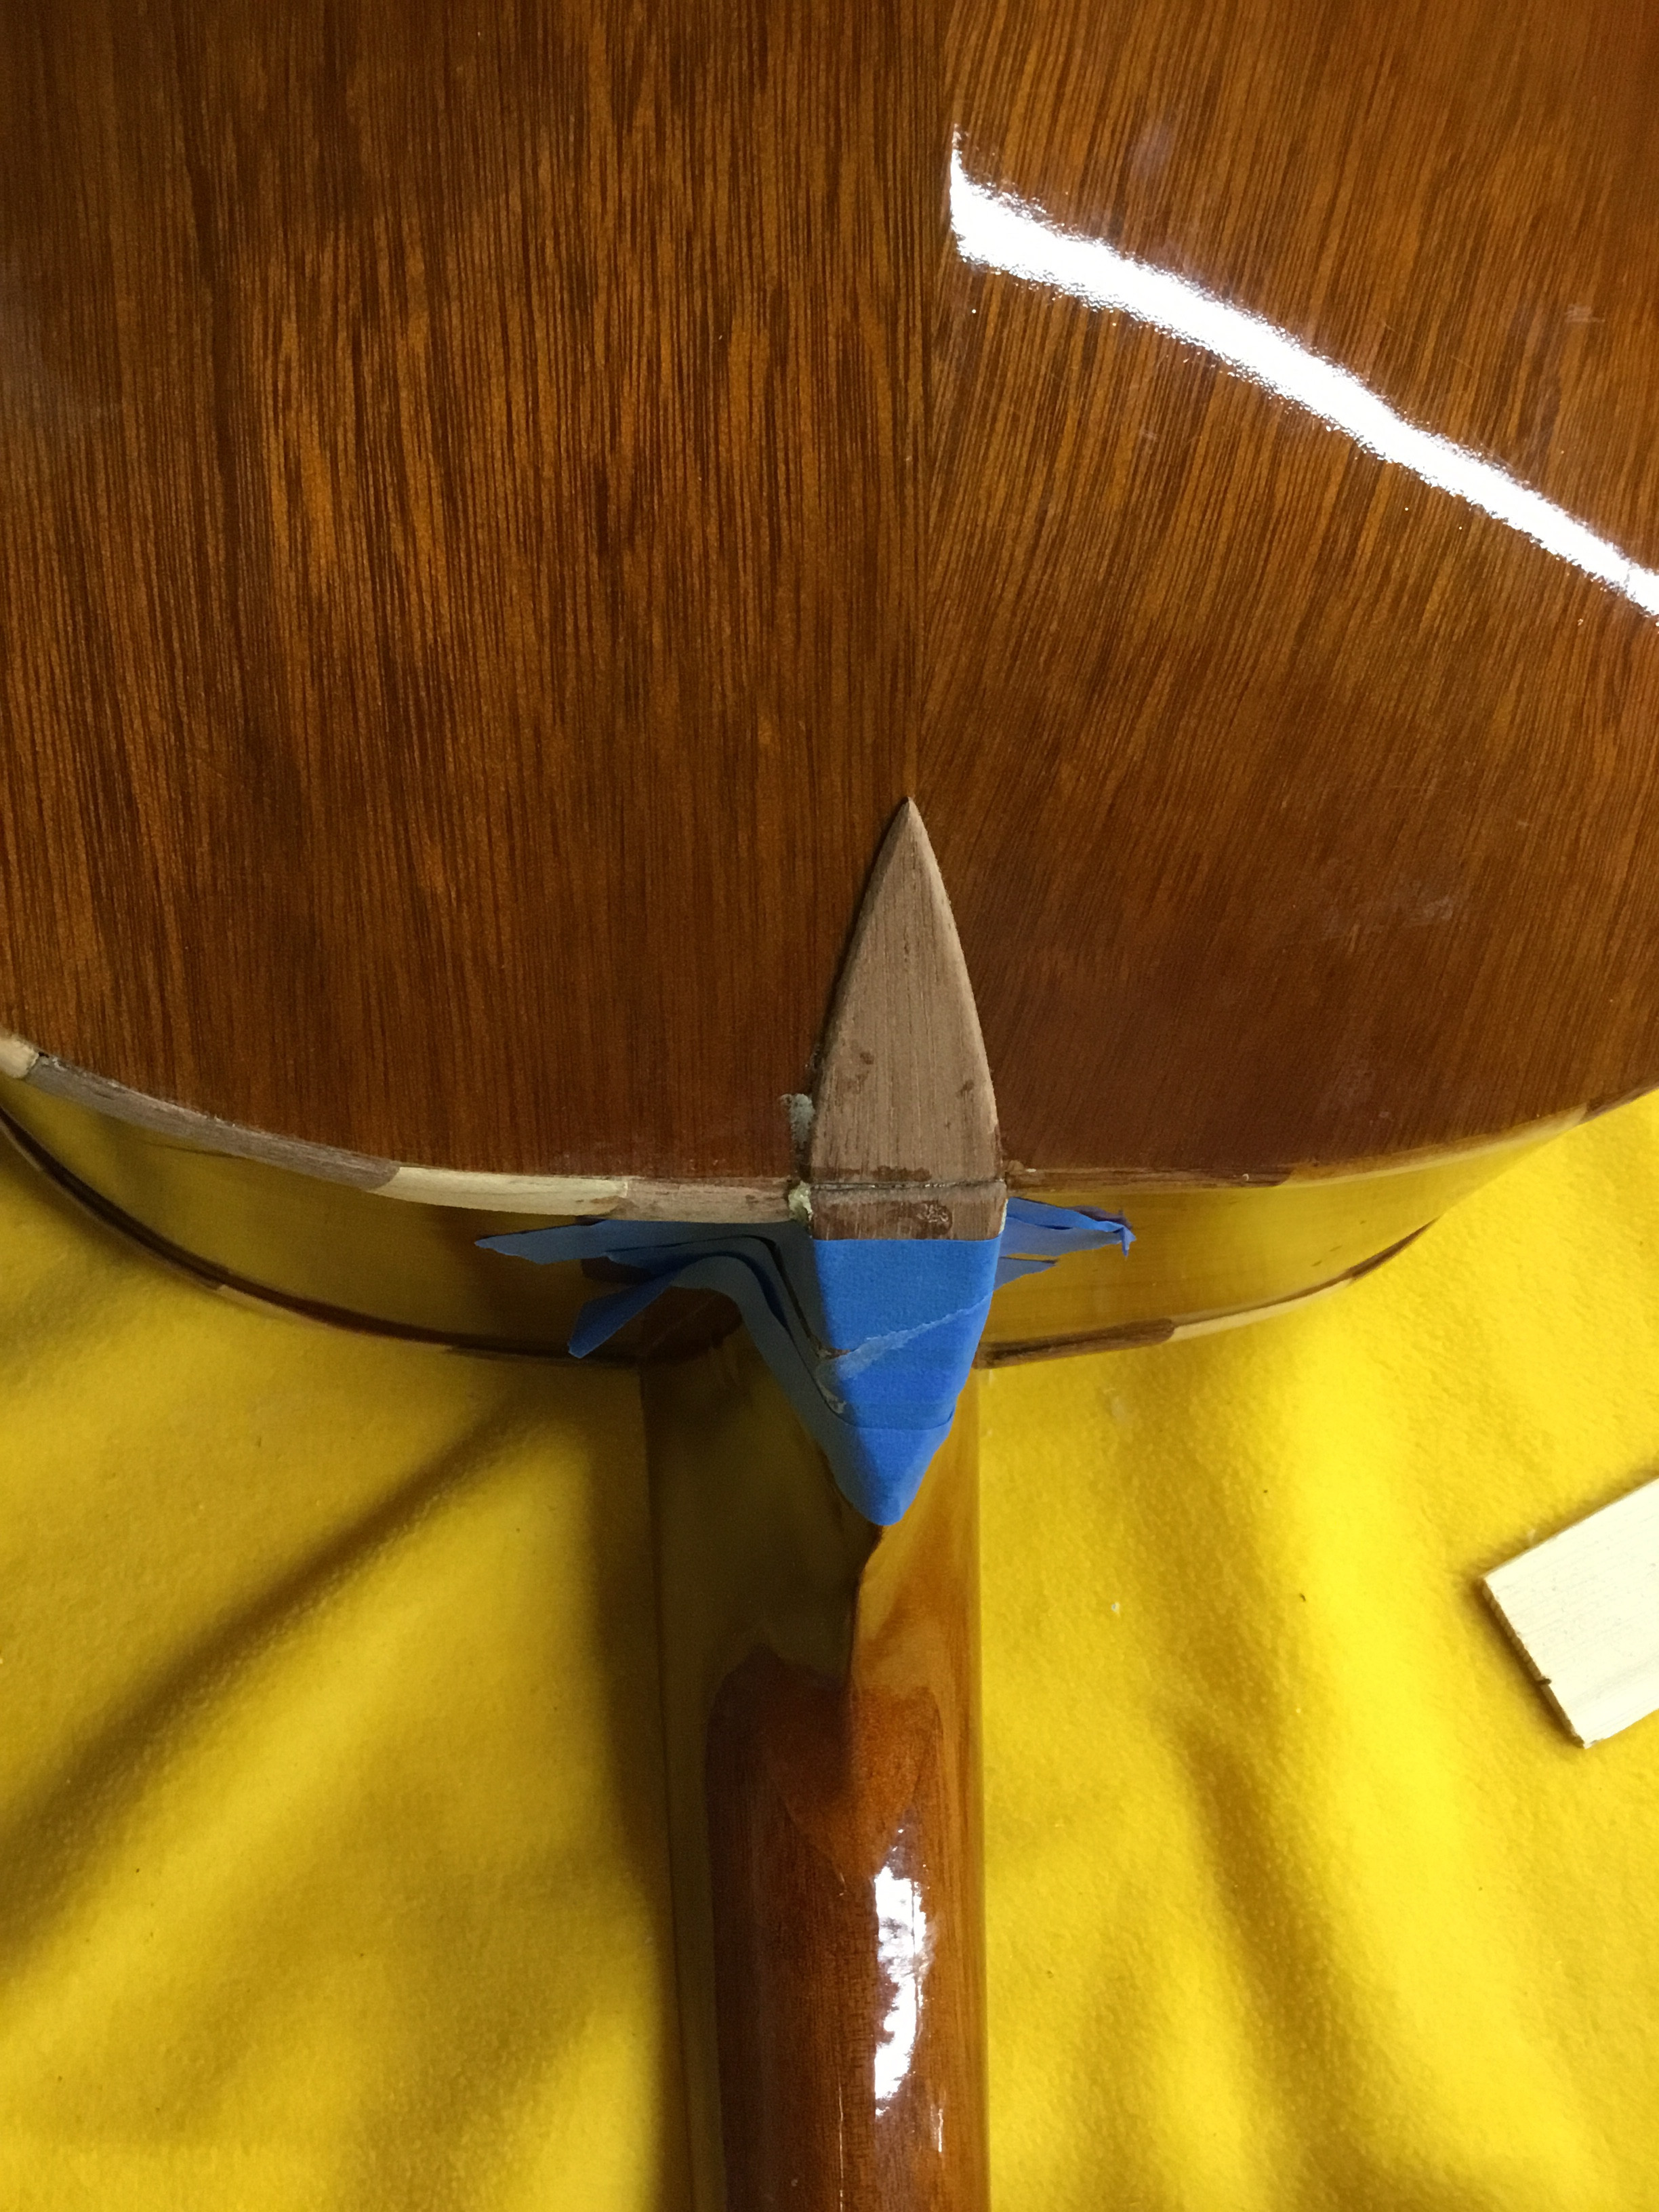 Heel plates being glued onto the Guitarron's neck joint, providing reinforcement and a clean finish
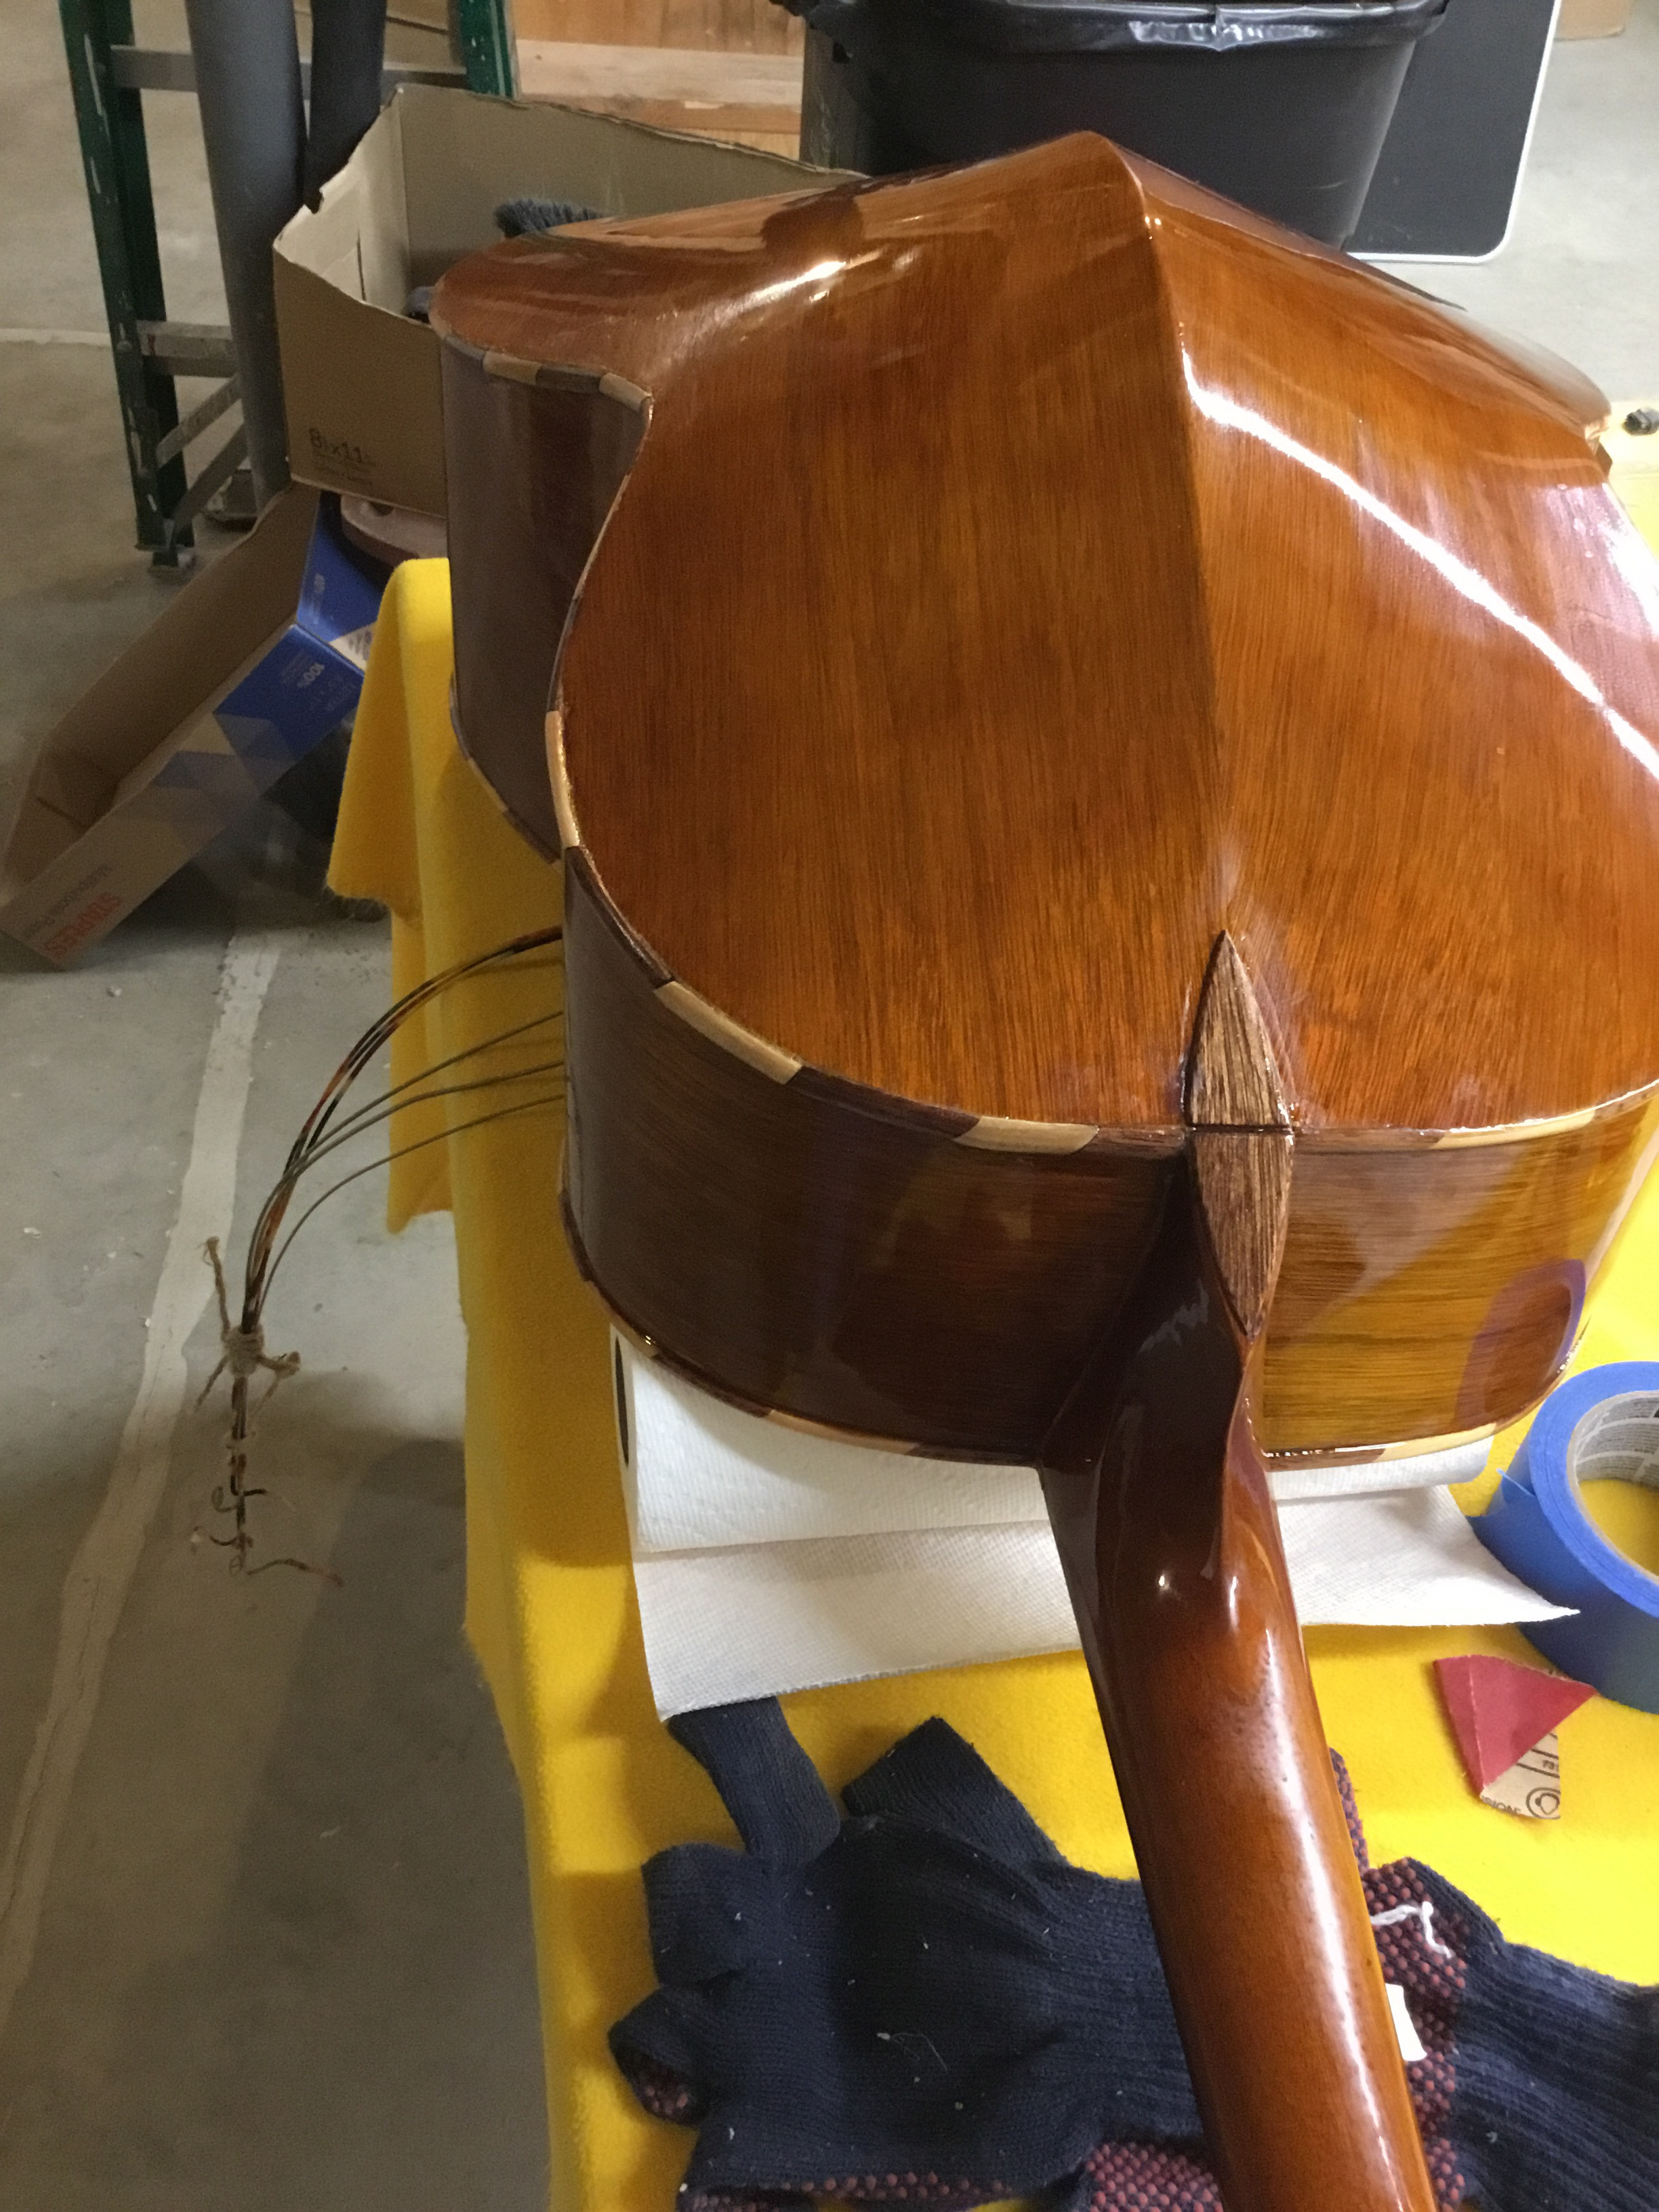
 Heel plates fully glued and secured in place on the Guitarron's neck joint
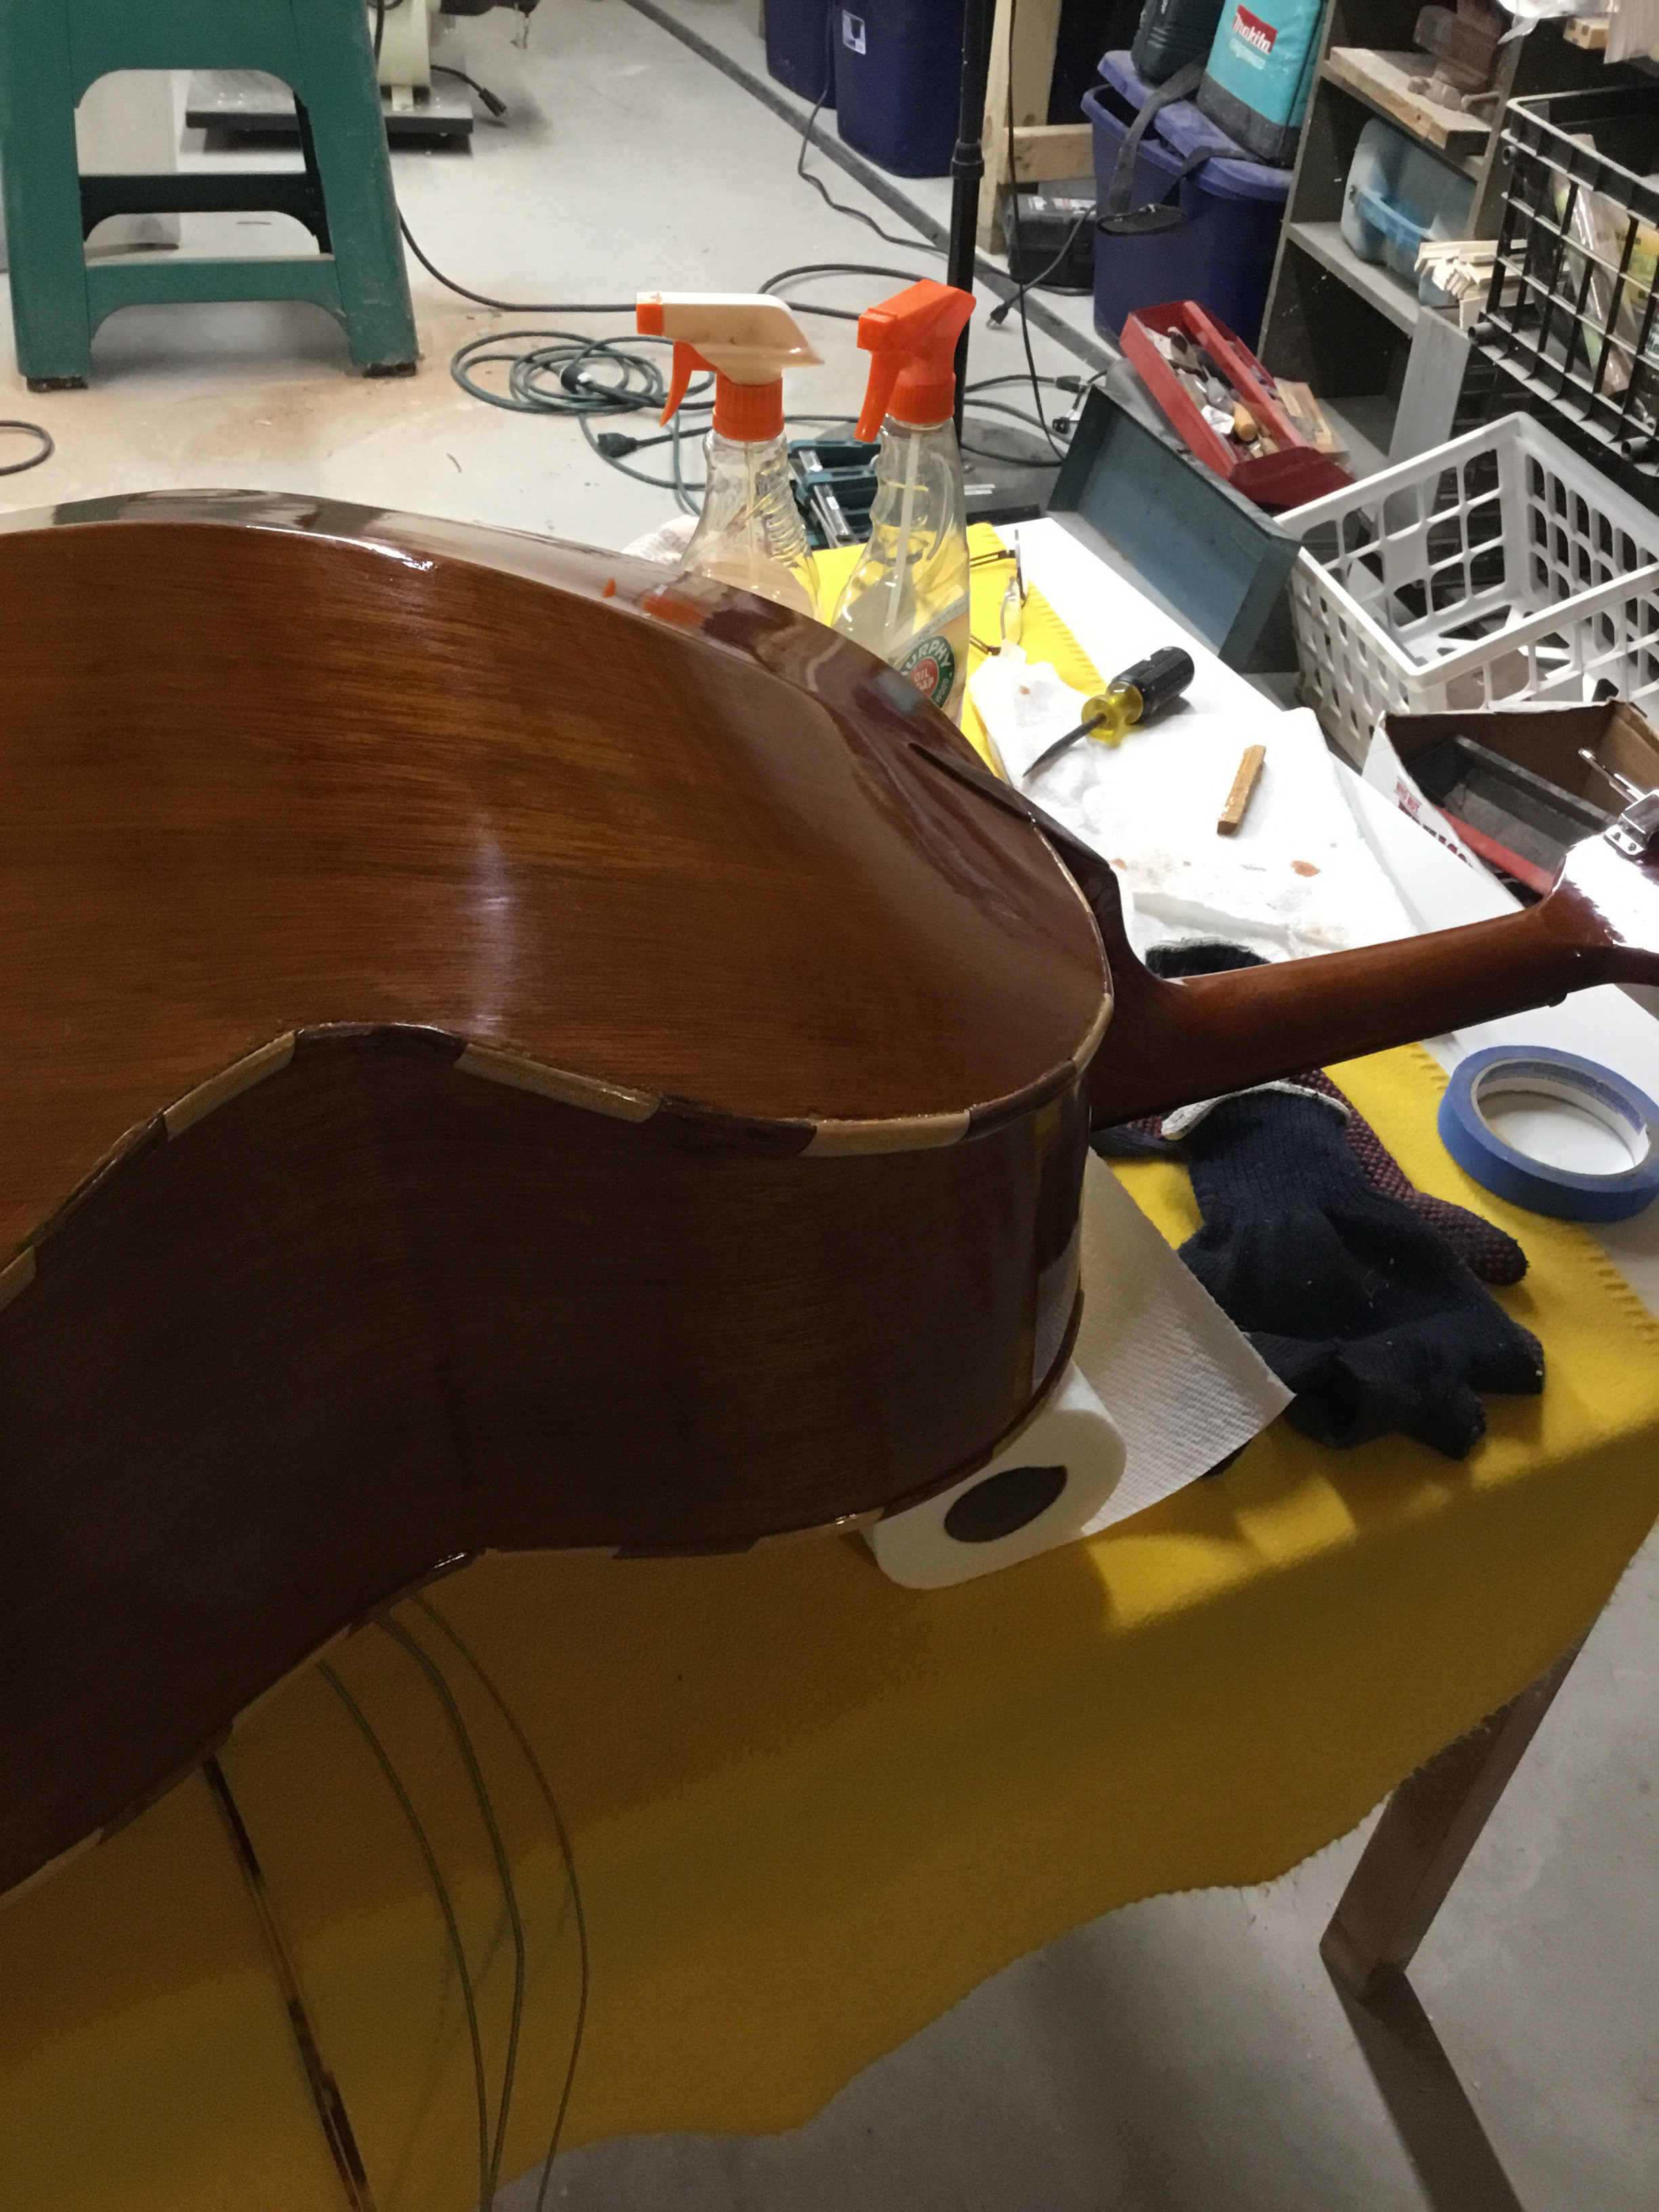
The final stages consisted of touch-up work. Wood stain was used to address any areas where the original finish was compromised, including the small gouge from the chisel mishap. Following the stain, a couple of coats of polyurethane were applied to the newly added wood components, seamlessly blending the repairs with the original finish.
 First coat of finish being applied to the repaired area of the Guitarron
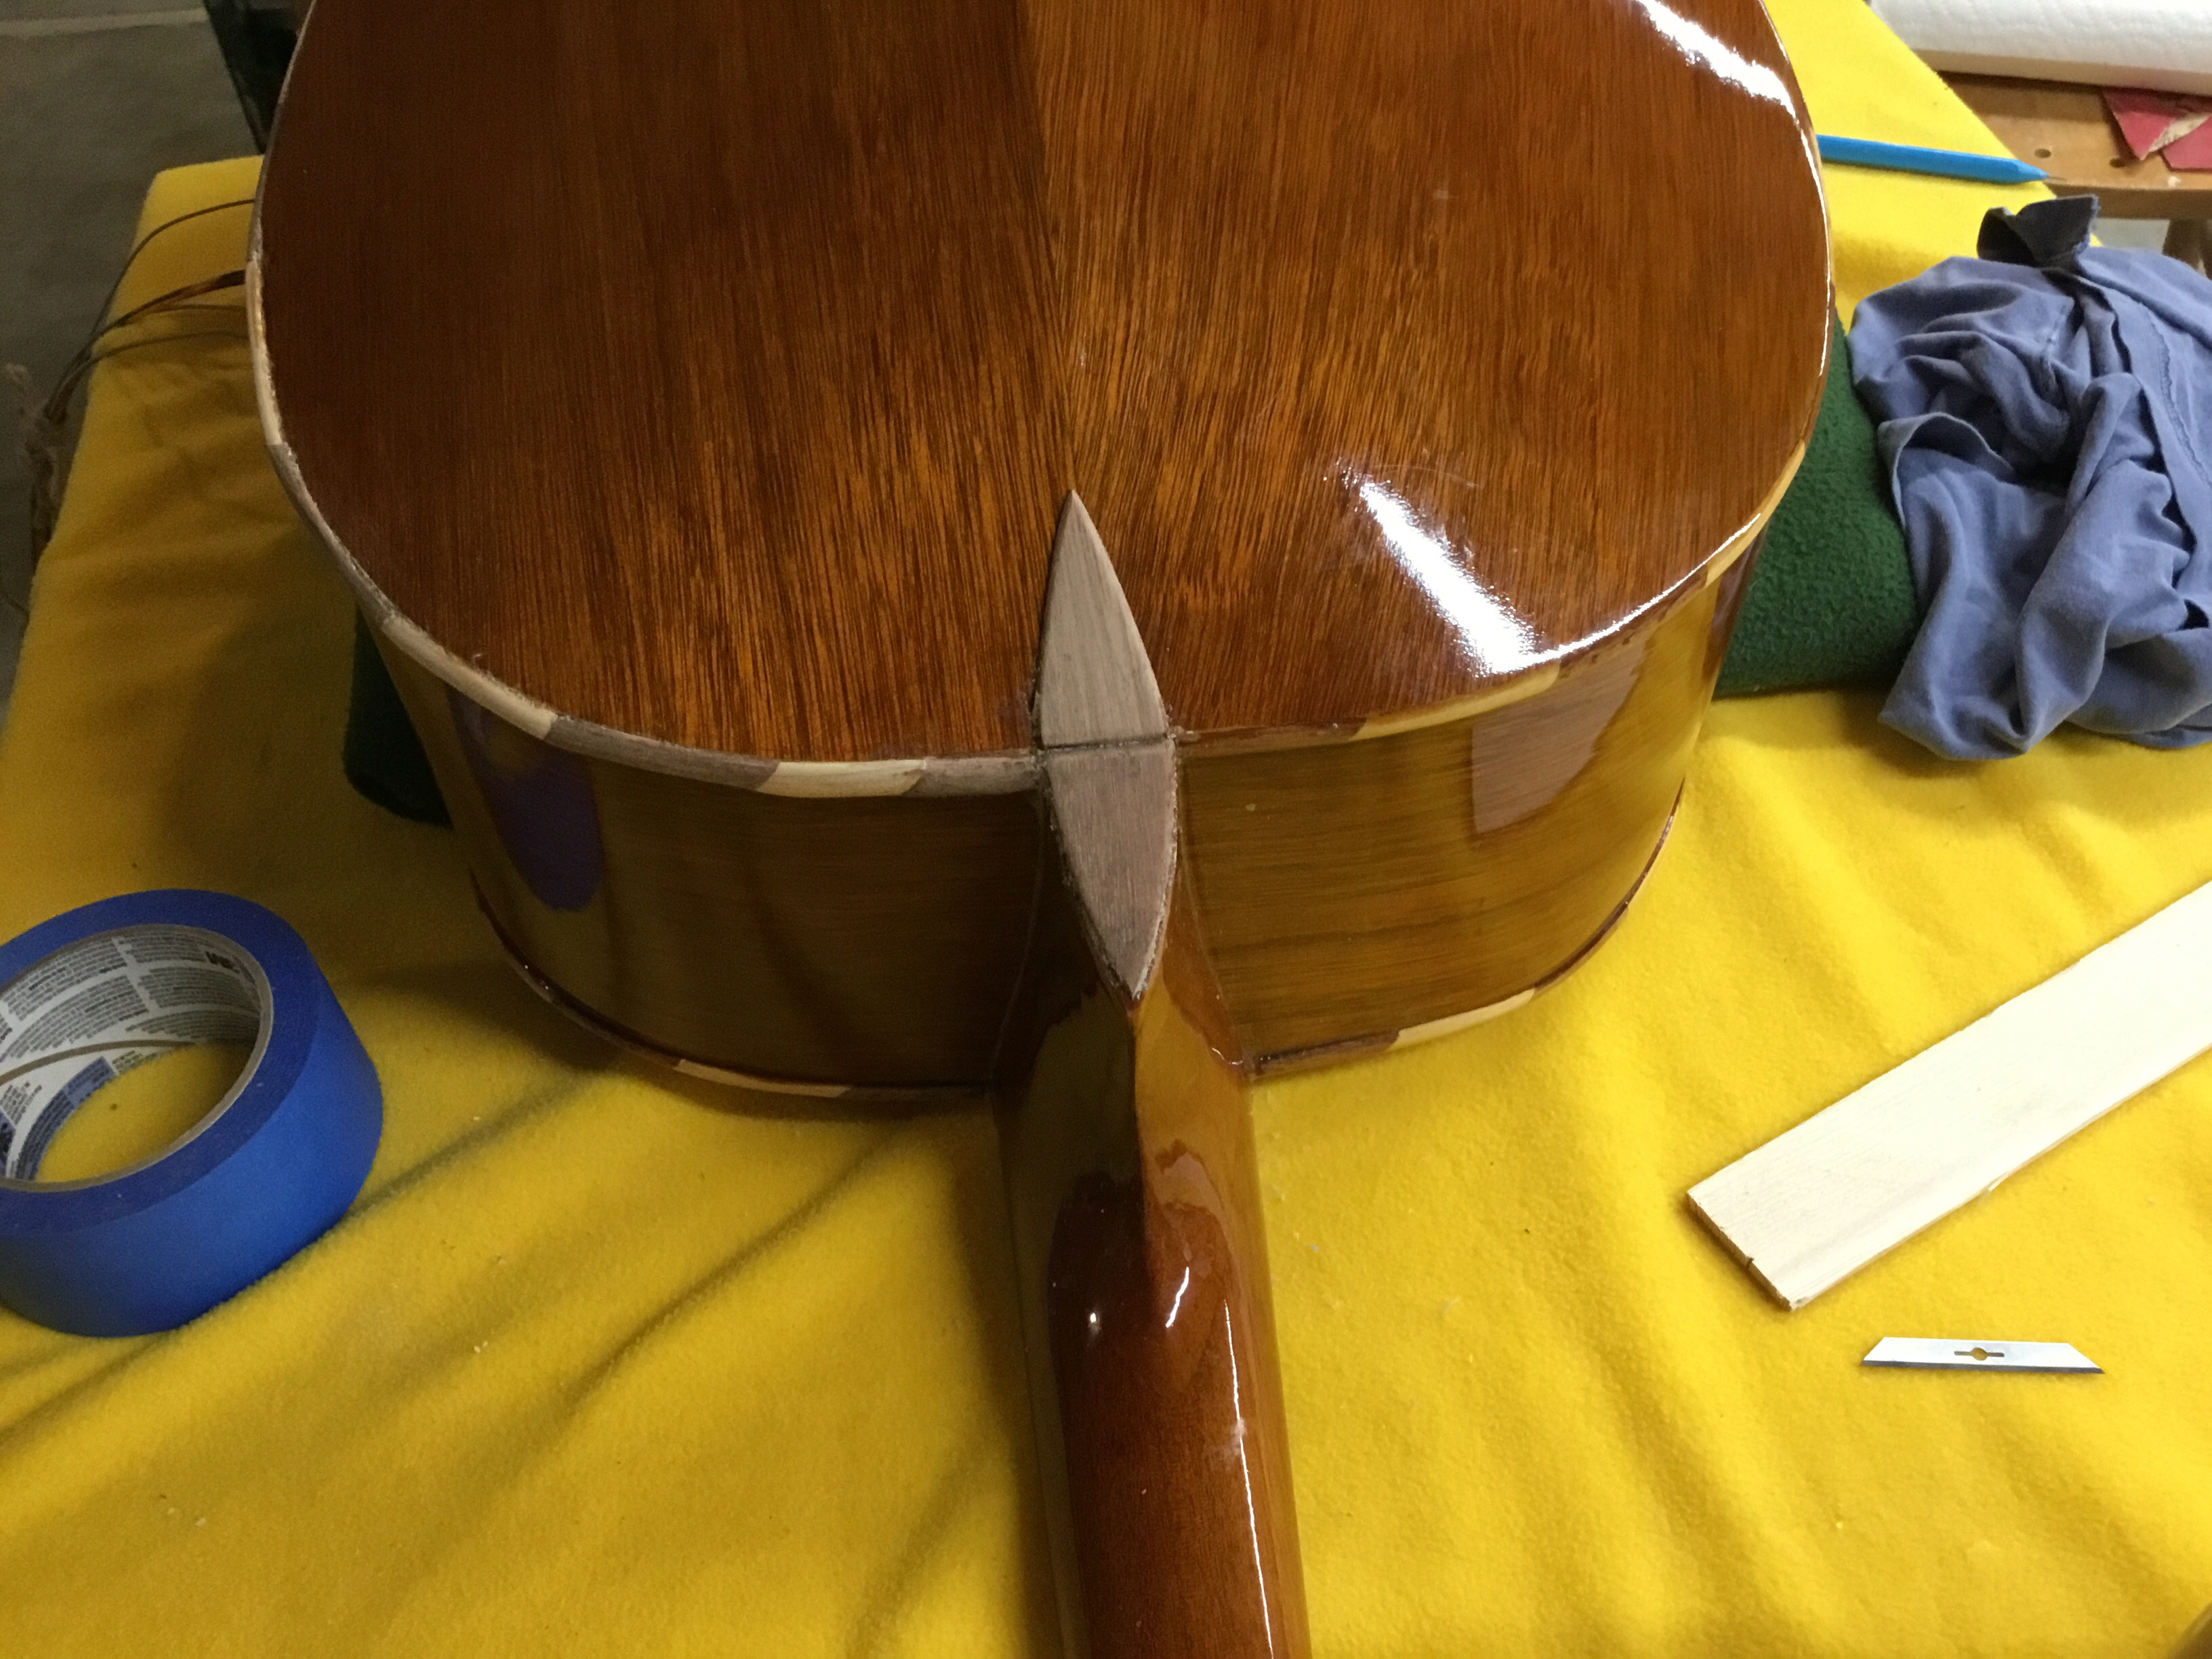
 Close up of the finished heel caps, showcasing the seamless integration with the Guitarron's body after staining and polyurethane coating
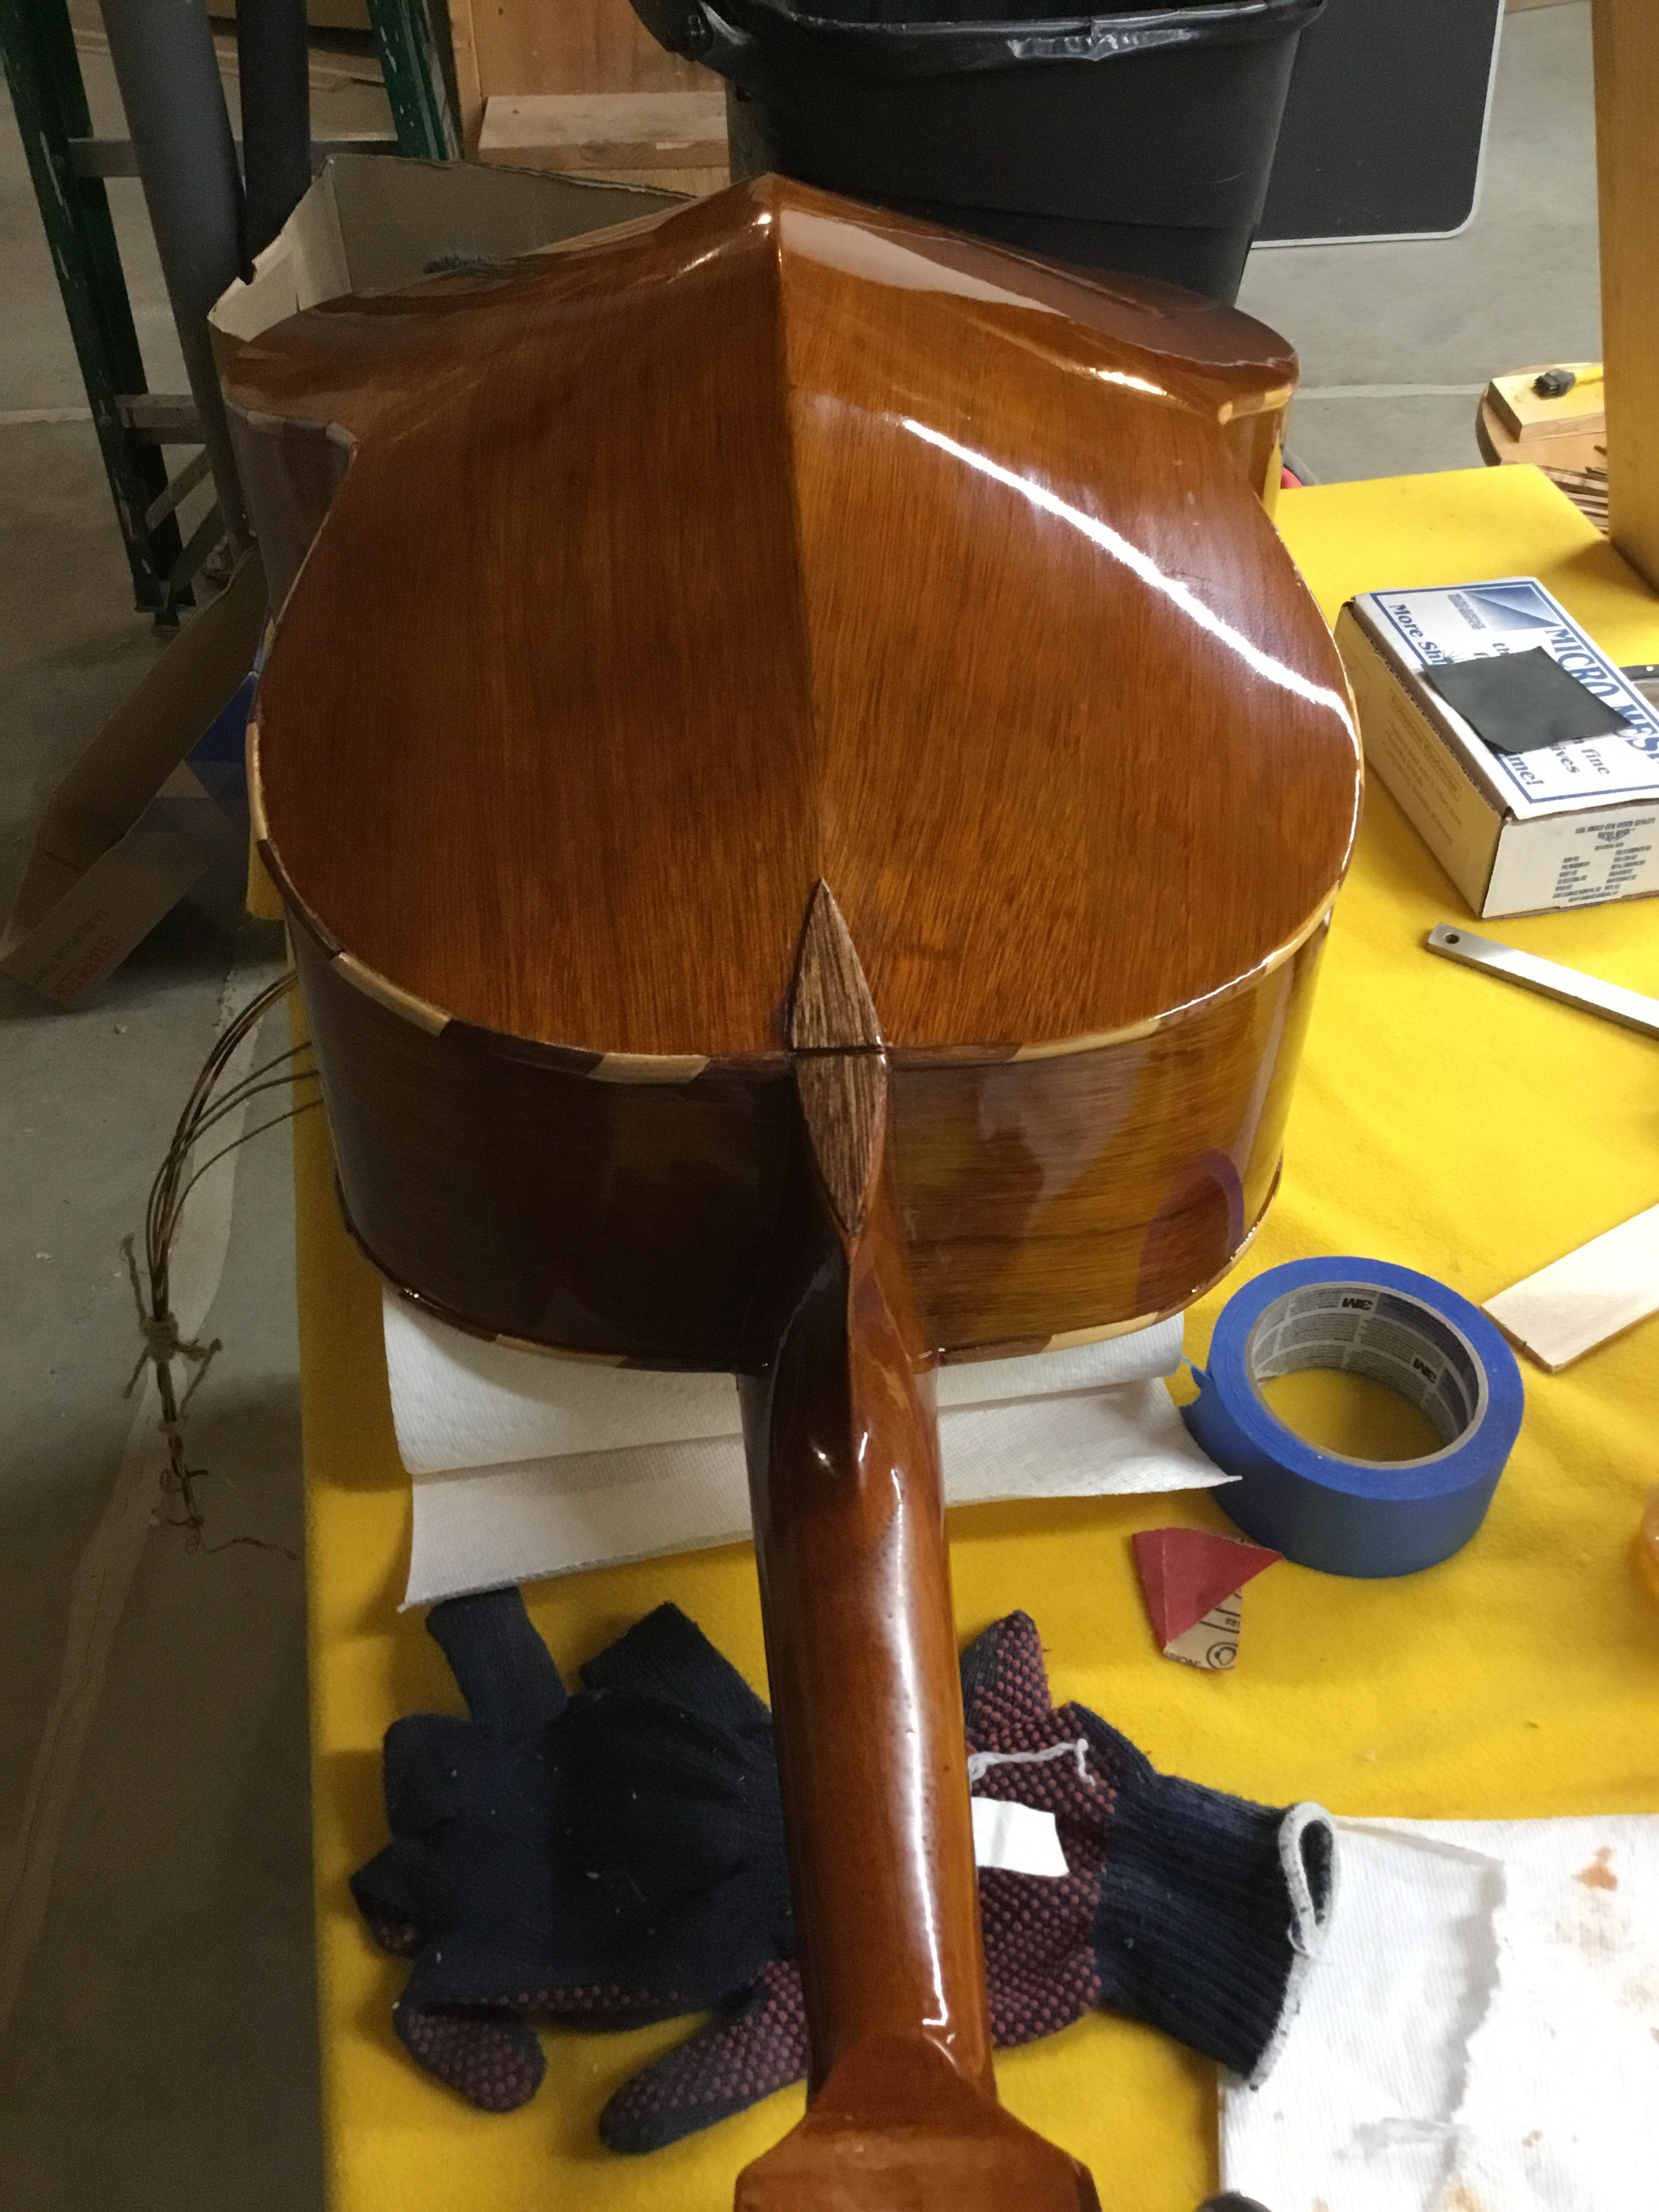
 Heel caps glued and polyurethane coated, completing the neck joint repair
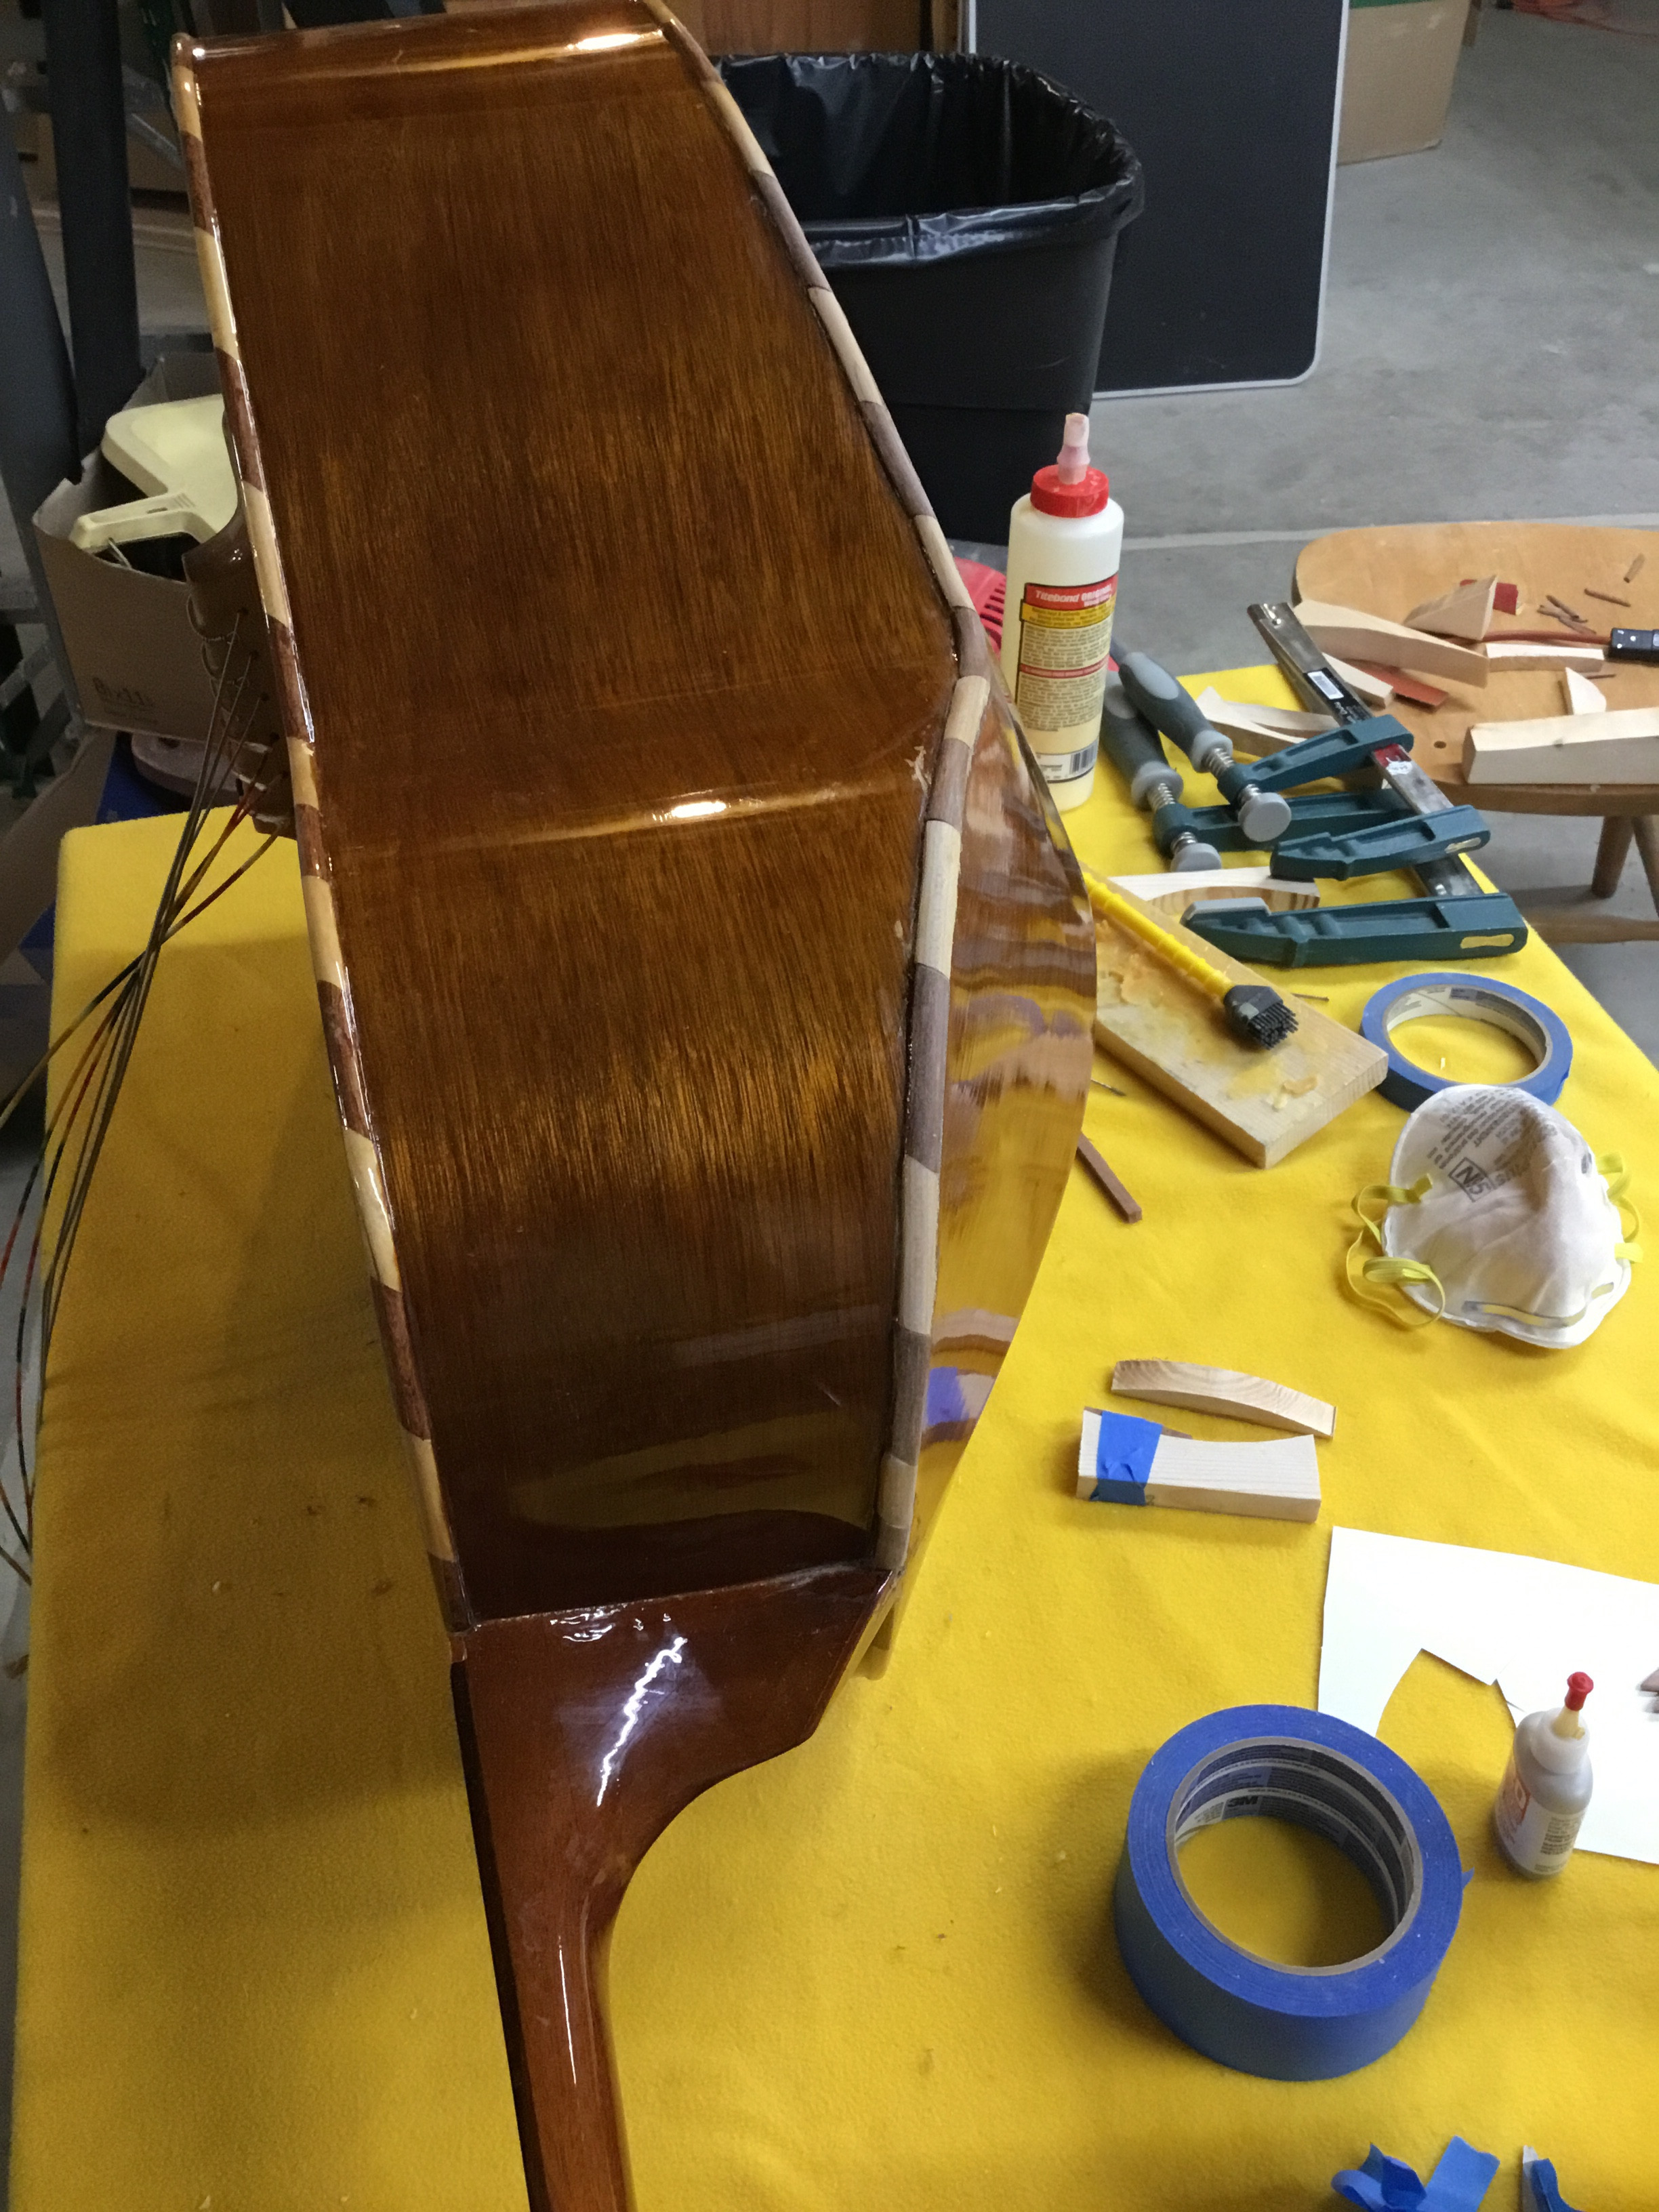
 Completed Guitarron repair, showing the restored instrument ready for strings
Initially, I had hoped to reuse the existing strings, but the top three, nylon-wrapped with wire, were unraveling due to minimal slack during removal. I informed Mitch about the need for new Guitarron strings, offering to string it up for a small fee, but suggested he could easily do it himself and save some money. He agreed, opting to handle the restringing.
And that concludes the story of Mitch’s remarkable Guitarron repair. It proved to be a challenging, enjoyable, and ultimately fulfilling project. Most importantly, the customer was thrilled with the restored instrument. With new strings, this Mariachi bass was ready to bring its booming voice back to life, filling the air with mariachi rhythms once more.